
This post may contain affiliate links. Please read our disclosure policy.
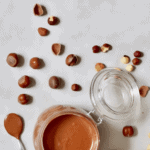
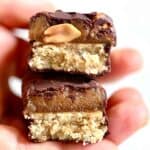
With just 5 ingredients and 30 minutes of your time, you can whip up a delicious jar of homemade Vegan Nutella. Dairy-free, Vegan, Paleo, refined sugar-free, and healthier!
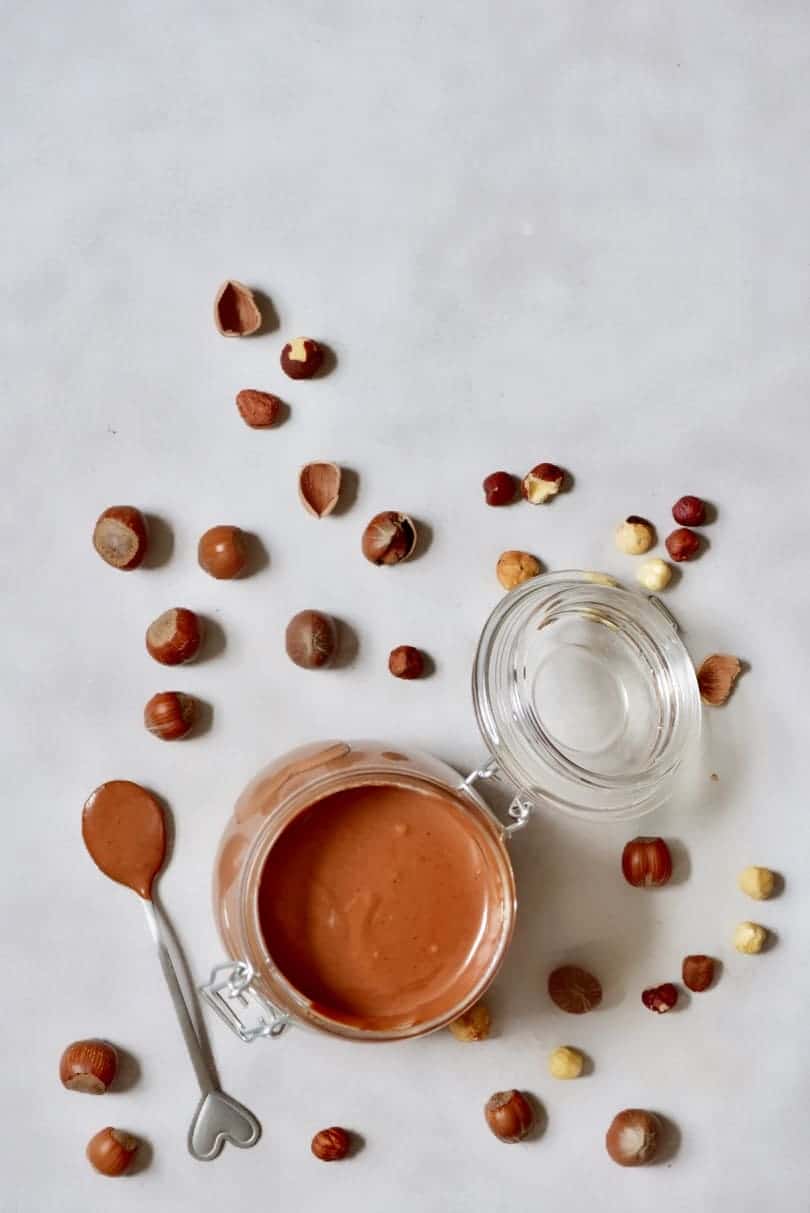
It’s taken me a while to get this homemade chocolate hazelnut butter to the point that I can now, officially, consider it a ‘homemade vegan Nutella’. After lots of recipe testing, I think I’ve finally hit the nail on the head! This spread is chocolatey, rich, and super-duper addictive- Not to mention that it uses all-natural ingredients and is 100% refined sugar-free, dairy-free, gluten-free – Bonus!
As much as I have loved to eat Nutella as a child and growing up, the sugar content alone is pretty crazy. Not to mention that, unfortunately, it includes milk powder AND palm oil! Luckily, making homemade Nutella means you can omit all the unwanted ingredients. I actually prefer this chocolate hazelnut spread now if I’m being completely honest and it’s refined sugar-free AND palm oil-free – yay!
Now, I’m not going to claim that this is a ‘healthy Nutella’ – because is that really even possible? But it’s certainly much much healthier than store-bought Nutella. And it’s made using just 5 ingredients; hazelnuts, maple syrup, cacao powder (or cocoa powder- if that’s all you have), coconut oil, and vanilla extract. Plus, a pinch of salt enhances the chocolate flavor even more!
The Method
Like I said above, I’ve tried numerous versions of this chocolate hazelnut spread before finally reaching this recipe and officially upgrading it to a vegan Nutella recipe. The best thing is- the method is so ridiculously simple. In fact, the entire process of making this vegan Nutella recipe is made up of just a few steps:
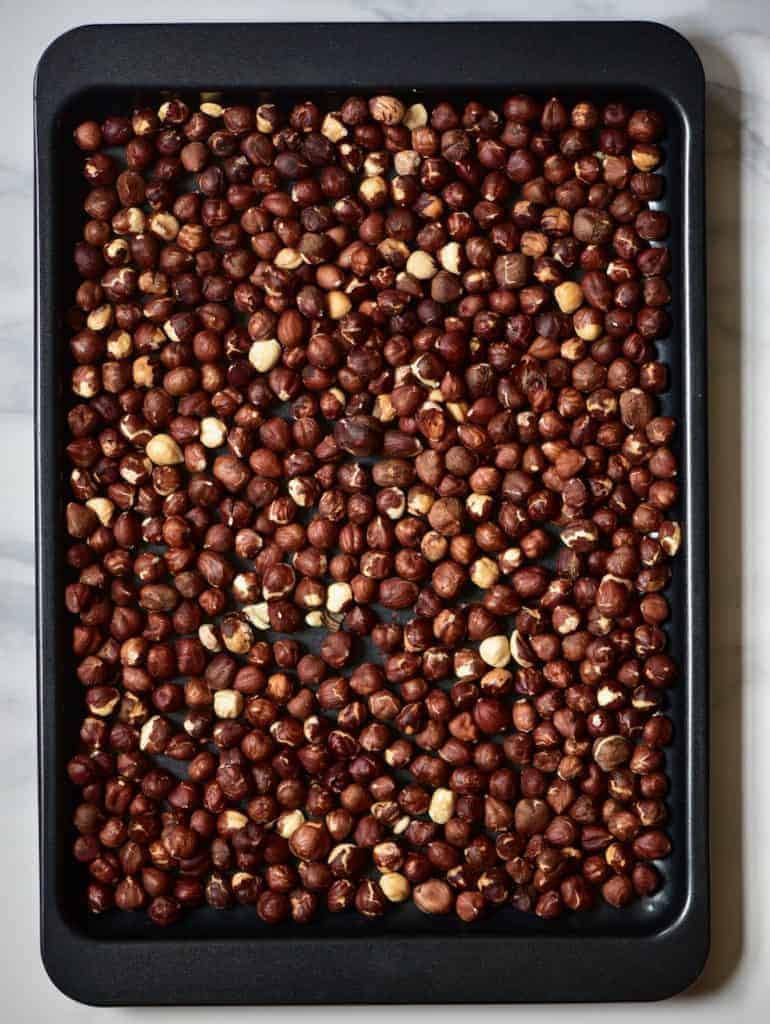
- Roast hazelnuts for 8-10 minutes
- remove the skins (I promise it’s much simpler than it sounds)
- Blend the nuts into a smooth butter
- add the other ingredients and blend some more
Voila! Okay, so there’s a little bit more to it than that. But that’s the gist – it’s basically the exact same process as making homemade hazelnut butter with ONE additional step at the end. Let’s get into the details now;
The Steps
As I said- to begin, you need to roast your hazelnuts. To do this spread them out as a single layer on a baking sheet and place in the oven for between 8-10 minutes at 160ºC/320F (fan assisted). This helps to loosen their skins and also bring out some of their oils ( making them easier to blend).
Once they’re out the oven it’s time to get rid of the skins. If you can’t get them all don’t worry- some will be quite stubborn The more skins you have, the less silky smooth your vegan Nutella will be. Luckily, it’ll taste just as amazing. You can leave the hazelnuts to cool down slightly / to room temperature before removing the skins, but I just pour them onto a kitchen towel and rub. Bring the sides of the towel up around them and scrunch, scrunch, scrunch in your hand. This should loosen all the skins.
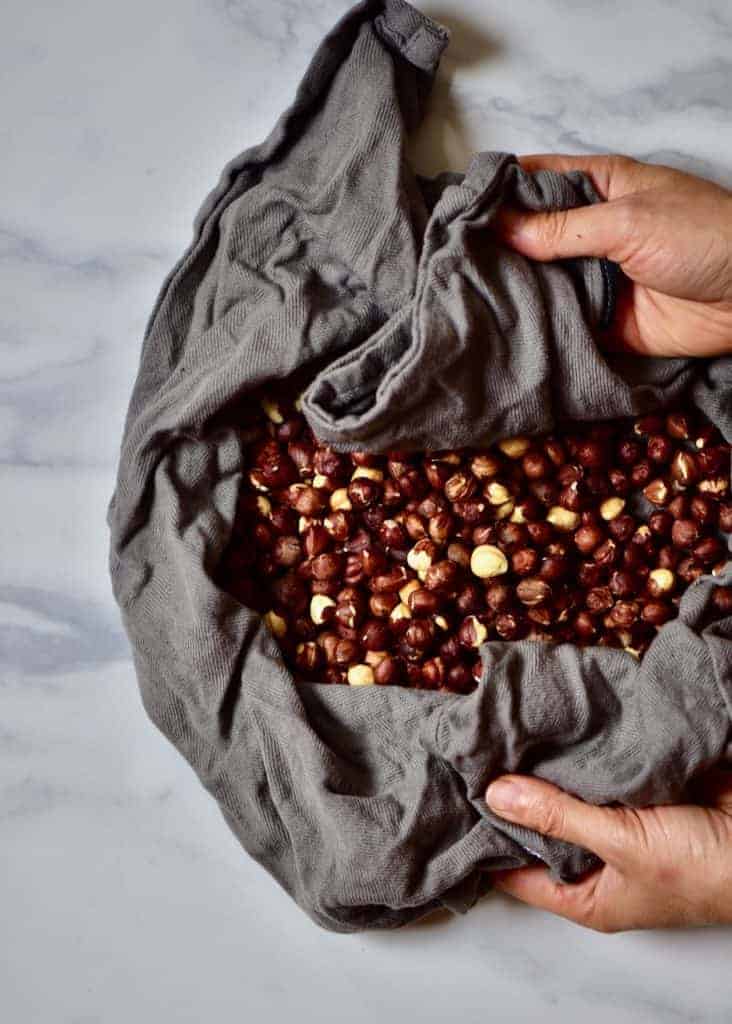
Note – you can also use a hairdryer to get rid of all the skins instead of picking them out. be warned though – this can get messy!
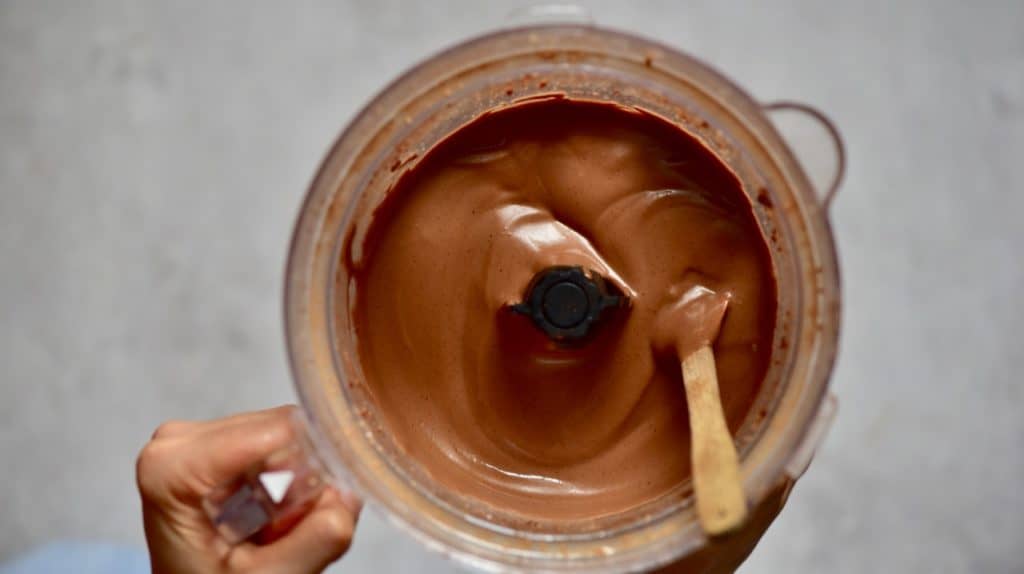
Next, it’s time to blend. pour the hazelnuts into a high-powered food processor or blender and blitz until you obtain a smooth butter. If you’ve seen my recipe for hazelnut butter then you’ll know that it takes me around fifteen minutes. However, this can change depending on what blender you are using. When blending, give your machine a rest every 2-3 minutes, so it doesn’t overheat and be patient – it might not look like it’s going to get creamy, to begin with, as it stays in that ‘finely ground’ stage for quite a while but, it will.
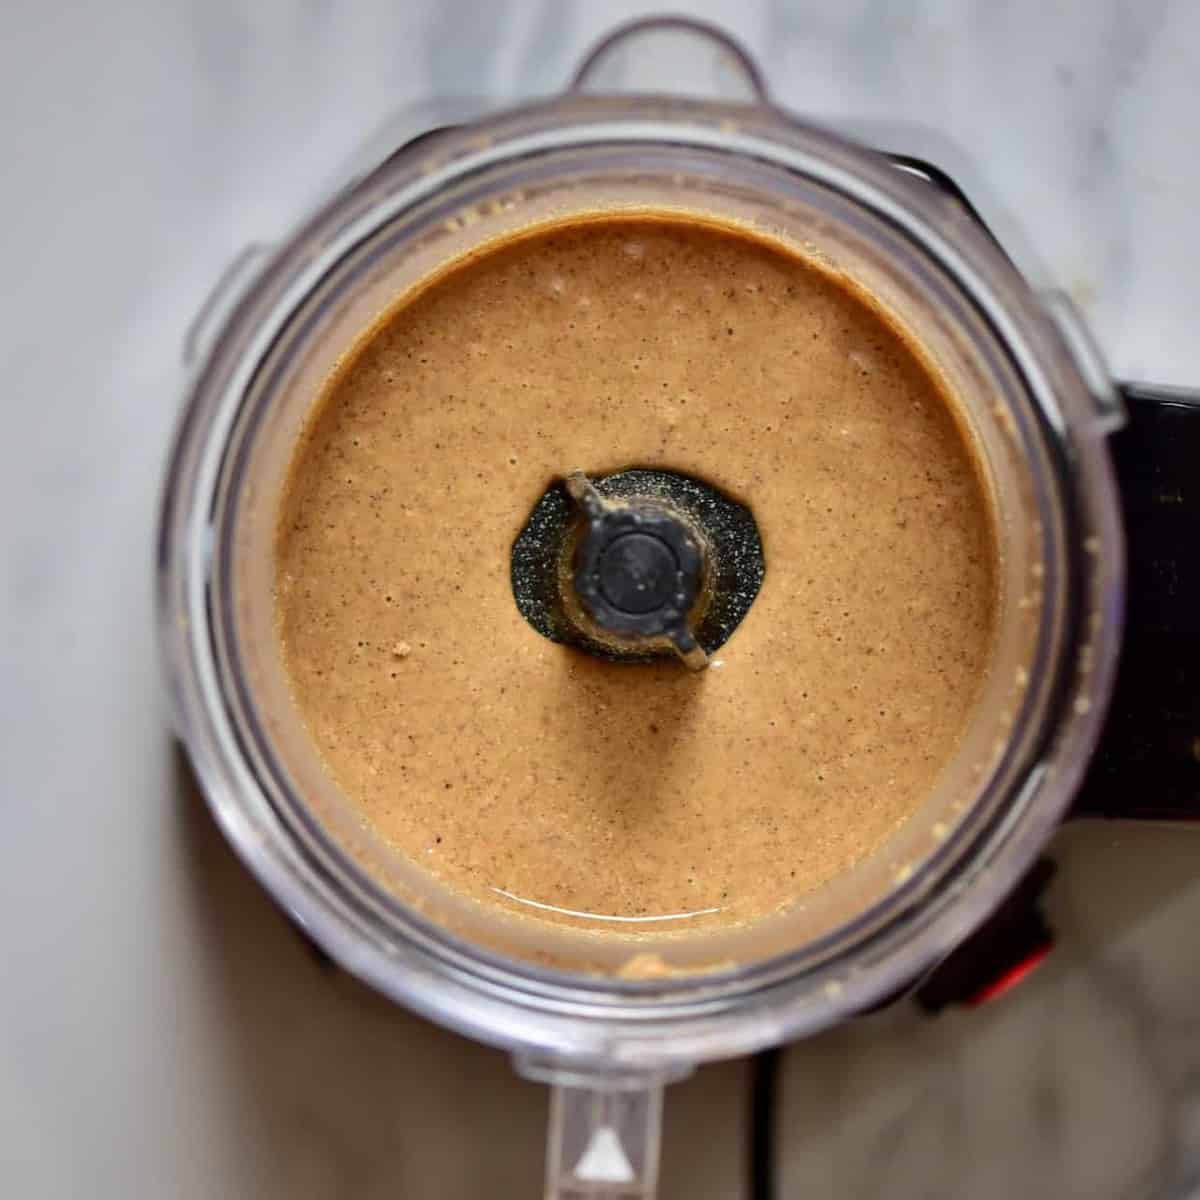
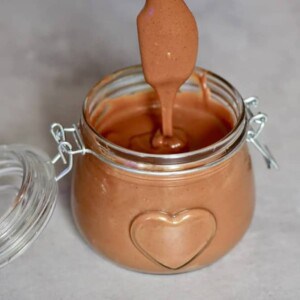
Once you’ve achieved a texture that you’re happy with then add all the remaining ingredients into the blender and blitz again until thoroughly combined. If the chocolate spread seems too thick, then you can add a little splash of plant-based milk ( like this hazelnut milk) to loosen it up.

Once ready, your dairy-free Nutella can be stored in an airtight container in the fridge for 2 weeks. It will thicken up slightly in the fridge due to the coconut oil solidifying – but this will easily loosen up.
How To Use Your Vegan Nutella

Other Recipes You May like
If you love this vegan Nutella recipe as much as I do, then you might want to experiment making chocolate spreads with other nut butters. You can also make a delicious chocolate hazelnut Milk. If you’re looking for other simple homemade Vegan DIY recipes then feel free to check out my list of dairy-free milks, tomato puree, vanilla extract or even homemade rose water. And, if you’re in the mood to try making some other healthier childhood favorites then you might like these recipes for homemade Bounty, Twix Bars & Snickers.
If you give this recipe a try then let me know your thoughts in the comments below. Also, I love to see your creations, so feel free to tag me @Alphafoodie.
DIY Homemade Vegan Nutella (5 ingredients)
Equipment
- Airtight jar for storing
Ingredients
- 2 Cups hazelnuts
- 1/4 Cup Cacao Powder or cocoa powder - you can use more for even more chocolate flavour
- 1/3 Cup Maple Syrup
- 1 Tbsp Coconut Oil
- 1 Tsp vanilla extract
- Pinch of salt
- Splash of plant-based milk, only needed if the Nutella is too thick Optional
Instructions
- Spread the hazelnuts as a single layer on a baking sheet and place in the oven for between 8-10 minutes at 160ºC/320F (fan assisted).
- Once ready, remove from the oven. You can leave the hazelnuts to cool down slightly, but I just pour them straight onto a kitchen towel and rub. Bring the sides of the towel up around them and scrunch, scrunch, scrunch in your hand. This should loosen all the skins. *
- remove the hazelnuts from the skins and pour into a high-powered food processor or blender.
- Blitz until you obtain a smooth butter. If you've seen my recipe for hazelnut butter then you'll know that it takes me around fifteen minutes. However, this will vary.**
- Once you've achieved a texture that you're happy with then add all the remaining ingredients into the blender and blitz again until thoroughly combined. If the chocolate spread seems too thick, then you can add a little splash of plant-based milk ( like this hazelnut milk) to loosen it up.
- Once ready, your dairy free Nutella can be stored in an airtight container in the fridge for 2 weeks.
Video
Notes
Nutrition
Nutrition information is automatically calculated, so should only be used as an approximation.


Do you have to roast the hazelnuts first?
Hi Antonia,
I recommend roasting them but you can skip this step. When blending them, make sure to give your machine a break from time to time so it doesn’t overheat.
Love this hazelnut recipe.. I am sugar free including maple syrup so I omit the sweetener altogether and me & my family still love it.. that’s really needed sometimes I add a bit of date syrup. Thanks for sharing!
So glad you like it, Joanna! 🙂