How to Make Date Paste (Healthy Sugar Substitute | Ve, GF, Paleo)
How to make date paste with just ONE ingredient – a simple, healthy unrefined sugar substitute (Paleo, Vegan, Whole30) perfect for naturally sweetening tons of recipes! Find how to make, store, and use this simple date puree below!
Servings: 24 Tablespoons
Equipment
Ingredients
- 17.8 oz dates I used Medjool dates, pitted (about 26 dates)
This amount will yield ~ 1.5 cups of date paste (17.8 oz/500 g).
Around 9 dates or 6 oz/170 g (~ 1 heaped cup) of pitted dates yields ½ cup of date paste.
- hot water optional - if your dates are particularly dry or you're using a mid-powered blender (read the recipe notes section for more info)
Instructions
Step 1: Prepare the dates
- If you’re using whole dates, you'll first need to remove the stones (pits) for the center of each date. To do so, I just pull the date in half by hand and release the pits. Alternatively, you can slice them with a knife lengthwise before popping out the pits.
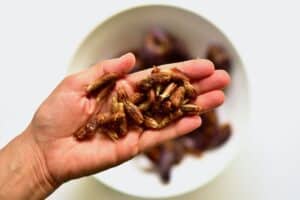
- If your dates are particularly dry or you aren't using a high-speed blender for the next step, I first recommend soaking the dates to soften them.To soak the dates: de-seed the dates and place them in a large bowl covered with HOT (or boiling) water and soak for 30 minutes. This will help plump them up and soften them (thus making it easier to blend the dates). Make sure to reserve the soaking water in case any of it is needed to thin the date paste when blending.
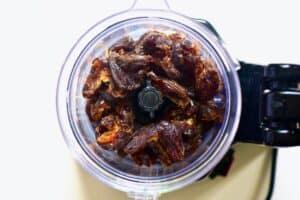
Step 2: Blend the dates into date paste
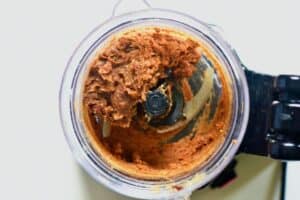
- Transfer all the pitted dates to your high-speed blender or food processor and process until smooth and paste-like. As the dates are very sticky and don’t have a massive water content, this will take some time to achieve the correct consistency, so I recommend giving your machine breaks every 2-3 minutes to avoid overheating.
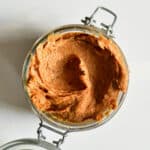
- If you’re really struggling to blend it into a paste, then add some hot water to your machine, one tablespoon at a time.The date puree is ready when you achieve a smooth homogenous, lump-free mixture.
How to Store Date Paste
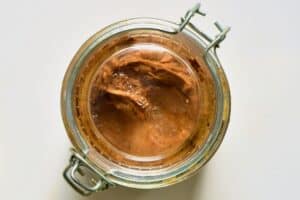
- Make ahead: you can leave the dates to soak for up to two days (in the fridge) before blending.Store: store the date paste in a clean airtight container (I store mine in a glass jar) in the fridge. For date paste without water, it should last between 3-4 months. With water, I probably wouldn't use it past one month, though I haven't tried as I nearly always make mine without water.Freeze: this date paste is also incredibly freezer-friendly and can freeze for 6 months with water or 12+ months without. I recommend portioning it into Tbsp portions in an ice-cube tray. It doesn't fully freeze either, so it’s still "scoopable" directly from the freezer.
Video
Notes
- When to use Hot water: if you're using particularly dry dates or have a mid-powered blender, you may not be able to make the date paste with just dates. In that case, you’ll need some hot water for soaking/adding to the machine while blending (read below for process). I recommend using around ¼ cup water put cup (tightly packed) dates when using a "regular" blender/food processor.
- Make sure to use enough dates: you NEED enough dates in your machine to cover the blades comfortably for them to be able to process the dates. If you accidentally add too little, you can add some liquid. However, remember that this will impact the shelf life and how it is used in recipes (since it will also add more moisture to baked recipes).
- Try to avoid adding liquid: all the images on this page show homemade date paste made using NO liquid at all. That way, the shelf life will be longer, and it won't be adding moisture to your baked recipes. However, if you find you need some liquid, I still recommend minimizing it as much as possible. After all, the thinner the date puree, the less sweet it will be.
- To make a date spread recipe: I recommend adding a pinch of salt and some vanilla extract with either water or dairy-free milk to thin it to a spreadable consistency.
- Choose a good variety of date: since date paste is just blended dates, make sure you like the flavor of the dates you’ll be using before trying the recipe. That’s why I love to use Medjool dates, as they’re wonderfully sweet and flavorful.
Nutrition
Serving: 1Tbsp | Calories: 59kcal | Carbohydrates: 16g | Protein: 1g | Fat: 1g | Saturated Fat: 1g | Polyunsaturated Fat: 1g | Monounsaturated Fat: 1g | Sodium: 1mg | Potassium: 138mg | Fiber: 2g | Sugar: 13g | Vitamin A: 2IU | Vitamin C: 1mg | Calcium: 8mg | Iron: 1mg