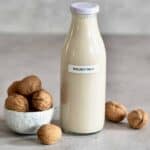
How to Make Walnut Milk
How to make walnut milk with just TWO ingredients and a blender! This homemade walnut milk blends soaked walnuts (activated walnuts) and water to make a buttery, creamy, silky walnut milk packed with flavor and nutrition! This simple nut milk is the perfect new addition to your dairy-free milk collection!
Servings: 3 cups
Ingredients
- 1 cup walnuts
- 4 cups filtered water
Check the Recipe Notes below for ingredient add-ins!
Instructions
Step 1: Soak the Walnuts
- Add the walnuts to a large bowl, cover with cold/room temperature water, and add ½ tsp salt. Leave to soak for at least 6 hours, up to 12 hours. I like to do this overnight (8-9 hrs).When simply soaking nuts, I usually don't use any salt. However, salt is used when activating nuts to help to neutralize the enzyme inhibitors.
- Drain the nuts and rinse them once more. Activated nuts then generally go through a dehydrating process. However, we want the nuts soaked when making walnut milk so you can skip that step entirely.If you didn't add any salt to the soaking water, it could be saved to use to water plants (your plants will love it, as it will contain higher levels of carbon dioxide). However, if salted, discard the water. Do not drink either version, as it will contain all the phytic acid and other nasties that we've specifically tried to remove.
Step 2: Blend the Walnut Milk
- Transfer the soaked walnuts to your high-speed blender and blend into a rough crumb consistency. Be careful not to over blend, or you'll start to make walnut butter,
- Add the filtered water and allow the machine to blend for around two minutes until the liquid is creamy and milky-looking.
Step 3: Strain the Walnut Milk
- I use a Nutra Milk processor, which automatically strains the nut milk, using a spout to drain the nut milk, leaving any leftover nut pulp in the jug. However, when using a regular blender/food processor, you'll need to strain the milk manually. To do so:Use either a nut milk bag, coffee filter, or several layers of cheesecloth over a bowl (if using cheesecloth, it's easiest to lay it in a sieve – otherwise, you’ll need a second person to hold the cloth while you pour).Pour the walnut milk through the nut milk bag. Then squeeze the bag to strain as much liquid as possible from the leftover pulp. You may also use a fine-mesh sieve and press the walnut pulp to drain the liquid.Due to walnuts being such a soft, buttery nut, you may find that you don't get much pulp at all. You could even decide not to strain the milk – it's up to you. Don’t discard any leftover walnut pulp, though! Check the FAQs for how to use this and avoid waste!
- Enjoy the walnut milk immediately or transfer it to a bottle (easiest using a funnel) and store it in the fridge.
How to Store
- Store: store the walnut milk in an airtight bottle in the fridge for between 3-5 days.It's natural for the walnut milk to separate as it sits in the fridge, as it contains no stabilizers. Just give it a good shake before using it each time. The walnut milk will begin to smell bitter/off when it's past its best.Freeze: I don't often freeze this homemade walnut milk. However, if you want to try, you could freeze the walnut milk either in a freezer-safe container or an ice-cube tray, ready to pop out as needed.
Video
Notes
How to Flavor Walnut Milk?
There are several ways to sweeten and flavor homemade walnut milk easily and naturally. Here are just a few of my top recommendations.
- Salt: a pinch of salt helps enhance the nuts' flavor in a wonderful way and will act as a natural preservative.
- Sweetener: there are several ways to sweeten your homemade walnut milk. You can use dates (or date paste to avoid any bits in your nut milk), sweeteners (like monk fruit or erythritol), or even liquid sweeteners (like honey or maple syrup).
- Vanilla: add 1 teaspoon of homemade Vanilla extract or Vanilla Powder, increase to personal taste.
- Chocolate walnut milk: I recommend adding 2 Tbsp of cocoa powder with the sweetener of your choice (adjusted to taste) and a pinch of salt.
- Maple walnut milk: this flavor combination is perfect for the Fall/Winter months. Simply add 2-3 tablespoons maple syrup and a pinch of salt (add more for a salted maple nut milk). Optionally add some vanilla too.
- Golden milk: easily boost the healthful properties of this walnut milk with some golden paste or golden spice powder.
- Cinnamon date: cinnamon and walnuts pair SO well. For this cinnamon walnut milk, add ¼-1/2 teaspoon ground cinnamon and 2-4 Medjool dates (based on how sweet you want the milk to be) or the sweetener of your choice.
- Vanilla spice nut milk: there are several spice blends that you can combine with vanilla and the sweetener of your choice
- One-minute "cheat" walnut milk: if you've run out of walnut milk, you can actually make "instant" nut milk by combining ONE tablespoon of raw, unsalted walnut butter (or nut butter of your choice) per ONE cup of water.
- Use a combination of nuts: yup, you read that right. If you want to mix and match nuts, feel free to do so. Just make sure to soak them all so they blend easily.
- To strain or not strain: walnut milk (and cashew milk) are particularly great for making nut milk that doesn't leave behind a ton of pulp since they're so soft. This means you can get away with not straining the milk at all in some cases (especially if using a high-speed blender). Though there will be sediment in the milk, so it won’t be completely smooth unless strained.
- To quick-soak nuts: if you want to quickly soften the nuts but aren't too fussed with "activating" the walnuts, you can soak the walnuts in boiling water for 15 minutes before blending.
- Be careful not to under-blend: I blend for a full two minutes in my high-speed machine until the liquid is super milky and opaque – to try to extract as much from the soaked walnuts as possible. For less powerful machines, you will likely need more time.
- To avoid the milk separating: you can add around one teaspoon of sunflower lecithin - a natural emulsifier. You can read more about sunflower lethicin at Healthline, including the health benefits. However, note that some people may experience stomach issues with this, so I don't include it in the main recipe.
Nutrition
Serving: 0.5cup | Calories: 128kcal | Carbohydrates: 3g | Protein: 3g | Fat: 13g | Saturated Fat: 1g | Polyunsaturated Fat: 9g | Monounsaturated Fat: 2g | Sodium: 8mg | Potassium: 86mg | Fiber: 1g | Sugar: 1g | Vitamin A: 4IU | Vitamin C: 1mg | Calcium: 24mg | Iron: 1mg