How to Make Bechamel (White Sauce)
How to make homemade pasta (egg pasta) with just two ingredients and a simple process- no pasta machine required. This pasta dough recipe can then be used to make homemade pasta noodles, sheets, and shapes! I'll also take you through how to store fresh pasta, dry it, and cook it!
Servings: 6
Ingredients
- 1.4 oz butter unsalted
- 1.5 Tbsp plain flour
- 1.5 cups milk whole milk is best
- 1/4 tsp ground nutmeg powder
- 1/4 tsp white pepper powder optional
Instructions
Step 1: Prepare the roux
- In a large pan or saucepan, melt the butter over low heat. Once it's fully melted, add the flour, and cook it for around 1 minute. The mixture should be pale and foaming – that's when it's ready for the next step.
Step 2: Add the milk
- Turn off the heat from the pan and then gradually add in the milk. Just add in a little at a time, constantly stirring to incorporate.If you add it all in at once, the sauce will become lumpy – so avoid this at all costs!
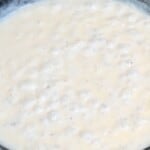
- Once all the milk is added, place it back over low heat and bring it to a boil, stirring constantly. The sauce will thicken as it heats.
- Once thickened to your desired level (it should coat the back of a spoon), add the spices, reduce the heat to a gentle simmer for two minutes, then it's ready to use as a lasagna bechamel or for whatever purpose you'd prefer!
Notes
- The milk temperature: I remove my roux from the heat before adding the milk, which means I can usually get away with adding cold milk without is spitting and/or going 'crazy.' However, to eliminate all risk feel free to heat up the milk in a saucepan or in the microwave before adding it to the roux.
- For a quick cheese sauce: Add in around ½ cup of sharp cheese in the last two minutes before removing the white sauce from the heat.
- Make sure to cook the flour enough: You don't want it to be brown, but you also don't want your homemade bechamel to have a raw floury flavor. So, make sure to allow the roux to cook for a while until it's fragrant.
- Use a whisk and spoon/silicone spatula: If I can (i.e., those days when I remember where my whisk is…), I like to use both tools when making the homemade bechamel sauce. A whisk is excellent for breaking up lumps for a smooth sauce, but a spatula or spoon can be used to properly stir the bottom of the pan and ensure nothing is burning or sticking to the pan.
Read the blog post for tons more answers to FAQs and ingredient notes!
Nutrition
Calories: 92kcal | Carbohydrates: 4g | Protein: 2g | Fat: 7g | Saturated Fat: 5g | Trans Fat: 1g | Cholesterol: 20mg | Sodium: 74mg | Potassium: 84mg | Fiber: 1g | Sugar: 3g | Vitamin A: 264IU | Vitamin C: 1mg | Calcium: 71mg | Iron: 1mg