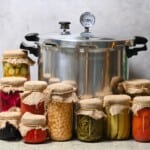
The Complete Guide to Pressure Canning
An easy guide to pressure canning for beginners: a simple at-home canning technique, perfect for preserving high & low-acid fruit and vegetables, meat, fish, soups, and more to lock in its freshness and flavor.
Equipment
- Bubble remover or chopstick, skewer, plastic/wooden knife, thin silicone/plastic spatula
Instructions
Sterilize the canning tools and prepare the canner
- Sterilize everything you'll use for pressure canning, including the jars, lids, tongs, pressure canner, funnel, and kitchen counters. Wash the items in hot soapy water and rinse them well. Leave everything to dry except the jars.
- Place the pressure canner on the stovetop. Add the wire rack/trivet (or a jar separator) to the bottom of the canner. Add about 2-3 inches of hot water (the exact amount will depend on the recipe). Add the jars (filled with a little water to stop them from floating). Keep the water simmering to keep the jars warm.
Prepare the food and fill the jars
- Prepare the food according to its recipe or the USDA guidelines.
- Take a jar from the hot water and use a funnel or ladle to transfer the food to the hot jar. Make sure to leave the right amount of headspace.
- Once filled, use a bubble remover (or a chopstick, etc) to run along the insides of the jar to release trapped air bubbles.
- Wipe away the rim with a clean tea towel. Add the lid and screw it until finger-tight (securely screwed until the point of resistance, but not too tight that air can't escape during the processing).
- Place the closed jar in the canner and fill the remaining jars, working one at a time.
Pressurize the canner and process the jars
- Ensure the jars remain upright the entire time and aren't touching the sides of the canner or each other.
- Close and lock the canner lid, ensuring the pressure vent/petcock is open. Heat the stove at its highest heat setting until you notice steam escaping the vent/petcock consistently. Then, start a timer to allow it to vent for 10 minutes.
- After 10 minutes, close the vent/petcock and allow the pressure to build in the canner. This usually takes between 3-8 minutes. If using a weighted gauge canner, the gauge will begin to jiggle/rock,
- Set a time to process the jars according to their recipe.
Depressurize the canner
- Following the required processing time, remove the canner from the heat. Leave it to depressurize and the safety lock to release/the air vent to drop to its normal position. Older models of canners that don't have a dial gauge should be timed. Around 30 minutes for pint jars or 45 minutes for quart jars.Don't force-cool the canner!
- After the canner is depressurized, remove the weight from the vent port/open the petcock, and leave it for another 10 minutes.
- Carefully remove the lid facing away from you so hot steam flows in the other direction.
Cool, inspect, and label the jars
- Use the canning tongs/jar lifter to carefully remove the jars from the canner, ensuring they remain upright the entire time. Transfer to a heat-proof flat surface (like a wooden chopping board or kitchen towel-covered worktop), leaving a 1-inch space between the jars.
- Leave them undisturbed to cool at room temperature for at least 12 hours (up to 24 hours) before handling them.
- Once fully cooled and undisturbed for at least 12 hours, inspect the jars for proper sealing. Remove the ring and inspect the lid. It should look concave and not flex, wobble, or make a popping sound when pressed in the center. It should feel 100% secure.Any jars that haven't properly sealed can either be re-processed within 24 hours with a new jar/lid OR transferred to the fridge to use within a few days.
- Label the cooled jars with the contents and a date to avoid food waste.
- Store the jars in a cool (below 95ºF/35ºC; somewhere between 50-70ºF/10-21ºC is ideal), dry, dark location like a kitchen cupboard or pantry for a year (or sometimes, more).
Notes
Adjust the method to your altitude: This is incredibly important, as the water boiling point changes based on the altitude. Exact temperatures and timings are required for safe pressure canning. Most foods are processed at 10 pounds pressure at 240ºF/116ºC.
See the blog post for a detailed chart on how to adjust the pressure based on altitude.