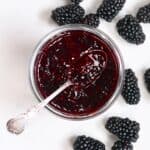
Homemade Blackberry Jam
An easy Homemade Blackberry jam recipe for beginner jam-makers with lots of tips and tricks! A practically foolproof method for luscious, tasty blackberry jam every time.
Servings: 40
Equipment
- 2 Glass jars 1.5 pint/24oz/0.75l each
- Large, shallow heavy-based saucepan
- Silicone spatula or wooden spoon
- Potato masher or another similar tool
- Sieve or jelly bag optional
- Bubble remover optional
- Magnetic lid wand optional
Ingredients
- 2.2 pounds blackberries best to use fresh seasonal blackberries
- 12 ounce white sugar
- 2 Tbsp pectin read notes for pectin-free version
- 1 lemon, juiced or bottled juice - 1/4 cup
Instructions
If you want more significant bits of blackberry in the jam
- Place the fresh berries and sugar in a bowl for a few hours (or overnight). During this time, the berries will macerate, and the sugar begins to dissolve - thus needing less time to cook before the sugar fully dissolves, allowing the berries to stay more in-tact.
If you Want Fewer Seeds In Your Jam
- First, mash the blackberries and add with the lemon juice to the pan. Simmer for a few minutes to break the fruit down, and then press through a sieve or jelly bag into a bowl. Then simply place 2-3 spoonfuls of the seeds back into the jam or remove the seeds entirely for more of a blackberry jelly recipe (which uses the blackberry juice only).
The Usual Steps
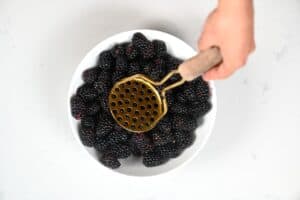
- Start by very lightly mashing the blackberries in a bowl (or the pan) using a potato masher or similar tool.
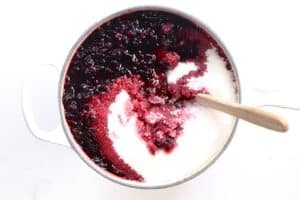
- Then, in a medium heavy-based pan, add the sugar, blackberries, lemon juice, and pectin. Heat on low-medium heat, stirring constantly, to completely dissolve the sugar. This will eliminate the risk of grainy/sugar crystal formed jam later on.
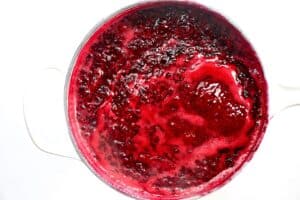
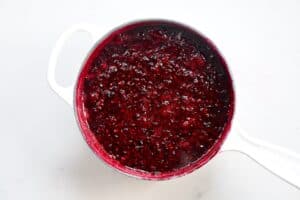
- Bring the mixture to a boil (a rolling boil that can't be stirred down) at high heat for five minutes, without stirring. Use a spoon to make sure the jam isn't sticking to the bottom of the pan. If it is, then you can mix a couple of times and reduce the heat slightly.
- To check that the jam has reached setting point, either use a thermometer or the saucer test*. If using a thermometer, the temperature needs to be 105ºC/220ºF.
- Skim off any of the excess foam on top of the pan, for a clean jam. You can also add in a small amount of butter right at the end and stir to help disperse the rest of the foam/scum.
- Remove from heat and leave the jam to cool for 10-15 minutes. This will allow the berries to settle so that they don't sink to the bottom in the jars.
- Meanwhile, sterilize the jars you will be using for the jam and then place it in the oven for 10 minutes at 160ºC/325ºF to completely dry.
- Place the jar onto a wooden surface (or other heat proof surface) and transfer the jam to the jars. This process is easier with a canning funnel, but not necessary.Wipe away any spillage on the outside of the jar with a damp cloth and then seal the jars. Be careful not to touch the lip or inside the lid if you're hoping to properly 'can' your jam.
Storing:
- If you plan to use the blackberry jam reasonably quickly and don't intend to properly 'can' it then It will last in the fridge for up to three weeks or in the freezer for up to 6 months.
- You can also use the hot water bath method (see notes below) if you want to properly store your jam for long-term storage. That way, your jam will last up to 2 years in a cool, dry, dark location.
Video
Notes
* For the saucer test, it's best to have placed a saucer in the fridge/freezer before starting the jam. After five minutes, add a spoonful to the sauce and wait 30 seconds. Push it with your finger, and if it wrinkles, even a little, then it will set.
Read the blog post for the water bath canning method and check my Step-by-Step Guide to Water Bath Canning for Beginners!!
Recipe Notes & Variations
- This jam is quite hard set because of combining the pectin with the blackberries. You can reduce the pectin amount in half for a solid-set, but softer jam or read below for a pectin-free option.
- You can use fresh lemon juice or bottled. Bottled has a consistent pH level, so it is actually preferred by many jam makers.
- You don't necessarily need pectin for this recipe. You can use the lemon peels and pips in the mixture (discarding them before canning the jam), and this will help to set the jam. However, it will be a softer set.
- I would steer clear of jam sugar (instead of using sugar plus pectin) for this recipe. The amount of pectin may be too high for the berries. If using it, then only use a percentage of jam sugar along with granulated sugar.
- Feel free to mix the berries that you use. Just make sure to test the set time accordingly, as it may change.
- You can adjust the amount of sugar in this recipe. However, less sugar will affect how the jam sets and how long it takes to reach the setting point.
- Feel free to use other varieties of sugar, such as unrefined brown sugar, coconut sugar, etc.
- If you end up making your jam too runny, this can be cooked again to thicken up.
- To take your jam making to the next level - first warm the sugar in the oven. This will reduce the cooking time and gives the jam a better color and flavor.
Nutrition
Serving: 1Serving | Calories: 46kcal | Carbohydrates: 12g | Protein: 1g | Fat: 1g | Saturated Fat: 1g | Sodium: 2mg | Potassium: 40mg | Fiber: 1g | Sugar: 10g | Vitamin A: 53IU | Vitamin C: 6mg | Calcium: 7mg | Iron: 1mg