This post may contain affiliate links. Please read our disclosure policy.
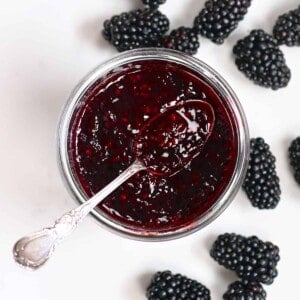
Learn how to make blackberry jam at home using just four ingredients. My foolproof method is beginner jam-makers friendly, allowing you to store the blackberry jam short term or preserve it for long-term storage.

Important note: This recipe was updated and improved on July 12, 2024, to include more information on proper canning, storage, and more tips. It was originally published on July 22, 2020.
Every time I eat blackberry jam, it reminds me of blackberry picking on warm summer evenings. That’s why I’ve developed this easy homemade blackberry jam recipe – it allows you to preserve the summer’s bounty and enjoy luscious, tasty jam year long.
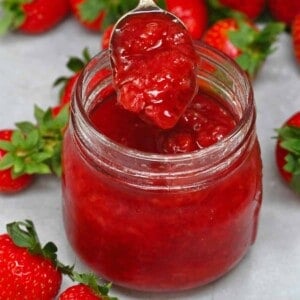
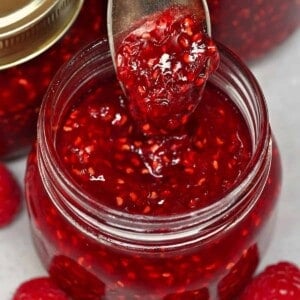
For this recipe, you need only four ingredients: blackberries, lemon juice, sugar, and pectin. Working with a small batch like my recipe allows you to make the jam in under 20 minutes. Prepare this along with homemade strawberry jam and easy raspberry jam (no-pectin), and you are ready for your summer garden party or Sunday brunch! You can also serve it alongside homemade fig jam to complement a cheese board!

Want to save this recipe?
Watch blackberry jam video tutorial
Ingredients

- Blackberries: You can use store-bought or wild berries. Fresh or slightly underripe are best.
- Sugar: White granulated sugar is most common but if wanted, you can use unrefined brown sugar, coconut sugar, or other granulated variety.
- Pectin: Use either powdered pectin or liquid pectin, depending on what you have. The steps will be slightly different, but both are described below. Also, keep in mind that using liquid pectin results in a softer jam.
- Lemon juice: To balance the flavor (optional).
See the recipe card for full information on ingredients and quantities.
How to make blackberry jam
Prepare the jars
First, sterilize your equipment. Wash the jars, lids, and bands in hot, soapy water and rinse them well. Place them on a clean surface.
If you’re planning to can the jam, prepare the canner by adding the trivet/rack to the bottom and filling it with enough water to submerge the jars by 2 inches. Bring to a boil over medium heat and boil the sterilized jars for 10 minutes. Then, keep them in the water so they stay warm until ready to fill.
Using powdered pectin
Prepare and mash the blackberries: Start by washing and drying the berries. Then, crush them lightly in a bowl (or the pan) using a potato masher or similar tool. Add the powdered pectin and mix it well into the crushed berries. I also like to squeeze in the lemon juice now so it can be incorporated into the mashed blackberries.

Cook the jam mixture: Transfer the mixture to a medium heavy-based pan and bring to a boil over high heat. Stir frequently to allow the pectin to dissolve completely.
Then add all the sugar and bring the mixture to a full rolling boil. Stir constantly to allow the sugar to dissolve. Once you have a full rolling boil, let the jam boil for 1 minute.
Finally, remove the pan from the heat and skim off any excess foam from the surface of the jam. Continue with the jarring steps below.

Using liquid pectin
Prepare the blackberries: Wash and dry the berries. Then, mash them lightly in a bowl (or the pan).
Cook the jam: Transfer the crushed blackberries to a medium heavy-based pan and add the sugar and lemon juice. Bring to a rolling boil over high heat and stir constantly to help dissolve the sugar.
Add the liquid pectin and stir to incorporate. Keep the rolling boil for 1 minute and stir constantly. Finally, remove the pan from the heat and skim off any excess foam from the surface of the jam. Continue with jarring the jam.
Jar the jam
Place the jars on a heatproof surface and fill them with the jam to about ¼ inches (0.5 cm) from the top. This process is easier with a canning funnel. Wipe away any spillage on the outside of the jar with a damp cloth, and then seal the jars.
As the jam cools, it will set into a thicker consistency. The jam is now ready to enjoy or store short-term in the fridge or freezer.

Can the jam (optional)
Check my Canning Guide for Beginners, where I explain in detail how to proceed with each step. In short, once you’ve filled the jars to ¼ inch (0.5 cm) from the top, make sure to remove air bubbles. Adjust the headspace if needed, wipe the rime, and then screw the lid to fingertip-tight. Then, using tongs (you can get specific jar ones), lower your jars back into the pan of boiling water, making sure they are around 2 inches deep in the water.
Bring to a boil and process the jars with the canner lid on for around 10 minutes (this can change depending on your altitude). Then, remove the lid and let the jars rest for 5 minutes in the canner. Finally, remove the jars from the water and leave them to cool on a wooden or another heatproof surface. You’ll know that the lids are sealed properly when they are concave and won’t wiggle when pressed. If you have one that hasn’t been sealed properly, then place it in the fridge to use first.
Voila, your homemade blackberry jam is ready to store in your pantry or cupboard!
Storage
- Short-term storage: Once you fill the jars with the jam, you can store them in the fridge for up to three weeks or in the freezer for up to six months.
- Long-term storage: To do this, you need to properly can the jars using the hot water bath canning method. The jars can then be kept in a cool, dry, dark location like your cupboard or pantry for around 1.5 years.

Recipe notes and variations
- Use fresh berries: Fresh or slightly underripe blackberries are best for jam due to their higher pectin content and balanced sweetness.
- Wild blackberries: When using wild or farm-to-table style berries, it’s best to clean them thoroughly. Soak in salted water to clean and remove bugs. Then, dry them thoroughly so they don’t spoil. Note that wild blackberries contain more pectin than many store-bought varieties, which means you can reduce (or even eliminate) the need for additional pectin entirely.
- Lemon juice: I use fresh lemon juice in my recipe, but you can also use bottled lemon juice. Its consistent pH level makes it a reliable and safe option for jams.
- Fewer seeds in the jam: You need to sieve the mixture if you want fewer seeds in the jam. First, mash the blackberries and add them to the saucepan with the lemon juice. Simmer for a few minutes to break down the fruit, then press through a sieve or jelly bag into a bowl. Place the blackberry juice back in the pan along with the sugar and pectin to continue cooking. Add 2-3 spoonfuls of the collected seeds back into the jam or skip them entirely for more of a blackberry jelly (which uses blackberry juice only).
Ideas for serving blackberry jam
The sky is the limit when it comes to using this freshly made blackberry jam. Here are some of my favorites:
- Spread it on toast: Of course, it tastes amazing, spread over warm toast, homemade bagels, or even homemade croissants. It’s also a great topping for pancakes and waffles.
- Fill desserts: You can fill pastries, cakes, tarts, and cookies (blackberry jam makes a great combo with these pistachio thumbprint cookies).
- Top yogurt and oatmeal: It’s a great way to add a fruity and sweet boost to your morning breakfast bowls.
- Swirl into ice creams: Mix some jam into this vanilla ice cream or add a few spoonfuls to these vegan magnum ice creams.
- Glaze for meats: Mix the jam with vinegar, soy sauce, or mustard; this creates a sweet and savory glaze that enhances the meat’s flavor (try it for chicken, duck, or pork).
More homemade jam recipes
If you try this homemade blackberry jam recipe, let me know how it goes in the comments below. I’d appreciate a recipe card rating and would love to see your recipe recreations – tag me on Instagram @Alphafoodie!

Blackberry Jam Recipe (With Video)
Equipment
- 7 Small jars 8 oz each (250 ml)
- Large, shallow heavy-based saucepan
- Silicone spatula or wooden spoon
- Potato masher or another similar tool
Ingredients
- 3.2 pounds blackberries 10 cups whole fresh blackberries (5 cups crushed)
- 3.3 lb white sugar 7 cups
- 1/4 cup lemon juice freshly squeezed or bottled, optional
- 6 Tbsp powdered pectin OR liquid pectin
Instructions
Prepare the jars
- Sterilize your equipment. Wash the jars, lids, and bands in hot, soapy water and rinse them well. If you plan to can the jam, prepare the canner as well (see the steps below).
Using powdered pectin
- Wash and dry the blackberries. Crush them lightly in a bowl (or pan). Add the powdered pectin and mix it well into the crushed berries. Squeeze in the lemon juice and stir to combine.
- Add the blackberry mixture to a medium heavy-based pan and bring to a boil over high heat. Stir frequently to allow the pectin to dissolve completely.
- Add all the sugar and bring the mixture to a full rolling boil, stirring constantly. Once it reaches a full rolling boil, let the jam boil for 1 minute.
- Remove the saucepan from the heat and skim off any excess foam from the surface of the jam. Continue with the jarring steps below.
Using liquid pectin
- Wash and dry the berries and mash them lightly in a bowl (or the pan).
- Transfer them to a medium heavy-based pan and add the sugar and lemon juice. Bring to a rolling boil over high heat and stir constantly.
- Add the liquid pectin and stir to incorporate. Keep the rolling boil for 1 minute and stir constantly.
- Remove the pan from the heat. Skim off any excess foam. Continue with the next step.
Jar the jam
- Place the jars on a heatproof surface and fill them with the jam to about ¼ inches (0.5 cm) from the top.
- Wipe away any spillage on the rim and outside of the jar with a damp cloth, and then seal the jars. This blackberry jam is now ready to enjoy or store short-term in the fridge (3 weeks) or freezer (6 months).
Water-bath canning (optional)
- Prepare your canner by adding the trivet/rack to the bottom and filling it with enough water to submerge the jars by 2 inches. Bring to a boil over medium heat and boil the jars for 10 minutes. Keep them in the water so they stay warm until ready to fill.
- Fill the jars with the jam to about ¼ inch (0.5 cm) from the top, and make sure to remove air bubbles. Adjust the headspace if needed. Wipe the rim. Then screw the lid to fingertip-tight.
- Using tongs, lower your jars back into the pan of boiling water, making sure they are around 2 inches deep.Bring to a boil and process the jars with the lid on for around 10 minutes (this can change depending on your altitude). Then, remove the lid and let the jars rest for 5 minutes in the canner.
- Remove the jars from the water and leave them to cool on a heatproof surface. The lids are sealed properly when they are concave and won't wiggle when pressed. If you have one that hasn't been sealed properly, place it in the fridge to use first. The rest can be stored in a cool, dry place like a pantry or a cupboard for up to 1.5 years.
Video
Notes
Nutrition
Nutrition information is automatically calculated, so should only be used as an approximation.


Can you use monkfruit sugar in place of regular sugar
I haven’t tested it with monk fruit sugar, but it may work as a substitute! Just keep in mind it might slightly change the texture or consistency. If you give it a try, I’d love to hear how it turns out! 🙂
How much liquid pectin? Still 6 tablespoons?
Thank you
Hi Susan,
Yes, you can use either 6 Tbsp powdered pectin OR 6 Tbsp liquid pectin. I hope you give it a try!
where did you put the pectin in? I didnt see it in video, Thanks
Hi Jay,
You need to add the pectin to the mashed blackberries. I hope you give this a try!
Ball dry Pectin instructions says with Blackberries do not add Lemon juice, but blueberries and Cherri’s yes
Hi Jay,
I always add the lemon juice to balance the flavor but it’s optional and you can omit it.
I love this recipe and the cute jars you used!!
Thank you so much for your comment, Emily!
Watch out Fortnum and Masons! This Jam is amazing. Highly recommend.
Thank you so much for your comment, Kieron! So happy you like the jam! It’s ony of my favorties too!
Yummy ❤️
Hey Tina! I’m so glad you liked the recipe! Enjoy making your jam!
There’s a problem with your built in calculator [1x][2x][3x], it fails to update the amount of crushed berries. Easy enough to do in my head, but someone might be accidentally misled into adding 21 cups of sugar to only 5 cups of crushed berries.
FYI, I’ll be making this with 2 gallons of fresh picked wild blackberries from my backyard, and I’m adding a touch of fresh homegrown chopped/puréed cayenne pepper to half the batch, add in a little spicy kick, make things a bit more exciting!
Thanks for the recipe!
Hi there,
Thanks for pointing this out- it seem there was a glitch but it has been resolved. You can now use the built-in calculate with no issues.
Thanks again! You jam with little spicy kick sounds exciting! 🙂
I would definitely add more pectin. It wasn’t enough for me and I had to cook longer
Hi Morgan,
Thank you for your feedback!
I sure hope this it’s as good as it smells. I love a good blackberry jam. This is the first time I’ve ever made jam and I’m canning it. I’m actually going to make the same but put jalapeños in it.
That sounds delicious! I hope you enjoy making your jam!