How to Dry Chives
Drying herbs at home is an easy, budget-friendly way to extend the shelf life of your food – and this is my fool-proof guide to getting perfect dried chives.
Servings: 10
Equipment
- Dehydrator or oven or microwave
Ingredients
- 3.5 oz chives or as much as needed
This will yield about 0.35oz/10 g of dried chives
Instructions
- Rinse your fresh chives and pat them dry well to remove as much moisture as possible.
- Cut the chives into even pieces (unless you’re air drying) using a sharp knife or kitchen scissors.
Using a Dehydrator
- Place the pieces on the tray in a single layer. As they're small pieces, you'll want to use a sheet on the tray or place one on the bottom of the dehydrator. Some of them might fall through the cracks because of the circulation of the air.
- Dry them at 105ºF/40ºC for around 3-5 hours or longer. You want to wait until the dry chives crackle.
In the Oven
- Line a baking sheet with parchment paper. Then place the chives in a single layer on the tray.
- Turn the oven to the lowest temperature. Many ovens now have dehydrating features, so set it at 125ºF/52ºC or if possible 105ºF/40ºC. Dry for 3-5 hours. If your oven doesn't go that low, set it at 170ºF/75ºC, then keep the door open with a wooden spoon. Dry for 2-3 hours.
In the Microwave
- Place your chopped chives between two paper towels. Microwave for 30 seconds at medium to high power. Check on them and remove any that are dried. Repeat the cycle until all pieces are brittle and crumbly dry.
Air Drying
- Collect the chives in a bunch – don't chop them! – and tie the stems at the bottom. You can loosely wrap a mesh or paper bag around them to protect them.
- Hang them upside down in a warm, dry place. Air-drying chives will take anywhere from 8 hours to a full week to dry completely, depending on your climate and how hydrated the chives are.
Notes
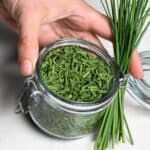
Store them in a cool dark place in a glass or mason jar for up to 1 year.
To rehydrate them, put them in a bowl of warm water and let them sit for 10-15 minutes.
Check the blog post for more tips, serving recommendations, and answers to top FAQs!
Nutrition
Calories: 3kcal | Carbohydrates: 0.4g | Protein: 0.3g | Fat: 0.1g | Saturated Fat: 0.01g | Polyunsaturated Fat: 0.03g | Monounsaturated Fat: 0.01g | Sodium: 0.3mg | Potassium: 29mg | Fiber: 0.2g | Sugar: 0.2g | Vitamin A: 432IU | Vitamin C: 6mg | Calcium: 9mg | Iron: 0.2mg