
This post may contain affiliate links. Please read our disclosure policy.


How to paint a refrigerator at home with a simple, low-cost method. You can create a retro refrigerator (SMEG-style) on a budget to match your kitchen decor – using one of two methods!
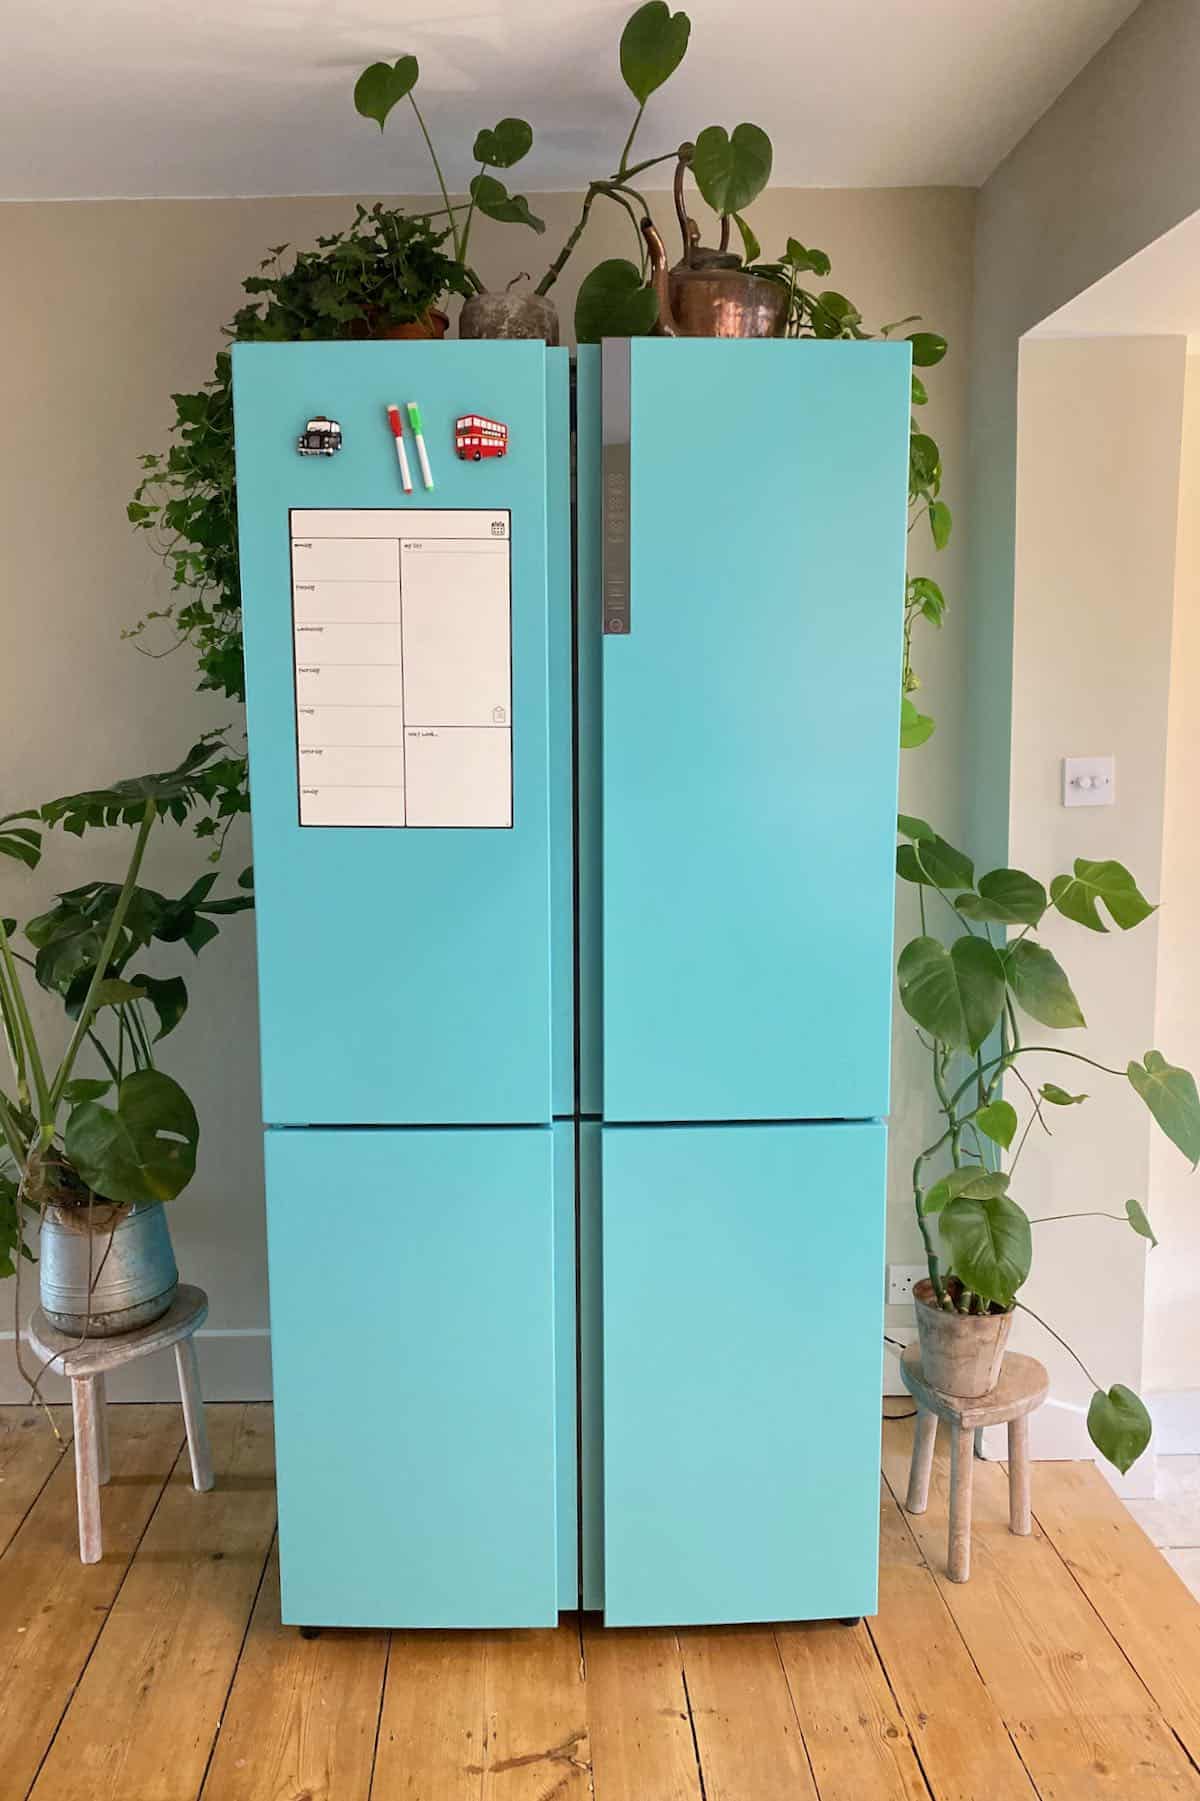
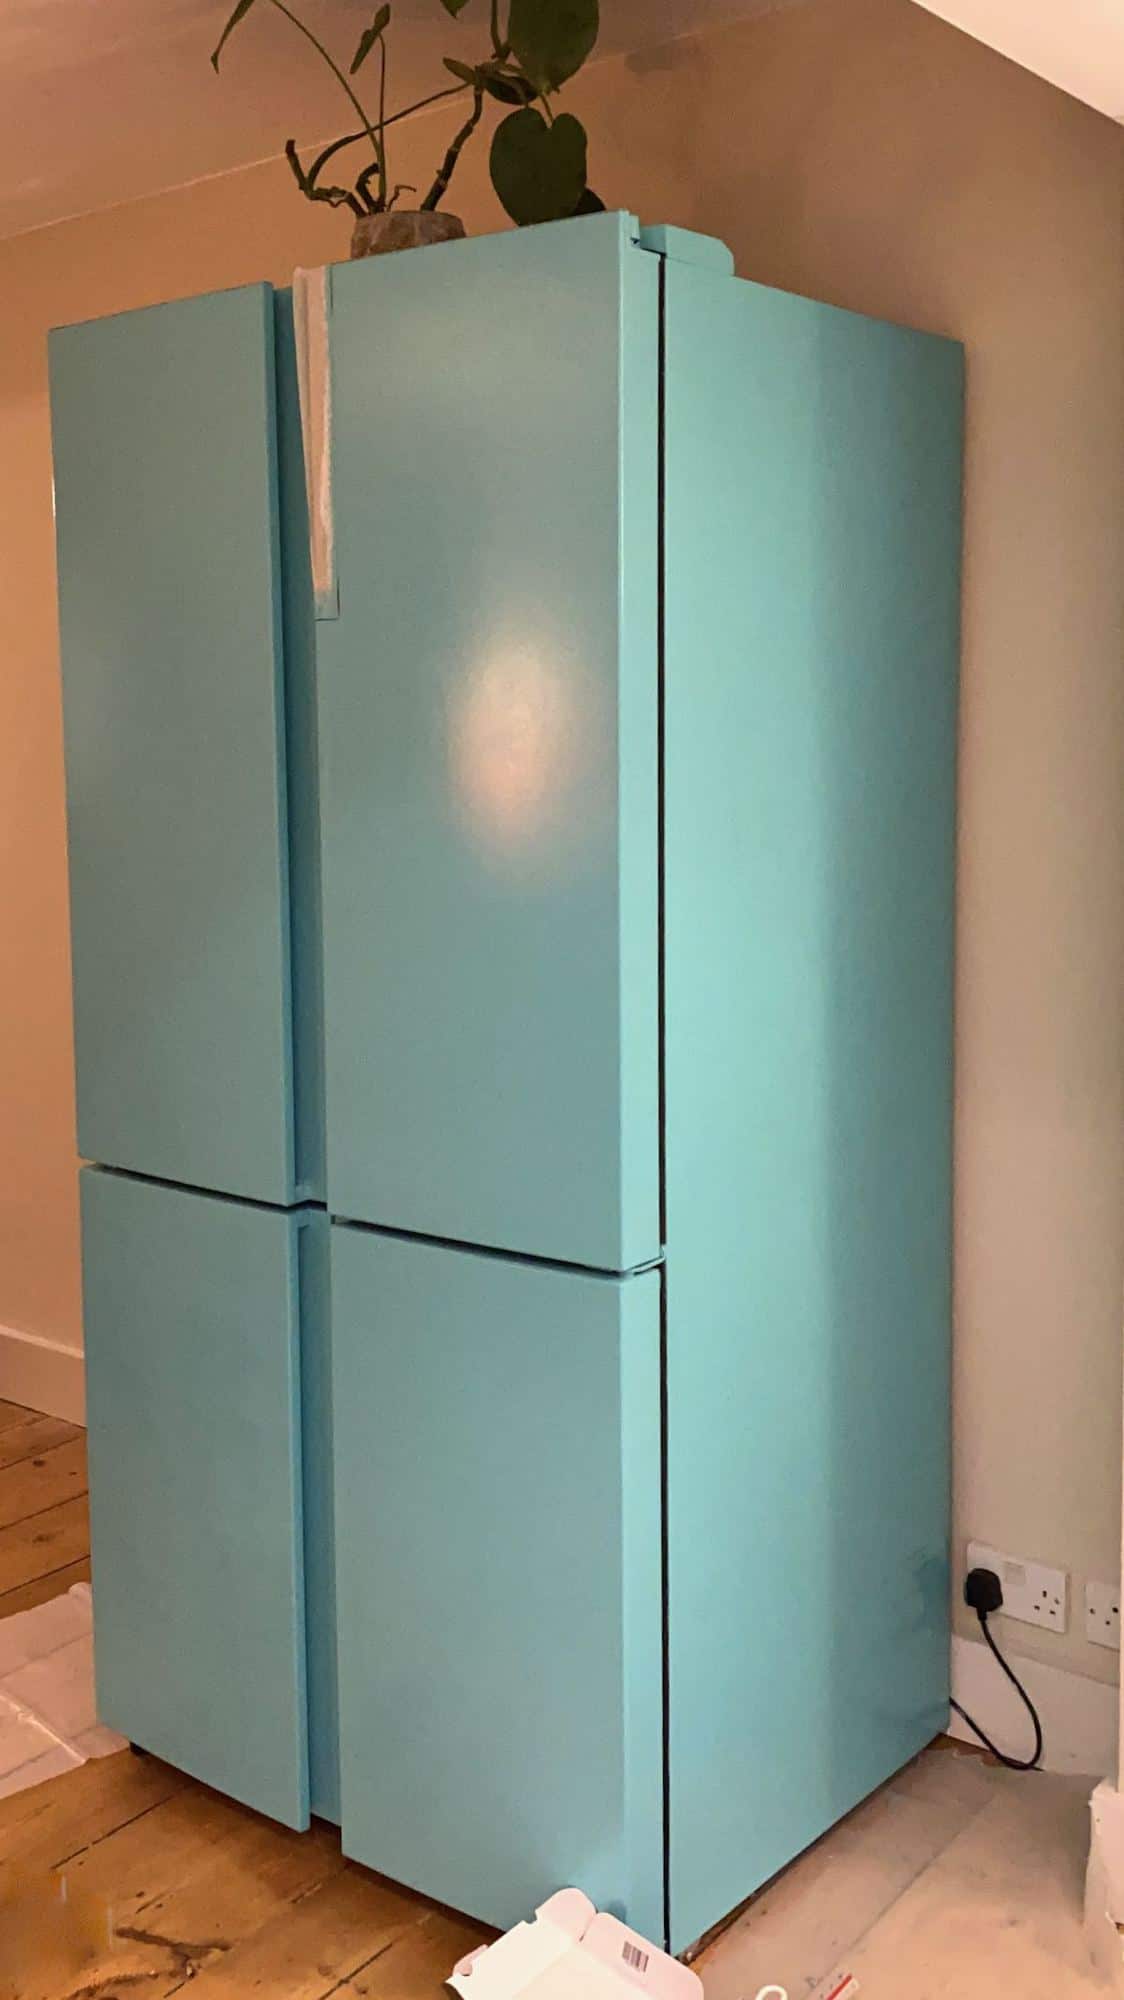
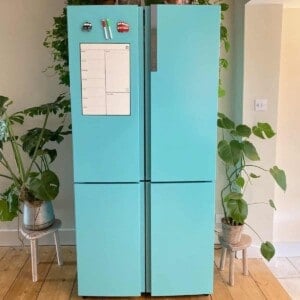
Anyone who follows me on Instagram will know that I’ve very recently moved house. I’m no longer a Londoner – instead, I’m now an ‘Oxonian.’ And one of the main elements that drew me to my new apartment is the gorgeous open-plan kitchen with its skylight and beautiful blue turquoise kitchen decor. Now I have a gorgeous turquoise/blue refrigerator to match!
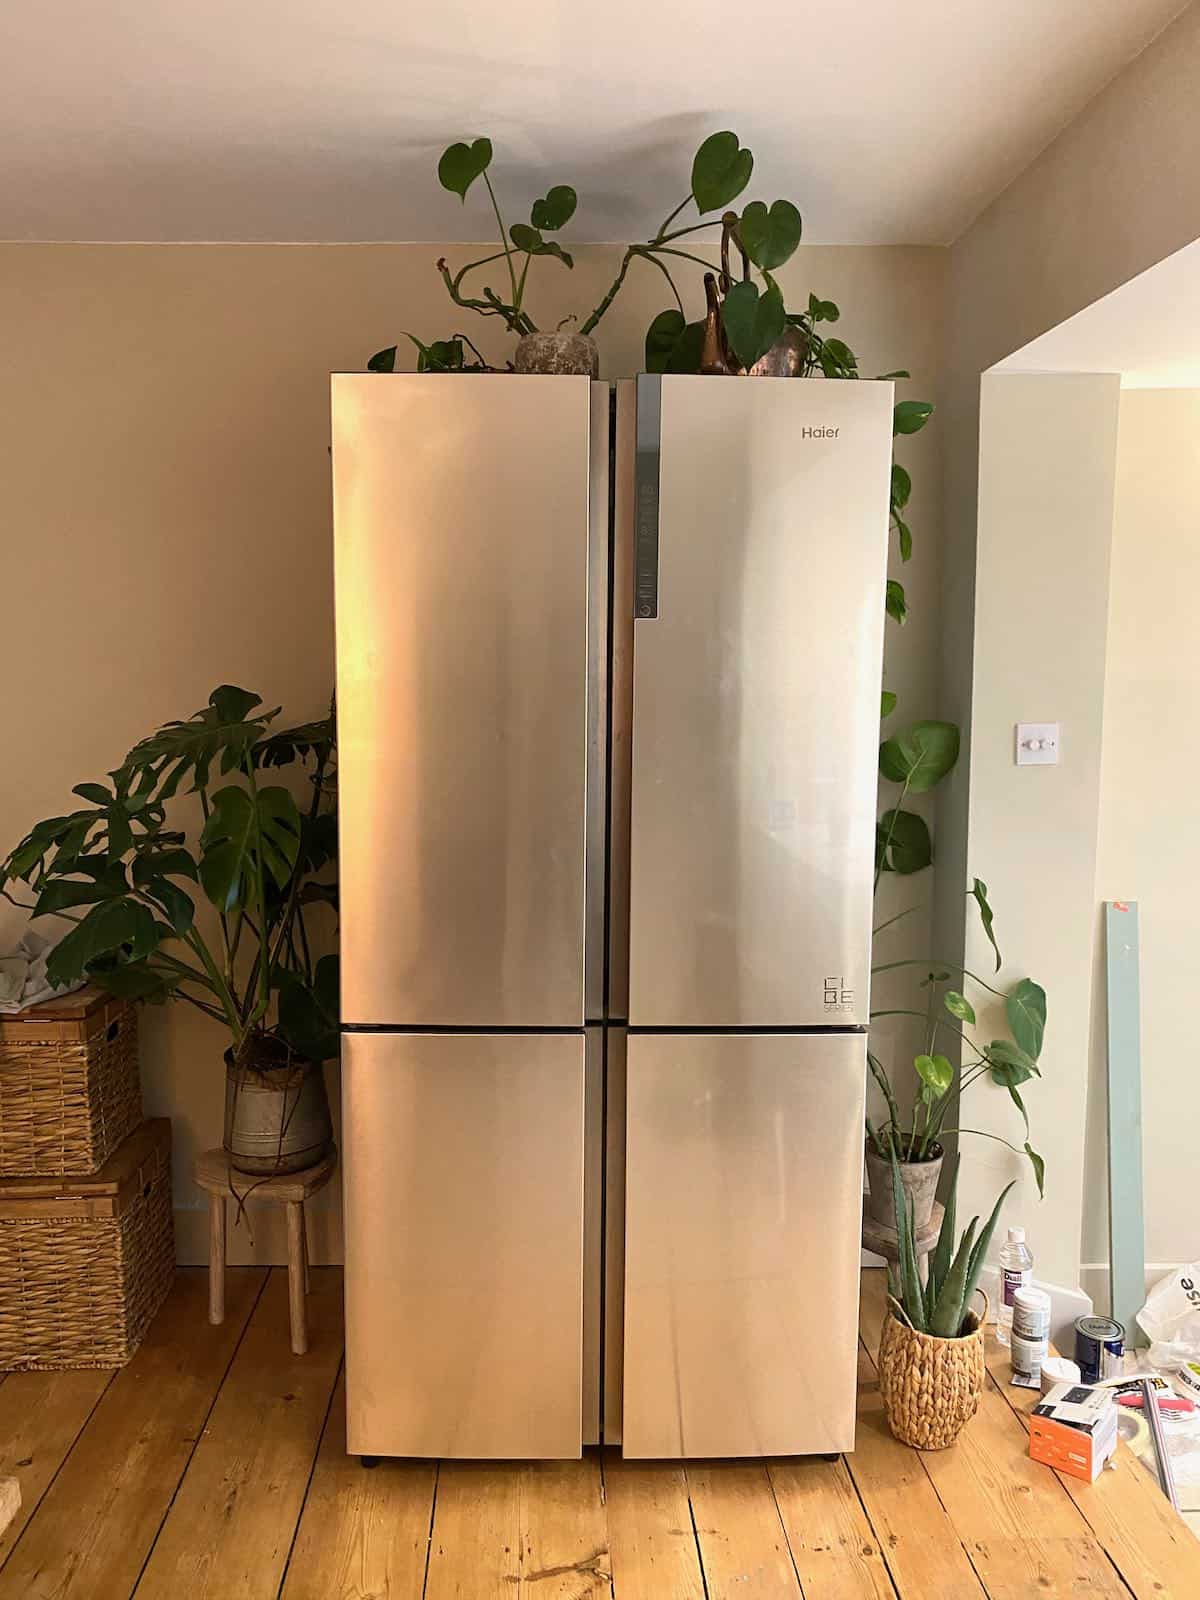
Before upgrading, I had a pink retro-style refrigerator that matched my pink aesthetics amazingly in my previous apartment. Although my new refrigerator is WAY bigger, I’ve always missed the gorgeous retro refrigerator style. Turns out that not only can you get this look from home, but it’s also incredibly cost-efficient and straightforward to do (a heck of a lot cheaper than buying a Smeg fridge, that’s for sure).
Learning how to paint a refrigerator is not only simple, but there are several ways you can use and even different ‘extra’ fridge decoration options (i.e., using stencils, swapping out handles, etc.) You can also choose from tons of colors – if a blue refrigerator doesn’t fit your kitchen decor (think farmhouse kitchen!). All you need are just a few simple and fairly inexpensive tools, and you can do this entire project in under $40 (or less!).
Want to save this recipe?
The Equipment
- Roller – using a small paint roller is a lot more useful than a regular paintbrush since it doesn’t leave any streaks and can provide better coverage. However, use a brush if you prefer.
- Primer – make sure to use one specifically for metal.
- The Paint – make sure to get paint for metal, I used silk texture. Avoid matte or eggshell texture to avoid obvious smudge/fingerprint marks. The color is up to you. I choose a turquoise color called “Tropicana/R229D” by Valspar.
Tip: Paint colors can look different in different lighting. The paint brand I used has a handy section on their website that gives you an idea of how the color will change based on the lighting (super handy!) Look for something similar. - OPTIONAL: Sandpaper – If you want/need to sand the fridge before painting then I suggest using medium 120-grit sandpaper.
- OPTIONAL: Seal layer – For a longer-lasting finish, you can use a paint sealer- however, it’s not 100% necessary.
How To Paint A Refrigerator
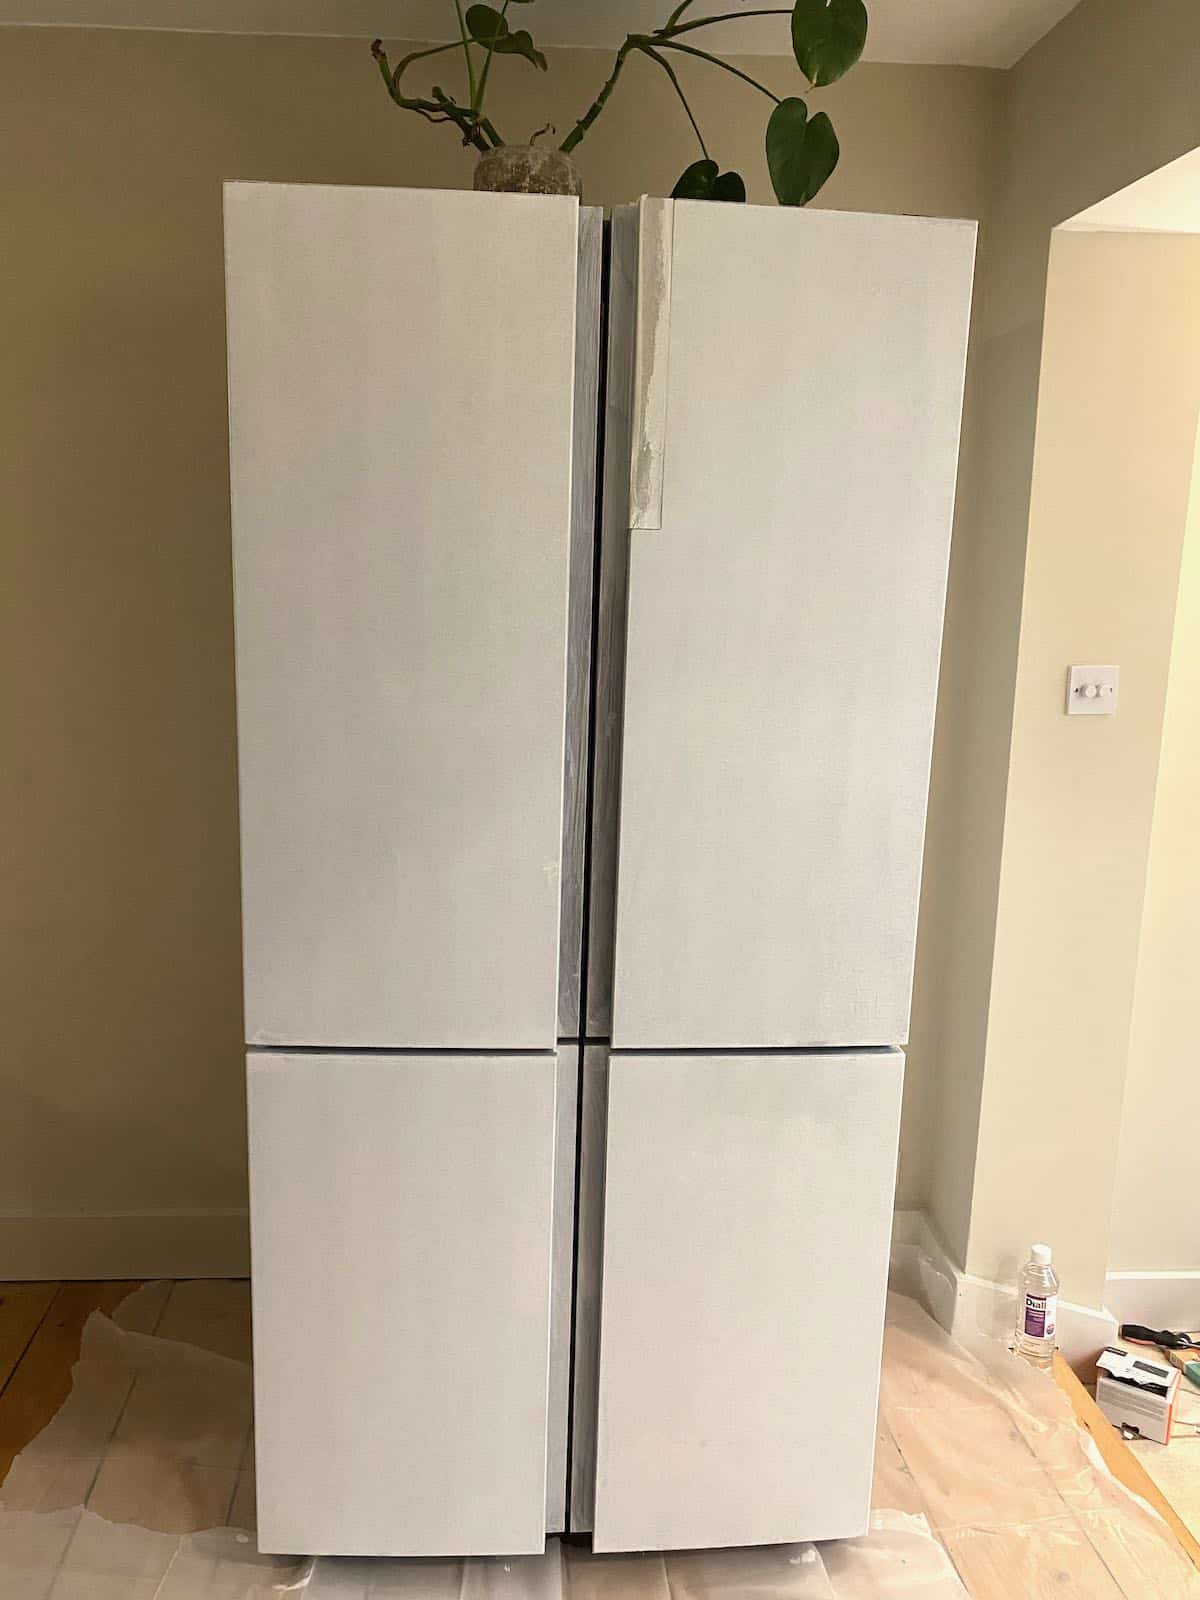
Step 1: Prepare the Refrigerator
First, remove everything from the refrigerator, unplug it, and move it slightly away from the wall or any other furniture (so they don’t get any paint splats). Aim to do this DIY refrigerator painting in a well-ventilated area too!
Place a ‘drop cloth’/tarp under the appliance to avoid drips. You could also use old materials like bed sheets or even trash bags. If you’re alone when doing this, you can usually tilt the fridge slightly to move the material underneath it, one corner at a time.
Step 2: Clean the refrigerator
It’s essential to thoroughly clean the outside of the refrigerator where you’ll be painting. Even the tiniest amount of dust can affect the way that the paint goes onto the appliance.
Mine was very clean already, so I just wiped it down to get rid of any dust.

To clean the fridge, use a damp cloth with a little soap (sugar soap works very well for this purpose) or even a vinegar-water mixture (1:1 ratio). Make sure to use a cloth that doesn’t leave behind any fibers – like a microfiber cloth.
You can dry the fridge with the same type of cloth – but avoid a towel or anything that may leave small fibers.
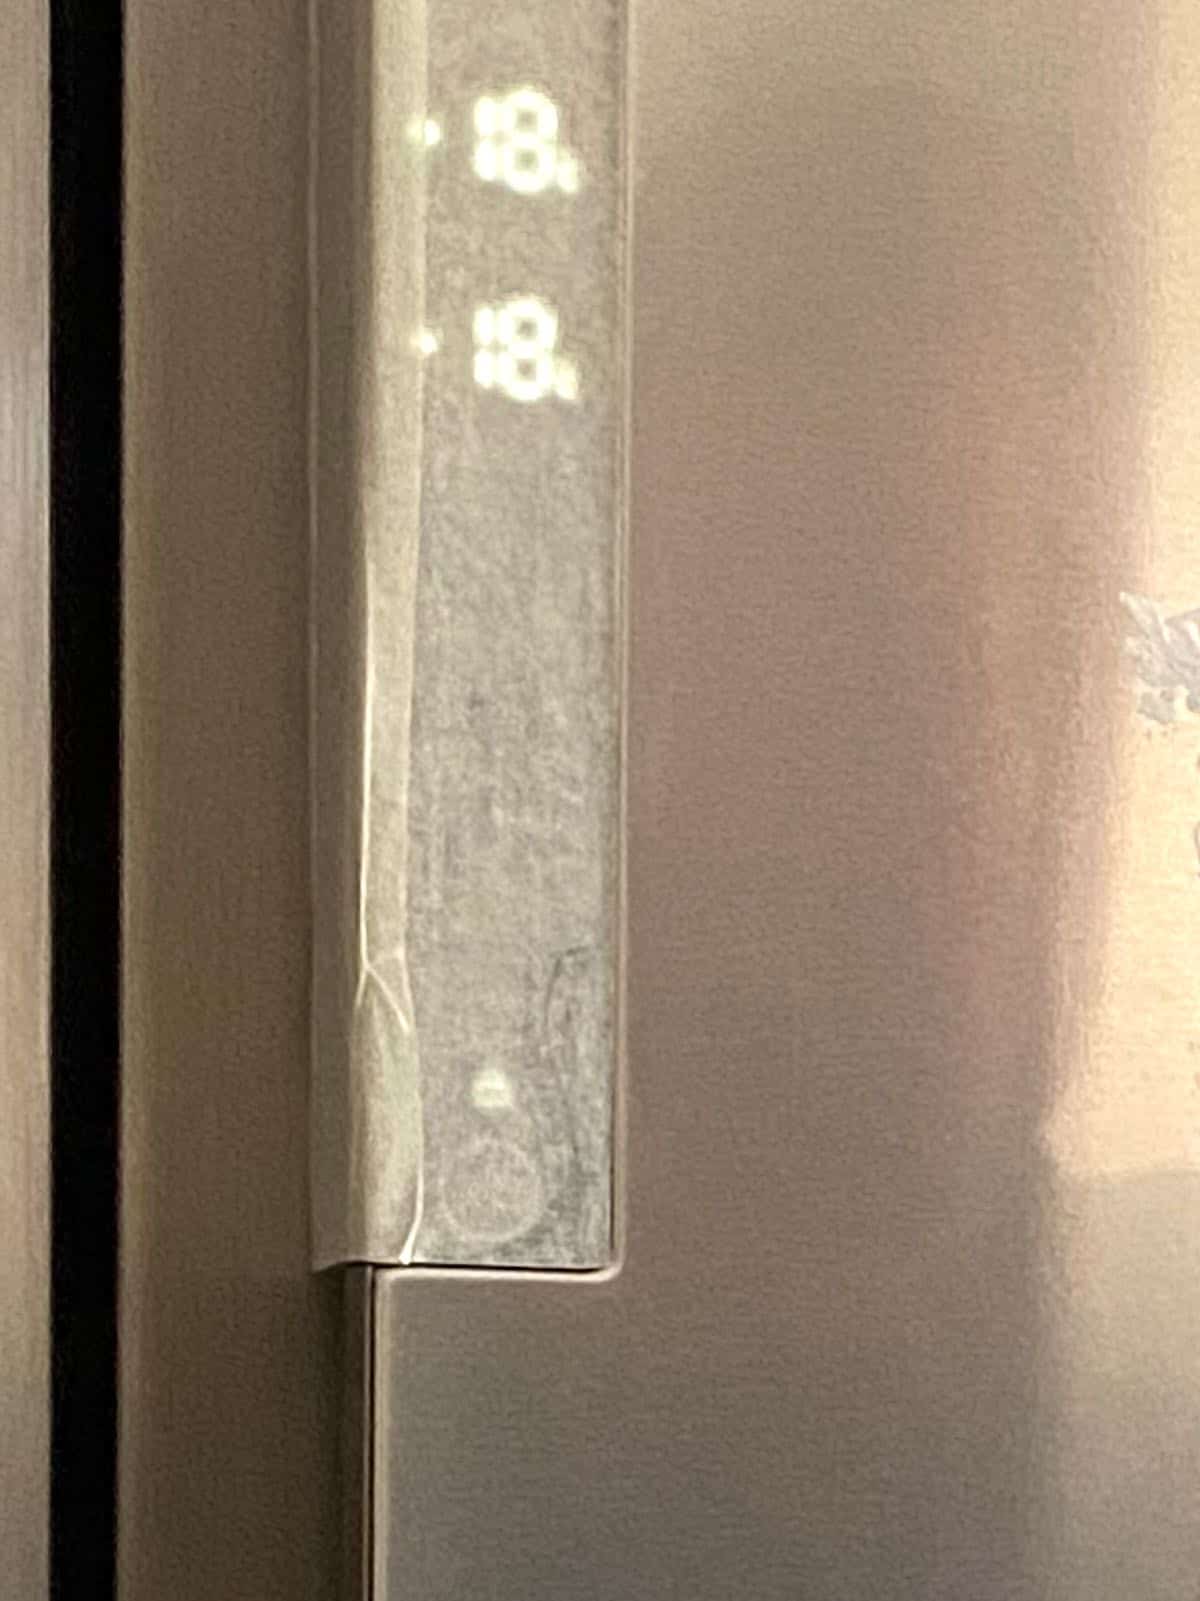
Step 3: Tape areas you’re not painting
Use masking tape to cover any areas that you don’t want to paint. This can include any displays, handles, and hinges. Make sure that the tape is smooth on all sides so that no paint gets below the tape.
Top Tip: You can also use masking tape to create a more detailed design when painting your fridge, such as stripes, blocks, etc.
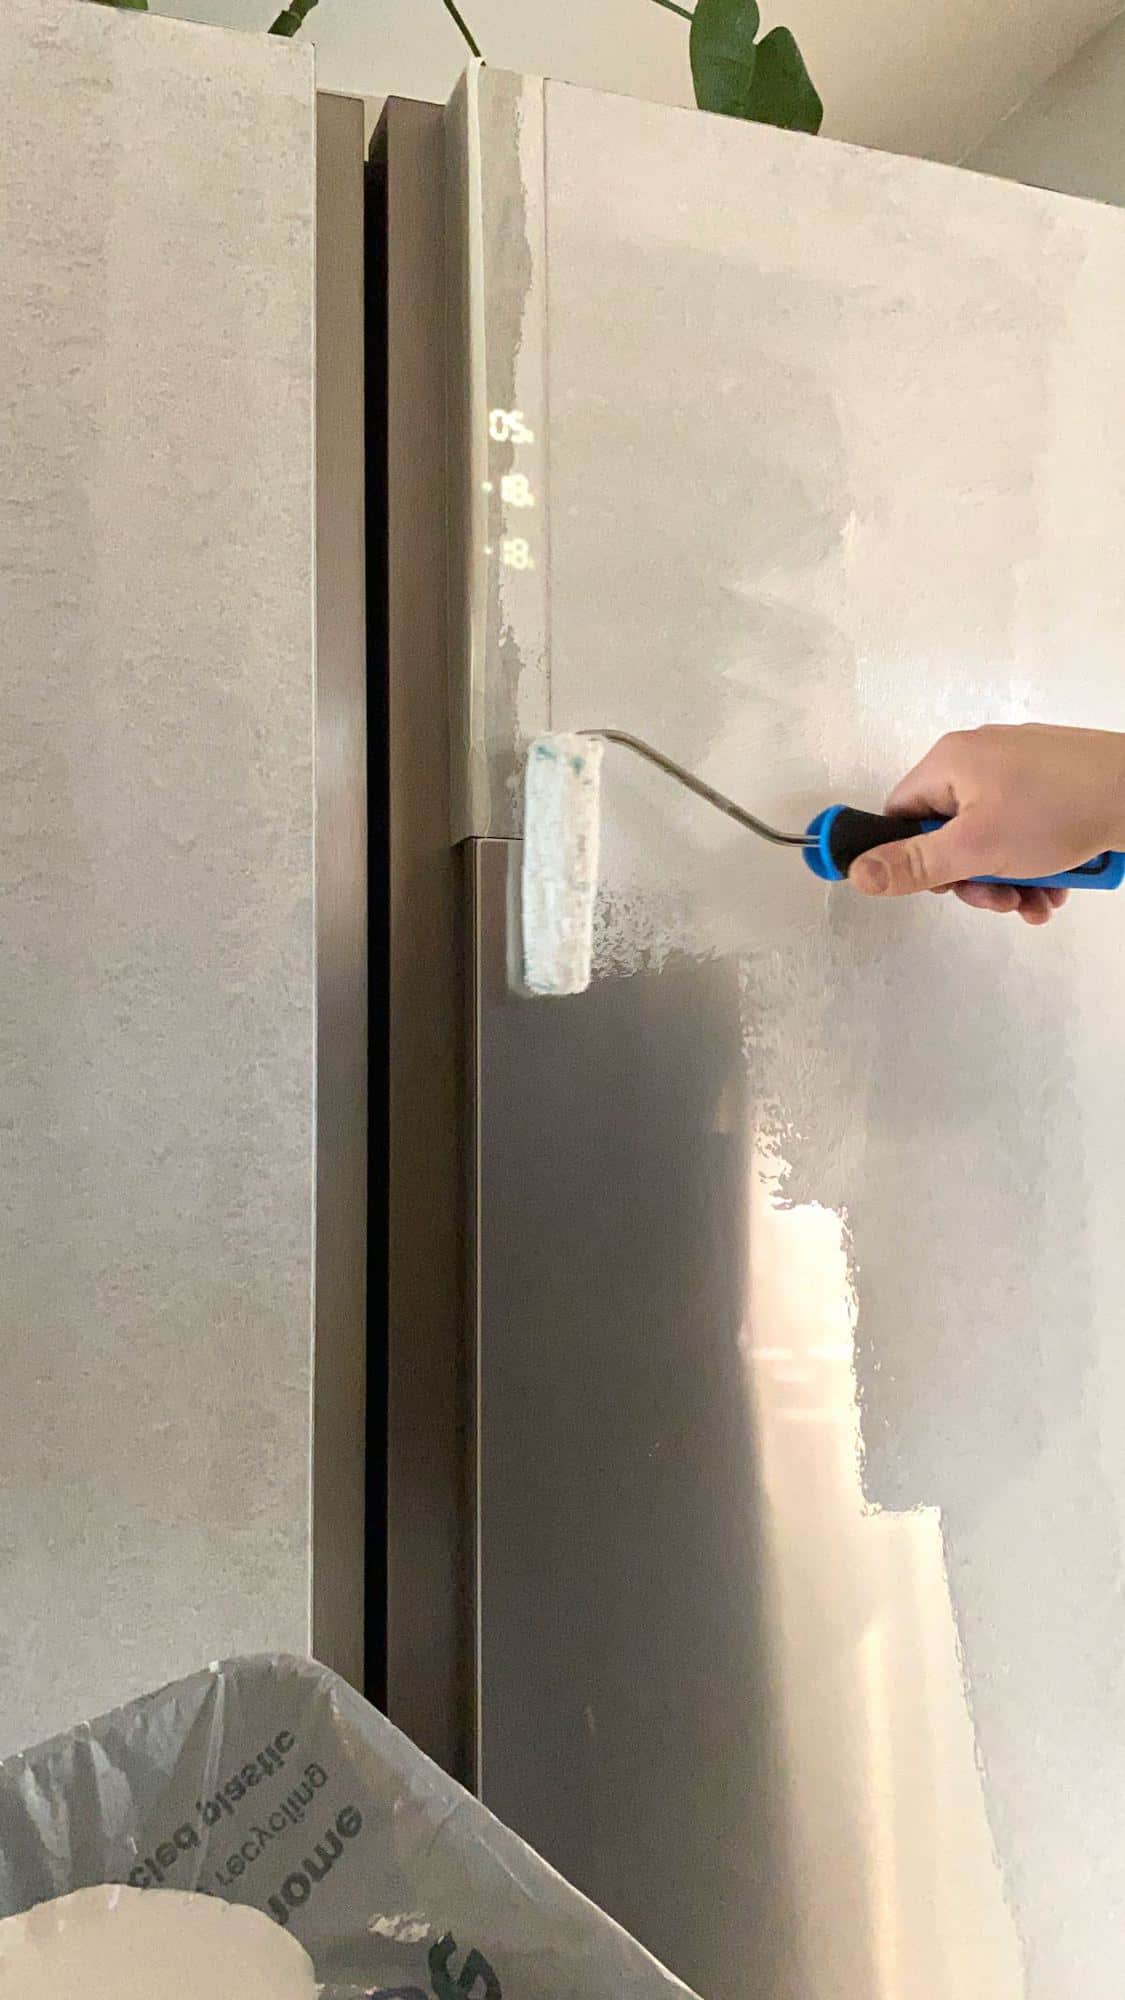
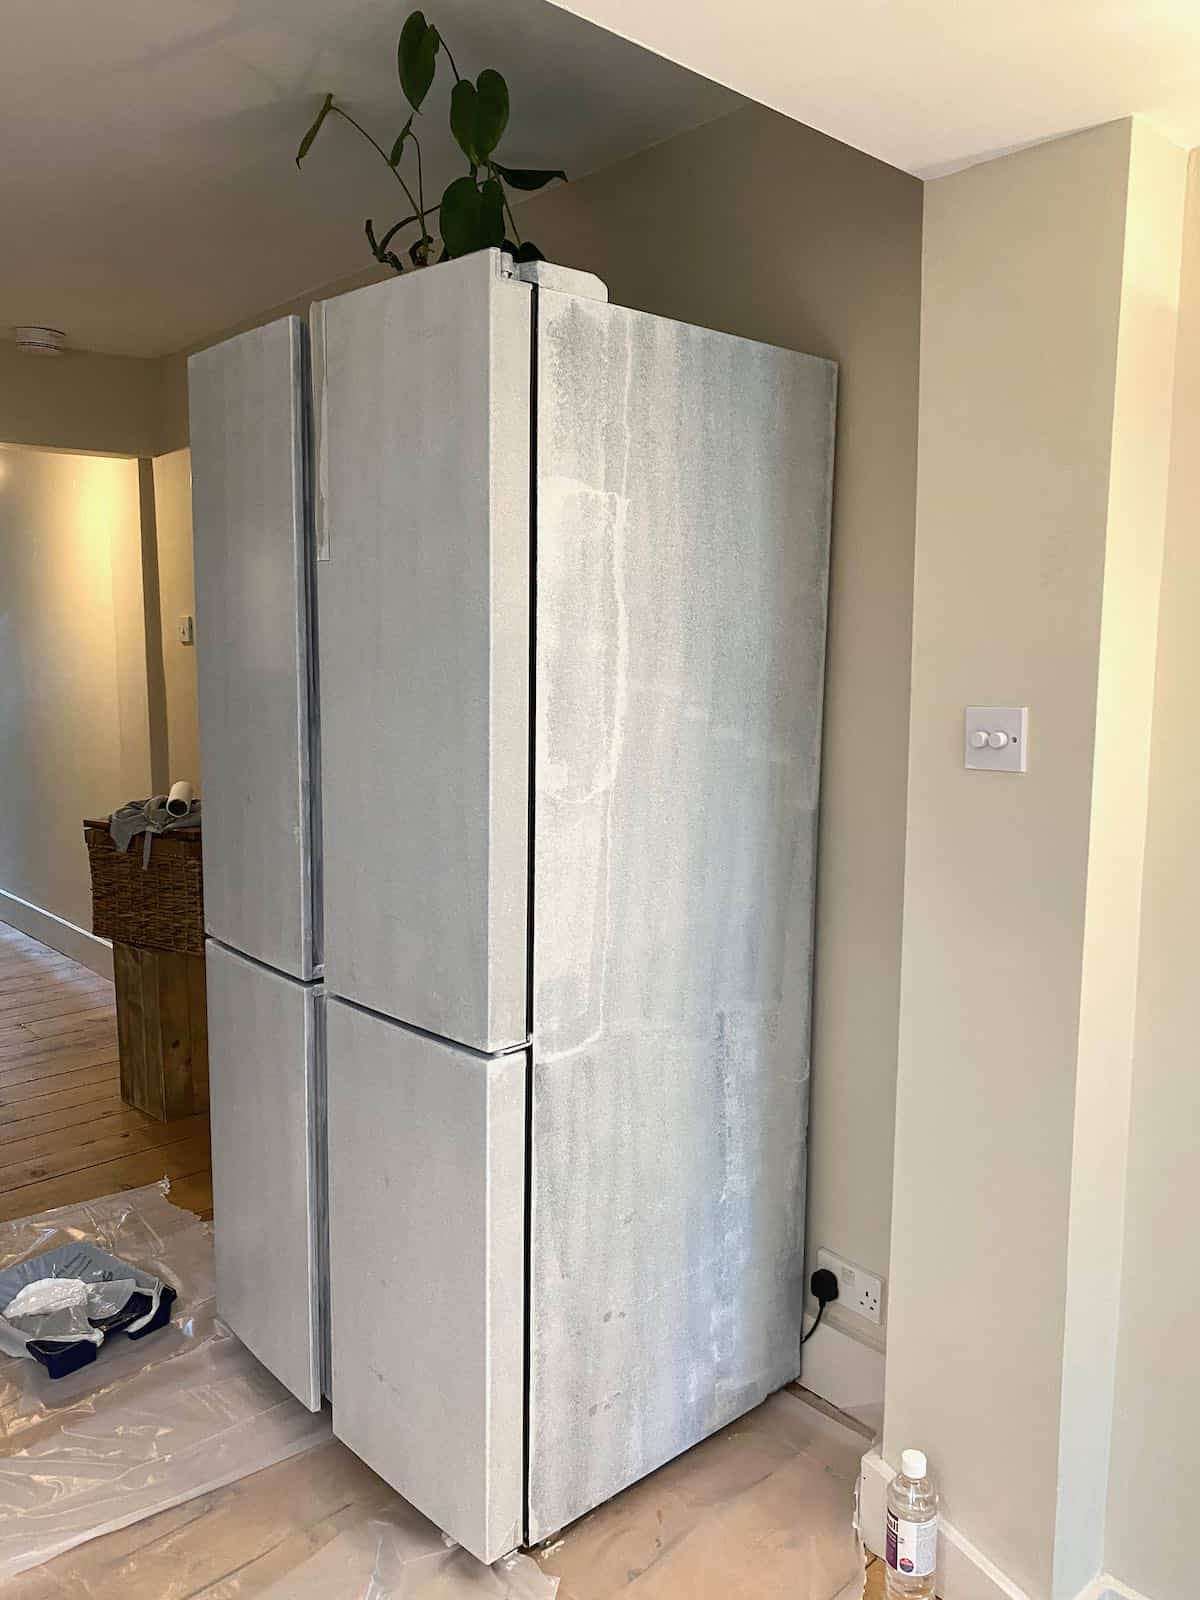
Step 4: Paint the refrigerator with a primer/base coat
Just like when painting walls, you’ll need to paint the refrigerator with a paint primer. This helps to create a really nice, smooth surface to paint on.
Several brands offer two-in-one paint and primer. This saves a step (and time) – but isn’t available in all colors.
To paint the refrigerator with the primer, you can use a small foam roller for the larger parts and a small brush for any harder-to-reach areas. Then allow the paint to dry completely (usually between 4-6 hours in a well-ventilated area).
Tip: Use two layers of primer for older refrigerators and even better coverage, but mine didn’t require it.
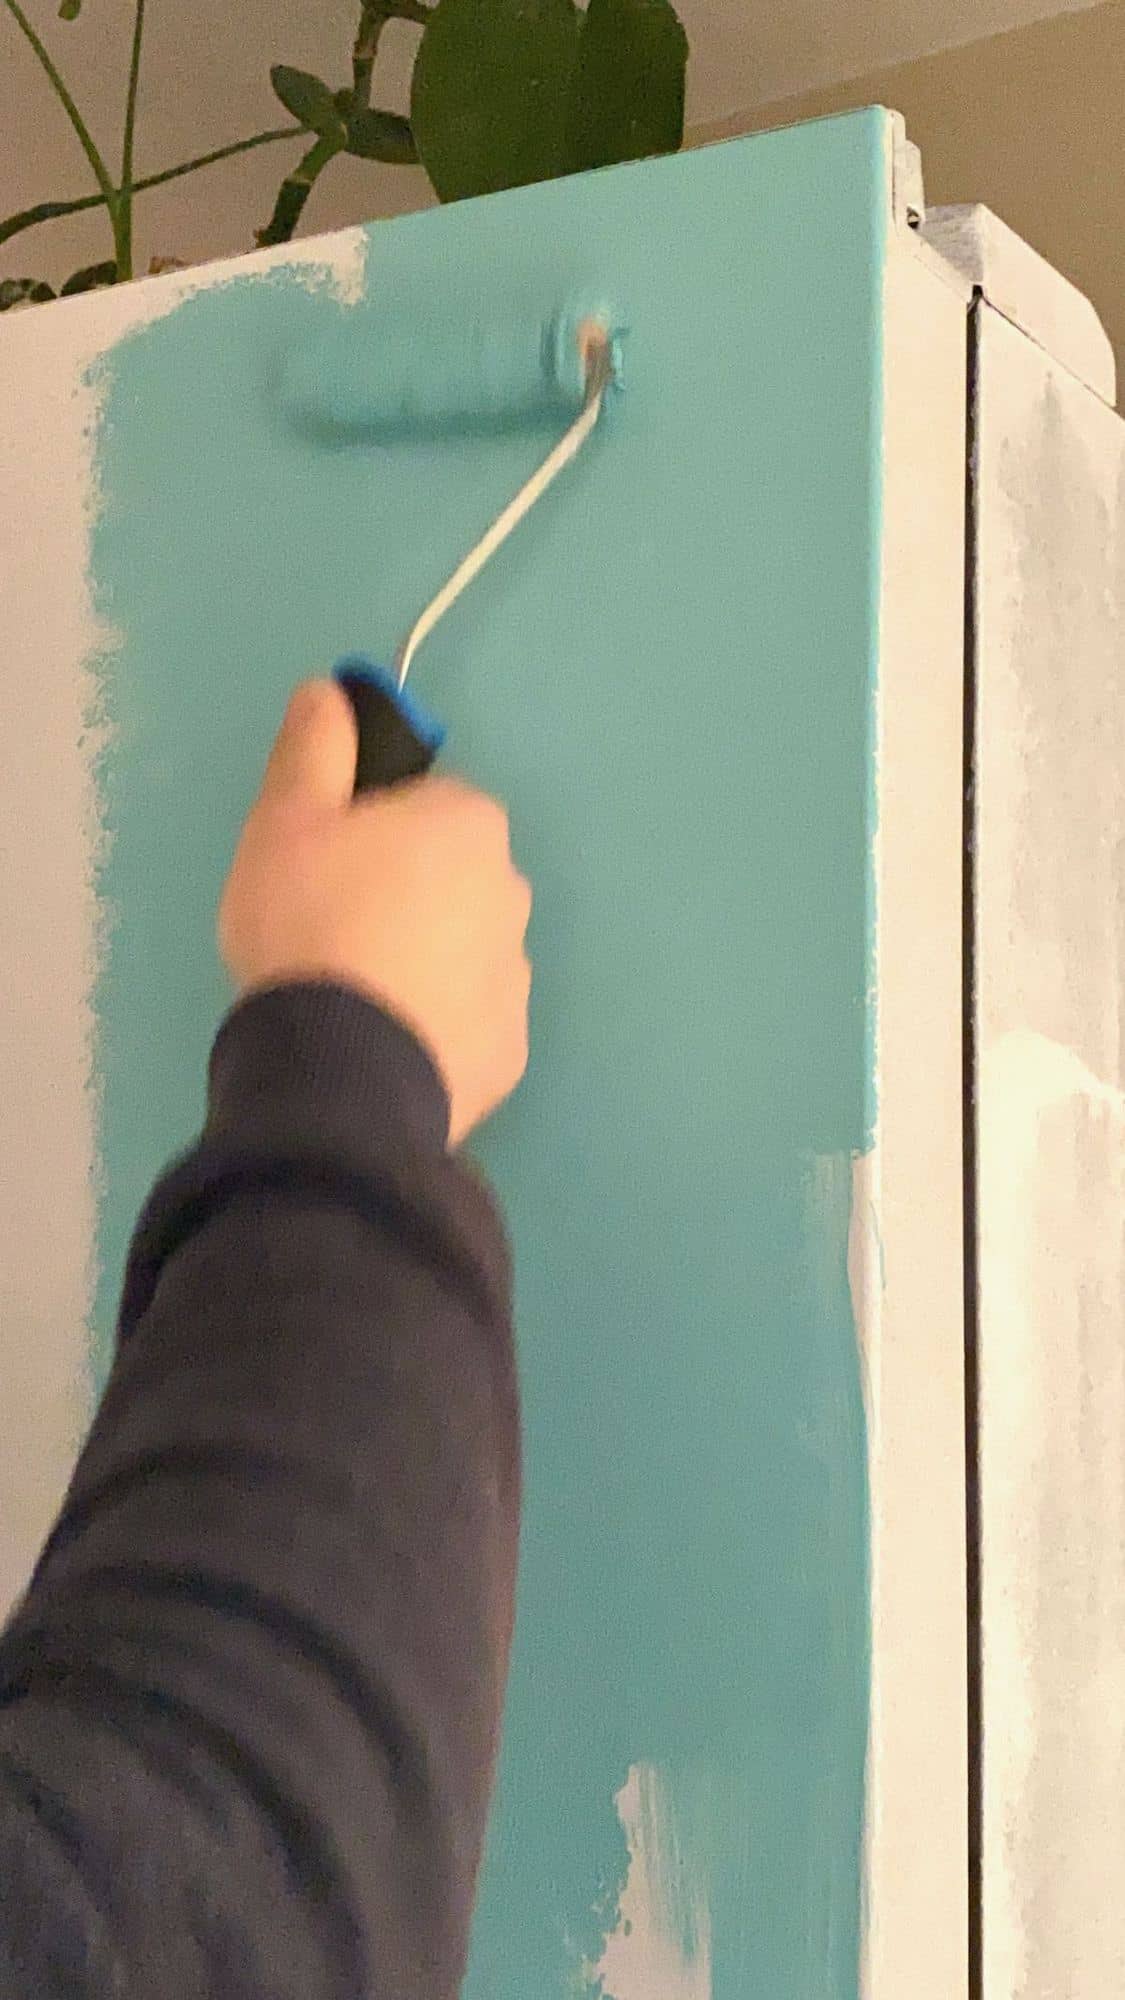
Step 5: Paint The Refrigerator
First, stir the paint well before pouring it into a tray. You can get wooden paint sticks specifically for this or use something similar like an old wooden spoon.
Using a clean, dry foam roller, paint the first layer of paint on the refrigerator. Don’t worry if it doesn’t look 100% at this point, as you’ll be painting another layer. I like to start with the top of the fridge, then the front and sides.
Use a small brush to reach any hard-to-reach areas again, and then allow the coat to dry completely (4-6 hours in a well-ventilated area, usually).
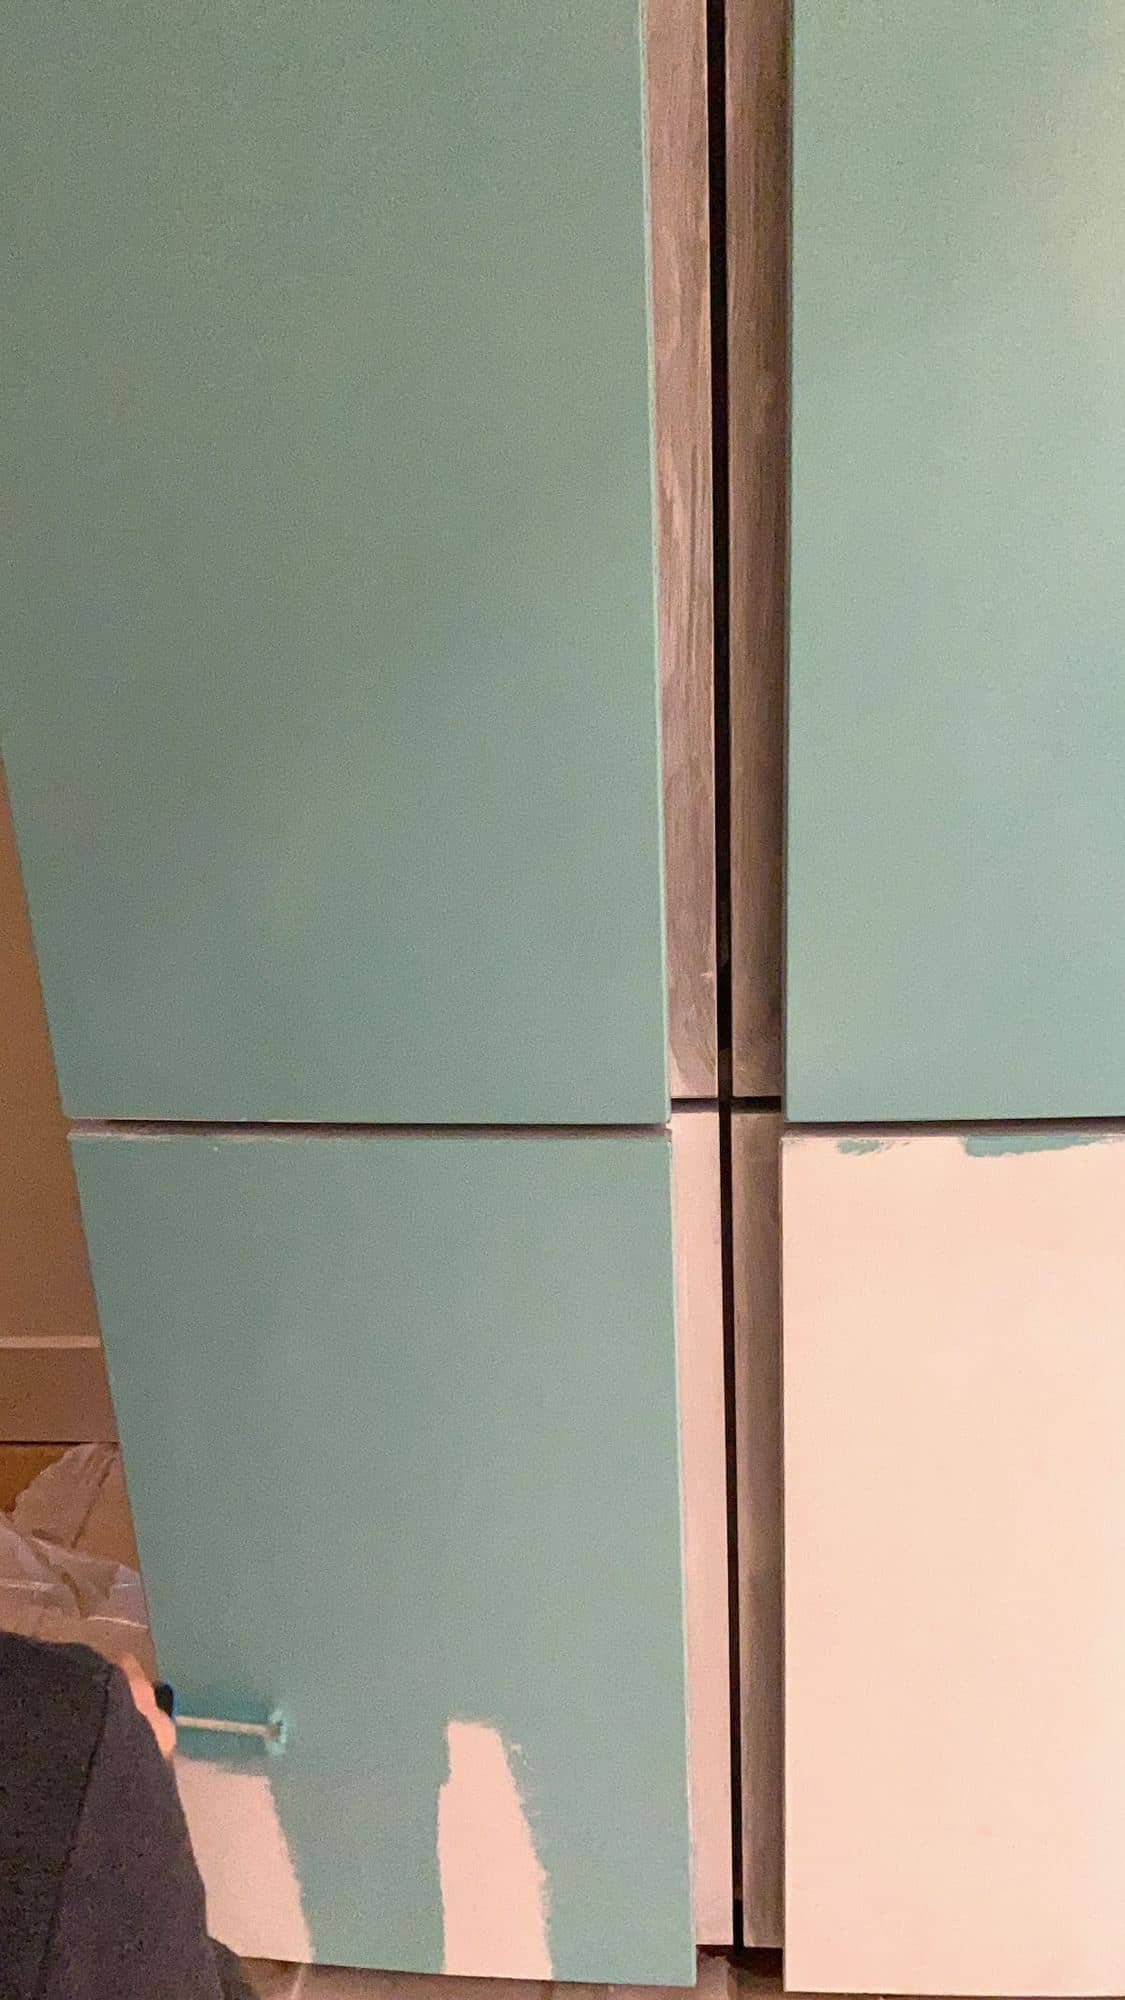
Top tip: I suggest painting the first coat the evening before and leaving it to dry overnight, so you give it a good 8-10 hours or more.
Once completely dry, paint the fridge with a second coat. If you don’t wait, you can ruin the finish entirely – so try not to be too impatient.
Alternative method: Spray paint
If you’d prefer to use spray paint to paint the refrigerator, use an oil-based spray primer first. Shake the can for about 60 seconds before spraying to thicken up the mixture.
When spraying, hold the can around 8-10”/20-25cm away from the refrigerator and make sure to move the can while spraying, so you don’t end up with uneven parts.
Allow it to dry completely (according to the instructions on the can).
Then, use your spray paint color of choice (make sure it’s for metal surfaces and avoid matte finishes to avoid smudge/fingerprint marks). For a retro refrigerator pastel shades and yellow work well.
Paint using the same method as above (same distance, with 60 seconds shaking the can before-hand). Heavy or uneven coats are more likely to drip and may need to be finely sanded down between coats.
Top Tip: It’s best to use protective gloves when using a spray. I’d also suggest taking the appliance outdoors when doing this or placing protective sheeting on the walls nearby the appliance as a spray is more likely to spread.
Step 6: The Final Steps
Allow the fridge to dry completely before moving it back into place and plugging it in. I suggest leaving it a full 24hrs for complete confidence. Remove the tape once it’s dry.
Top Tip: You can go one extra step and properly seal the paint with a sealant, though this takes a very long time to dry, and I’m not sure if it will affect the fridge’s magnetism.
Once your fridge is ready, pop over to this post to read my Guide to Fridge Organization, Ideas and Tips!
FAQs
Make sure to use paint that can be used on metal surfaces. Hardware stores will help you find what you need. If purchasing online, then make sure to read the item description.
Appliance epoxy is great for touching up in white. Water-based, latex-based, and oil-based paints can be used as long as they mention that they’re for metal. Several spray paint options work well on metal – rust-oleum being one of the best-known brands that I can think of.
Chalkboard paint is another option that can be great for a simple DIY refrigerator project and retro refrigerator look.
No, it’s not 100% necessary. However, it will protect the paint further from scraping off and general wear and tear. Spray enamel sealant can also prevent the fridge from getting rusty.
It shouldn’t. You can always use a magnetic primer before painting the fridge to ensure this isn’t the case. This may be more necessary with different paints like chalkboard paint, though I’m not 100% sure.
Sanding the fridge can help to create a smoother base for the primer and could also ensure a longer-lasting finish. However, I decided to skip this step and will report back on how it lasts long-term. For now, the paint went on wonderfully though and looks perfect, so I think that the decision is really up to you. It also depends on the finish of your refrigerator – is it smooth or not.
If you do decide to sand the fridge, first clean it, sand it, re-clean (to get rid of any new dust), and then paint it with the primer coat.
More Refrigerator Painting Notes
- Drying time can depend on how well ventilated the area, where you’re painting, is. Also, the weather will affect the drying time. For example, high humidity can take longer to dry.
- If your fridge is very old/dirty, you may need to use a small air compressor to get out any dust and food bits from the fridge’s various hard-to-reach parts.
- If you make any mistakes when painting, you can clean it up with q-tips and a little rubbing alcohol. If it’s the first coat, you can sand down any areas that are bumpy before the second coat.
- For a retro refrigerator on a budget, I suggest going for yellow or pastel shades like duck-egg blue, pastel pink, etc.
- If you have plastic handles that come away from the fridge, these can be replaced with metallic handles OR painted the same color or painted complementary metallics: silver, gold, bronze – just make sure to seal these high-touch areas.
- The number of coats of paint that you’ll need will vary depending on what color you’re painting the fridge.
- To have your refrigerator paint match your kitchen cabinets perfectly, several brands will be able to mix custom colors as well as having standard colors.
If you give this Retro Refrigerator DIY a try, then let me know your thoughts and any questions in the comments. Also, feel free to show me pictures of your own fridge/freezers – just tag @AlphaFoodie. Lastly, let me know if you’d like me to post other DIY kitchen ideas/ home decor posts in the future!
How to Paint a Fridge On A Low budget (Retro Style Refrigerator)
Equipment
- Roller brush
- Masking tape
Ingredients
- Primer
- Paint I used a turquoise color called “Tropicana/R229D”
- Sealant Optional
Instructions
Step 1: Prepare the Refrigerator
- Remove everything from the refrigerator, unplug it, and move it slightly away from the wall or any other furniture (so they don’t get any paint splats). Aim to do this DIY refrigerator painting in a well-ventilated area too!
- Place a ‘drop cloth’/tarp under the appliance to avoid drips. You could also use old materials like bed sheets or even trash bags. If you’re alone when doing this, you can usually tilt the fridge slightly to move the material underneath it, one corner at a time.
Step 2: Clean the refrigerator
- It’s essential to thoroughly clean the outside of the refrigerator where you’ll be painting. Even the tiniest amount of dust can affect the way that the paint goes onto the appliance.To clean the fridge, use a damp cloth with a little soap (sugar soap works very well for this purpose) or even a vinegar-water mixture (1:1 ratio). Make sure to use a cloth that doesn’t leave behind any fibers – like a microfiber cloth.You can dry the fridge with the same type of cloth – but avoid a towel or anything that may leave small fibers.
Step 3: Tape areas you’re not painting
- Use masking tape to cover any areas that you don’t want to paint. This can include any displays, handles, and hinges. Make sure that the tape is smooth on all sides so that no paint gets below the tape.Top Tip: You can also use masking tape to create a more detailed design when painting your fridge, such as stripes, blocks, etc.
Step 4: Paint the refrigerator with a primer/base coat
- To paint the refrigerator with the primer*, you can use a small foam roller for the larger parts and a small brush for any harder-to-reach areas. Then allow the paint to dry completely (usually between 4-6 hours in a well-ventilated area).Tip: You can use two layers of primer for older refrigerators and even better coverage, but mine didn’t require it.
Step 5: Paint The Refrigerator
- Stir the paint well before pouring it into a tray. You can get wooden paint sticks specifically for this or use something similar to an old wooden spoon.
- Using a clean, dry foam roller, paint the first layer of paint on the refrigerator. Don’t worry if it doesn’t look 100% at this point, as you’ll be painting another layer. I like to start with the top of the fridge, then the front and sides.
- Use a small brush to reach any hard-to-reach areas again, and then allow the coat to dry completely (4-6 hours in a well-ventilated area, usually).Top tip: I suggest painting the first coat the evening before and leaving it to dry overnight, so you give it a good 8-10 hours or more.
- Once completely dry, paint the fridge with a second coat. If you don’t wait, you can ruin the finish entirely – so try not to be too impatient.
Alternative method: Spray paint
- If you’d prefer to use spray paint to paint the refrigerator, use an oil-based spray primer first. Shake the can for about 60 seconds before spraying to thicken up the mixture.When spraying, hold the can around 8-10”/20-25cm away from the refrigerator and make sure to move the can while spraying, so you don’t end up with uneven parts.Allow it to dry completely (according to the instructions on the can).
- Then, use your spray paint color of choice (make sure it's for metal surfaces and avoid matte finishes to avoid smudge/fingerprint marks).Paint using the same method as above. Heavy or uneven coats are more likely to drip and may need to be finely sanded down between coats.Top Tip: It’s best to use protective gloves when using a spray. I’d also suggest taking the appliance outdoors when doing this or placing protective sheeting on the walls nearby the appliance as a spray is more likely to spread.
Step 6: The Final Steps
- Allow the fridge to dry completely before moving it back into place and plugging it in. I suggest leaving it a full 24hrs for complete confidence.Top Tip: You can go one extra step and properly seal the paint with a sealant, though this takes a very long time to dry, and I’m not sure if it will affect the fridge's magnetism.
Notes
- Drying time can depend on how well ventilated the area is that you’re painting. Also, the weather will affect the drying time. For example, high humidity can take longer to dry.
- If your fridge is very old/dirty, you may need to use a small air compressor to get out any dust and food bits from the fridge’s various hard-to-reach parts.
- If you make any mistakes when painting, you can clean it up with q-tips and a little rubbing alcohol. If it’s the first coat, you can sand down any areas that are bumpy before the second coat.
- For a retro refrigerator on a budget, then I suggest going for yellow or pastel shades like duck-egg blue, pastel pink, etc.
- If you have plastic handles that come away from the fridge, these can be replaced with metallic handles OR painted the same color/ painted complementary metallics; silver, gold, bronze- just make sure to seal these high-touch areas.
- The number of coats of paint that you’ll need will vary depending on what color you’re painting the fridge.
- To have your refrigerator paint match your kitchen cabinets perfectly, several brands will be able to mix custom colors as well as having standard colors.
As noted above, you need to wait about 4-6 hours between coats. Depending on the environment where your fridge is (a well-ventilated area or not), as well as the type of paint you use, it might take longer for the paint to dry.


Thank you so much! This is exactly what I needed to know and your steps are so easy to follow!
Thank you so much, KC! 🙂
Thanks for this easy-to-follow DIY! I’ve been debating whether to paint my refrigerator or wrap it in peel-and-stick vinyl. Both appear to have beautiful results, but I think I’m going to go with paint!
Question: do you have any idea if Rustoleum appliance paint is tintable? Or can I just use regular latex interior paint? My fridge is textured, so I’m a bit apprehensive.
Hi Robynne,
Try using paint specifically for metal and preferably a silk texture. You can also go to your nearest hardware store and ask what paint they would recommend if you’re unsure.
Let me know if you tried it!
Is it absolutely necessary to unplug refrigerator? Ours is completely full! It would not be practical for us with teenagers
Hi Natasha,
It’s just for safety measures and to be able to move the fridge away from the wall. Just be careful.
Love this idea. Pls do more DYI!
Thank you so much, Susanna. Glad you enjoyed this DIY.