
This post may contain affiliate links. Please read our disclosure policy.
A simple DIY for how to make paneer at home, using just 2 ingredients for this slightly chewy, non-melting, delicious Indian paneer cheese recipe.
This DIY is a simple paneer cheese recipe – showing you how to make paneer at home with just two ingredients. This non-melting, Indian classic can then be cooked into a variety of dishes where it’s soft, chewy texture and ability to suck up the flavors of everything around it make it a delicious treat.
Yes, buying a store-bought version of paneer is possible, of course, but like with any of my DIY’s, where’s the fun in that? Paneer cheese is incredibly easy to make – Possibly one of the easiest DIYs I’ve done so far. With just two ingredients and a few steps.
However, surprisingly, when I’ve asked paneer-making friends about their methods, they are all ever so slightly different – even though they all follow the same formula; boil milk, add acid to form curds, drain curds, form block, chop.
Within this post I’ll be discussing a few topics; what is paneer, how to make paneer at home, how to use the leftover whey, and a few suggestions for restaurant-style dishes to use your homemade fresh cheese.
What is Paneer?
Paneer cheese is a classic Asian cheese, common in India. It’s unaged and made by curdling milk with acid then pressed. And, perhaps one of it’s most loved features – paneer is a non-melting cheese.
Without melting, paneer has become a staple in a large variety of dishes. This includes saag paneer (a spinach and cheese appetizer dish), which is how I first ate it and fell for the malleable, soft juicy cheese texture and flavor.
Similarly to tofu and jackfruit, I love the way that paneer seems to suck up the flavors of everything that it is cooked with/in – making it perfect for dishes with sauces, etc.
I’m not someone who uses paneer every week. However, it’s been a DIY that I’d wanted to try for a while—especially having worked my way through various other cheese recipes recently. Including homemade Simple Herby Vegan Feta Cheese, Easy Stretchy Vegan Mozzarella Cheese , and other vegan options as well as DIY Homemade Ricotta Cheese.
Since my first time making this paneer cheese, It’s been a DIY I turn to at least monthly. I’ve been enjoying discovering and experimenting with new recipes to use the homemade paneer cheese every time I make a new batch.
How to Make Paneer At Home
Homemade paneer is not only ridiculously easy to make at home, but it’s almost identical to the way you make cottage cheese – with just a couple of changes. Cottage cheese is simply drained with some of the whey remaining in the mixture and keeping it very liquidy. However, paneer is pressed, to get rid of all the extra whey and form a single block of cheese.
Here in the UK, store-bought cottage cheese is usually larger individual curds in a loose mixture that is of spoonable texture. Unlike cottage cheese, paneer cheese is solid and can be sliced and diced.
A few tips on How to Make paneer
- A friend told me that she makes this recipe using a few tablespoons of cream in the milk, for a super creamy version that isn’t ‘squeaky’ like some store-bought paneer can be. I’ve never tried it myself, so I don’t have a preference – but feel free to experiment.
The main tip is always to use full-fat milk. Paneer needs to fat content in the milk, so if you try to make paneer with skimmed milk, then you’ll end up with a lot less paneer, and it will be very dry. - When adding the acid (vinegar/lemon) to your milk then try to only stir the mixture in one direction. This will help the curds become larger pieces that will stick together later on in the process.
- Don’t get rid of the liquid you get when draining the cheese. This is whey and can be used in a variety of ways, as it’s a wonderful protein source. In fact, you may notice many protein powders contain whey.
How to Use Leftover Whey

When you drain the paneer cheese, you’ll have a lot of leftover liquid. This is the cheese whey and is jam-packed with protein and a variety of vitamins/minerals. I’d refrain from wasting this liquid – instead, put it to good use:
- I’ve heard that you can save this liquid for when you next prepare paneer at home and it will encourage the curds to form. However, this isn’t something that I’ve tried so if someone has a good method for this then let us know in the comments.
- You can add the whey to smoothies and juices, for a protein and nutritional boost.
- It can be used in soups, in place of stock, or even combined with homemade vegetable stock.
- Whey liquid works well within baking recipes, including pancakes, bread, muffins, etc.
I’m sure there are plenty of other ways to use and consume whey, feel free to add your suggestions in the comments below.
The Process For Homemade Paneer
Ingredients
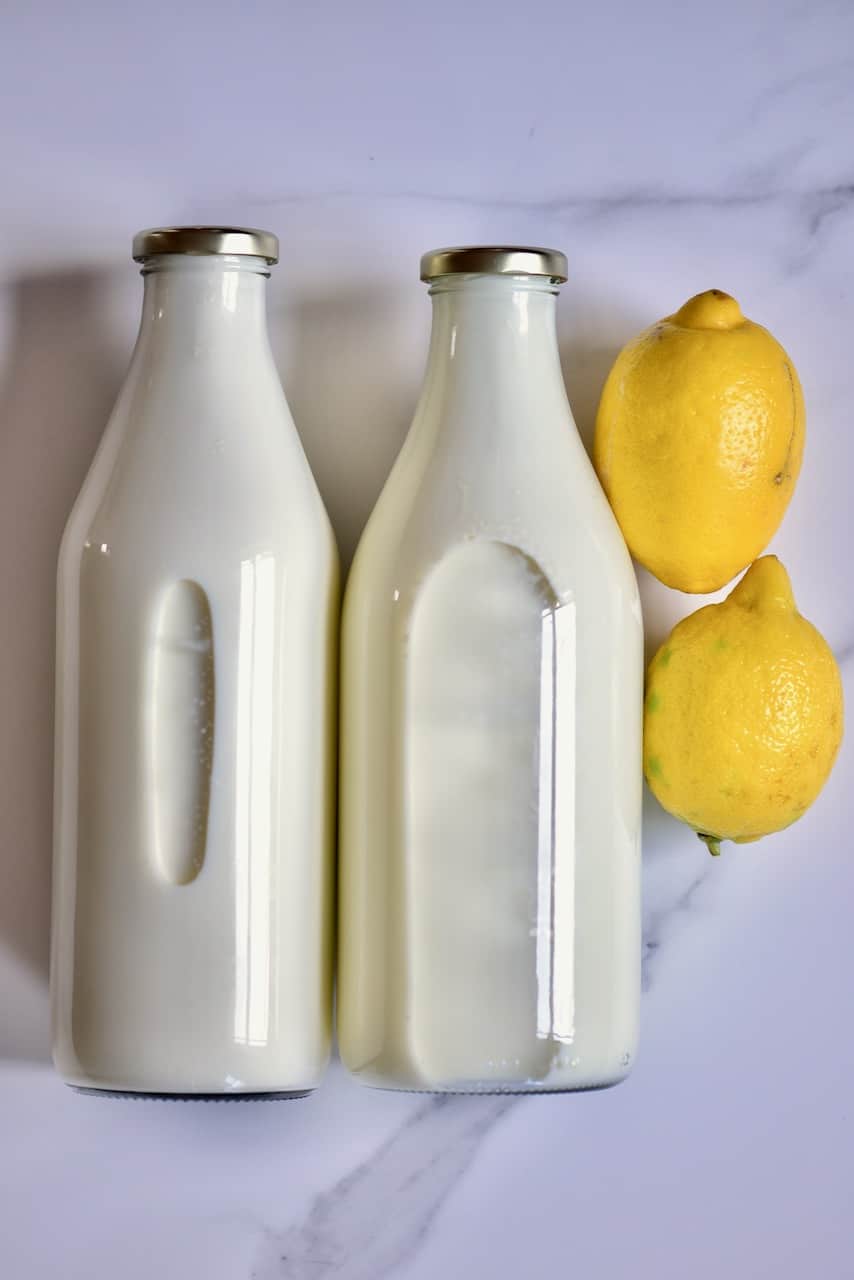
Full-fat milk (cow, buffalo, or goat milk will work as long as it’s full fat)
Lemons (you can alternatively use vinegar)
Paneer Recipe: How to make paneer at home
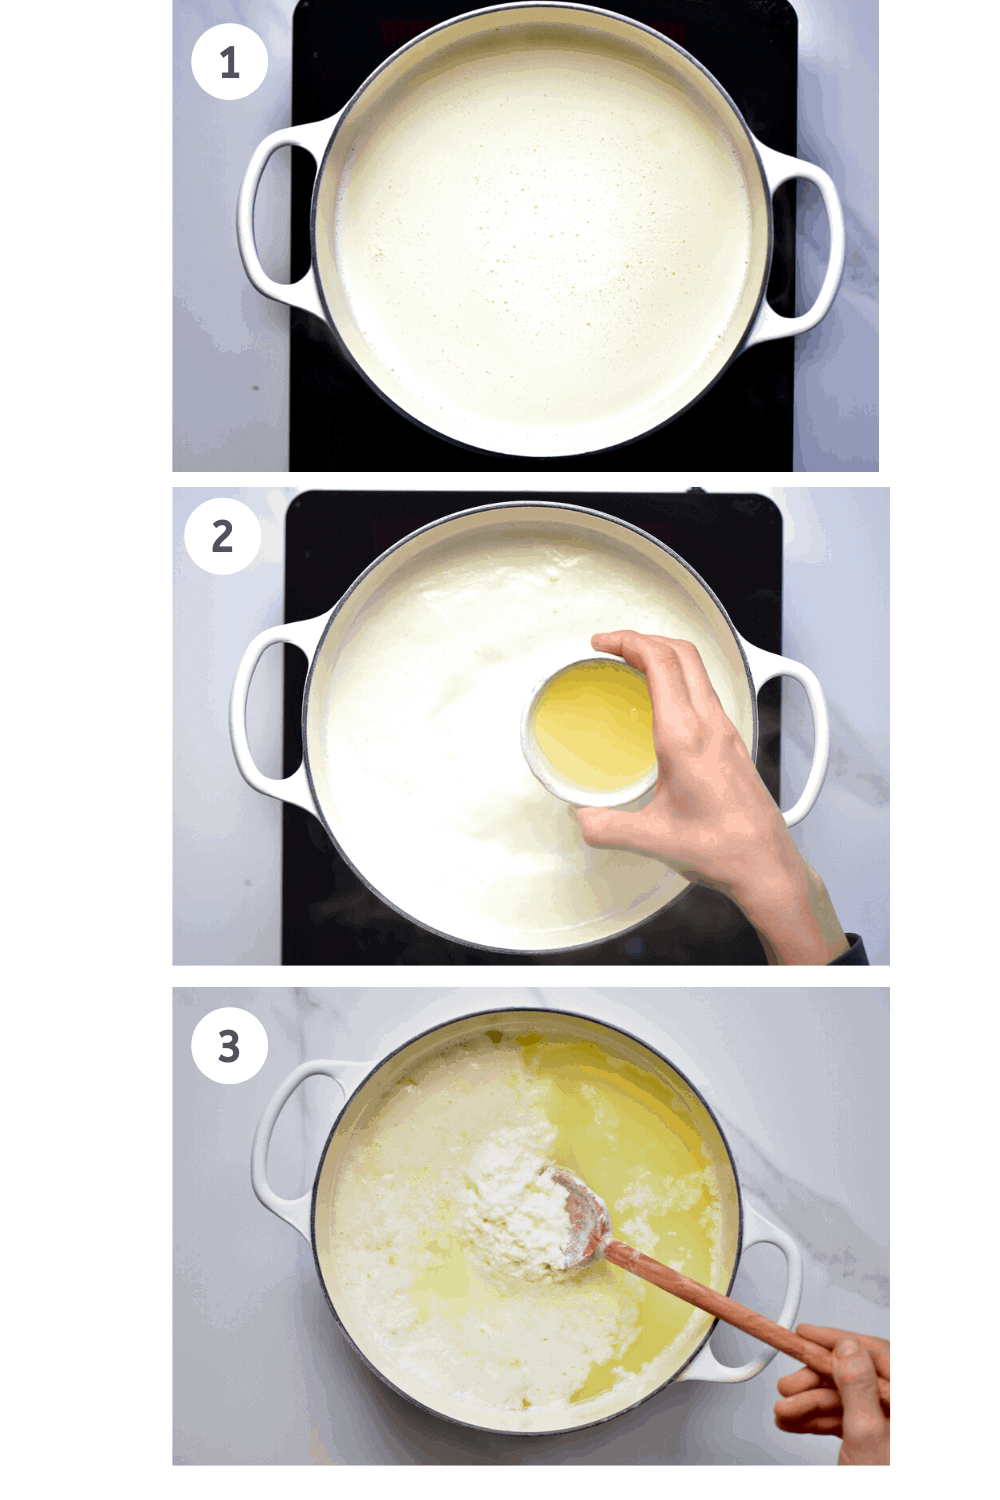
Heat the full-fat milk in a large pan over medium heat. Bring the mixture to a boil and then remove it from the heat.
You can now skim the top of the milk if a thin ‘film-like’ layer has appeared. If not, then add the lemon juice (or vinegar if you prefer).
As you pour in the acid of your choice, very gently stir the mixture. It’s best to mix in one direction only, to encourage curd growth. You can then continue to slightly agitate the mixture gently in one direction. However, I leave my mixture to rest for a few minutes while the curdling milk separates the curds from the whey.
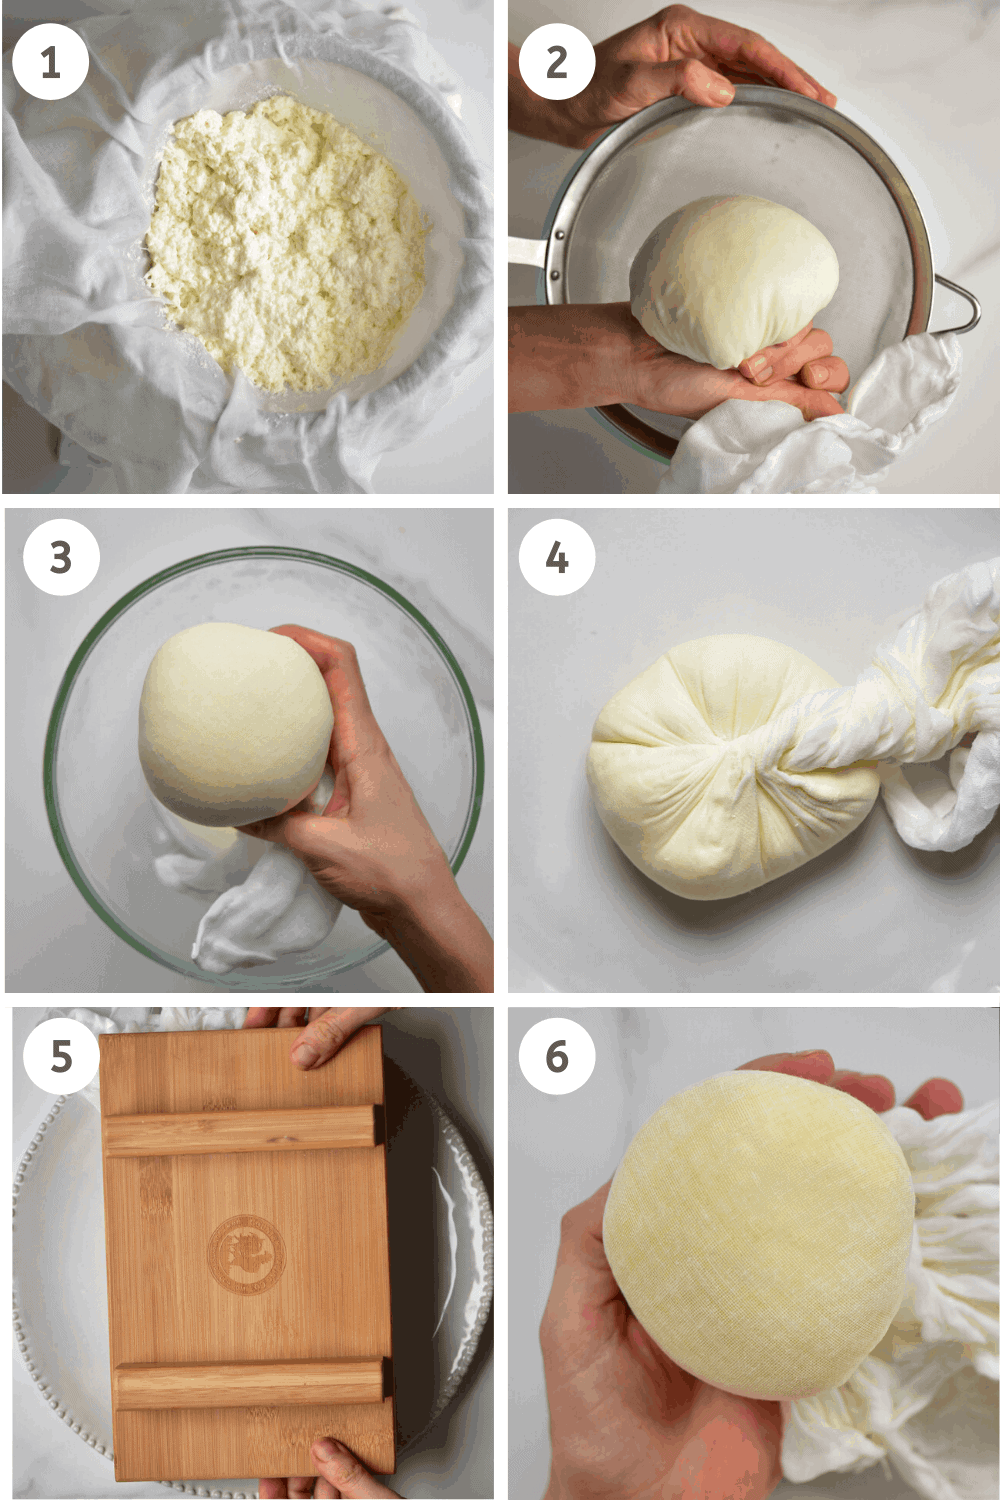
Pour this mixture through a muslin cloth/ cheesecloth or a nut milk bag into a large bowl.
You can then either hang the bag above the bowl, allowing the liquid to drain into it naturally. Otherwise, you can squeeze the curd gently, to release as much of the liquid as you can.
I’ve always done the second method – but I’ve heard that if you leave it to hang and drain naturally, you can get a softer cheese. As I prefer mine harder (for frying), I’ve never tried the method.
Next, it’s time to press your paneer cheese.
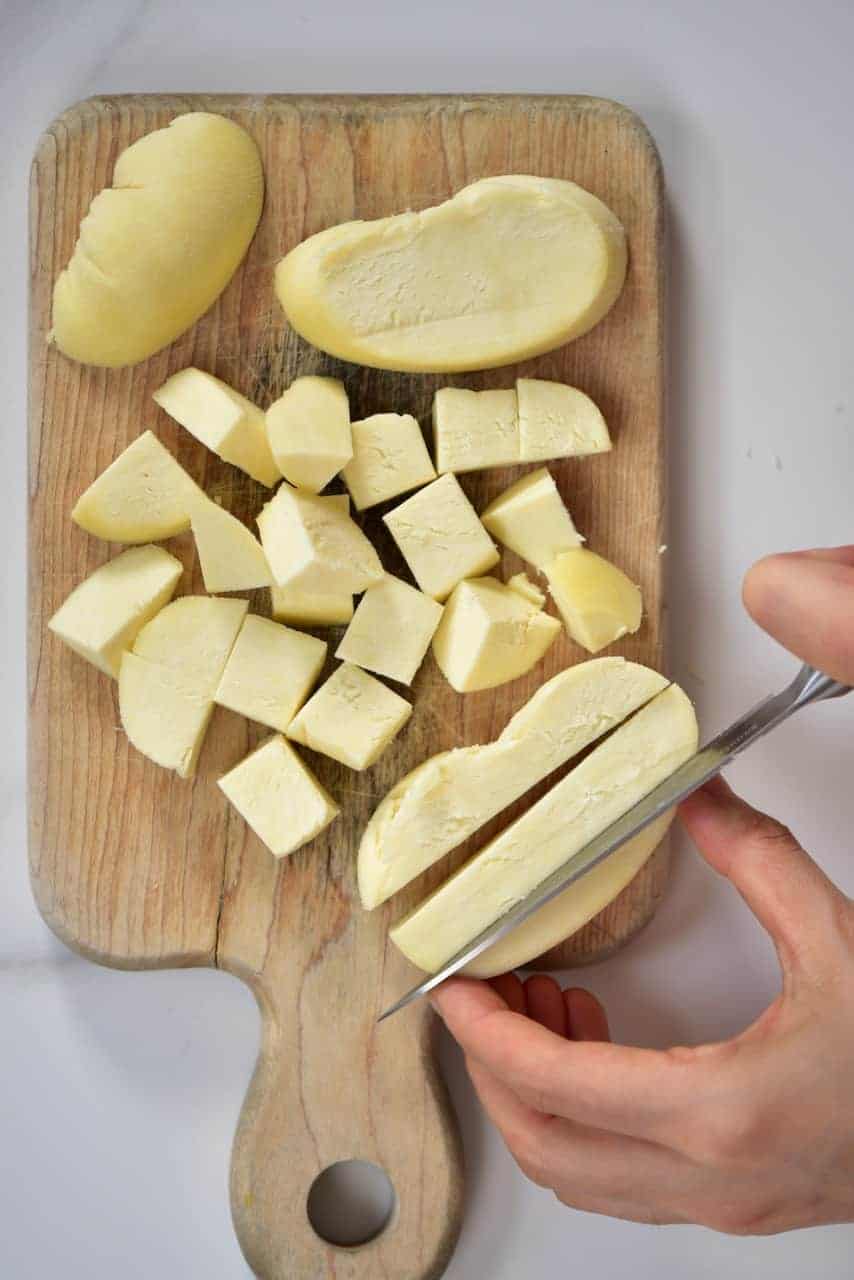
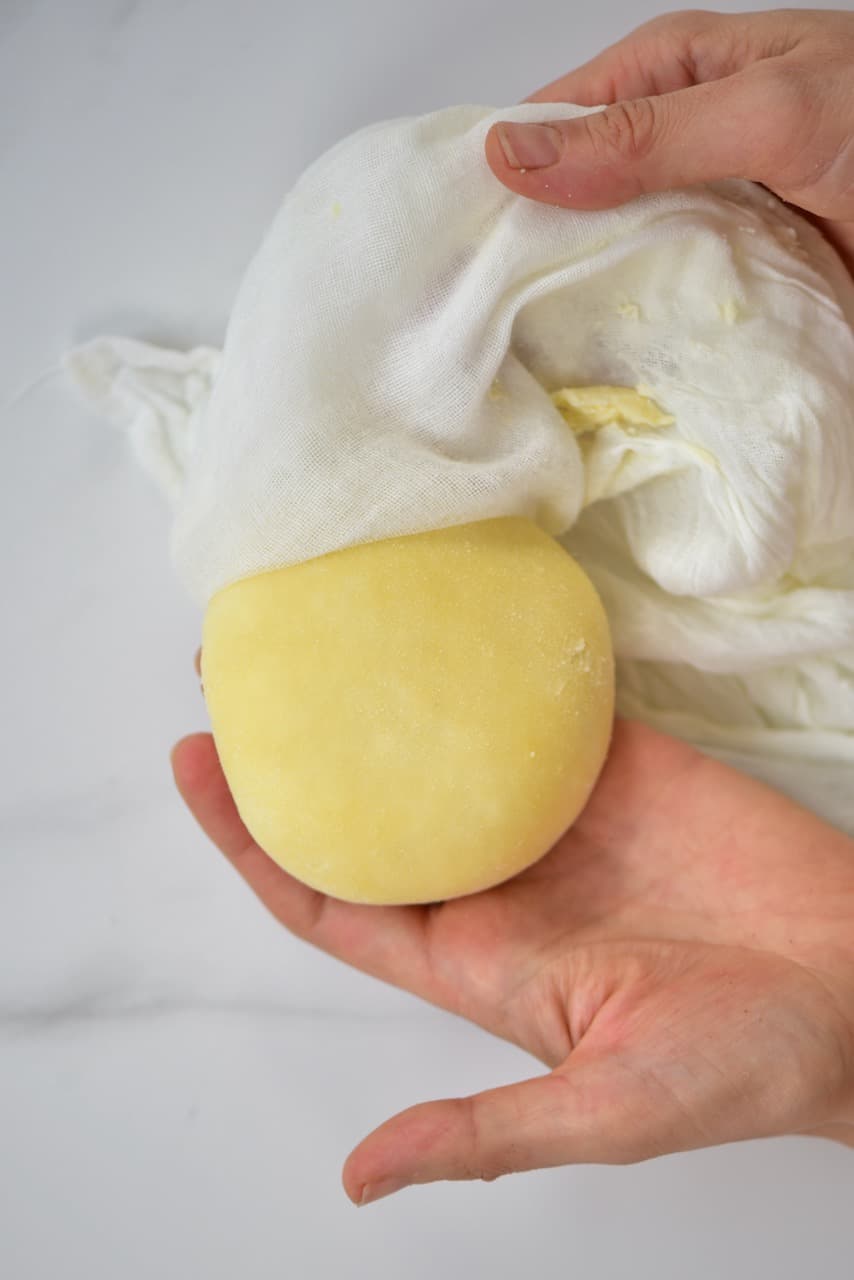
To do this form it in whatever shape you’d prefer (be it rounded, like mine – or more square) and fold the cloth tightly around it then place a heavy object onto the paneer to press it.
Pressing the paneer will push out any excess moisture and make the curds firmer – so you’re able to chop it and hold its shape.
Note* you can skip this step if you want to use your homemade paneer cheese immediately. However, it will be much more crumbly.
Depending on how firm you want your paneer to be, then you can press it for more or less time. I tend to do a minimum of 30 minutes for a softer block that is still choppable.
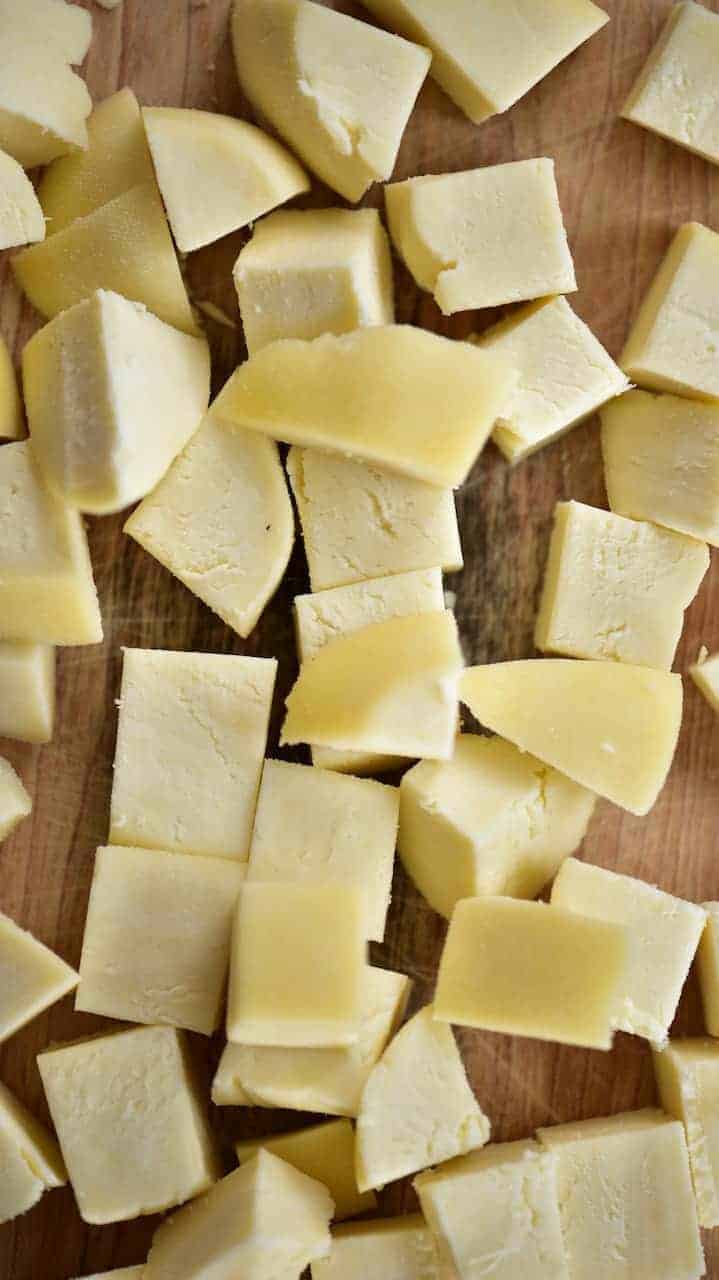
For these particular images in this blog, I left it weighted for over an hour in a cool place. You can see that my cheese is very solid – this is because I specifically wanted it to keep its shape for a fried paneer recipe. I suggest checking on your cheese after 30 minutes and then pressing further if required – anywhere up to two hours.
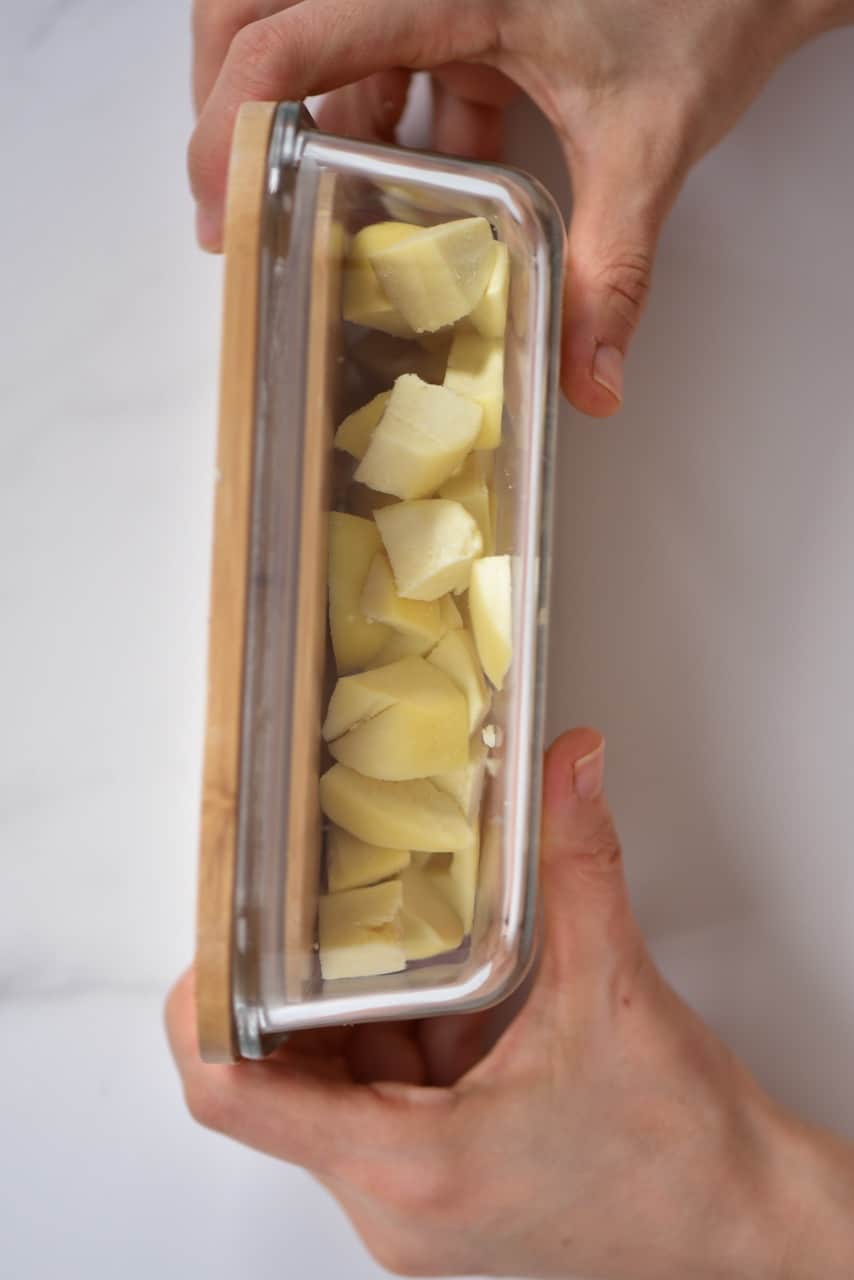
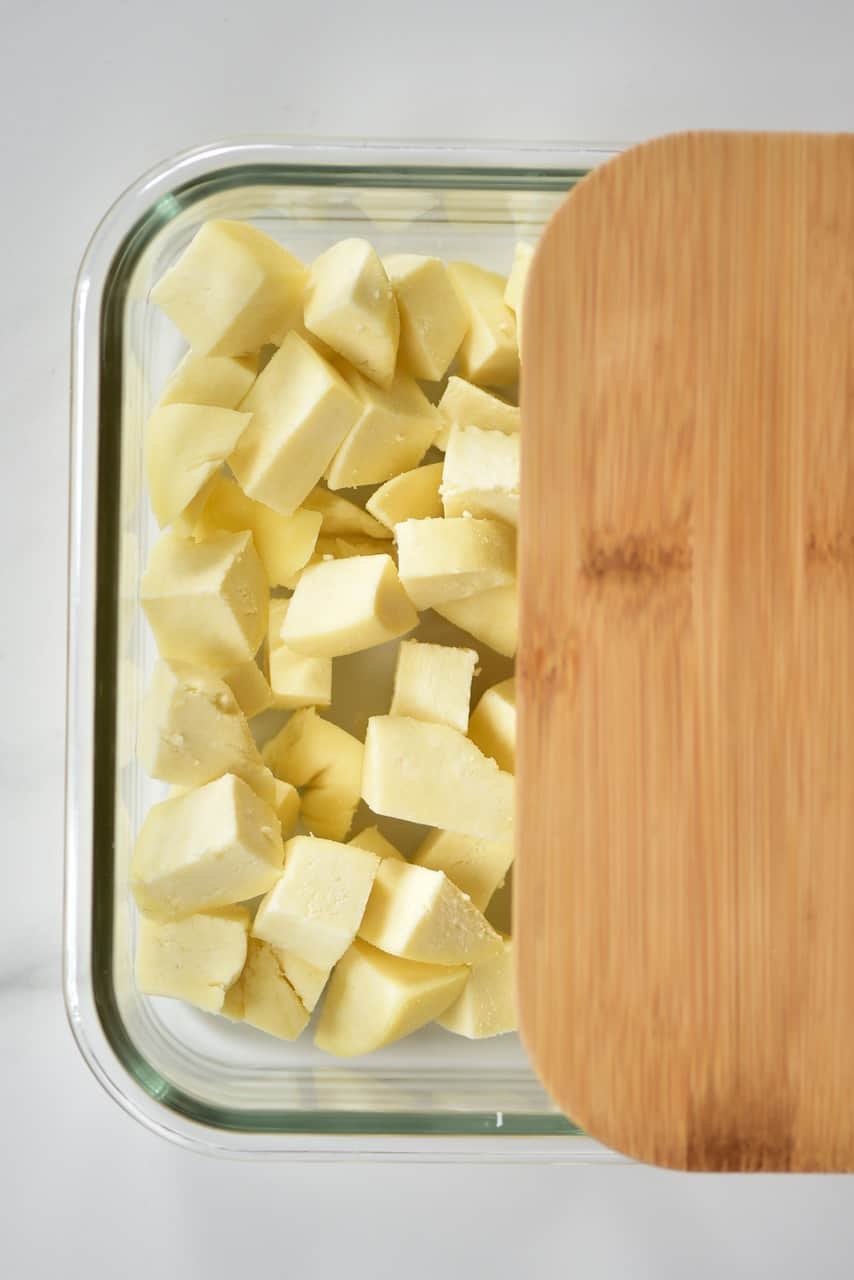
The block of paneer is now ready to be refrigerated. Chop it into cubes and place in a large airtight container in the refrigerator for up to 3 days. I tend to use mine on the same day that I make it since it’s such an easy process.
If you want to store it for longer, then you may be able to within a brine mixture ( using some of the leftover whey and some salt). I haven’t tried this, so I can’t say for sure if it works – but it seems to work for feta so, fingers crossed. You can also freeze it for 2 months, in an airtight container.
You can use this recipe to create amazing dishes such as saag paneer, paneer butter masala, tikka masala, makhani, bhurji, pan-fried paneer, and lots more. Let me know if you’d like me to include some of my favorite recipes on the blog.
If you try this simple Paneer DIY, I’d appreciate a recipe rating. Also, I’d love to know how you use your homemade cheese, so feel free to tag me on Instagram @Alphafoodie.

Paneer DIY
Equipment
Ingredients
- 2 litres full-fat milk
- 2 large lemons juice (you could use vinegar instead)
Instructions
- Heat the full-fat milk in a large pan over medium heat. Bring the mixture to a boil and then remove it from the heat.
- You can now, skim the top of the milk if a thin 'film-like' layer has appeared. If not then add the lemon juice (or vinegar if you prefer).
- As you pour in the acid of your choice, very gently stir the mixture. It's best to stir in one direction only, to encourage curd growth. You can then continue to slightly agitate the mixture gently in one direction. However, I leave my mixture to rest for a few minutes while the curdling milk separates the curds from the whey.
- Pour this mixture through a muslin cloth/ cheesecloth or a nut milk bag into a large bowl.
- You can then either hang the bag above the bowl, allowing the liquid to drain into it naturally. Otherwise, you can squeeze the curd gently, to release as much of the liquid as you can. I've always done the second method - but I've heard that if you leave it to hang and drain naturally you can get a softer cheese. As I prefer mine harder ( for frying), I've never tried the method.
- Next, it's time to press your paneer cheese. To do this form it in whatever shape you'd prefer ( be it rounded, like mine - or more square) and fold the cloth tightly around it then place a heavy object onto the paneer to press it. Pressing the paneer will push out any excess moisture and make the curds firmer - so you're able to chop it and hold its shape. *
- Depending on how firm you want your paneer to be, then you can press it for more or less time. I tend to do a minimum of 30 minutes for a softer block that is still choppable. **
- The block of paneer is now ready to be refrigerated. Chop it into cubes and place in a large airtight container in the refrigerator for up to 3 days. I tend to use mine on the same day that I make it since it's such an easy process.
- If you want to store it for longer then you may be able to within a brine mixture (using some of the leftover whey and some salt). I haven't tried this, so I can't say for sure if it works - but it seems to work for feta so, fingers crossed. You can also freeze it for 2 months, in an airtight container.
Video
Notes
Nutrition
Nutrition information is automatically calculated, so should only be used as an approximation.


I thoroughly enjoyed making cream cheese my family loved it, I put tsp of salt mixed herbs and garlic powder very yummy thank you1❤️
Thanks for your comment, Ana. Glad you enjoyed it <3
amazing could you store it in olive oil and herbs.?
Hi Jerri,
You can freeze the paneer or store it in water & salt solution to extend the shelf-life.
Could one make paneer from just cream, no milk?
Hi Karren,
I believe you can however, you may have to do some research. Let me know if you tried it.
Worked a treat and is totally delicious – Now to make the Saag Paneer!
So glad you liked it, Sophie!
Thanks so much for this recipe. I’m going to have a go with goats milk, since my DH can’t tolerate cows milk. Yay to the power of 10, if I can make saag paneer he can eat!
Thank you for your comment, Heather. Yes, the recipe should work with goat’s milk too.
Why is mines white but yours is more of a light yellow?
Hi TeeBee,
I think the color depends on the milk you use. Whenever I use the full-fat milk that I get from the farmer’s market, the color is always a little bit more yellow. However, when I buy the pasteurized milk from the store, the paneer turns more white.
the more green gras the cow feeds, the more yellow the whey.
Thanks for sharing, Ingrid!
Hi, I made the cream cheese ,
What can I use the liquid that was squeezed out of the cheese for?
Hi, There’s a section in the blog post on how to use this leftover whey 🙂 Including adding it to smoothies, soups, stews and even a variety of baked goods 🙂
Hi i have been really confused can you please tell me how is paneer ricotta and cream cheese different ? Cause the all come from using the same ingredients and methods. And each time i try making homemade cream cheese it turns into paneer.
I actually have a recipe for cream cheese on this blog. You’re right, the methods and ingredients are pretty identical up until the straining part where you will strain for less time and then you blend the cheese. Within a couple of minutes, you’ll get a light, fluffy cream cheese. Here is the recipe: https://www.alphafoodie.com/super-easy-homemade-cream-cheese/
Hi, if I want to use vinegar, what quantity should be used? Also, can bottled 100 %lemon juice be used?
Thanks so much
Hi Michelle,
You can use vinegar instead of lemon juice. I would recommend always using freshly squeezed lemon juice but when not available, bottled 100% lemon juice could work as well. Just make sure that it doesn’t have many preservatives as they could affect the process of making the paneer.
I hope this helps.
The question was how much vinegar. An estimate would be nice since some lemons are juicier than others.
Hi there,
You can use 6 Tbsp of vinegar instead of the lemon juice. I hope you give it a try!