
This post may contain affiliate links. Please read our disclosure policy.
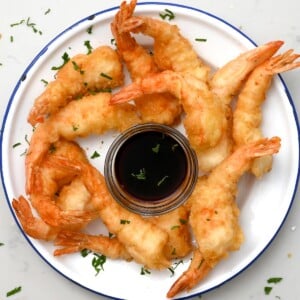
My favorite air fryer shrimp is ready in 10 minutes—perfectly seasoned, tender, and juicy. Serve it with salads, bowls, or as a main paired with veggies!

Cooking shrimp can be tricky—it’s easy to undercook or overcook. But with the air fryer, you can enjoy perfectly cooked, juicy shrimp every time. Just press a few buttons, and you’re set!
I’ve shared my favorite seasoning blend for air-frying shrimp (no breading!), but you can get creative and switch up the flavors! Plus, using the air fryer cuts down on fat while keeping all the delicious flavor intact. It’s a win-win for a low-carb, tasty protein—making air fryer shrimp the perfect quick meal for any busy weeknight!

Seafood lover? Try these quick shrimp and seafood recipes next: my shrimp scampi—garlicky, buttery, and ready in minutes—air fryer fish, air fryer cod, and air fryer salmon—so tasty! For something extra special, my Chilean sea bass is a must-try. And if you’re craving something smoky and charred, my grilled shrimp skewers are a summer favorite.
Watch how to make it
Ingredients

- Shrimp: Use fresh or frozen shrimp, medium or large. For convenience, you can buy fully prepped shrimp.
- Olive oil: You can also use your favorite cooking oil.
- Seasoning: My favorite combination is with sweet or smoked paprika, Italian seasoning (or just oregano), garlic powder, onion powder, salt, and black pepper.
- To garnish: I love to add lemon juice and some fresh parsley.
See the printable recipe card below for full information on ingredients and quantities.
How to cook shrimp in the air fryer
Cooking air fryer shrimp is quick and easy with just a few simple steps.
Prepare the Shrimp: First, if needed, clean the shrimp, removing the shells and veins. You can check out how to peel and devein shrimp for the detailed steps.
Then, pat dry the shrimp with paper towels—this is the best way to have them crispy on the outside and tender on the inside. Doing so will also help the oil and seasonings stick to the shrimp during cooking.

At this point, you can preheat your air fryer to 400ºF/200ºC. I like to let mine heat for just a few minutes to make sure the shrimp starts cooking quickly.
Season the shrimp: In a small bowl, mix the spices, then add the oil and mix well.
Then, pour the seasoning over the shrimp in a large bowl. Toss to coat, or use your hands to rub the shrimp with the seasoning on both sides.

Air fry: Optionally, you can spray a bit of olive oil on the air fryer basket. Then, arrange the shrimp in the basket. Be careful not to crowd them and keep them in a single layer. If you have a lot of shrimp, work in batches.
Air fry shrimp for 6 minutes at 400ºF/200ºC, flipping halfway through. Large shrimp can take up to 8-9 minutes to fully cook.

Recipe tips
- Pat your shrimp dry for that perfect crispy texture. Getting rid of extra moisture helps the seasoning stick and gives you the best cook.
- Don’t overcrowd the air fryer. Lay the shrimp in a single layer for even cooking, and cook in batches if you need to.
- Flip the shrimp halfway to make sure they crisp up nicely on both sides.
What to serve with air fryer shrimp
Air fryer shrimp is delicious on its own, but it pairs perfectly with a variety of dishes. Here are some of my favorite ideas to enjoy alongside it:
- Top your salads for extra protein — try it with a freshly made Caesar salad, or add a fresh side like Shirazi salad. Its crunch and tang are the perfect contrast to crispy shrimp.
- Serve with veggies: It pairs perfectly with air-fried asparagus, air fryer brussels sprouts, steamed broccoli, and more.
- Make a grain bowl: I love to serve it with fragrant jasmine rice or with this perfect quinoa recipe.
- Dip in your favorite sauce: Pair it with garlic chili-infused honey, buffalo wing sauce, cocktail sauce, sweet chili sauce, or even Raising Cane’s sauce, or a creamy lime crema for a tangy twist.

FAQs
Before cooking, shrimp have a rather dull grey and white color. When fully cooked, the shrimp will turn a pink/orange color and form a C shape. When pierced with a fork, the cooked shrimp will give a little bit of resistance but still be tender.
Yes! First, let the frozen shrimp thaw and pat them thoroughly dry. Then, you can follow the same recipe for seasoning and cooking them.
How to store leftovers: To store your leftover air fryer shrimp, let them cool completely, then transfer them to an airtight container. In the fridge, they’ll last for up to 4 days, though they’re best when eaten right after cooking. If you want to freeze them, just make sure to store them in a freezer-safe container after cooling. They’ll stay good for up to 2 months—just be sure to thaw before reheating. When reheating, use the same method as cooking but lower the temperature to avoid overcooking and making them rubbery.
More shrimp recipes you’ll love


If you try this air fryer shrimp recipe, let me know how it goes in the comments below. I’d appreciate a recipe card rating and would love to see your recipe recreations – tag me on Instagram @Alphafoodie!

10 Minute Air Fryer Shrimp
Equipment
Ingredients
- 1 lb shrimp medium to large
- 1.5 Tbsp olive oil or grapeseed oil
- 1/2 tsp sweet paprika or smoked
- 1/2 tsp Italian seasoning
- 1/2 tsp garlic powder
- 1/4 tsp onion powder
- 1/4 tsp salt
- 1/4 tsp black pepper
- To garnish lemon wedges, sprinkle of fresh parsley
Instructions
- If needed, clean the shrimp by removing the shells and veins. Pat dry with paper towels.
- Preheat the air fryer to 400ºF/200ºC.
- In a small small bowl, mix the paprika, Italian seasoning, garlic powder, onion powder, salt, and black pepper. Add the olive oil and whisk well.
- Place the shrimp in a bowl and pour the seasoning over them. Toss to coat, or rub the seasoning on all sides with your hands.
- Arrange the shrimp in the air fryer basket in a single layer. If needed, cook in batches for the best results.
- Air fry for 6 minutes at 400ºF/200ºC, flipping once halfway. Note that Larger shrimp can take up to 8-9 minutes. Once ready, enjoy the air fryer shrimp with a drizzle of lemon juice and a sprinkle of fresh parsley.
Video
Notes
Nutrition
Nutrition information is automatically calculated, so should only be used as an approximation.


I followed the recipe and set the fryer for the suggested six minutes but checked them at 5 minutes and they were overcooked circles . Great flavor and easy to prep . I will definitely try again and lower the temp to 350 degrees and check at 4- 5 minutes . These were jumbo shrimp too! I have a Ninja airfryer .
Hi Kent! Thanks for trying out the recipe, and I’m Sorry to hear the shrimp got overcooked. I hope you give it another try. You can indeed lower the temperature a bit, as you suggested. I hope your next batch turns out perfect!
Tudo muito fácil e rápido, adorei esta receita, muito obrigado!!!!!
Thank you so much, Alexandre!