
This post may contain affiliate links. Please read our disclosure policy.


You only need a couple of simple steps to make the perfect quinoa every single time. You will have fluffy, delicious quinoa — a great meal prep-friendly side dish to boost the nutrition of your meals.

Whether you’re new to eating quinoa or have just struggled to get perfect quinoa results when following package instructions, this post is for you. I will share with you my easy and fool-proof method for cooking quinoa, resulting in a light and fluffy, gluten-free, high-protein, and high-fiber dish—no more gritty or mushy texture!
Table of Contents
Ingredients

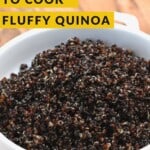
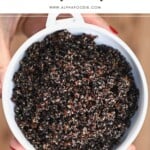
- Quinoa: I often use white quinoa, but this method also works with red, black, and tri-color quinoa.
- Water: Plenty of fresh water to rinse the quinoa. To cook the quinoa, use water or, for a more pronounced flavor, use vegetable stock or broth.
- Salt
How to cook quinoa the right way
Rinse the Quinoa: First, add the quinoa to a large bowl and cover with plenty of cold water. Wash it well by rubbing it with your hands until the water becomes cloudy. Washing the quinoa removes the bitterness caused by the saponin coating of the grains. Then place in a fine-mesh strainer and rinse once again under running water. Drain well.
Cook the Quinoa: Add the drained quinoa to a large saucepan. Be quick to avoid softening. Then, pour in cold water and a pinch of salt. Bring to a rolling boil for exactly 3 minutes, skimming off the foam that forms on top. Reduce the heat to a simmer, cover, and cook for an additional 12 minutes.

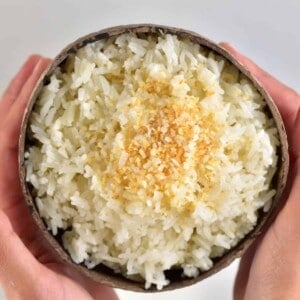
Turn off the heat and fluff the quinoa with a fork. All the water would have been absorbed, and you would have perfect quinoa, not clumpy or overcooked.
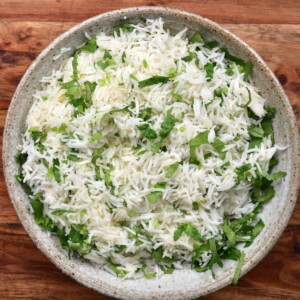
It’s now ready to serve with your choice of protein (like baked chicken) or vegetables. I also love topping it with some fresh herbs like parsley. For a quick and healthy protein boost, try pairing it with healthy tuna salad with mixed vegetables.
You can also store it in an airtight container in the fridge for up to 5 days, so quinoa is great for making in a big batch. It’s perfect for quick lunches, making a quinoa salad, using stir-fries, etc.

More easy side dish recipes

If you try making fluffy quinoa at home, let me know how it goes in the comments below. I’d appreciate a recipe card rating and would love to see your recipe recreations – tag me on Instagram @Alphafoodie!

Simple Steps to Perfect Quinoa
Ingredients
- 2 cups quinoa
- 1.5 cups water
- 1/2 tsp salt
Instructions
- Add the quinoa to a large bowl and cover with plenty of cold water. Rub it with your hands to wash it. Rinse under water and drain well.
- Add the rinsed quinoa to a large pot. Add 1.5 cups of water and 1/2 tsp of salt. Cover with a lid.
- Bring to a rolling boil for exactly 3 minutes. Skim off the foam that forms on top.
- Reduce the heat to a simmer, cover, and cook for an additional 12 minutes.
- Turn off the heat and fluff the quinoa with a fork. Enjoy!
Video
Notes
Nutrition
Nutrition information is automatically calculated, so should only be used as an approximation.


Dear Samira,
Is it possible to just fried the Qunia seeds with heat and eat them like fried nuts?
Hi Mojgan,
It’s safer to eat cooked quinoa. If you want to just fry it, it might be better to first soak and sprout the seeds.