
This post may contain affiliate links. Please read our disclosure policy.
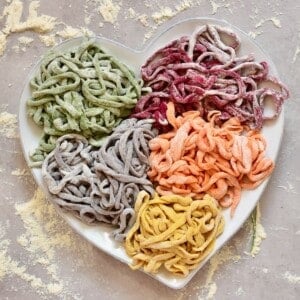
This simple homemade colored pasta is 100% naturally colored using vegetables, adding a beautiful rainbow to your plate without any food coloring.
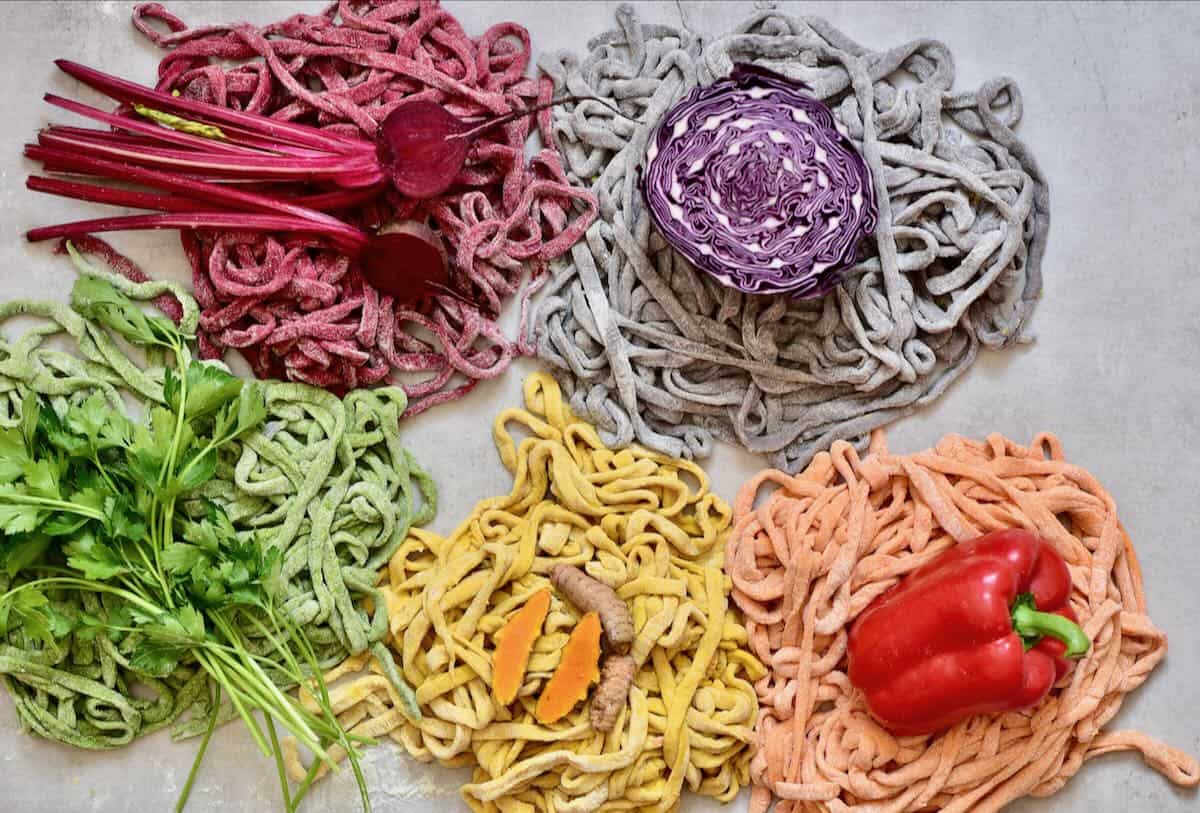
Discover the joys of homemade, naturally colored pasta! This simple and customizable recipe enhances your meals both nutritionally and visually. The basic dough requires just 1 cup of 00 flour and one egg per portion, allowing for a variety of vibrant, natural colors without altering the taste.
Made entirely from vegetables, these colors brighten your dish without affecting the flavor, making it perfect for anyone seeking a healthier, more appealing meal option. Plus, for more creative pasta ideas, check out my pappardelle flower pasta recipe.
Want to save this recipe?
Watch how to make it
How to color pasta naturally
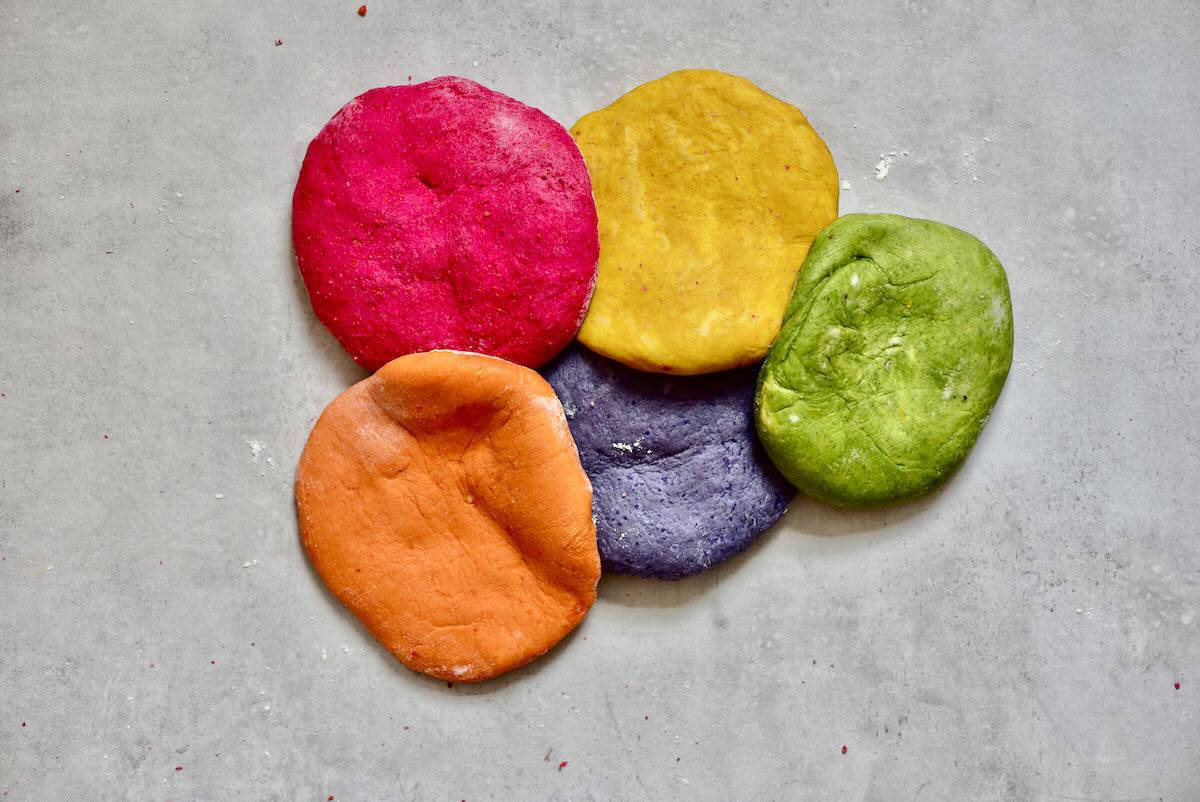
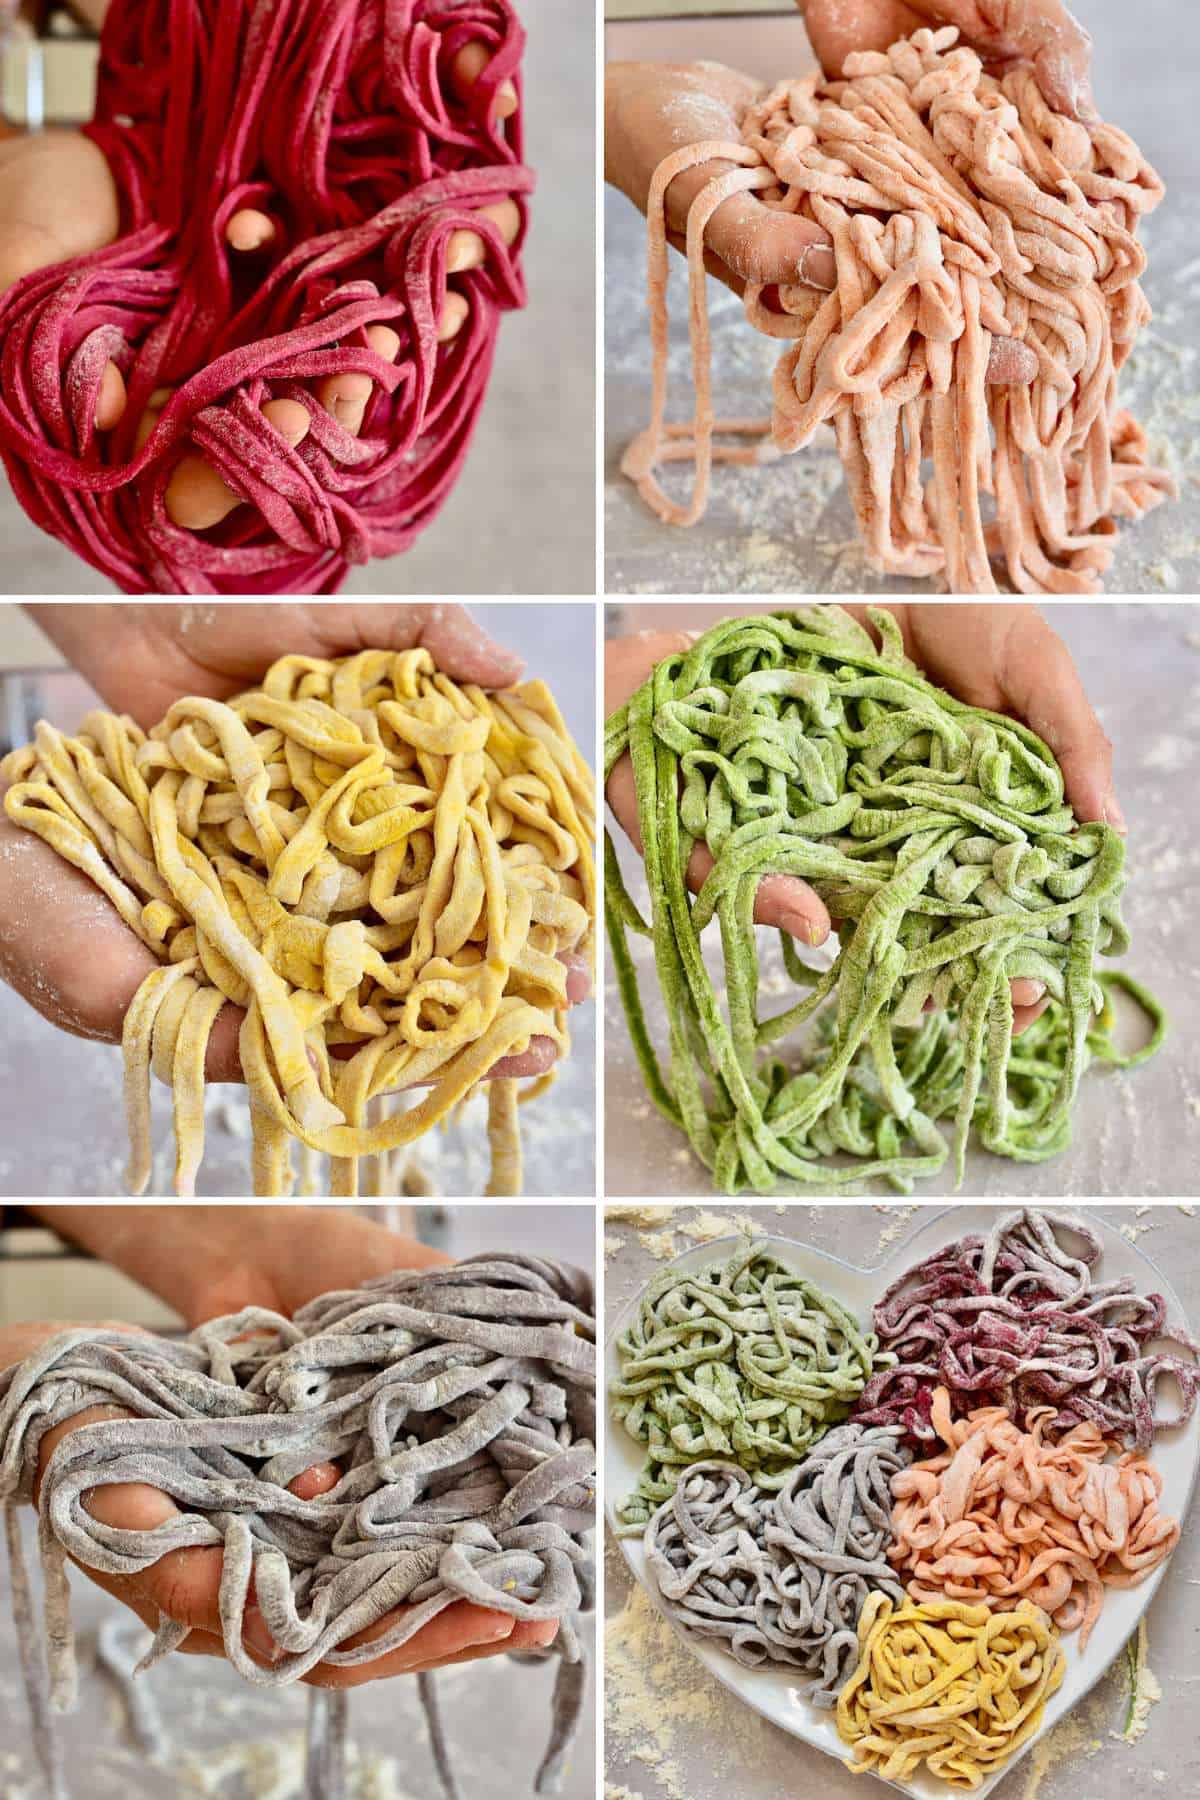
Start by preparing the different all-natural colored pasta doughs. You can choose to go with only one color or as many colors as you’d like. Just keep in mind that you have to add 1 cup of flour and 1 egg for each color and per portion. You might also need to add a bit more flour to wetter ingredients (like the peppers) so that the dough is not sticky.
For Red Color Pasta Dough
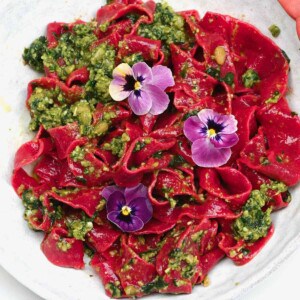
For the red pasta, use 1 medium-sized boiled beetroot. You can also add some boiled carrots to adjust the redness of the beetroot.
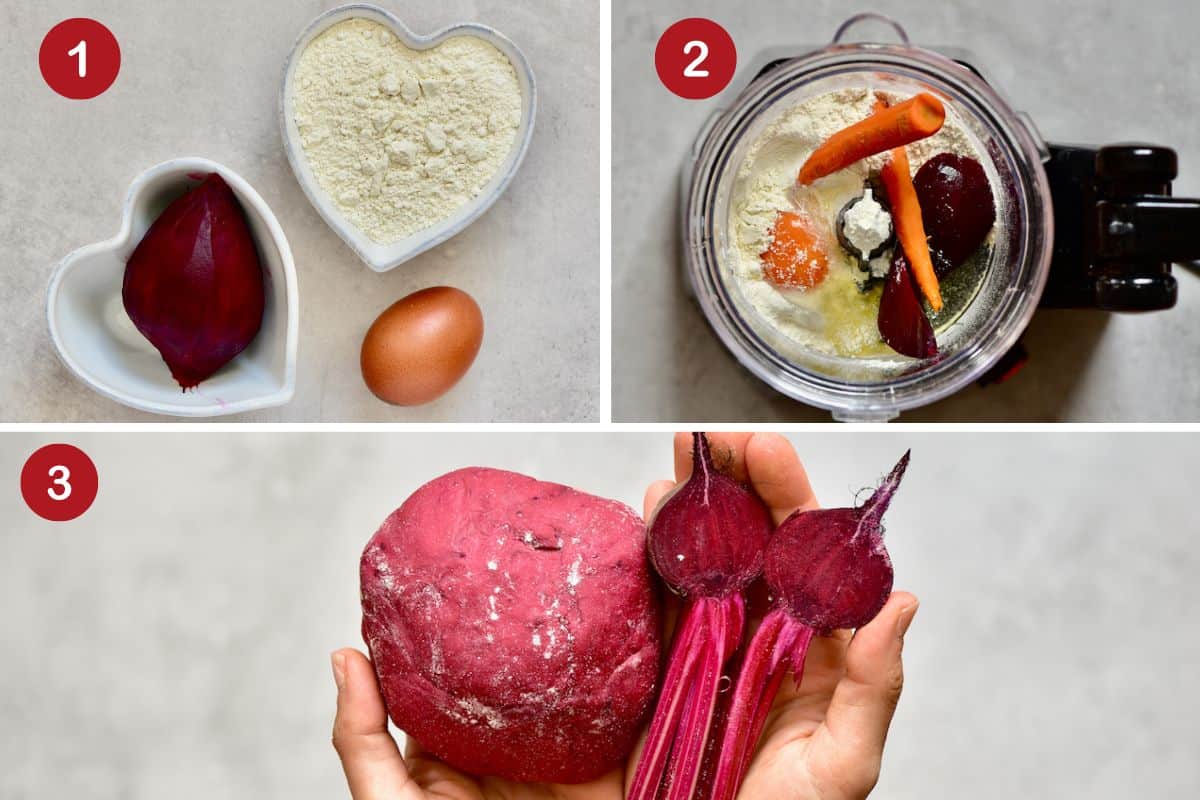
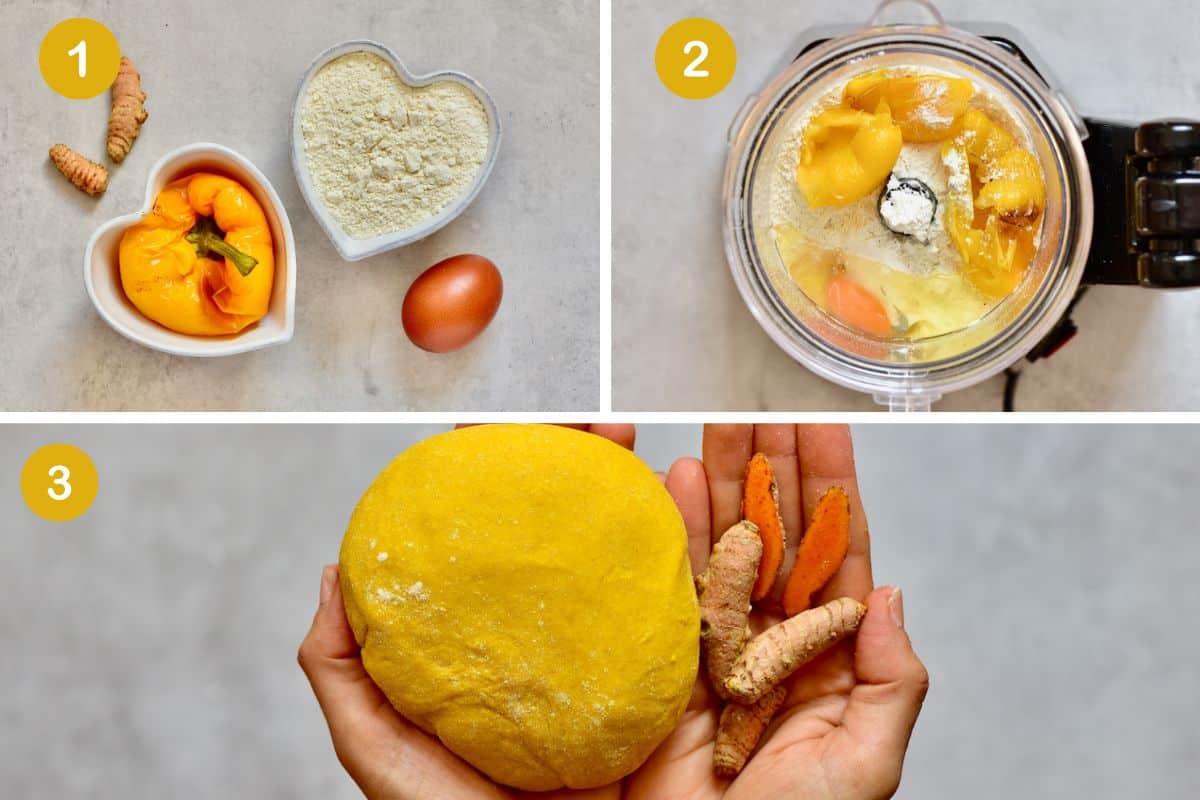
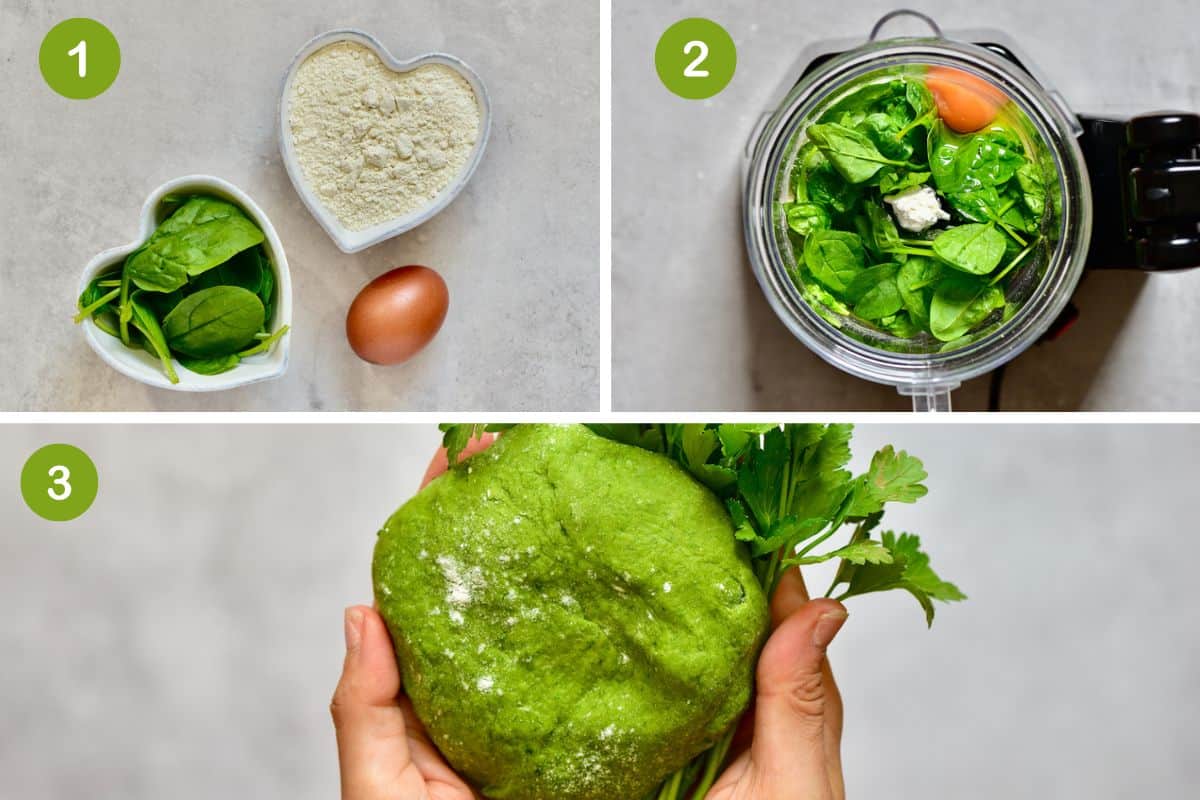
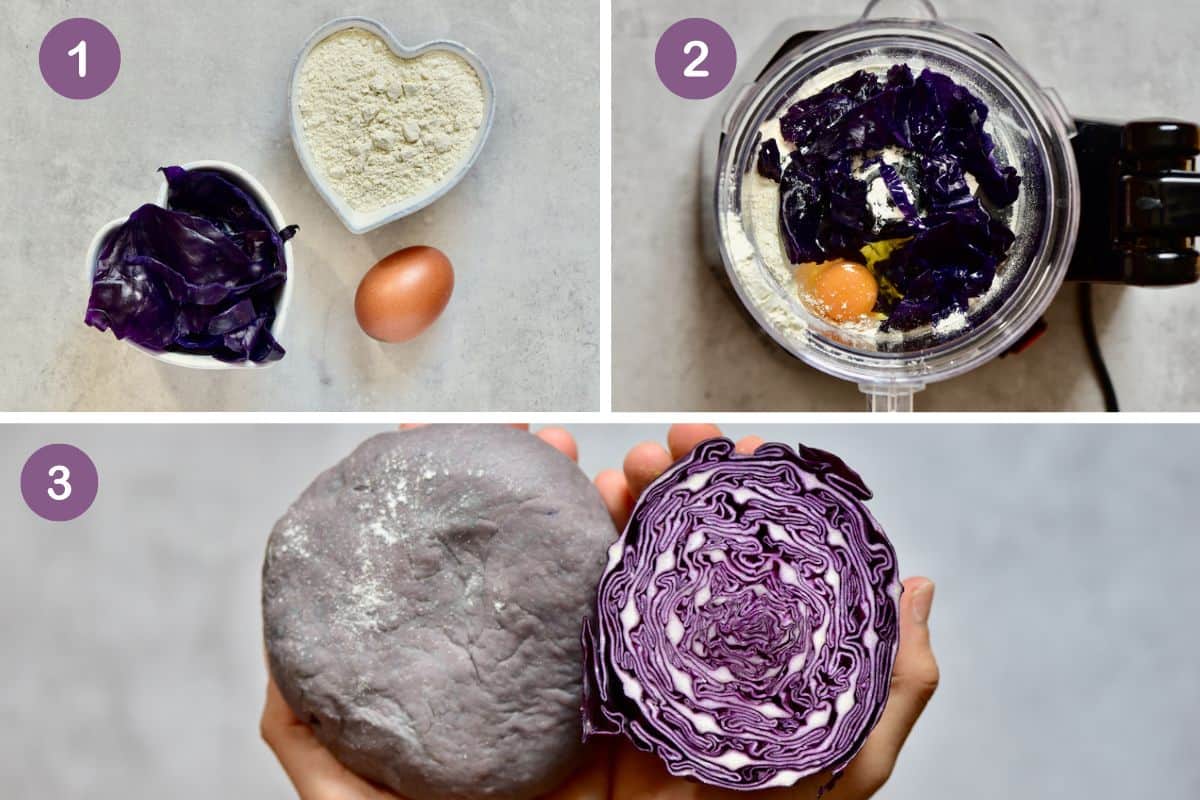
Blitz the egg, flour, and vegetables in a high-speed blender or food processor until you obtain a smooth dough.
Knead the dough with your hands to form a smooth ball. If it sticks to your hands, add a bit of flour. Leave it to rest at room temperature (if wanting to save the dough for later then wrap it in plastic wrap and chill it in the fridge).
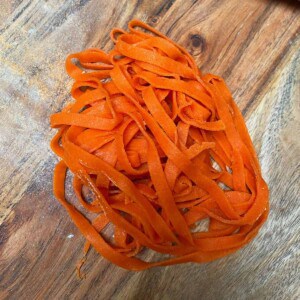
For Orange Color Pasta Dough
For the orange pasta, use 1 red pepper. You first need to roast it in the oven for 10-15 mins at 200C. Then blend and knead the same way as for the beetroot pasta.
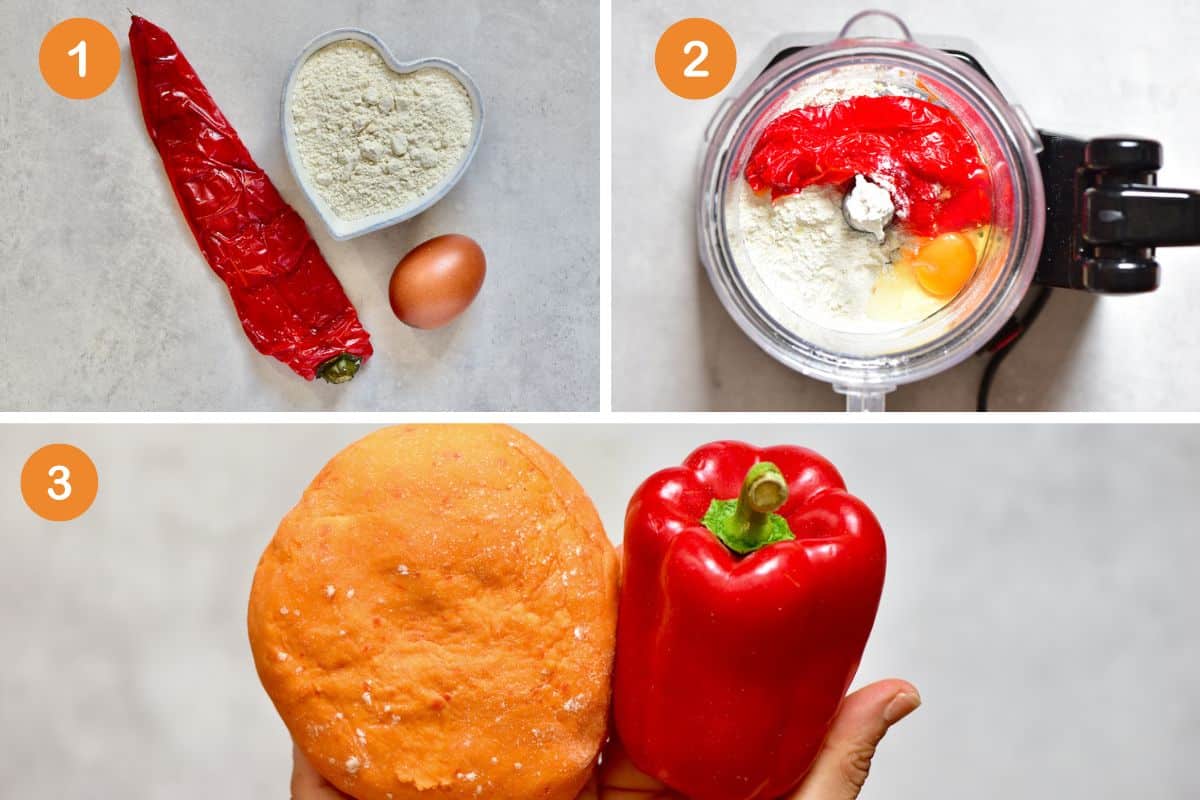
Note: You might need to add a bit more flour as the pepper has high water content. We don’t want sticky dough. Just add the flour as you blend.
For Yellow Color Pasta Dough
you can use either 1 roasted yellow bell pepper or turmeric (either powder or fresh root). If you choose to go with the pepper, you can also add a pinch of turmeric powder to make it a brighter yellow. Repeat the same process as above, blending, kneading, and resting the dough. Add a bit more flour, if needed (as the yellow pepper is quite moist).
For Green Color Pasta Dough
Use either 1 cup of spinach or 1 cup of parsley. I tried both and each of them makes a great green color. Repeat the same process of blending, kneading, and resting.
For Purple Color Pasta Dough
You can use either 1 cup of boiled red cabbage or 1-2 baked purple potatoes. You can also add a pinch of baking powder to the cabbage to adjust the hues of purple.
And voila, you have your dough!
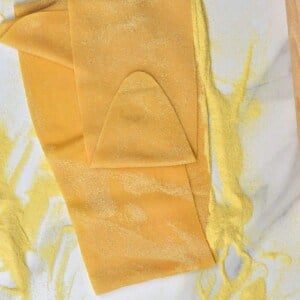
Rolling Out Your colored Pasta Dough
After the colored pasta dough has rested for approximately 30 minutes, begin by rolling it out with a rolling pin until it’s thin enough to pass through the pasta machine on the ‘0’ setting. Continue to feed the dough through the setting, folding it in half each time, until it achieves a uniform shape. Lightly flour the dough throughout the process to prevent sticking. Gradually, you can further thin the dough using the machine’s settings.
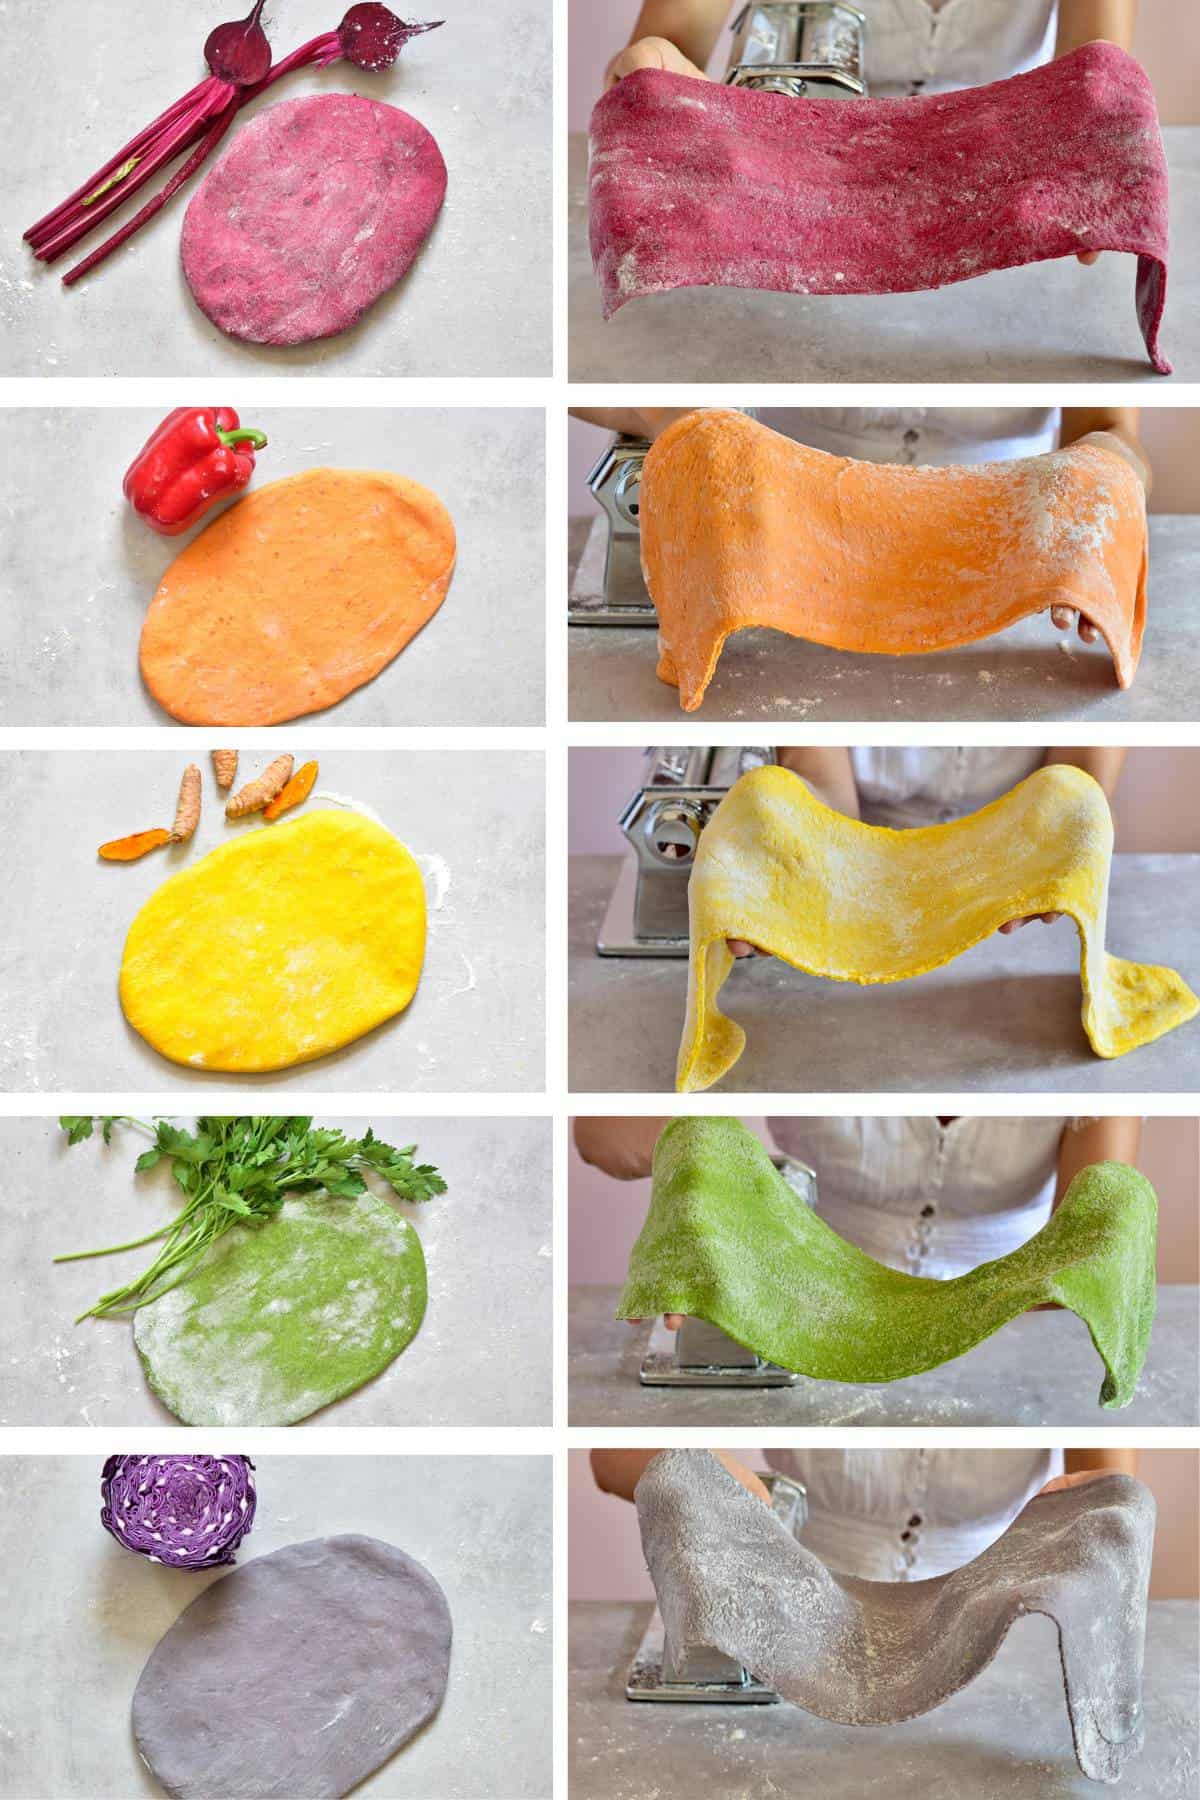
Alternatively, if you are using a rolling pin throughout, ensure to roll and stretch the dough into even, thin sheets.
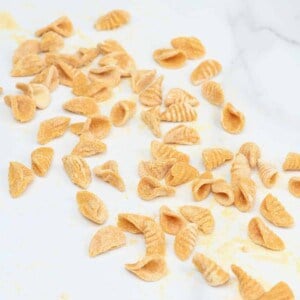
Cutting and Shaping
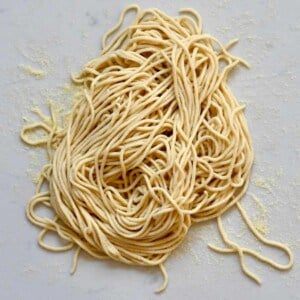
Once you have obtained thin sheets of pasta dough, you can proceed with cutting it. I chose to cut it into long ribbons, like Tagliatelle or Pappardelle, but you can cut it in different shapes/sizes. Be generous with flouring the pasta, so it doesn’t stick together. To cut it into long strips, you just need to fold the pasta a couple of times and then just cut it with a knife. Or, if you are using the pasta machine, choose one of its other settings for cutting.
Cooking Naturally Colored Pasta
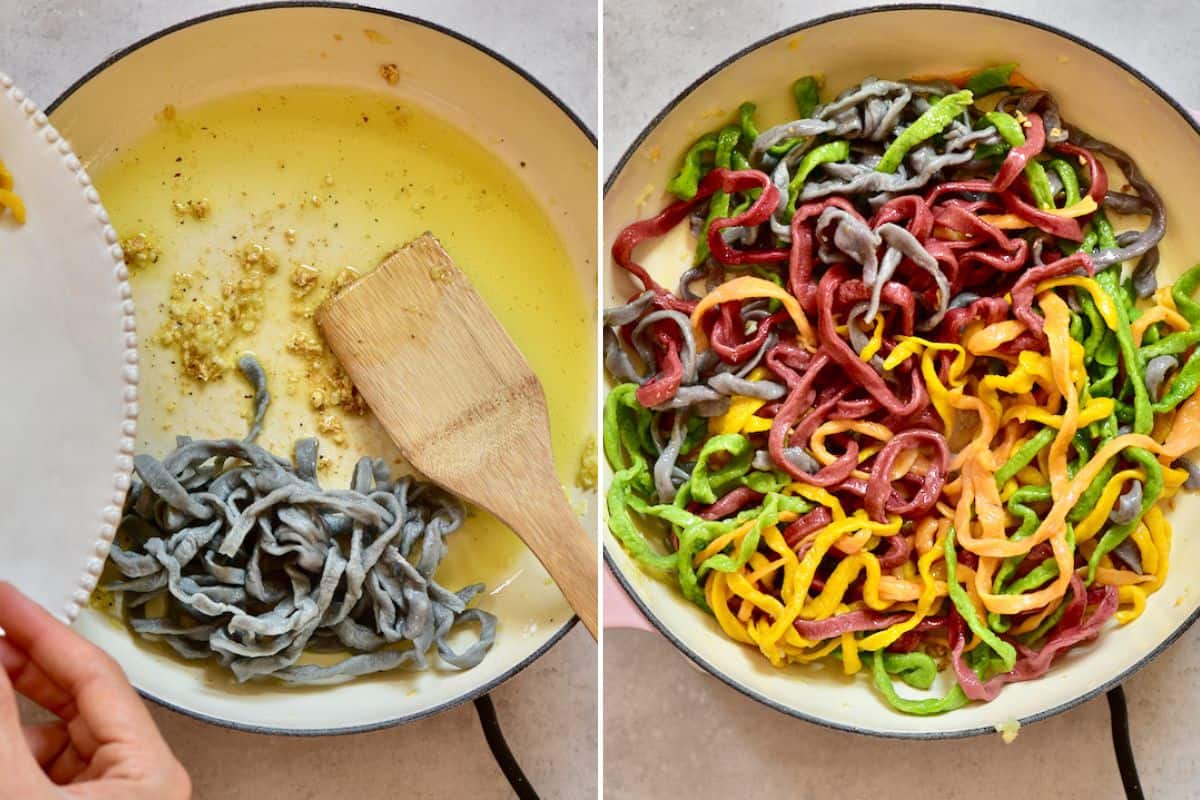
Start by preparing a simple dressing: sauté chopped garlic in olive oil until fragrant. Then, cook the pasta separately by color in boiling water for 3 minutes to avoid the color bleeding, especially from the red pasta. Drain and immediately toss with the garlic dressing, or your choice of sauce, and serve.
How to store colored pasta ribbons
Learn how to keep your colored pasta ribbons fresh and vibrant with these simple storage tips.
- Drying: If you’ve made fresh colored pasta, you can let it dry for several hours in a cool, dry place before storing it. Spread it out on a drying rack or a clean cloth, ensuring the pieces don’t touch each other to prevent sticking and color transfer.
- Airtight Containers or Bags: Once the pasta is dry, place it gently in airtight containers or resealable plastic bags. If you have different colors, store each color separately to prevent colors from bleeding into each other.
- Refrigeration: If you plan to use the pasta within a few days, keep it in the refrigerator. This is especially important for pasta that hasn’t been completely dried, as the moisture can lead to spoilage.
- Freezing: For longer storage, freeze the pasta. Lay the pieces flat on a baking sheet to freeze them separately, then transfer them to airtight containers or bags once frozen. This prevents the pasta from sticking together.
More homemade pasta
If you try this recipe, let me know how it goes in the comments below. I’d appreciate a recipe card rating and would love to see your recipe recreations – tag me on Instagram @Alphafoodie!
How to Make Colored Pasta (All Natural)
Equipment
- Rolling Pin -OR-
Ingredients
The pasta base for each color
- 1 cup flour best to use 00 pasta flour, but plain flour works
- 1 egg large
For the all-natural colors
- Red: 1 boiled beetroot & 1 carrot optional, it is used to lighten the redness of the beetroot
- Orange: 1 roasted red pepper
- Yellow: 1 roasted yellow pepper -OR- 1 tsp turmeric powder -OR- 1-2 fresh turmeric roots
- Green: 1 cup spinach leaves -OR- 1 cup parsley
- Purple: 1 cup boiled red cabbage & 1/2 tsp baking powder optional, used to adjust the saturation of the purple -OR- 1-2 small baked purple potatoes
A simple way to serve the pasta
- 2 garlic cloves minced (or chopped finely)
- 1 Tbsp olive oil for sautéing
- black pepper to taste
Instructions
Prepare Colored Pasta Dough
- Place 1 cup of flour, 1 egg, and your chosen vegetable color source directly into a blender or food processor.
- Blend until all ingredients form a smooth, consistent dough.
- Transfer the dough to a surface and knead by hand to achieve a smooth ball, adding flour if necessary to reduce stickiness.
- Let the dough rest for 30 minutes at room temperature before rolling and shaping.
Color Pasta Variations
- Red Pasta: Boiled beetroot (+ optional carrots for hue).
- Orange Pasta: Roasted red pepper (add extra flour if needed).
- Yellow Pasta: Roasted yellow pepper or turmeric (add extra flour if moist).
- Green Pasta: Spinach or parsley.
- Purple Pasta: Boiled red cabbage or baked purple potatoes (add baking powder for hue adjustment).
Roll and Shape
- Roll dough to thin sheets, flouring to prevent sticking. Use pasta machine or rolling pin.
- Cut into ribbons or desired shapes.
Cook Colored Pasta
- Sauté minced garlic in olive oil, add black pepper to taste.
- Boil each color separately for 3 minutes.
- Drain and mix with garlic-olive oil dressing or preferred sauce.
Video
Notes
- You might need to add a bit more flour as the pepper has a higher water content. We don’t want a sticky dough. Just add the flour as you blend.
- If you are using the pepper, you might need to add a bit more flour as the pepper has a higher water content. We don’t want a sticky dough. Just add the flour as you blend.
- Check blog post for storing and drying techniques.
Nutrition
Nutrition information is automatically calculated, so should only be used as an approximation.


Is there any way to use yellow pepper without roasting it?
Hi! 😊 Roasting the yellow pepper really helps here, it concentrates the color and removes excess moisture and the skin, which keeps the pasta dough from getting too wet. It also tastes nicer than raw, with a sweeter, mellower flavor. If you skip roasting, the raw pepper will add more water, so you’d want to blend and then cook the puree down to reduce it, and likely add a little extra flour to balance the dough. Roasted just gives the cleanest color, flavor, and texture. Hope that helps!
Can I let this dry and store in air tight container or does it have to be frozen for storage?
Hi Emmanuel! Yes, you can air dry the pasta and then store it in an airtight container.
Do adding the Vegas impart a taste to the
Pasta ex: cabbage?
Hi Dot,
Adding veggies to the pasta dough won’t really impart a strong taste. It might add a hint of flavor, but it won’t overpower the pasta itself. I hope you give this recipe a try 🙂
I tried to make this today and had a horrible time with it. This being the first time I ever tried to make pasta, I found to be a challenge. I will eat it because I made it. But do you have advice for first time people as to how to get your pasta from sticking together after putting it through the pasta attachment for the kitchen aid? It was not due to your instructions; it was due to my none experience. Please help!
Hey Heather! I totally get it—making fresh pasta for the first time can be tricky, especially when it comes to preventing it from sticking! A few things that might help:
1. Lightly dust the pasta with flour (or semolina) after rolling it out and again after cutting it. This helps absorb any excess moisture and keeps the strands separate.
2. Make sure the dough isn’t too wet before rolling—if it feels sticky, knead in a little extra flour before running it through the pasta attachment.
3. Let the pasta dry slightly on a floured surface or pasta hanger for about 10-15 minutes before cooking or storing.
Each time you make pasta, it gets easier! I love that you’re sticking with it.
Would I be able to make several batches and the freeze the dough uncooked?
Hi Chantal.
Yes, you can freeze the dough uncooked for 2 months.
Is there a way to make with out the egg?
Hi Ilene,
You can follow the steps to make this pasta (no eggs) https://www.alphafoodie.com/how-to-make-vegan-pasta-at-home/