
This post may contain affiliate links. Please read our disclosure policy.


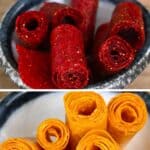


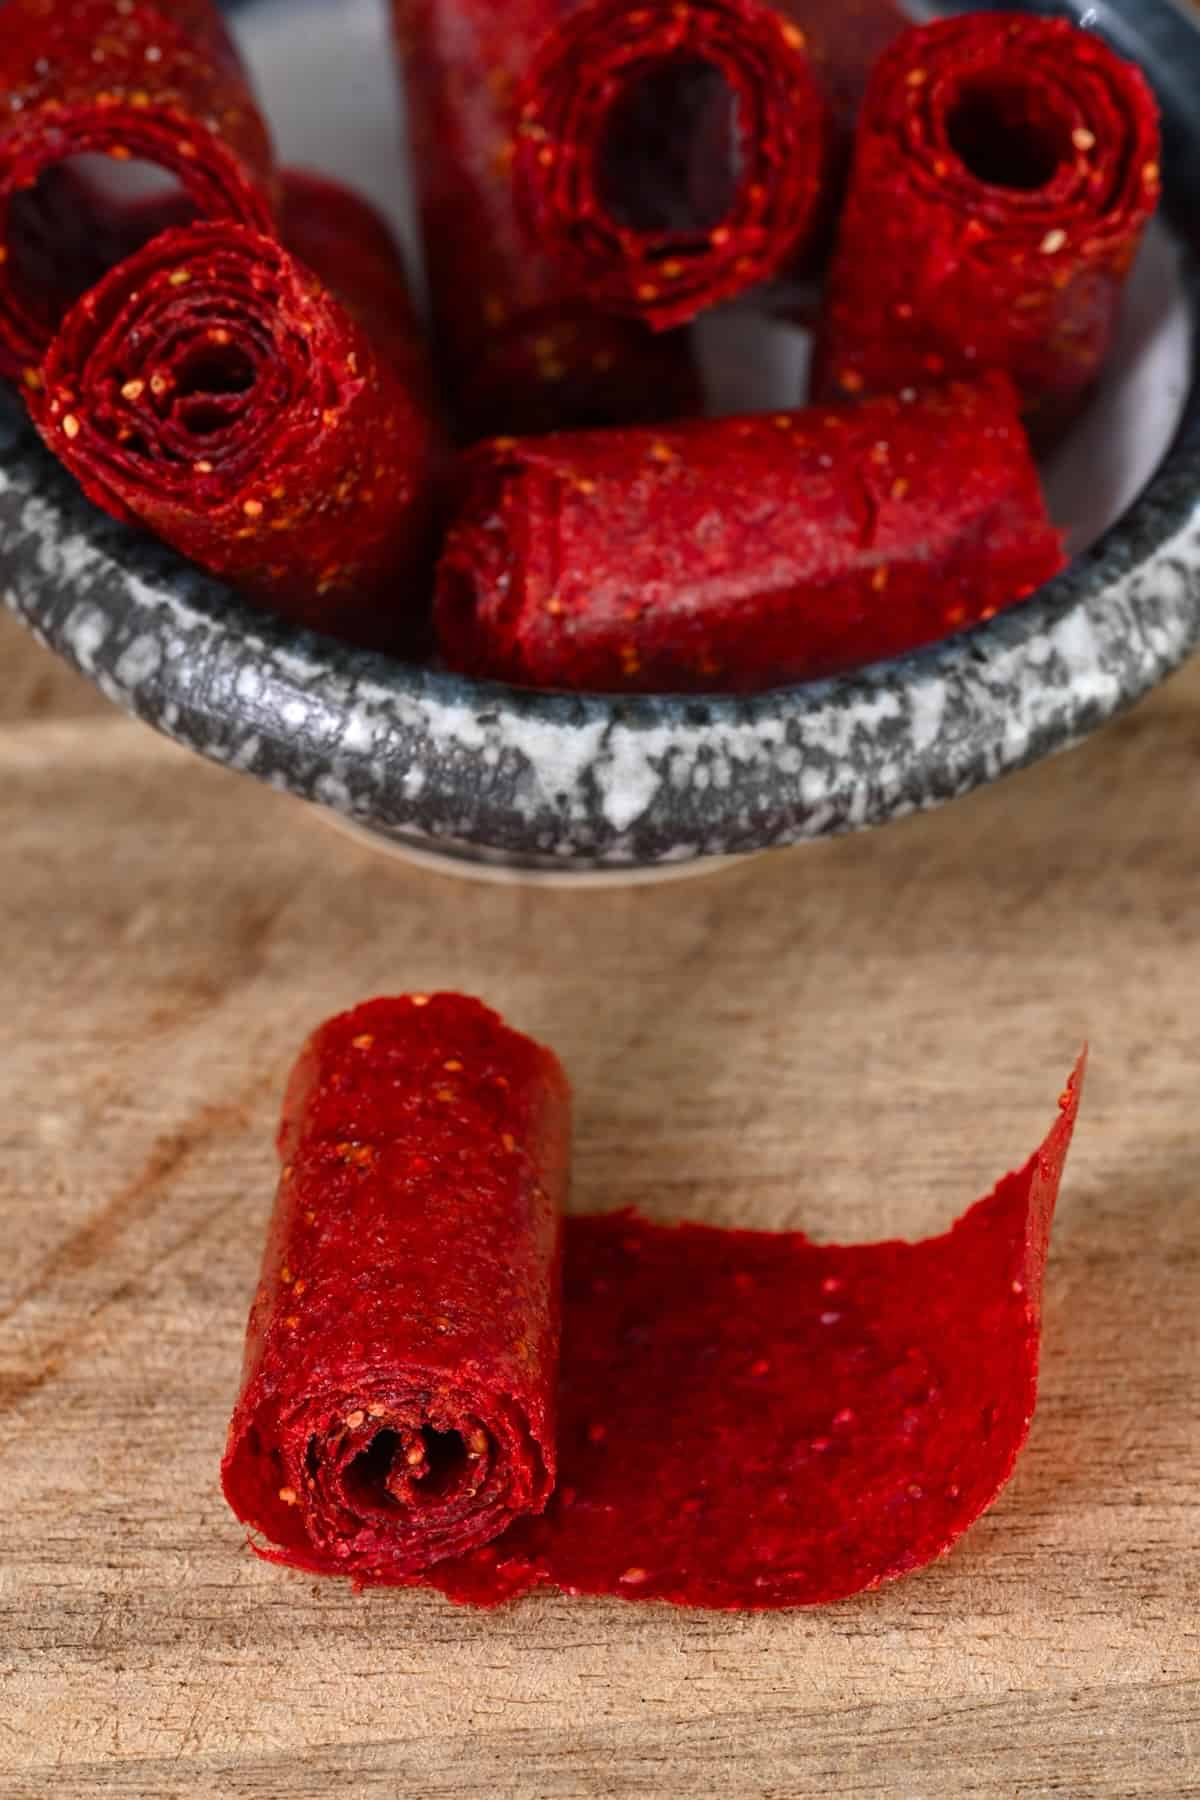
This 2-Ingredient homemade fruit leather is all-natural, fun, delicious, and a tasty fruit snack and lunchbox treat made using an oven or dehydrator. No boiling needed and no added sugar!
As someone who rarely finds a moment to sit still, I love having healthy snacks that I can just grab and go when needed, like fruit and nut bars, and these healthy homemade fruit leather strips/fruit roll-ups.
They require just 2 ingredients – blended fruit and lemon juice (3 if you want to add a little sweetener). The ingredients are mixed, spread across a tray, and then dehydrated in an oven or dehydrator until dry, flexible, and delicious.
And, unlike store-bought versions of fruit roll-ups or fruit gummies, these homemade ones are free from dyes, chemicals, refined sugars, and more additives. Instead, it’s JUST fruit. You can’t get more natural than that!
Even better, learning how to make fruit roll ups at home will help save you money, AND it’s super versatile too. I mean, did you know you can make almost any fruit into fruit leather? Or you can sugar-glaze them and turn them into tanghulu candied fruit. You will love it either way!
Not just that, but you can combine fruits too and discover unique flavor combinations with each batch. How about strawberry peach leather, almond cherry, or strawberry rhubarb? The sky is the limit when making this healthy snack!
Want more ways to enjoy fruits? I love getting in fruits with my morning smoothies. As we inch towards summer, you might also enjoy this homemade watermelon shaved ice or grilled peach salad.
Want to save this recipe?
Is Fruit Leather The Same As Fruit Roll Ups?
Yes and no. Fruit leather and fruit roll ups both use similar ingredients and methods to prepare. However, the leather version is cut down into small pieces rather than rolled, which means it is often thicker.
You can use the method below to make dehydrated fruit leather or rolls. Simply start with a thicker layer of fruit puree to start the dehydration process when making the leather vs a thin layer for the roll-ups.
Homemade Fruit Leather Ingredients
- Fruit puree: There are several types of fruit leather you could make:
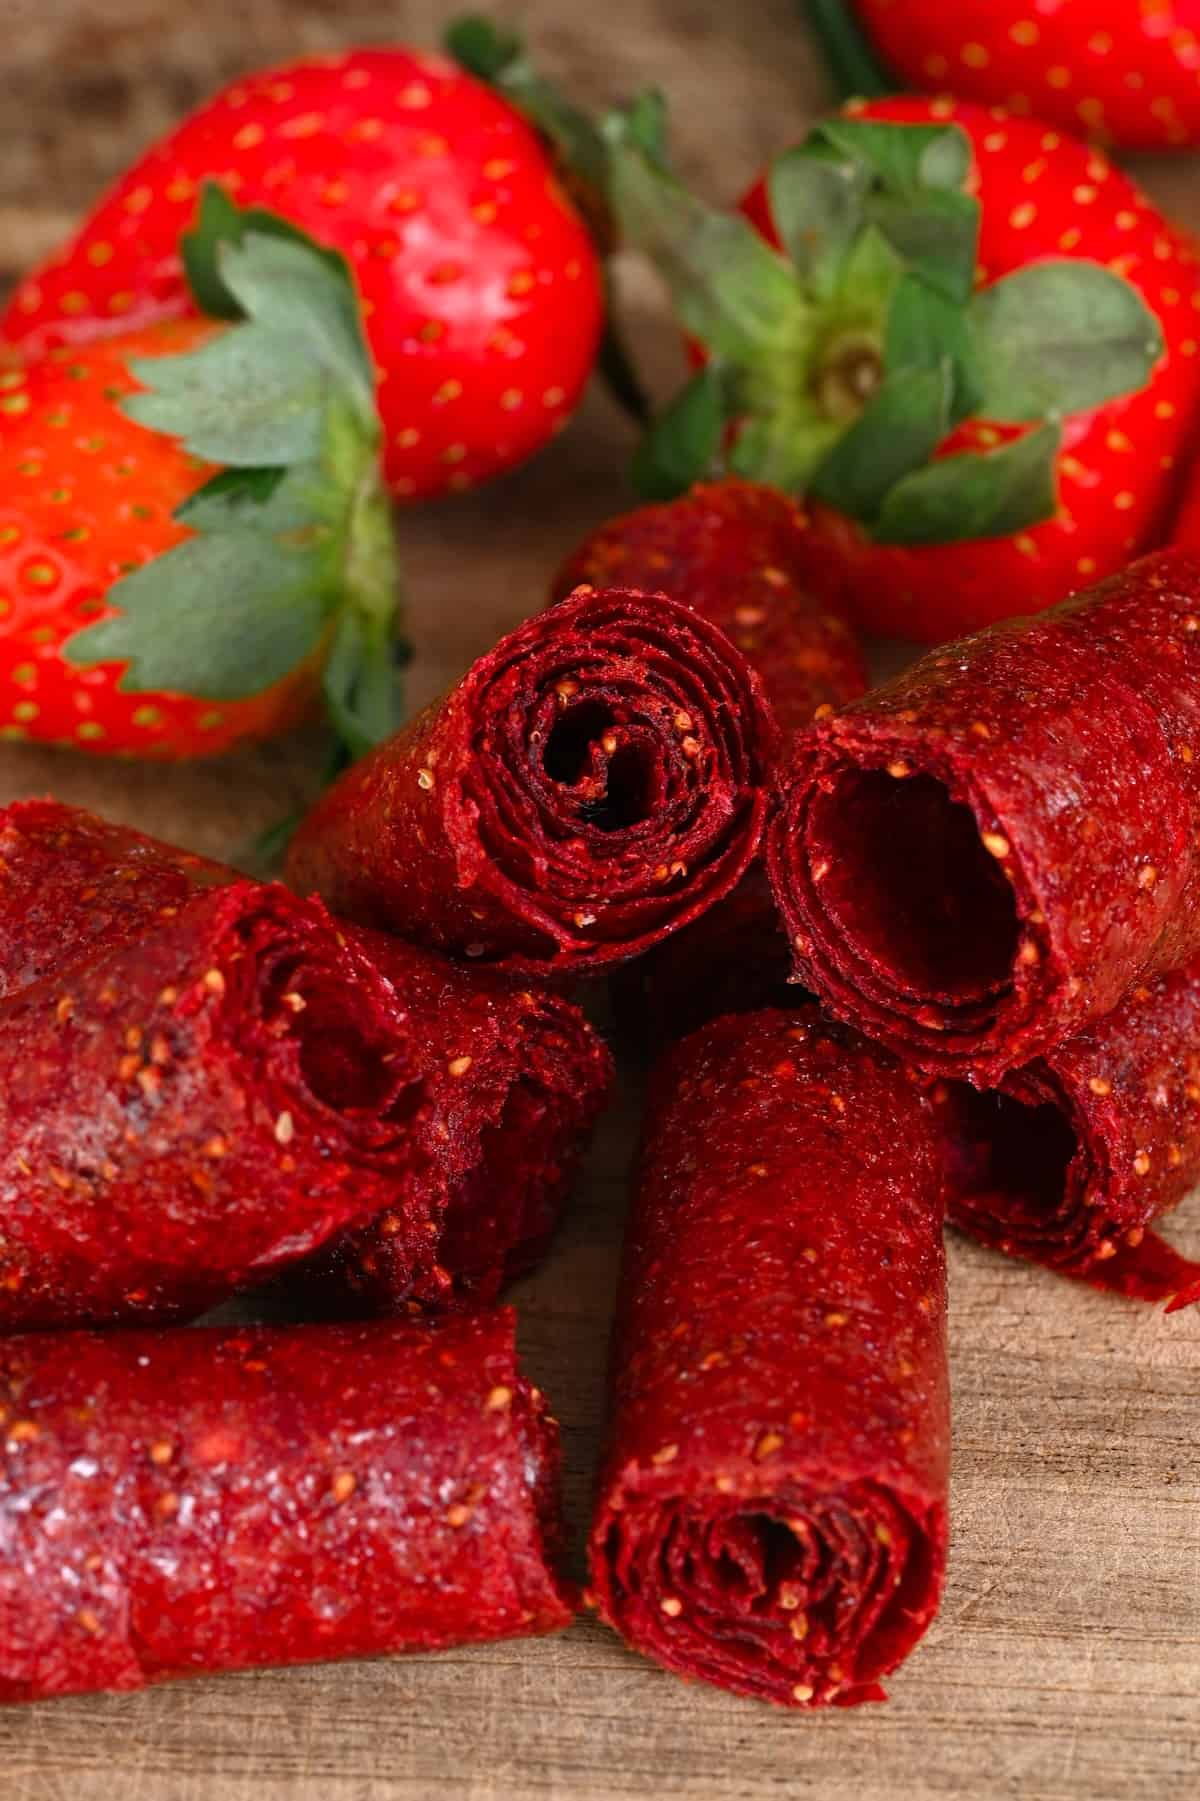
- Strawberries
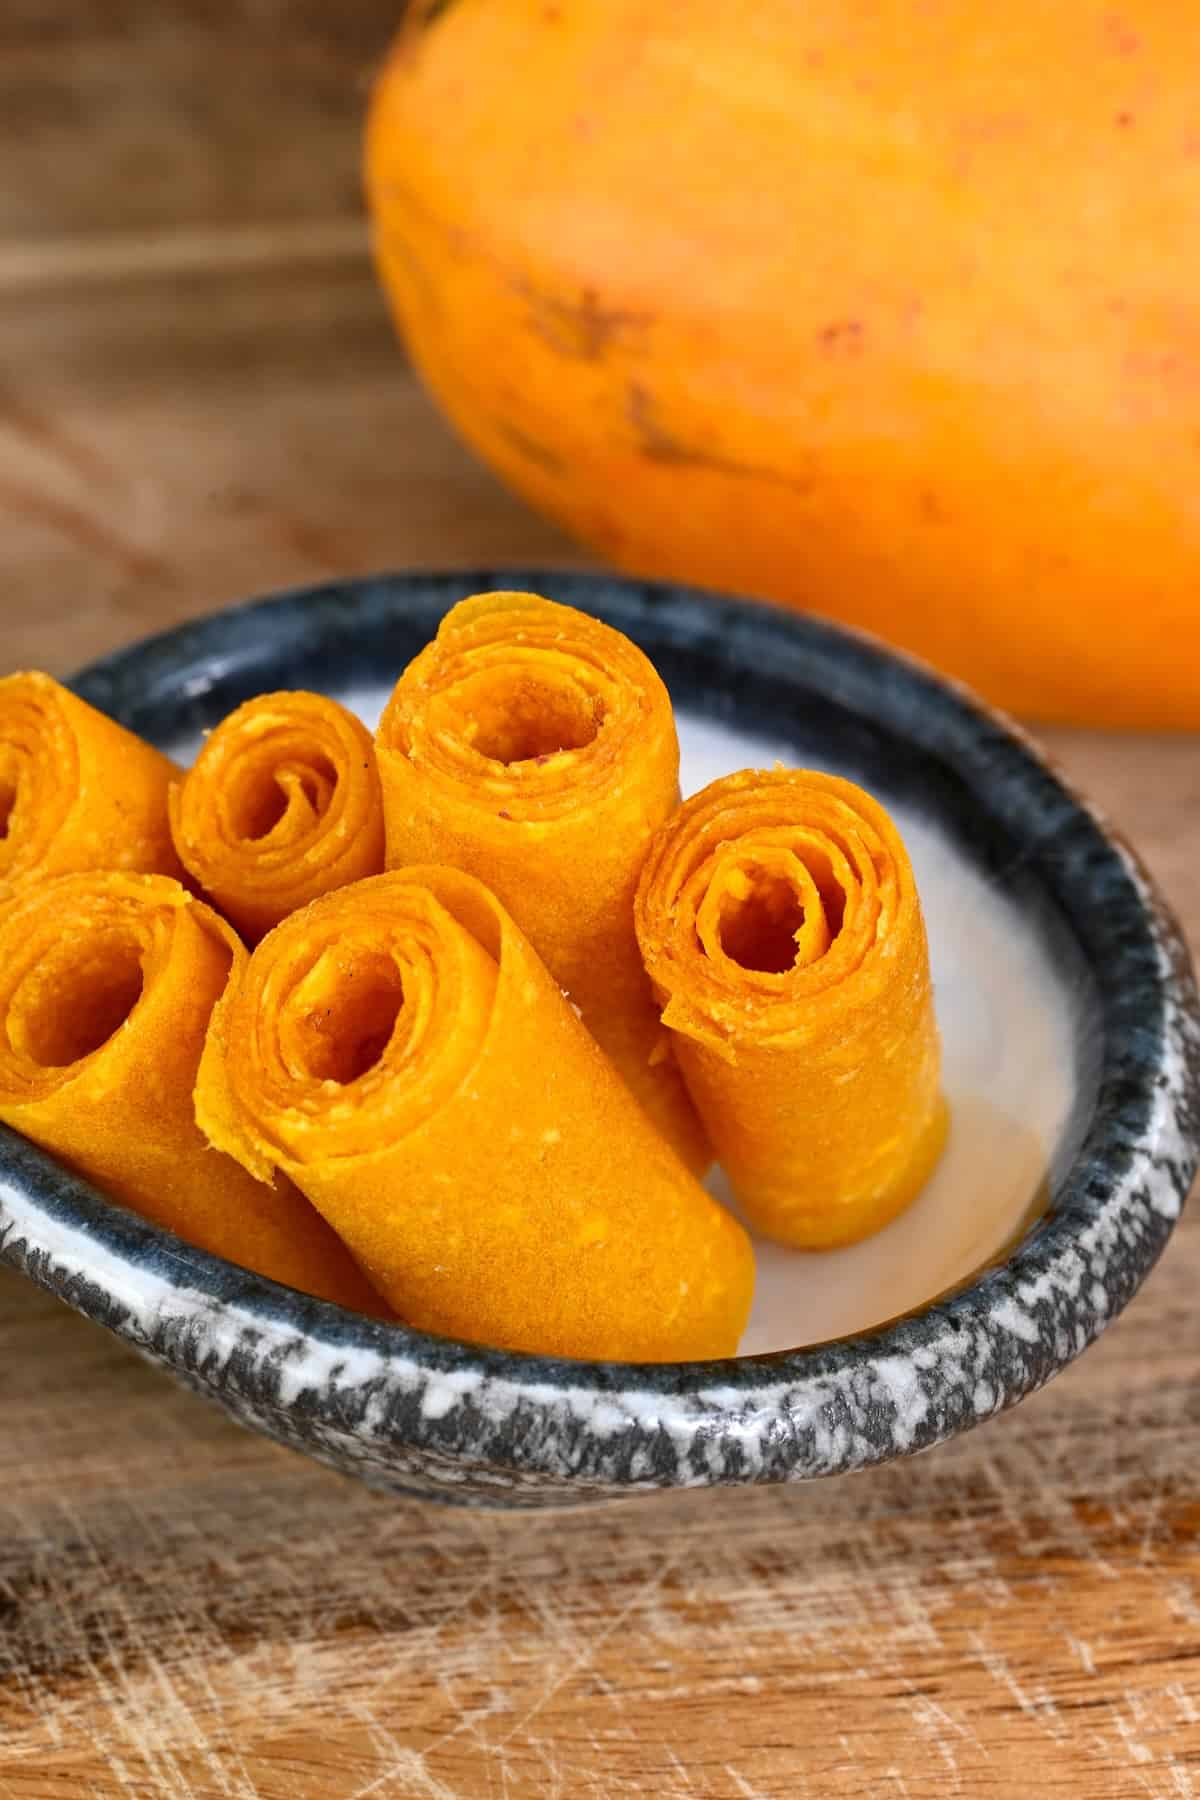
- Mango
- Blueberries
- Raspberries, blackberries, and other berries
- Apricot
- Apple (use applesauce)
- Kiwi
- Peaches
- Pineapple
- Plum
- Rhubarb, etc.
You can use fresh or frozen fruit but make sure to thaw it first. Also, note that certain fruits, like bananas, will discolor and turn an odd brown color. For that reason, I like to mix them with other fruits but don’t often use them alone.
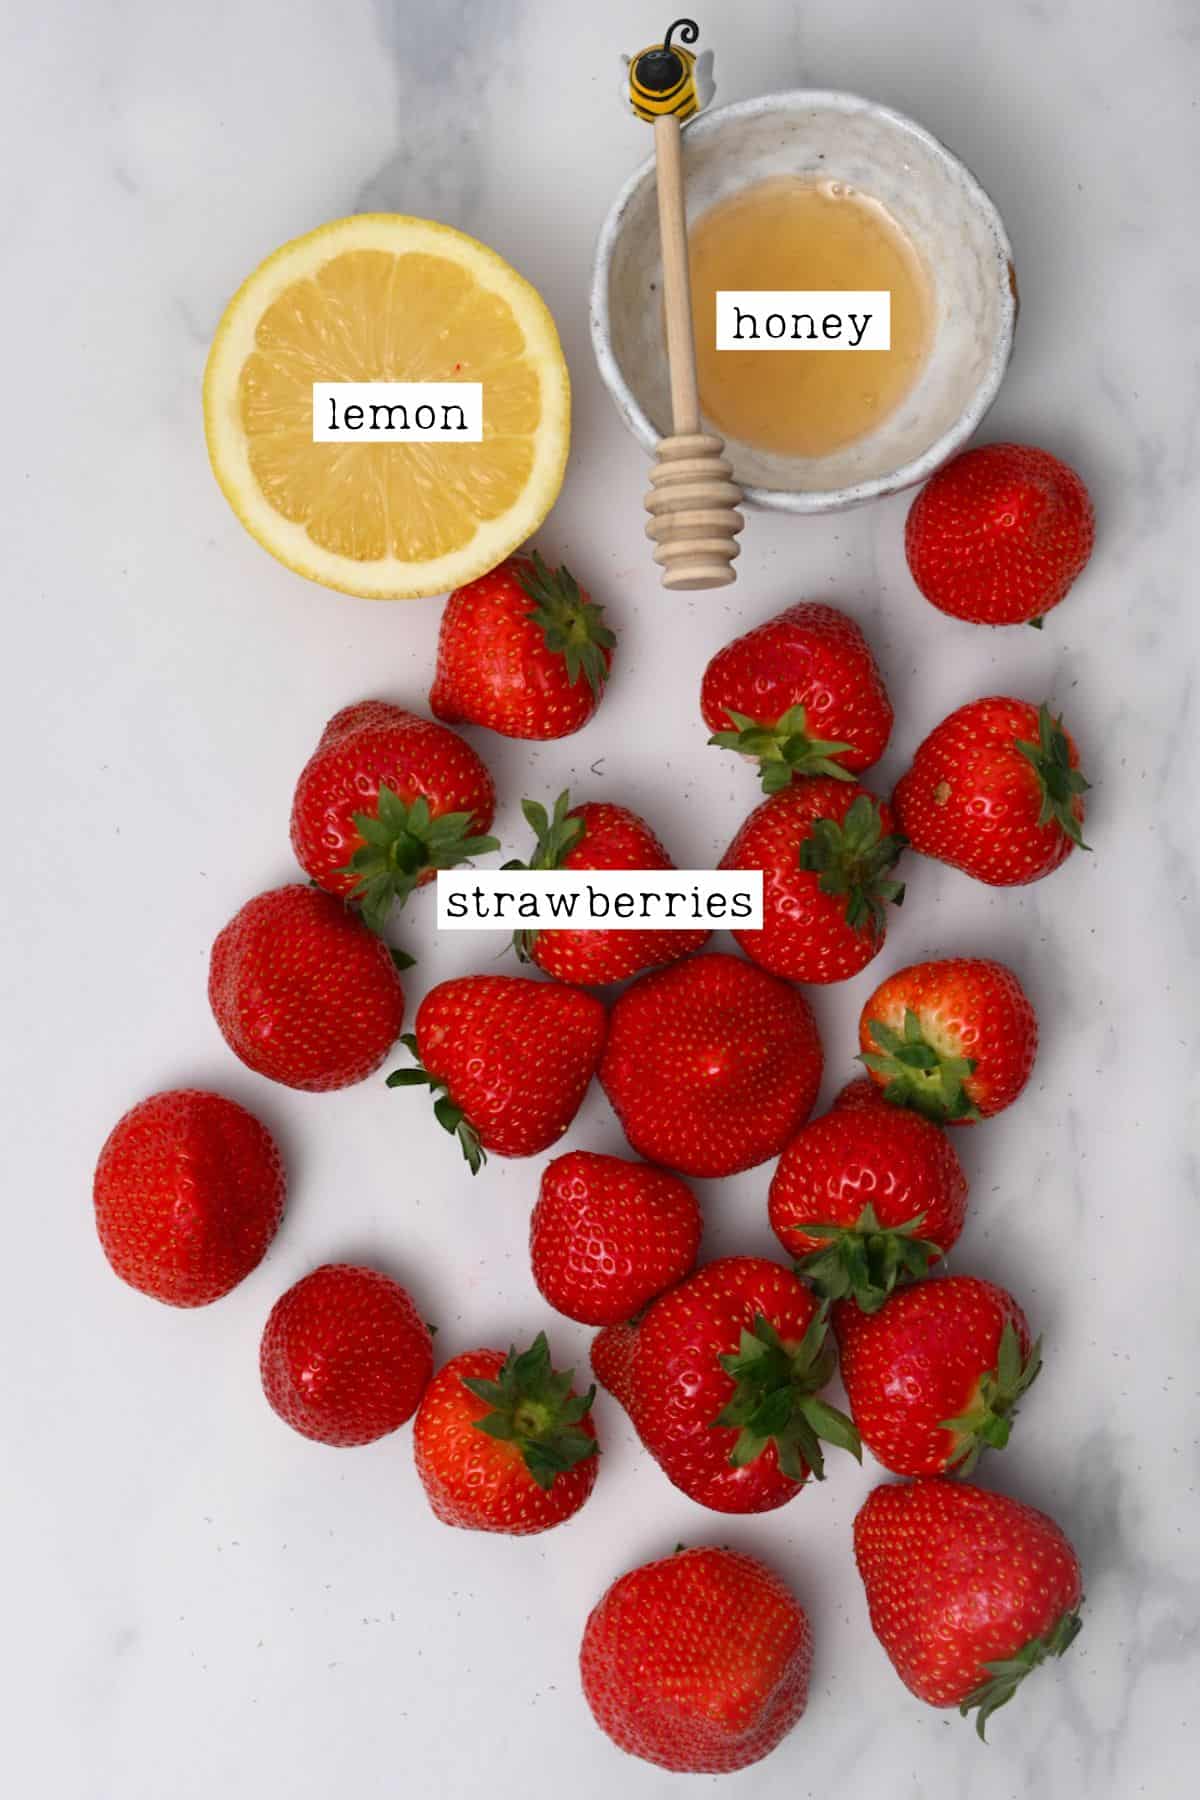
- Lemon juice: Use fresh lemon juice for the best results. This will help the fruit maintain its bright color.
- Sweetener: (Optional) Only add enough to reach your desired sweetness. Use your favorite liquid sweetener – maple syrup, honey, agave, etc. Use a sugar-free syrup, if preferred, or unsweetened applesauce to naturally sweeten it.
I don’t recommend using granulated sugar in this recipe, as it won’t dissolve properly into the puree (unless it’s heated to dissolve it).
How to Make Fruit Leather/Rolls
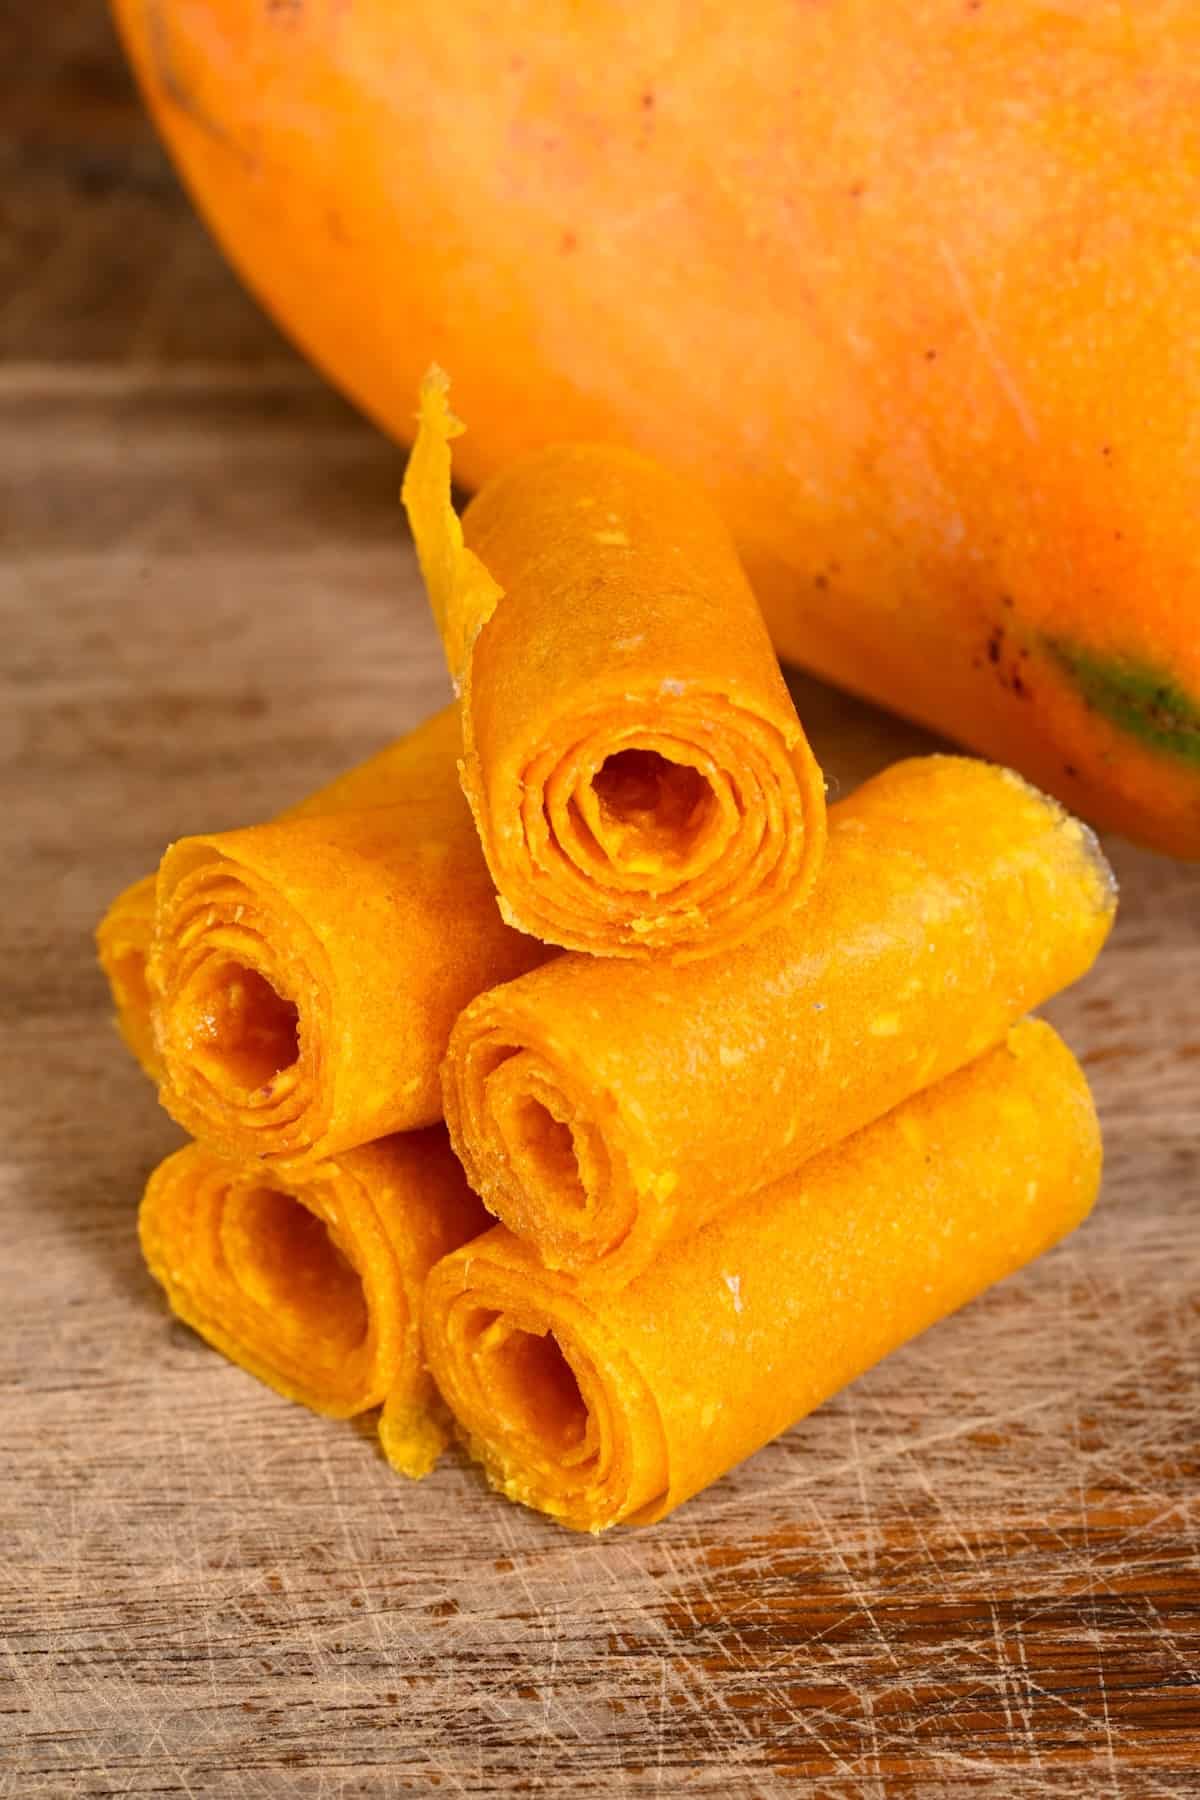
I decided to make homemade strawberry rolls and mango rolls this time, but the below process will work with any of the fruits previously listed.
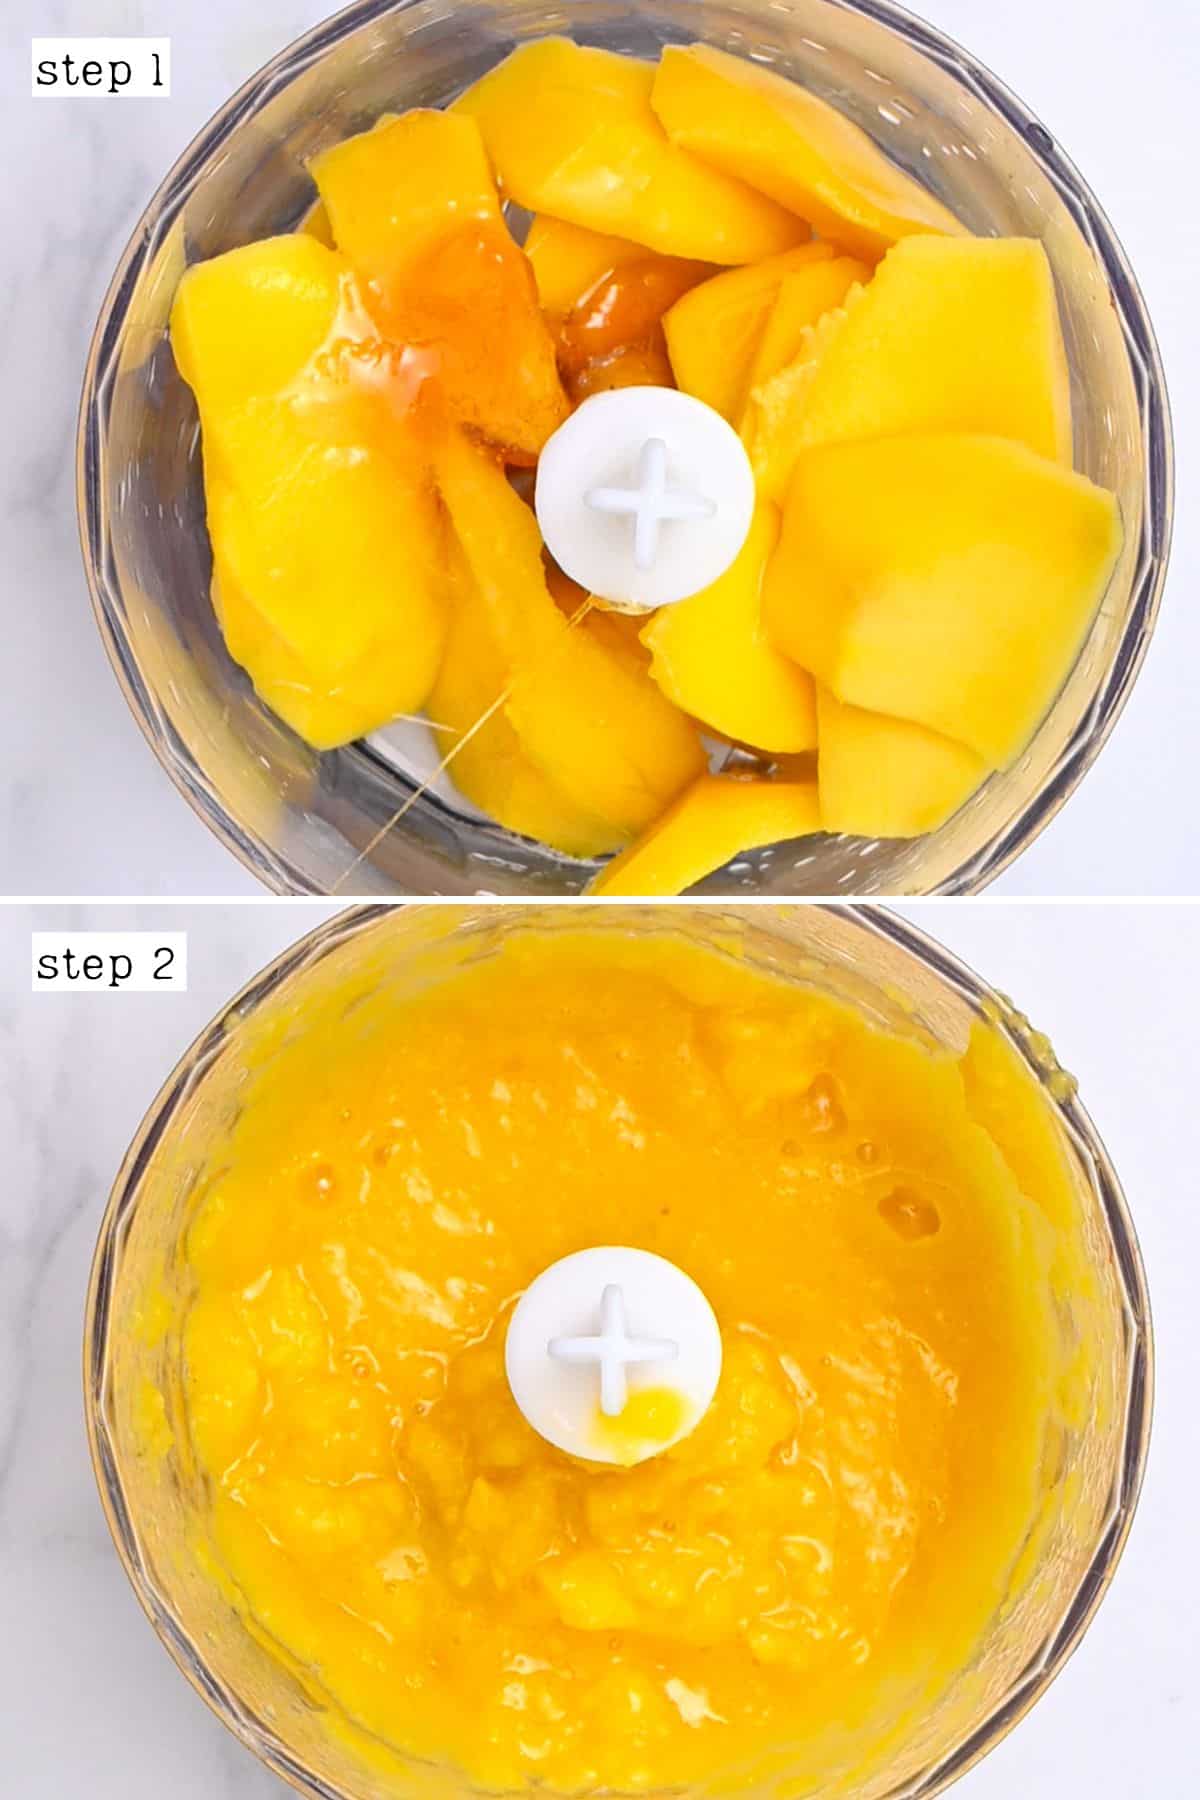
Step 1: Prepare and Blend the Fruit
First, blend your fruit of choice into a puree using a blender or food processor until smooth.
If you want to make a multi-fruit version, blend the fruits separately and combine them half and half on the tray before dehydrating/oven-baking them.
Then, add the lemon juice and optionally any liquid sweetener to taste.
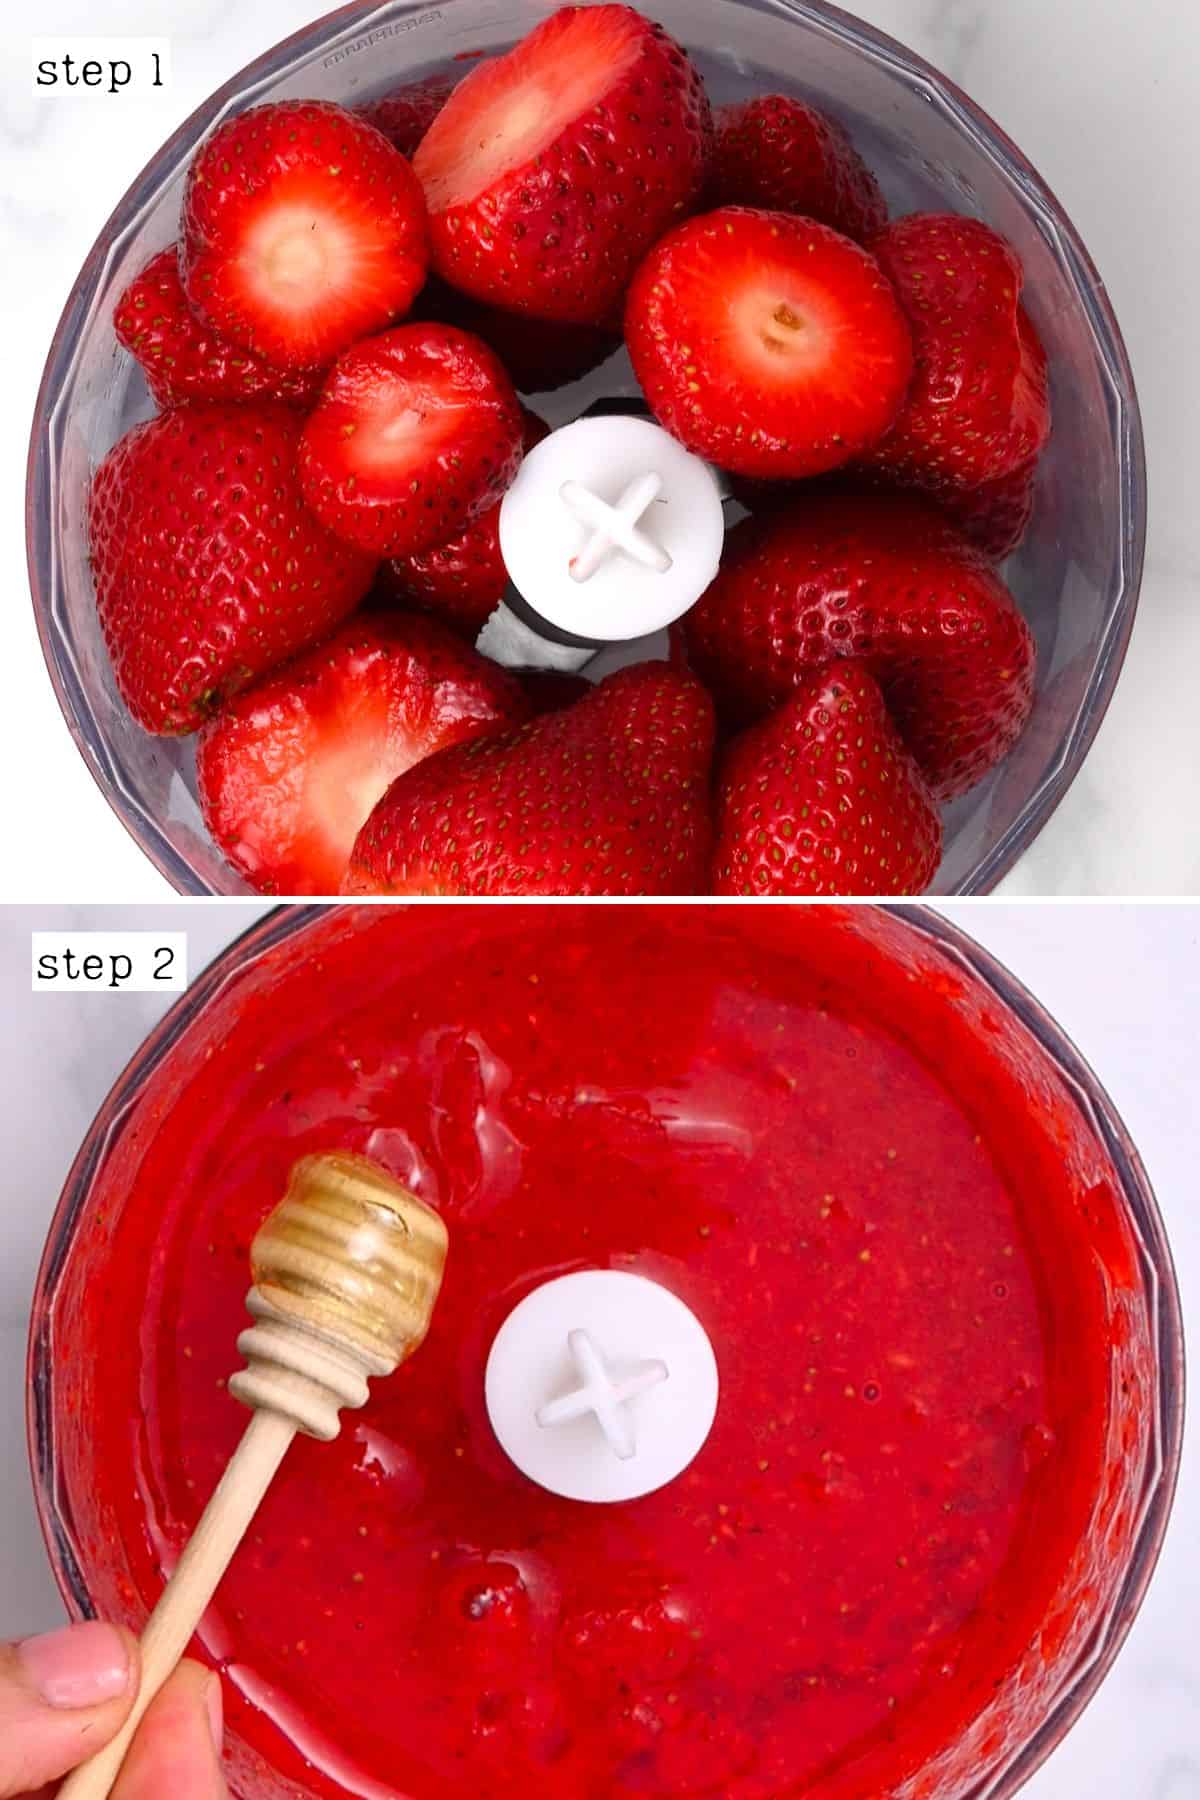
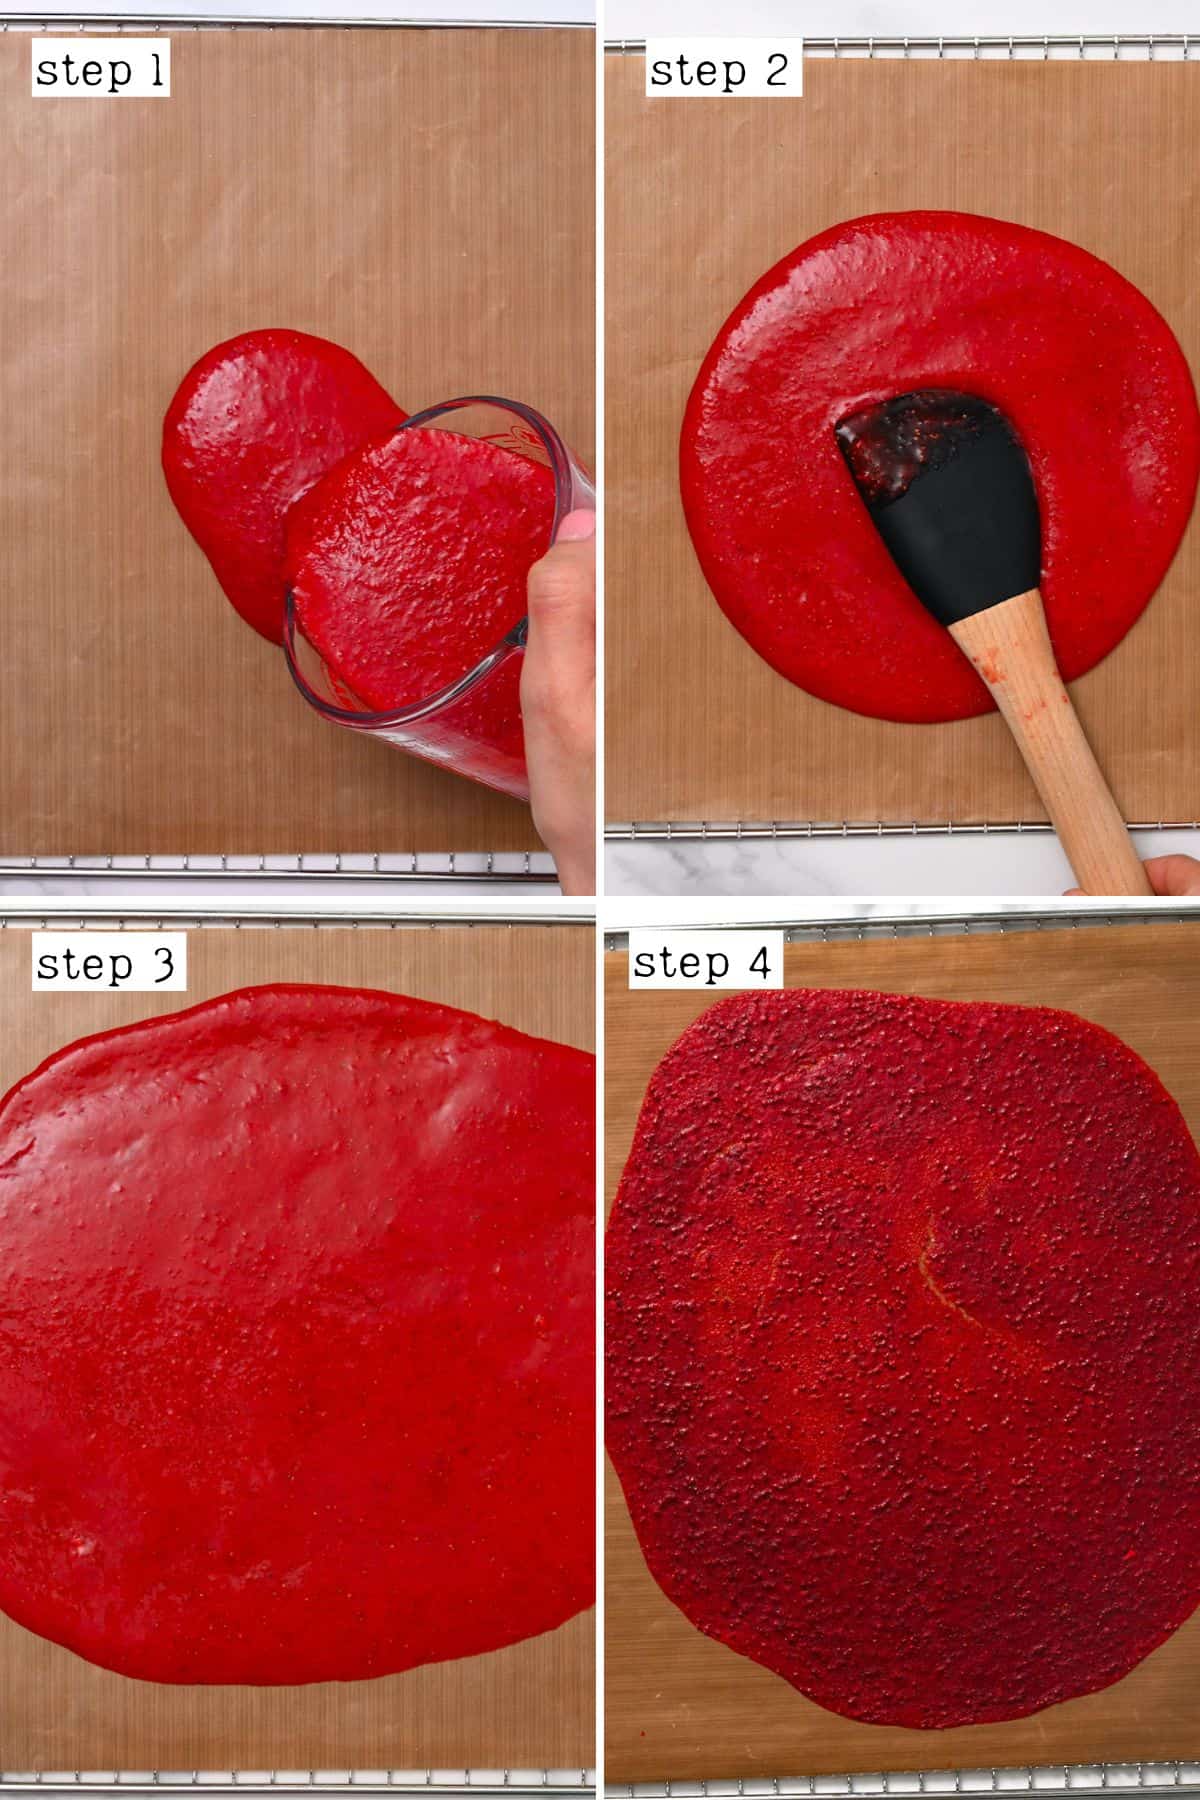
Step 2: Spread
Spread 1 cup of the fruit mixture across a large Silpat or parchment-lined baking tray (don’t use wax paper) or dehydrator tray in a thin layer of around 1/8 inch (0.3cm). You can tilt the tray and/or use an offset spatula to help spread it in an even layer across the tray.
Top Tips For This Step
- Make it into as much of a rectangle shape, rather than rounded, if you want more even rolls when cutting them. However, this isn’t necessary. I used regular-rimmed baking sheets and spread about a cup of fruit puree per sheet.
- Note that a Silpat sheet (silicone baking mat) works best as parchment paper will slightly absorb some of the moisture in the fruit and crumple up slightly, making the fruit leather uneven in places, too.
- You can make the puree thicker, closer to ¼ inch thickness, but that’s best for thicker pieces, not for rolls. Just note that the thicker the puree, the longer the time to dehydrate.
- Note that your dehydrator may have come with a fruit leather tray (a tray with a rim for liquidy foods).
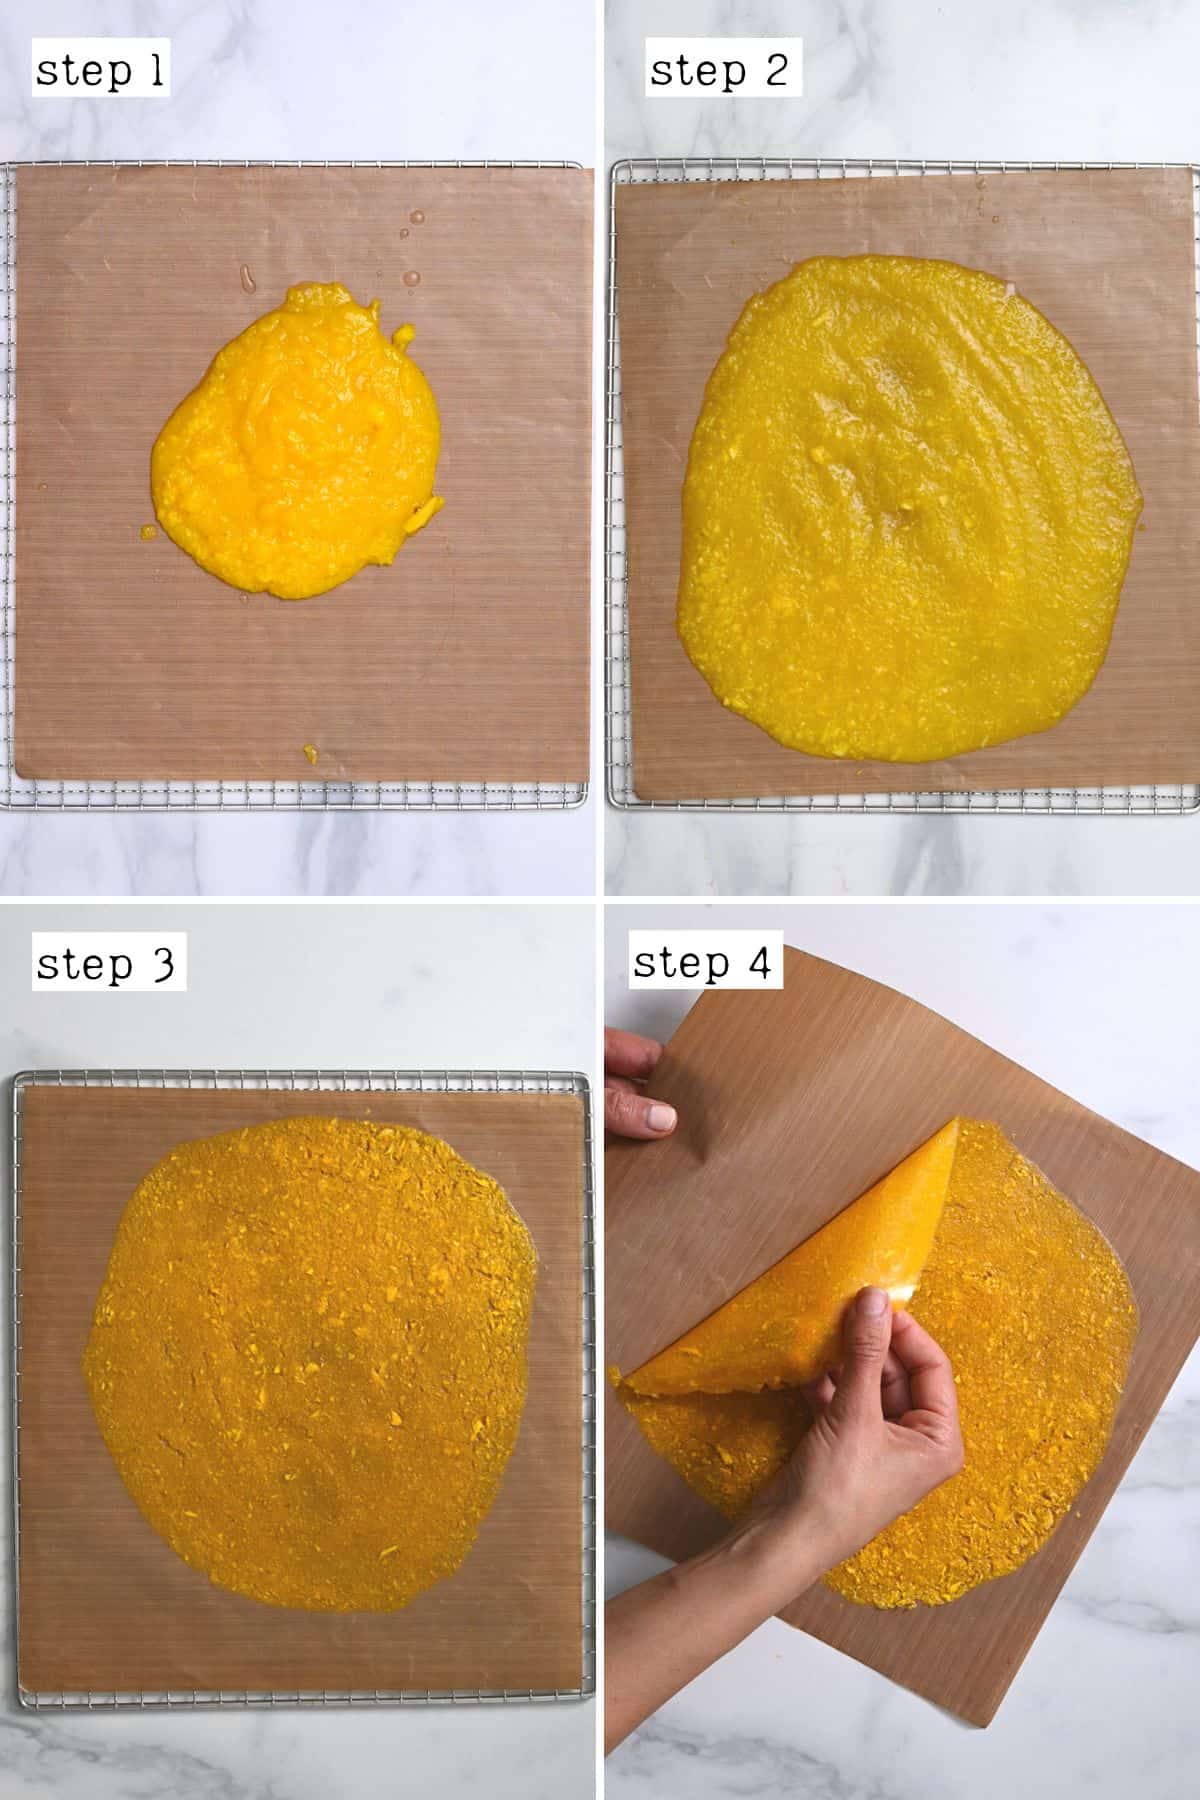
Step 3: Dehydrate the Fruit
Dehydrator Fruit Leather
Set your food dehydrator to 140ºF/60ºC and allow it to dry for between 7-12 hours until it’s dry.
Oven Fruit Leather
The aim here is to set your oven temperature as low as it can. 135-150ºF/57-65ºC is ideal, though up to 170-180ºF/75-80ºC will work too. Avoid any temperatures above 200ºF/95ºC, though.
The time to make fruit leather in oven will vary based on the temperature and how thick your fruit puree is on the tray. As a general guideline, expect it to take between 8-12 hours at 140ºF/60ºC, 5-8 hours at 150ºF/65ºC, and 3-5 hours at 170ºF/75ºC.
If the oven doesn’t go low enough, prop the end of a wooden spoon in the door to keep it slightly open.
How do you know when it’s ready? It should look and feel dry (or very subtly tacky but not sticky) and it should be pliable. Make sure not to dry/cook them for too long, otherwise, they will become crispy/won’t roll.
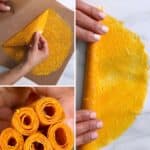
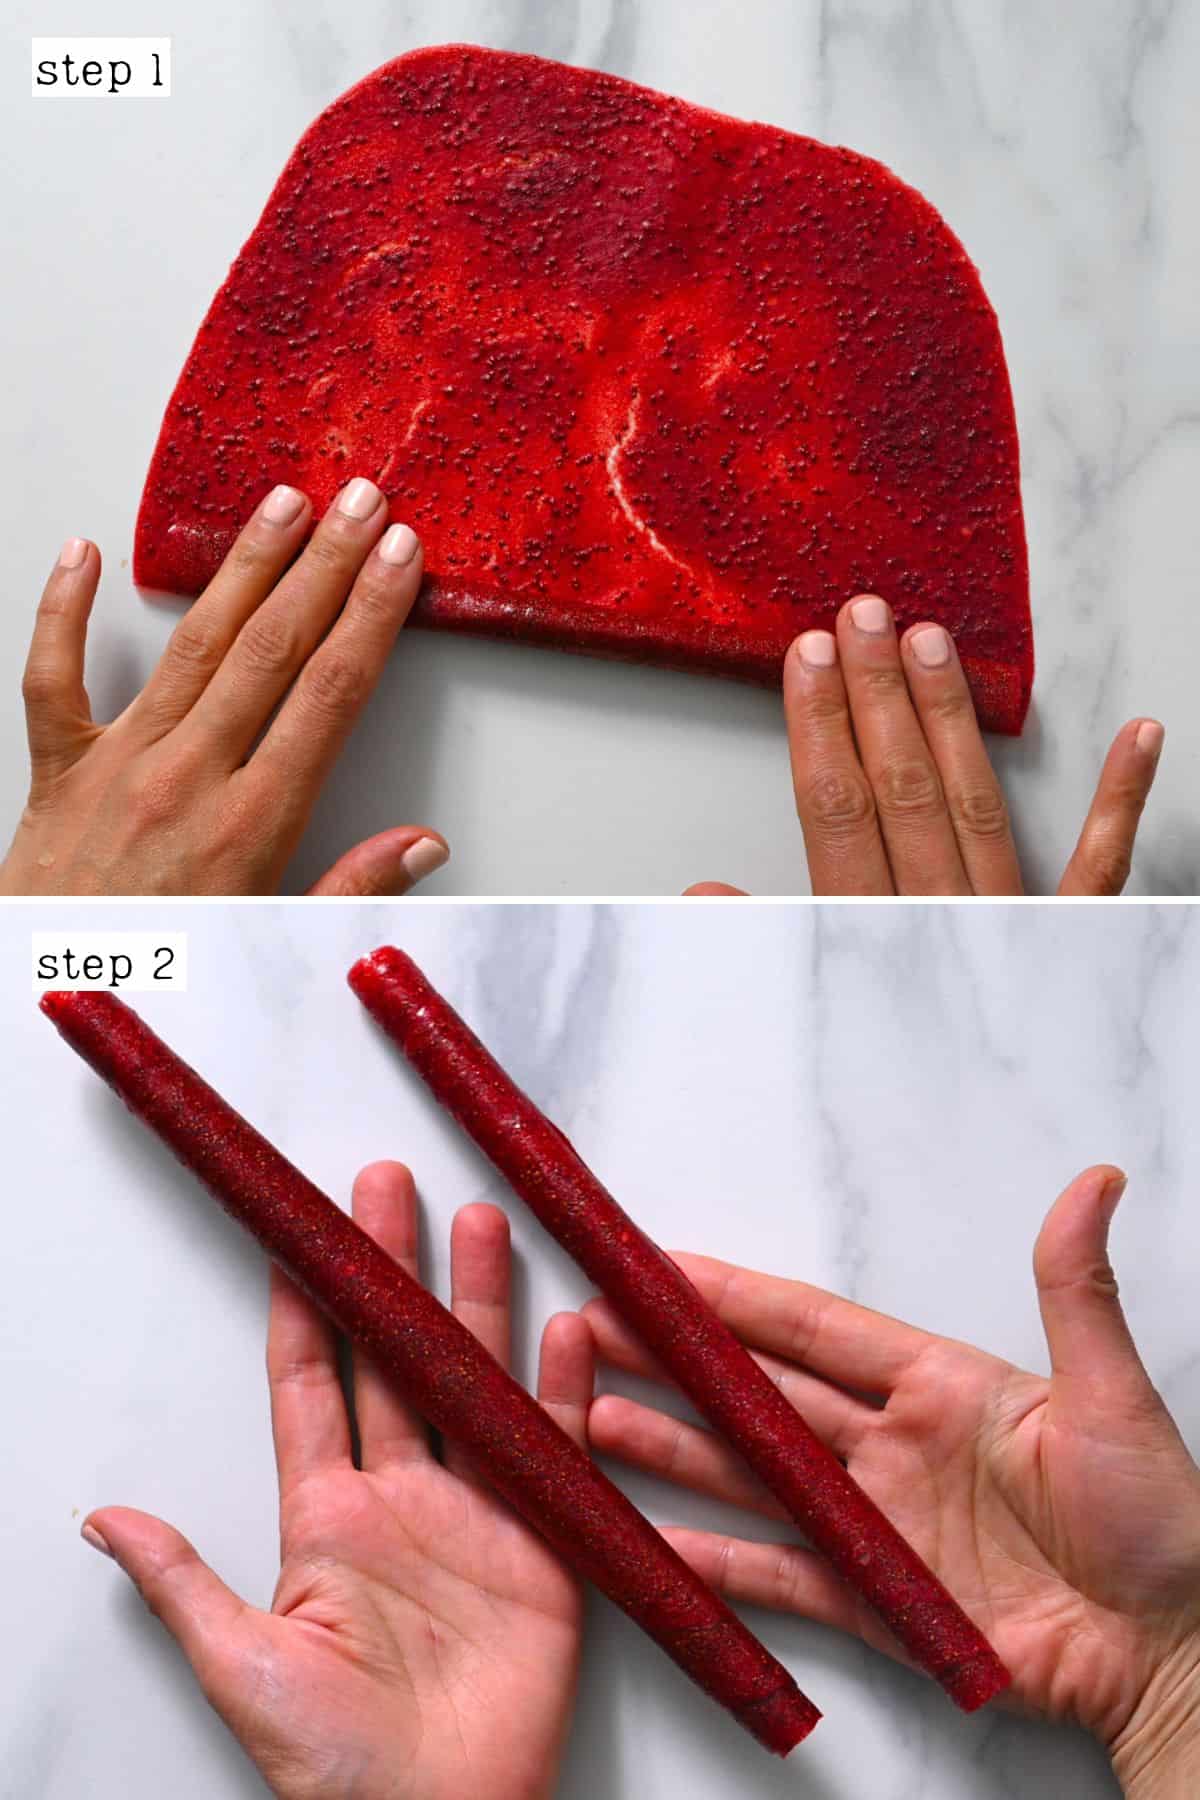
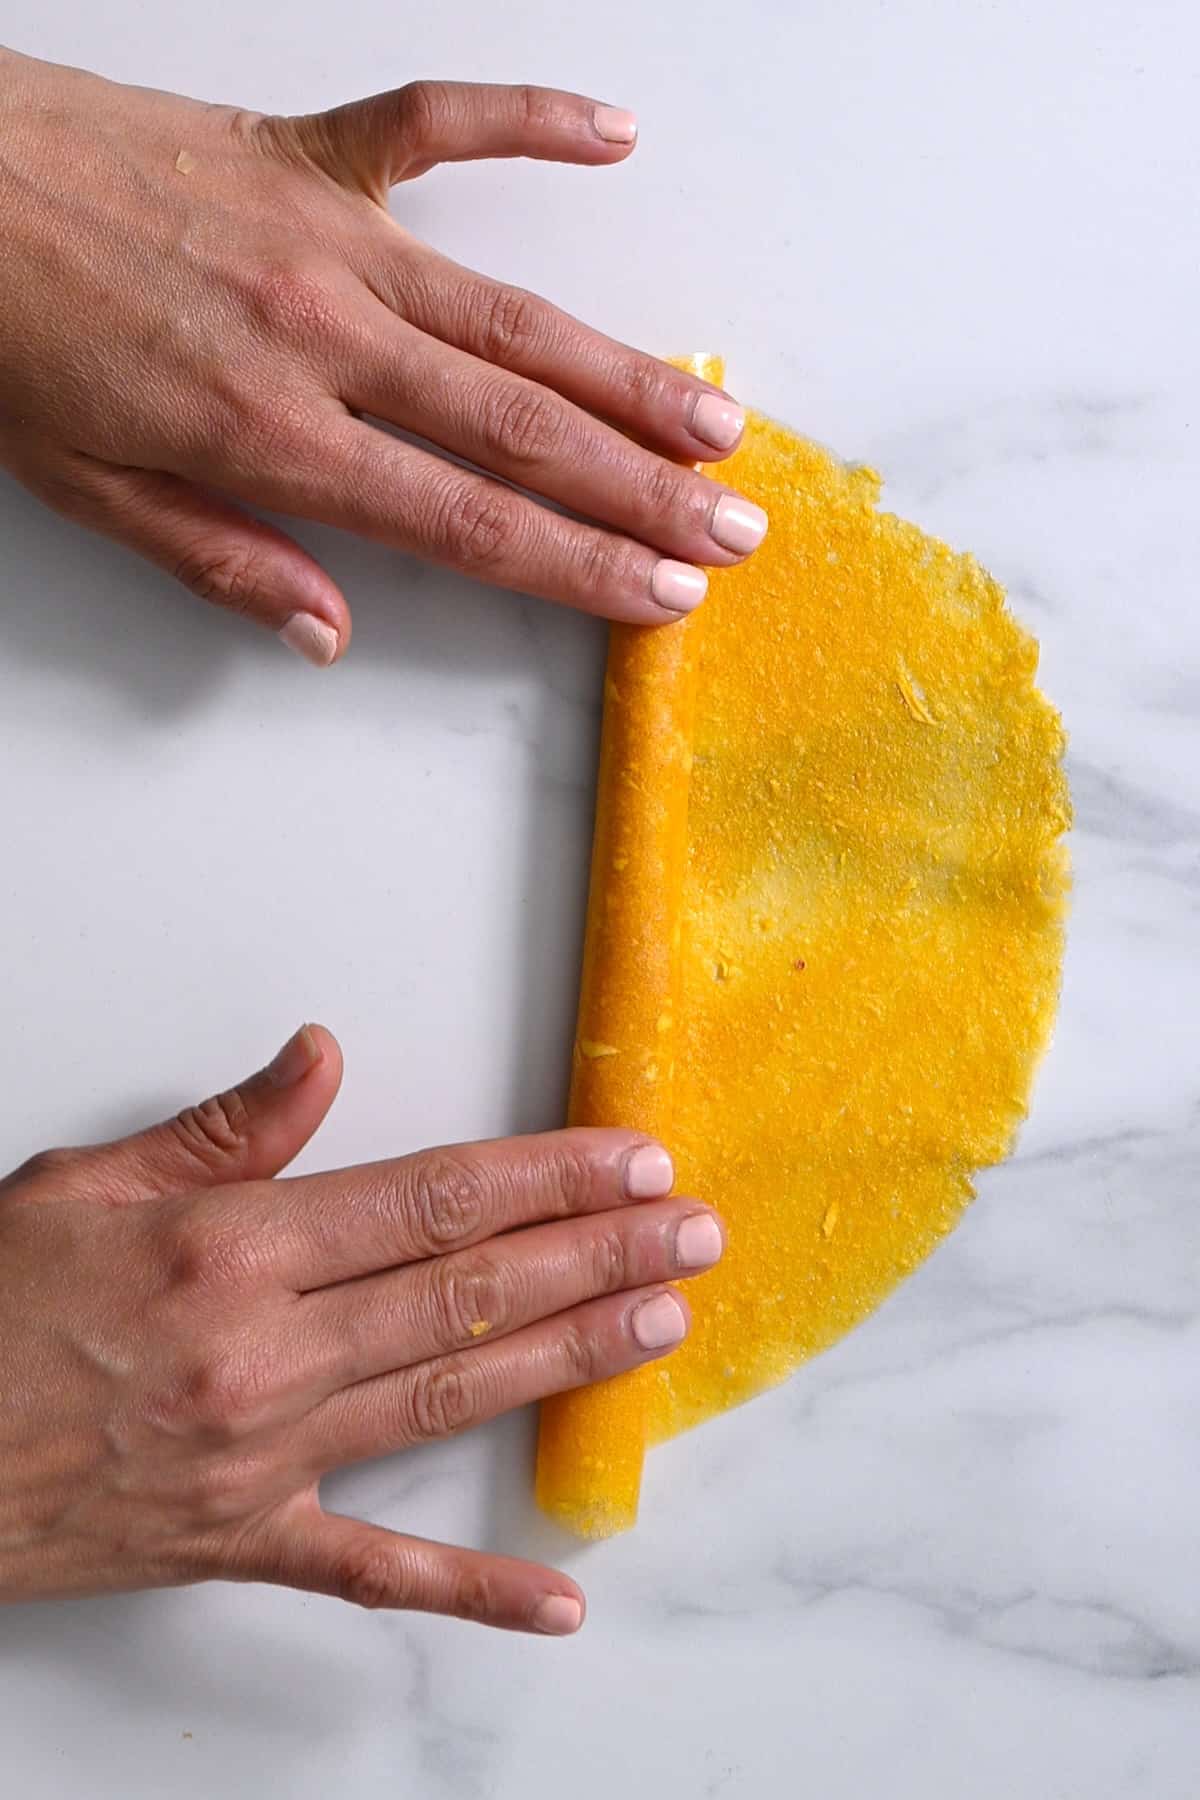
Step 4: Cut and Roll the Homemade Fruit Leather
First, allow the dehydrated fruit to cool completely to room temperature. Then, use scissors, a pizza cutter, or a knife to cut into strips or squares.
Alternatively, to make the rolls, cut the fruit into 1-inch strips and then roll them (fruit on the outside) while still connected to the parchment paper. If you dehydrate them on Silpat, peel them away from the sheet first and place them on parchment paper/wax paper before rolling.
Enjoy your tasty, healthy fruit snack!
As well as enjoying these homemade fruit roll ups as a snack, you can also use them, cut into pieces, as a nori alternative to make dessert sushi!
How Long Does Homemade Fruit Leather Last?
Store: Store in a paper towel-lined airtight container in a cool, dark, dry location for around 2 weeks or in the refrigerator for 1-2 months (it may last longer, but I’ve never tried).
Freeze: Place in an airtight container or freezer-safe Ziplock and store for up to a year!

More Dehydrator Recipes
If you try this fruit leather recipe, let me know how it goes in the comments below. I’d appreciate a recipe card rating and would love to see your recipe recreations – tag me on Instagram @Alphafoodie!

Easy Fruit Leather Recipe (No Boil Needed!)
Equipment
- Dehydrator or oven
Ingredients
For strawberry
- 1.1 lb strawberries 3 cups chopped
- 2 Tbsp lemon juice 1/2 lemon
- 2 Tbsp honey optional; sweeten to taste; any liquid sweetener will work – maple syrup, agave, or even a sugar-free syrup
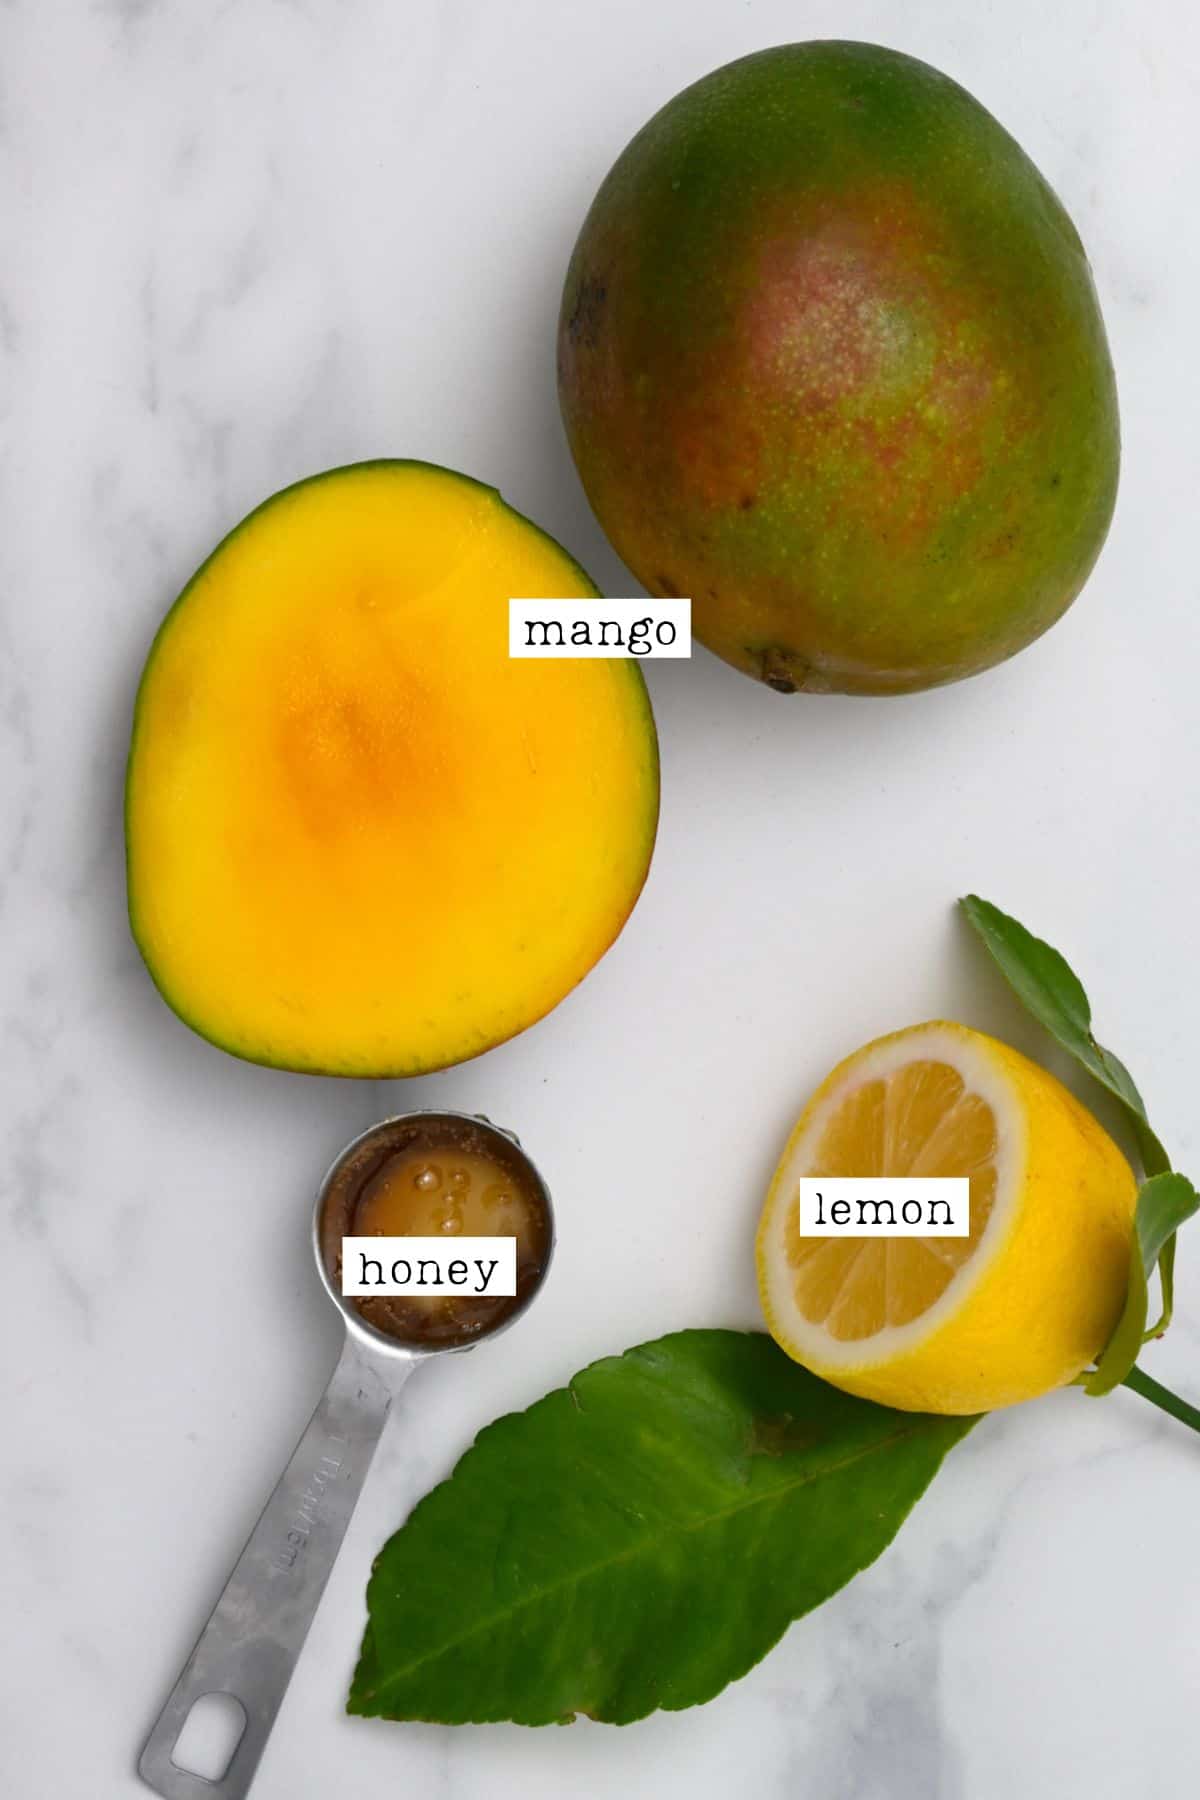
For mango
- 6.4 oz mango 1 cup
- 1/2 Tbsp lemon juice
- 1 Tbsp honey optional; sweeten to taste; any liquid sweetener will work – maple syrup, agave, or even a sugar-free syrup
Or use the fruit of your choice: blueberries, raspberries, apricots, kiwi, peach, pineapple, plum, etc. Or use a combination of fruit that you like.
Instructions
Step 1: Prepare the fruit
- Blend your fruit of choice into a puree using a blender or food processor until smooth.If you want to make multi-fruit version, blend the fruits separately and combine them half and half on the tray before dehydrating them.
- Add the lemon juice and optionally any liquid sweetener to taste.
- Spread 1 cup of the fruit puree across a large Silpat or parchment-lined baking tray (don't use wax paper) or dehydrator tray in a thin layer of around 1/8 inch (0.3cm). You can tilt the tray and/or use an offset spatula to help spread it in an even layer across the tray. Check the notes below for more tips!
Step 2: Dehydrate
- In the Oven: The aim here is to set your oven temperature as low as it can. 135-150ºF/57-65ºC is ideal, though up to 170-180ºF/75-80ºC will work too. Avoid any temperatures above 200ºF/95ºC, though.The time will vary based on the temperature and how thick your fruit puree is on the tray. As a general guideline, expect it to take between 8-12 hours at 140ºF/60ºC, 5-8 hours at 150ºF/65ºC, and 3-5 hours at 170ºF/75ºC.If the oven doesn't go low enough, prop the end of a wooden spoon in the door to keep it slightly open.In the Dehydrator: Set your food dehydrator to 135ºF/57ºC and allow it to dry for between 6-10 hours until it's dry.
- How do you know when it’s ready? It should look and feel dry (or very subtly tacky but not sticky) and it should be pliable. Make sure not to dry/cook the roll-ups for too long otherwise, they will become crispy/won’t roll.
Step 3: Cut or Roll
- Allow the dehydrated fruit to cool. Then, use scissors, a pizza cutter, or a knife to chop it into small pieces.Alternatively, to make rolls, cut the fruit into 1-inch strips and then roll them while still connected to the parchment paper. If you dehydrate them on Silpat, peel them away from the sheet first and place them on parchment paper/wax paper before rolling.
Storage Instructions
- Store: Store in a paper towel-lined airtight container in a cool, dark, dry location for around 2 weeks or in the refrigerator for 1-2 months (it may last longer, too).Freeze: Place in an airtight container or freezer-safe Ziplock and store for up to a year!
Notes
- For seed-free fruit leather: Pass your fruit puree through a fine-mesh sieve or nut milk bag onto the parchment-lined tray.
- Don’t spread it too thin: The water will evaporate from the fruit puree as it dehydrates and become thinner. I recommend aiming for around 1/8 inch thick but ensuring there are no “holes”/parts where you can see the sheet beneath.
- The dehydrating time will vary: The time can vary based on the exact liquid content in your puree, the humidity, your exact model of oven/dehydrator, etc. So keep an eye on it until it’s slightly tacky.
- Multi-fruit leather: You can blend multiple fruits together for interesting flavors (i.e., mango and strawberry or strawberry and raspberry) or puree the fruit separately and then spread it half and half on a tray, so each roll is two flavors.
- If the edges are too dry: This is more of an issue when making fruit leather (but it shouldn’t happen if you leave a border on your tray). However, there’s an easy fix. Just rub a little water into the edges to help rehydrate them slightly.
- Yield: Use around 3 cups of fruit per baking sheet (one cup of pureed fruit per 13×18 inch sheet).
- Optional add-ins: you can add vanilla extract (or almond extract, depending on the fruit) or dry spices like cinnamon, clove, etc., for extra flavor. I highly recommend experimenting with different fruit combinations to find your favorite unique flavor mash-ups.
- To speed up the oven process, it can help to transfer the fruit mixture to a saucepan first and allow it to simmer and reduce over medium-low heat with the lemon juice and optional sweetener (granulated sugar is fine for this method) until it reduces and thickens slightly (around 10 minutes).
- Make it into as much of a rectangle shape, rather than rounded, if you want more even rolls. However, this isn’t necessary. I used regular-rimmed baking sheets and spread about a cup of fruit puree per sheet.
- Note that a Silpat sheet (silicone mat) works best as parchment paper will slightly absorb some of the moisture in the fruit and crumple up slightly, making the fruit leather uneven in places.
- You can make the puree thicker, closer to ¼-inch thickness, but that’s best for thicker pieces, not for roll-ups. Just note that the thicker the puree, the longer the time it takes to dehydrate.
- Note that your dehydrator may have come with a fruit leather tray (a tray with a rim for liquidy foods).
Nutrition
Nutrition information is automatically calculated, so should only be used as an approximation.


