
This post may contain affiliate links. Please read our disclosure policy.
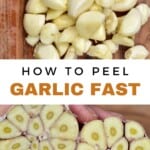
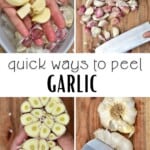

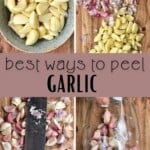

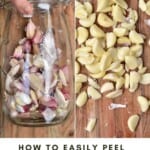
How to peel garlic using one of 6 methods. I’ve tested and rated 6 supposed ‘easy ways to peel garlic’ to find out which REALLY work!

Confession – I love garlic! So much so that there is garlic in practically every savory dish I make. Even just last week, I posted this recipe for Lebanese Toum (garlic sauce), which I why I’ve been on the hunt for methods on how to peel garlic easily.
The ‘best’ way to peel garlic, easiest way to peel garlic, quickest way to peel garlic? You name it, I’ve tried the ‘hack’/’trick.’ Now I’ve decided to compile my testing into a helpful guide.
The fact is, as much as we love this ingredient, we all seem to collectively agree that peeling it is a laborious (and boring) task. Thus, we’d rather make it easier or avoid it altogether. It’s what has thousands (if not millions) turning to pre-peeled garlic cloves, garlic paste, and other ‘prepped’ garlic products.
However, then you may be sacrificing flavor and freshness. And, in some cases, consuming extra ingredients and preservatives. Depending on your needs, though, there are methods below that aim to keep the garlic cloves whole, chopped, or slightly smashed. So, let’s jump right into it.
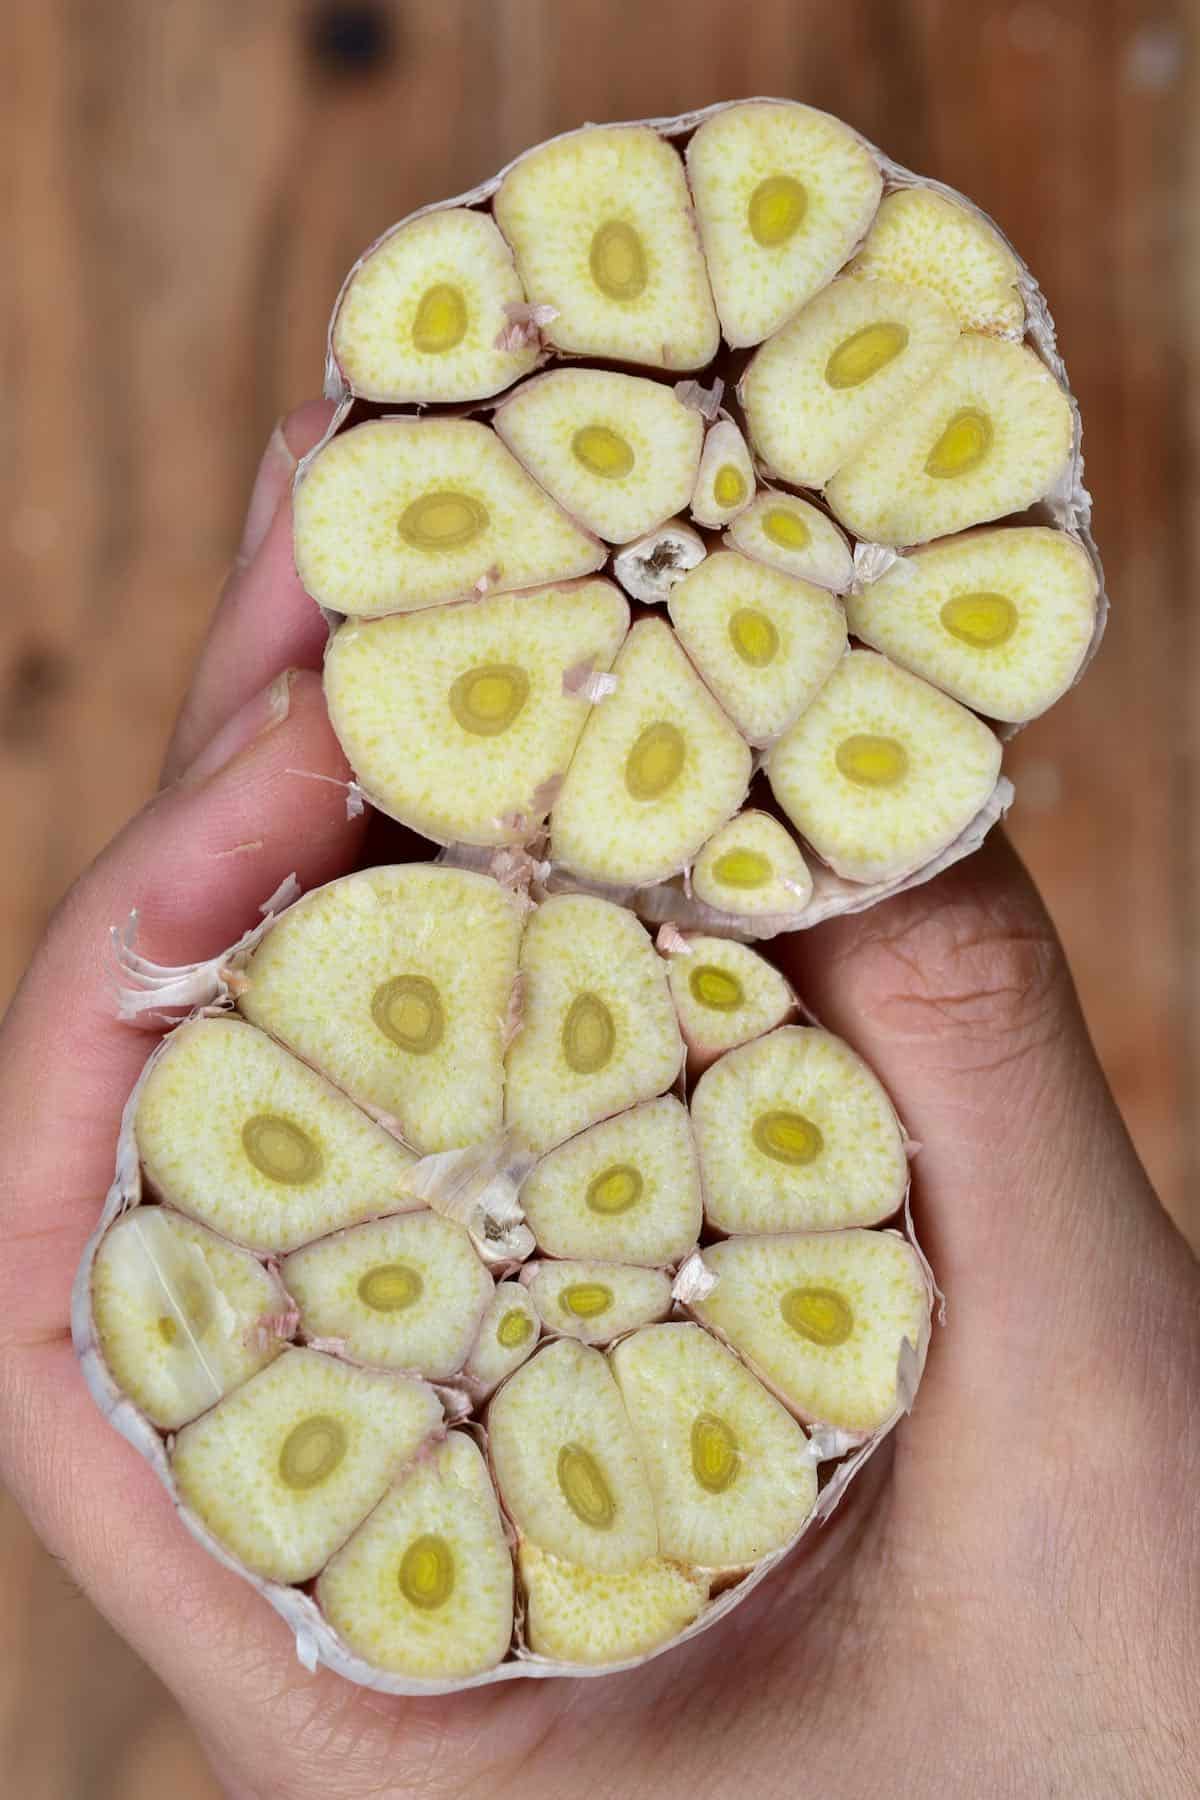
Note: Throughout this post, I’ve used garlic with purple skin. I’ve used purple and white-skinned varieties interchangeably throughout my life. I haven’t noticed any major difference when it comes to peel garlic easily. However, I didn’t compare the two side-by-side.
Want to save this recipe?
Table of Contents
- How To Separate the Garlic Head Into Cloves
- Method 1: The Traditional Knife Method
- Method 2: Cutting the Garlic Head In Half
- Method 3: Hot Water
- Method 4: The Jar Method / Shake Method
- Method 5: In The Microwave
- Method 6: Remove With A Paring Knife
- BONUS METHOD: Don’t peel it
- Finally: Using a silicone tube
- Conclusion
- FAQs
- What To Do Next?
- How to peel garlic. (6+ Easy ways to peel garlic) Recipe
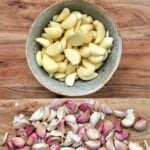
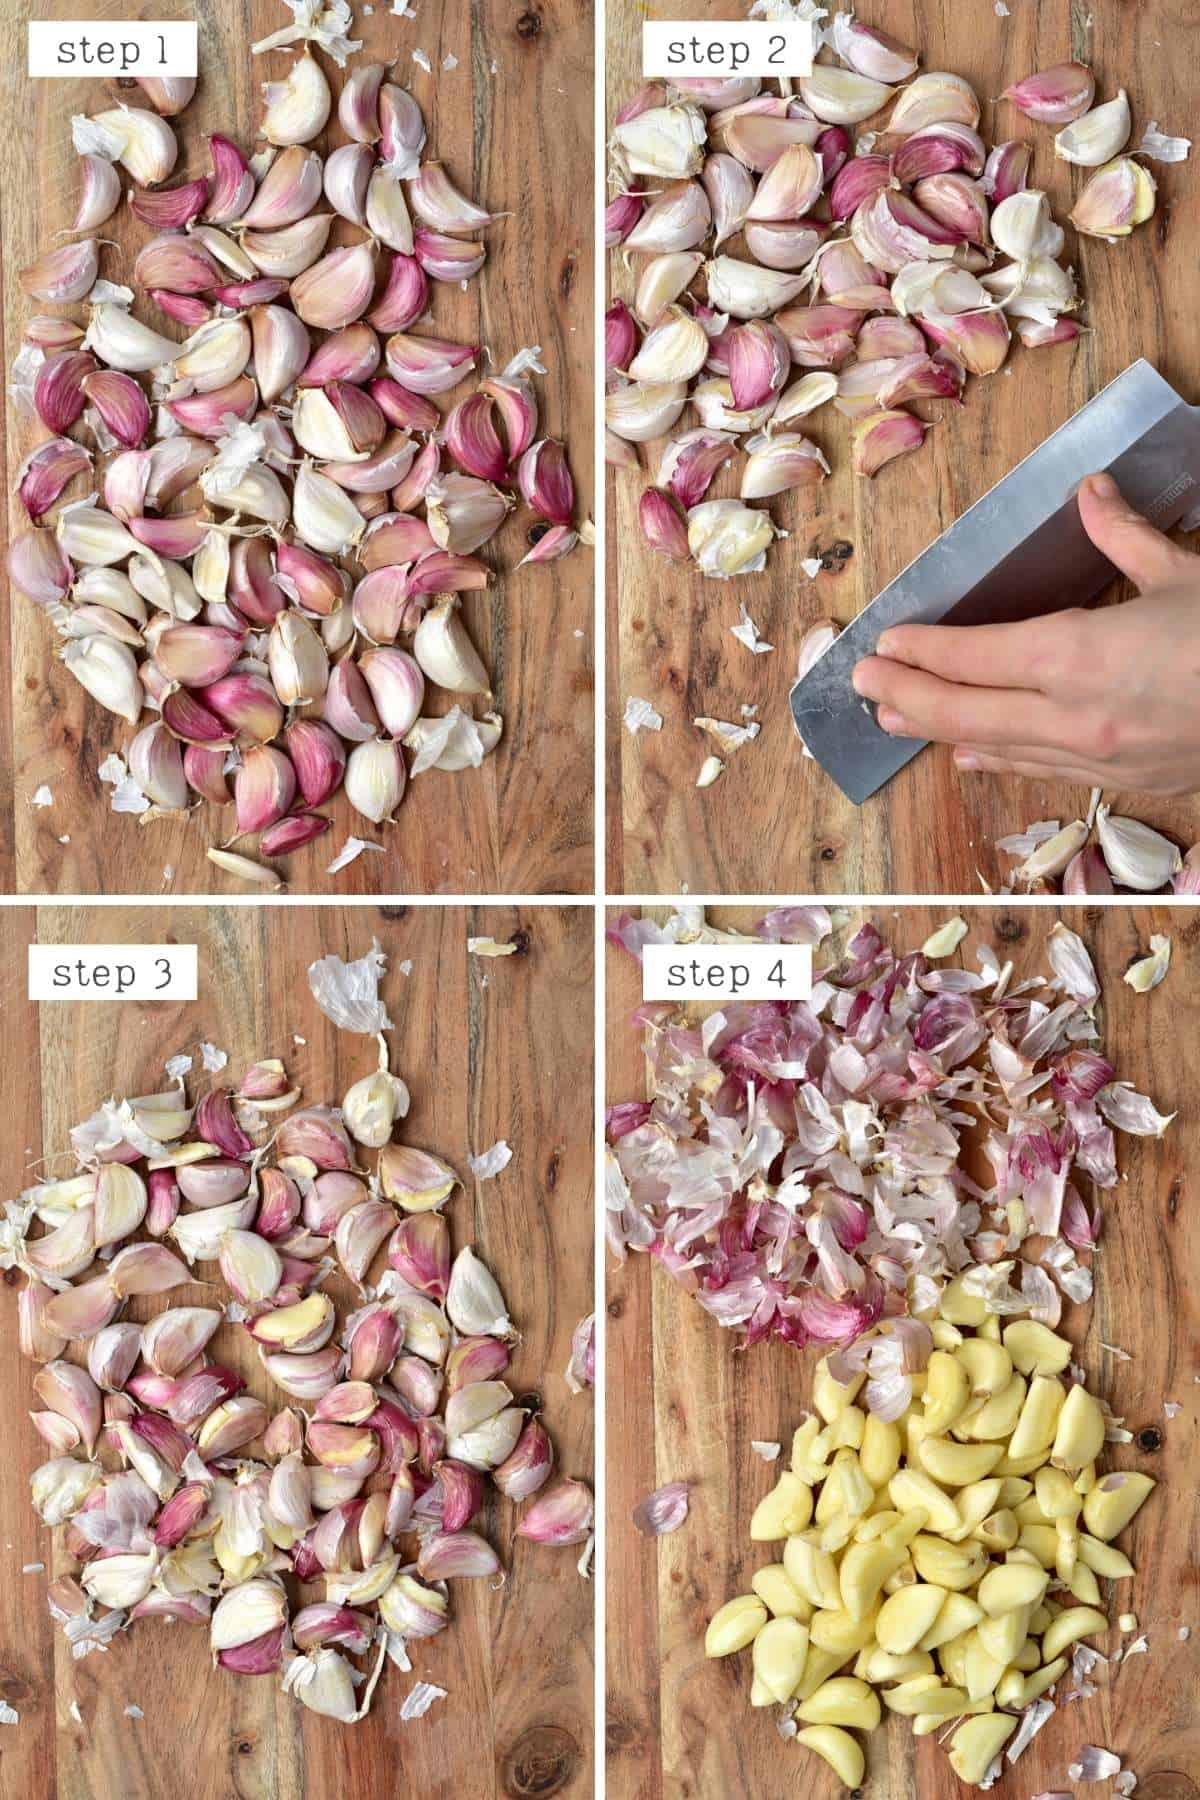
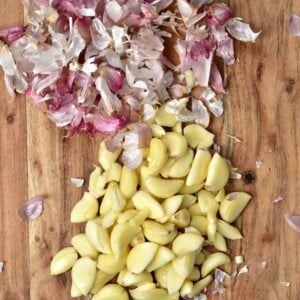
How To Separate the Garlic Head Into Cloves
Before doing most of the below methods, you’ll first want to separate your garlic head into cloves. This may seem tricky, but it’s simple. Just place the garlic on your cutting board and use both palms of your hand to push down firmly.
Note: I’ve found this actually works better if you have the root end facing upwards.
You can, optionally, then trim the root end and tip of each clove before trying each method. However, this isn’t necessary for the majority of methods.
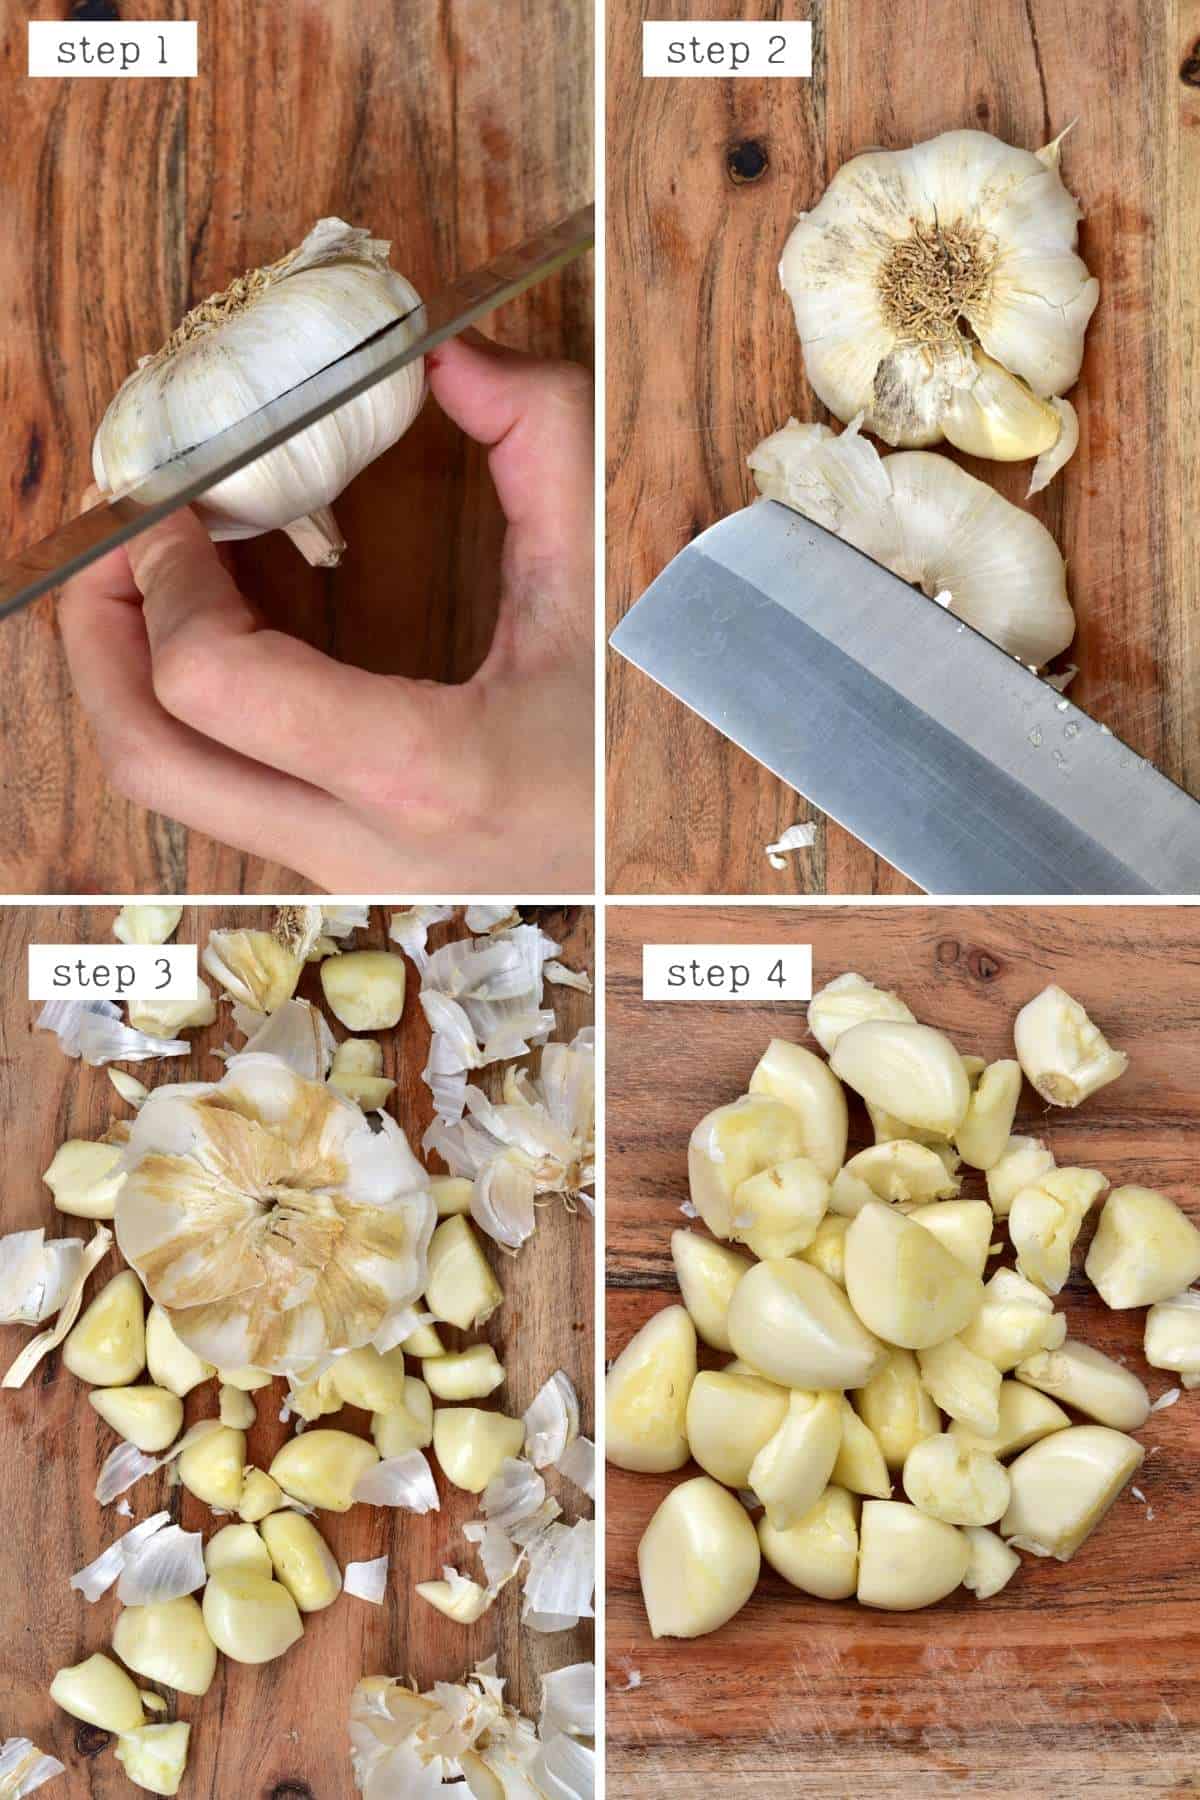
Method 1: The Traditional Knife Method
This method works with the whole clove but will be even easier with the root end chopped off.
- Place the clove on your cutting board. Place the flat part of a wide knife over it, pressing down with firm but gentle pressure (if you want to avoid squashing the clove entirely).
- You should hear the noise of the skin crunching. Then remove the knife, and the garlic skin should be easy to peel and remove.
Top Tips: You can also do this with the palm of your hand, but the knife will provide more leverage (and less stinky fingers). Also, avoid using ceramic knives, which may break in the process.
Final thoughts: Honestly, there’s a reason this method is a classic – it works. The problem is that it’s really the best option for just a few cloves. Any more than that, and it quickly becomes long and tiresome. It is also likely to crush the garlic, which isn’t great if you want to use full cloves for presentation – however if you’re going to chop/mince it, then it’s great.
Method 2: Cutting the Garlic Head In Half
This method works best if you don’t mind the cloves being chopped in half (i.e., if you plan on slicing/mincing/chopping it after peeling.)
- This ‘hack’ consists of simply chopping the garlic head in half through the middle of the cloves (at the ‘equator’).
- Once chopped, place the two halves, garlic side down, onto your chopping board and use the side of a wide knife to smash down onto the garlic firmly. The idea is that the cloves should then release, and you’ll be able to lift and remove all the skin.
The reality isn’t quite as simple, and this garlic peeling hack does take quite a bit of force, but it’s doable. However, I realized the reason why the garlic isn’t releasing as well as you’d hope is because of where it’s connected at the root. For that reason, I came up with a variation.
Variation: Slice root area
Using a sharp knife, you can first remove the root area and try this garlic peeling method. It becomes far easier. However, ultimately, it does take away the ‘ease’ factor of this ‘one step’ hack.
This is hard to do, and, as you can see in the image, I turned to a ‘scalpel’ type of blade – which arguably not everyone has just lying around.
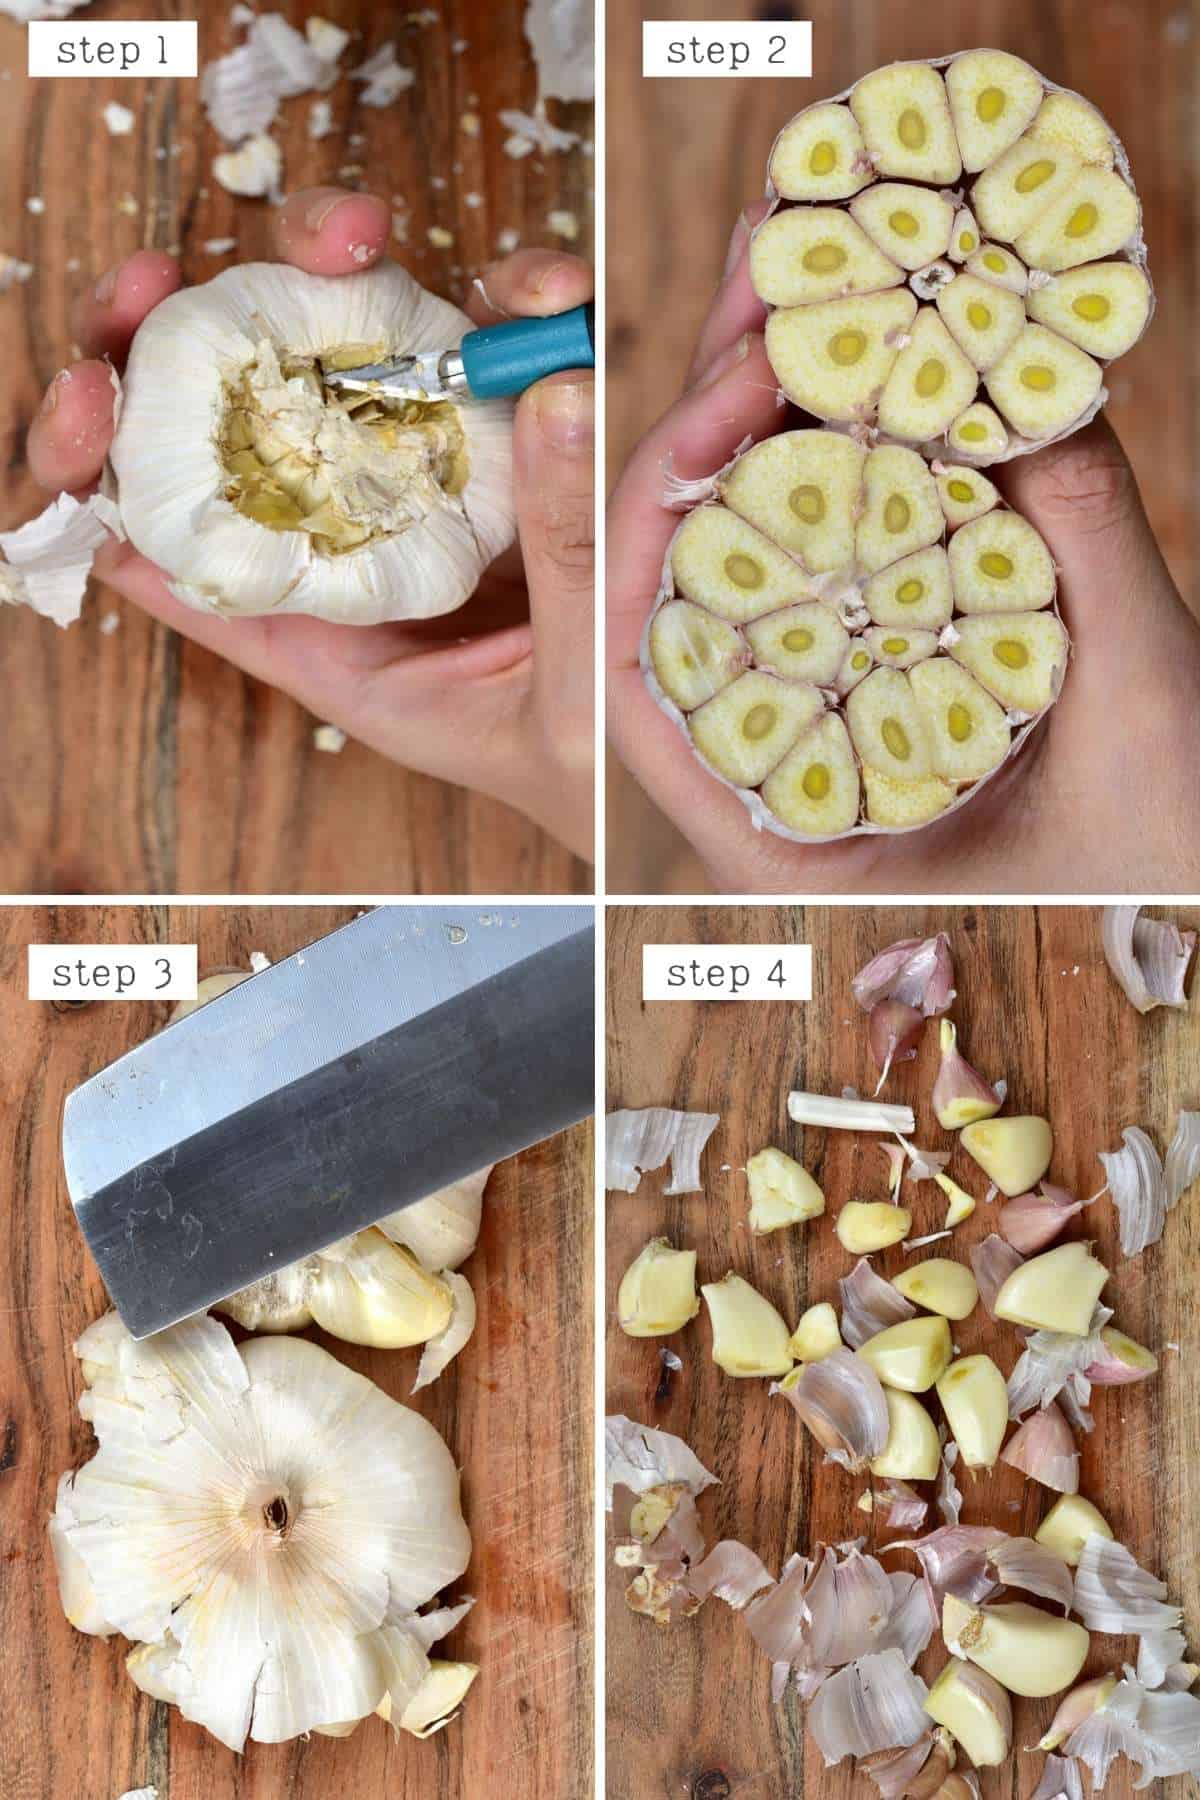
Final thoughts: I’m on the fence with this one. I like the method, especially if you have an entire head (or multiple heads) that you want to peel in one go and don’t mind them being chopped in half. However, it does take quite a bit of force to press down on the chopped head and actually get the cloves to release – so it’s not foolproof!
Method 3: Hot Water
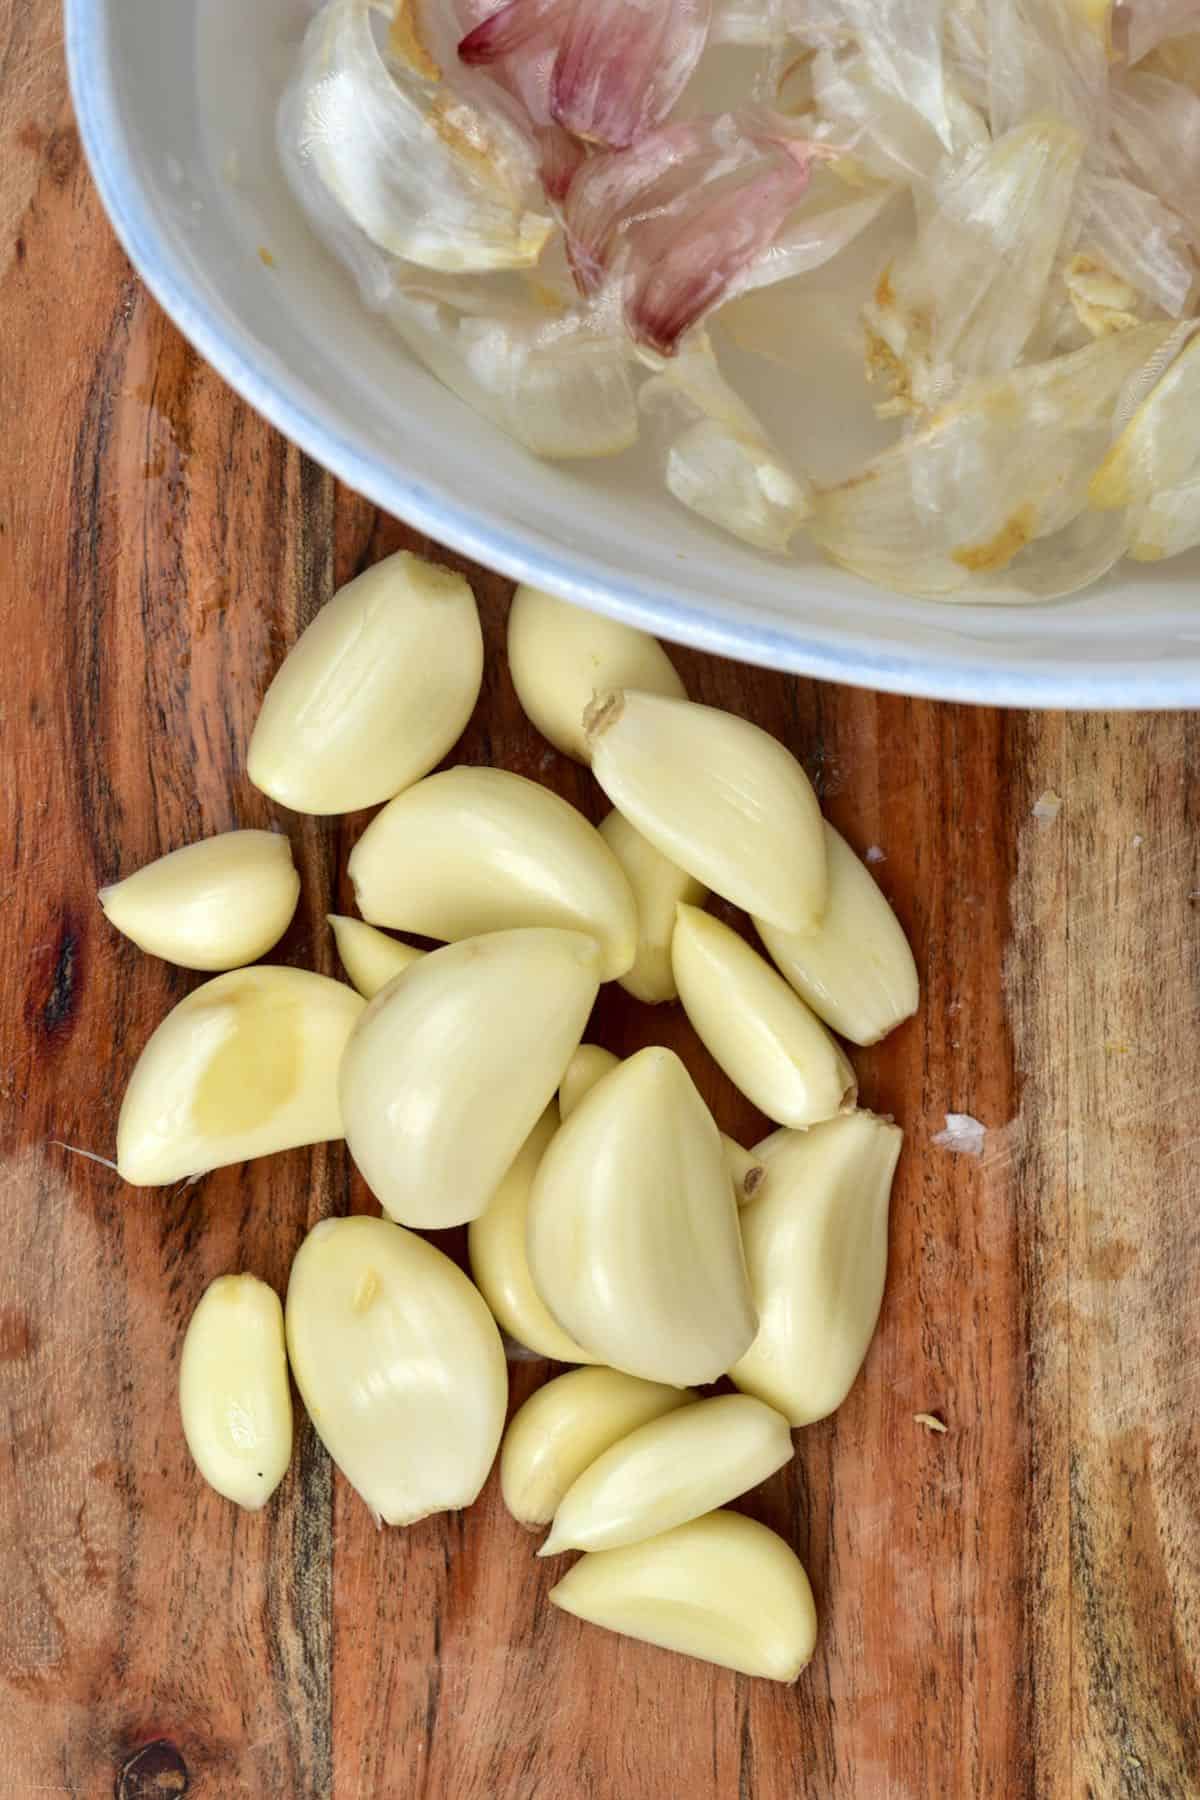
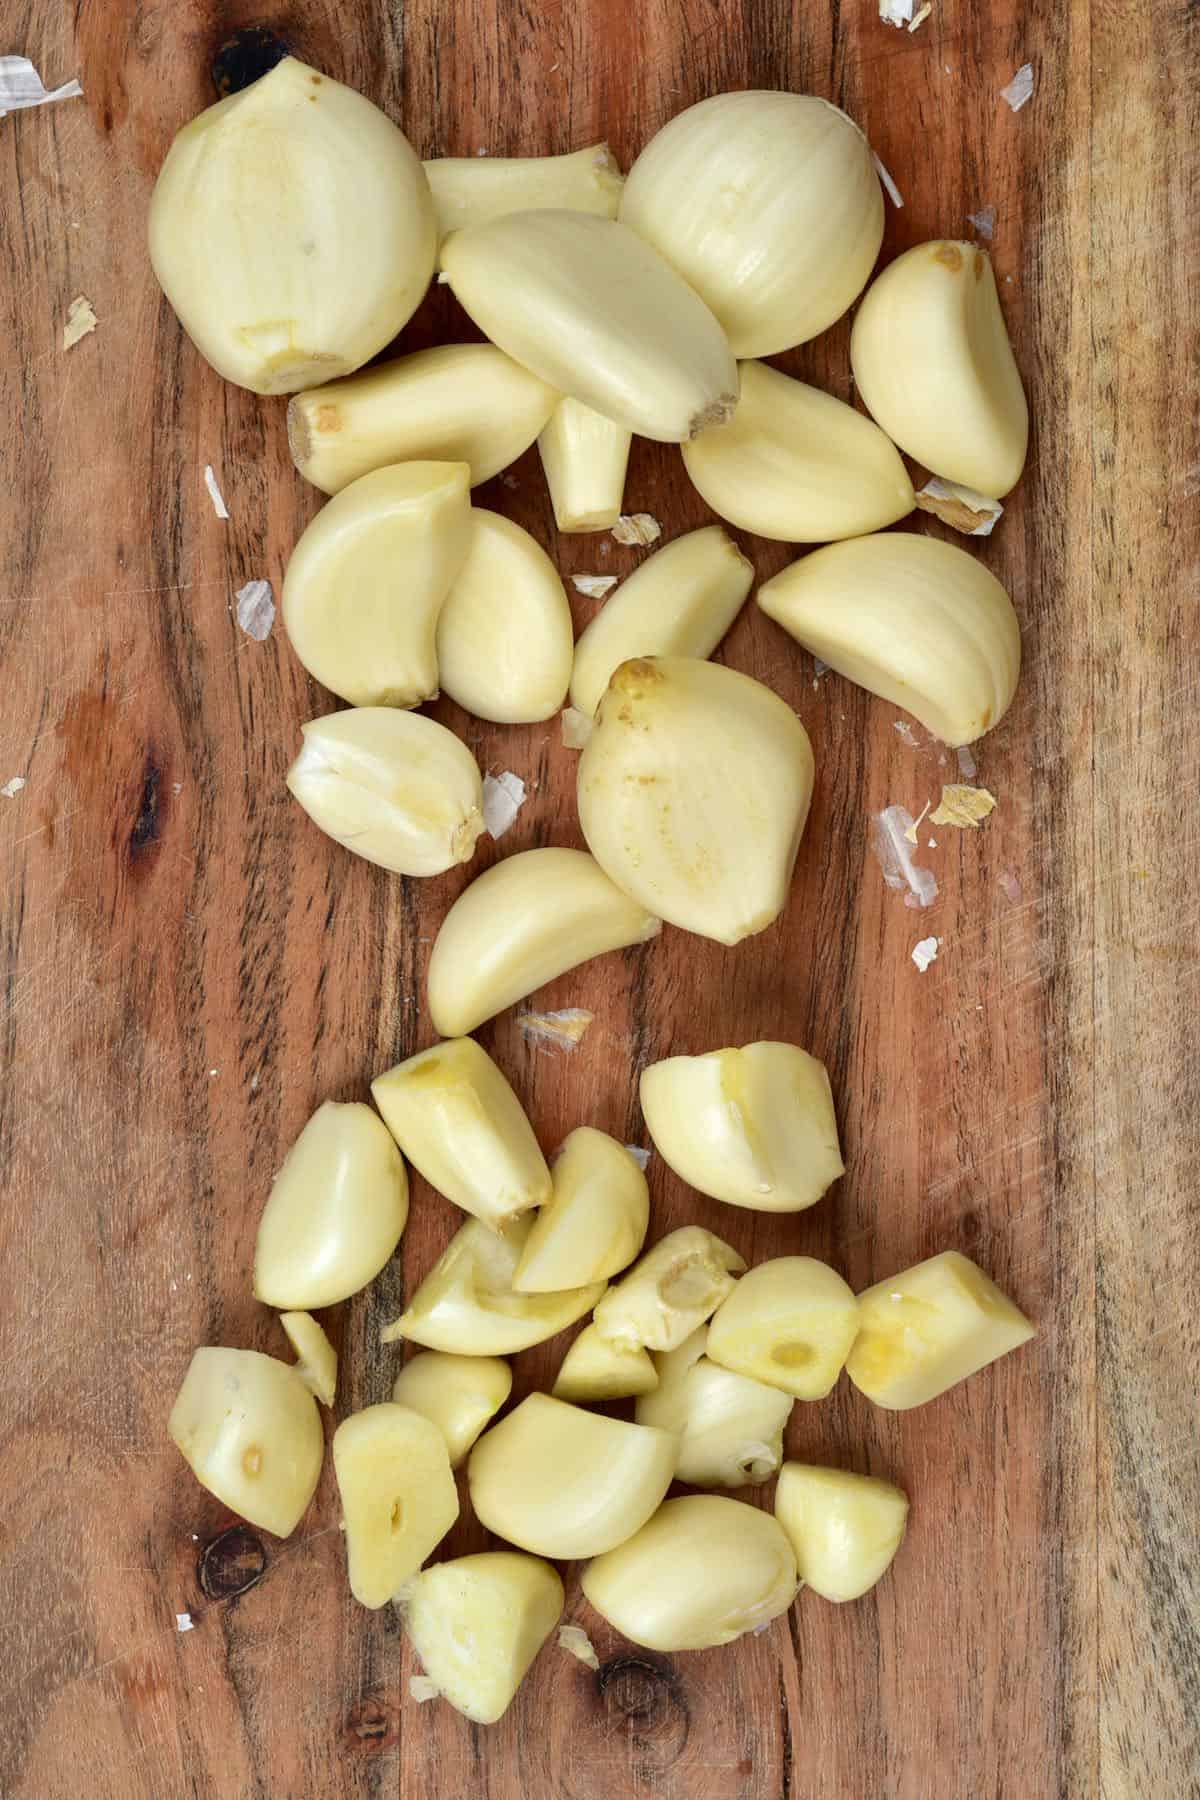
- Place the garlic cloves in a bowl and pour over very hot water.
- Allow them to soak for about 1 minute, and then remove the peels. At this point, they should come off very easily. It’s similar to blanching almonds, where the skin will steam and loosen in the water and slip away.
I advise leaving the garlic cloves in the water and doing this one at a time. That way, if there are any ‘stubborn’ cloves, they get the benefit of the extra soaking time.
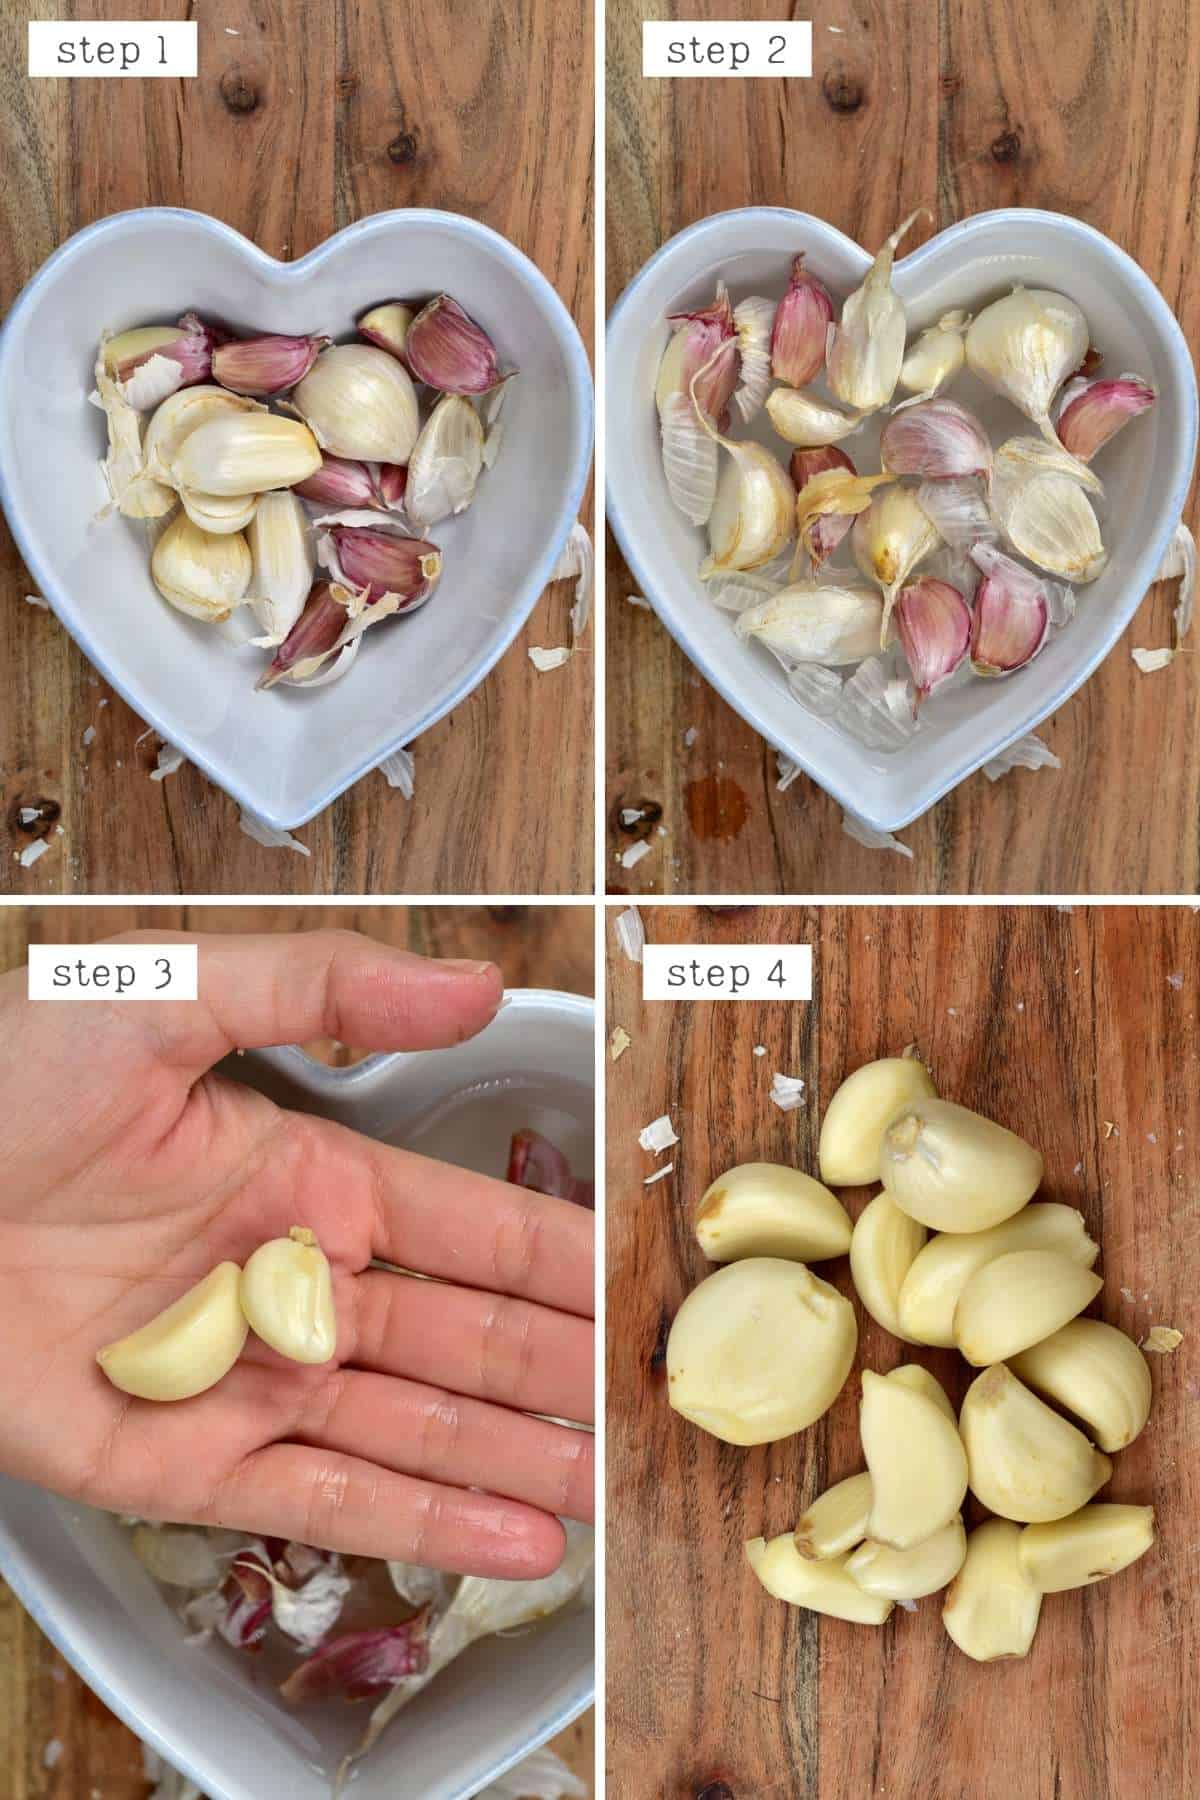
Final thoughts: I really like this method – especially if you want to keep the cloves whole for presentation. And as it’s unlikely you’re using the cloves raw, it doesn’t matter that they’re being heated slightly either. Obviously, the soaking time does amp up the time needed for this method but I still find it FAR quicker than relying on manually smashing each clove, and it’s hands-off prep time so that you can busy yourself with other things.
Method 4: The Jar Method / Shake Method
The idea of peeling garlic in a jar is that you place the garlic cloves into the jar and shake vigorously. The friction and slight ‘bruising’ of the garlic will cause the peel to loosen and remove it. So, let’s give it a go.
- I placed the cloves in my large glass jar. You want the container you’re using to be much larger than the amount of garlic you’re peeling. This is so that it has plenty of area and surfaces to shake around and bump, etc.
- Once inside, secure the lid and shake the jar vigorously up and down and side to side for 20-30 seconds. If you notice that it needs more time, shake for a further 10 seconds.
- Then, pour the cloves out onto the worktop, and the idea is that the peels should come off fairly easily. If there are any stubborn ones, place them back in the jar and repeat.
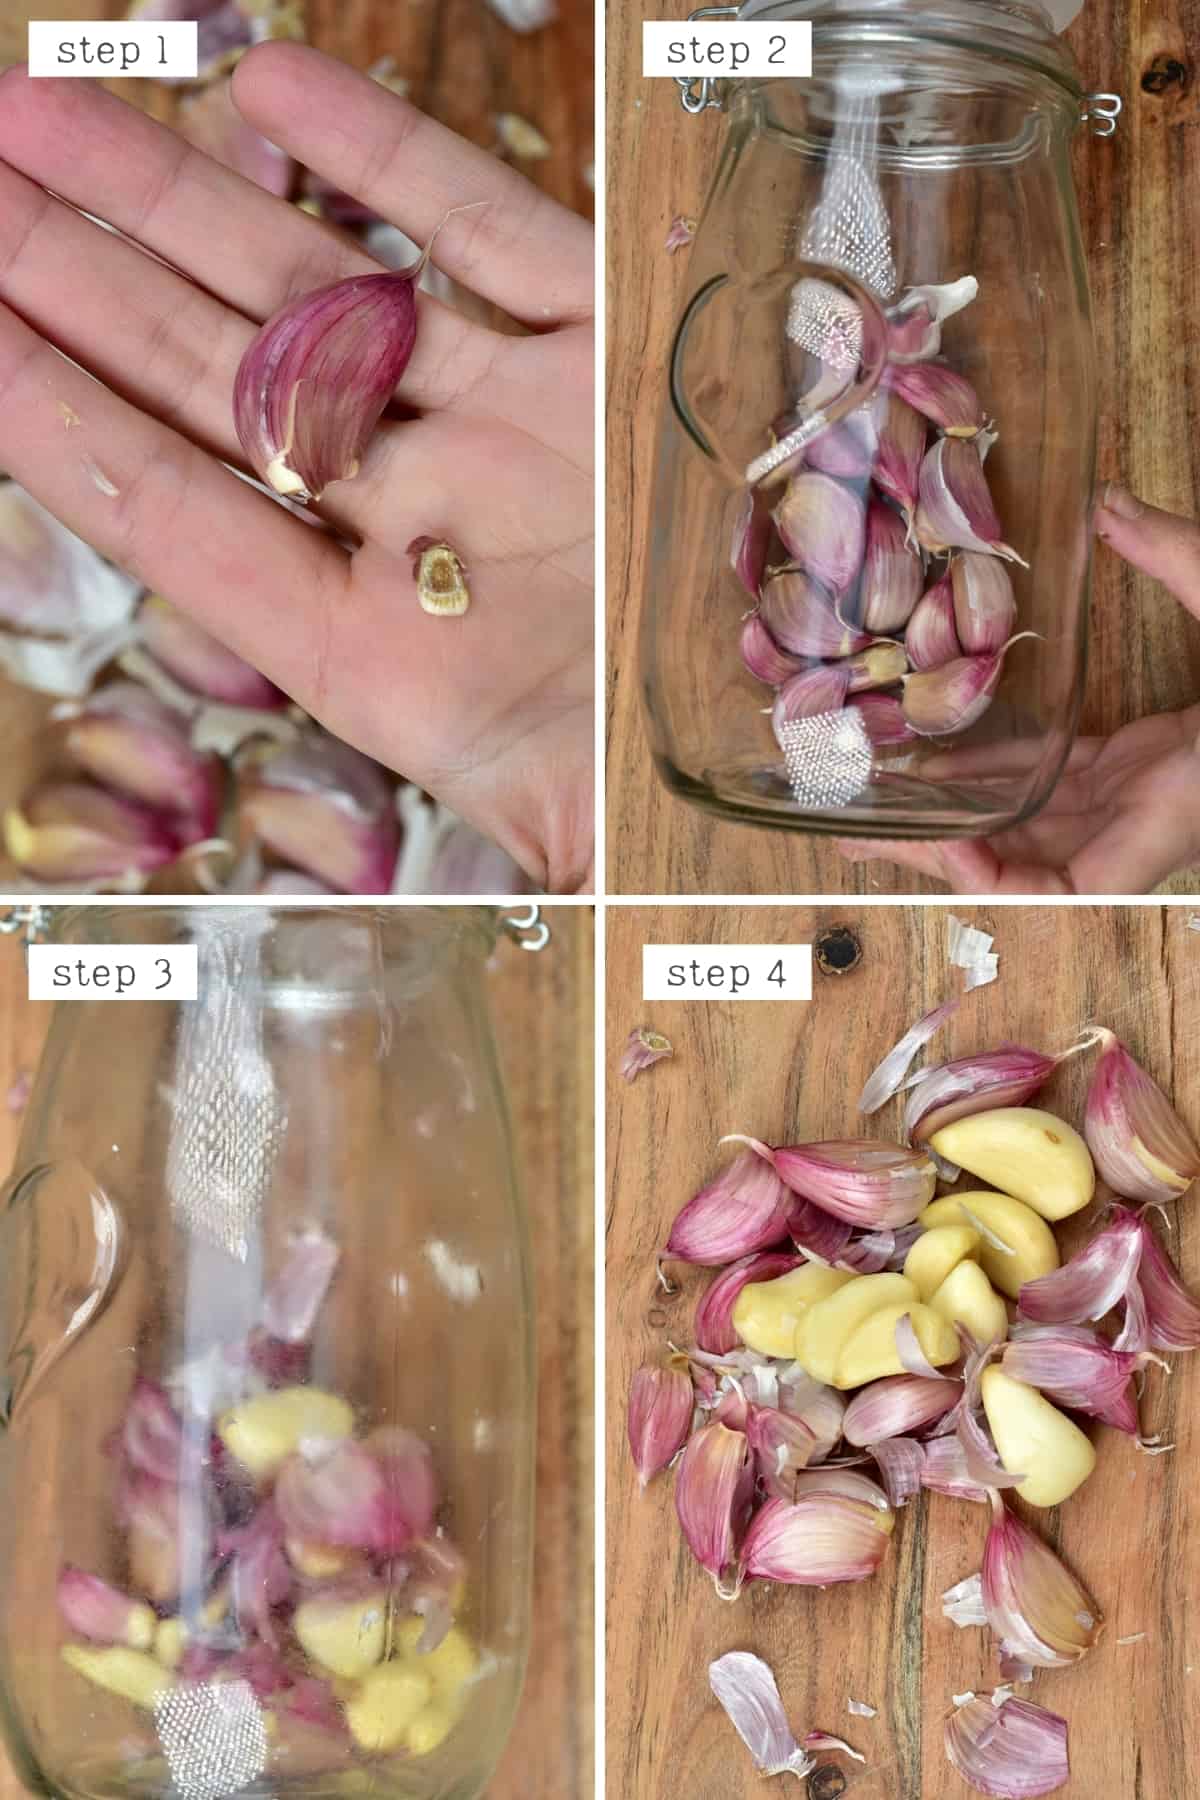
Note: I’ve seen some people attempt peeling garlic in a jar with the whole garlic head and achieve okay results. But separating the cloves will definitely provide a head-start.
- I wasn’t impressed with the original results, so I retried the method, first cutting off each clove’s ‘root,’ and it worked much better. But I can’t say as I’m massively impressed.
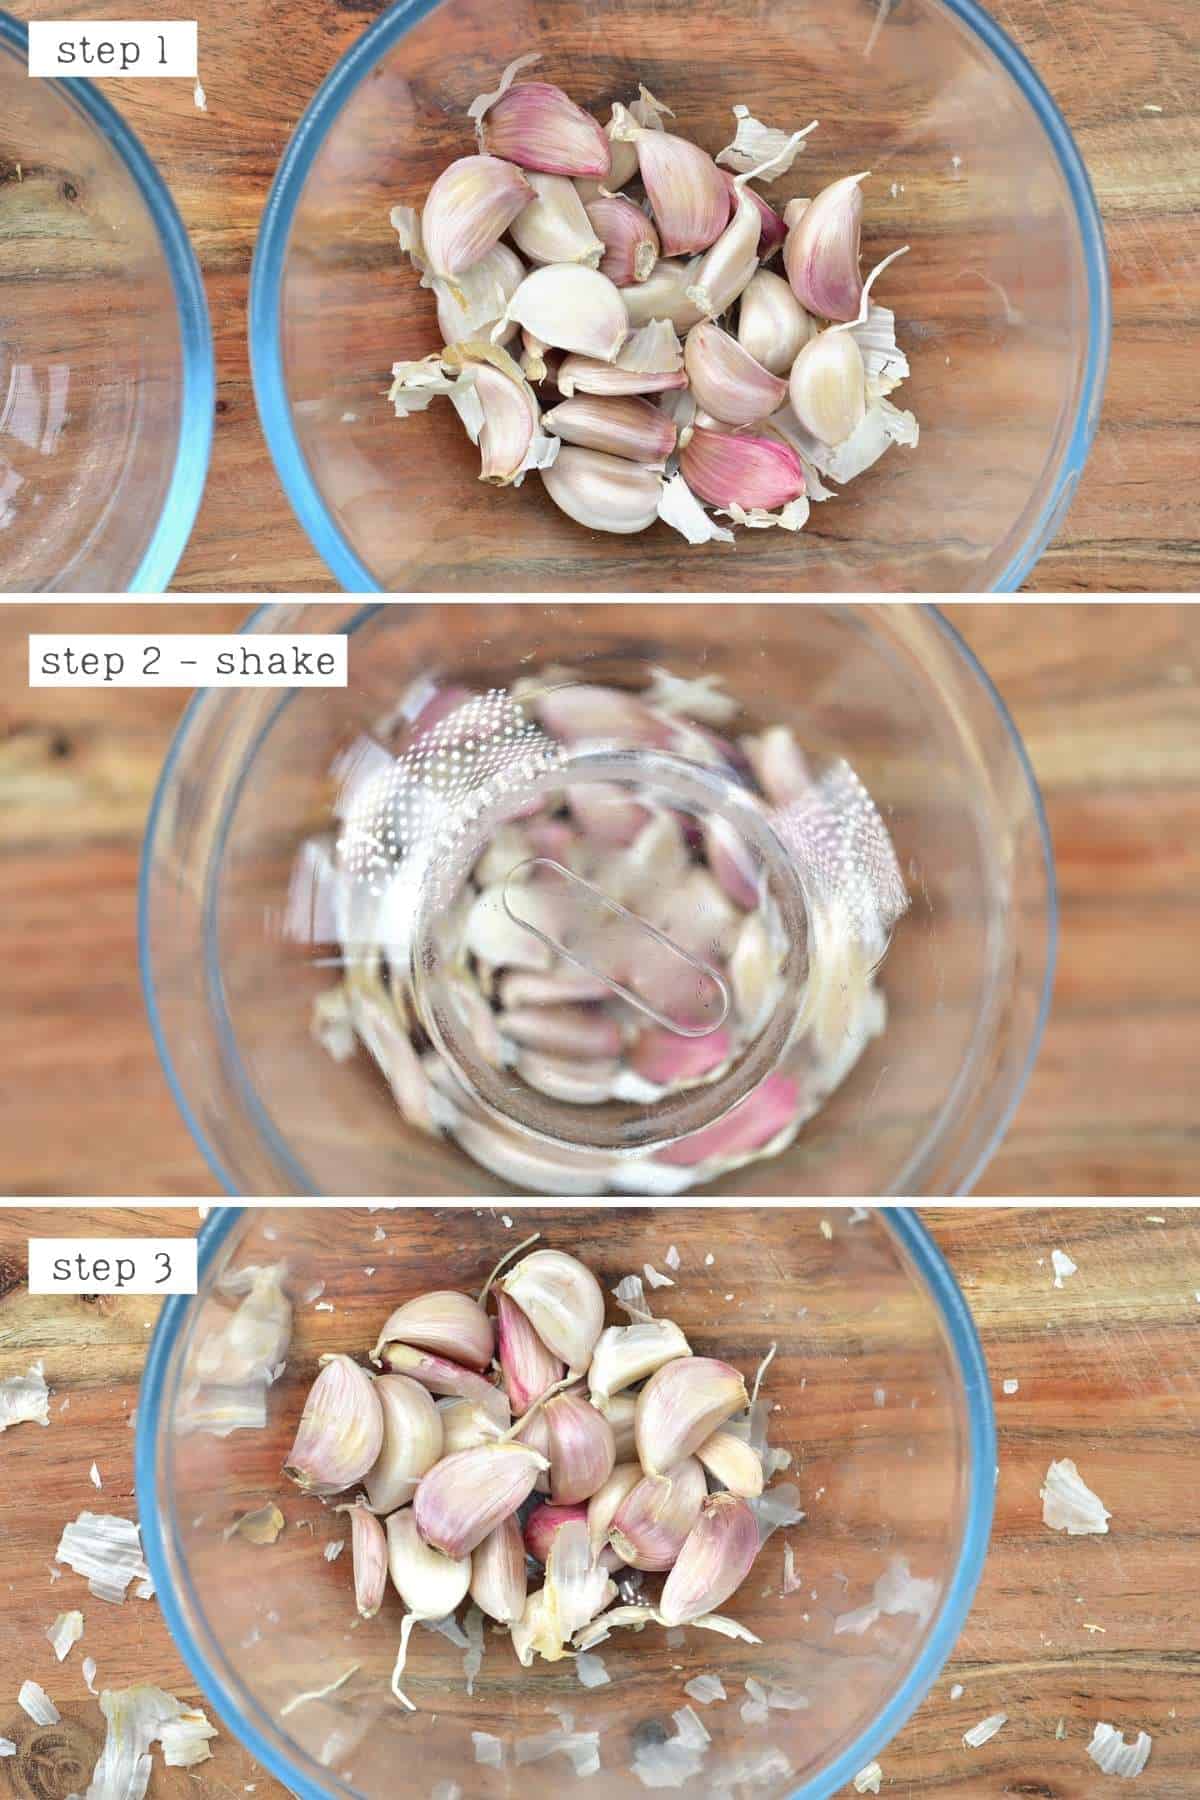
Variations
This garlic peeling trick can similarly be done using a large Tupperware container, bowl covered with a chopping board, or two large bowls (of the same size) that can be held together when shaking.
Top Tip: I would suggest avoiding plastic containers, though, as the garlic flavor can become infused in the plastic and will be difficult to remove.
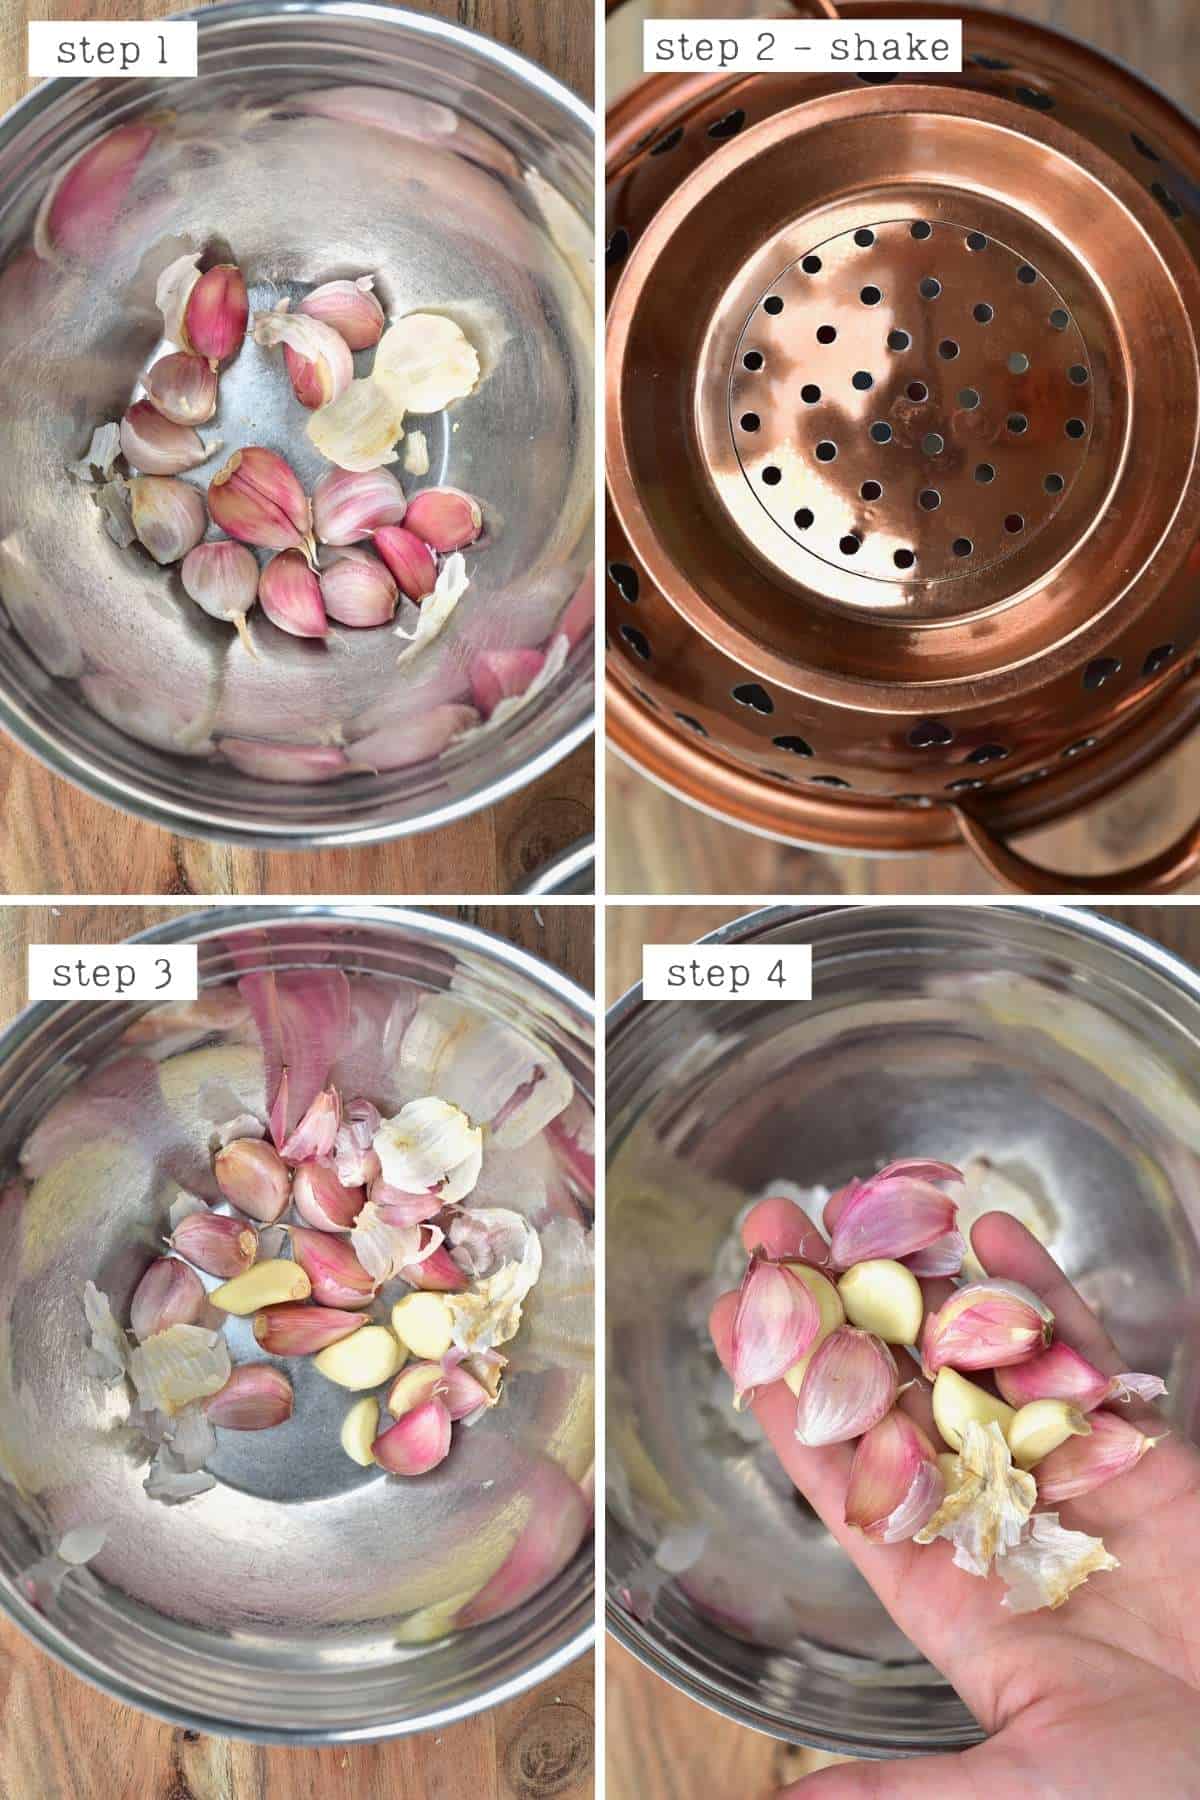
I tested this method with two metal bowls of similar size and two glass bowls of the same size. The method does work but needed extra effort to finish the peeling (similar to the jar method) – although the bowls definitely worked better.
Final Thoughts: I feel like I may be missing something here. This is a trick I’ve seen used countless times to peel garlic easily, and yet I just wasn’t that impressed. I tried it several times, with different garlic heads, jars, bowls, etc., and always achieved okay’ results. Some cloves would peel, and others wouldn’t. By the time you’re done shaking with as much force as you can muster to release the stubborn cloves, you’re just as well using the classic ‘smash’ method, which is less effort (but takes more time).
HOWEVER, this is a method I’ve seen work for multiple people, so feel free to experiment.
Top Tip: This method seems to work best with older garlic where the skin is already a little loose. Then the shaking allows it to just break and fall away from the cloves. It’s also best to use large amounts of garlic to smash into each other and help the process along.
Feel free to give this a go, though. If it does work for you, it’s a great method for when you want large quantities (like multiple heads of garlic) at one time.
Method 5: In The Microwave
There are a few different ways that I’ve seen people use a microwave to help quickly peel garlic. I tried what I thought may be the most effective.
- Add your garlic cloves to a microwave-safe bowl along with cold water and microwave for between 30-60 seconds.
- I checked mine at 30 seconds, and it was a no-go. I did it for a further 30 seconds, and the skin was able to be peeled off.
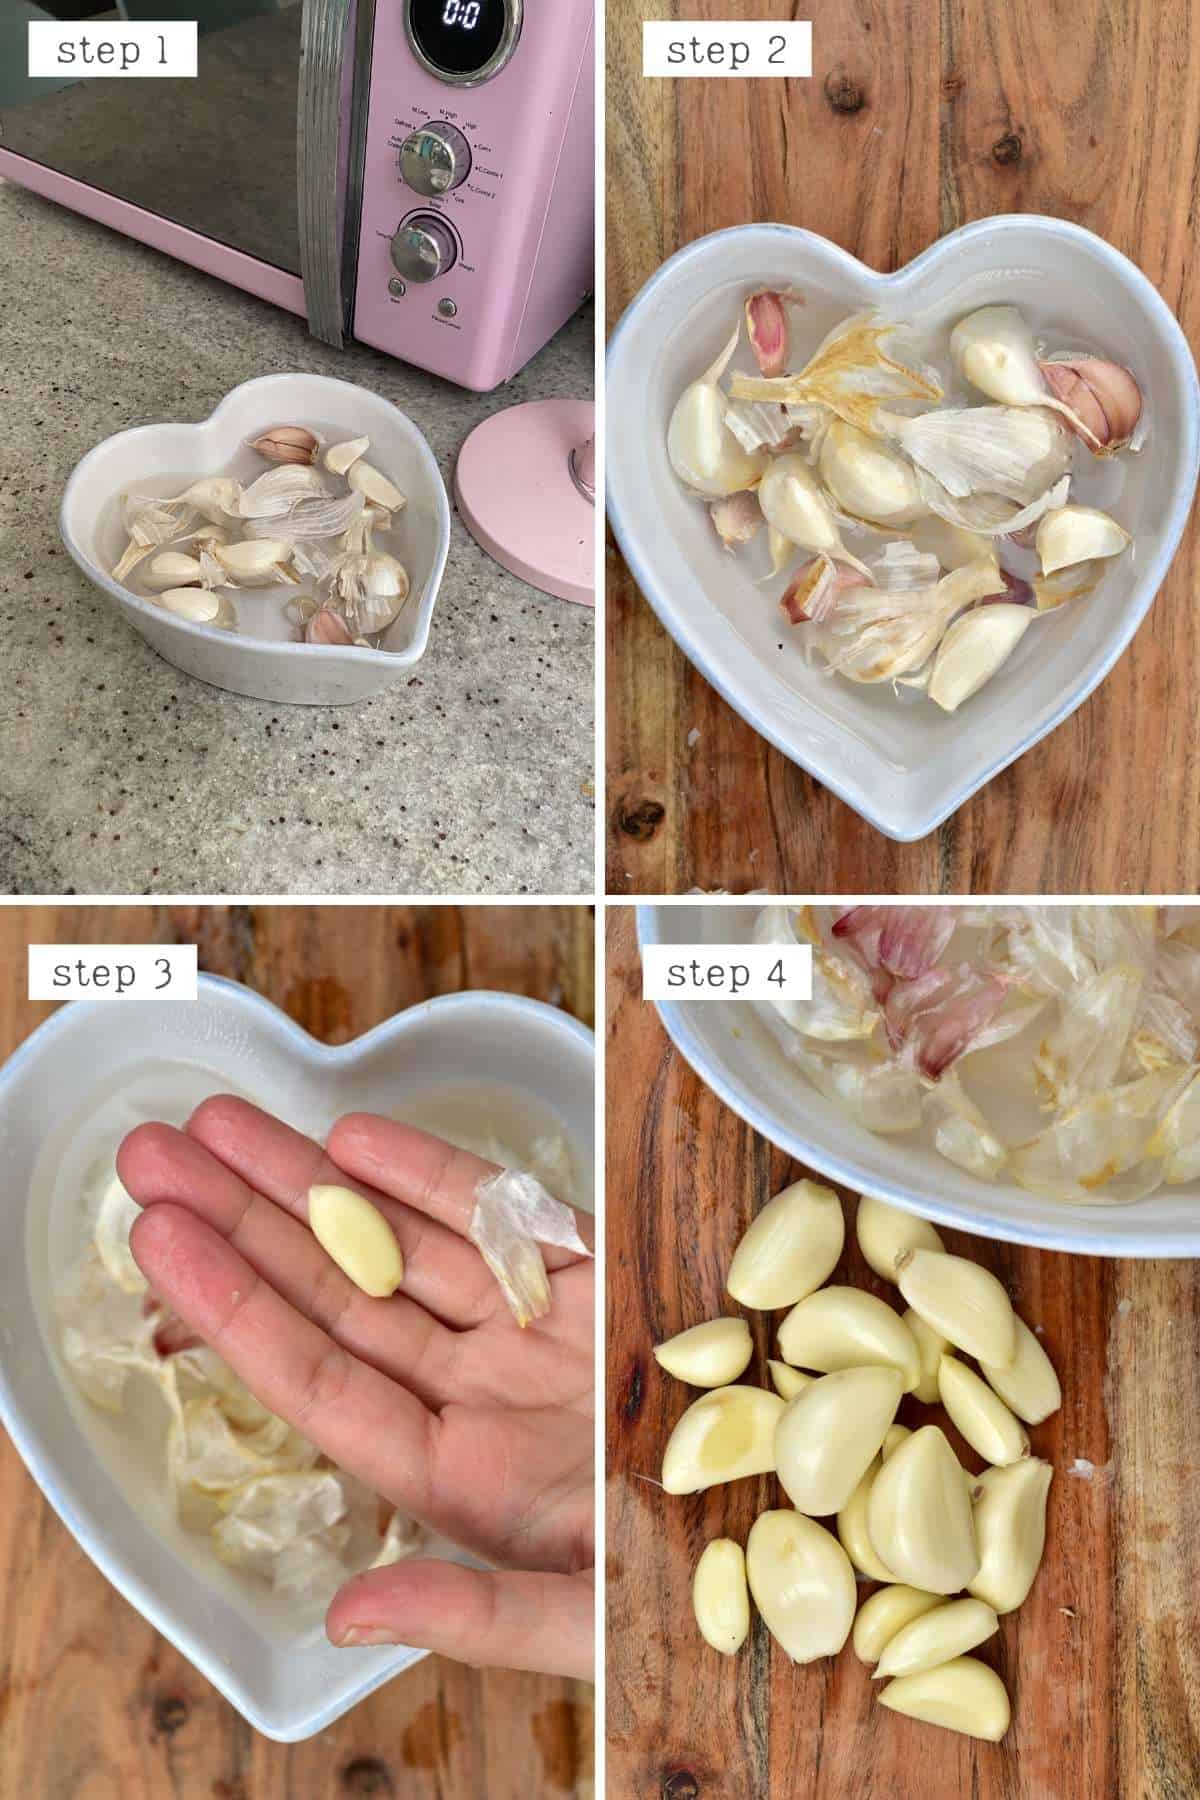
Final thoughts: Even when I could get the peel off, it definitely wasn’t as easy as I’d hoped, and this isn’t a method I would even bother to try again. The peels were slippery and annoying to handle, and it was more annoying than helpful.
Potential alternative microwave method:
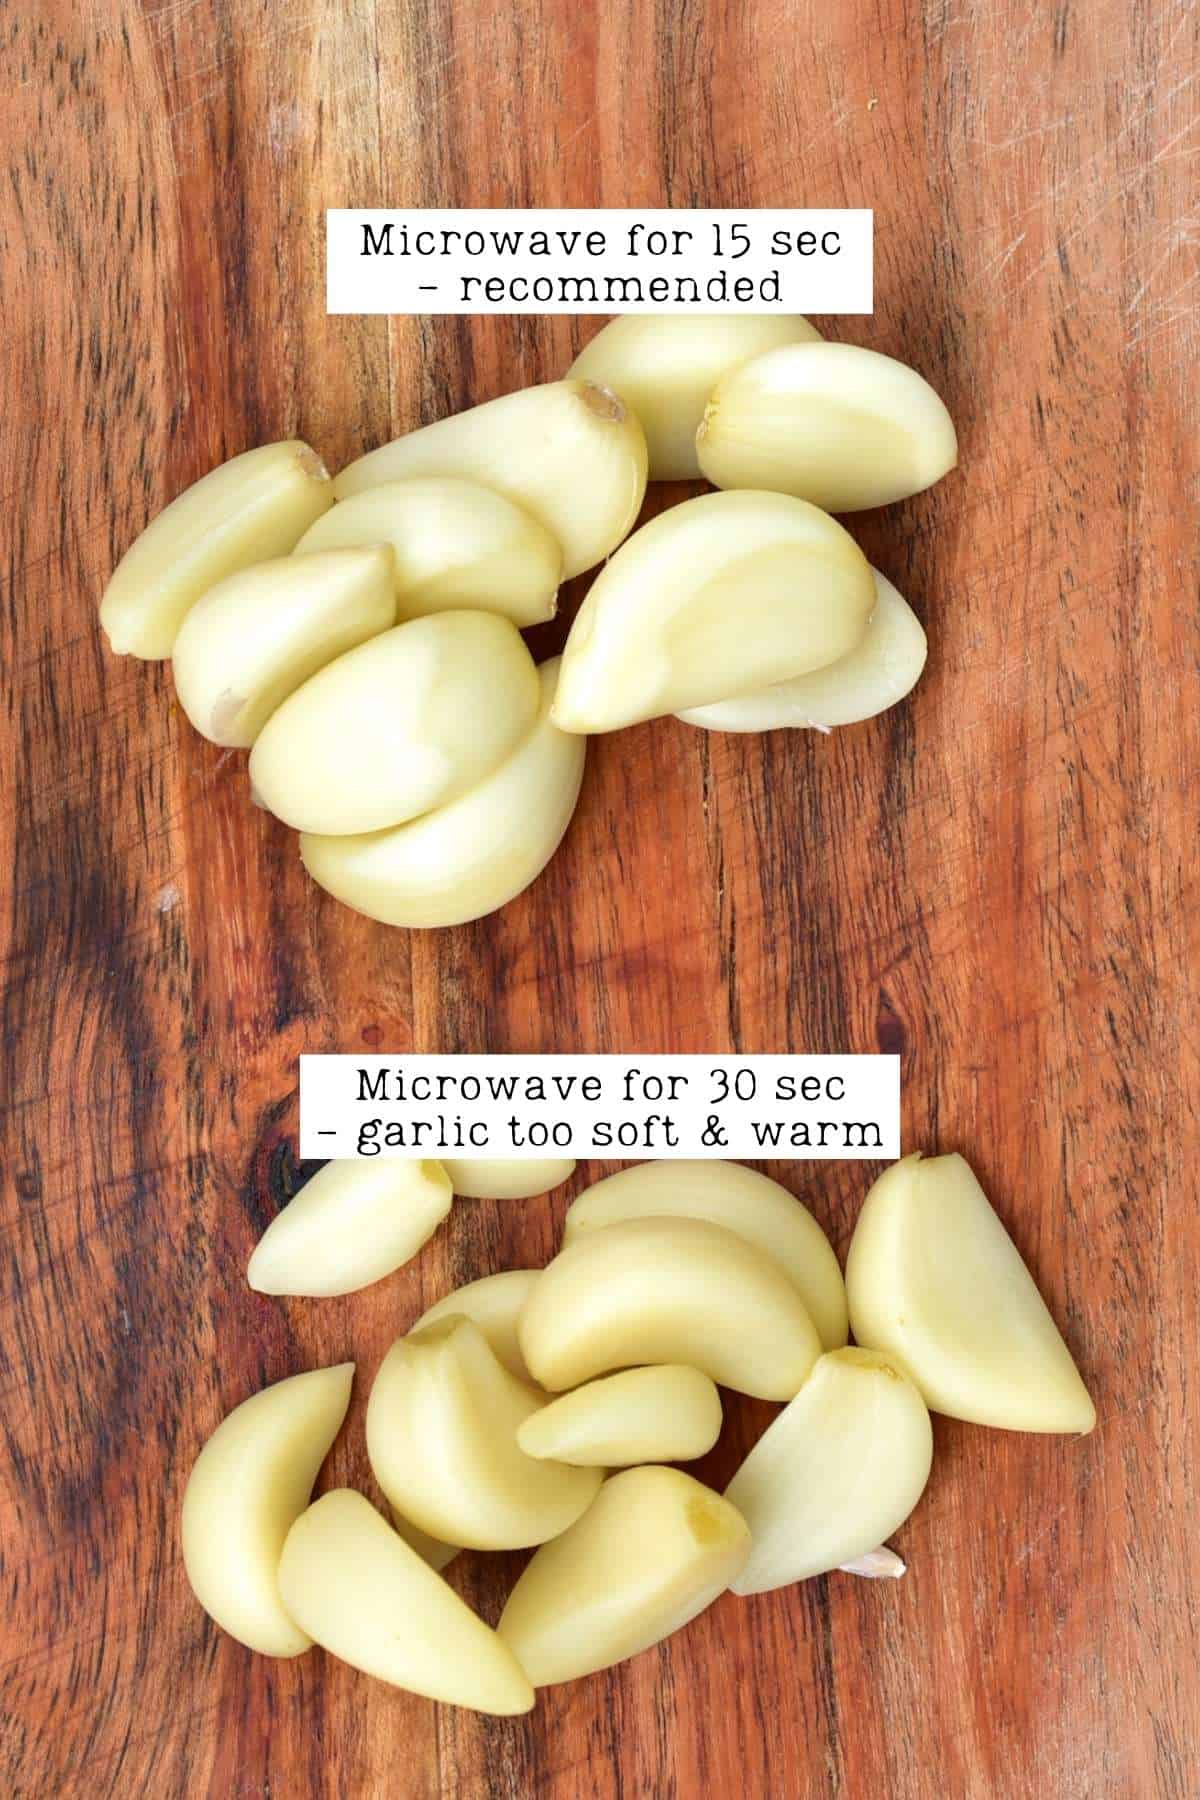
Wrap the entire garlic bulb or your individual cloves inside some damp paper towel and microwave for 15-20 seconds (15 for high-powered microwaves). Then remove it from the microwave, and rub lightly with the paper towel. The cloves should easily pop out of their skins.
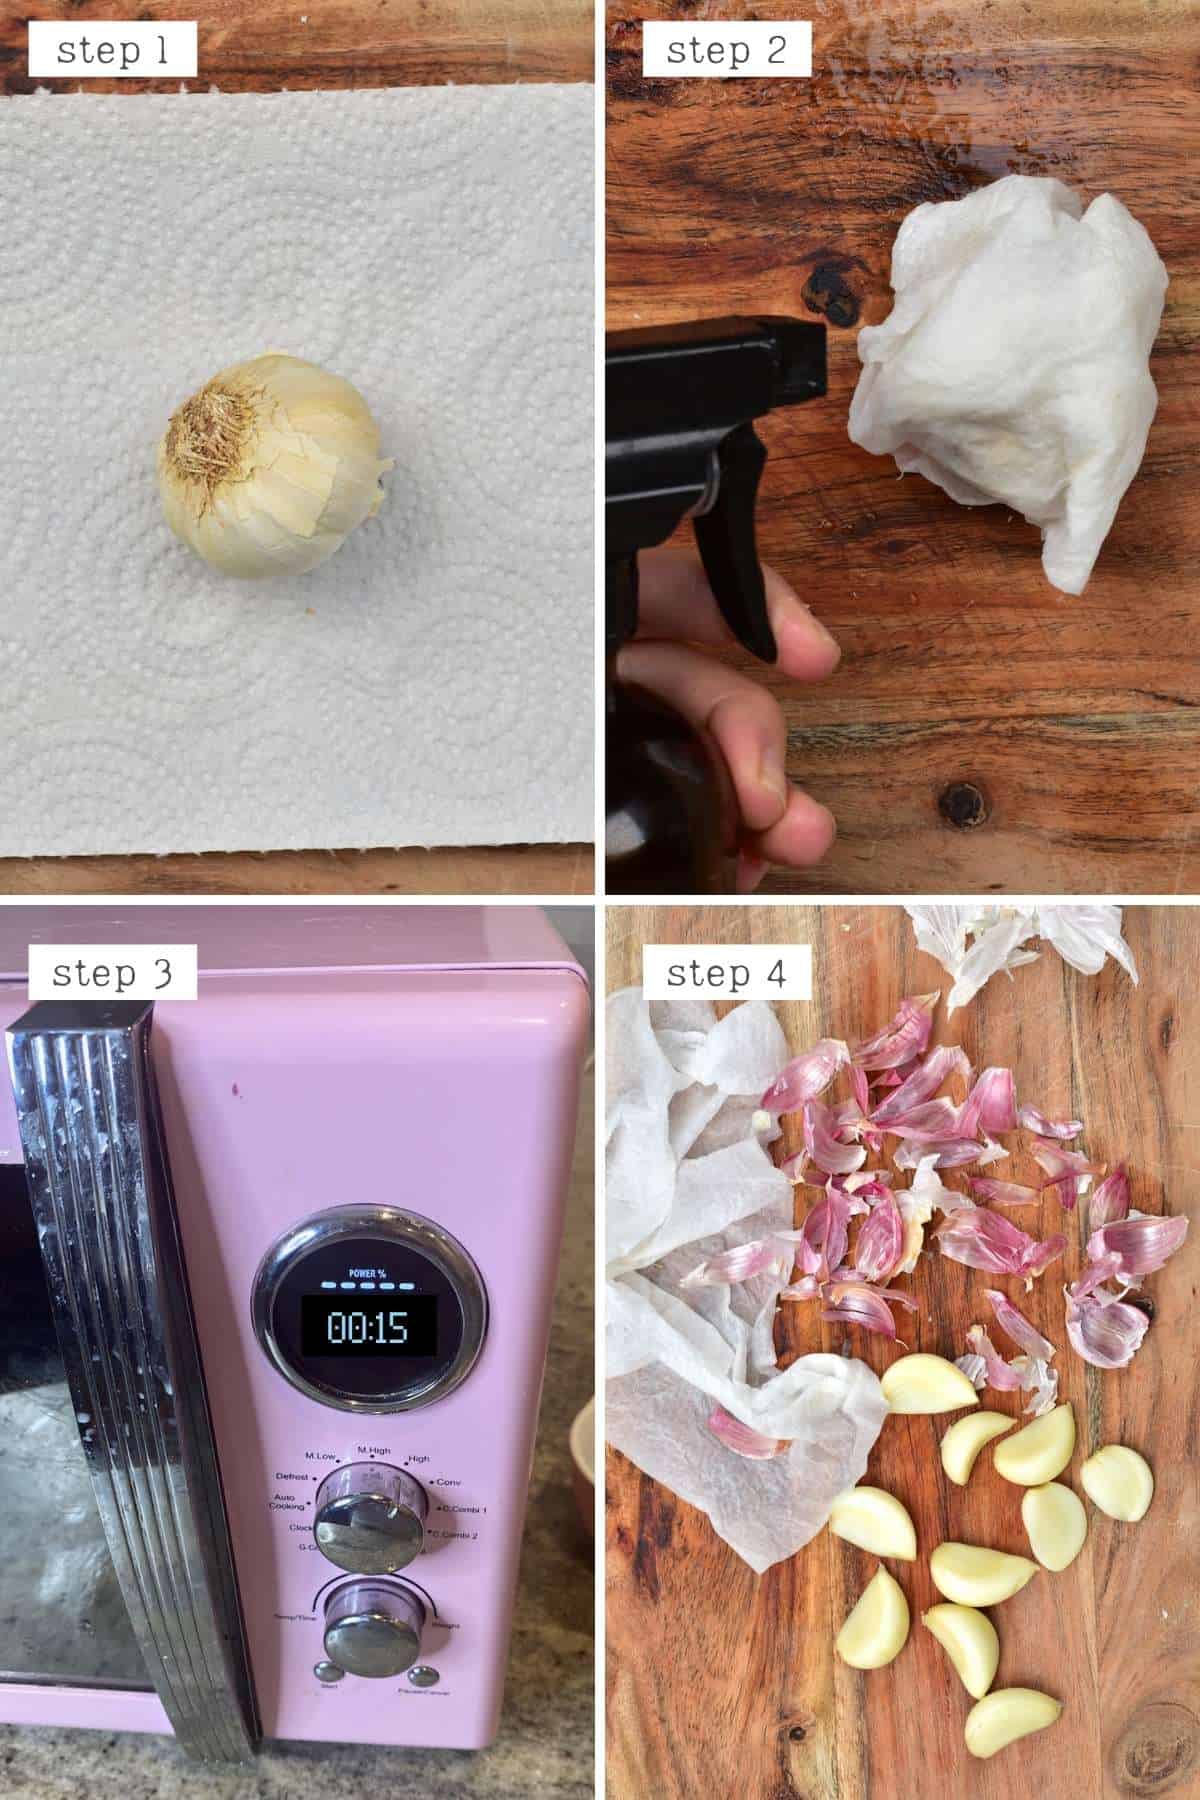
Final thoughts: This method works well and is one I’d definitely use again – just try not to heat the garlic too much. At 15 seconds the garlic was easy to peel and just a little warm. At 30 seconds, the garlic was also easy to peel (of course) but it was also very warm and starting to soften. For that reason, I suggest 15 seconds (or 20 if you have a low powered microwave).
Method 6: Remove With A Paring Knife
This is one of those ‘viral’ garlic hacks that made the rounds not too long ago, so obviously, I had to give it a try. Upon first inspection, the hack basically looks like someone inserts a sharp paring knife into the side of a garlic clove, gives it a slight twist, and pulls it out – easy peasy. Upon further inspection, though, it’s obviously not quite as simple.
In fact, it seems to rely on careful knife skills, placement of fingers, and specific twists/motions.
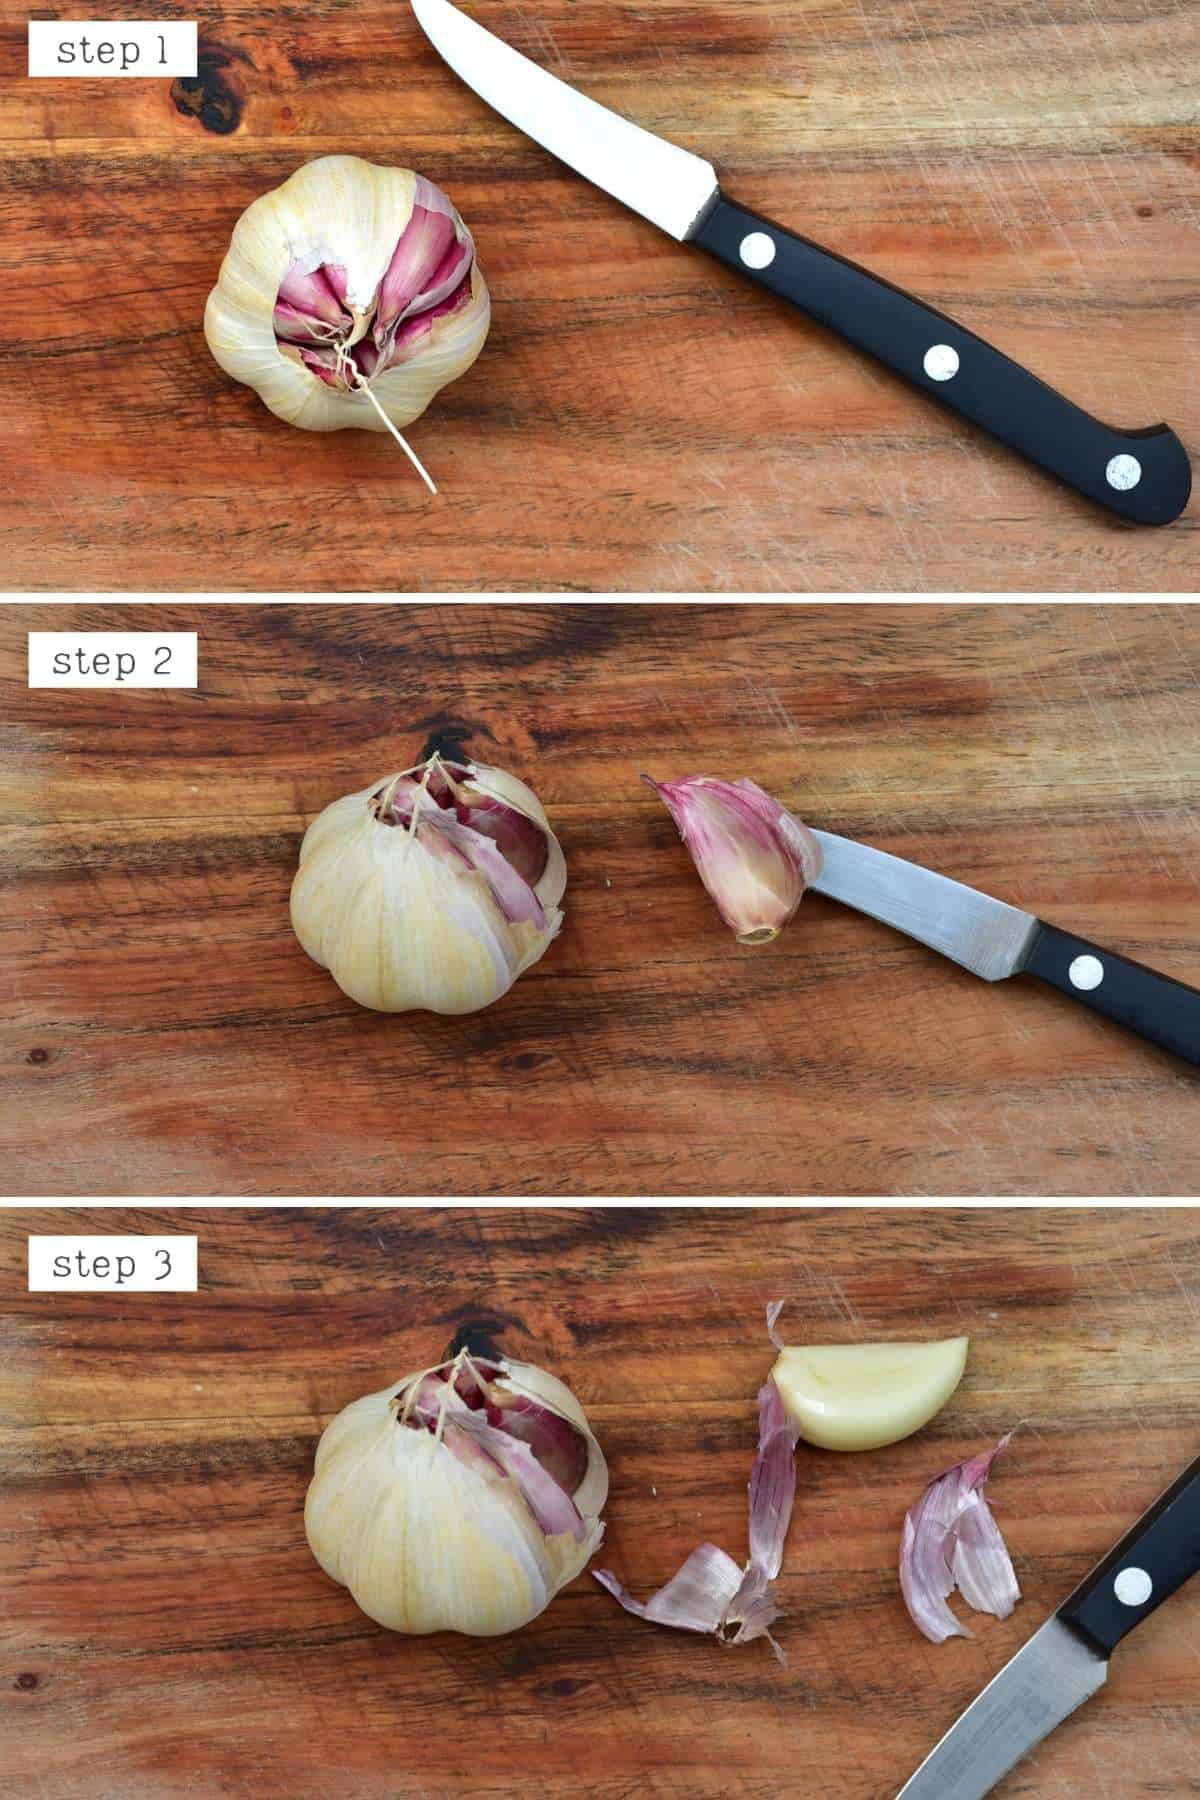
- First, hold the garlic head, root side up, and choose a sharp paring knife with a pointed tip.
- Using the knife, stab into a clove, on the left-hand side, near to where the curved outer part of the clove end (and the flat part begins).
- Now, you need to do some wiggling/ twisting. First, do a firm twist with your knife to try to loosen the clove from where it is attached to the root. Then continue to gently shake to loosen it from its skin – and pull. The clove should emerge from the head – skin-free.
- After the first clove is removed, I find it easiest to use a finger to hold onto the other side of the clove I’m trying to remove, holding it in place and stopping the clove from breaking in half when twisting the knife.
Top Tip: This method is easiest when you first sever the section where the cloves are attached to the garlic head root. However, this takes time, and even the sharpest knife can struggle. As with a previous method, I do this with a Stanley knife/scalpel – so, not great. It’s also a safety hazard, and no-one needs to risk stitches for some garlic!
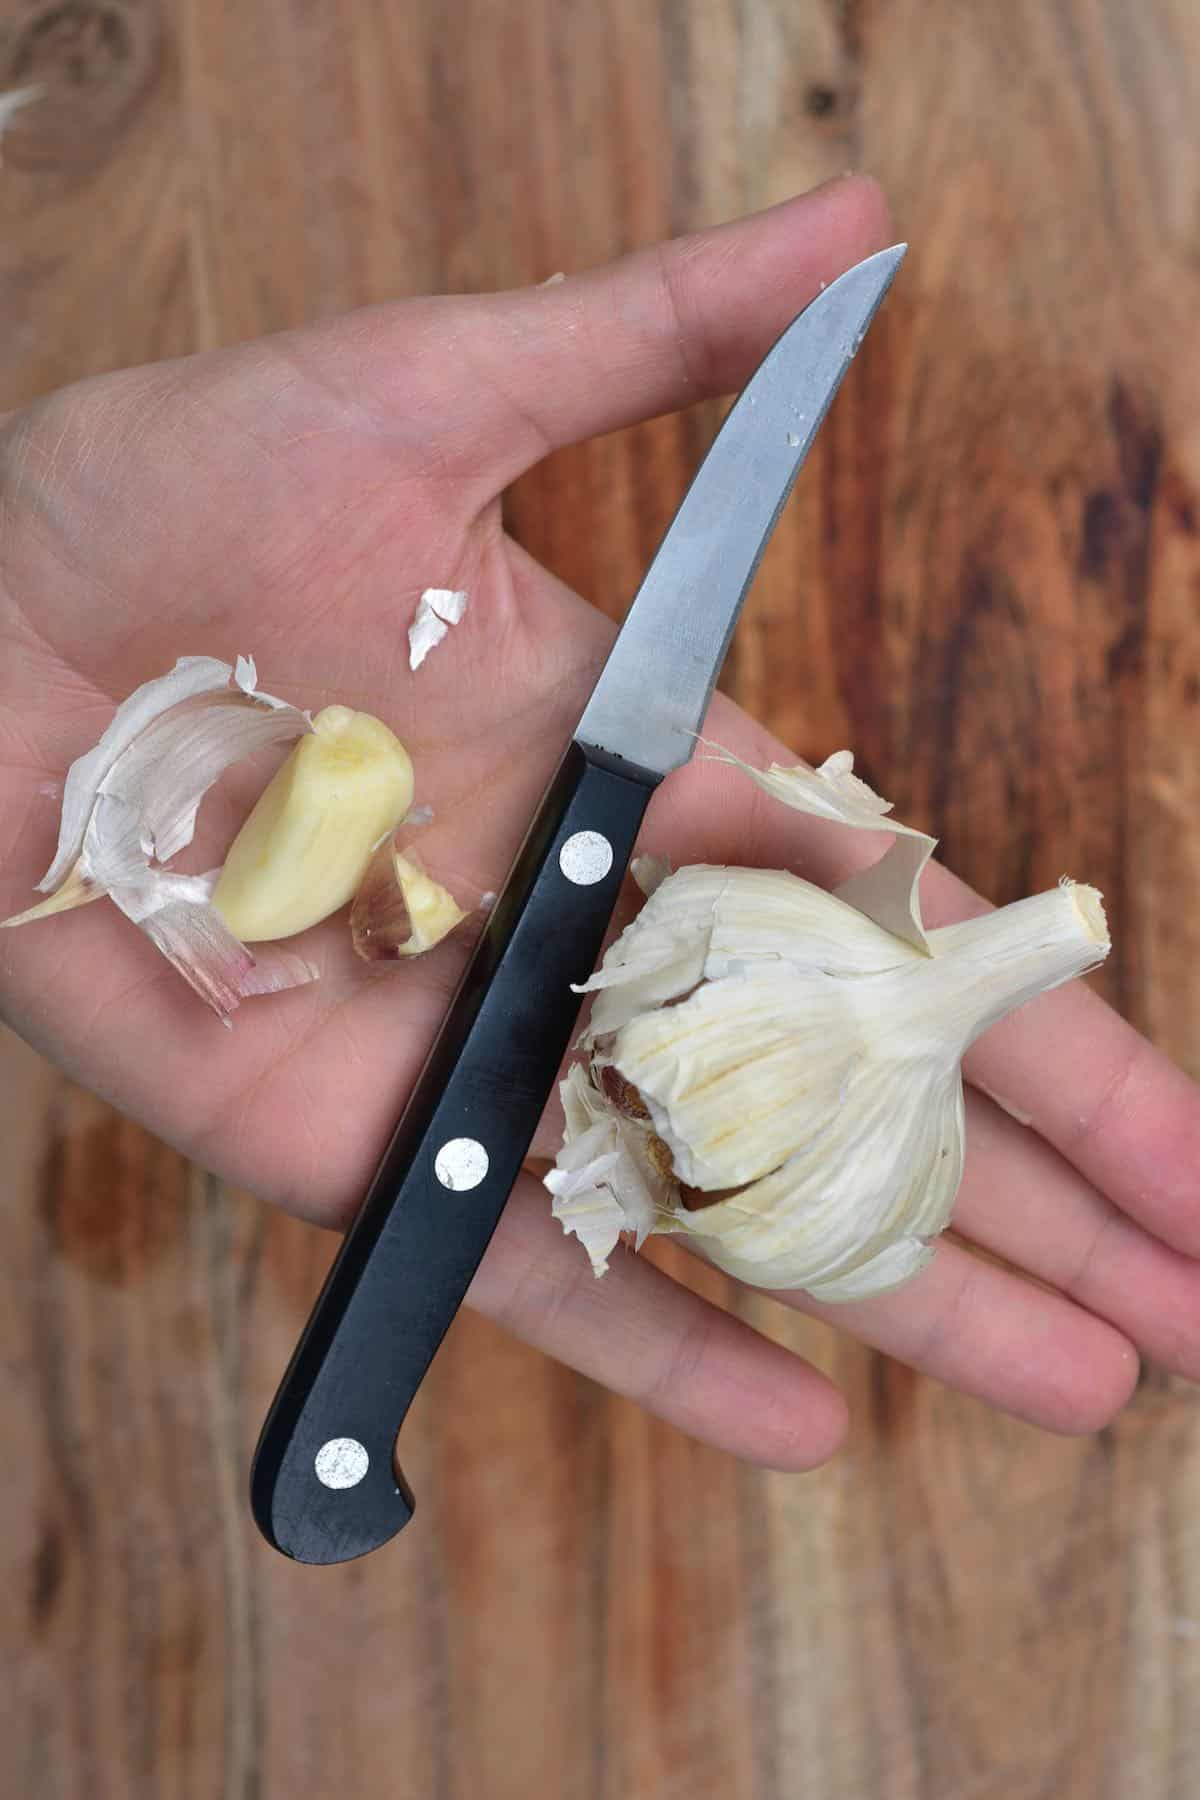
Final thoughts: This method DOES work; it just requires practice to actually learn the correct method to make this work (almost) every time – and even then you’ll get the occasional dud. So I suppose it all depends on if you’re happy to put in the time to learn the method. It’s definitely not the fastest way to peel garlic from the get-go. I find this method works best when you only need a few cloves – which you can get directly from the head, no separating required.
BONUS METHOD: Don’t peel it
Yes, you read that right. If you have a garlic press, you can get away with not peeling the garlic clove at all before mincing it. Just press the cloves in the press, skin and all. You can then remove the peel from the press afterward.
The downside of this method is that it only produces minced garlic, and the yield is less than if you were to peel it first, as some stay stuck in the press with the peel. This can be minimized by peeling just a strip of the skin from the clove and placing that part face-down in the press.
This method is best if you only need a small amount of garlic.
Finally: Using a silicone tube
This is one I haven’t tried as I wanted to use ‘tool-free’ methods; however, it is something I’ve seen a few times online. I’ve decided to mention this method because if you have a silicone mat in your house, you can avoid buying a new gadget. Just place your cloves on the silicone mat, fold over the mat and rub back and forth. The friction should cause the peel to come off the cloves, and it takes a firm but not ‘annoying’ amount of pressure.
Conclusion
Okay, so after peeling, hacking, and microwaving my way to discovering the easiest way to peel garlic, the truth is that I still prefer the traditional ‘smashing’ method (method 1) if needing a smaller amount of cloves. For a larger amount of cloves, I’m tempted to continue to use the hot water method (method 3) or the microwave method (when wrapped in a damp paper towel, not in a bowl), which worked well.
I think further experimentation needs to be done with the shaking method because so many people seem to swear by it, but I don’t see the fuss!
Let me know in the comments what your favorite way of peeling garlic is!
FAQs
How long does peeled garlic last?
If you don’t need to use all of your peeled garlic in one go, then no worries. Store it in a ziplock bag or glass container for between 3-5 days in the refrigerator.
The garlic cloves can also be frozen whole in an airtight container for up to 6 months. However, the texture may change upon thawing. You can see more freezing tips here.
Easy Garlic Conversions
When trying to work out how many cloves I need for a recipe, I use the following conversions.
One clove of garlic is equal to:
- 1/2 teaspoon of minced garlic
- 1 teaspoon of chopped garlic
What To Do Next?
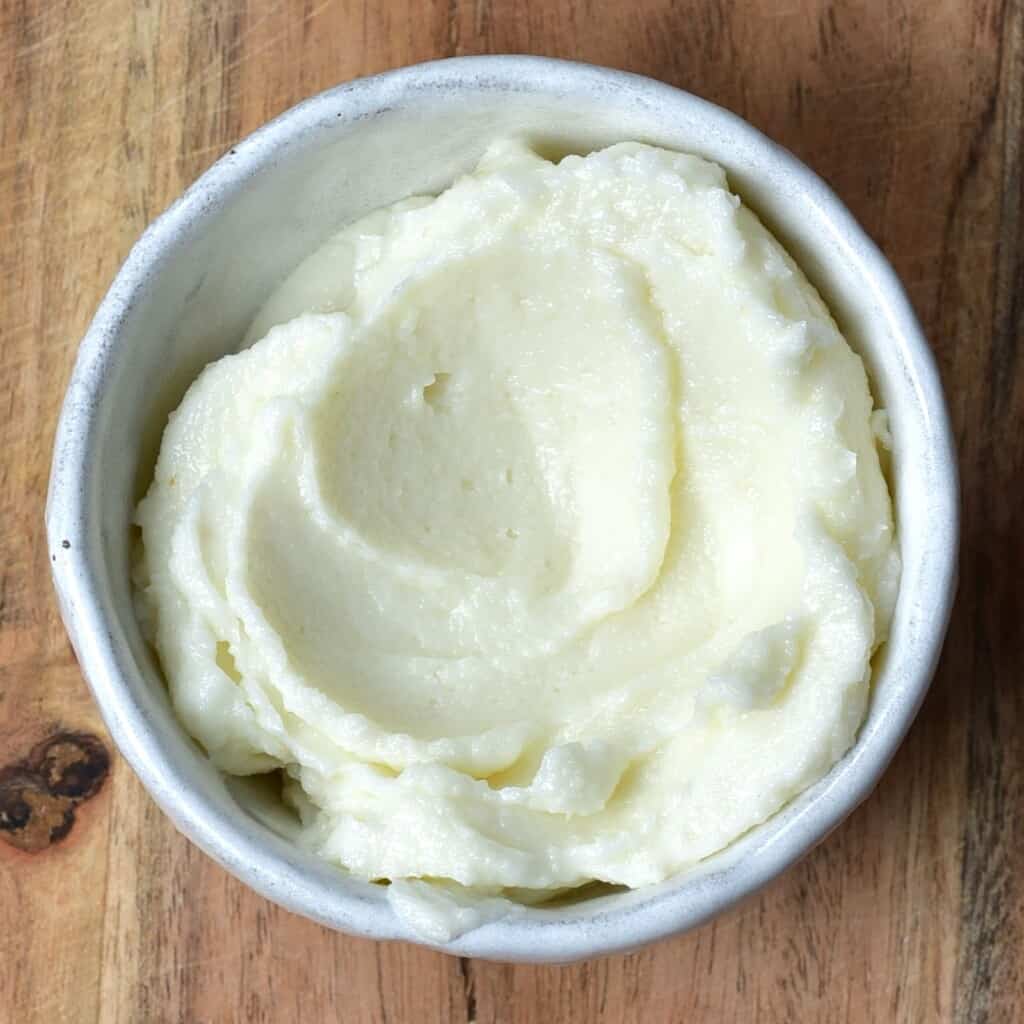
Once you’ve chosen your garlic peeling method of choice, then it’s time to learn how to freeze the garlic, make garlic paste, or more!
You may also like some of these other garlic DIYs and recipes:
- Homemade Lebanese Garlic Sauce (Toum)
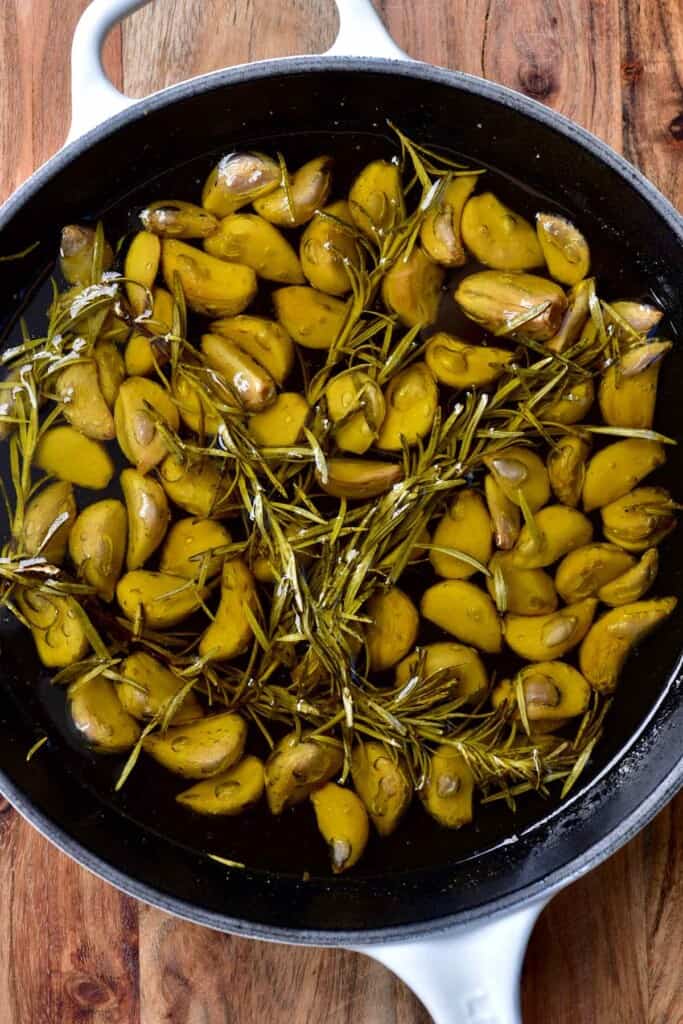
- Simple Homemade Garlic Confit (& Garlic Oil)
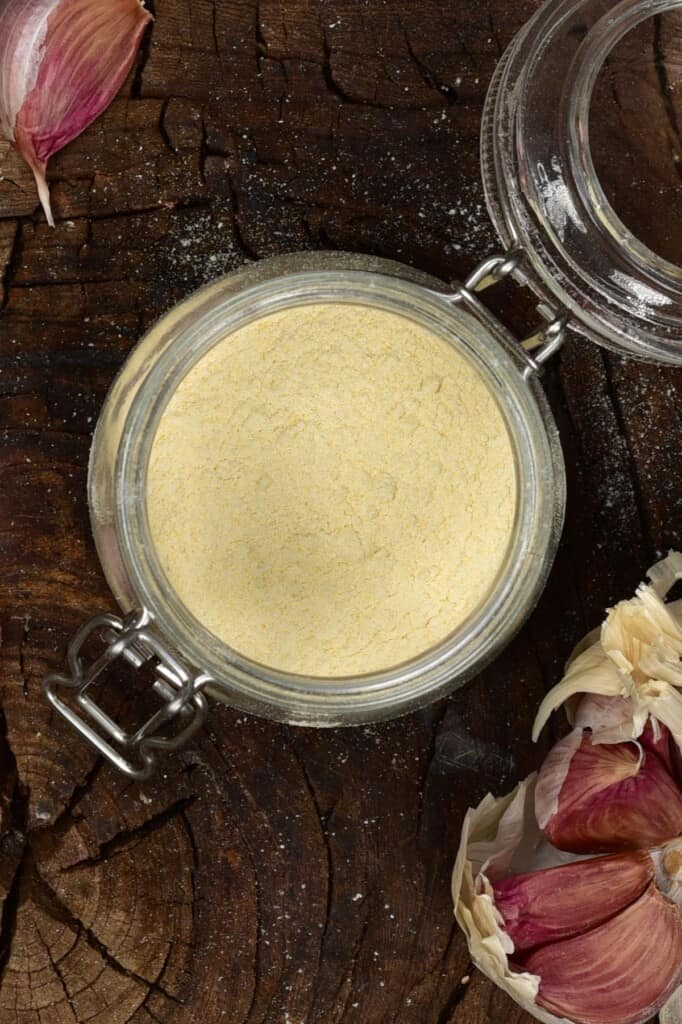
- How to Make Garlic Powder
- How to Make Garlic Flakes (+ Dried Minced Garlic)
- Homemade Garlic Naan Bread (Indian Flatbread)
- Rosemary Garlic Crispy Roasted Potatoes
If you try any of these (sometimes) easy ways to peel garlic, then let me know your thoughts and questions in the comments. I’d also really appreciate a recipe rating and would love to see your recreations – just tag @AlphaFoodie.
How to Peel Garlic (6+ Easy Ways to Peel Garlic)
Ingredients
- 1 garlic head or as much as needed
Instructions
How to separate the garlic head Into cloves
- Before doing most of the below methods, you'll first want to separate your garlic head into cloves. This may seem tricky, but it's simple. Just place the garlic on your cutting board and use both palms of your hand to push down firmly.Note: I've found this actually works better if you have the root end facing upwards.You can, optionally, then trim the root end and tip of each clove before trying each method. However, this isn't necessary for the majority of methods.
Method 1: The Traditional Knife Method
- This method works with the whole clove but will be even easier with the root end chopped off.Place the clove on your cutting board. Place the flat part of a wide knife over it, pressing down with firm but gentle pressure (if you want to avoid squashing the clove entirely). You should hear the noise of the skin crunching. Then remove the knife, and the garlic skin should be easy to peel and remove.Top Tips: You can also do this with the palm of your hand, but the knife will provide more leverage (and less stinky fingers). Also, avoid using ceramic knives, which may break in the process.
- Final thoughts: there's a reason this method is a classic – it works. The problem is that it's really the best option for just a few cloves. Any more than that, and it quickly becomes long and tiresome. It is also likely to crush the garlic, which isn't great if you want to use full cloves for presentation – however, if you're going to chop/mince it, then it's great.
Method 2: Cutting the Garlic Head In Half
- This method works best if you don't mind the cloves being chopped in half (i.e., if you plan on slicing/mincing/chopping it after peeling.)
- This 'hack' consists of simply chopping the garlic head in half through the middle of the cloves (at the 'equator'). Once chopped, place the two halves, garlic side down, onto your chopping board and use the side of a wide knife to smash down onto the garlic firmly. The idea is that the cloves should then release, and you'll be able to lift and remove all the skin.The reality isn't quite as simple, and this garlic peeling hack does take quite a bit of force, but it's doable. However, I realized the reason why the garlic isn't releasing as well as you'd hope is because of where it's connected at the root. For that reason, I came up with a variation.
Variation: Slice root area
- Using a sharp knife, you can first remove the root area and try this garlic peeling method. It becomes far easier. However, ultimately, it does take away the 'ease' factor of this hack.This is hard to do, and, as you can see in the image on the blog, I turned to a 'scalpel' type of blade – which arguably not everyone has just lying around.
- Final thoughts: I'm on the fence with this one. I like the method, especially if you have an entire head (or multiple heads) that you want to peel in one go and don't mind them being chopped in half. However, it does take quite a bit of force to press down on the chopped head and actually get the cloves to release – so it's not foolproof!
Method 3: Hot Water
- Place the garlic cloves in a bowl and pour over very hot water. Allow them to soak for about 1 minute, and then remove the peels. At this point, they should come off very easily (it's similar to blanching almonds, where the skin will steam and loosen in the water and slip away.I advise leaving the garlic cloves in the water and doing this one at a time. That way, if there are any 'stubborn' cloves, they get the benefit of the extra soaking time.
- Final thoughts: I really like this method – especially if you want to keep the cloves whole for presentation. And as it's unlikely you're using the cloves raw, it doesn't matter that they're being heated slightly either. Obviously, the soaking time does amp up the time needed for this method- but I still find it FAR quicker than relying on manually smashing each clove, and it's hands-off prep time so that you can busy yourself with other things.
Method 4: The Jar Method / Shake Method
- I placed the cloves in my large glass jar. You want the container you're using to be much larger than the amount of garlic you're peeling. This is so that it has plenty of area and surfaces to shake around and bump, etc. Once inside, secure the lid and shake the jar vigorously up and down and side to side for 20-30 seconds. If you notice that it needs more time, shake for a further 10 seconds. Then, pour the cloves out onto the worktop, and the idea is that the peels should come off fairly easily. If there are any stubborn ones, place them back in the jar and repeat.Note: I've seen some people attempt peeling garlic in a jar with the whole garlic head and achieve okay results. But separating the cloves will definitely provide a head-start.
- I wasn’t impressed with the original results, so I retried the method, first cutting off each clove’s ‘root,’ and it worked much better. But I can’t say as I’m massively impressed.
Variations
- This garlic peeling trick can similarly be done using a large Tupperware container, bowl covered with a chopping board, or two large bowls (of the same size) that can be held together when shaking.Top Tip: I would suggest avoiding plastic containers, though, as the garlic flavor can become infused in the plastic and will be difficult to remove.I tested this method with two metal bowls of similar size and two glass bowls of the same size. The method does work but needed extra effort to finish the peeling (similar to the jar method) – although the bowls definitely worked better.
- Final thoughts: I feel like I may be missing something here. This is a trick I've seen used countless times to peel garlic easily, and yet I just wasn't that impressed. I tried it several times, with different garlic heads, jars, bowls, etc., and always achieved okay' results. Some cloves would peel, and others wouldn't. By the time you're done shaking with as much force as you can muster to release the stubborn cloves, you're just as well using the classic 'smash' method, which is less effort (but takes more time).HOWEVER, this is a method I've seen work for multiple people, so feel free to experiment. Top Tip: This method seems to work best with older garlic where the skin is already a little loose. Then the shaking allows it to just break and fall away from the cloves. It's also best to use large amounts of garlic to smash into each other and help the process along. Feel free to give this a go, though, because, if it does work for you. It's a great method for when you want large quantities (like multiple heads of garlic) at one time.
Method 5: In The Microwave
- Add your garlic cloves to a microwave-safe bowl along with cold water and microwave for between 30-60 seconds. I checked mine at 30 seconds, and it was a no-go. I did it for a further 30 seconds, and the peel was able to be peeled off.
- Final thoughts: Even when I could get the peel off, it definitely wasn't as easy as I'd hoped, and this isn't a method I would even bother to try again. The peels were slippery and annoying to handle, and it was more annoying than helpful.
- Potential alternative microwave method
- Wrap the entire garlic bulb or your individual cloves inside some damp paper towel and microwave for 15-20 seconds (15 for high-powered microwaves). Then remove it from the microwave, and rub lightly with the paper towel. The cloves should easily pop out of their skins.
- Final thoughts: This method works well and is one I'd definitely use again – just try not to heat the garlic too much. At 15 seconds the garlic was easy to peel and just a little warm. At 30 seconds, the garlic was also easy to peel (of course) but the garlic was very warm and starting to soften. For that reason, I suggest 15 seconds (or 20 if you have a low-powered microwave).
Method 6: Remove With A Paring Knife
- This seems to rely on careful knife skills, placement of fingers, and specific twists/motions;
- First, hold the garlic head, root side up, and choose a sharp paring knife with a pointed tip. Using the knife, stab into a clove, on the left-hand side, near to where the curved outer part of the clove end (and the flat part begins).Now, you need to do some wiggling/ twisting. First, do a firm twist with your knife to try to loosen the clove from where it is attached to the root. Then continue to gently shake to loosen it from its skin – and pull. The clove should emerge from the head- skin free.After the first clove is removed, I find it easiest to use a finger to hold onto the other side of the clove I'm trying to remove, holding it in place and stopping the clove from breaking in half when twisting the knife.Top Tip: This method is easiest when you first sever the section where the cloves are attached to the garlic head root. However, this takes time, and even the sharpest knife can struggle. As with a previous method, I do this with a Stanley knife/ scalpel – so, not great. It's also a safety hazard, and no-one needs to risk stitches for some garlic!
- Final thoughts: This method DOES work; it just requires practice to actually learn the correct method to make this work (almost) every time- and even then you'll get the occasional dud. So I suppose it all depends on if you're happy to put in the time to learn the method- it's definitely not the fastest way to peel garlic from the get-go. I find this method works best when you only need a few cloves – which you can get directly from the head, no separating required.
BONUS METHOD: Don’t peel it
- Yes, you read that right. If you have a garlic press, you can get away with not peeling the garlic clove at all before mincing it. Just press the cloves in the press, skin and all. You can then remove the peel from the press afterward.The downside of this method is that it only produces minced garlic, and the yield is less than if you were to peel it first, as some stay stuck in the press with the peel. This can be minimized by peeling just a strip of the skin from the clove and placing that part face-down in the press. This method is best if you only need a small amount of garlic.
Finally: Using a silicone tube
- This is one I haven't tried as I wanted to use 'tool-free' methods; however, it is something I've seen a few times online. I've decided to mention this method because if you have a silicone mat in your house, you can avoid buying a new gadget. Just place your cloves on the silicone mat, fold over the mat and rub back and forth. The friction should cause the peel to come off the cloves, and it takes a firm but not 'annoying' amount of pressure.
Notes
Nutrition
Nutrition information is automatically calculated, so should only be used as an approximation.


Great article! I hate peeling garlic and have tried smashing with knife and it’s always mushy and messy.
IMHO Shake method is easiest method and works best. Reason it didn’t work well for you – jar is too small to get job done. Instead use a 3 quart or larger covered saucepan.
Put whole garlic head(s) , roots and all, in the saucepan. Cover with lid and hold together in both hands and shake it violently like a two-handed maraca for a minute or two. Open lid, and like magic, 95-100% of whole garlic cloves will be peeled. Retrieve peeled cloves, discard empty husks and shake remaining cloves until finished. Takes less than 2 minutes and you already have everything you need to do it in your kitchen.
Hi Connie,
Thank you so much for your tips! I will give it a try.
How do you now freeze the cloves for best results? Thanks,Doris
Hi Doris,
There is a blog post about different ways to freeze garlic, you can read through it here:
https://www.alphafoodie.com/how-to-freeze-garlic/
I’ve added a lot of tips on there.
Great article! Lots of tips and good advice. Get the smell of garlic or onions off of your hands by taking a stainless steel butter knife and rubbing it over your hands under warm water from the tap. Works like magic.
Thank you, Diana, will have to try it out! 🙂
After 30 plus years of cooking, the silicon mat works for me. I stick the entire bulb in a silicone hot pad, roll back and forth while hearing this satisfying popping sound and most cloves are free and clear of their peels.
Thank you for this amazing tip!
I tried most of the techniques described here and ended up returning to what I’ve always done — smashing each clove with the flat of the knife. I can’t get any other way to work for me.
As a related tip, I make my own garlic paste in the food processor. You need some liquid to make that work, and the trick is to use a splash or two of vodka with each food processor load. The vodka acts as a preservative — if you were a bacterium, would you want to live on a mixture of garlic and vodka? — and I suspect it helps draw out the garlic flavenoids as well. Shell a bunch of garlic and process it once a month and you don’t have to hassle with preparing garlic cloves every recipe.
It will keep a very long time in the fridge in a sealed container, and it can even be frozen, though frankly our supply never lasts long enough to need freezing. The paste tends to take on a greenish-blue color after a few days. This is a little disconcerting, but it doesn’t affect the taste in the slightest. If you used a bit too much vodka, you may also notice after a while that the paste has settled and some of the vodka has floated to the top. You can pour off the excess if you wish. I personally wouldn’t drink it, but I suppose tastes vary.
Thanks for the comment, Peter!
I usually just smash the cloves with the flat of the knife too 🙂
Thanks, I just peeled well over 100 cloves by using your blanching, hot water method and found it the fastest way yet … (my previous method was to cut a small slit at the root end of the clove and peel back the skin in two or three goes, but the skin was a lot tighter to the clove this way)
Thank you for your comment, Alan. And wow, 100 cloves in one go – that’s a lot 🙂
Helpful tips, thanks!
Thank you for your comment, Brad.
If you want to get rid of garlic (or onion smell) on your hands and you have a stainless steel kitchen sink, just wash your hands, then rub your wet hands on the stainless steel. It will get rid of most, if not all, of the smell.
Great tip! Thanks, Elwin.
I usually cut the root end of the garlic and I twist it so that the peel breaks. And then with my nails or a small knife I “hook” the peel off, comes off fairly easy.
Thanks for the tip, Julie!
I had no idea there were so many ways to take off garlic peel! The smell of garlic stays on my fingers so I try to avoid touching it as much as possible. I trim each end a little and use a Tupperware box to shake it and find it works well. I’ve not tried a jar though.
Thanks for your comment, Victoria. That’s a great tip!