
This post may contain affiliate links. Please read our disclosure policy.
Pickles are an essential part of Lebanese food. These pickled turnips (pink pickles) are easy to make and last for one month in the fridge. Tangy and firm, they’re an essential condiment for authentic falafel and chicken shawarma and are also served with meze platters and more!
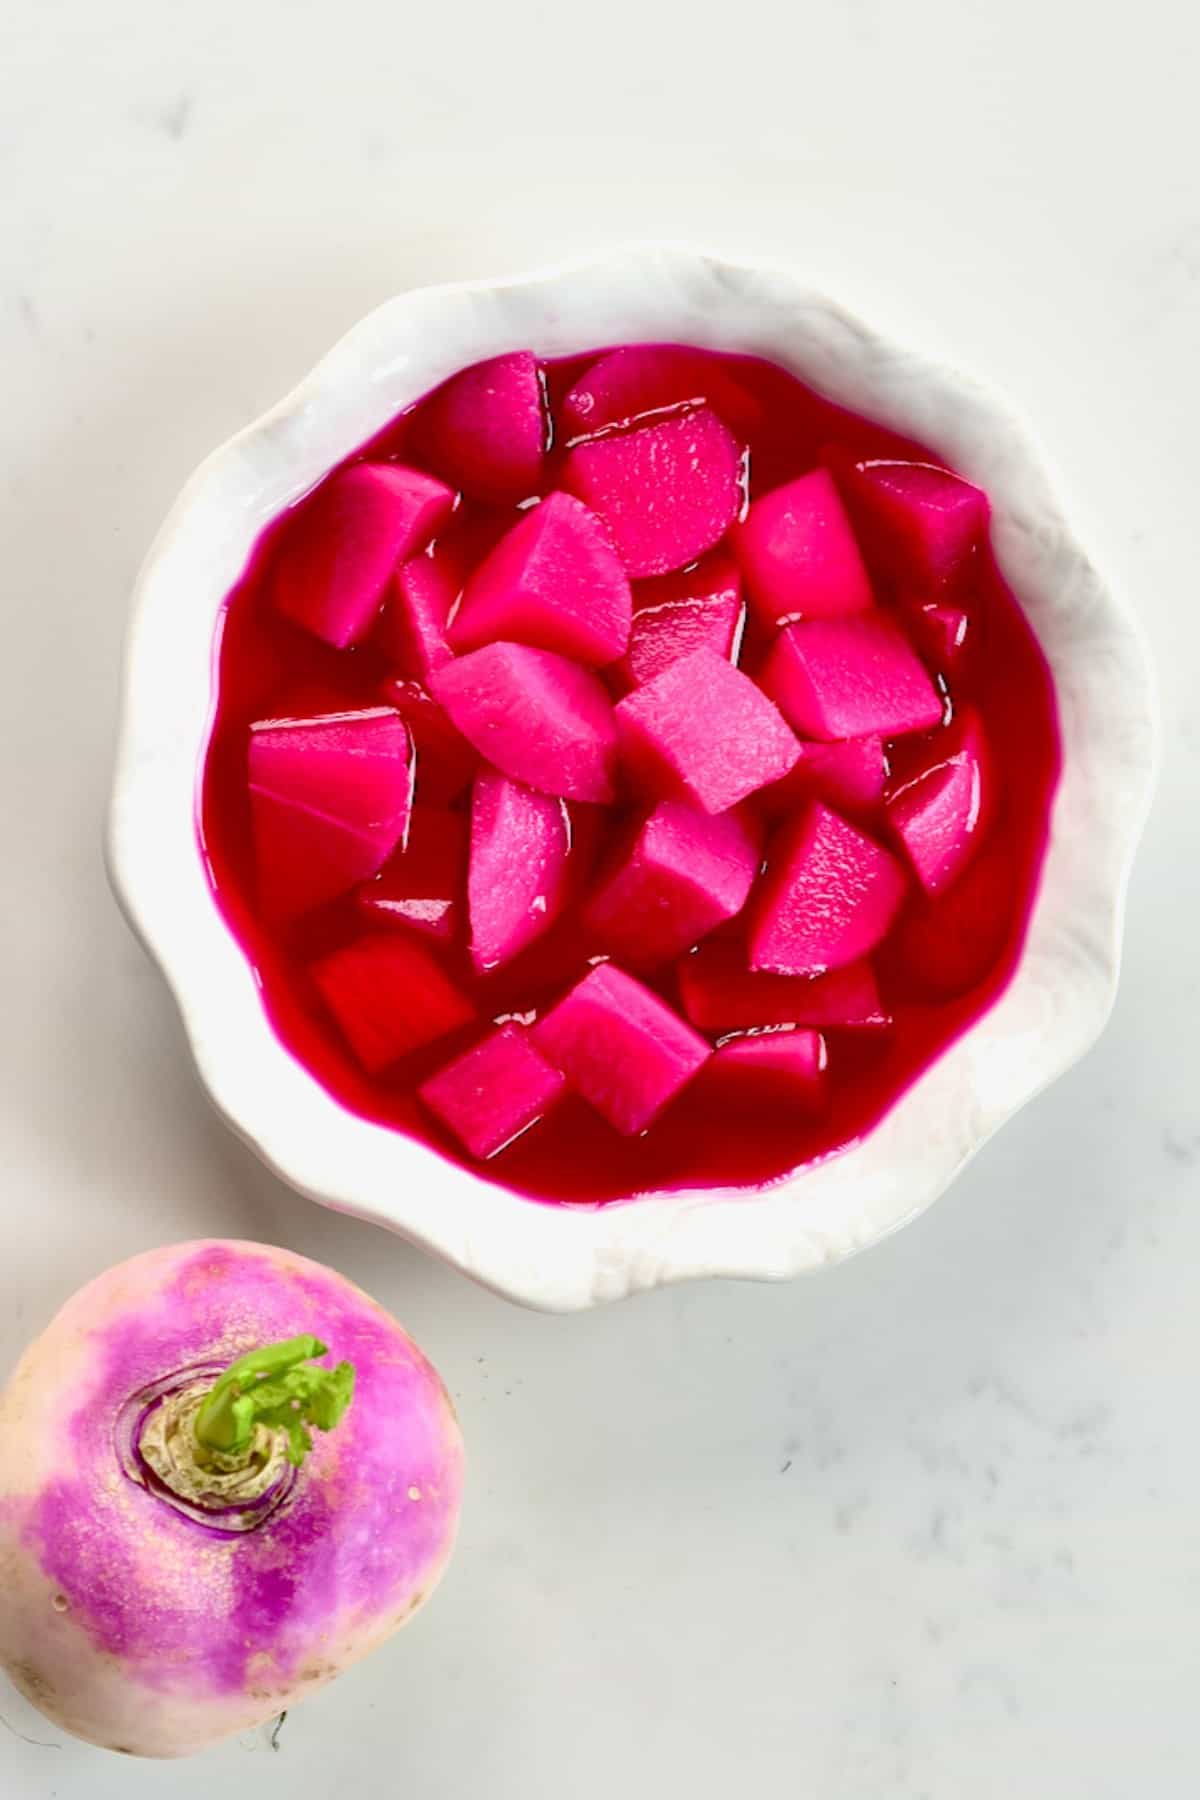
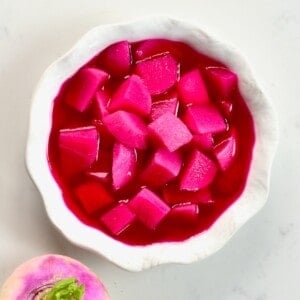
Pickled turnips are like the pickled cabbage of the Middle East—beautiful pink pickles (naturally colored) with a delicious tangy pickled flavor that accompanies a wide variety of dishes. Plus, they are so simple to prepare – make the pickling brine, slice turnips and beets, mix, and let them sit in a dark place until they’re ready to enjoy.
Want to save this recipe?
Watch how to make it
Ingredients
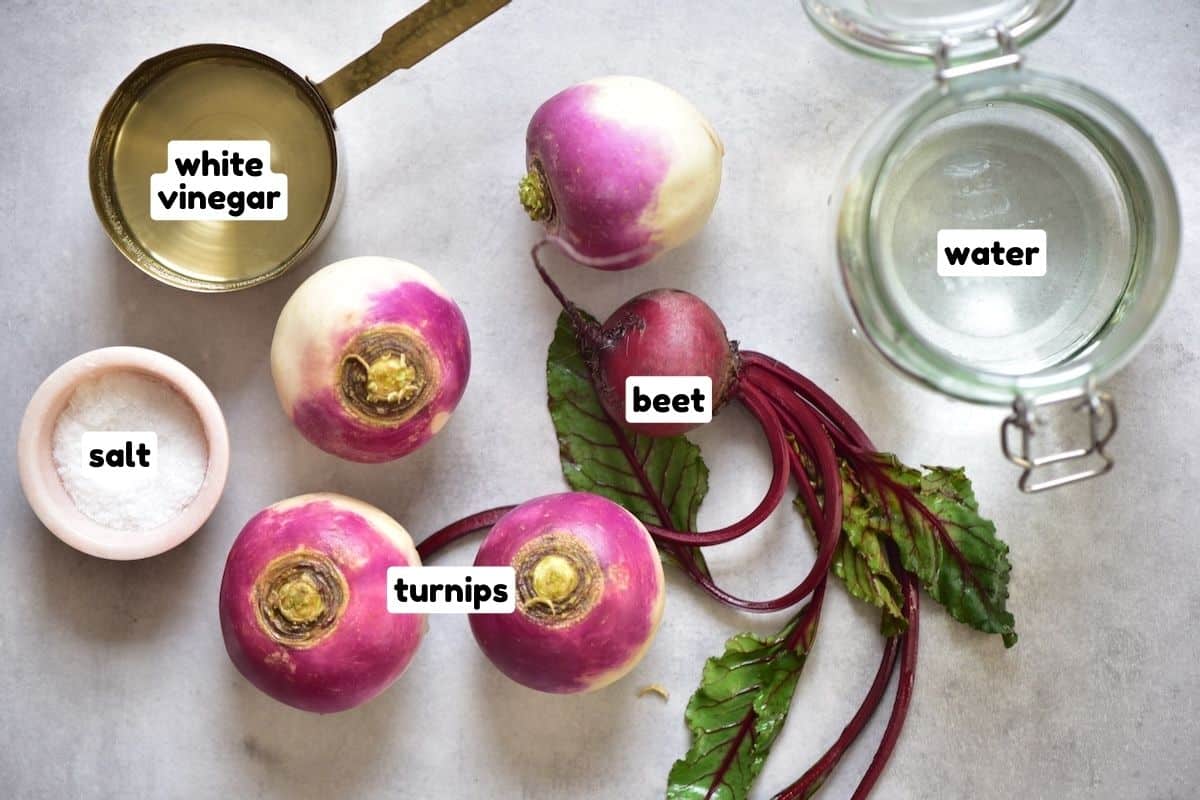
- Turnips
- Beetroot: It’s necessary for the pink color.
- Water
- White vinegar
- Salt
- Garlic (optional)
How to make pickled turnips
First, make sure to sterilize and dry all the jars and tools.
Prepare the pickling brine: Mix water and salt in a large bowl. Use an egg to check the water is salty enough (necessary for the pickling process). If the egg floats in the water, that means you’ve added enough salt. Otherwise, keep adding salt until the egg floats. Then add vinegar and stir.
Prepare the vegetables: Cut pickles and beetroot into the shape/size you prefer. I sometimes make them thin (like potato crisps), or I thinly slice them to about 1/2 inch thickness.
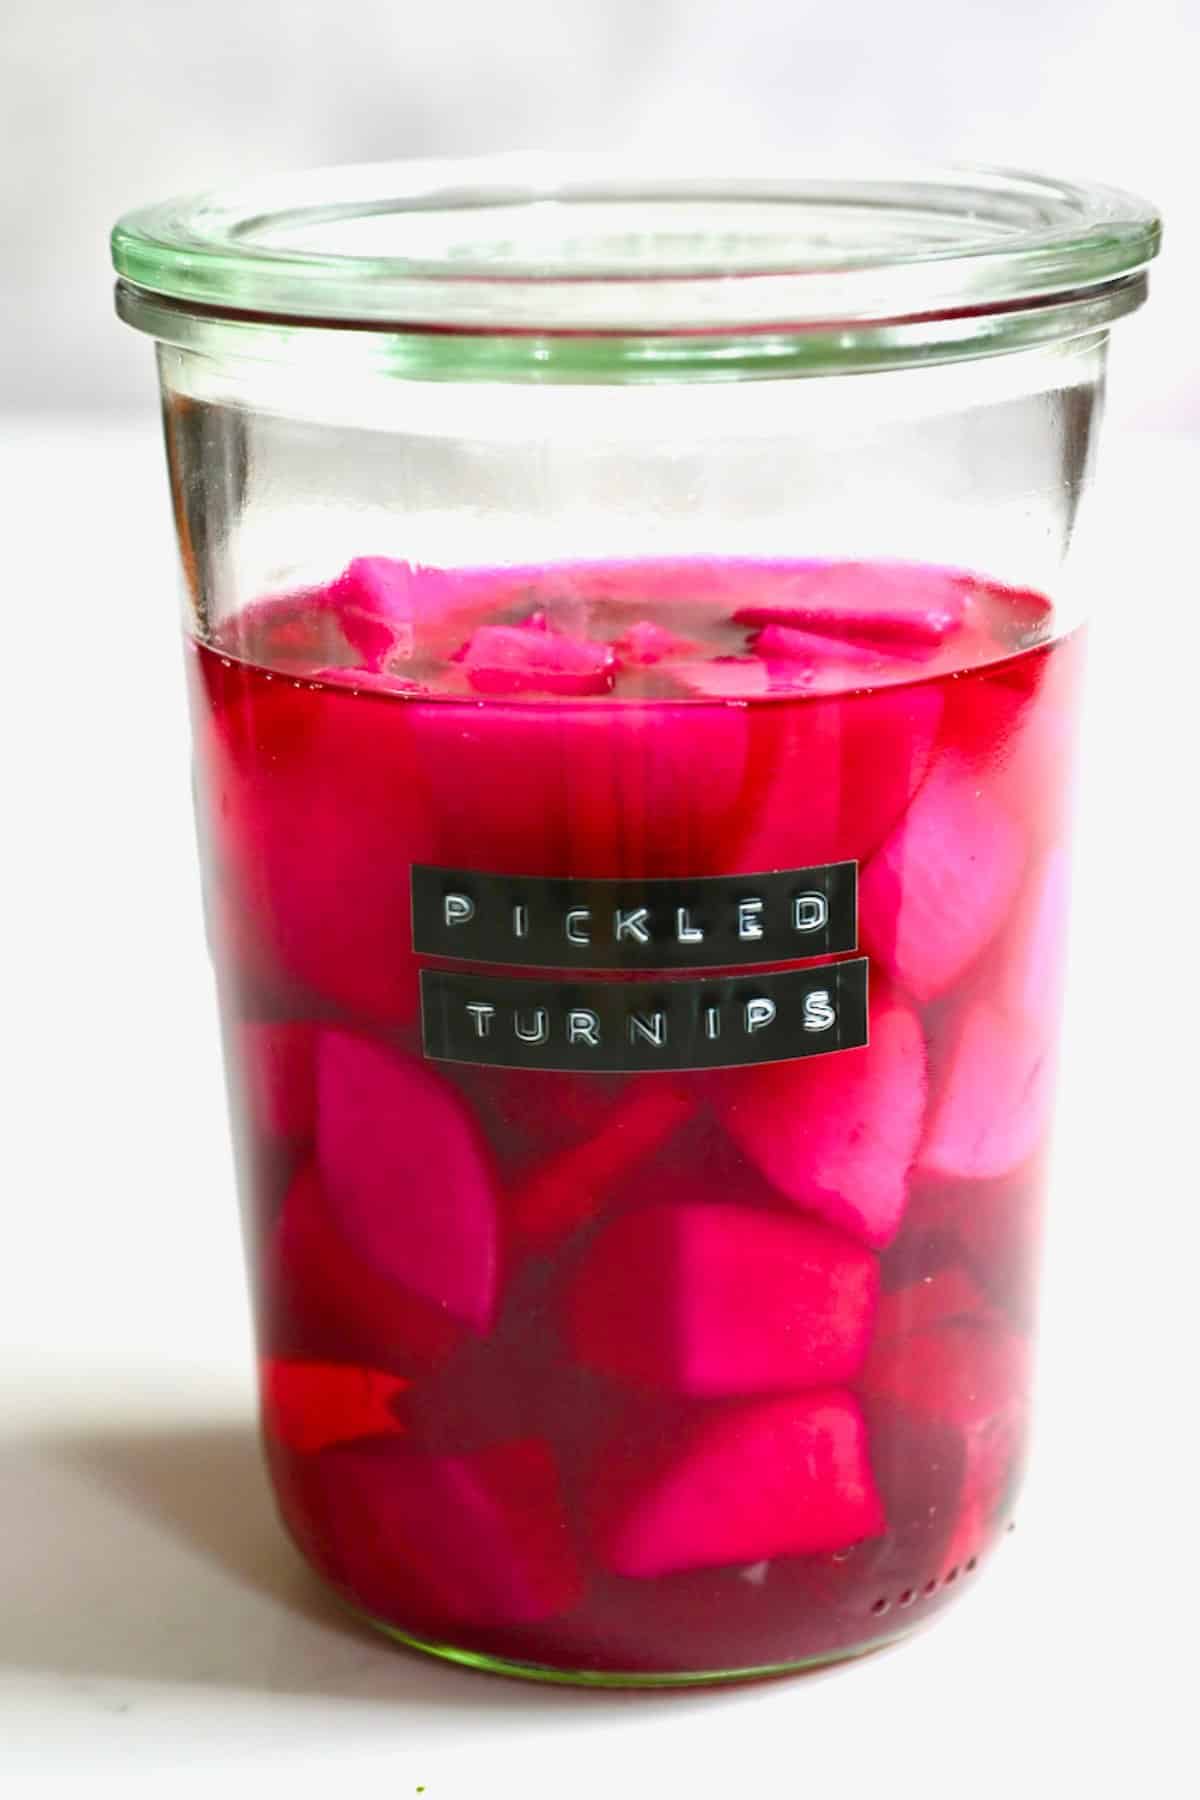
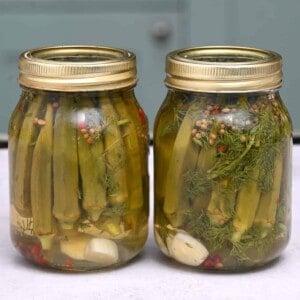
Fill the jars: Pour brine into the sterilized jar. Then, add the rest of the ingredients. Make sure to submerge all the pieces of turnips in the brine.
Set aside: Close the jar and place it in a dark cupboard at room temperature. The pickles are generally ready within 4 to 5 days. Afterward, store the pickles in the refrigerator for up to one month.

To achieve a lighter pink color, remove the beetroot from the jar on the third day or reduce the quantity next time.
Should the pickling brine be heated?
There are several methods for preparing the pickle brine, and I’ve tried them all. Some recipes ask for the brine liquid to be heated, some only heat certain elements, and some just chuck everything unheated into the jar. I usually stick to just adding everything in the jar – it works well and takes less effort, so really, it’s a win-win. My mother advised me to heat the water and salt first to dissolve the salt better, but she agreed with me that either way works.
Ways to use pickled turnips
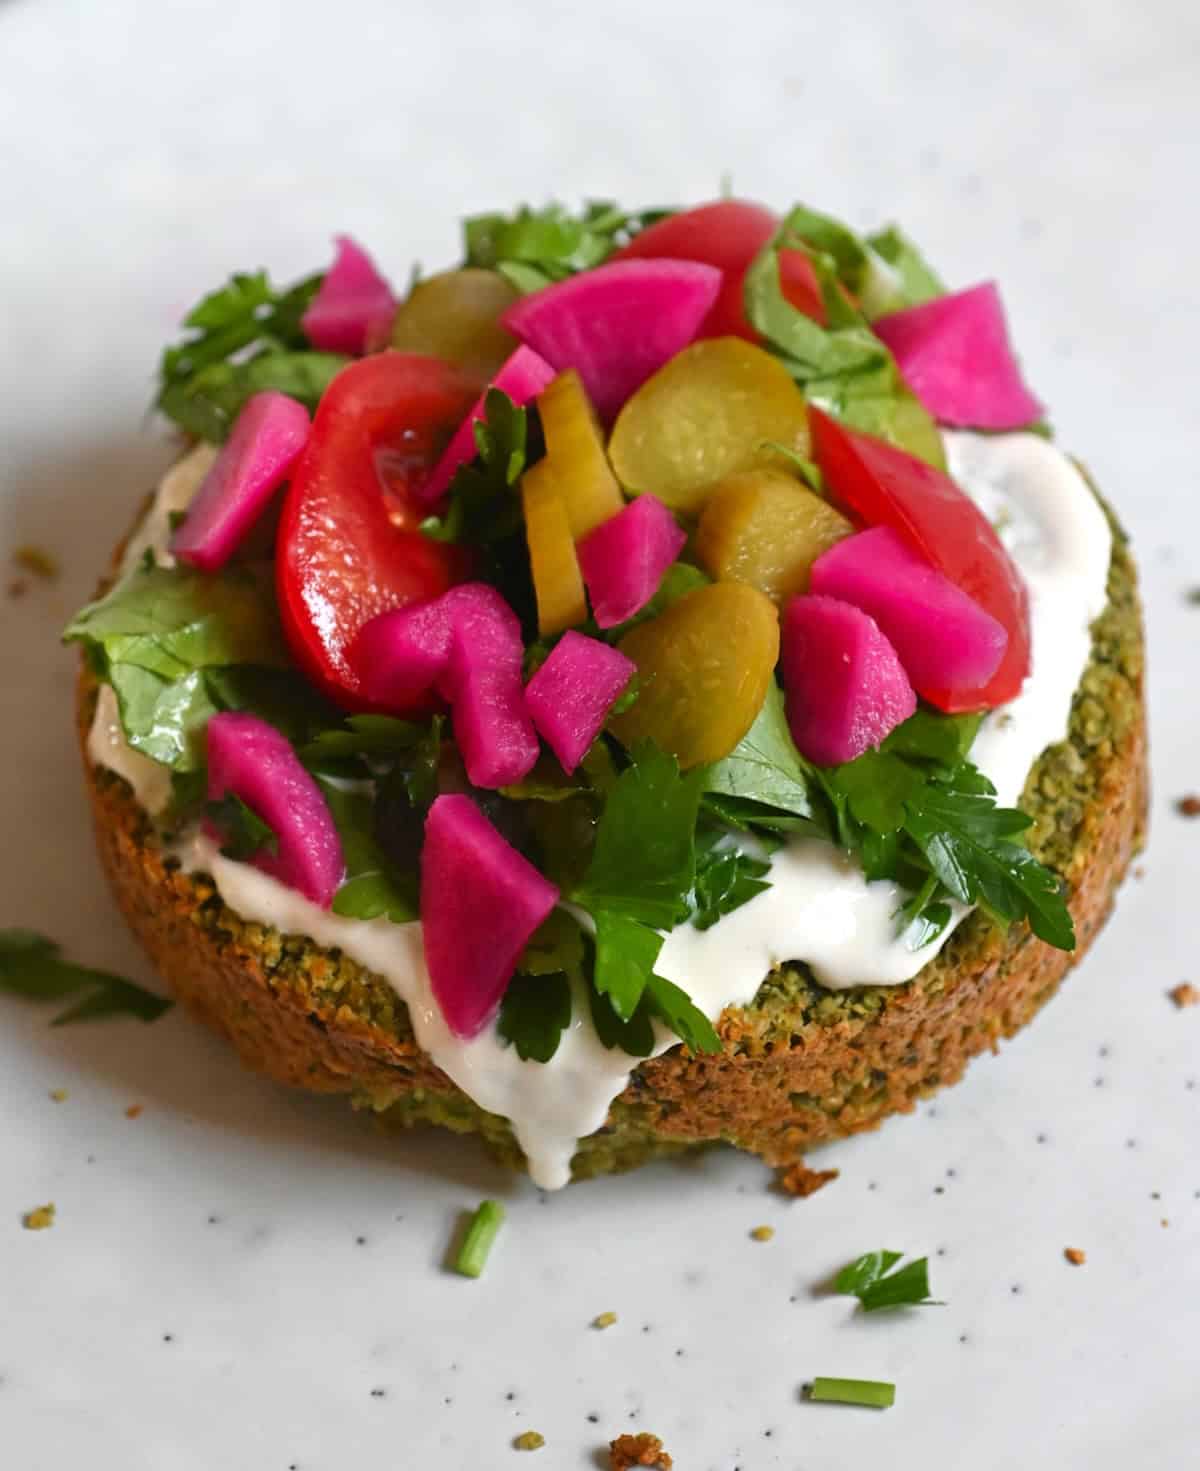
Serve these pickled turnips generously with dishes like Mujadara Hamra (lentils & bulgur) and Mujadara (lentils and rice with crispy onion). I love tucking them into pita bread wraps with my favorite authentic falafel or chicken shawarma.
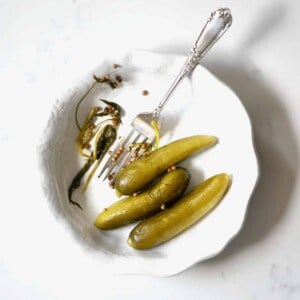
Pickled turnips are delicious alongside shish tawook, easy baba ganoush, and creamy hummus. They’re a perfect topping for baked falafel patties, as you can see in the photo, adding a burst of color and flavor! I also love adding to my Ful Medames Recipe.
More pickled recipes

If you try this pickled turnips recipe, let me know how it goes in the comments below. I’d appreciate a recipe card rating and would love to see your recipe recreations – tag me on Instagram @Alphafoodie!
Pink Pickled Turnips
Equipment
- 1 Big glass jars (32 oz) 32 oz (1L)
Ingredients
- 2.2 lb turnips
- 1 beet a small one
- 3 cups water
- 1/2 cup white vinegar
- 1.5 Tbsp salt
- 1 garlic clove optional
Instructions
- Sterilize all jars and tools. Let them dry.
- Mix the water and salt in a large bowl – this will be the pickling brine. Then mix in the vinegar.
- Cut the pickles into the shape/size you prefer – disks/slices, french-fry-like batons, or wedges. Or even use a melon-baller to make them into balls.
- Add the brine to the pickling jar.
- Add the rest of the ingredients. Make sure all the pieces of turnips are submerged in the brine.
- Close the jar and place it in a dark cupboard.
- The pickles are normally ready within 4 to 5 days. Then, they can be stored in the refrigerator for up to one month.
Video
Notes
Nutrition
Nutrition information is automatically calculated, so should only be used as an approximation.


Hi,
I was just wondering was your water pre boiled or did you just use regular room temp?
Hi Luna,
It’s just regular room temperature water. I hope you give this recipe a try.
Do you peel the turnips and the beet? It looks like you do not.
Hey Leslie!
No need to peel the turnips or the beet. Just give them a good wash, I usually wash them with a brush to make sure they don’t have any dirt!! Enjoy pickling! 🙂
Hi there! I have a few couple of questions:
1. What size of jar do you recommend for this recipe?
2. How do I sterilise jars?
3. Can I use cooked beetroot (the vacuum sealed ones sold in UK supermarkets, refrigerated ones)?
Many thanks
Hi there,
You can use 1 big jar (32 oz/1 liter). To sterilize the jars, wash them thoroughly with hot, soapy water, then place them in a preheated oven at around 325ºF/160ºC about 10-15 minutes.
You can also use the cooked beetroot.
I hope you give the recipe a try!
Can these not be bottled in mason jars and sealed for a longer shelf life so that I can give them as gifts?
Sure! You can definitely bottle them in mason jars and seal them. Just make sure to follow proper canning guidelines to ensure they last longer. It’s a great idea for gifts! I have the canning guide here on blog, here is the link: https://www.alphafoodie.com/a-step-by-step-guide-to-water-bath-canning-for-beginners/
Great recipe. I bought a raw beet. Do I cook it first before adding to the turnips? Thanks!
Hi there,
No, you can add it raw, I made a video of the process you can watch on this blog if it helps 🙂
You receipe are amazing I am so glad you did Instagram.
Thank you so much for your comment, Lexi!
Samira. We have a question.
Do you use 100 gram (5 tablespoons)salt as noted in the recipe? On 1 kg turnips.
We tried but it is very, very salty.
Please let me know, or it is part of the cooking style of course
Hi Han,
For 1 kg of turnips, you need 1.5 Tablespoons of salt which is about 25-27 g. I hope you give this recipe another try – it’s not supposed to be very very salty 🙂
The question I have is, after 4 to 5 days in a dark place do you then
put in the fridge.
Hi Joan,
Yes, after the turnips have pickled (4-5 days), it’s best to keep them in the fridge.
I tried this at home, but the next day the mix started smelling really bad.
Why does this happen? Is it normal?
Oh no! I’m sorry to hear that. What exactly did it smell like? Were the turnips completely covered by the pickling liquid?