
This post may contain affiliate links. Please read our disclosure policy.
This easy shrimp tempura gives you a light, lacy crunch with simple pantry ingredients and step-by-step photos so you nail it on the first try.

My little trick? An ice-cold sparkling-water batter and a quick potato-starch dusting so the shrimp grab onto the coating and stay perfectly crunchy.
If shrimp is on your menu this week, you might also like my shrimp stir fry for a saucy veggie toss or shrimp scampi for a garlicky pasta night.
What is shrimp tempura?
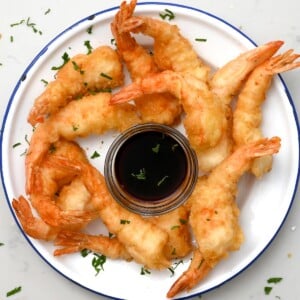
Tempura is a Japanese frying method that uses a cold, airy batter for a delicate, shatteringly crisp crust. Shrimp tempura (ebi tempura) means tail-on shrimp that are straightened so they don’t curl, lightly dusted with starch, dipped in a thin batter, and fried just until pale golden and crunchy. It’s served with a simple soy-based dipping sauce.
Shrimp tempura ingredients

- Shrimp, large or jumbo, tail-on: remove heads and shells, leave tails for easy dipping and the classic look.
- All-purpose flour: the light batter base for that thin, crisp shell.
- Potato starch: a touch in the batter and for dusting the shrimp makes the coating extra crisp.
- Egg: adds light structure and color.
- Ice-cold sparkling water or club soda: the bubbles and temperature keep the batter airy.
- Fine salt: season the shrimp and batter.
- Neutral oil for frying: vegetable, canola, or peanut; enough for about 2 inches in a heavy pot.
- Dipping sauce: soy sauce, mirin, a little water or dashi, and sugar; add grated daikon or ginger if you have it.
- Green onion or parsley: optional garnish for serving.
See printable recipe card below for the full ingredients list and quantities.
How to make shrimp tempura
Prepare and dust the shrimp
Start with large shrimp. Remove the heads and shells, leaving the tails on, and devein (you can check my easy guide on how to peel and devein shrimp). Pat very dry with paper towels. To keep the shrimp straight, place each one belly-side up and make 3 to 4 shallow slits. Flip and gently press along the length until it relaxes and lays straight.
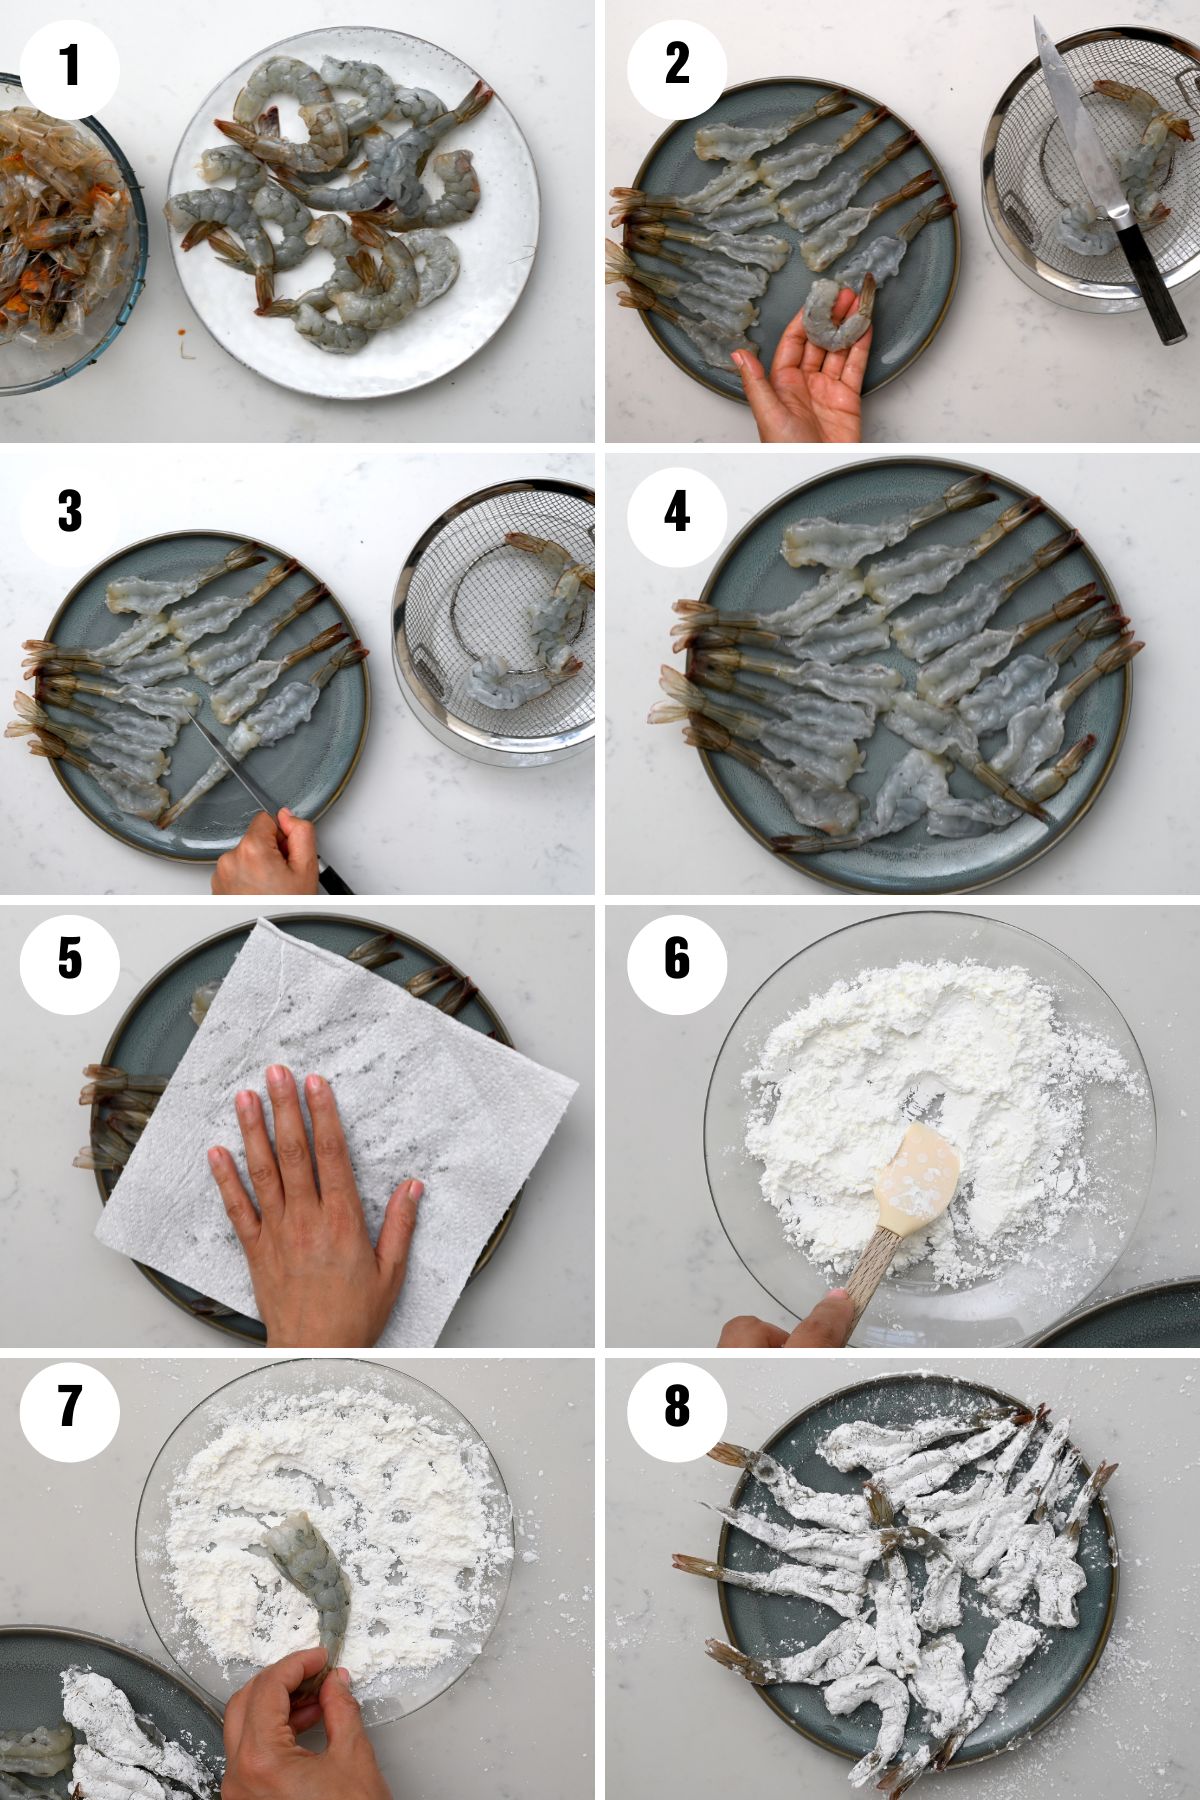
Stir a pinch of salt into some potato starch and lightly dust the shrimp, shaking off excess. This dry layer helps the wet batter cling.
Make the dipping sauce first so it’s ready: combine soy sauce, mirin, and water or dashi with a little sugar in a small saucepan. Warm briefly to dissolve the sugar, then set aside.
Mix the batter
In a bowl, whisk 1 large egg with 1 cup ice-cold sparkling water. Sift in 1 cup all-purpose flour and 2 tablespoons potato starch plus a small pinch of salt. Stir with chopsticks or a fork just until moistened. Lumps are fine.
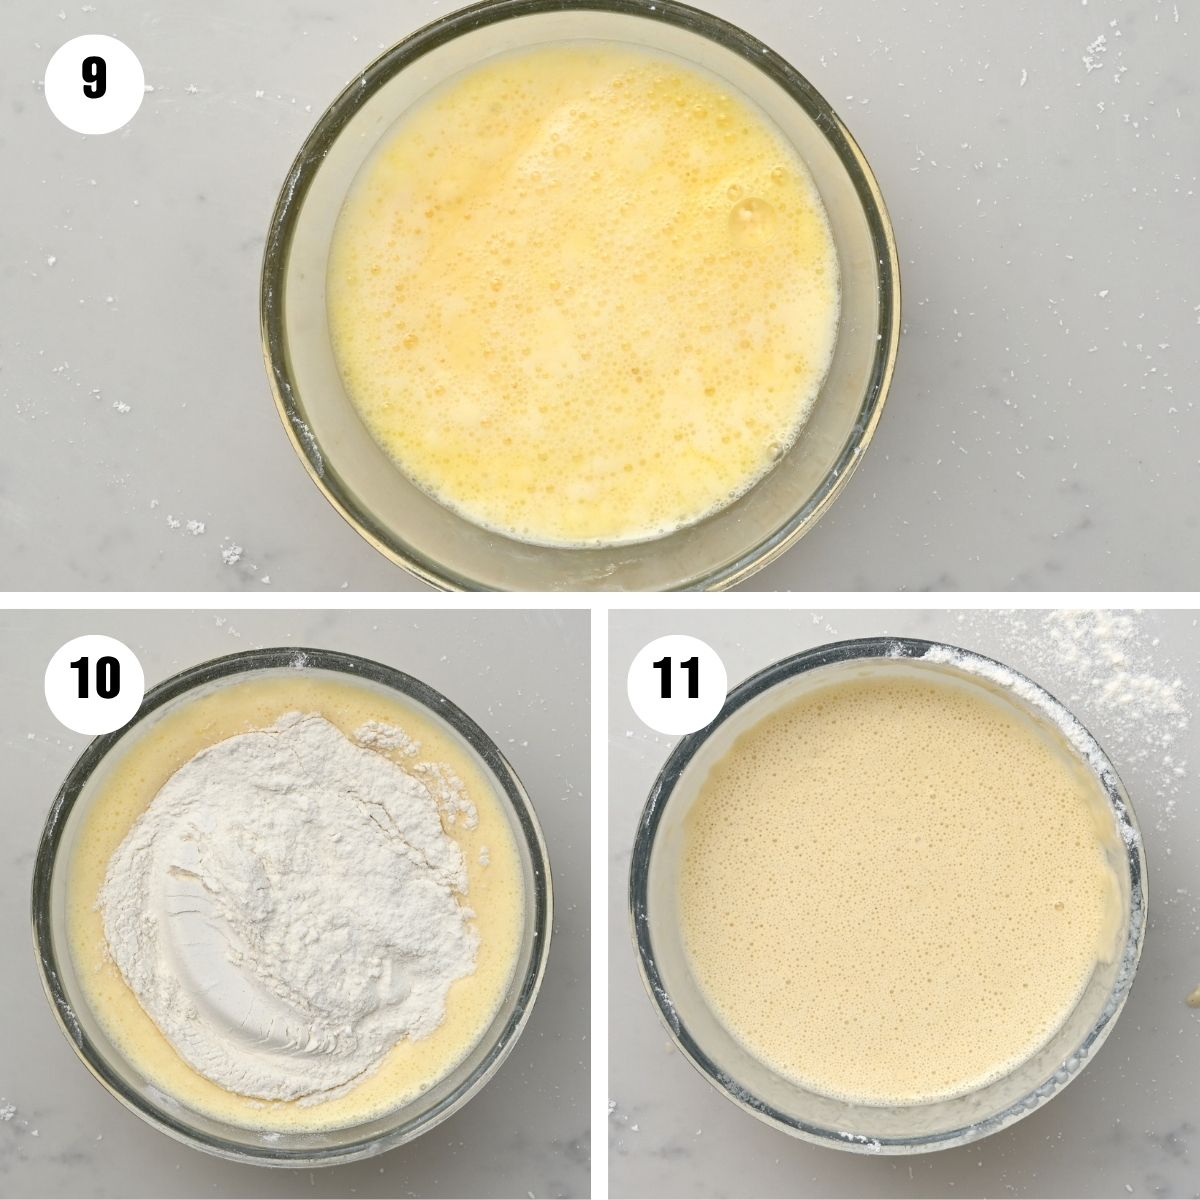
Keep the bowl over ice to stay cold while you fry.
Dip and fry the shrimp
Heat 2 inches of neutral oil in a heavy pot to 350°F (175°C). Holding each shrimp by the tail, dip it into the batter, let excess drip off, then slide into the oil. Fry 1½ to 2 minutes until the crust is crisp and pale golden and the shrimp is opaque.
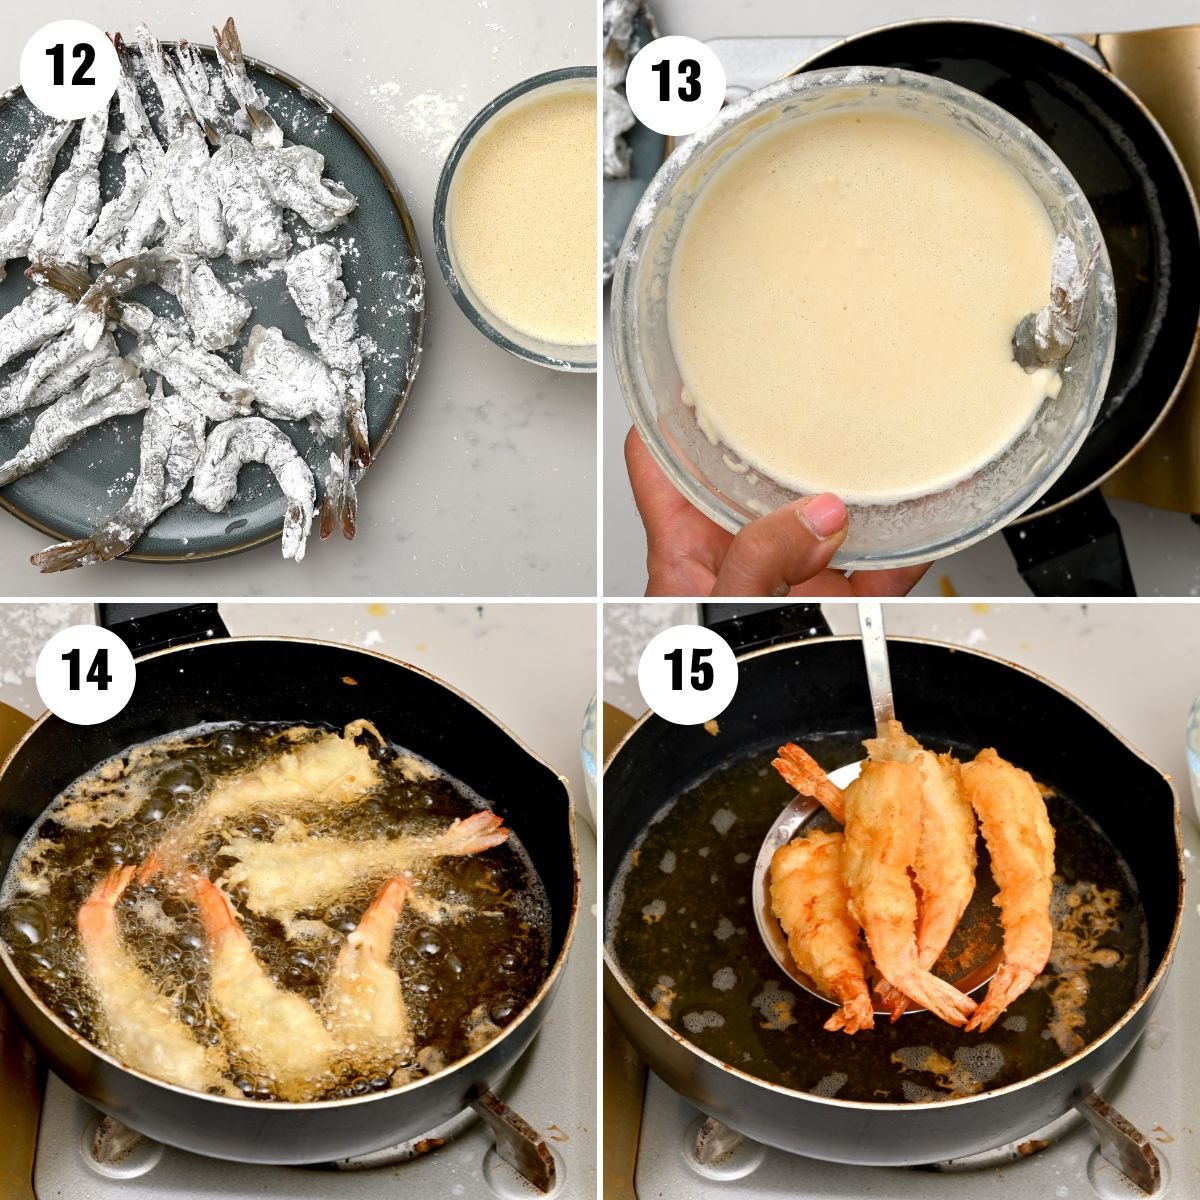
Drain the shrimp
Transfer the fried shrimp to a wire rack or paper towel to drain. Skim stray crumbs between batches for a clean, delicate crust.

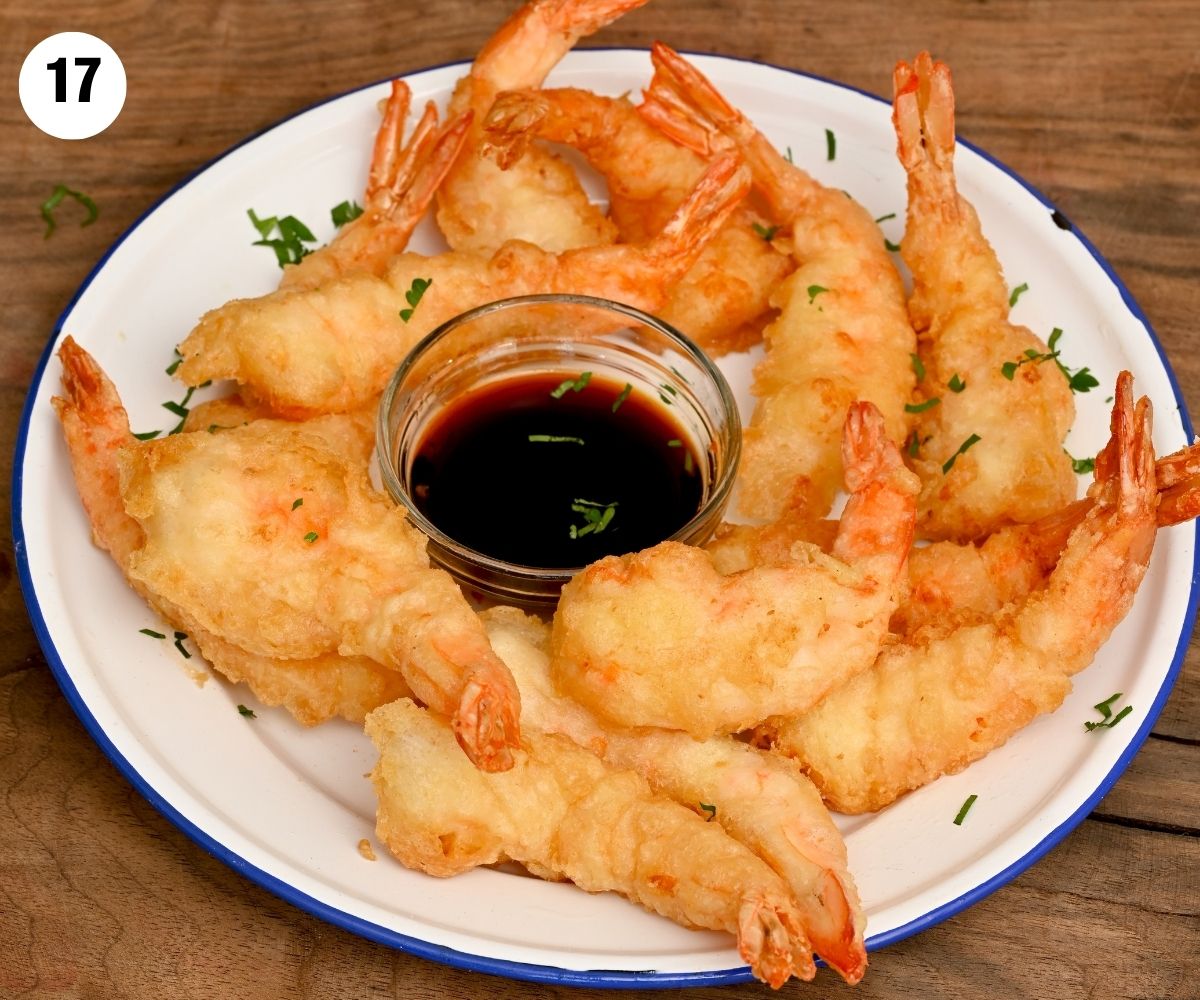
Serve
Serve hot with the dipping sauce and a sprinkle of something green if you like.
Tips for the crispiest tempura shrimp
- Keep it cold: Set the batter bowl over ice. Cold batter hitting hot oil puffs beautifully.
- Don’t overmix: A few lumps are good. Overmixing builds gluten and makes the crust heavy.
- Dust before battering: A light potato-starch dusting helps the batter grab on and stay crisp.
- Mind the oil temp: Aim for 350 to 360°F. Too cool makes greasy tempura, too hot browns before the shrimp cooks.
- Fry in small batches: Crowding drops the temperature and steams the coating.
- Drain on a rack: Airflow keeps the crust crisp longer than stacking on paper towels.
Storage and reheating
Tempura is best right after frying. If you have leftovers, refrigerate in an airtight container for 2 days.
Reheat on a rack in a 375°F oven for 8 to 10 minutes or in an air fryer at 350°F for 3 to 4 minutes until re-crisp.
You can freeze cooked tempura for 2 months. Reheat from frozen at 375°F until hot and crunchy.
FAQs
350 to 360°F keeps the coating pale and crisp while cooking the shrimp through.
The batter may be warm, the oil too cool, or the pan crowded. Keep the batter cold, oil at 350°F, and fry in small batches.
More shrimp recipes


If you make this shrimp tempura, I’d love to hear how it went. Leave a comment and please drop a five-star review so more people can find the recipe. Thank you!
Shrimp Tempura
Equipment
- Large Cast Iron Skillet or frying pan
Ingredients
- 1 pound shrimp large about 15, shell and head removed, tail on, deveined
- 4 tablespoons potato starch
- 1/2 teaspoon fine sea salt
- 1 cup all-purpose flour
- 1 egg large
- 1 cup sparkling water club soda, ice-cold
- 4 cups neutral oil for frying
- 1 teaspoon fresh grated ginger optional
- 2 tablespoons green onion thinly sliced (optional)
Quick dipping sauce
- 1/4 cup soy sauce
- 3 tablespoons mirin
- 2 tablespoons water or dashi
- 1 teaspoon sugar
Instructions
- Pat the cleaned, tail-on shrimp very dry with paper towels.
- Make 3 to 4 shallow slits on the belly side of each shrimp, then gently press along the length to straighten.
- Stir 2 tablespoons potato starch with 1/4 teaspoon salt. Lightly dust the shrimp and shake off the excess.
- Make the dipping sauce by combining soy sauce, mirin, and water or dashi with sugar in a small saucepan. Warm just until the sugar dissolves. Set aside.
- In a medium bowl, whisk the egg with the ice-cold sparkling water. Sift in the flour, 2 tablespoons potato starch, and 1/4 teaspoon salt. Stir just until moistened. Keep the bowl over ice to stay cold.
- Heat 2 inches of oil in a heavy pot to 350°F. Skim any surface crumbs as you fry.
- Holding by the tail, dip each shrimp into the batter, let the extra drip off, then slide it into the hot oil. Fry in small batches for 1½ to 2 minutes until pale golden, crisp, and the shrimp is opaque.
- Transfer to a wire rack or paper towel to drain. Repeat with remaining shrimp.
- Serve hot with the dipping sauce and garnish with ginger and green onion if you like.
Nutrition
Nutrition information is automatically calculated, so should only be used as an approximation.


This was Nothing less than ..” YUMMY ”
THANK YOU
Thank you, Holly! Glad you liked it!
This was such a hit! My kids are such fans of shrimp, so I wanted to make this recipe and everyone loved it.
I’m so glad your kids loved it, Amelia! Thank you so much for commenting! 🙂