
This post may contain affiliate links. Please read our disclosure policy.
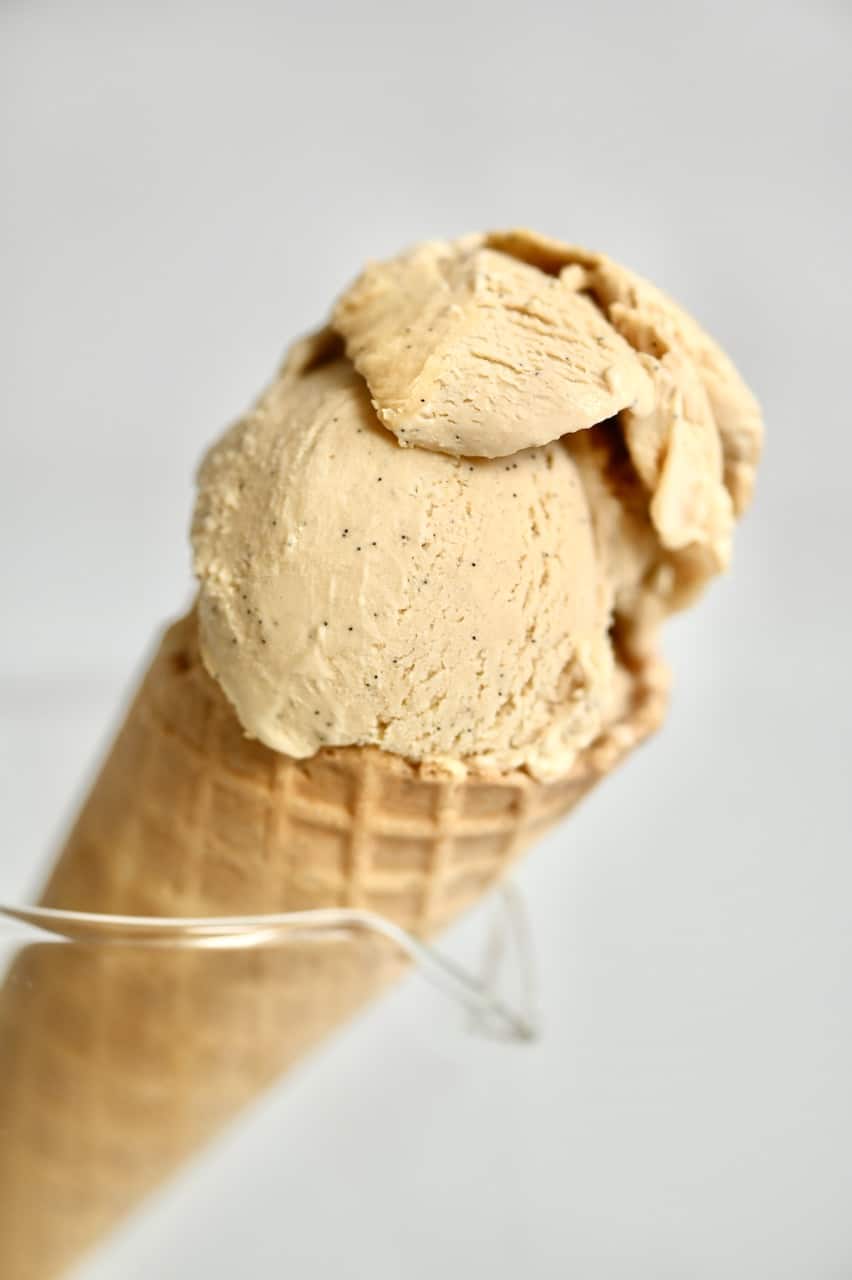
An easy homemade ice cream recipe for delicious, creamy caramel ice cream. Just five ingredients and no ice cream maker are required to make this rich and creamy homemade ice cream!
Coming across this easy caramel ice cream was a bit of a happy (and delicious) accident. While recipe testing for a simple no-churn vanilla ice cream (recipe coming soon), I tested out a variety of different sweetener options. Who knew that by adding unrefined cane sugar, the results would be a perfectly toffee-colored, caramel-tasting, rich, and creamy ice cream.
At first, I thought about just adding a note to the vanilla ice cream post, but then I realized that this delicious caramel ice cream deserves a post of its very own. Especially since this is one of the easiest caramel ice cream recipes you can make. There’s not even any need to pre-make a caramel. By combining the unrefined cane sugar into the custard, you automatically get a delicious caramel flavor and color.
This easy homemade ice cream is also super simple to customize. In fact, I’ve included a whole section below on ideas that you could try. And if you want an even more straightforward ice cream recipe, how about this Simple Avocado Ice Cream?
Want to save this recipe?
How To Make Ice Cream
Making ice cream can be a bit of an art. Some methods require meticulous watching of custard, with a hundred different opportunities for the process to go wrong. There are also options like my ‘instant’ ice cream, which is as simple as shaking a bunch of ingredients. This caramel ice cream sits comfortably somewhere in the middle – semi custard-based, but no ice cream machine needed, this no-churn easy homemade ice cream is a recipe I can get behind time and time again.
I do use a thermometer to keep things precise, but if you don’t have one, then I’ve included ways to get around that, too. Honestly, it’s just amazing to me how the combination of specific sugar and vanilla pods makes for such a delicious dessert caramel flavor. This entire recipe is made up of just five ingredients.
The Ingredients
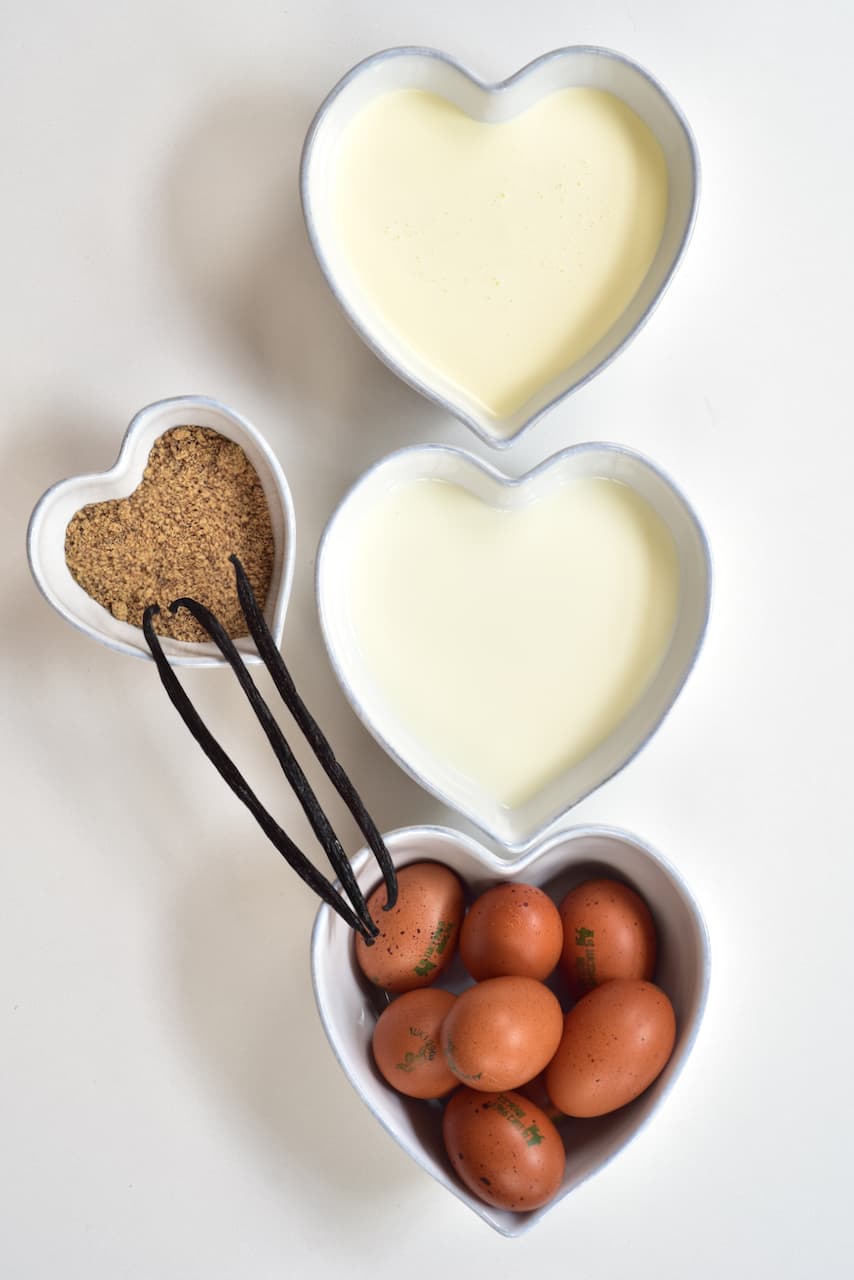
- Egg Yolks – I used Clarence Court Burford Browns
- Whole Milk & Heavy Cream (double cream )
- Vanilla Pods – You can also add a little vanilla extract. Did you know that the alcohol in the extract will actually lower the freezing point of the ice cream, making it a softer scoop.
- Unrefined Cane Sugar – Try not to reduce the amount I suggest as you’ll end up with more of a vanilla ice cream. Plus, less sugar content also means harder ice cream (which no one likes!)
The Steps
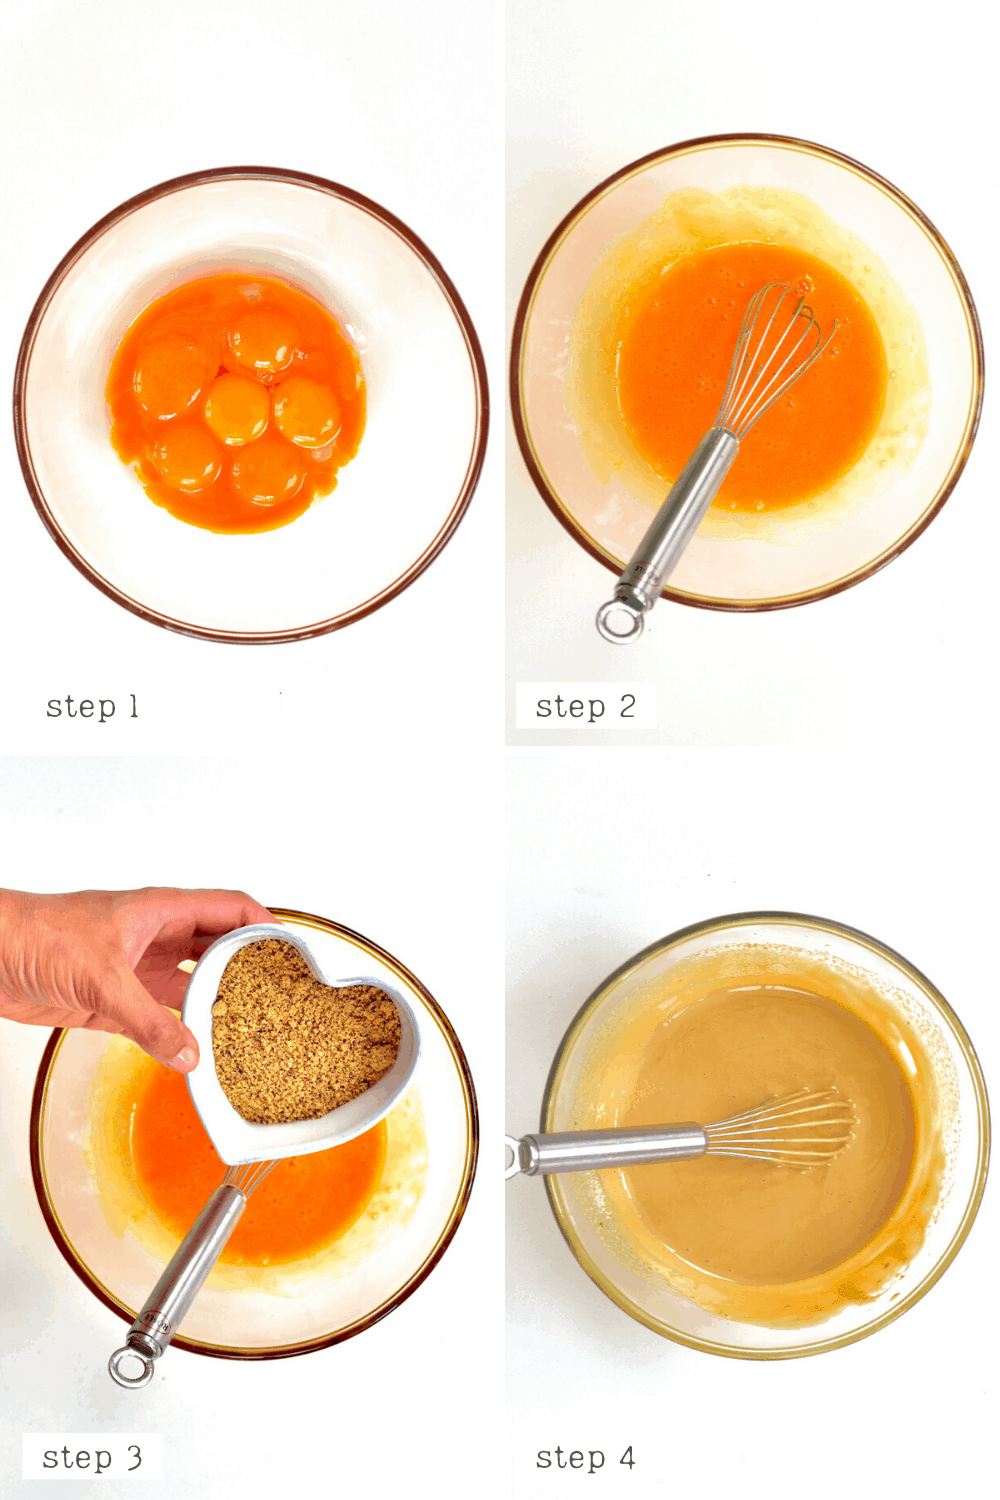
First, Prepare the egg mixture. Separate the egg yolks from the egg whites.
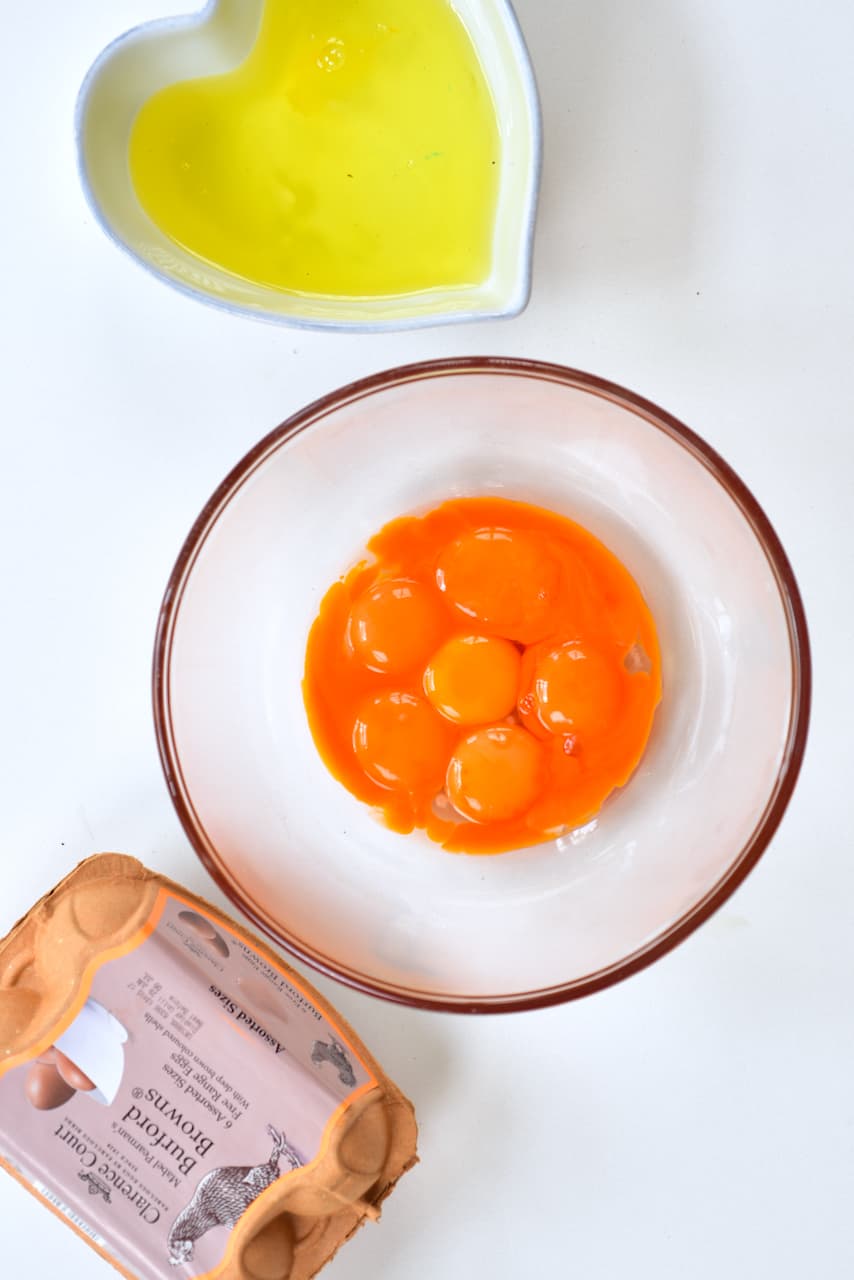
Then whisk the yolks with the sugar until the sugar has dissolved into a thick, creamy mixture.
Second, heat the dairy. Combine the milk and cream into a large pan, whisking constantly while heating on low.
Add the seeds from the vanilla pods into the mix and stir well, then throw in the entire pod. This will help to infuse additional flavor into the caramel ice cream. The pods will be removed later on in the process.
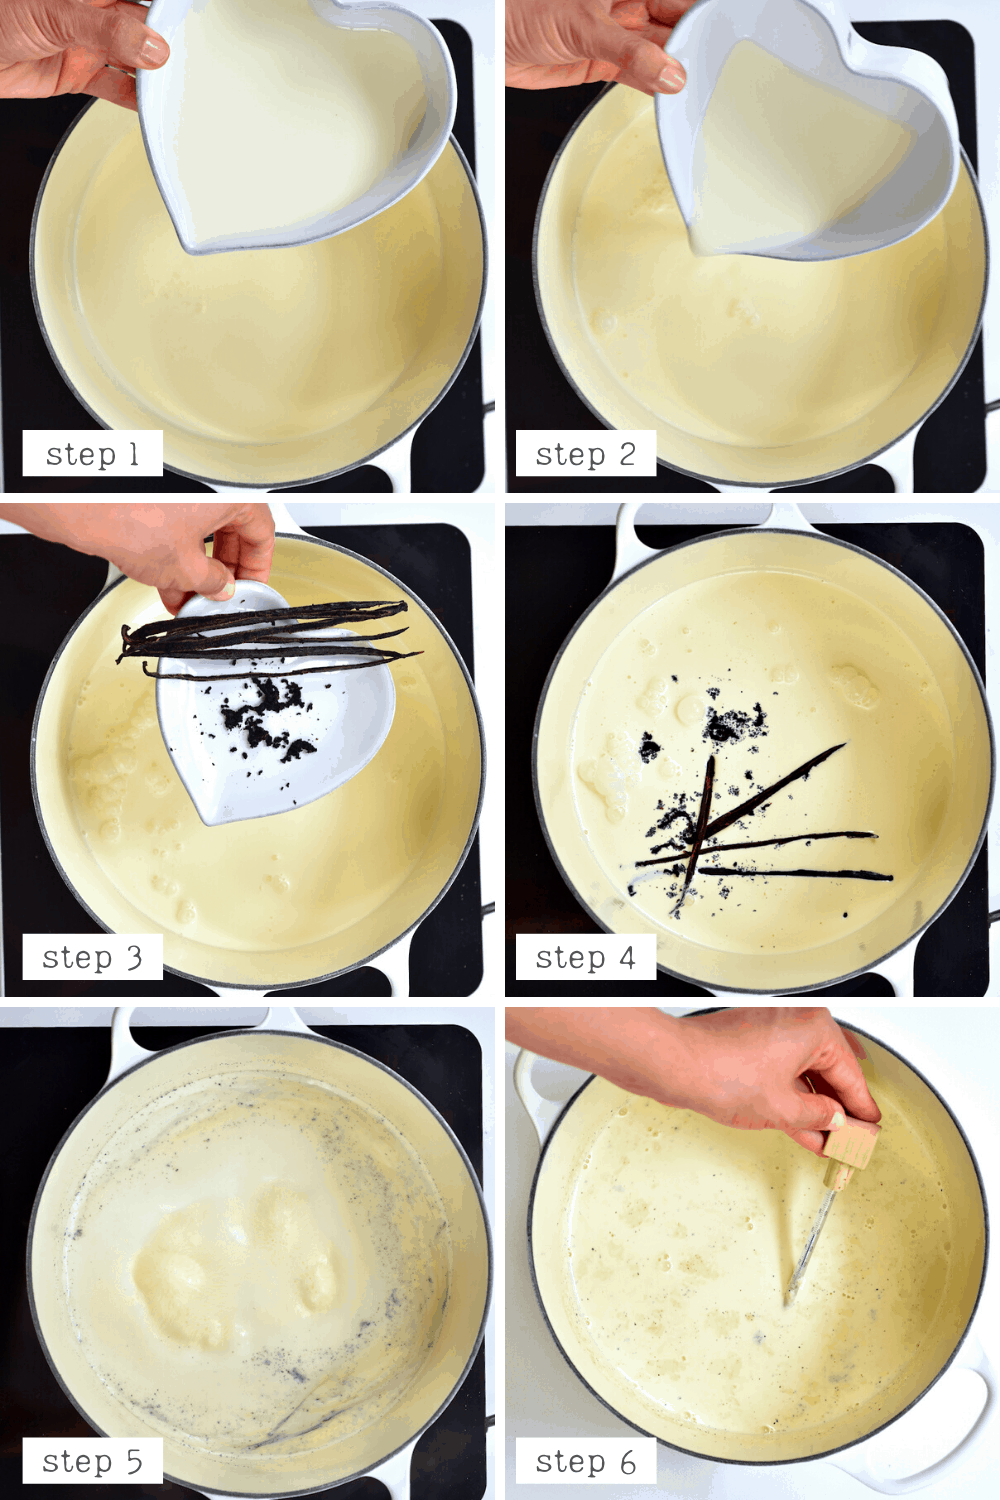
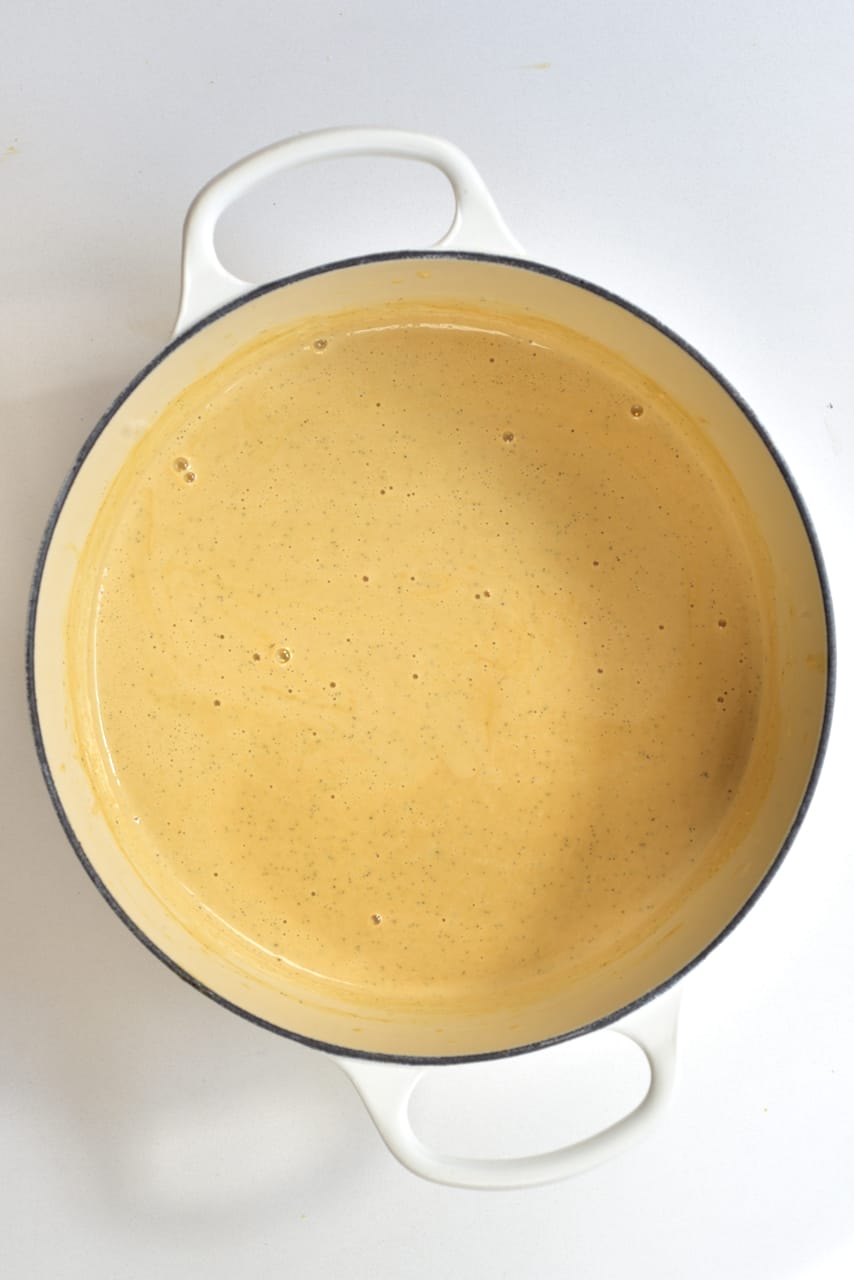
Third, bring the mixture to a soft boil. Once it begins to boil, quickly reduce the heat and simmer on low for around 10 minutes, stirring occasionally.
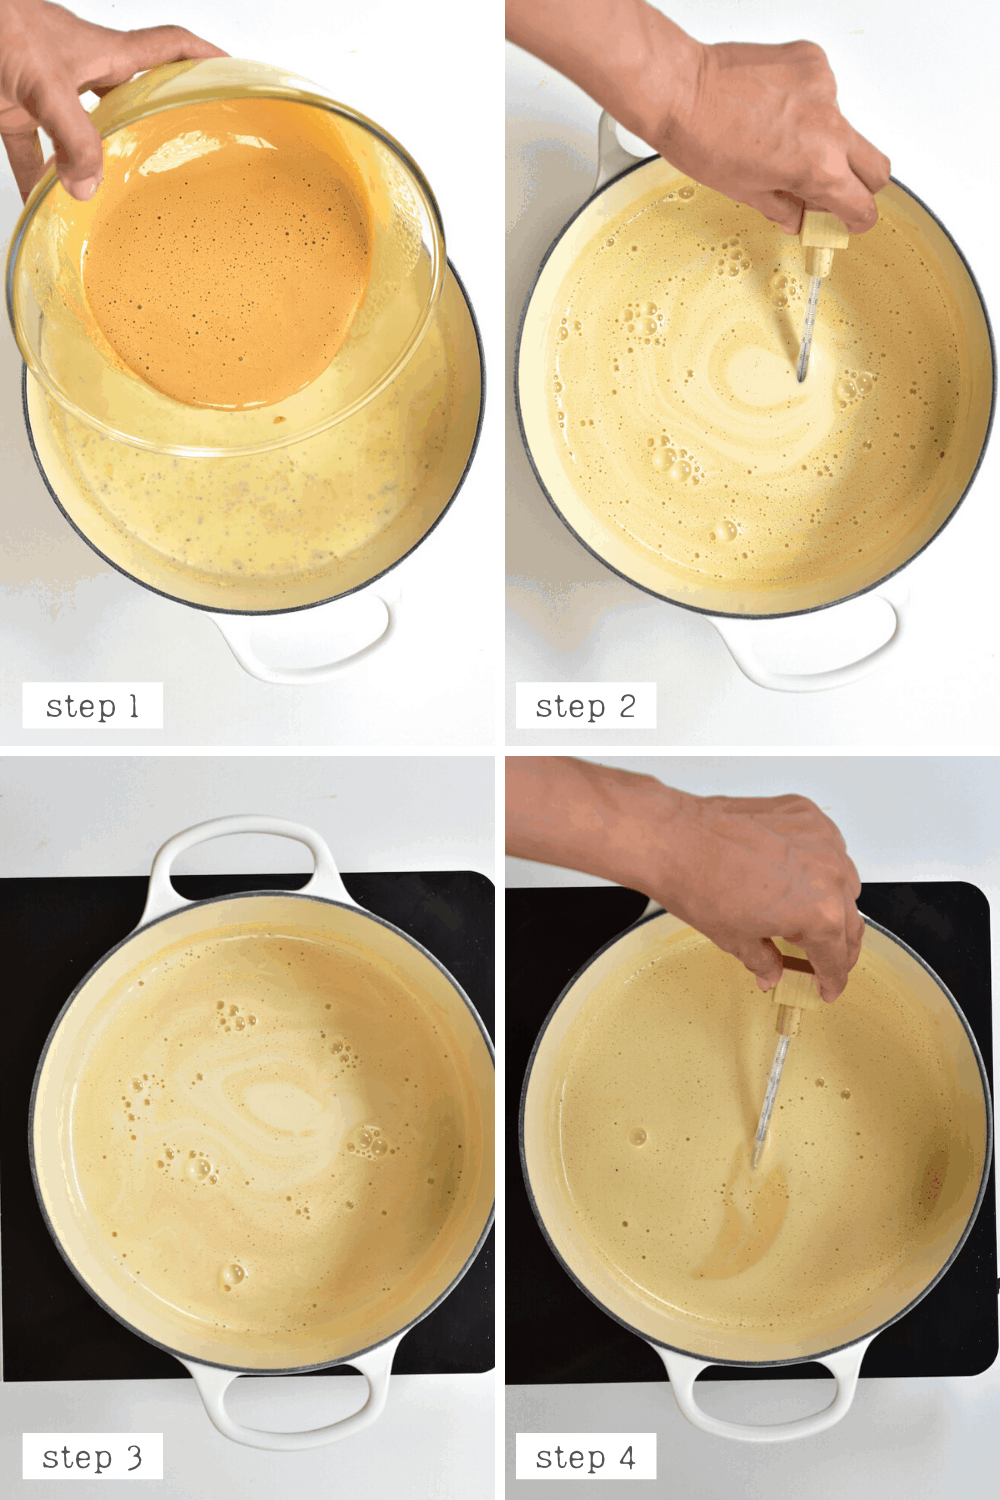
Fourth, cool this mixture. Once the ten minutes are up, quickly remove from heat and transfer it to a bowl (or leave in the saucepan) over an ice-bath. The temperature needs to be brought down to 60ºC/140ºF. If you don’t have a thermometer, then it needs to be cool enough to dip a clean finger in for 3-4 seconds and withstand the heat (be careful when doing this!).
Fifth, combine and pasteurize the caramel ice cream. When ready, stir the egg mixture into the cream mixture then heat gently again to at least 70ºC/160ºF and simmer (not boil!) for around 10 minutes to thicken slightly. Without a thermometer, you can test that your ice cream has reached the right heat and consistency when you dip a spoon in the mix, and it coats the back of the spoon, without easily sliding off.
Set aside to cool down.
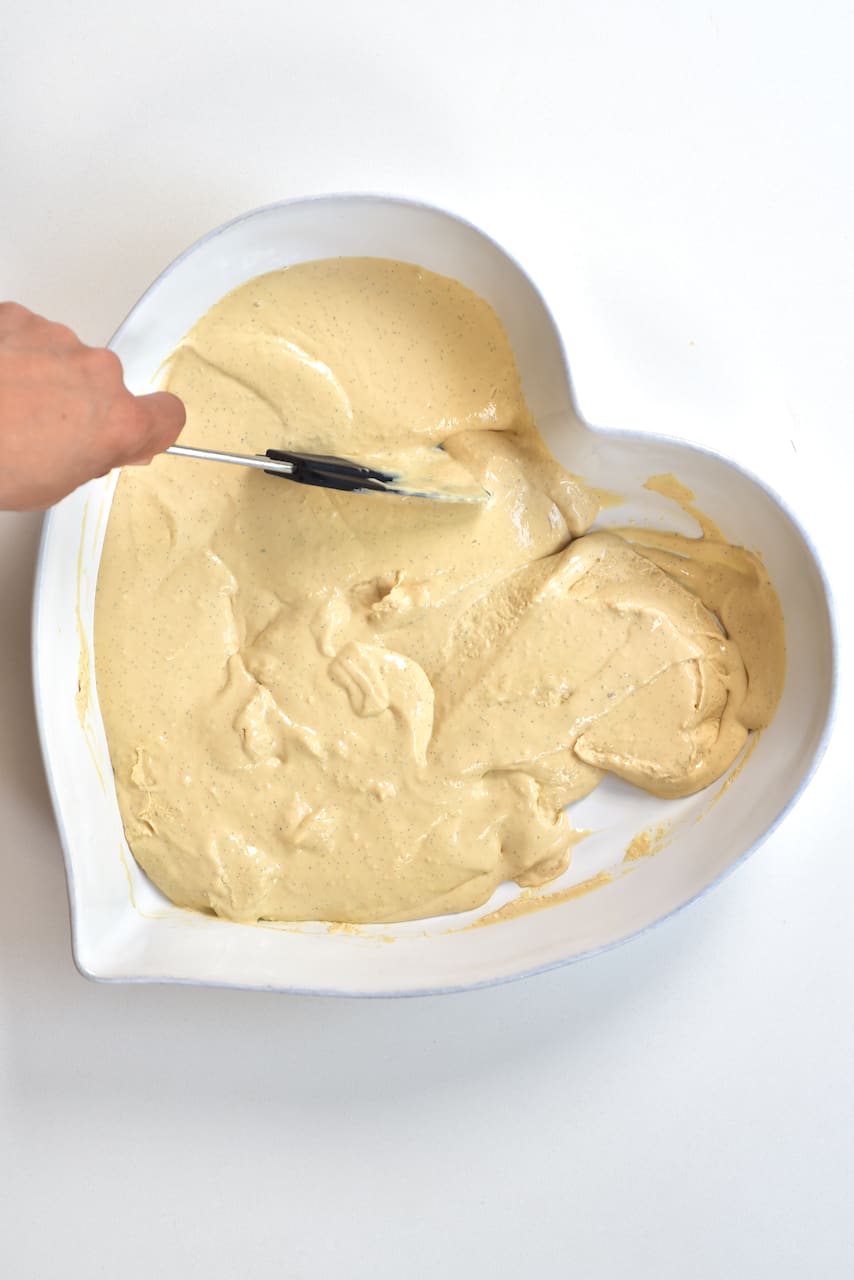
Sixth, chill the mixture. Transfer to a large bowl and remove the vanilla pods. It’s important that you use a container/bowl with a large surface area as that will help chill the mixture faster.
You can leave the mixture to chill overnight in the fridge to further infuse the vanilla flavor before removing the pods if preferred.

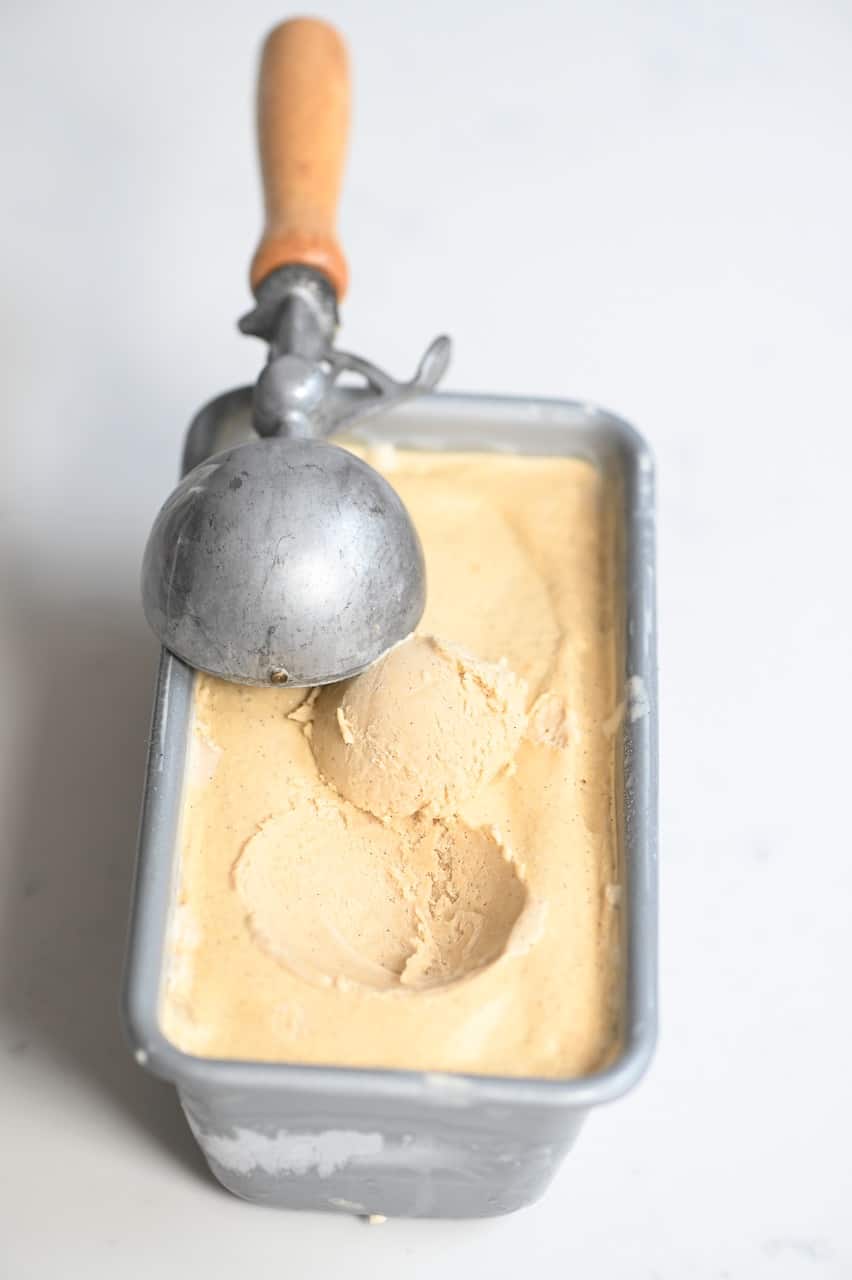
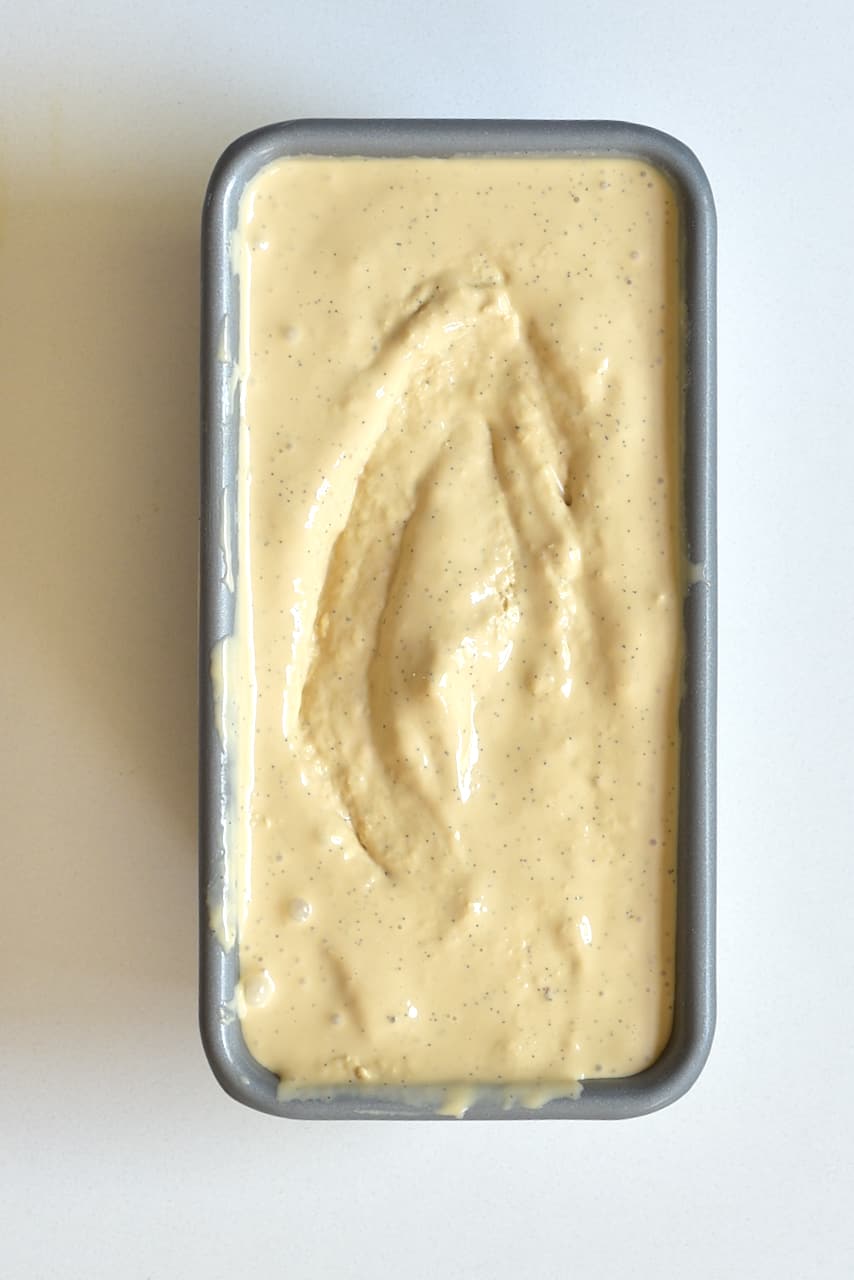
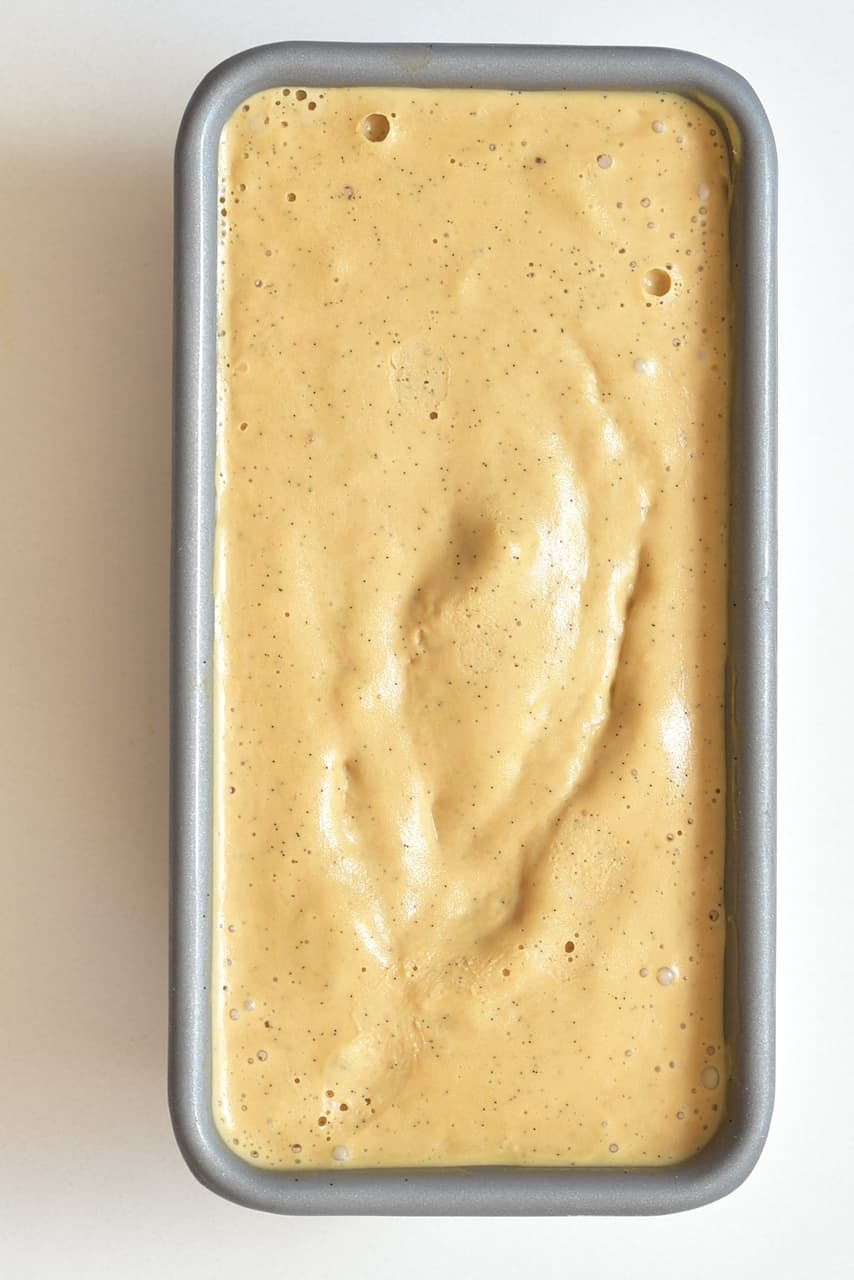
Seventh, it’s time to freeze. Place the caramel ice cream in the freezer for 45 minutes and then take out and mix/fold to agitate the ice crystals.
Put back in the freezer for another 45 minutes, then mix again. If the mixture hasn’t hardened too much, put it back in the freezer for a final 45 minutes.
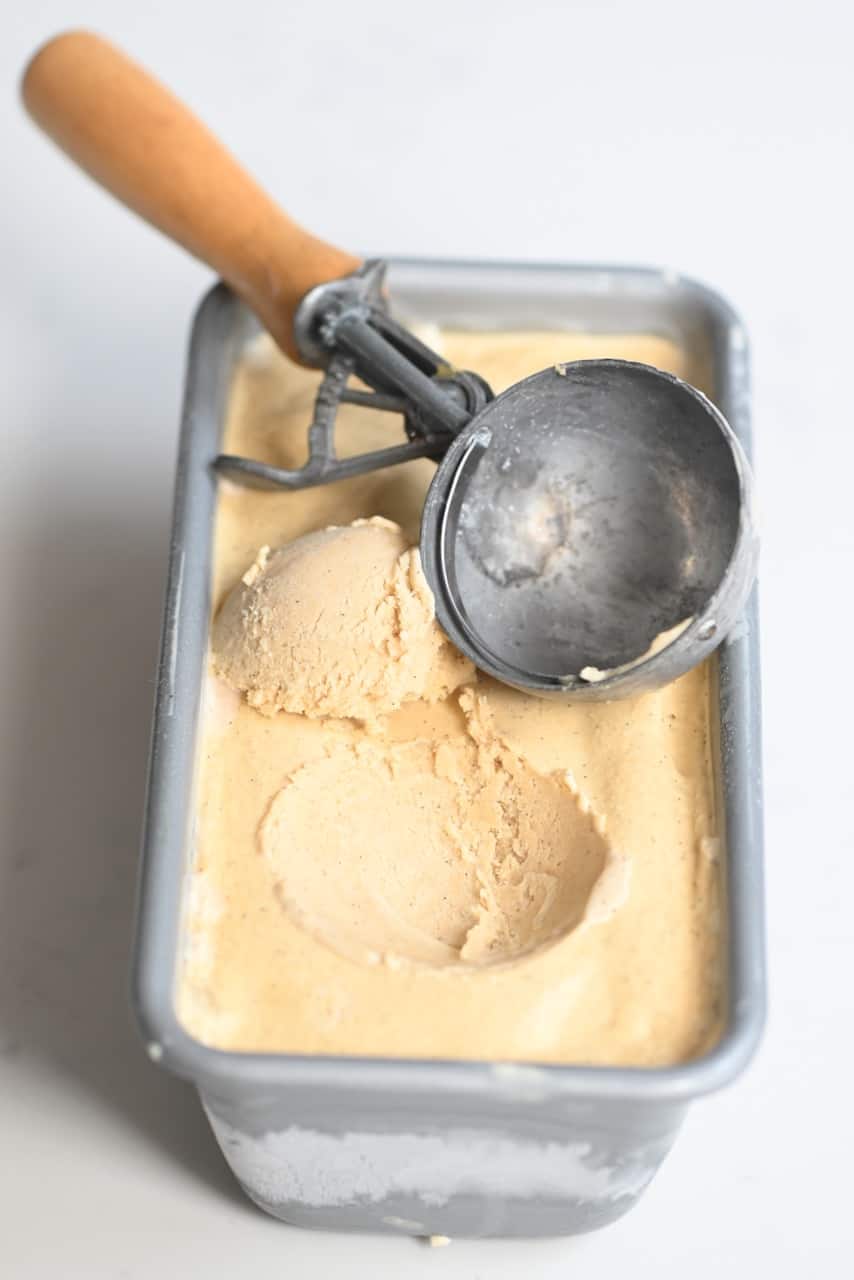
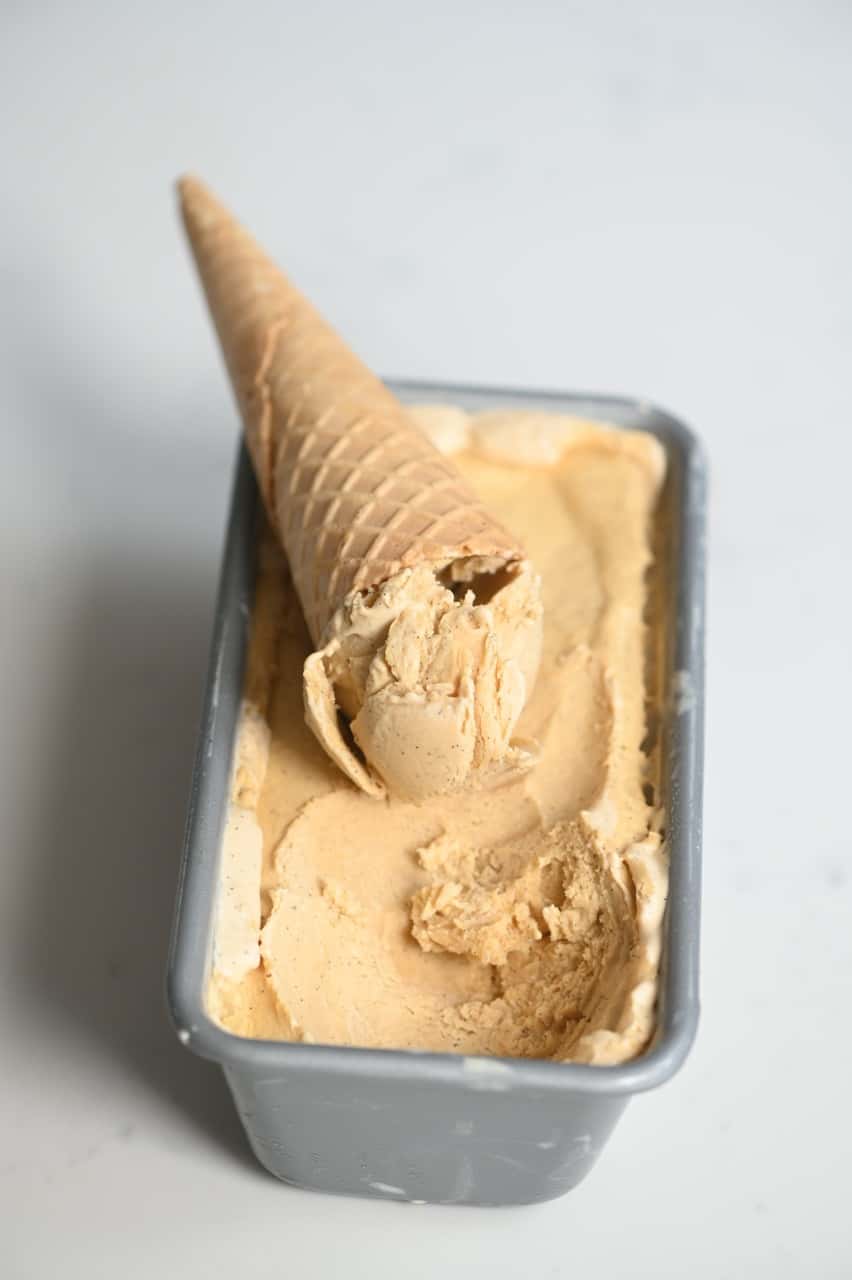
Finally, transfer to a freezer-safe container (such as an ice cream tub or a bread loaf tin, like I did) and freeze for about 1 hour. It’s best to cover with a silicone wrap to avoid freezer burn.
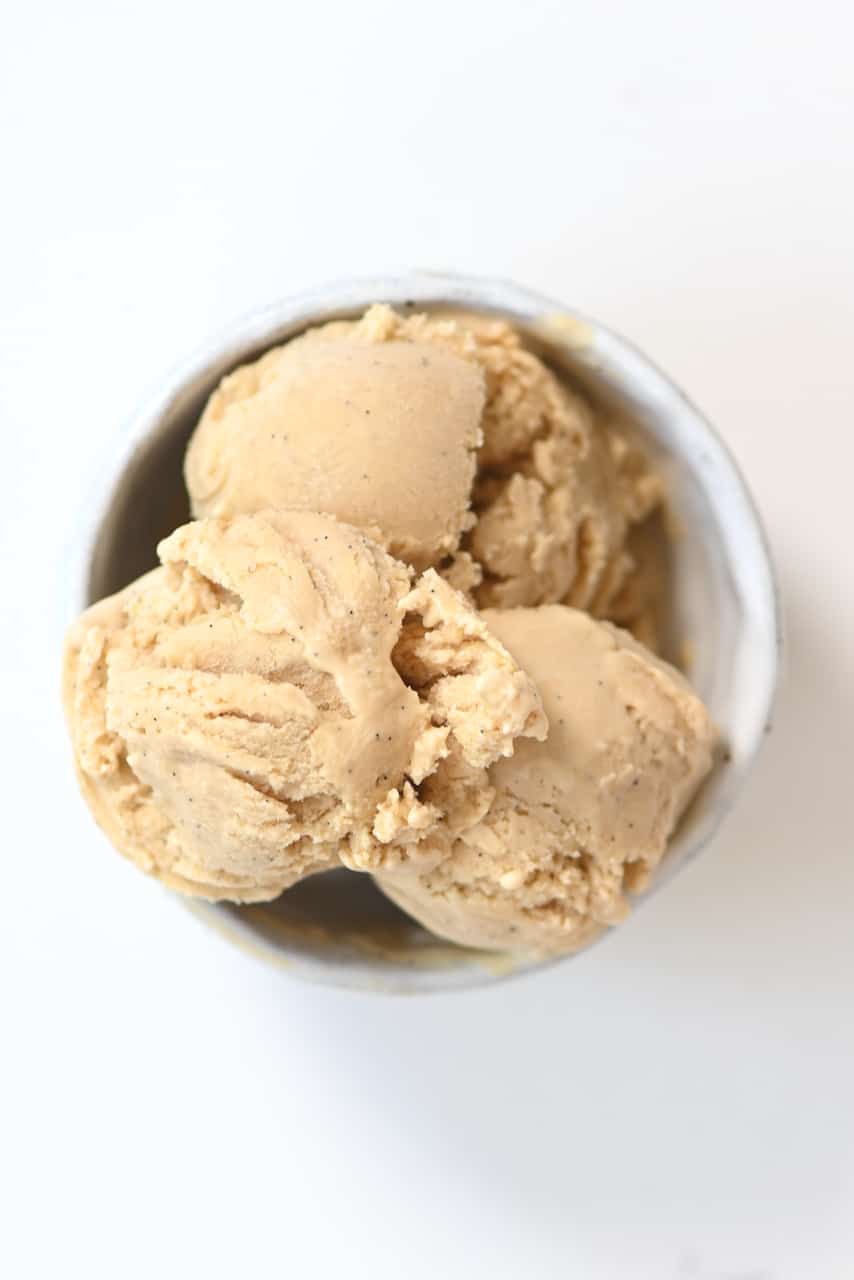
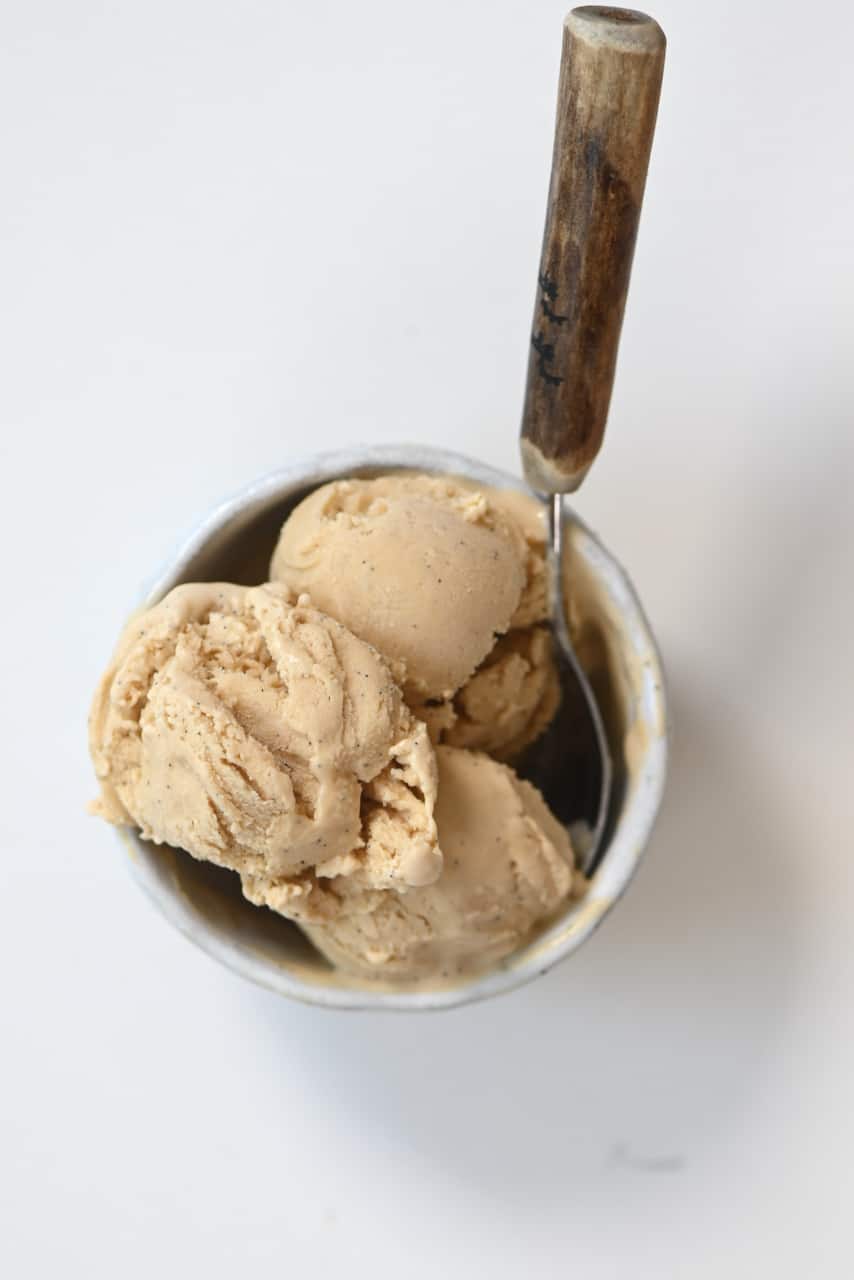
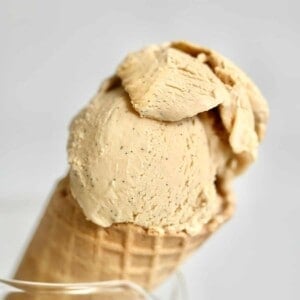
The caramel ice cream is now ready to serve!
Remove from the freezer 5-10 minutes before serving to allow it to soften just a bit.
Serve it on its own or pair it with warm desserts like brownies, apple crisp, or a spoonful of Blackberry Cobbler.
Recipe Notes & Variations
- For salted caramel ice cream, add a dash of salt to the recipe. You could also top with a sprinkling of sea salt flakes when doing the final freeze.
- Adding vanilla extract or any ‘alcohol’-based ingredient will help to lower the freezing point of the ice cream. This will allow it to remain creamy, rather than ‘rock-solid,’ once frozen.
- The same goes for sweeteners – I know many may want to reduce the amount, but the sugar helps to stop the ice cream from freezing solid.
Caramel Ice Cream Add-Ins
This easy homemade ice cream is incredibly easy to customize. Simply add any additions into the caramel ice cream base just before freezing for the first time, and you’re good to go. Caramel pairs wonderfully with several different flavors too.
- For a peanut butter version – Add peanut butter directly into the ice cream and swirl (combining with a little cream will help it from freezing solid). Also, you could freeze some Vegan Chocolate Peanut Butter Cups and then crush them and pour into the ice cream.
- For additional caramel flavor – Swirl in a caramel sauce, like this one I use for my Salted Caramel & Raspberry Vegan Magnum Ice Creams.
- Other Cookies & Baked Goods – whether you cant to crush in homemade Ooey Gooey Vegan Chocolate Chip Cookies or your favorite store-bought options (like Biscoff or Oreos), just crush them into the size you’d prefer and fold into the ice cream mixture. The same can be said for brownies and other baked goodies.
- Coffee and/or Alcohol – Coffee and caramel are a sinfully delicious combination. Also, certain alcohols like Baileys, pair well with the caramel flavors.
- Chocolate – Whether you want to swirl in a chocolate ganache, mix with chocolate ice cream, or chocolate chips. You could use this Milk chocolate, dark chocolate, or white chocolate. I like to shave chocolate on top, too.
- Nuts – or caramelized nuts can be crushed up and are a fantastic addition to this caramel ice cream. Pecans are a classic combination with caramel.
- Other Snacks – ‘salty’ snacks with the sweetness of this ice cream are a match made in heaven. Combine popcorn, pretzels, or similar salty snacks to this ice cream.
- Coconut: For a delicious coconut ice cream, you could add shredded coconut for texture, and coconut butter, for flavor. You could even add toasted coconut flakes to top.
If you give this healthy caramel ice cream recipe a go then let me know your thoughts in the comments. Also, feel free to tag me in your recreations @AlphaFoodie.
Caramel Ice Cream
Ingredients
- 8 egg yolks I used Clarence Court Burford Browns
- 3 vanilla pod
- 1.5 cups whole milk
- 1.5 cups heavy cream or double cream
- ¾ cup Unrefined Cane sugar or brown sugar
Instructions
- Prepare the egg mixture. Separate the egg yolks from the egg whites and then whisk the yolks with the sugar until the sugar has dissolved into a thick, creamy mixture.
- Heat the dairy. Combine the milk and cream into a large pan, whisking constantly while heating on low.
- Add the seeds from the vanilla pods into the mix and stir well, then throw in the entire pod. This will help to infuse additional flavor into the caramel ice cream and will be removed later on in the process.
- Bring the mixture to a boil. Once it begins to boil, quickly reduce the heat and simmer on low for around 10 minutes, stirring occasionally.
- Cool this mixture. Once the ten minutes are up, quickly remove from heat and transfer it to a bowl (or leave in the saucepan) over an ice-bath. The temperature needs to be brought down to 60ºC/140ºF. If you don't have a thermometer, then it needs to be cool enough to dip a clean finger in for 3-4 seconds and withstand the heat (be careful when doing this!).
- Combine and pasteurize the caramel ice cream. When ready, stir the egg mixture into the cream mixture then heat gently again to at-least 70ºC/160ºF and simmer (not boil!) for around 10 minutes to thicken slightly. Without a thermometer, you can test that your ice cream has reached the right heat and consistency when you dip a spoon in the mix, and it coats the back of the spoon, without easily sliding off.
- Set aside to cool down.
- Chill mixture. Transfer to a large bowl and remove the vanilla pods. It's important that you use a container/bowl with a large surface area as that will help chill the mixture faster.
- You can leave the mixture to chill overnight in the fridge to further infuse the vanilla flavor before removing the pods if preferred.
- It's time to freeze. Place the caramel ice cream in the freezer for 45 minutes and then take out and mix/fold to agitate the ice crystals.
- Put back in the freezer for another 45 minutes, then mix again. If the mixture hasn’t hardened too much, put it back in the freezer for a final 45 minutes.
- Finally, transfer to a freezer-safe container (such as an ice cream tub or a bread loaf tin, like I did) and freeze for about 1 hour. It's best to cover with a layer of plastic wrap to avoid freezer burn.
- The caramel ice cream is now ready to serve! Remove from the freezer 5-10 minutes before serving to allow it to soften just a bit.
Video
Notes
- For salted caramel ice cream, add a dash of salt to the recipe. You could also top with a sprinkling of sea salt flakes when doing the final freeze.
- Adding vanilla extract or any ‘alcohol’-based ingredient will help to lower the freezing point of the ice cream. This will allow it to remain creamy, rather than ‘rock-solid,’ once frozen.
- The same goes for sweeteners – I know many may want to reduce the amount, but the sugar helps to stop the ice cream from freezing solid.
- For a peanut butter version – Add peanut butter directly into the ice cream and swirl (combining with a little cream will help it from freezing solid). Also, you could freeze some Vegan Chocolate Peanut Butter Cups and then crush them and pour them into the ice cream.
- For additional caramel flavor – Swirl in a caramel sauce, like this one I use for my Salted Caramel & Raspberry Vegan Magnum Ice Creams.
- Other Cookies & Baked Goods – whether you cant to crush in homemade Ooey Gooey Vegan Chocolate Chip Cookies or your favorite store-bought options (like biscoff or Oreos), just crush them into the size you’d prefer and fold into the ice cream mixture. The same can be said for brownies and other baked goodies.
- Coffe and/or Alcohol – Coffe and caramel are a sinfully delicious combination. Also, certain alcohols like Baileys, pair well with the caramel flavors.
- Chocolate – Whether you want to swirl in a chocolate ganache, mix with chocolate ice cream, or chocolate chips. You could use this Milk chocolate, dark chocolate, or white chocolate. I like to shave chocolate on top too.
- Nuts – or caramelized nuts can be crushed up and are a fantastic addition to this caramel ice cream. Pecans are a classic combination with caramel.
- Other Snacks – ‘salty’ snacks with the sweetness of this ice cream are a match made in heaven. Combine popcorn, pretzels, or similar salty snacks to this ice cream.
- Coconut: For a delicious coconut ice cream, you could add shredded coconut for texture, and coconut butter, for flavor. You could even add toasted coconut flakes to the top.
Nutrition
Nutrition information is automatically calculated, so should only be used as an approximation.


In number four what does “still occasionally” mean????
Hi Melissa,
Thanks for catching this. It should be “stirring occasionally”. It’s fixed now. <3