
This post may contain affiliate links. Please read our disclosure policy.
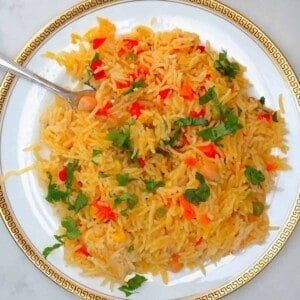
This Lebanese rice recipe is a staple side dish at home. You only need rice, vermicelli noodles, and oil to make light and fluffy Lebanese rice with vermicelli—a perfect pairing for stews and your favorite Middle Eastern mains.

This delicious and flavorful Lebanese rice, also known as riz bi sha’riyeh, is a classic and staple dish in Middle Eastern cuisine and something I grew up with back in Lebanon. It’s a simple, naturally vegan, and easy-to-make recipe that combines long-grain rice with toasted vermicelli and some oil. It’s as simple to make as stovetop jasmine rice.
Lebanese rice is a versatile and comforting dish for both busy nights and special occasions. It’s great for serving alongside all my favorite stews like butter bean fasolia stew, or carrot and pea bazella w riz stew. I even love it with just some yogurt!

Want to save this recipe?
Watch how to cook it
Ingredients

- Long-grain rice: For a light and fluffy texture. You can use either brown or white. You can use basmati rice.
- Vermicelli noodles: They add crunchy texture and nutty flavor. If needed, substitute with thin pasta like capellini or angel hair pasta.
- Vegetable Oil: Use any other neutral-flavored oil, such as sunflower, canola, avocado oil, or even olive oil.
- Water and Salt: To cook and season the rice. For more flavor, you can use chicken broth.
See the printable recipe card below for full information on ingredients and quantities.
How to cook Lebanese rice with vermicelli
Prepare the rice: Start by rinsing the rice until the water runs clear. Place the rice in a sieve and rinse under running water. Alternatively, fill a bowl with water and swish the rice in it, changing the water 3-4 times. Rub the rice with your fingers to get all the excess starch off. This will stop it from clumping up, resulting in a light and fluffy dish.
Also, break the vermicelli noodles into pieces.
Sauté the vermicelli and rice: Heat the oil in a large saucepan and add the vermicelli. Stir fry on medium heat for 1-2 minutes until the noodles turn a deep golden brown color. Stir constantly so they don’t burn on one side.
Next, add the rice and sauté for 1-2 minutes, stirring to incorporate and toast it on all sides.
Cook the rice: Then, add the water and salt, stir well, and bring to a boil over medium-high heat. Once boiling, lower the heat, cover the saucepan, and simmer on low for about 12-15 minutes or until all the water is absorbed.
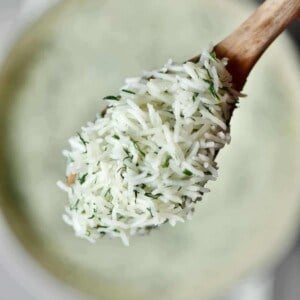
Finally, fluff the Lebanese rice with a fork, and it will be ready to serve!

What to serve with Lebanese rice
You can enjoy the rice on its own or paired with stews and proteins. Here are some popular ways to serve it:
- With natural yogurt: Enjoy the rice as a light meal with some yogurt or yogurt-based dips.
- With stews: Top it with or serve it alongside Lebanese butter bean stew, Lebanese carrot and peas stew, or Lebanese bamya okra stew.
- With protein of choice: This is the perfect side dish for proteins like Lebanese molokhia (jute leaves with chicken), homemade kofta kebab, and authentic shish tawook.
Also, let me know in the comments below what your favorite ways to serve Lebanese rice with vermicelli are.

More simple rice recipes

If you try this recipe for Lebanese rice with vermicelli, let me know how it goes in the comments below. I’d appreciate a recipe card rating and would love to see your recipe recreations – tag me on Instagram @Alphafoodie!

Lebanese Rice With Vermicelli
Ingredients
- 2 cups long-grain rice
- 2.5 cups water
- 1 cup vermicelli noodles broken into pieces
- 2 Tbsp vegetable oil
- 1 tsp salt
Instructions
- Rinse the rice until the water runs clear, either in a bowl or in a sieve under running water. Rub the rice with your fingers to remove all the excess starch.Break the vermicelli noodles into pieces.
- In a large saucepan, heat the oil over medium heat and add the vermicelli. Sauté, stirring constantly, for 1-2 minutes until the noodles turn golden brown.
- Add the rice and sauté for 1-2 minutes, stirring to incorporate and toast it on all sides.
- Pour the water and add the salt. Stir well and bring to a boil over medium-high heat. Once boiling, lower the heat, cover the saucepan, and simmer on low for about 12-15 minutes or until all the water is absorbed.
- Fluff up the Lebanese rice, and it's ready to serve.
Video
Notes
Nutrition
Nutrition information is automatically calculated, so should only be used as an approximation.


I use rendered butter instead of oil and chicken broth instead of water
Hi Mary! Those sound like delicious upgrades. Rendered butter (ghee) and chicken broth will add such lovely richness and flavor to the vermicelli rice. Thanks for sharing your twist! 😊
CONGRATULATION FOR YOUR MOTHER.
SHE IS A REAL LIBANESE WOMAN
Thank you so much! <3
I use rendered butter instead of oil and chicken stock instead of water. Very tasty.
Thank you for sharing, Mary Joanne! These substitutions sound delicious.
Hello, we always ad Turmeric to our vermicelli rice. It looks even more beautiful.
That sounds delicious. Thanks for sharing, Sam!
amazing blog ! and I like this
thank you for tasty post
Thank you for your comment, Hari!