
This post may contain affiliate links. Please read our disclosure policy.
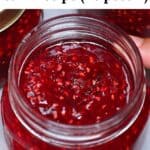


This classic 3-ingredient raspberry jam recipe is sweet, summery, tangy, delicious, and made with simple beginner-friendly steps and no added pectin. Plus, you can store it in the fridge, freezer, or can it in a hot water bath!
Preparing batches of jams and jellies is one of my favorite ways to capture and preserve the delicious sweet, tart, juicy flavor of ripe fruits to enjoy year-round. I love making classics like Blackberry Jam and Peach Jam, and this jam also captures the best of the season in a jar.
This homemade raspberry jam recipe is so simple and foolproof that it’s perfect for anyone new to jam-making. It requires just 3 ingredients: raspberries, sugar, and lemon juice – no pectin is required!
Want to save this recipe?
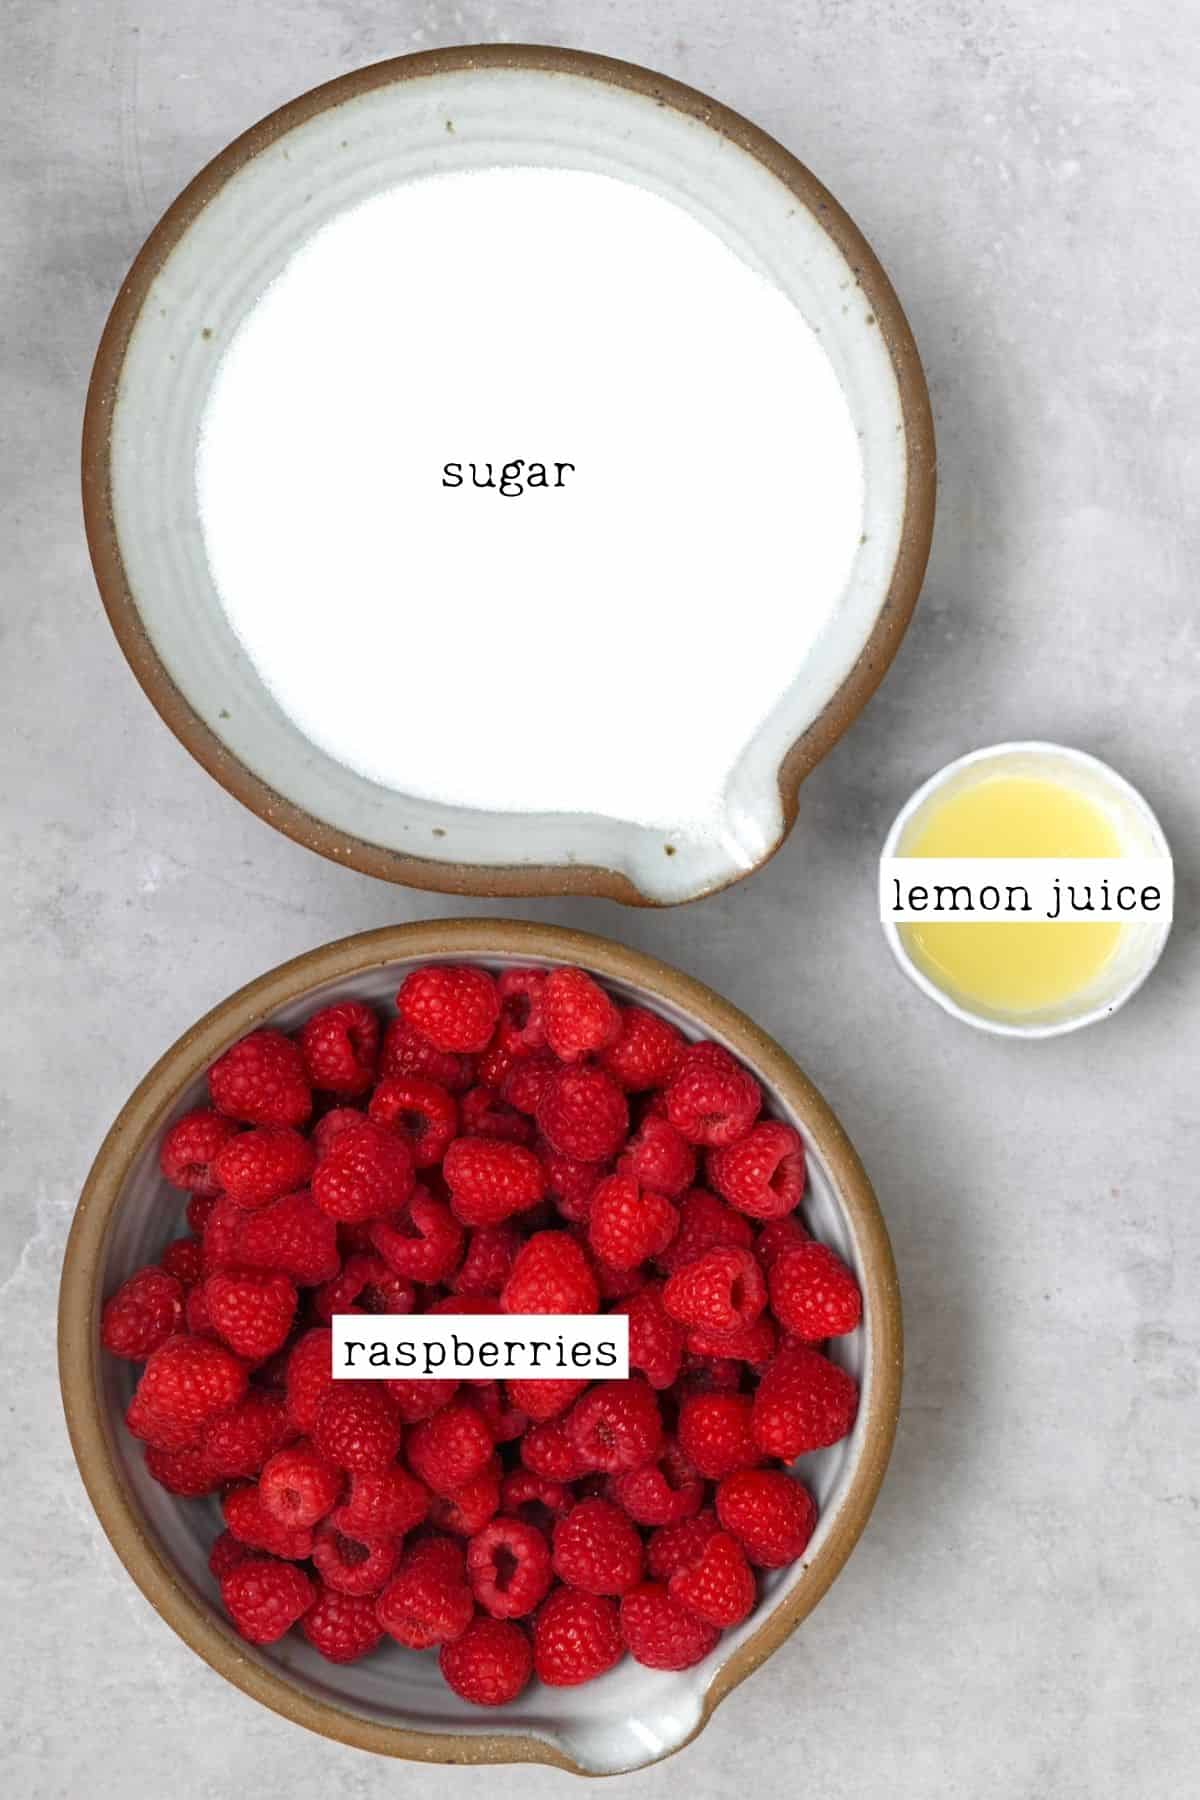
The Ingredients
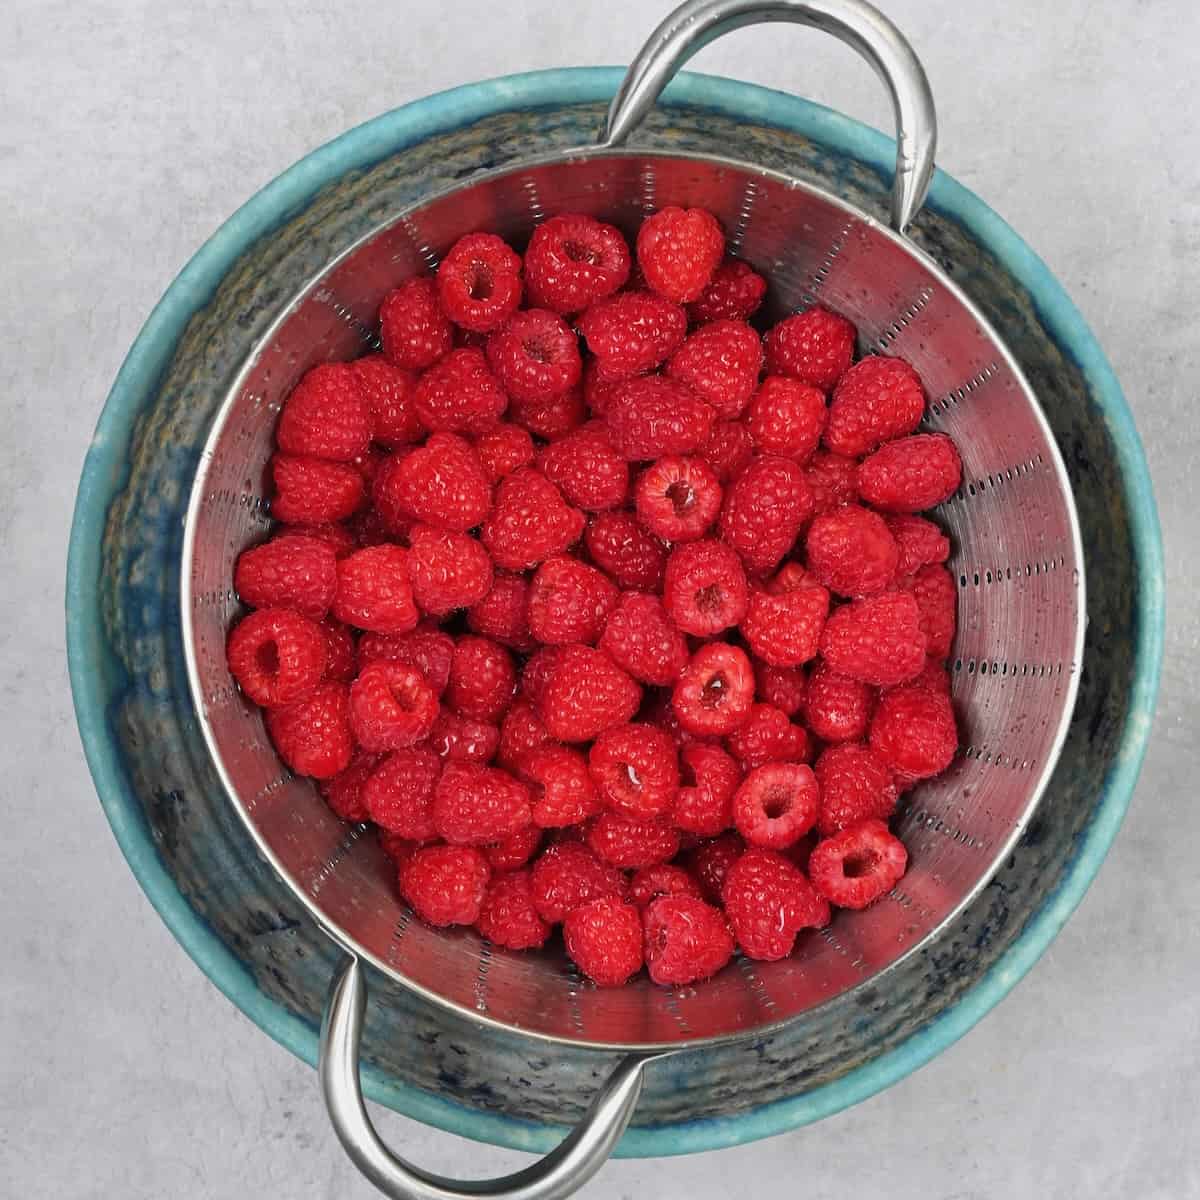
- Raspberries: It’s best to use fresh raspberries (rather than frozen) since they’re easier to work with. I like to combine primarily ripe berries with a small amount of slightly under-ripe ones. This not only adds flavor depth, but the under-ripe berries also contain more pectin.
- Sugar: Granulated white sugar sweetens without adding extra flavor, so it is the preferred option. However, feel free to experiment with unrefined sweeteners if wanted. Note that for this recipe, sugar labeled “jam sugar” or “preserving sugar” isn’t necessary, as it contains pectin and affects the simmering time/set of the jam.
- Lemon juice: You can use fresh or bottled lemon juice (the latter is best for water bath canning as it has a consistent pH level). It will help to balance flavor, boost the pectin content, and is a natural preservative. Add lemon zest for even more zing.
Refer to the recipe card notes for my favorite ways to add flavor to this recipe.
How to Make Raspberry Jam
Prepare the Jars and Fruit
First, it’s important to sterilize all the jars and tools used for this recipe. Wash the jars, lids, and bands in hot soapy water, rinse them well, and leave them to drain and dry. Or wash them in a dishwasher on the top rack – it’s best if they’re still warm when you go to use them).
Also, place 1-2 small plates in the freezer (they’ll be used for the gel test).
If you’re planning to can the jam, prepare the canner by adding the trivet/rack to the bottom of the canner and filling it with enough water to submerge the jars by an inch.
Then, wash the raspberries well, removing any stems and berries that are spoiled, blemished, etc.
Make the Jam
Transfer the berries and sugar to a large, deep, heavy-based stainless-steel saucepan. Then use a potato masher (or fork) to gently crush the berries, leaving some whole if preferred.
Then, add the lemon juice and stir. Bring the mixture to a full rolling boil, stirring constantly to ensure the sugar dissolves and the jam doesn’t stick to the pan.
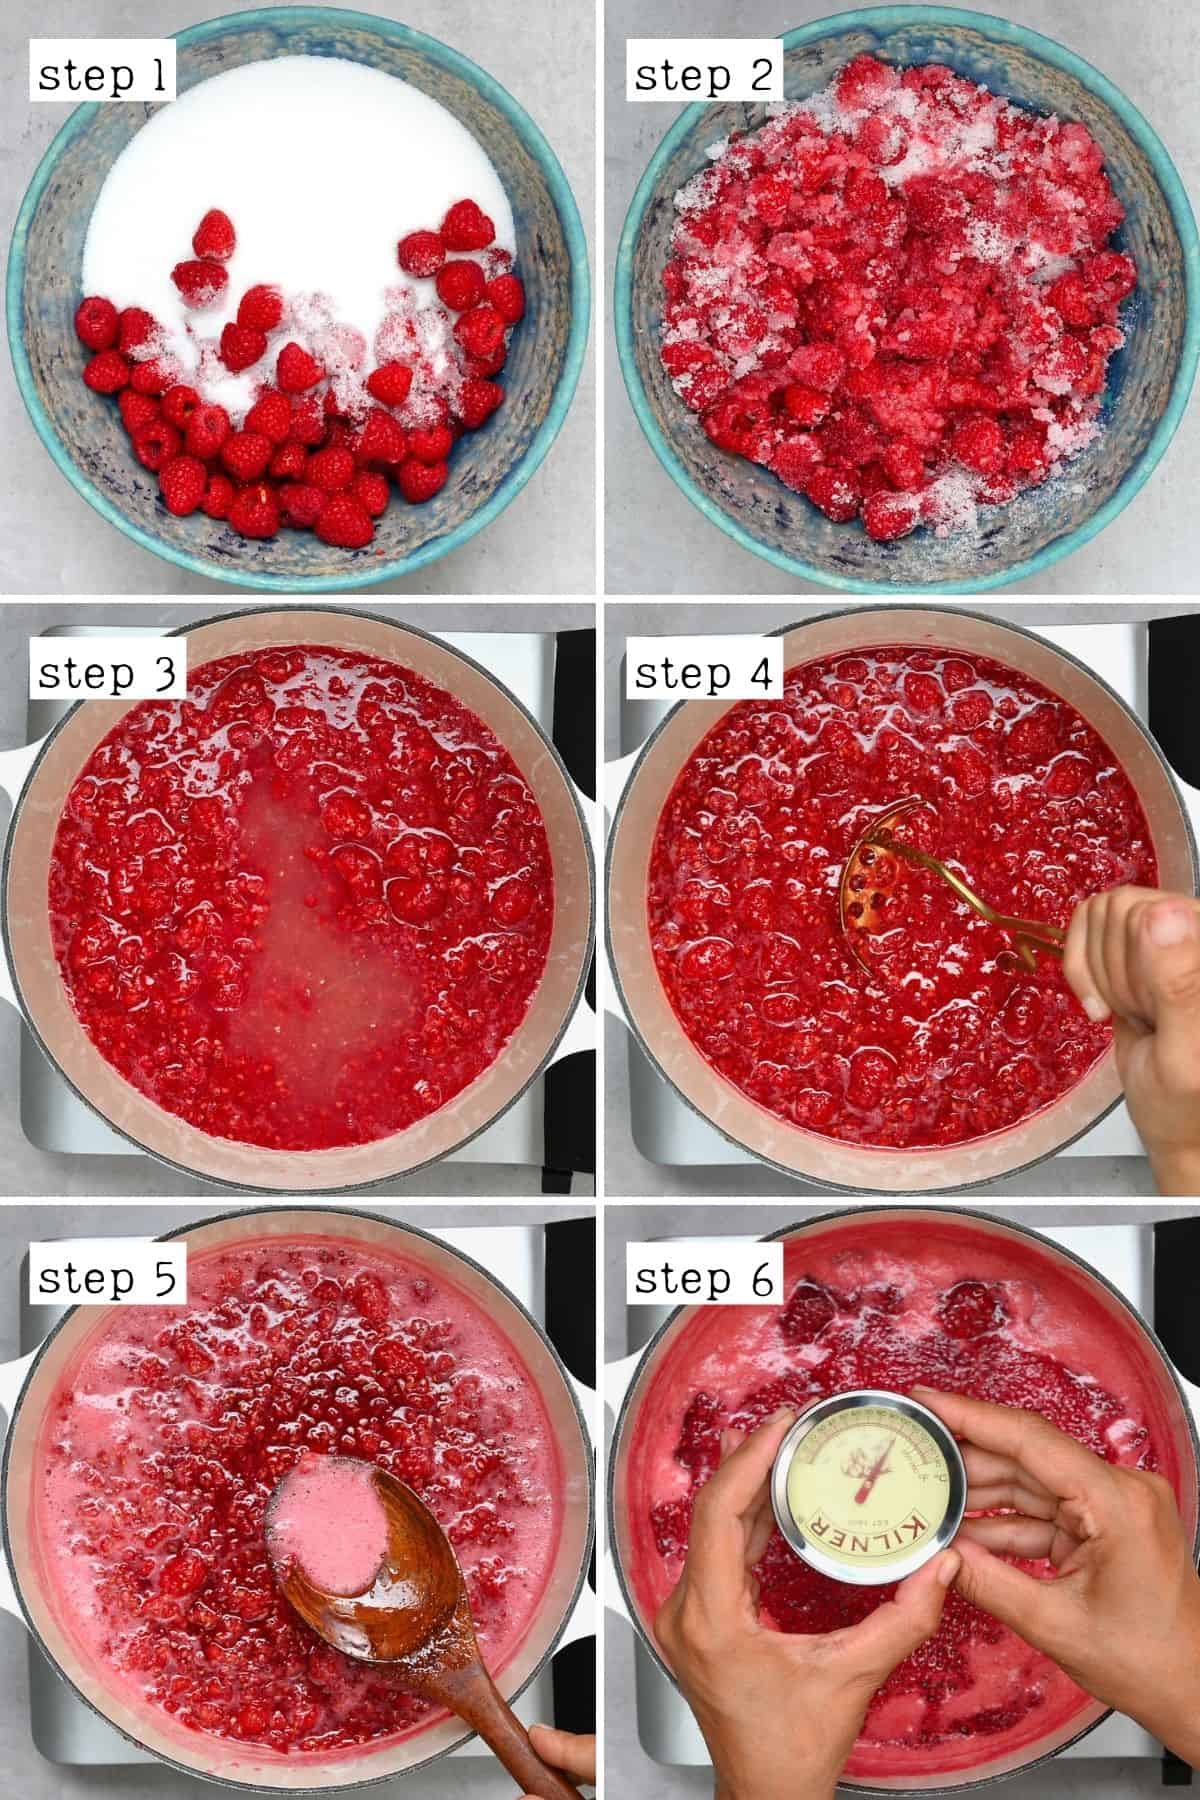
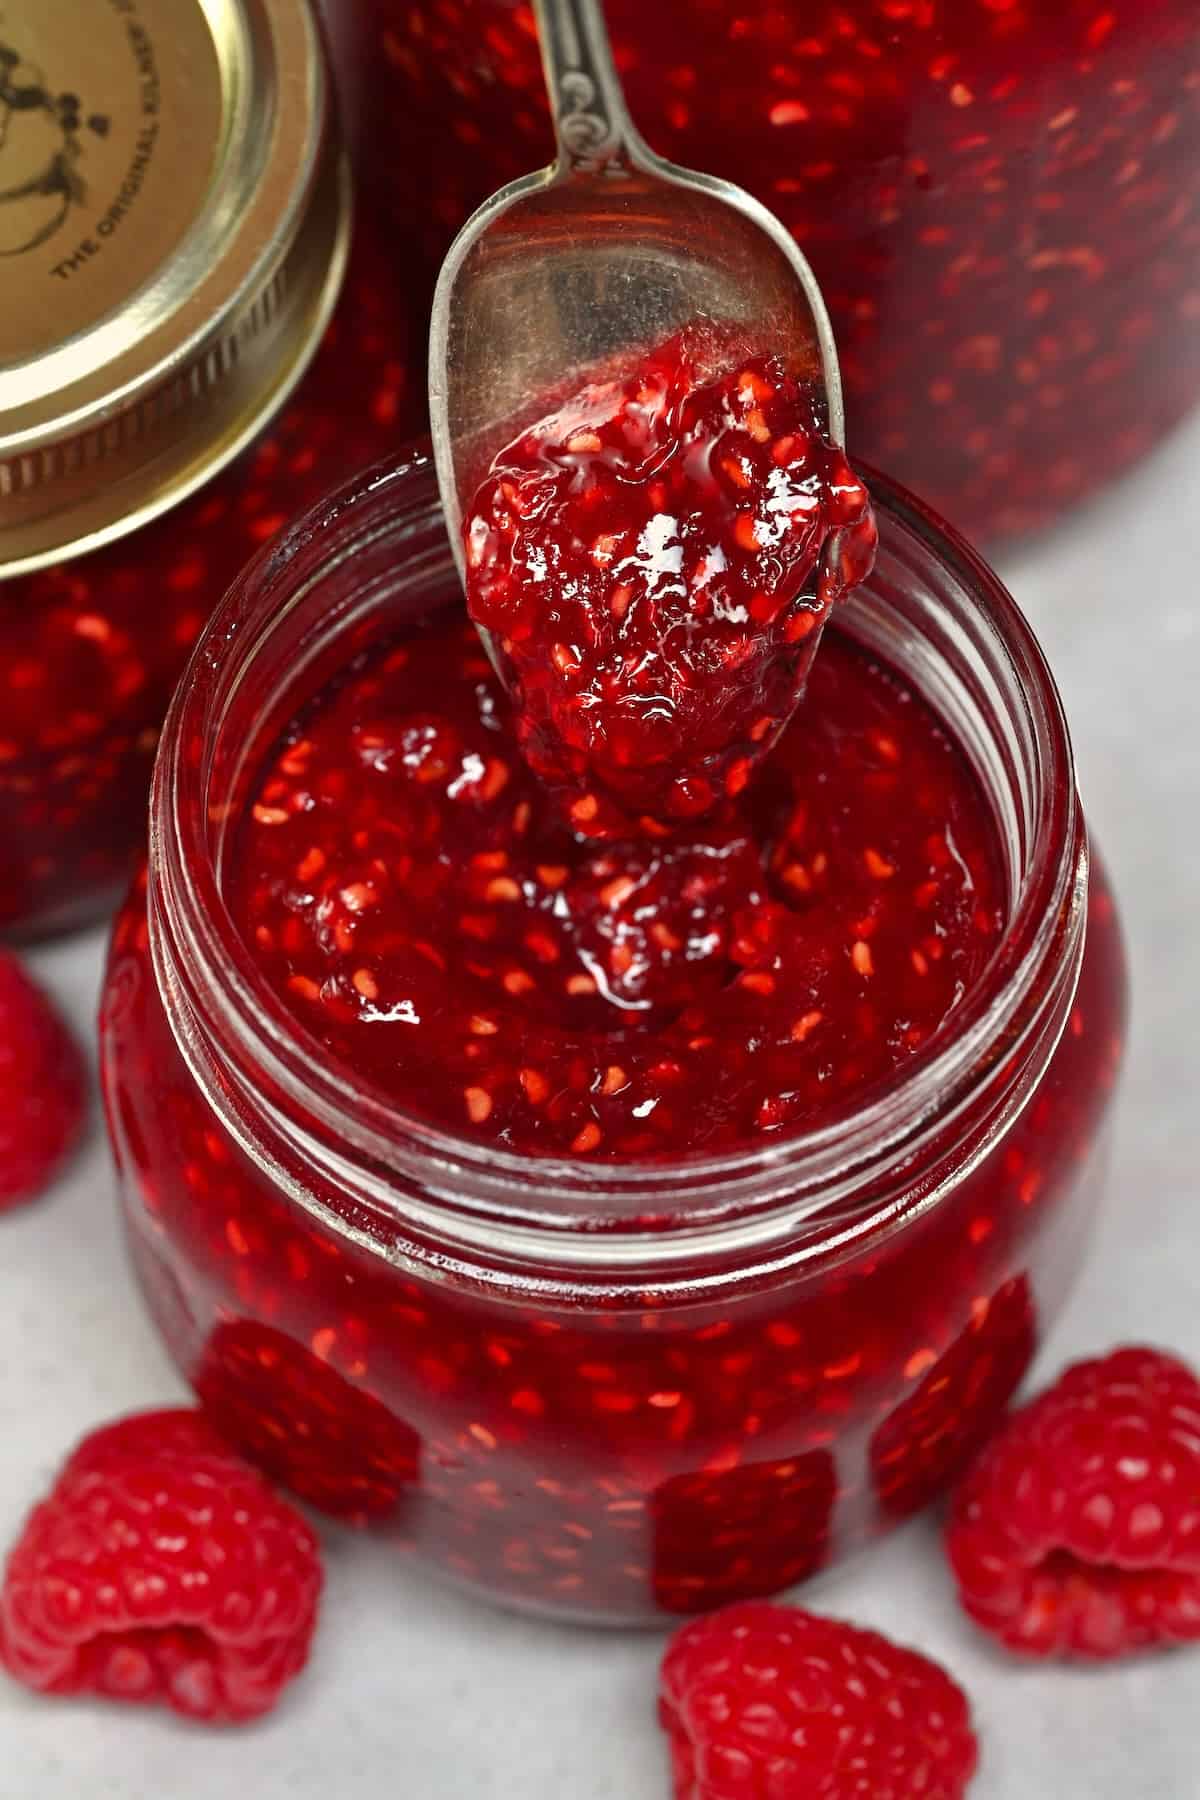
As foam appears on the top of the jam, use a spoon to scoop it away, simmering until the jar thickens enough to coat the back of a spoon (about 15-20 minutes).
The Gel Test
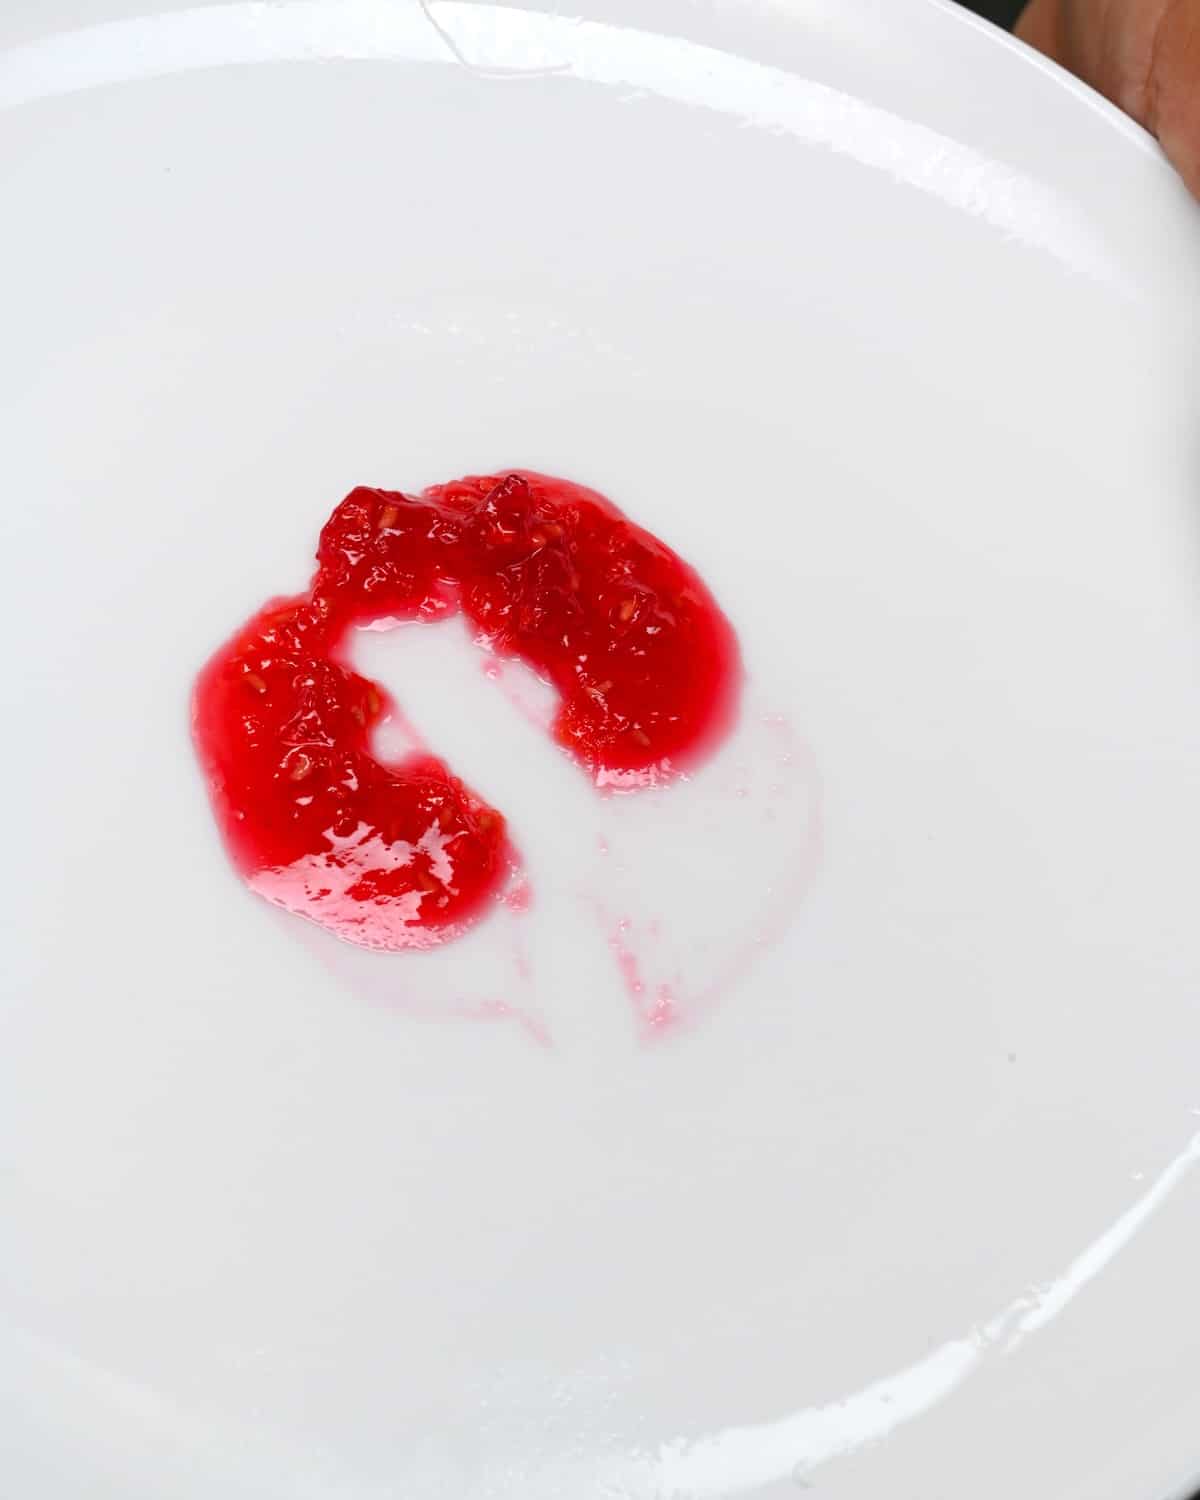
To test if the jam has reached the correct “set,” remove the saucepan from the heat and place about a teaspoon of the jam over the pre-chilled plate (from the freezer). Return it to the freezer for 1-2 minutes, then test the set. It should be set and wrinkle when pressed.
Alternatively, use a candy thermometer inserted vertically into the saucepan of jam (don’t touch the bottom!). It should reach 220ºF/104ºC.
If it hasn’t set, continue to cook for a few minutes and test it again.
Prepare and Fill The Jars
First, place the sterilized, warm jars on a clean kitchen towel/wooden board (this will stop temperature shock from causing cracks).
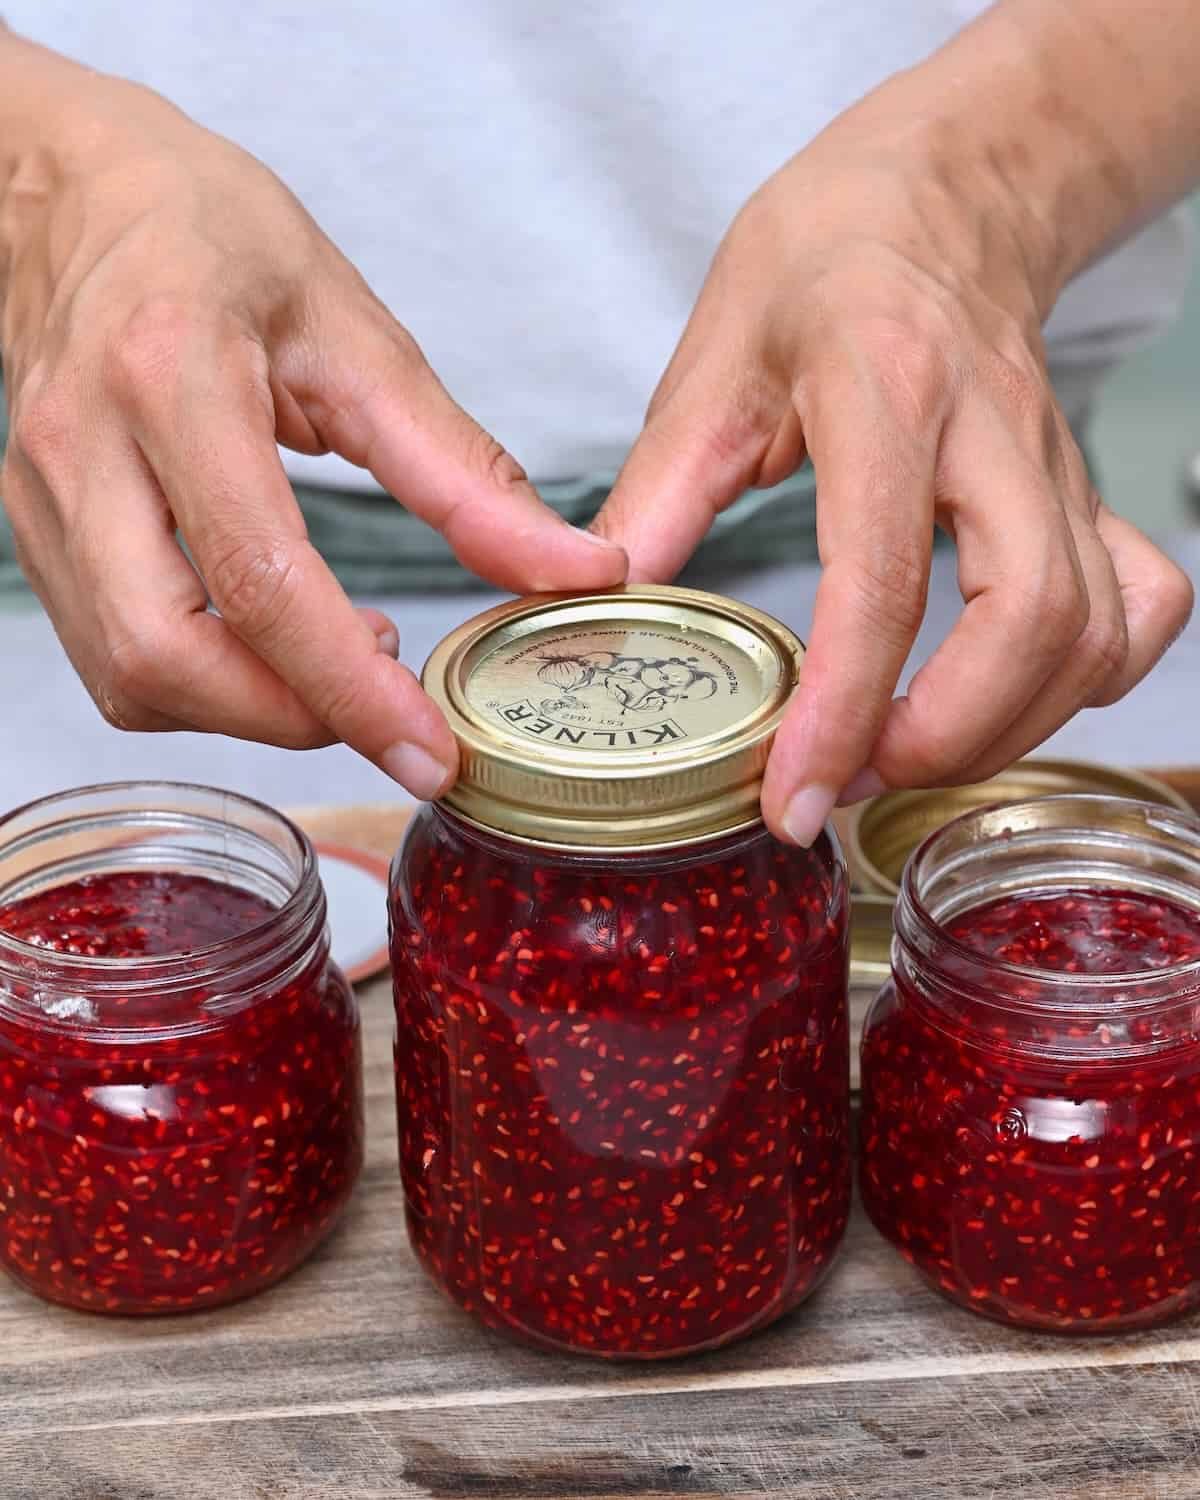
Then, ladle the hot jam into the hot jars, leaving about ¼-inch headspace (0.5 cm) at the top. Tap the jar against your kitchen surface and/or use a knife to remove any air bubbles in the jam.
To make the jars hot, heat them up (with the lids on) in the water bath canner while bringing the water to an almost boil. Alternatively, warm the jars (not the lids) in the oven. The jars need to be warmed up so they don’t crack when the jam is added.
Wipe the jar rims with a clean kitchen towel and place the lid on the jar, screwing the screw bands until they are fingertip-tight.
At this point, the homemade raspberry jam is ready to use immediately, transfer to the fridge for short-term storage, or keep reading for the simple 4-step hot water bath canning process to make this jam shelf-stable for up to a year!
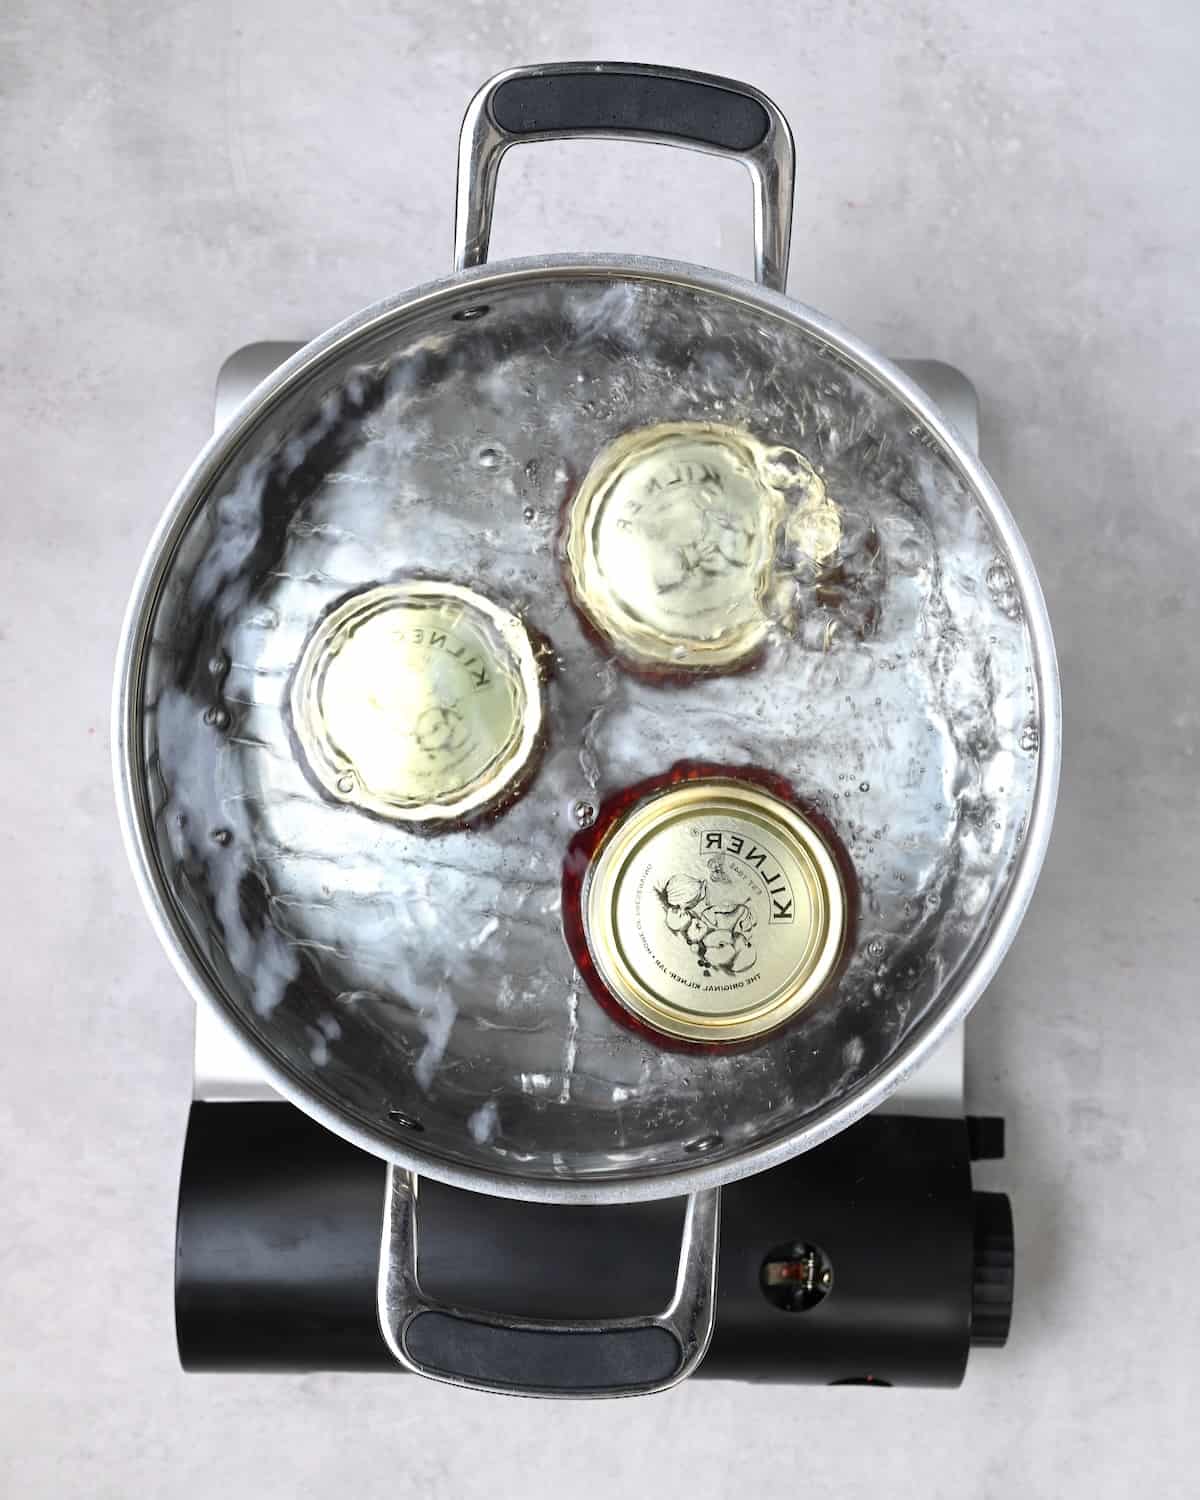
Water Bath Canning
Place the filled jars in the prepared canner, ensuring they’re submerged under at least 1 inch of water.
Bring the water to a boil over medium-high heat, add a lid, and allow them to process for 10 minutes (adjust the time based on the altitude of where you live).
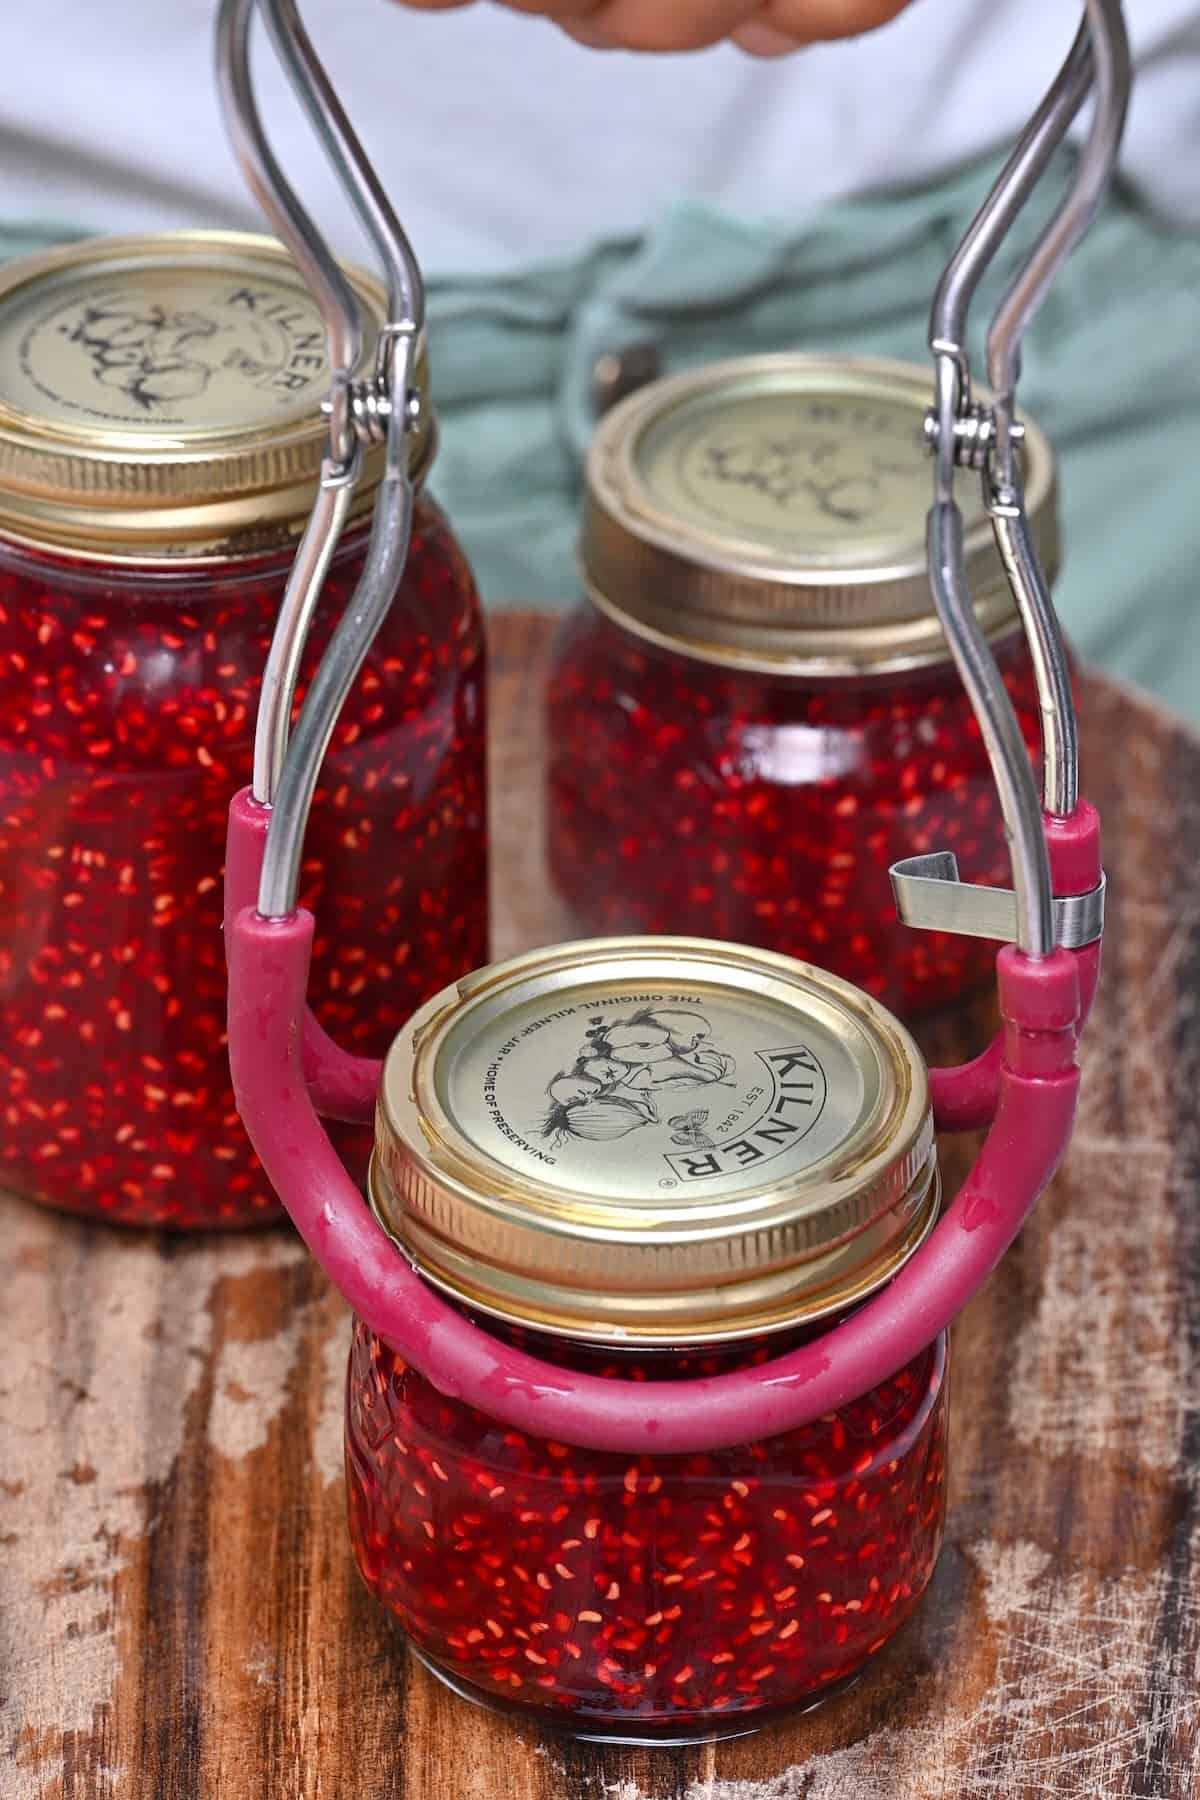
Then, remove the canner lid and allow them to sit for 5 minutes before carefully using canning jar tongs to remove the jars from the water and set them onto a clean kitchen towel to drain and cool undisturbed for 24 hours.
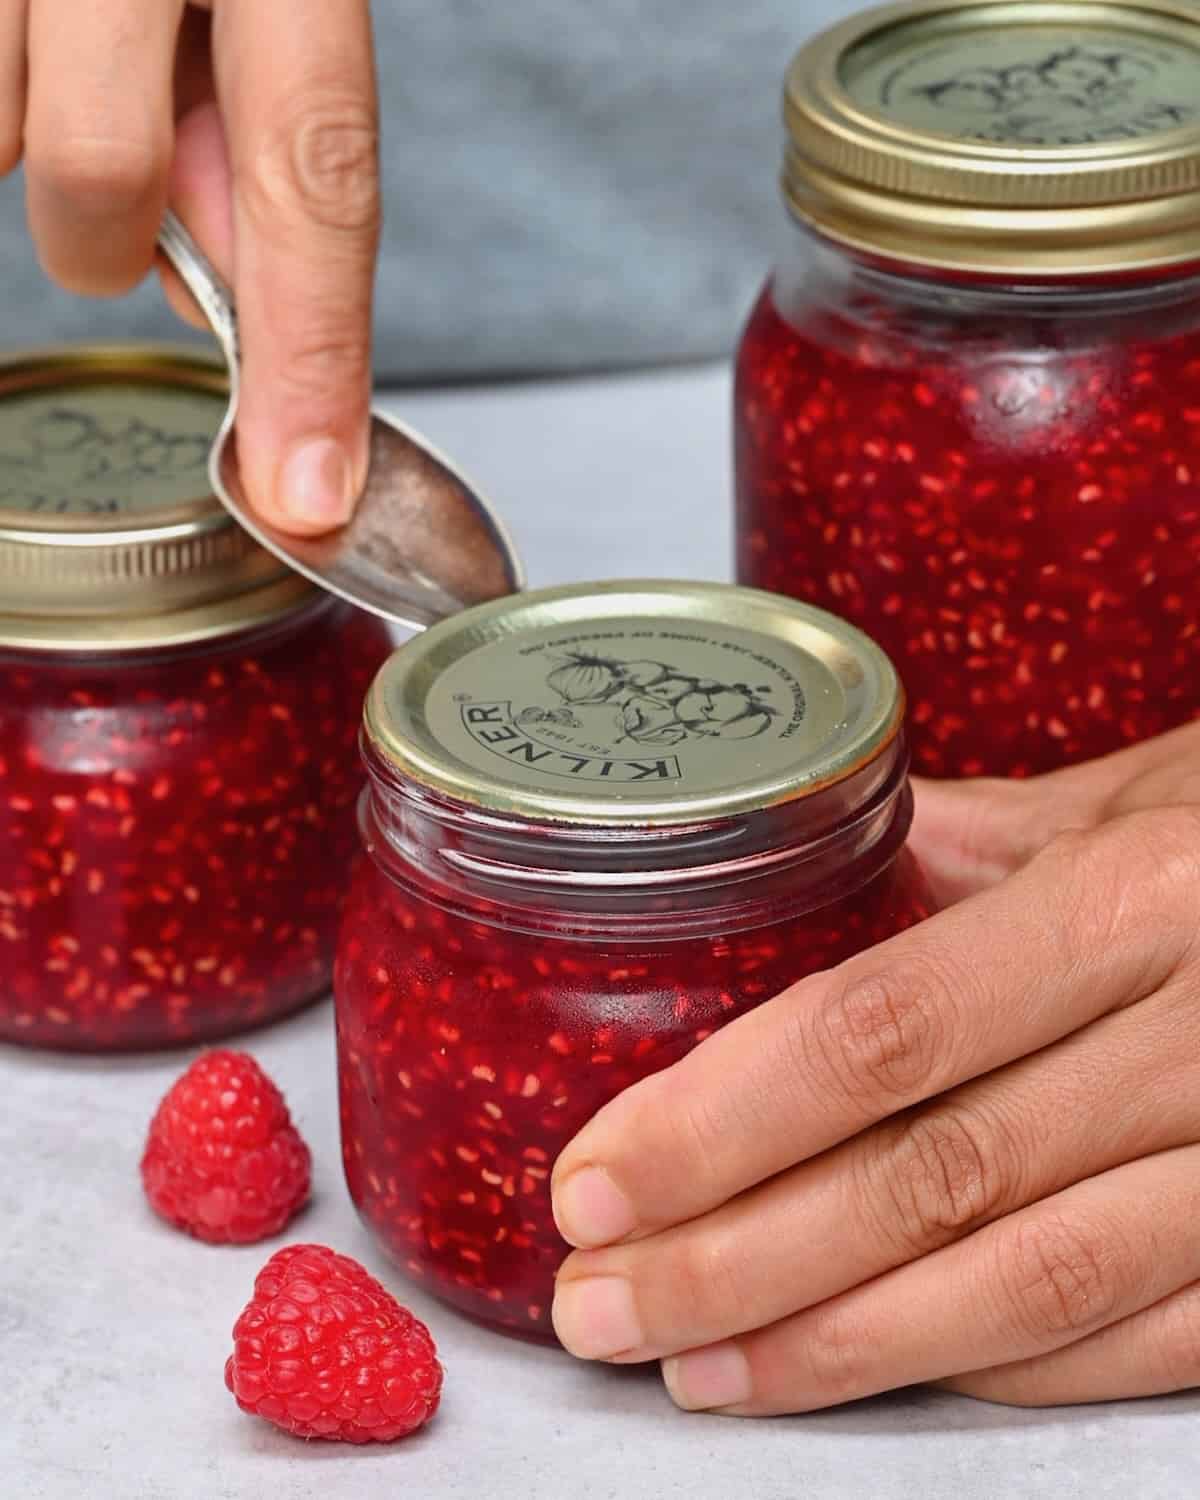
Once cooled, check the seal – the middle part of the lid should not pop up and down when pressed. Then store them in a cool, dark location (like your pantry) for up to a year and a half.
Unsealed jars can be reprocessed with new lids/jars (check for chips) or transferred to the fridge for use within a month.
How to Store
Fridge: Aim to use the raspberry jam within 3-4 weeks. If you’ve reduced the amount of sugar or lemon juice (which are natural preservatives), the shelf life will be shorter.
Freezer: Use freezer-safe jars and freeze them for 4-6 months.
Canned: Store the jars, labeled, in a cool dark location (like a pantry) for 12-18 months. Once opened, transfer the jar to the fridge to use within a month.
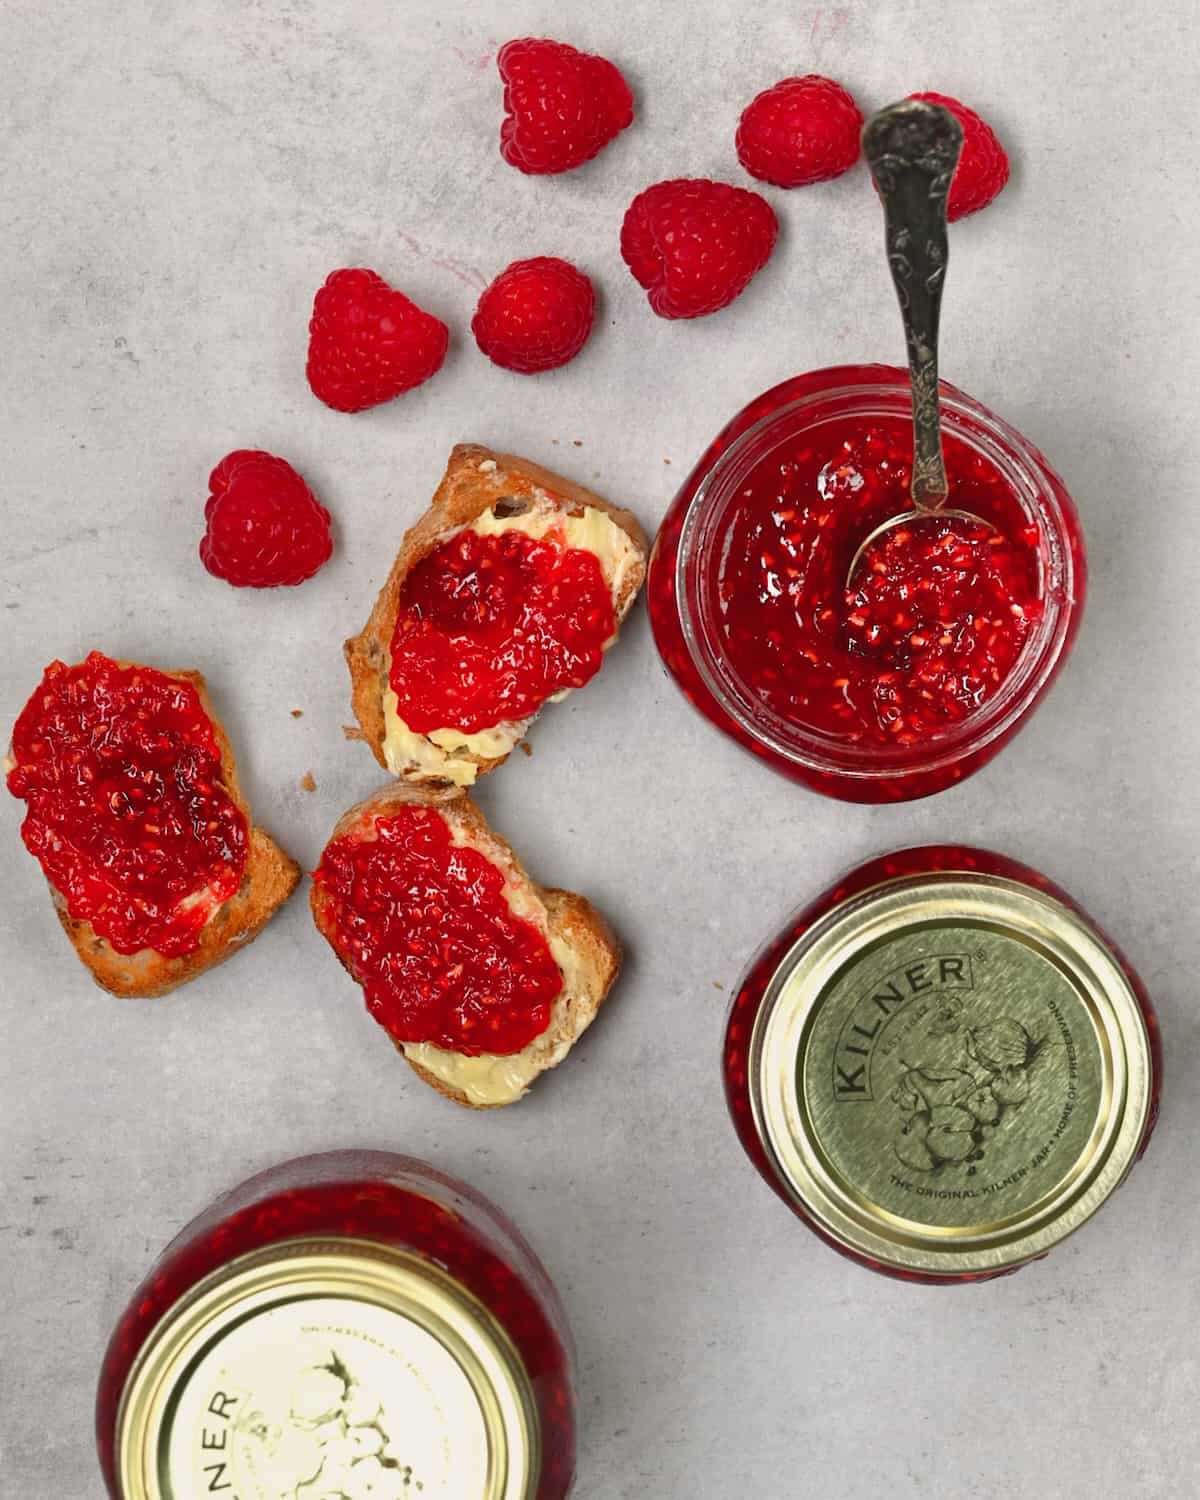
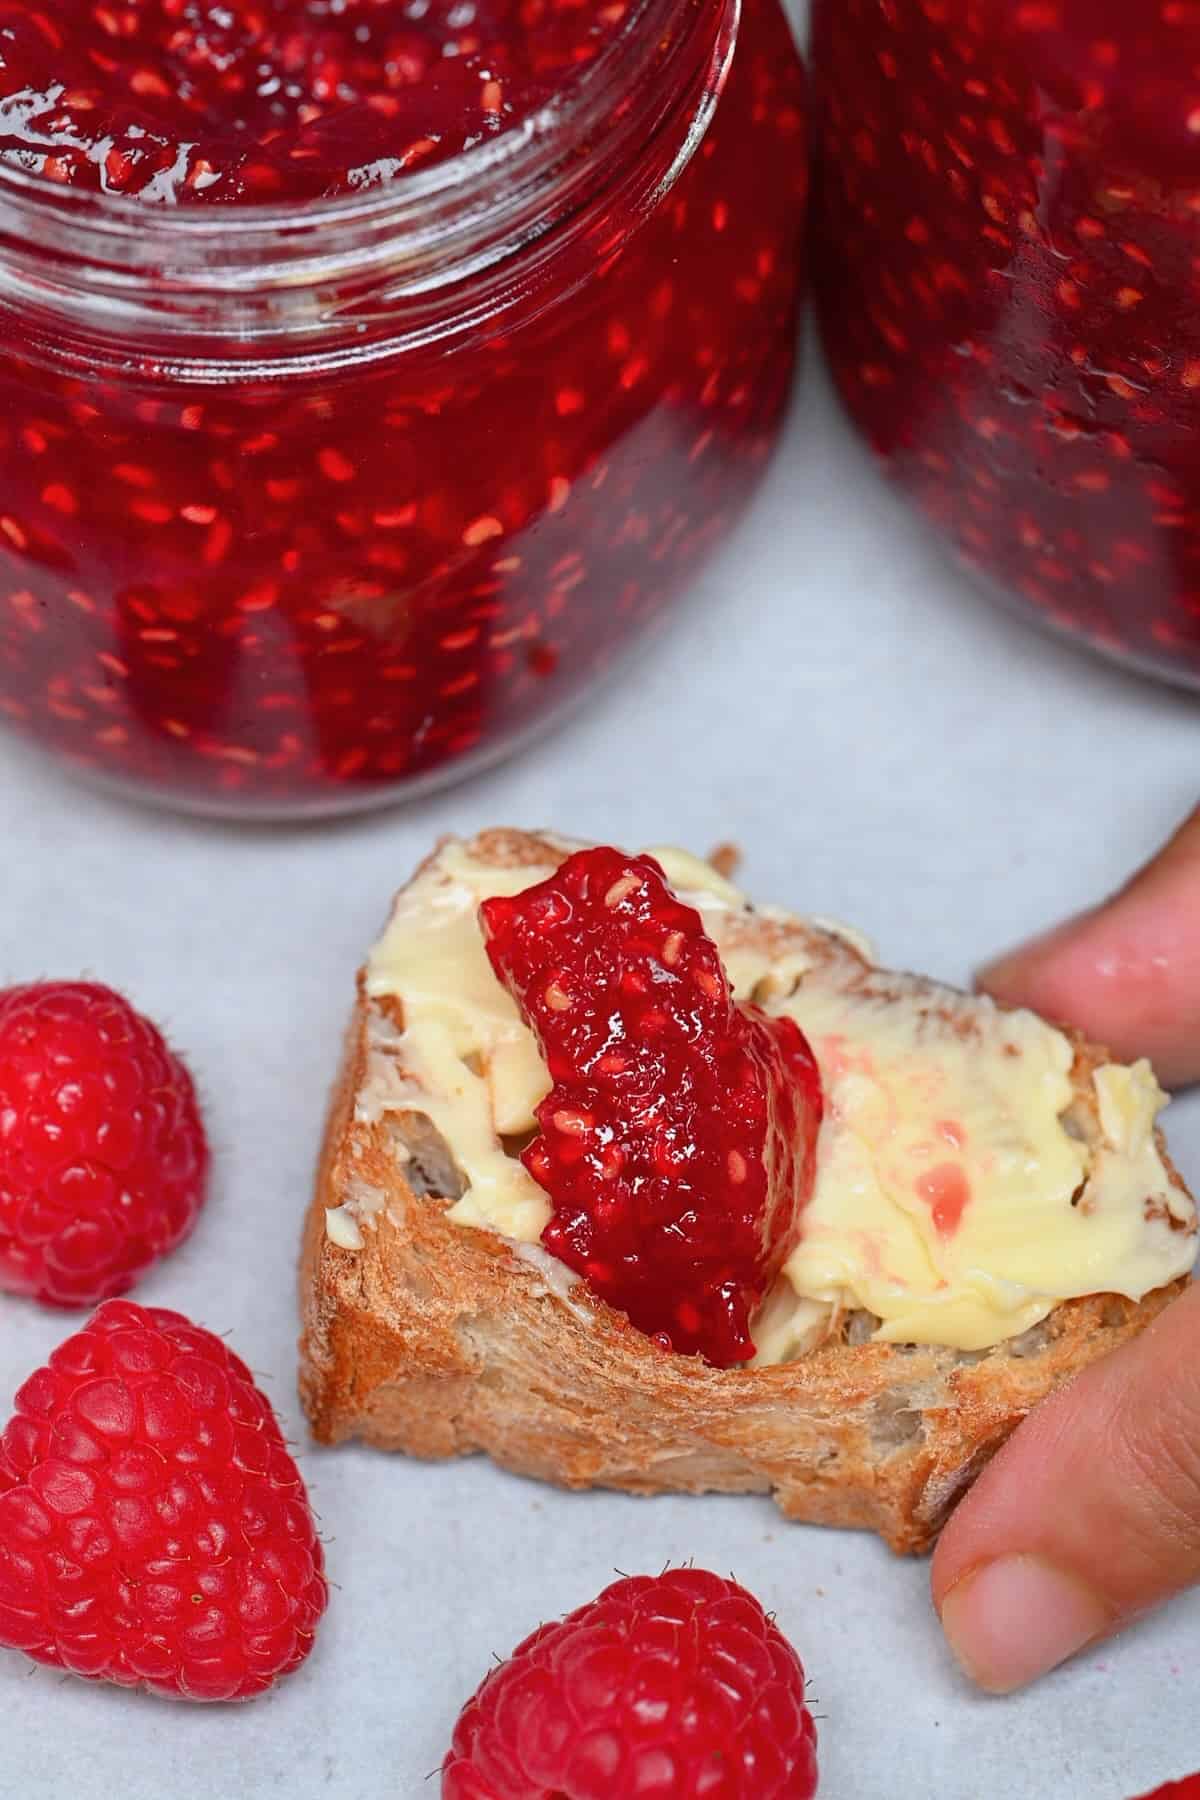
How to Use Raspberry Jam
- As a spread over toast, bagels, simit, etc.,
- Spread into layered cakes, a Swiss roll, scones with cream or clotted cream,
- To fill muffins/cupcakes,
- In a PB&J or other sandwiches,
- Dolloped over pancakes, waffles, and French toast,
- Thin with water to use as a sauce for cheesecake and other desserts
- Spoon into oatmeal, baked oats, overnight oats, and rice pudding,
- With yogurt (optionally with fruit & granola),
- As a filling for cookies (including thumbprint cookies) and pastries (like croissants),
- As part of a charcuterie/cheese platter.
More Simple Jams Recipes
If you try this easy raspberry jam recipe, let me know how it goes in the comments below. I’d appreciate a recipe card rating and would love to see your recipe recreations – tag me on Instagram @Alphafoodie!
Easy Raspberry Jam Recipe (No Pectin)
Equipment
- 6 Canning jars (8 oz) 8 oz each (250 ml)
- Potato masher or another similar tool
- Jelly bag optional
- Bubble remover optional
- Magnetic lid wand optional
Ingredients
- 2.2 pounds raspberries 8 cups; use some underripe berries for added tart flavor and pectin
- 28 oz white sugar 4 cups
- 1/4 cup lemon juice fresh or bottled (the latter works best for canning)
Instructions
Prepare the berries and jars
- Sterilize all the jars and tools used for this recipe. Wash the jars, lids, and bands in hot, soapy water, rinse them well, and leave them to drain and dry. Or wash them in a dishwasher on the top rack- it’s best if they’re still warm when you go to use them. Also, place 1-2 small plates in the freezer (they'll be used for the gel test).If you’re planning to can the jam, prepare the canner by adding the trivet/rack to the bottom of the canner and filling it with enough water to submerge the jars by an inch.
- Wash the raspberries well, removing any stems and berries that are spoiled, blemished, etc.
Simmer the jam
- Transfer the berries and sugar to a large, deep, heavy-based stainless-steel saucepan. Then use a potato masher (or a fork) to gently crush the berries, leaving some whole if preferred.
- Add the lemon juice and stir. Bring the mixture to a full rolling boil, stirring constantly to ensure the sugar dissolves and the jam doesn't stick to the pan.
- As foam appears on the top of the jam, use a spoon to scoop it away, simmering until it thickens enough to coat the back of a spoon (about 15-20 minutes).
The gel test
- To test if the jam has reached the correct "set," remove the saucepan from the heat and place about a teaspoon of the jam over the pre-chilled plate (from the freezer). Return it to the freezer for 1-2 minutes, then test the set. It should be set and wrinkle when pressed.Alternatively, use a candy thermometer vertically into the saucepan of jam (don’t touch the bottom!). It should reach 220ºF/104ºC.
- If it hasn't set, continue to cook for a few minutes and test it again.
Fill the jars
- Place the sterilized, warm jars on a clean kitchen towel/wooden board (this will stop temperature shock from causing cracks).To make the jars hot, heat them up (with the lids on) in the water bath canner while bringing the water to an almost boil. Alternatively, warm the jars (not the lids) in the oven.
- Ladle the hot jam into the hot jars, leaving about ¼-inch headspace (0.5 cm). Tap the jar against your kitchen surface and/or use a knife to remove any air bubbles in the jam.
- Wipe the jar rims with a clean kitchen towel and place the lid on the jar, screwing the screw bands until they are fingertip-tight.
- At this point, the jam is ready to use immediately, transfer to the fridge for short-term storage, the freezer for 6 months, or be water bath canned to keep for up to a year!
Water bath canning
- Place the filled jars in the prepared canner, ensuring they're submerged under at least 1 inch of water.Bring the water to a boil over medium-high heat, add a lid, and allow them to process for 10 minutes (adjust the time based on the altitude of where you live).
- Remove the canner lid and allow them to sit for 5 minutes before carefully using canning jar tongs to remove the jars from the water and set them onto a clean kitchen towel to drain and cool undisturbed for 24 hours.
- Once cooled, check the seal – the middle part of the lid should not pop up and down when pressed. Then store them in a cool, dark location (like your pantry) for up to a year and a half.
Video
Notes
- Select the best raspberries: They should be “just ripe” or “ripe,” but not overripe, with a juicy, sweet to sweet-tart flavor. Avoid using any past their best, blemished, bruised, etc.
- Make sure to use sterilized jars: This is important to avoid premature spoiling.
- Use nonreactive tools: This includes a nonreactive saucepan (stainless steel, glass, enamel-coated will work well), spoons (silicone or wooden), etc. Avoid aluminum, copper, etc.
- To adjust the consistency: If you accidentally make the jam too runny, return it to the pan to cook for longer.
- For seedless raspberry jam: Push the jam through a fine-mesh sieve/jelly bag using a wooden spoon or a food mill (with the smallest hole disk).
- Vanilla: Add pure vanilla extract (or paste) or some vanilla powder at the end (off heat).
- Almond extract: Stir this in off the heat at the end for a subtle nutty flavor depth.
- Orange: Add some orange zest for a bright, tangy, citrusy flavor.
- Spices: You can experiment with cinnamon, nutmeg, pumpkin pie spice, etc. Add it to taste.
- Fresh herbs: I.e., a handful of finely chopped mint leaves, thyme, rosemary, or basil.
- Ginger: Add finely grated ginger to taste, starting with about ½ teaspoon.
- Chili: i.e., raspberry jalapeño jam/raspberry habanero jam. Finely dice the chili and remove the seeds. Add as much as you’d like for a subtle or big kick.
- Maple syrup/honey: Add just a small amount instead of regular sugar for the subtle flavor depth. If you add too much, it will overwhelm the berry flavor.
- Alcohol: Add a splash of Amaretto, Peach Schnapps, bourbon, or orange liqueur to create a more complex, full-bodied flavor in these raspberry preserves.
Nutrition
Nutrition information is automatically calculated, so should only be used as an approximation.


hiiiiiiiiiiiiii
Hi kenna! 😊 Thank you so much for the love and the rating, it truly means a lot! So glad you’re enjoying the raspberry jam. 🙂
very good. thankyou! i like the texture, used the raspberries from a farm, and so it tastes even better!
So glad you enjoyed it, Mili! Using fresh farm-picked raspberries sounds absolutely delicious. Thanks for your lovely feedback!
I used a candy thermometer in this recipe. After over an hour of cooking and still not reaching the 220⁰ mark, as suggested, I decided to try the plate method. Not only was it set but perhaps over-set. The color was not a bright red but it was dark, from being over cooked. Also, the jam only yielded a little over 4 pints, due to cooking too long. So, if anyone else out there uses a candy thermometer try checking your batch after 20 minutes, if the temperature hasn’t reached the suggested reading. The taste is alright, just thicker than desired.
Thank you for sharing your experience, Christie. Indeed, depending on the pot, berry type, and heat level, the temperature might lag even when the jam is ready. The plate test is always a reliable backup. Appreciate you taking the time to comment!
Second time I have used this recipe, it tastes so good. Thank you for sharing the recipe.
Glad you liked it, Janet!
First time I have made jam and this recipe made it so simple, it came out preface. Thank you I will be using this recipe time and time again.
So happy you liked it, Janet. Thanks for commenting!
A family favorite. Easy and delicious. You will not be disappointed.
Hey Carlee! I’m so glad to hear you loved the recipe! Enjoy making more delicious jam!
Can I use without canning, maybe in a tupper? And if so, how long will it last?
Hi Emmy,
You can keep it in the fridge for 3-4 weeks.
Love this recipe. I use it for strawberry, blue berry and black berry.
Hey George! I’m so glad you love the recipe! Using it for strawberry, blueberry, and blackberry sounds delicious.
Thank you for this easy to understand recipe/directions. Very very yummy. And I waterbathed 3 jars to enjoy down the road.
Hey Mainegirl! I’m so glad you found the recipe easy to follow and that you enjoyed it! Waterbathing the jars is a great idea for later.
How long is this good in the fridge? If put in the freezer, how long is it good once it’s thawed?
Hey Brittani! The jam should be good in the fridge for about 3 to 4 weeks. If you freeze it, it can last for about 6 months. Once it’s thawed, try to use it within a week for the best taste. I hope this helps.