
This post may contain affiliate links. Please read our disclosure policy.


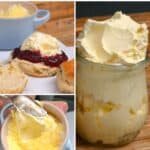


How to make clotted cream – it’s rich, thick, creamy, and perfect for spreading over scones, dolloping on desserts, and using for cream tea! A simple ONE-ingredient recipe!

Want to save this recipe?
What is clotted cream
Clotted cream comes under several names, including scalded cream, Devonshire cream, and Cornish cream. It is a super thick, rich British cream product thought to originate in Southwest England. More specifically, in Cornwall and Devon (known for their top-quality dairy).
Using a water bath or steaming method, full-fat cow’s milk is heated. Then it’s cooled in shallow pans in order to separate the cream content from the liquids. This clots on the surface – hence the name – and is then skimmed off.
The flavor is slightly nutty, subtly tangy and sweet, and super creamy and rich, with a texture like soft cream cheese. It also contains the highest fat content of all cream products, at 55% minimum and 64% average.
For this recipe, though, I am turning to a more modern method. This version heats double cream at a low temperature over many hours, so it thickens and forms a crust. Allow it to cool, chill for 8-10 hours, and voila!
What do you need
For this clotted cream recipe, you’ll require just one ingredient!
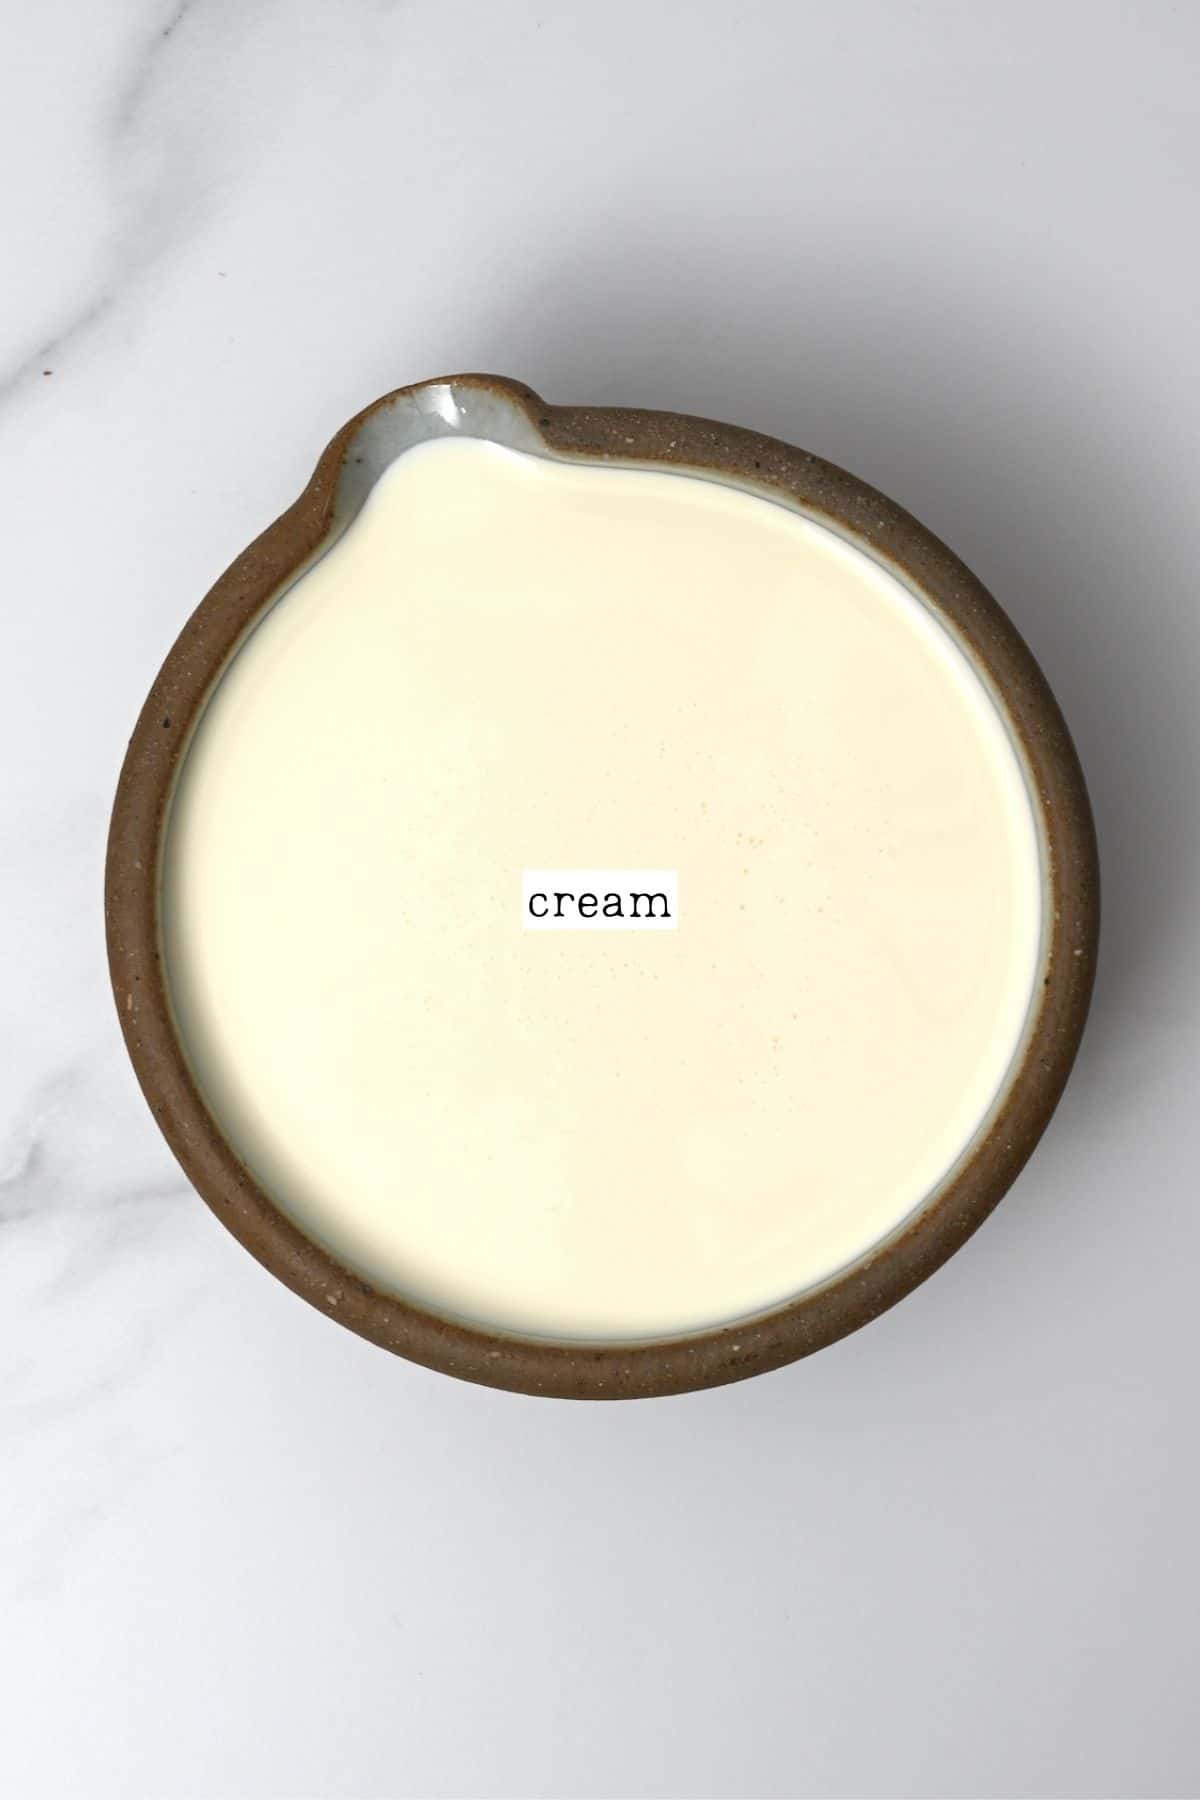
- Heavy cream/whipping cream: Alternatively, use double cream in the UK. Make sure it isn’t “ultra-pasteurized.” Pasteurized is fine, and unpasteurized works best.
The flavor will vary somewhat due to the difference in fat levels (heavy cream contains around 36% compared to double creams 48%). If you can purchase imported double cream, then feel free to do so.
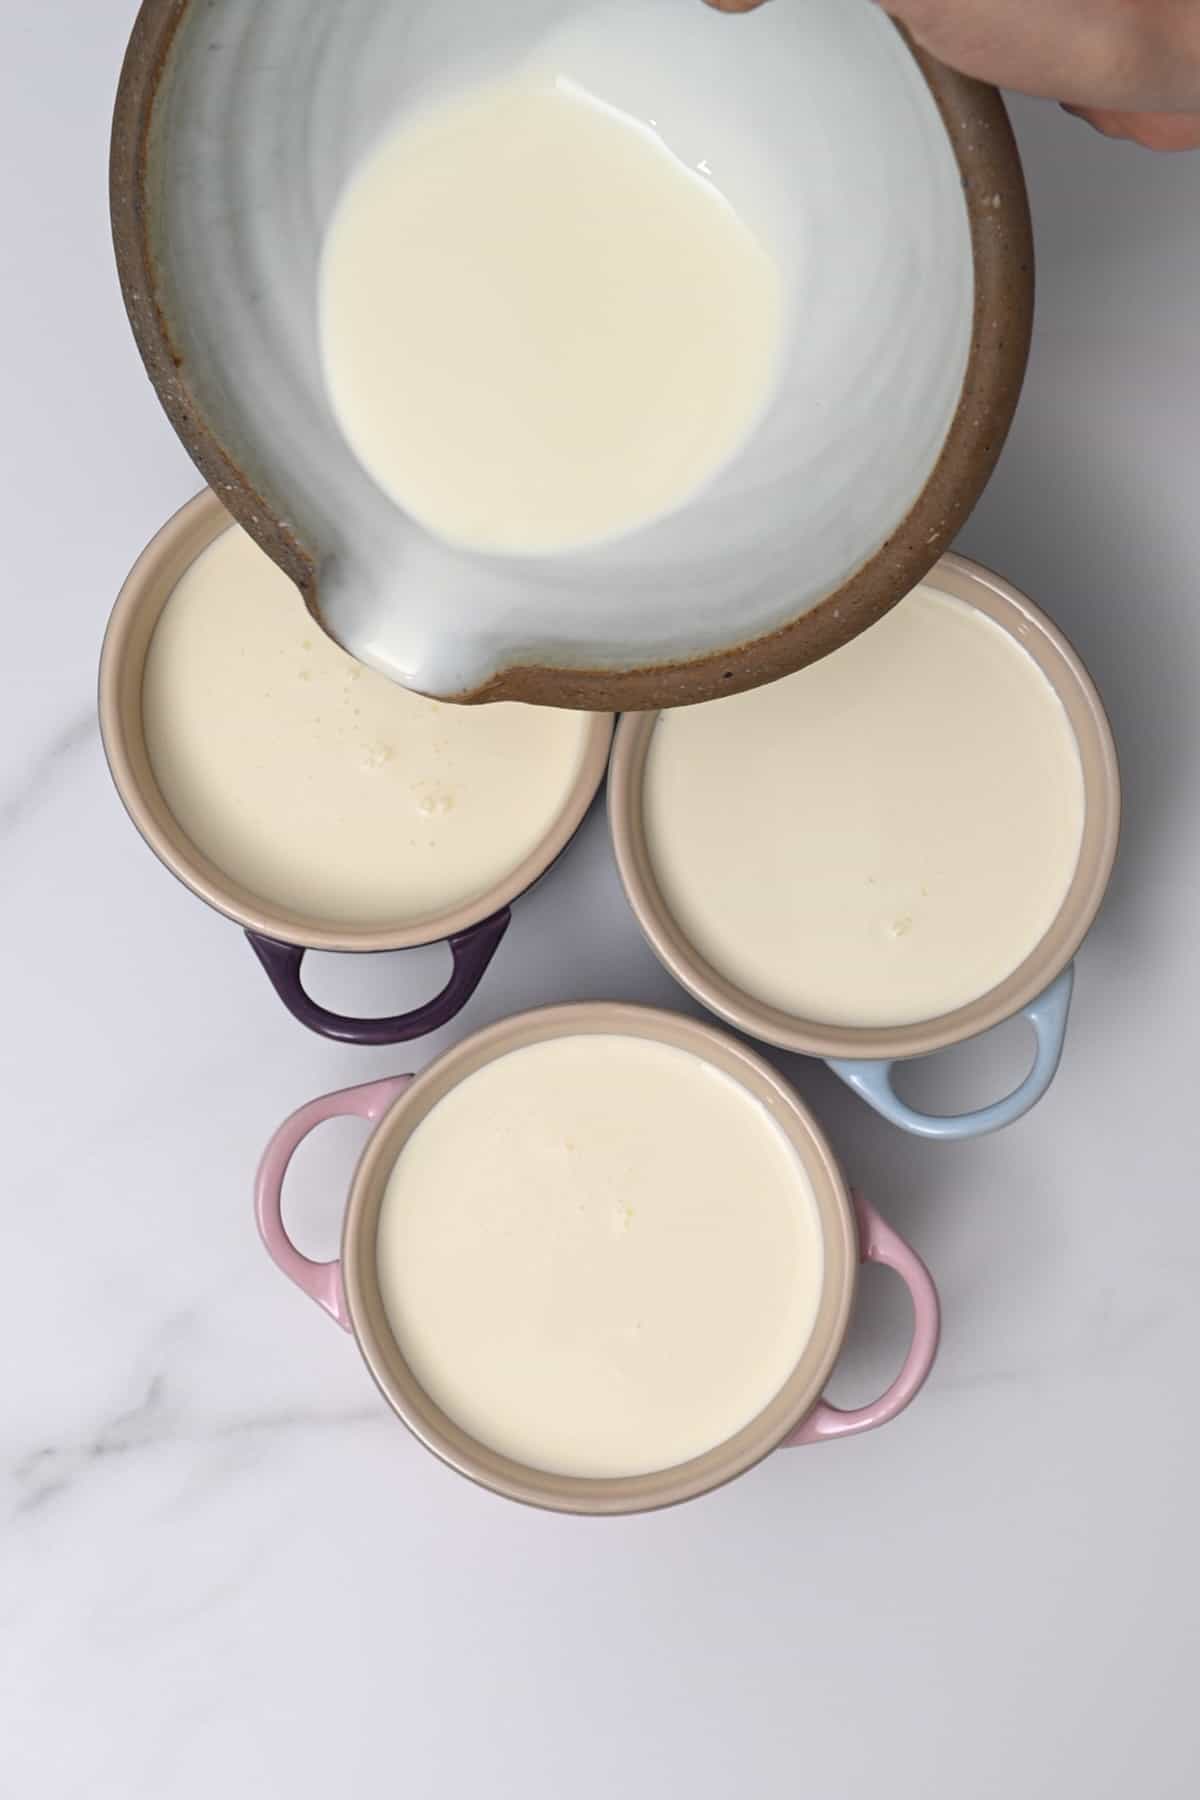
- Ramekins: I decided to use three small ramekins (4 in/10 cm in diameter). Alternatively, you could use a larger oven-safe dish, like an 8×8-inch (20x20cm) square dish.
How to make homemade clotted cream
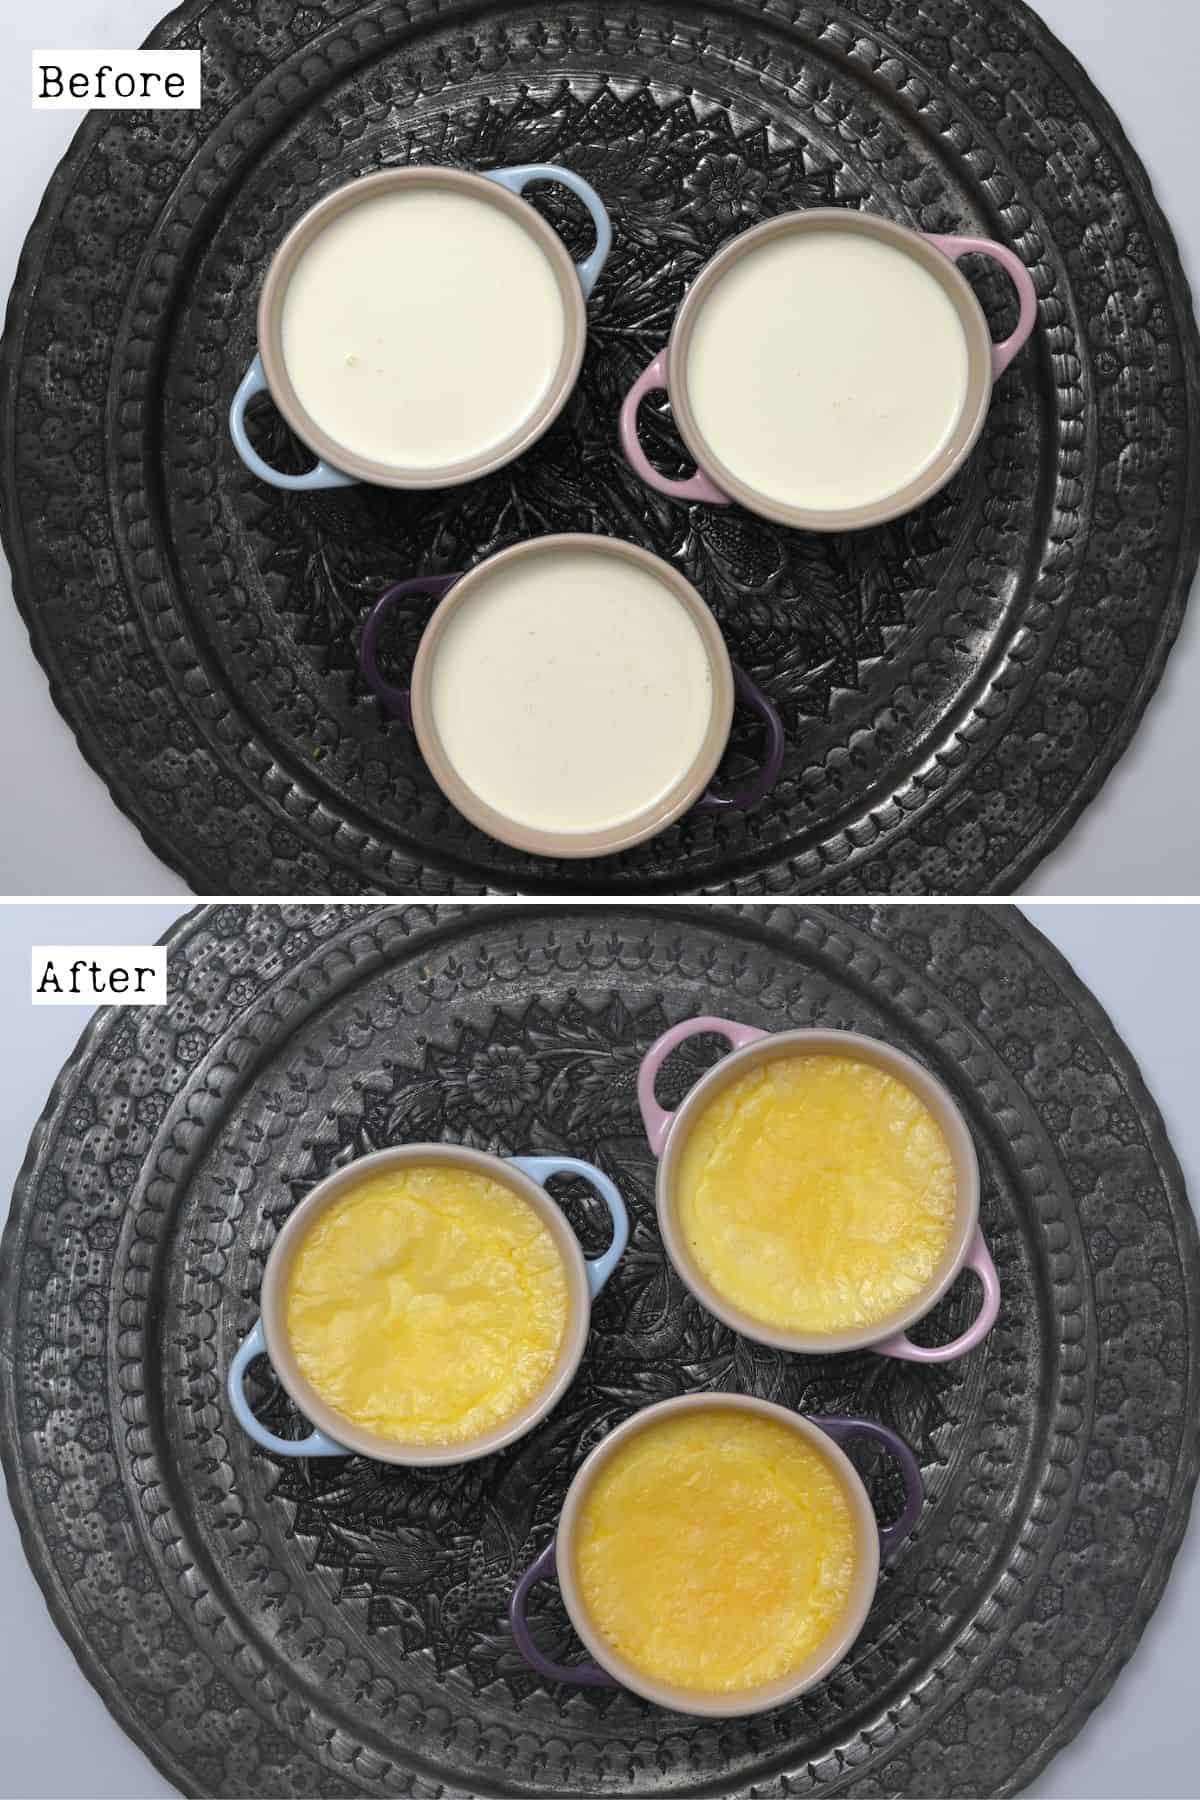
You can prepare this recipe in one large, shallow baking dish or several smaller ramekins. I decided to use three ramekins.
First, preheat the oven to 175ºF/80ºC.
Then, pour 5 Fl oz/150ml into each ramekin.
No matter the size of the dish you use, the aim is to pour only 1 ½-2 inches of cream (4-5 cm) into the dish.
Place the ramekins on an oven tray, transfer them to the middle shelf of the oven, and bake for 12 hours, untouched.
Then, remove the ramekins from the oven and allow them to cool completely at room temperature.
When you remove the ramekins from the oven, you’ll notice the cream may seem slightly liquidy. This will thicken as it cools, though.
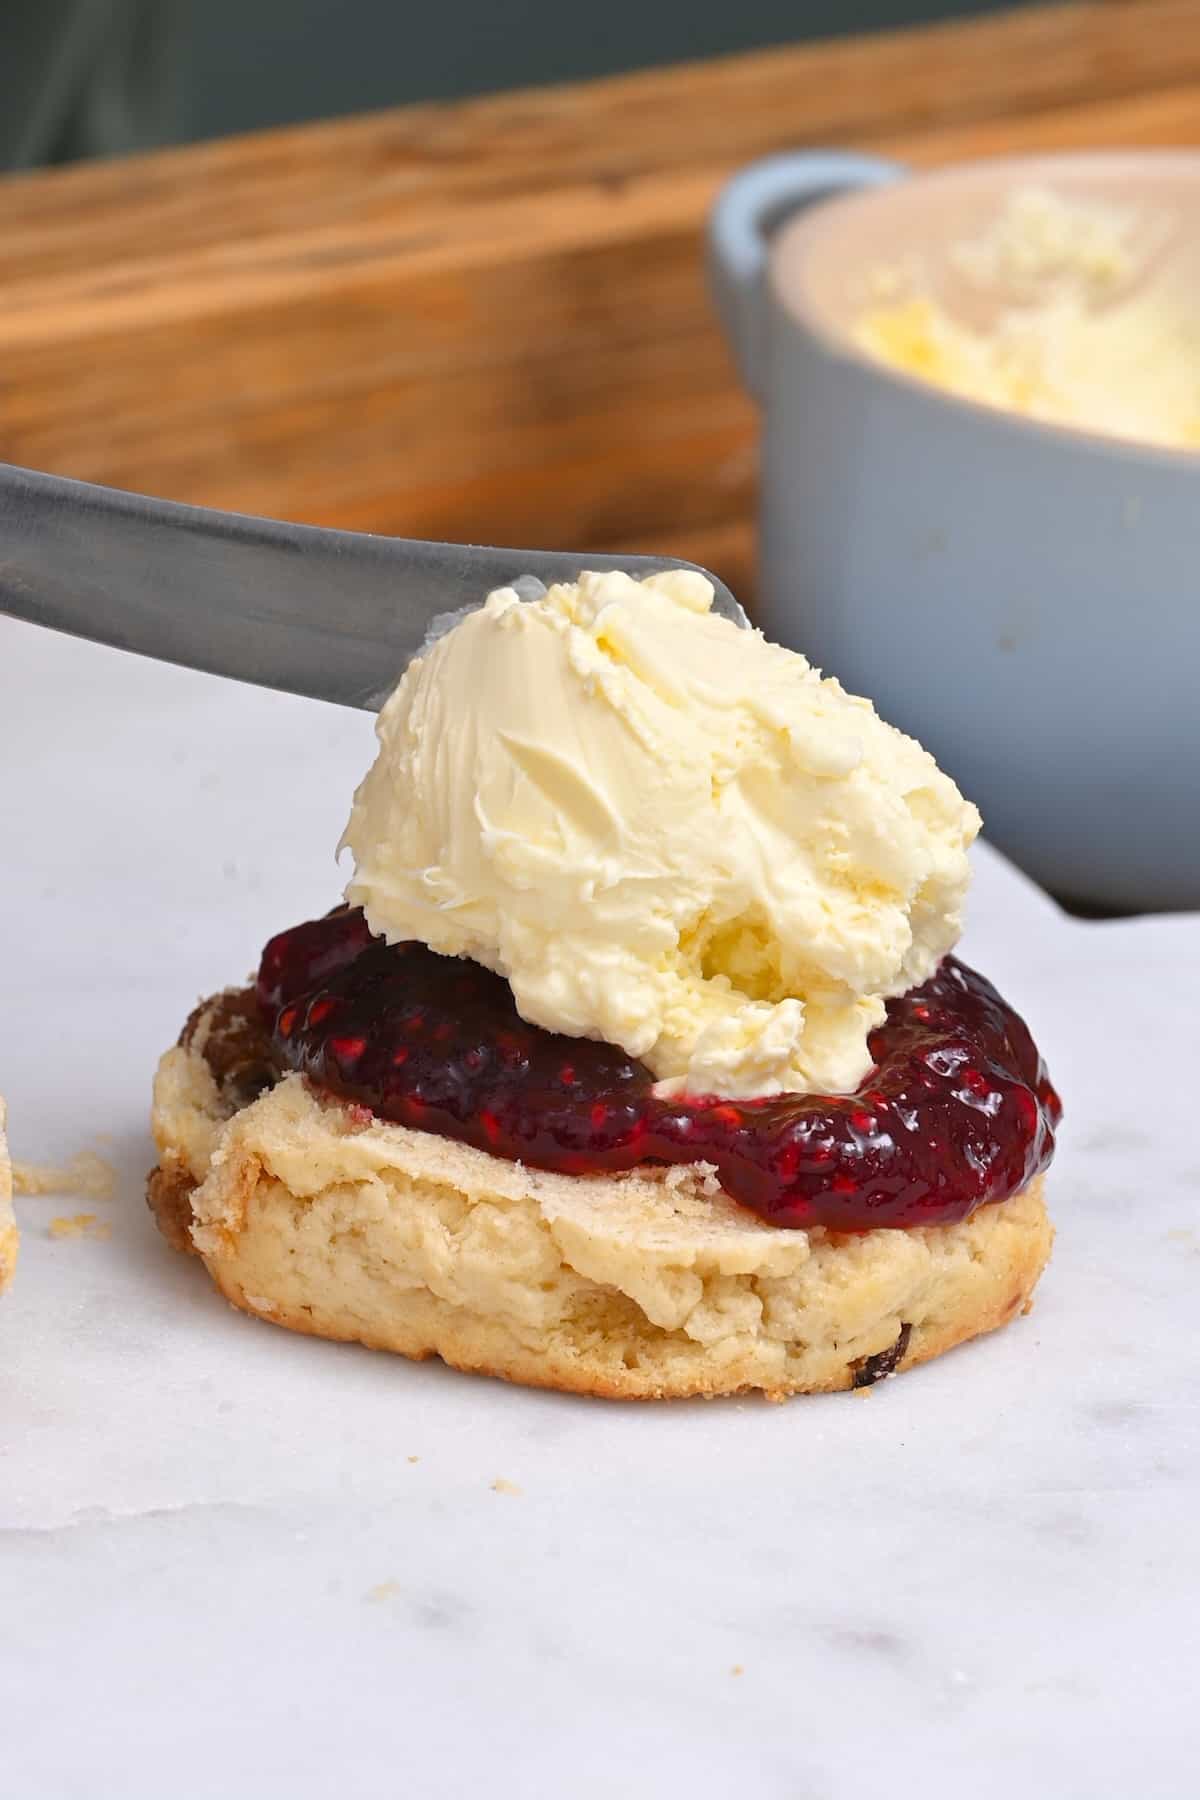
You’ll also notice a golden crust on top. Don‘t be tempted to discard this. This is what makes clotted cream so special and is absolutely delicious. Just mix it right into the cream.
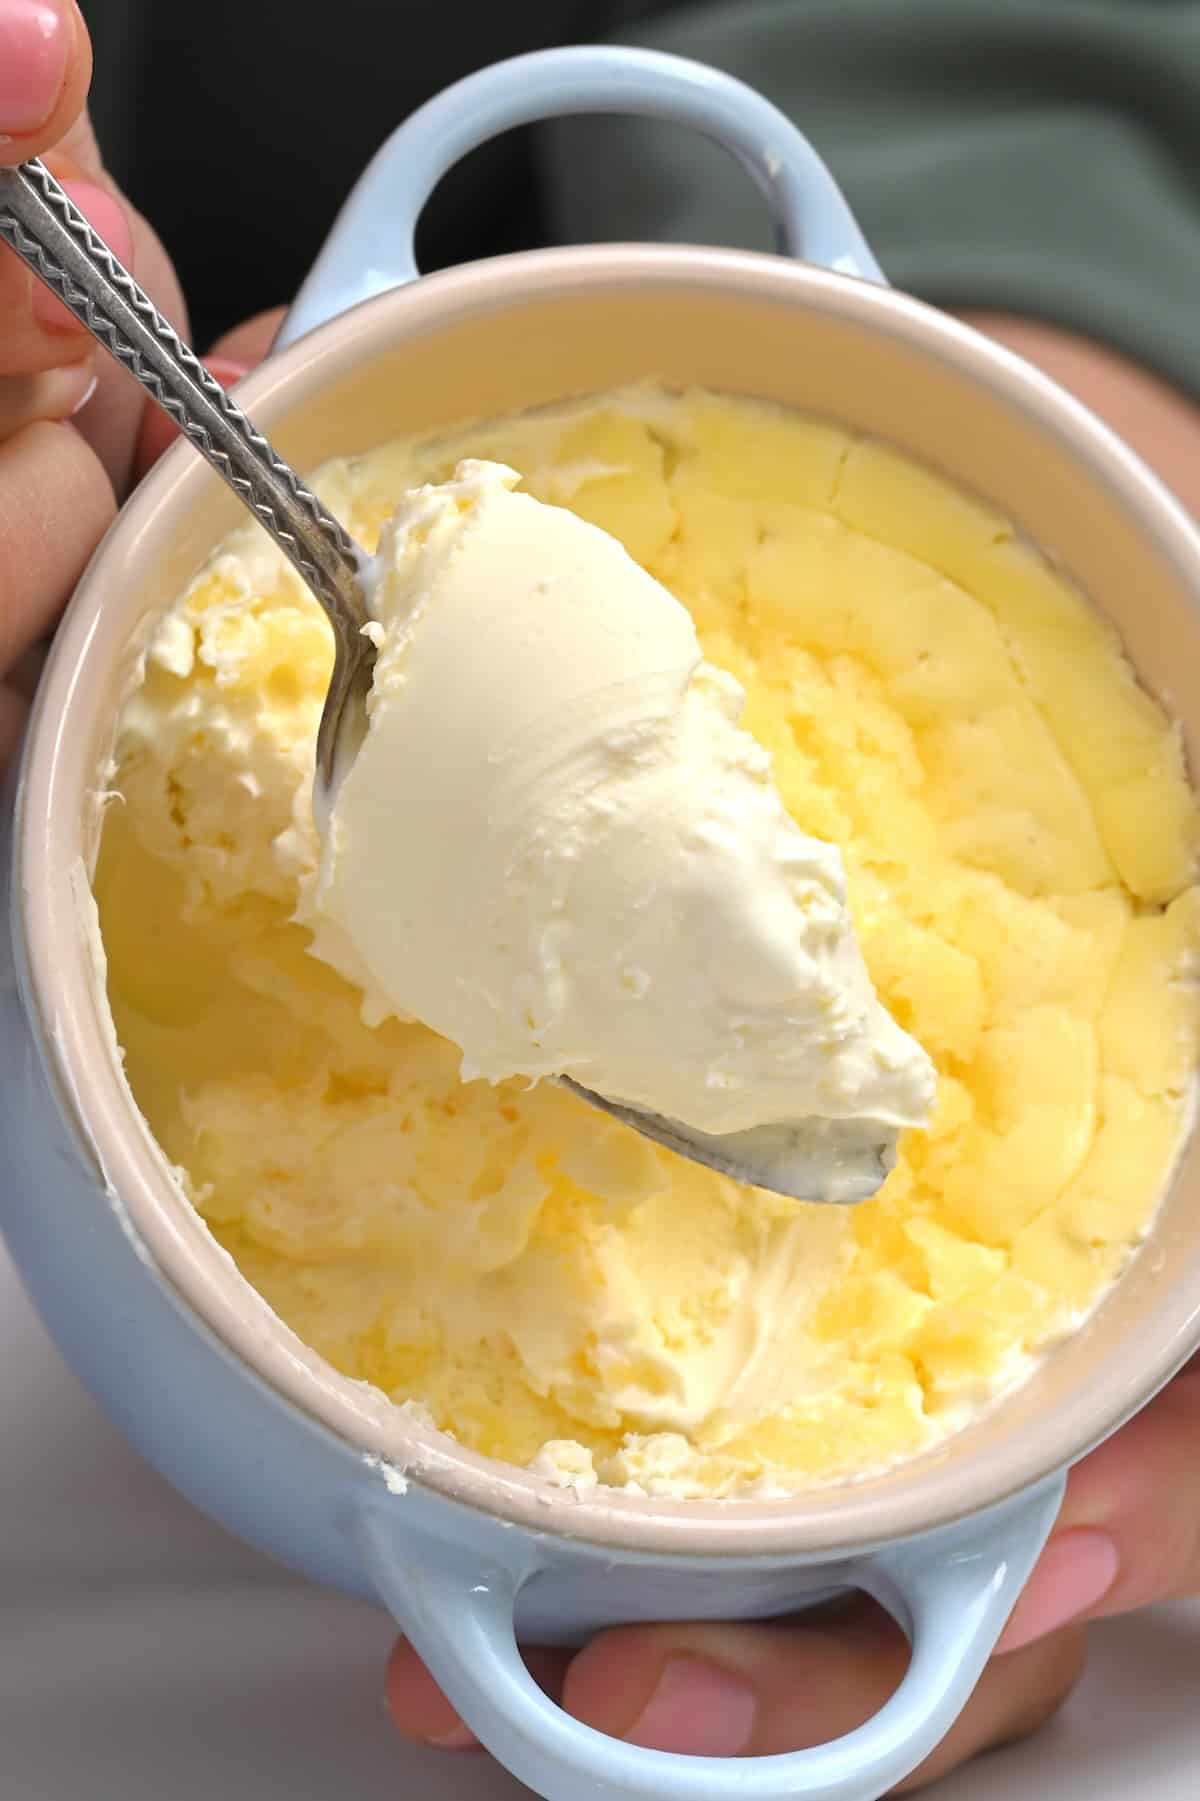
Cover the ramekins with plastic wrap and transfer them to the fridge. Leave them to chill for around 8 hours or overnight.
Finally, remove the ramekins from the fridge. Use a spoon to lift up a corner, and pour out any liquid below the thick layer of cream, if there is any.
Mix everything remaining together. If it’s too thick, spoon some of the discarded liquid back into it – and voila!
The leftover liquid (if there is any) is whey and can be used to add to smoothies, when making oatmeal porridge, baking (including making homemade scones!), etc.
How long does clotted cream last
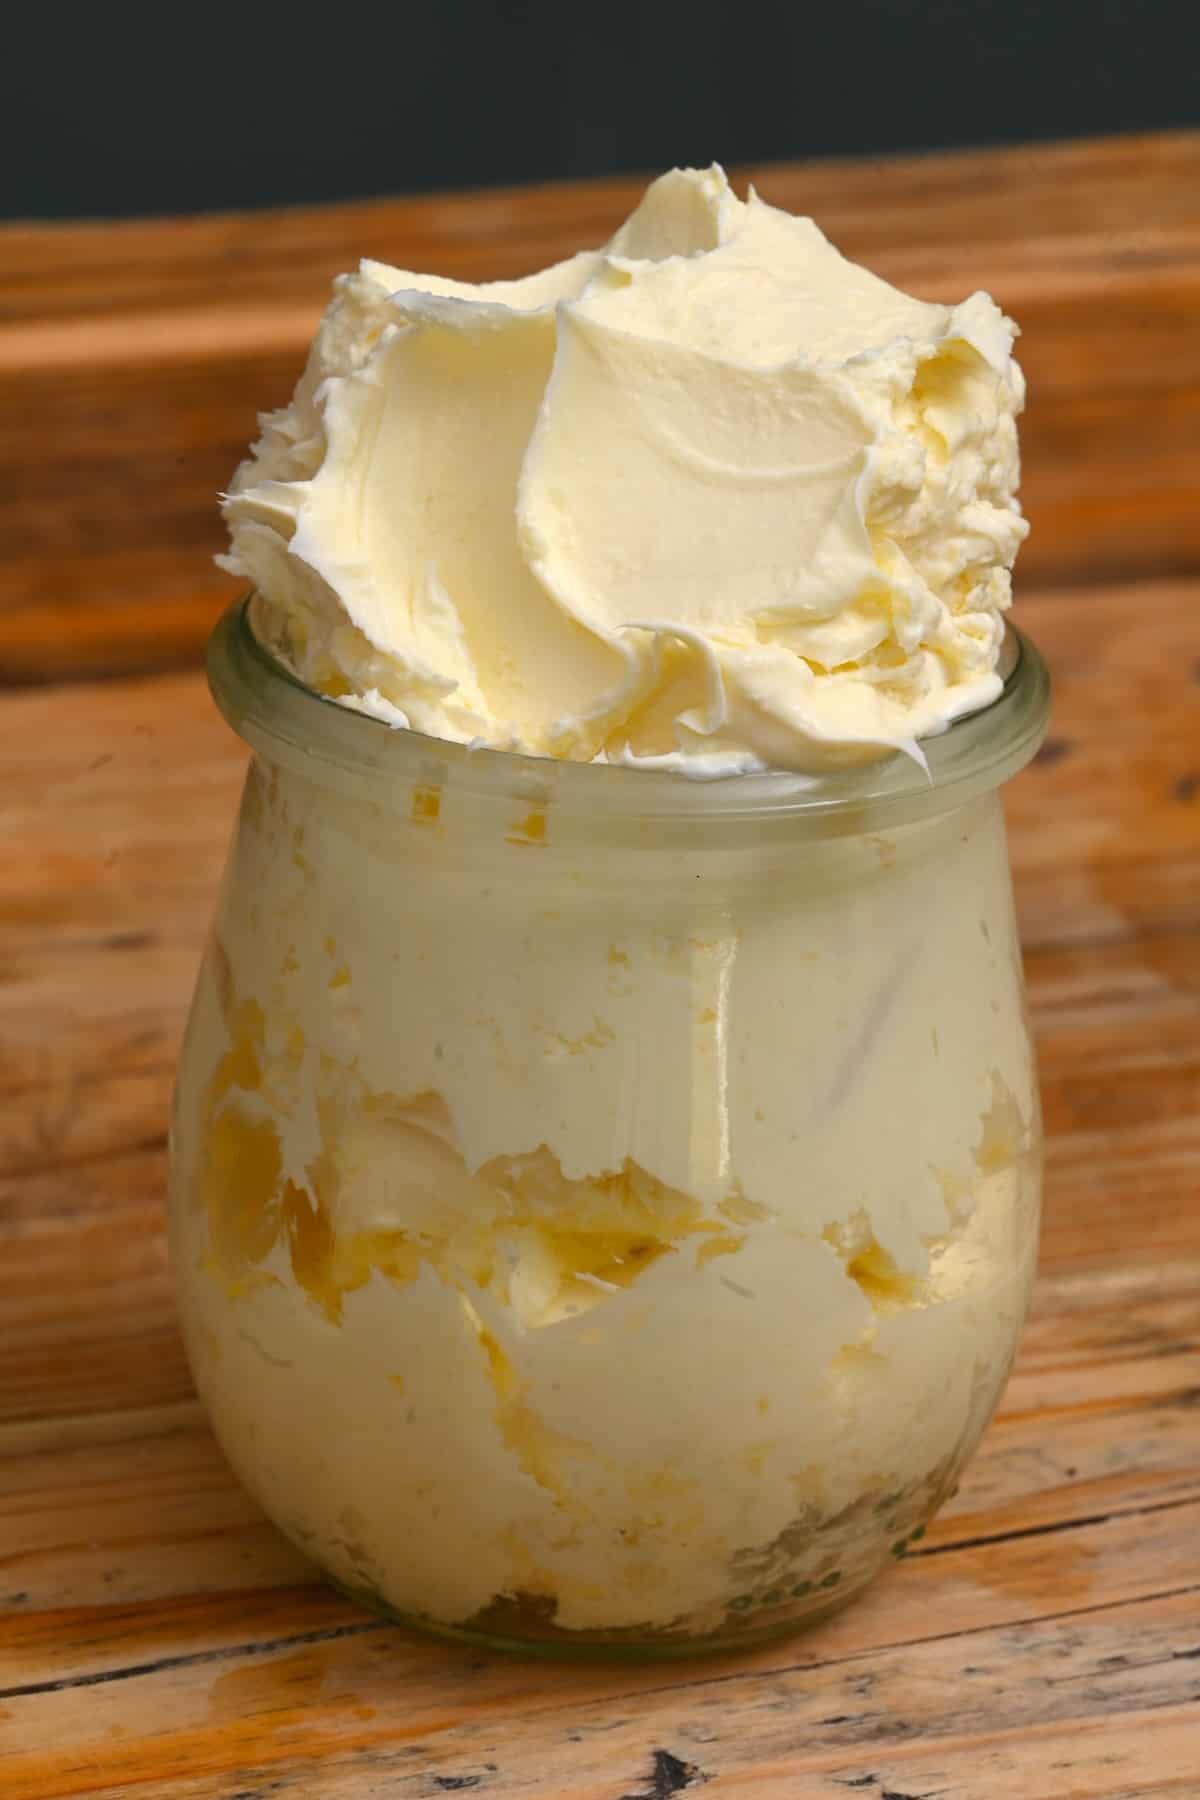
Cover the cooled cream tightly or transfer it to an airtight container/jar and store it in the refrigerator for 7-10 days.
While chilling, it can become as thick as butter. So it’s best to bring it back to room temperature for optimal “spreading” consistency.
Can You Freeze Clotted Cream
Freeze it in an airtight freezer-safe container or bags for up to 3 months. Allow it to thaw in the fridge before using it again, mixing it well first.
Essential tips
- Monitor the oven: You don’t have to stand over the oven for 12 hours. But it’s a good idea to monitor it occasionally when trying this recipe for the first time. Some ovens run cold or hot and may need adjusting. The top shouldn’t get darker than a pale golden brown.
- Oven safety feature: Some modern ovens come with a safety feature that switches them off after a certain amount of time. If this is yours, make sure to bake the cream at a time when you’ll be able to switch it back on (i.e., not overnight while sleeping).
- Avoid ultra-pasteurized cream: Because of the heat treatment, you won’t get the same results. Pasteurized is fine, though. If you’re able to find it, unpasteurized is best.
- The oven temperature: If your oven temperature doesn’t go below 200ºF/95ºC, you can still try it. However, I’d check on it at 10 hours rather than 12.
- Don’t add too much cream: Aim for around 1 ½-2 inches of cream no matter which size dishes you use.
- Leave enough time: This isn’t a slow process. Following the 12 hours of heating time, it needs to cool and chill for a further 8-10 hours.
- Don’t skip the chilling step: It is necessary so the cream can thicken to the correct consistency.
Clotted cream uses
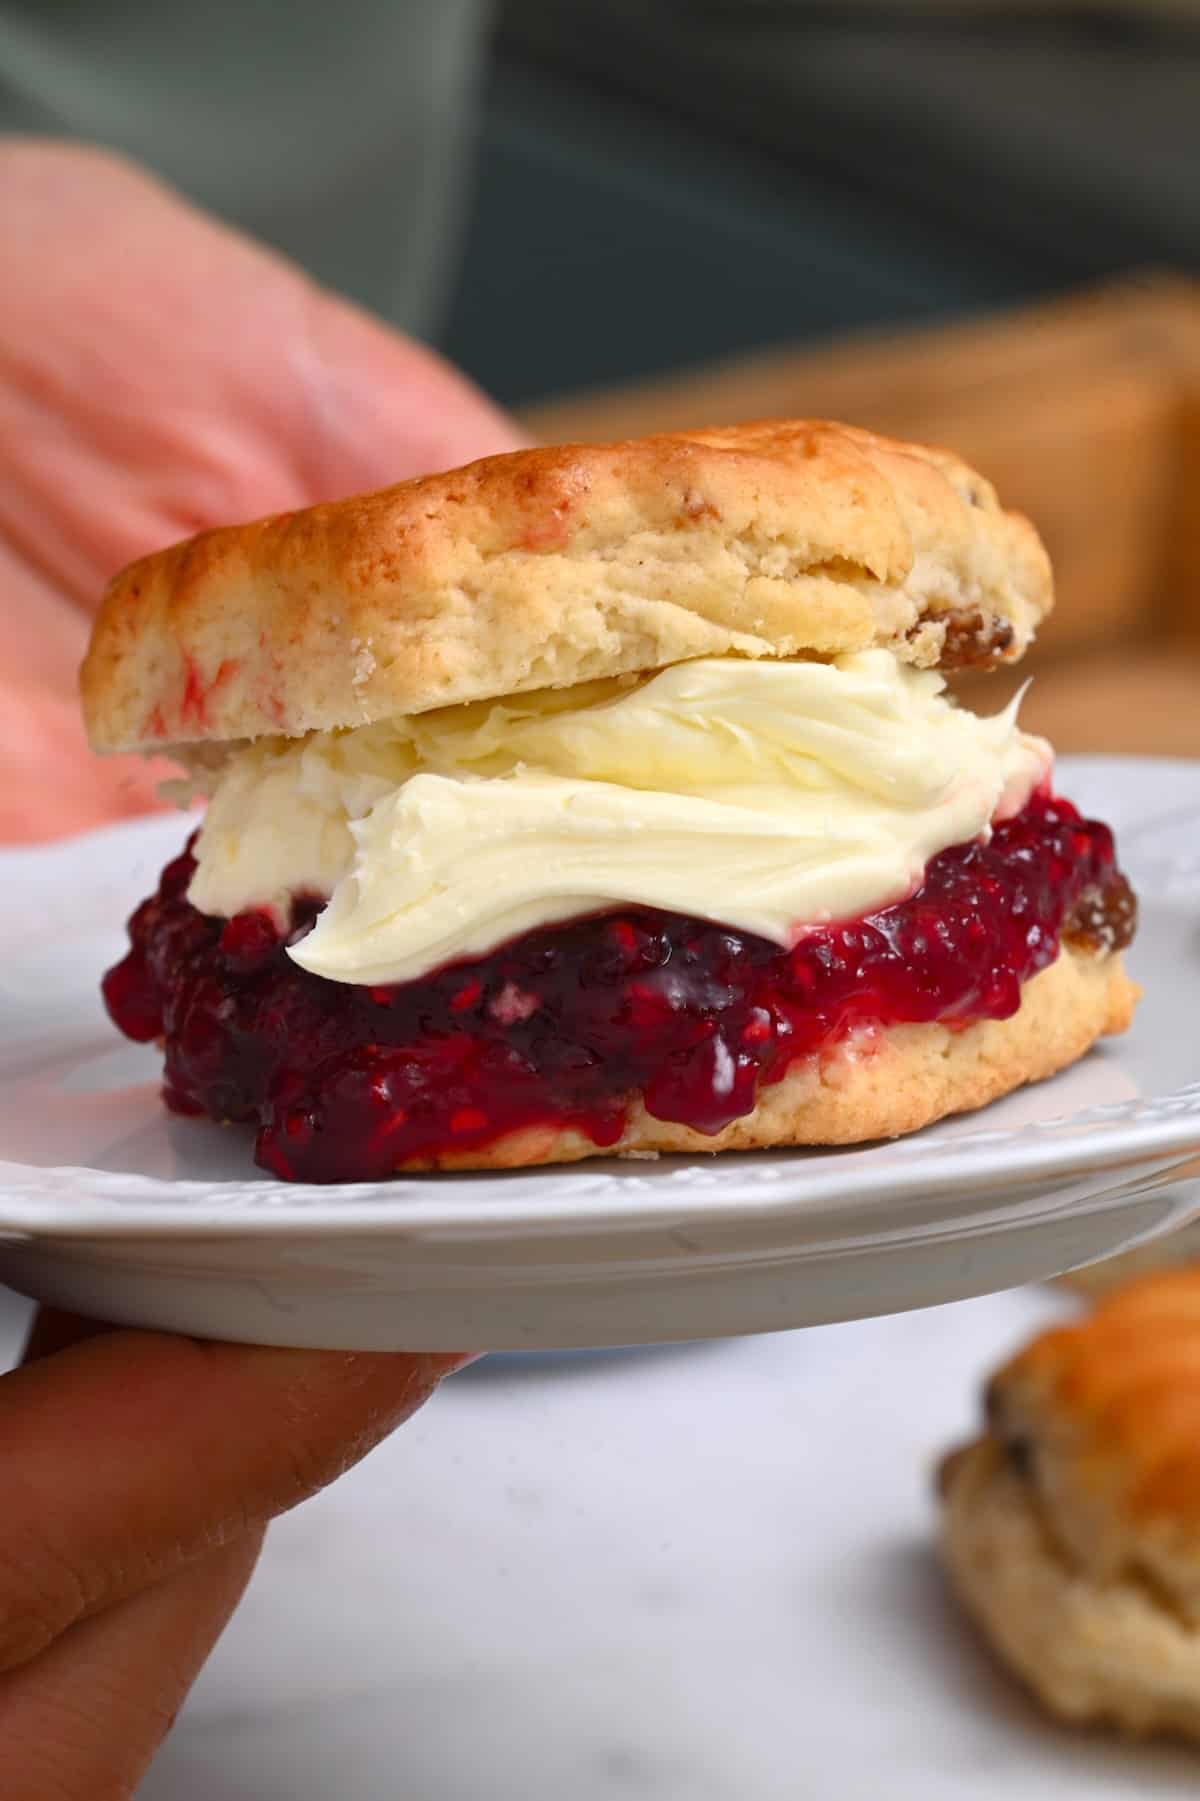
It is traditionally best known for being the addition to “Cream tea” – afternoon tea served with scones, clotted cream or butter, and jam (strawberry jam, raspberry jam, blackberry jam, etc.).
However, you could also enjoy it in other ways:
- With fresh fruits (especially berries like strawberries and raspberries),
- To dollop over desserts like pies and warm puddings (i.e., sticky toffee pudding),
- To make fudge, chocolate truffles, or even ice cream,
- Mix into mashed potato or mushroom risotto,
- Add a small amount when making scrambled eggs,
- Stir into soup recipes for extra creaminess,
- Add a dollop to oatmeal porridge.
More simple dairy DIYs
If you try this homemade clotted cream recipe, let me know how it goes in the comments below. I’d appreciate a recipe card rating and would love to see your recipe recreations – tag me on Instagram @Alphafoodie!

The Perfect Clotted Cream Recipe
Equipment
- 3 Ramekins (6 oz) small (4 in/10 cm in diameter), or 1 large
Ingredients
- 15 fl oz heavy cream (double cream) use unpasteurized or pasteurized but avoid ultra-pasteurized
Instructions
- Preheat the oven to 175ºF/80ºC.
- Pour 5 Fl oz/150ml each into three ramekins (or small oven-safe bowls). You can prepare this recipe in one large, shallow baking dish or several smaller ramekins. No matter the size of the dish you use, the aim is to pour only 1 ½-2 inches (4-5 cm) of cream into the dish.
- Place the ramekins on an oven tray, transfer them to the middle shelf of the oven, and bake for 12 hours, untouched.
- Remove the ramekins from the oven and allow them to cool completely at room temperature.When you remove the ramekins from the oven, you’ll notice the cream may seem slightly liquidy. This will thicken as it cools, though.
- Cover the ramekins with plastic wrap and transfer them to the fridge. Leave the clotted cream to chill for around 8 hours or overnight.
- Remove the ramekins from the fridge, use a spoon to lift up a corner, and pour out any liquid below the thick layer of cream, if there is any. Mix everything remaining together. If it's too thick, spoon some of the discarded liquid back into it – and voila!You’ll notice a golden crust on top. Don't be tempted to discard this. This is what makes this recipe so special and is absolutely delicious. Just mix it right into the cream.The leftover liquid (if there is any) is whey and can be used to add to smoothies, when making oatmeal, baking (including making homemade scones!), etc.
Storage Instructions
- In the fridge: Cover it tightly or transfer it to an airtight container and store it for 7-10 days. While chilling, it can become as thick as butter. So it's best to bring it back to room temperature for optimal "spreading" consistency. In the freezer: Keep for up to 3 months. Allow it to thaw in the fridge before using it again, mixing it well first.
Notes
- Monitor the oven: While you don’t have to stand over the oven for 12 hours, it’s a good idea to monitor it occasionally when trying this for the first time. Some ovens run cold or hot and may need adjusting. The top shouldn’t get darker than a pale golden brown.
- Oven safety feature: Some modern ovens come with a safety feature that switches them off after a certain amount of time. If this is yours, make sure to bake the cream when you can switch it back on (i.e., not overnight while sleeping).
- The oven temperature: If your oven temperature doesn’t go below 200ºF/95ºC, you can still try it. However, I’d check on it at 10 hours rather than 12.
- Leave enough time: This isn’t a slow process. Following the 12 hours of heating time, it needs to cool and chill for a further 8-10 hours.
- Don’t skip the chilling step: it is necessary so the cream can thicken to the correct consistency.
Nutrition
Nutrition information is automatically calculated, so should only be used as an approximation.


I tested my stove today and if I use “cook time, and set it for 12 hours at 175°, it did not turn off. I my do overnight in a couple days. I’d rather do that than leave the house.
Hi Peggy,
It sounds like you’re on the right track. I hope you enjoyed this recipe! 🙂
Hello,
Can you use whipping cream for this recipe?
Hey Holly! Yes, you can definitely use whipping cream for this recipe. It’s a great choice and will work just fine! Let me know how it turns out!
Is it possible to make this in the slowcooker? Seems ideal…Constanze temperature of 80° and doesn’t turn off/can be left on overnight… right?
Hi Ina,
Indeed, it can be made in a slow cooker. Set it to LOW and let it cook for 8 hours. I hope you give it a try!
Could this be done with a slow cooker? If so, what temp and for how long? Thank you for any info.
Hi Marie! Yes, you can make it a slow cooker! Set it on low and let it cook for about 8 hours. Enjoy!
This didn’t work for me. I did it exactly as stated in small ramekins at 175 degrees for 12 hours. I checked the temp regularly. After chilling, it is just heavy cream with some small chunks in it. I am putting it back in the oven and see what happens after awhile. Sad.
Hi Susan. Thank you for trying the recipe and sharing your results. It sounds like it might not have heated long enough. Every oven is a little different, so extending the time (as you did) is a good call. I hope the second round worked better!
If I’m using raw cream – will this process pasteurize it?
Hi Miranda,
This process will have a pasteurizing effect on the cream, though it’s not a substitute for standardized pasteurization processes. If you are still concerned, it’s best to use pasteurized cream to make clotted cream (but avoid ultra-pasteurized). I hope this helps.