This post may contain affiliate links. Please read our disclosure policy.
How to make homemade biscuits (aka American buttermilk biscuits) that are tall, buttery, soft, flaky, and made completely from scratch with 6 ingredients and simple step-by-step instructions in under an hour!
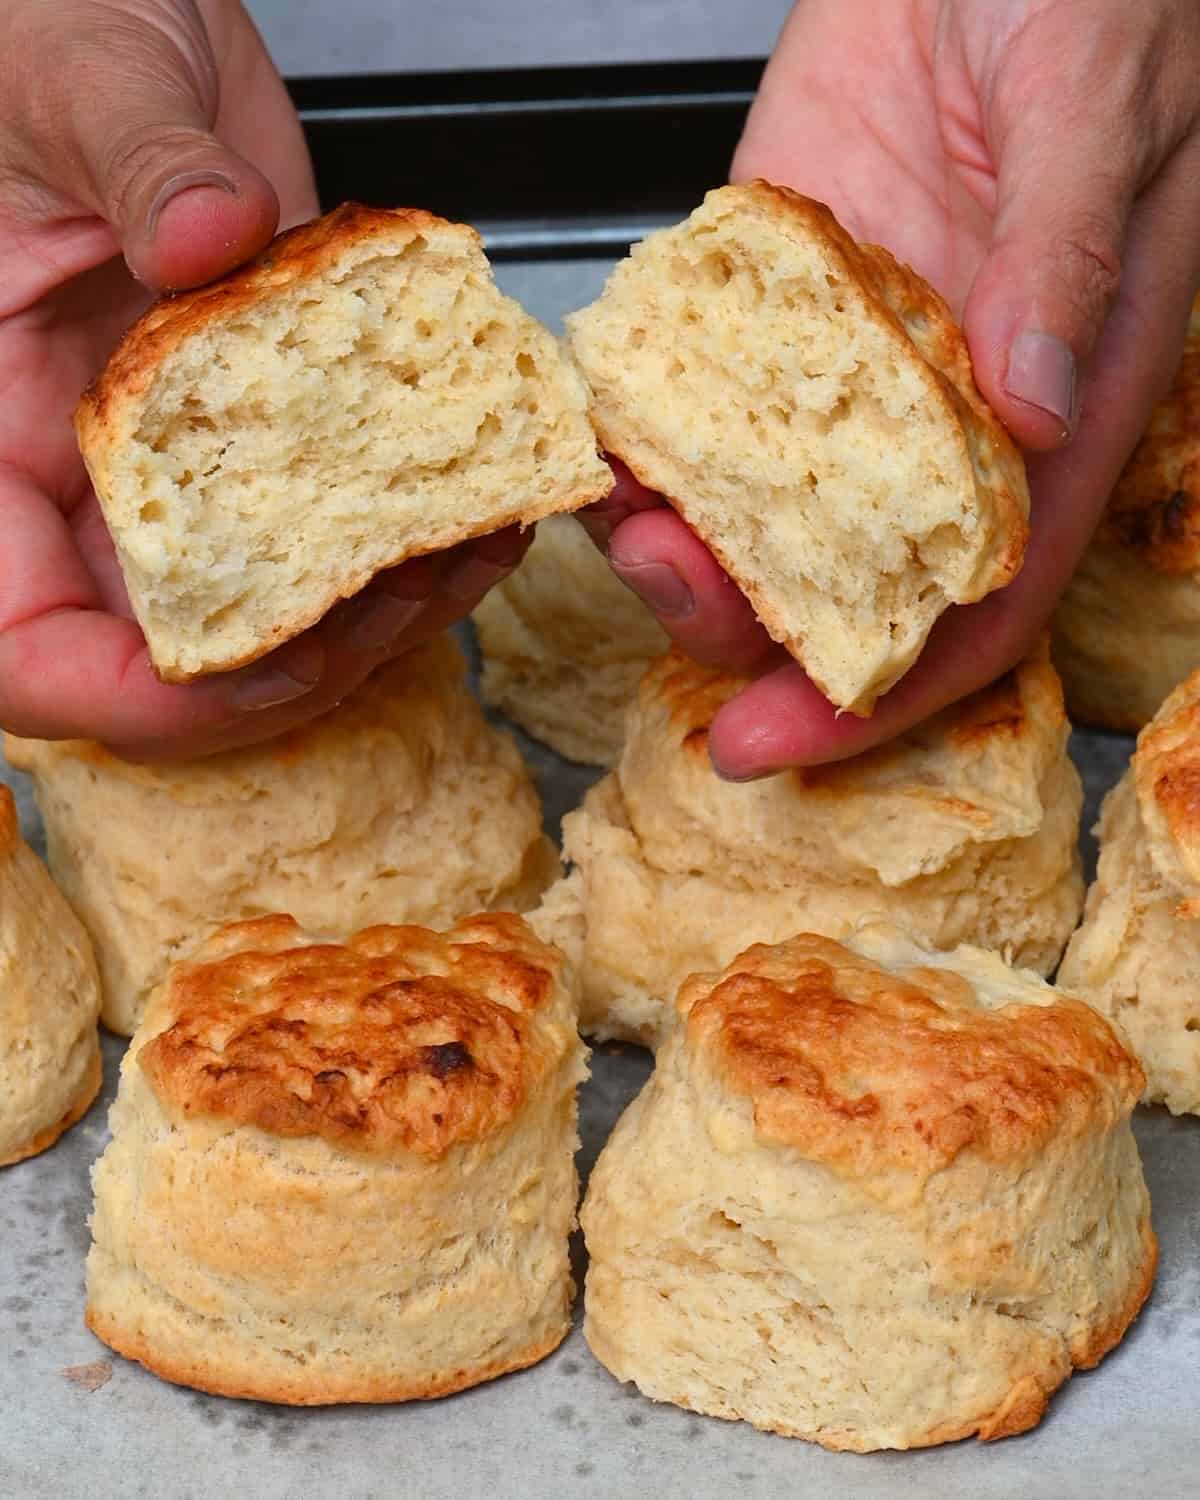
For many years, I, like many UK dwellers, kind of assumed that American biscuits and British scones were the same thing (whoops!). However, while they are similar in ingredients and look, some key differences – largely the “lamination” step – help make these homemade biscuits truly fluffy, flaky, and delicious.
And don’t worry if you saw the word lamination and panicked. This homemade biscuit recipe requires just 6 simple pantry staples and about 15 minutes of hands-on prep. Following a simple method and a few key tips/techniques, you can make perfect biscuits from scratch every time.
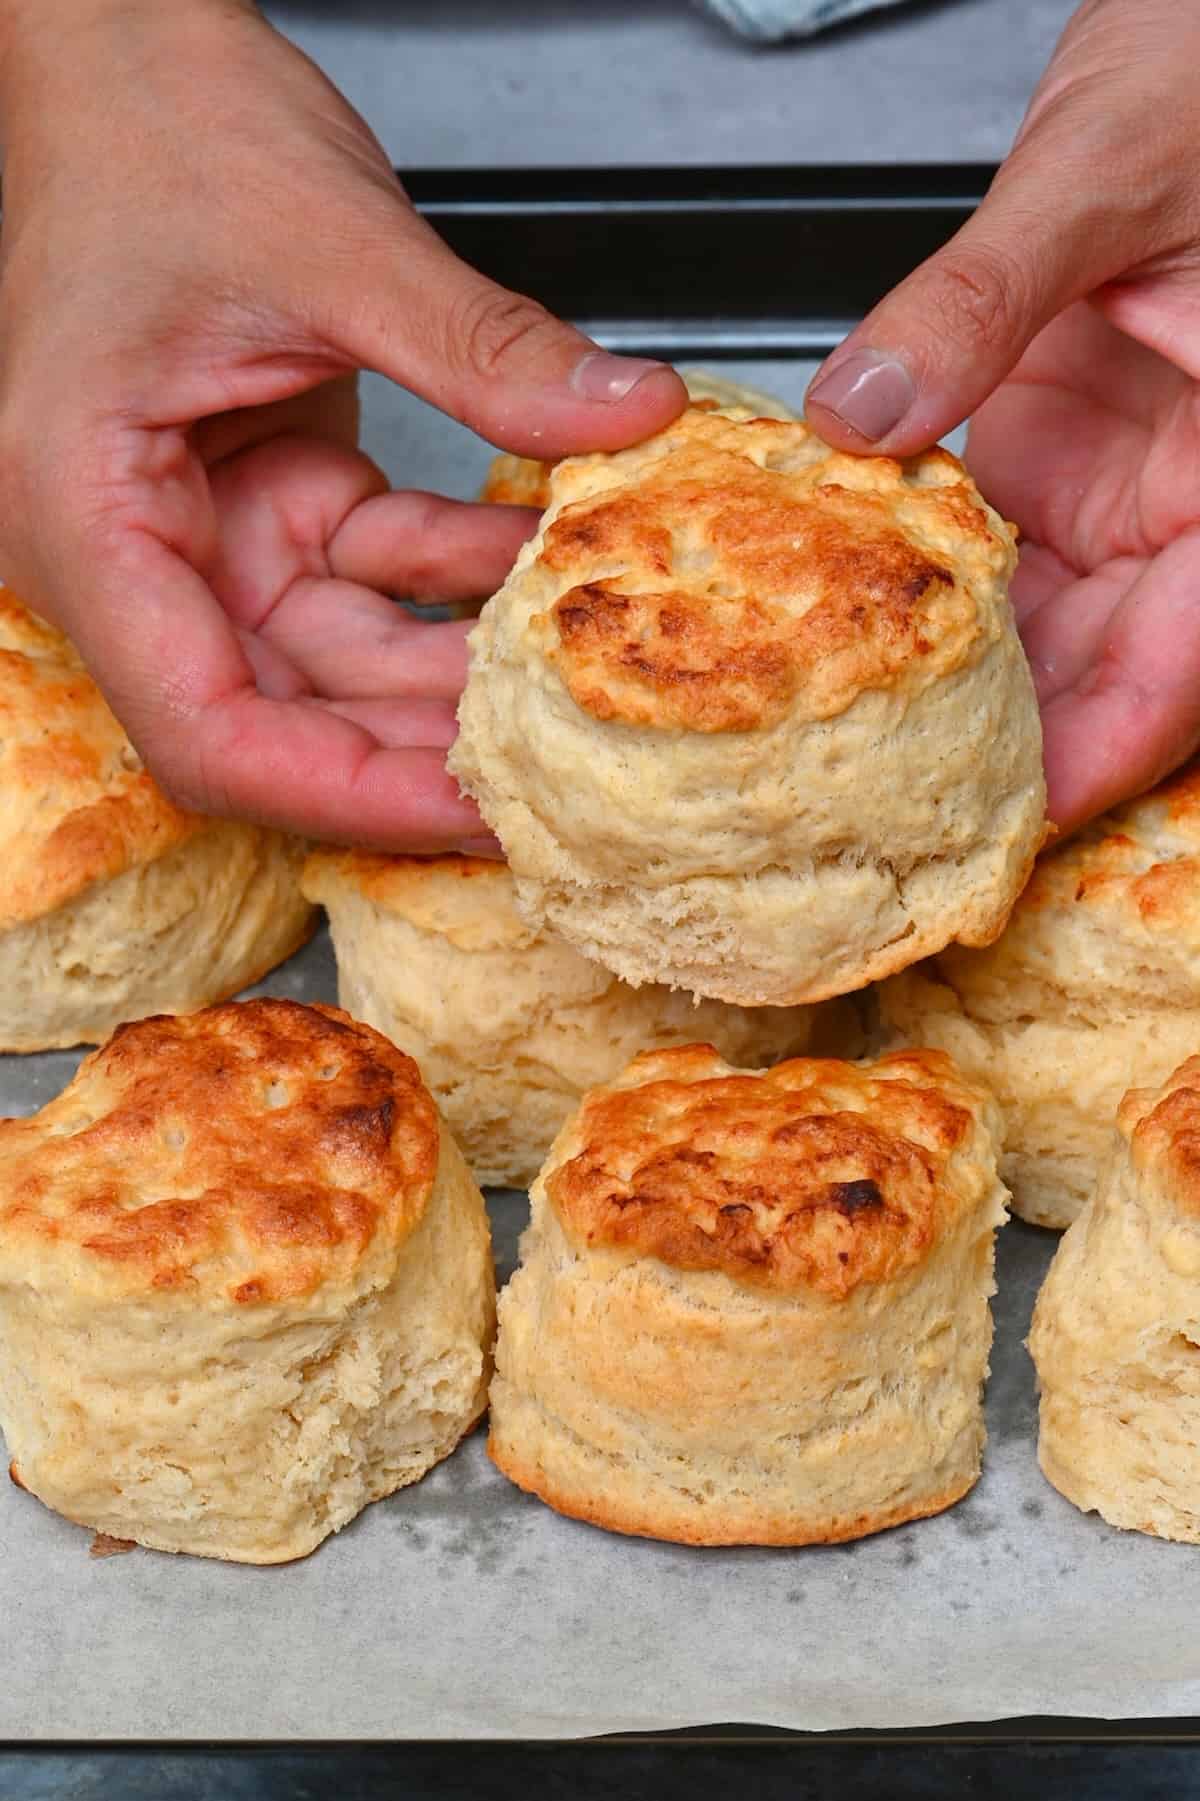
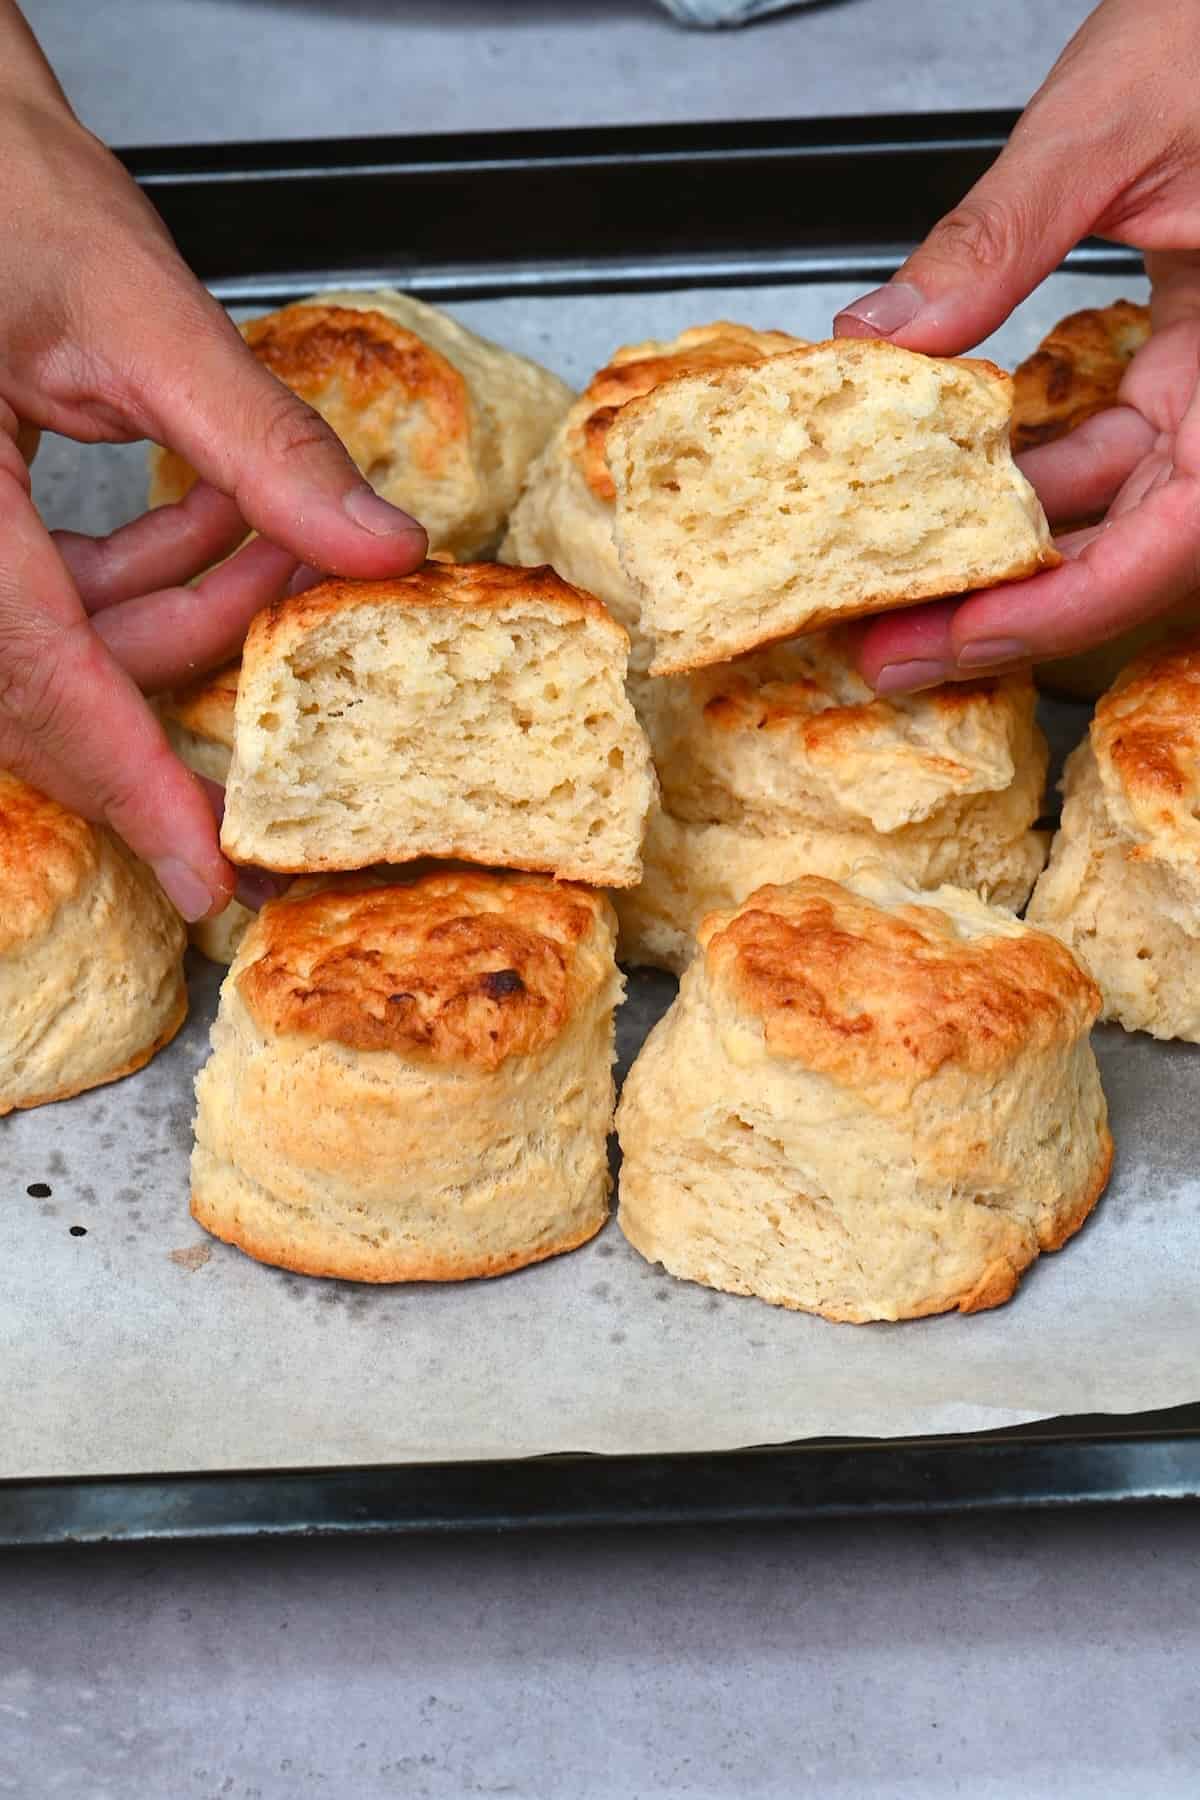
These homemade biscuits rise wonderfully to become super tender and fluffy in the middle, with a crisp exterior and plenty of flaky, buttery layers. Perfect for making biscuits and gravy, serving on your Thanksgiving dinner ideas, dipping into stews, slathering with butter and jam, and more.
Want to save this recipe?
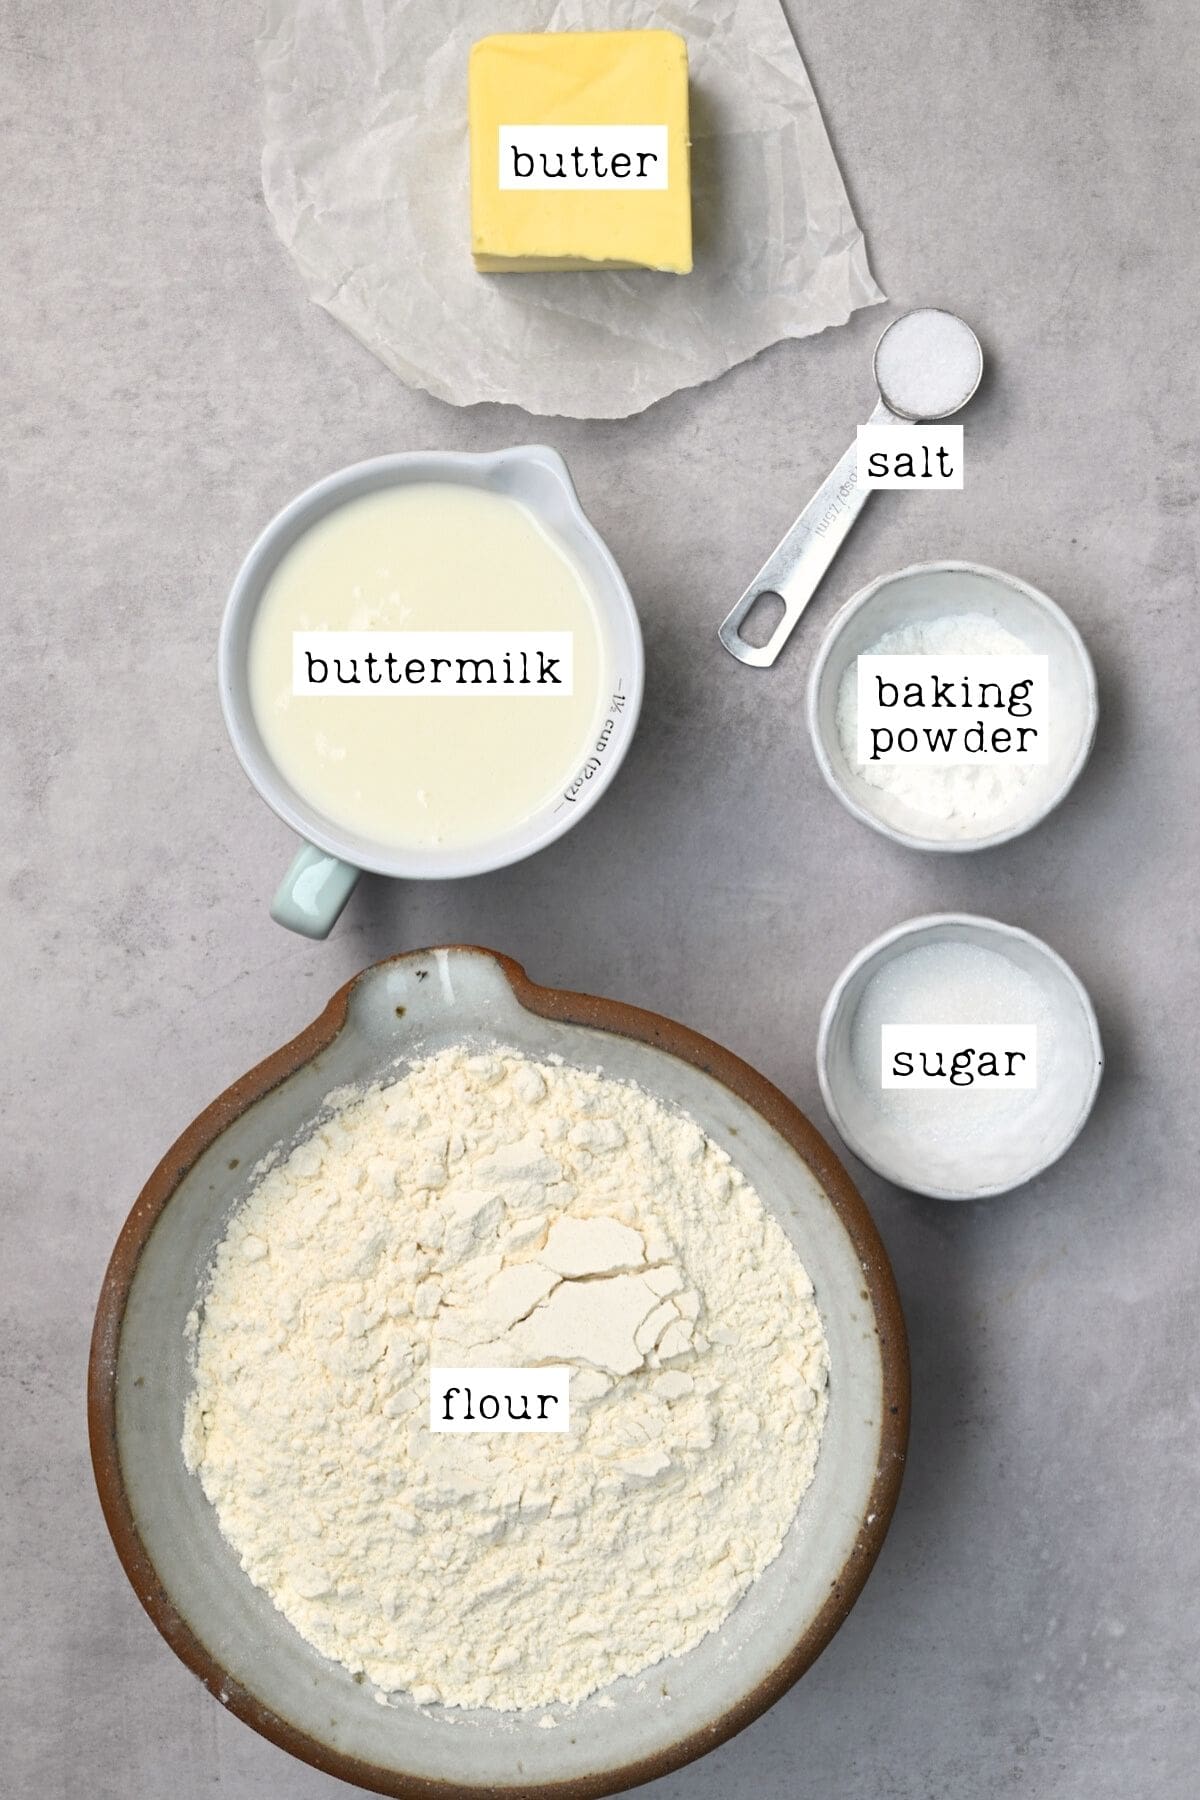
Homemade Biscuit Ingredients
- All-purpose flour: I usually use regular all-purpose flour, though pastry flour should also work, or a mixture of regular and whole wheat flour.
- Butter: Make sure to use cold butter. Unsalted butter is best. Use lightly salted if you absolutely have to, and omit any extra salt from the recipe.
- Buttermilk: It’s best to use natural buttermilk, though a homemade buttermilk substitute works in a pinch.
Regular full-fat milk works in a pinch, and the easy biscuits will be super tender but not as flavorful. You may also need to slightly adjust the amount since buttermilk is thicker.
- Baking powder: This helps leaven and lift the dough.
- Sugar: A little bit helps add a very subtle sweetness and depth. Adjust the sweetness based on how you plan to serve them.
- Salt: Use kosher/sea salt when possible. Only a little enhances the overall flavor.
Add 1 cup of shredded cheese (cheddar, parmesan, etc.) to the dough for cheesy biscuits.
What Tools You Need to Make Biscuits
- Box grater,
- Pastry cutter – optional,
- Round biscuit cutter – 3-4 inches/7.5-10cm wide; or a glass with this diameter,
- A baking sheet,
- Parchment paper.
How to Make Homemade Biscuits
Make the Biscuit Dough
First, place the butter in the freezer for 15-20 minutes, then preheat the oven to 425°F/220ºC and line a baking sheet with parchment paper.
Then, in a large bowl, combine the dry ingredients (flour, baking powder, salt, sugar) and mix.
Grate the chilled butter and add it to the flour mixture, stirring well.
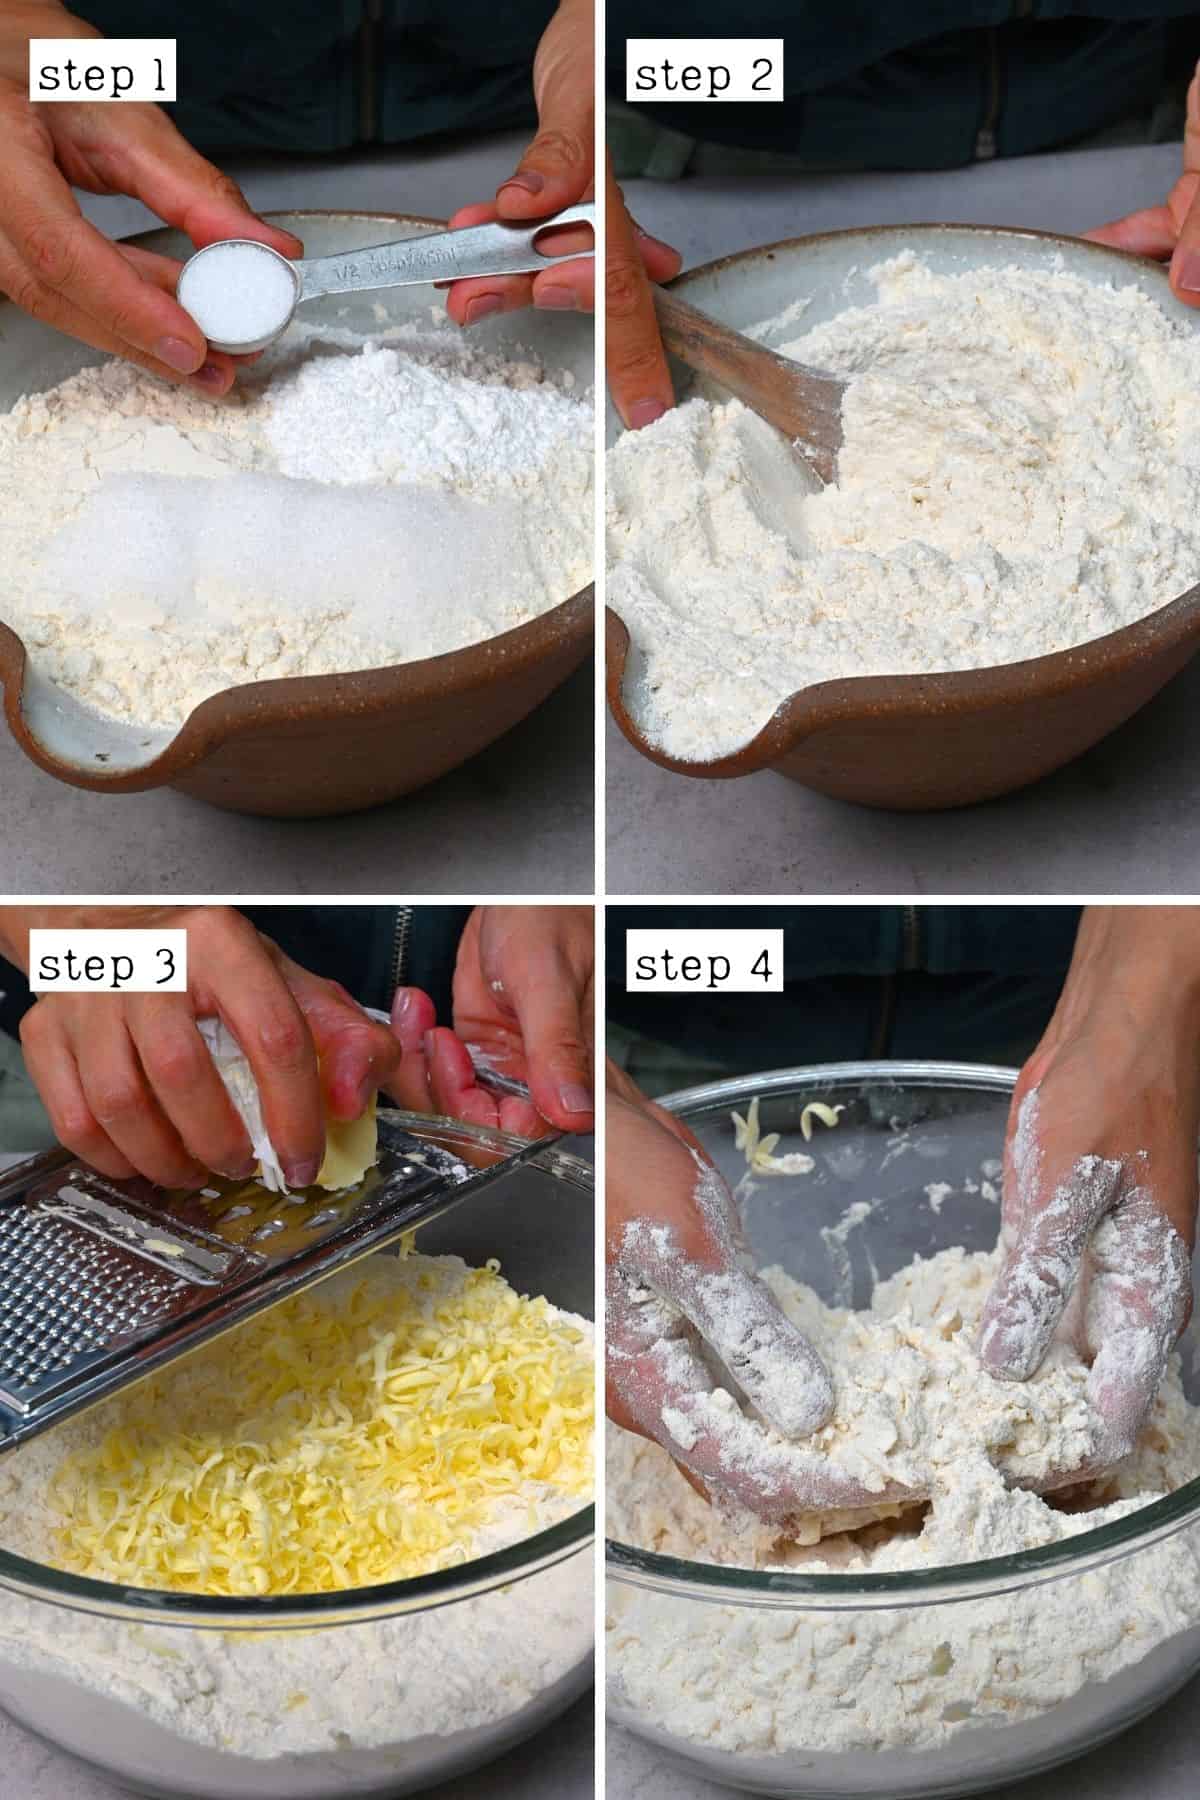
Technically, you can leave it as is. However, I like to work the butter and flour into a crumb consistency. Alternatively, use a pastry cutter or food processor pulse setting to incorporate chopped butter into the flour into pea-sized pieces.
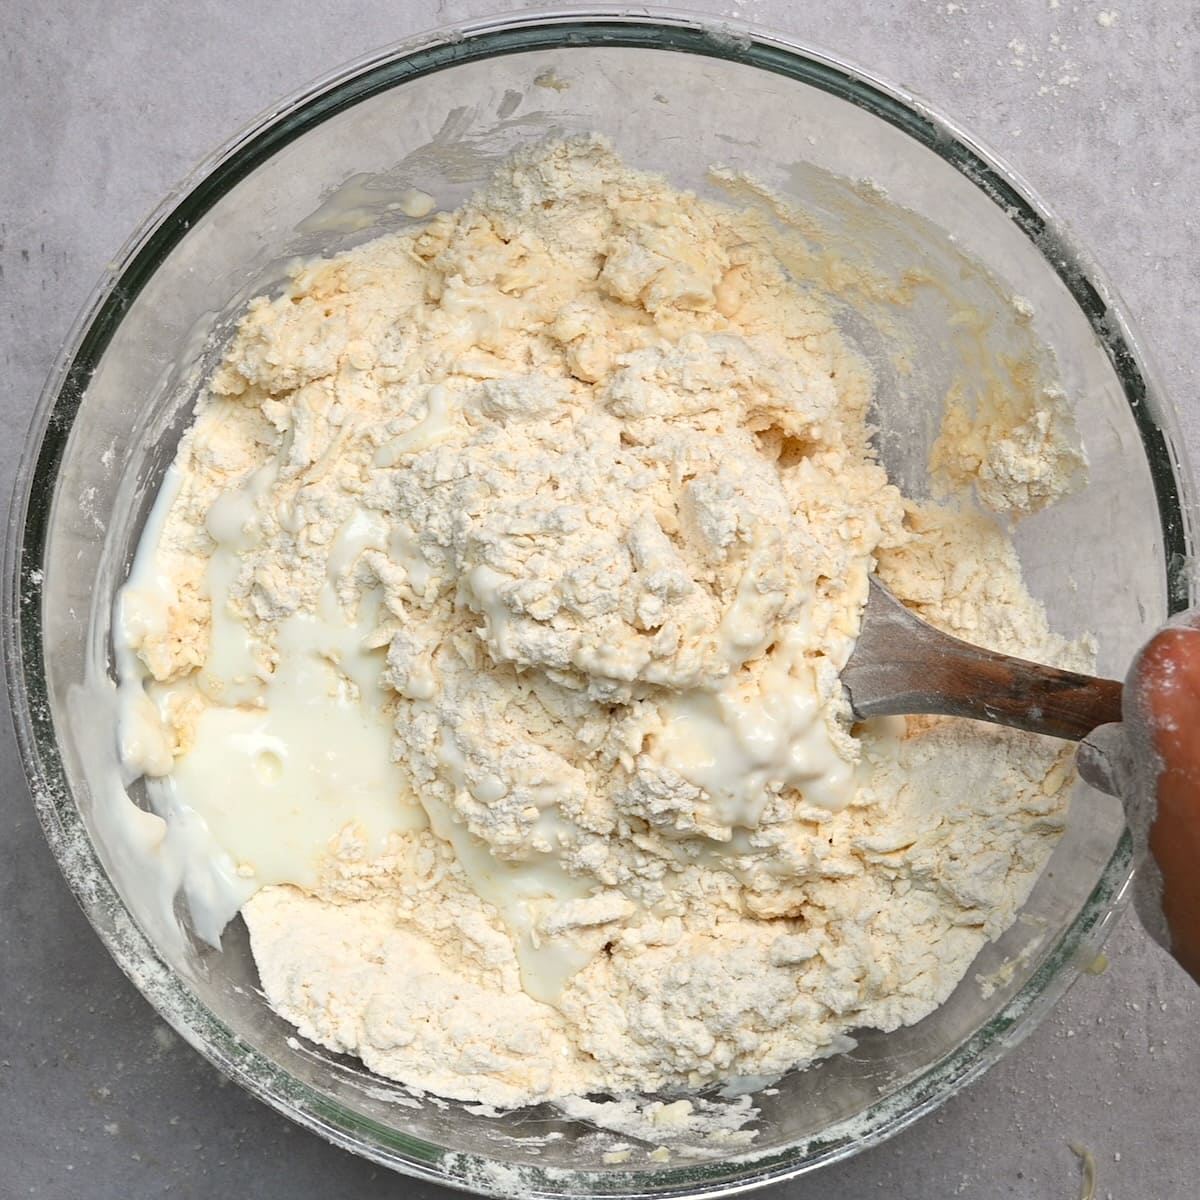
Next, slowly incorporate the buttermilk, adding a bit at a time while you stir until it forms a dough.
If it’s too dry, add more buttermilk, a tablespoon at a time.
Knead, Roll, and Fold the Dough
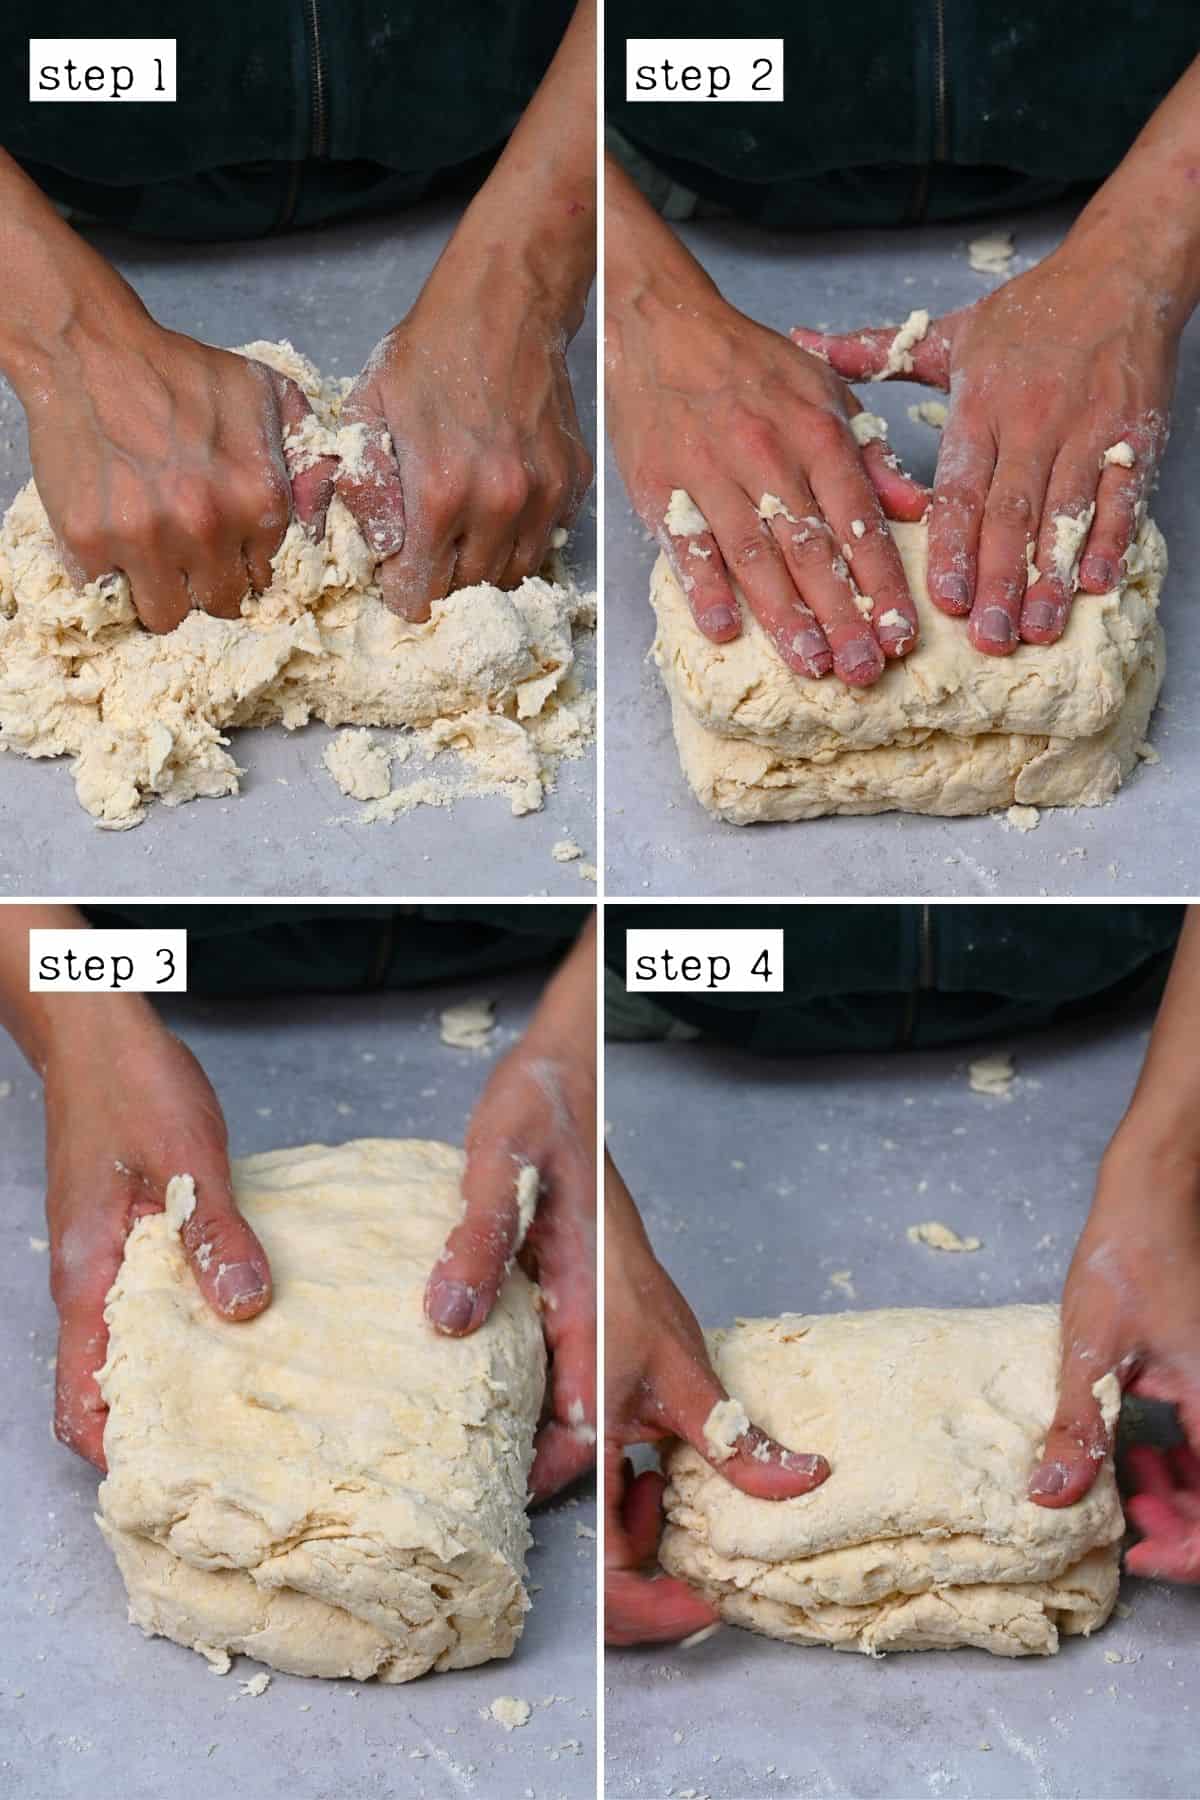
Place the dough onto a clean, flat surface (no need to flour it!) and gently/lightly knead until it comes together. Then, using your hands, spread it into a rough rectangle before folding the outer thirds over one another into the middle (like folding a letter).
Be careful not to knead too much, or you’ll end up with tough biscuits. Using a rolling pin works the gluten more, too, so using your hands to press/fold the dough is best.
Roll/spread it out and fold it into thirds again before covering it with plastic wrap and chilling it in the fridge for 5-10 minutes.
Cut and Bake the Biscuits
Sprinkle a small amount of flour and spread the dough to ¾ inch (2cm) thick across the lightly floured surface. Again using your hands is best.
Use a 3-4 inch (7.5-10cm) biscuit cutter or the rim of a glass to cut out as many biscuits as you can from the dough.
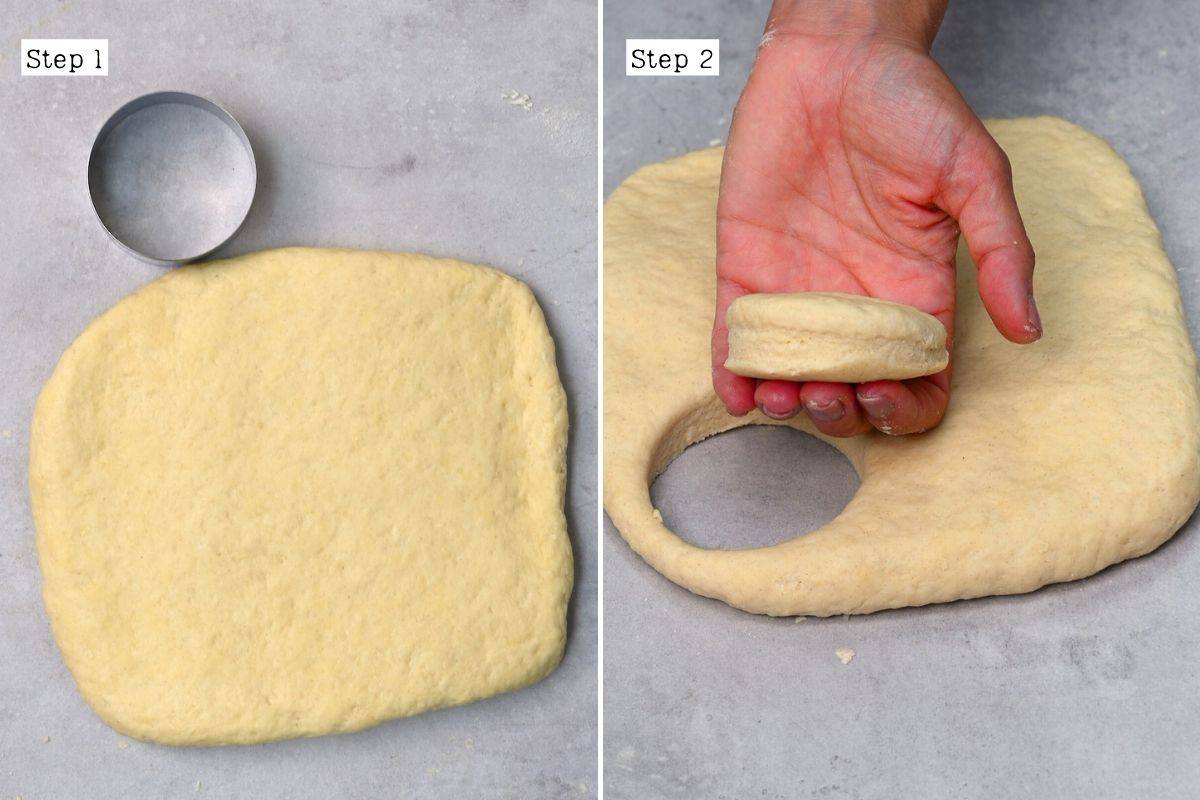
When cutting the biscuits, it’s important to press straight down into the dough without twisting the cutter. This will ensure the biscuits rise evenly and aesthetically without sealing the layers. Flouring the cutter can help to avoid sticking.
Then, re-roll the dough by stacking and flattening it, and cut out more – trying to get as many biscuits as possible.
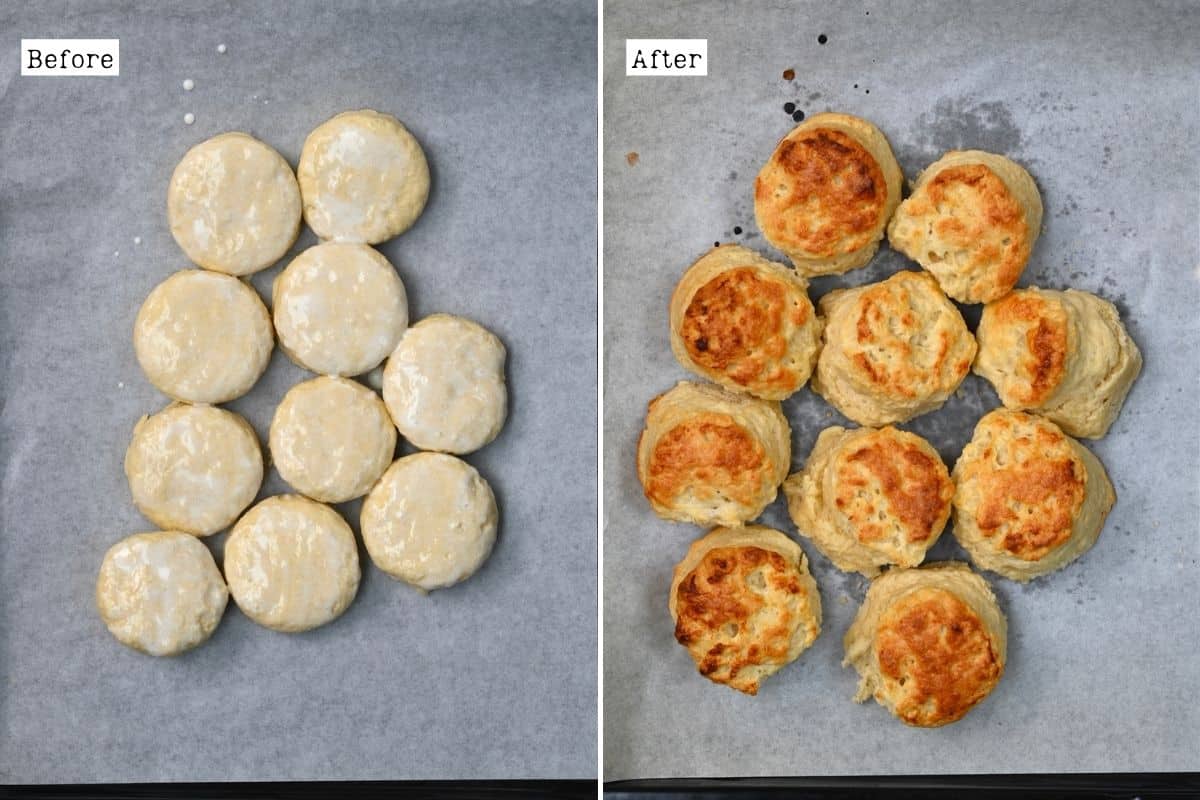
Transfer the biscuits to the lined baking sheet, brush them lightly with buttermilk (or melted butter), and bake for 15-17 minutes at 425°F/220ºC.
Placing the biscuits fairly close together (but not touching) on the tray can encourage them to rise only upwards and not outward, creating odd shapes.
How Do I Know When Biscuits Are Done Baking?
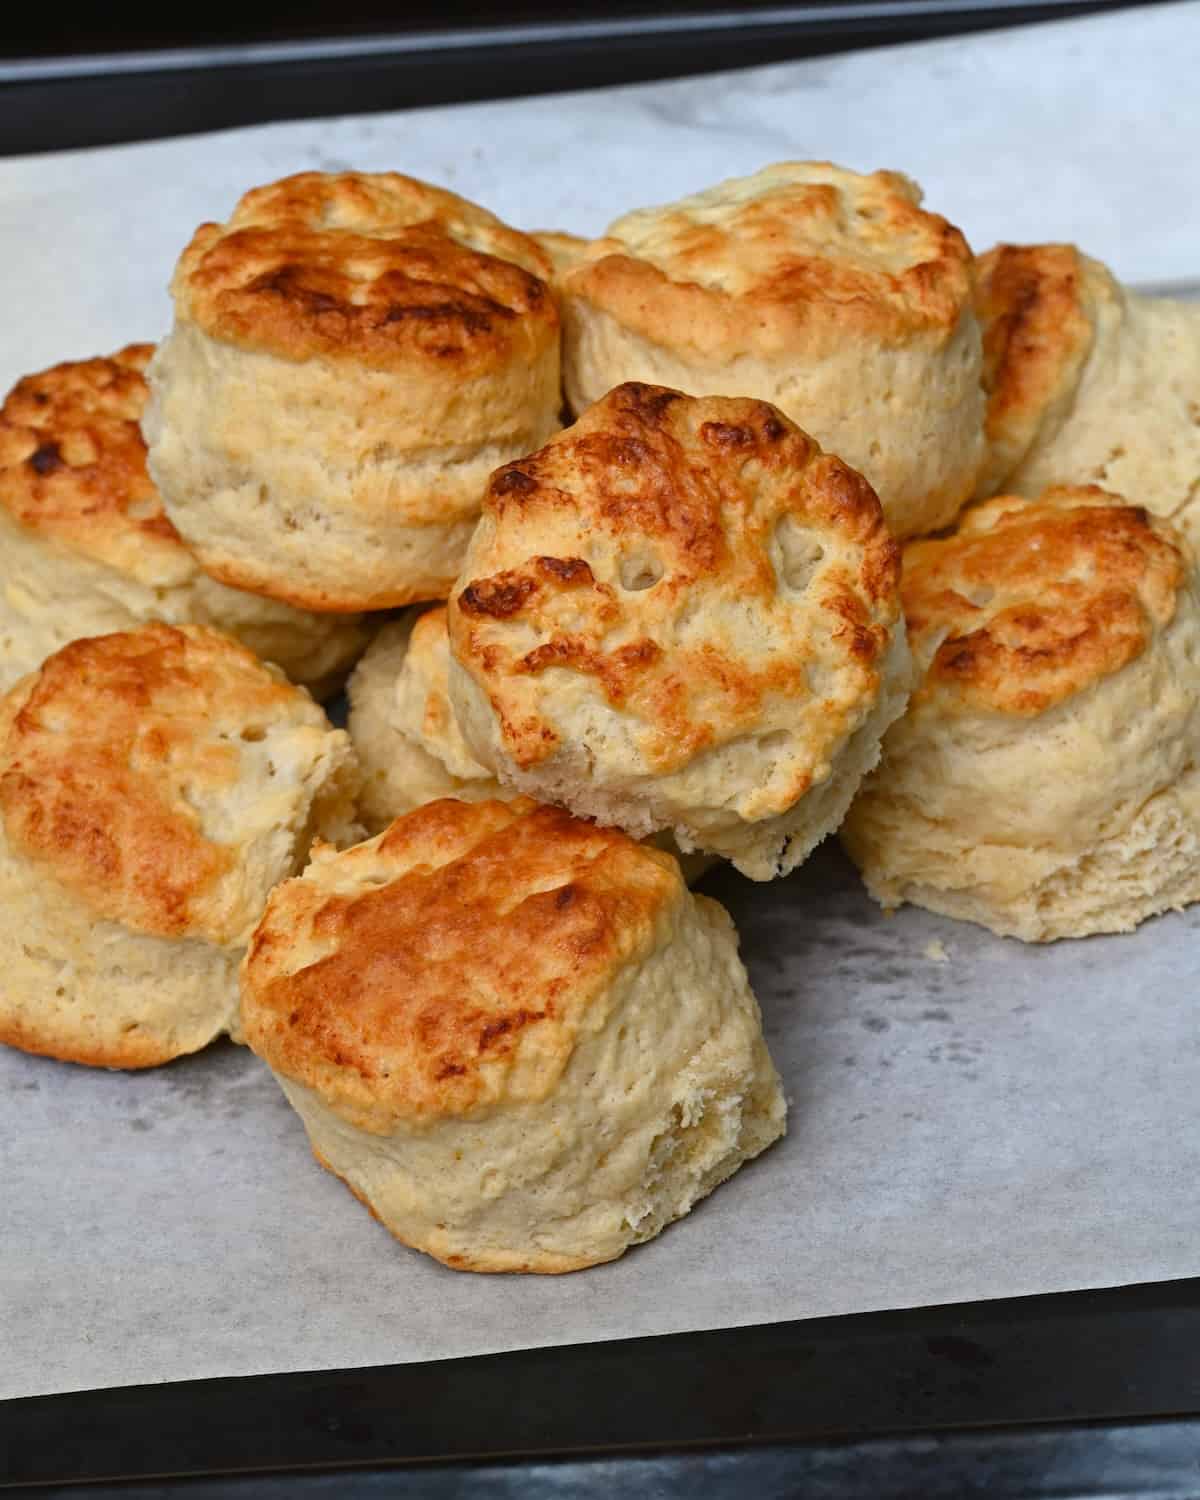
The biscuits are ready when they are risen and flaky with golden brown tops.
Top Tips for Soft and Flaky Biscuits
Though a simple recipe, when making American biscuits, it’s important to stick to a few key techniques for soft, fluffy, flaky buttermilk biscuits.
- Use cold ingredients: It’s vital to use chilled butter and buttermilk, as the butter needs to remain cold throughout the process of preparing the biscuit dough. This is so that it can create steam pockets as it melts while baking, producing super light and tender biscuits.
- Don’t over-handle the dough: Not only is it important to avoid warming the butter, but over-mixing/working the gluten in the flour can lead to dense, tough biscuits.
- Fold the dough carefully: This helps create lots of flaky layers in the biscuits. Definitely don’t skip the folding steps.
- Chill the dough before baking: This will ensure the butter is at the right temperature so it bakes as intended in the oven for the BEST homemade biscuits.
- Only lightly flour the surface: Adding too much extra flour will lead to dry results.
- Use a high temperature: This helps the biscuit to rise quickly and produce a crisp, golden exterior but a soft, tender middle.
Storage and Reheating
Allow the biscuits to cool completely after baking, then place them in an airtight container/bag at room temperature for 1-2 days or in the fridge for 3-5 days.
You can also freeze the baked biscuits by flash-freezing them on a tray (to avoid sticking) and transferring them to a Ziplock for 2-3 months. When desired, allow them to thaw at room temperature for an hour or two.
To reheat the biscuits, pop them in a preheated oven at 350ºF/175ºC until warm (5-10 minutes).
Can I Freeze Biscuit Dough?
Yes, I often make a double batch of the dough and freeze half of it for later. To do so, prepare the dough and spread it into the ¾-inch square/rectangle. Then, wrap it in plastic wrap and place it in a Ziplock bag for up to 3 months.
When you want to use it, allow it to thaw in the refrigerator overnight, then cut out and bake the biscuits as usual.
How to Serve Buttermilk Biscuits?
There are a few popular ways to enjoy this breakfast and holiday staple, such as to make biscuits and gravy (with sausage gravy), alongside soups and stews (try them with beef barley soup), on your Thanksgiving table, and/or a brunch spread with:
- Lashings of butter or homemade hot honey,
- Whipped cream (or dairy-free coconut whipped cream) and fruit,
- Butter or cream and jam/jellies/preserves,
- Honey butter or maple butter,
- Scrambled eggs and optionally bacon,
- A sausage patty and optionally cheese,
- Fried chicken breast (with honey or hot sauce),
- Pulled pork or slow cooker beef brisket (to make biscuit sliders).
You can also transform these Southern buttermilk biscuits into a biscuit sandwich, grilled cheese, pizza, or even biscuit croutons.
More Quick Bread Recipes
If you try this easy biscuit recipe, let me know how it goes in the comments below. I’d appreciate a recipe card rating and would love to see your recipe recreations – tag me on Instagram @Alphafoodie!
Easy Homemade Biscuits
Equipment
- Pastry cutter optional
- Round biscuit cutter 3-4 inches/7.5-10cm wide; or a glass with this diameter,
- Baking sheet and parchment paper
Ingredients
- 1.1 lb all-purpose flour 3 cups or pastry flour
- 6 oz butter 3/4 cup, cold
- 1 cup buttermilk and a bit more for brushing
- 0.9 oz baking powder 2 Tbsp
- 0.4 oz white sugar 2 tsp
- 1 tsp sea salt
Instructions
Make the Biscuit Dough
- Place the butter in the freezer for 15-20 minutes. Then preheat the oven to 425°F/220ºC and line a baking sheet with parchment paper.
- In a large bowl, combine the dry ingredients (flour, baking powder, salt, sugar) and mix.
- Grate the chilled butter and add it to the flour mixture, stirring well.Technically, you can leave it as is. However, I like to work the butter and flour into a crumb consistency. Alternatively, use a pastry cutter or food processor pulse setting to incorporate chopped butter into the flour into pea-sized pieces.
- Slowly incorporate the buttermilk, adding a bit at a time while you stir until it forms a dough.If it’s too dry, add more buttermilk, a tablespoon at a time.
Knead, Roll, and Fold the Dough
- Place the dough onto a clean, flat surface (no need to flour it!) and gently/lightly knead until it comes together. Using your hands, spread it into a rough rectangle before folding the outer thirds over one another into the middle (like folding a letter).Be careful not to knead too much, or you'll end up with tough biscuits. Using a rolling pin works the gluten more, too, so using your hands to press/fold the dough is best.
- Roll/spread it out and fold it into thirds again. Then cover it with plastic wrap and chill it in the fridge for 5-10 minutes.
Cut and Bake the Biscuits
- Sprinkle a small amount of flour and spread the dough to ¾ inch (2cm) thick across the lightly floured surface. Again, using your hands is best.
- Use a 3-4 inch (7.5-10cm) biscuit/cookie cutter or the rim of a glass to cut out as many biscuits as you can from the dough.It’s important to press straight down into the dough without twisting the cutter. This will ensure they rise evenly and aesthetically without sealing the layers. Flouring the cutter helps avoid sticking.
- Re-roll the dough by stacking and flattening it, then cut out more, trying to get as many biscuits as possible.
- Transfer the biscuits to the lined baking sheet, brush them lightly with buttermilk (or melted butter), and bake for 15-17 minutes at 425°F/220ºC. They are ready when they are risen and flaky with golden-brown tops. Placing the biscuits fairly close together (only just not touching) on the tray can encourage them to rise only upwards and not outward/creating odd shapes.
Video
Notes
Nutrition
Nutrition information is automatically calculated, so should only be used as an approximation.





Any chance there’s gluten free recipe or substitutes on this ?
Hey Dom! I haven’t tested a gluten-free version of this recipe, but you could try using a 1:1 gluten-free flour blend (like Bob’s Red Mill or King Arthur) as a substitute for the all-purpose flour. Since gluten-free flours absorb moisture differently, you may need to adjust the liquid slightly to get the right dough consistency.
If you try it, I’d love to hear how it turns out!