
This post may contain affiliate links. Please read our disclosure policy.


How to dry sage at home with one of 4 methods: dehydrator, oven, microwave, or air drying – so you never run out when needed. Plus, how to store and use dried sage!
Sage is a popular herb that’s part of the mint family alongside oregano, rosemary, thyme, and basil. It has a robust earthy flavor (with hints of citrus and pine) and can be used as fresh or dried sage leaves to boost dozens of dishes. However, drying sage can extend its shelf life and is a great way to deal with a surplus of the growing herb.
Even better, sage contains less moisture than many herbs, making it quick and simple to dehydrate while maintaining its flavor. Within this post, I’ll take you through how to dry sage using four methods and how to store it, use it, and several top tips and FAQs.
You might also like to learn how to dry mint, how to dry thyme, how to dry parsley, or how to dry rosemary!
Want to save this recipe?
How to Dry Sage Leaves
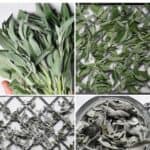
First, before using any of the below methods for dehydrating sage leaves, you need to prepare them.
- Remove the fresh sage leaves from the stem, and discard any discolored (yellowing or other blemishes) or dry/shriveled leaves.
If you are air-drying them, there’s no need to remove them from the stem. - Rinse them in a colander, shake away excess water, then use a tea towel/paper towel or salad spinner to remove ALL remaining moisture.
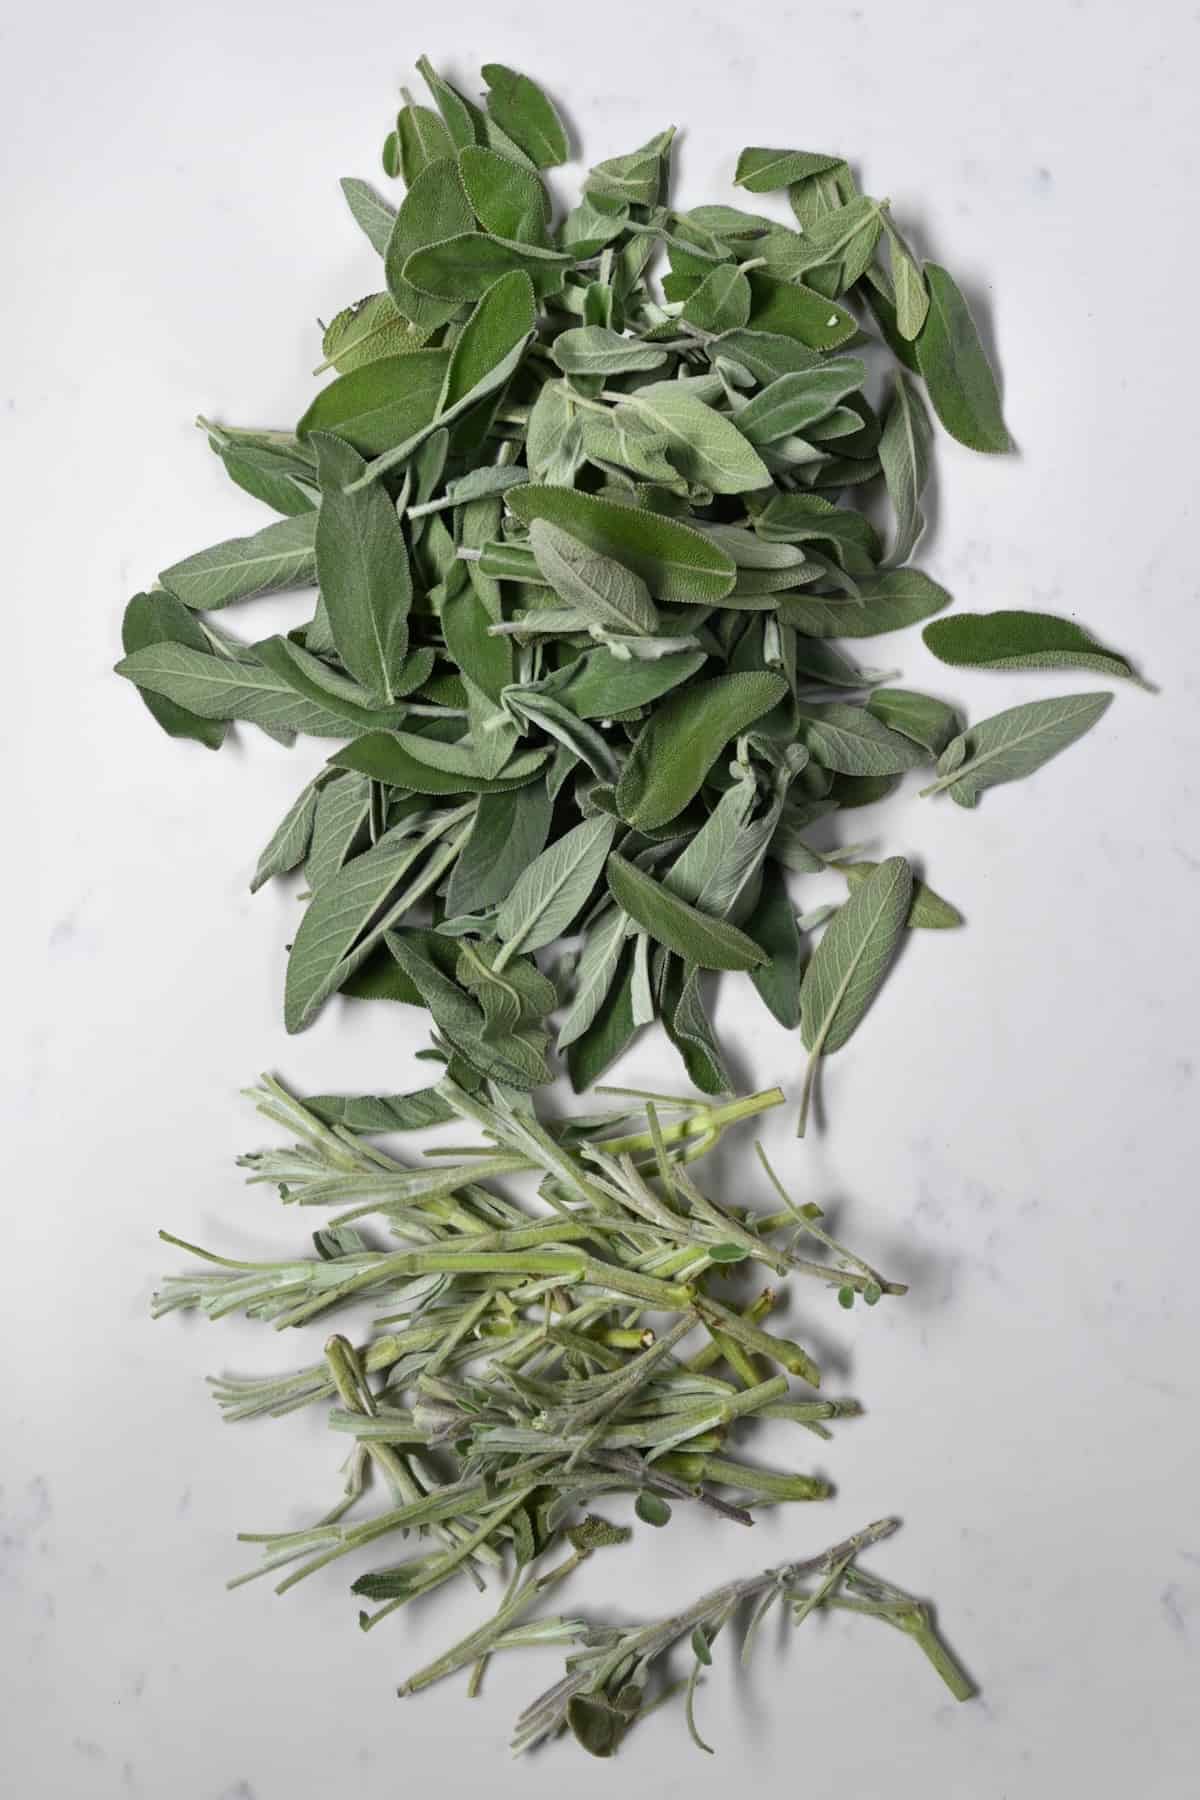
If you harvest directly from a sage plant, only remove about 1/3 of the mature leaves to allow the plant to recover & re-grow. Also, check for any insects/bugs, spider webs, or eggs.
In a Dehydrator
A food dehydrator will provide the most consistent results with low heat to retain nutrients and quality.
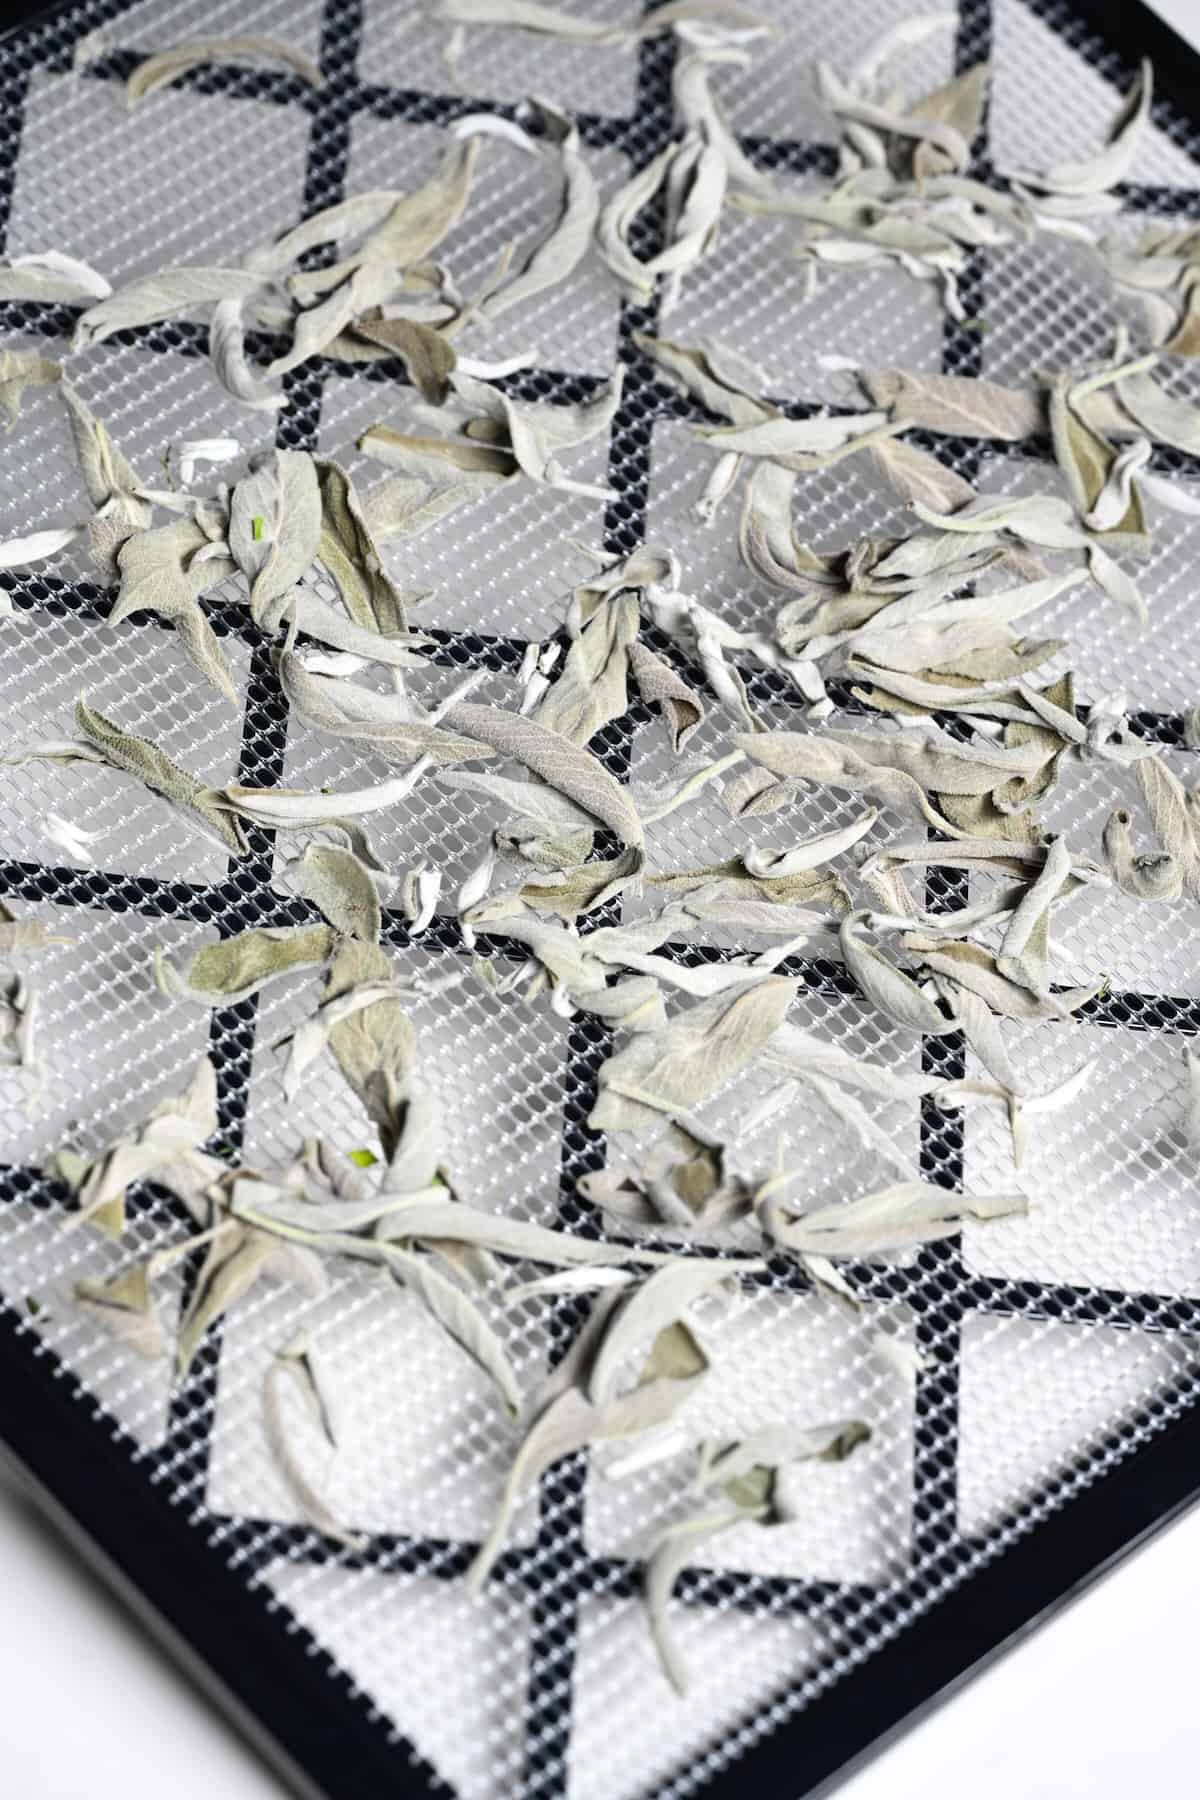
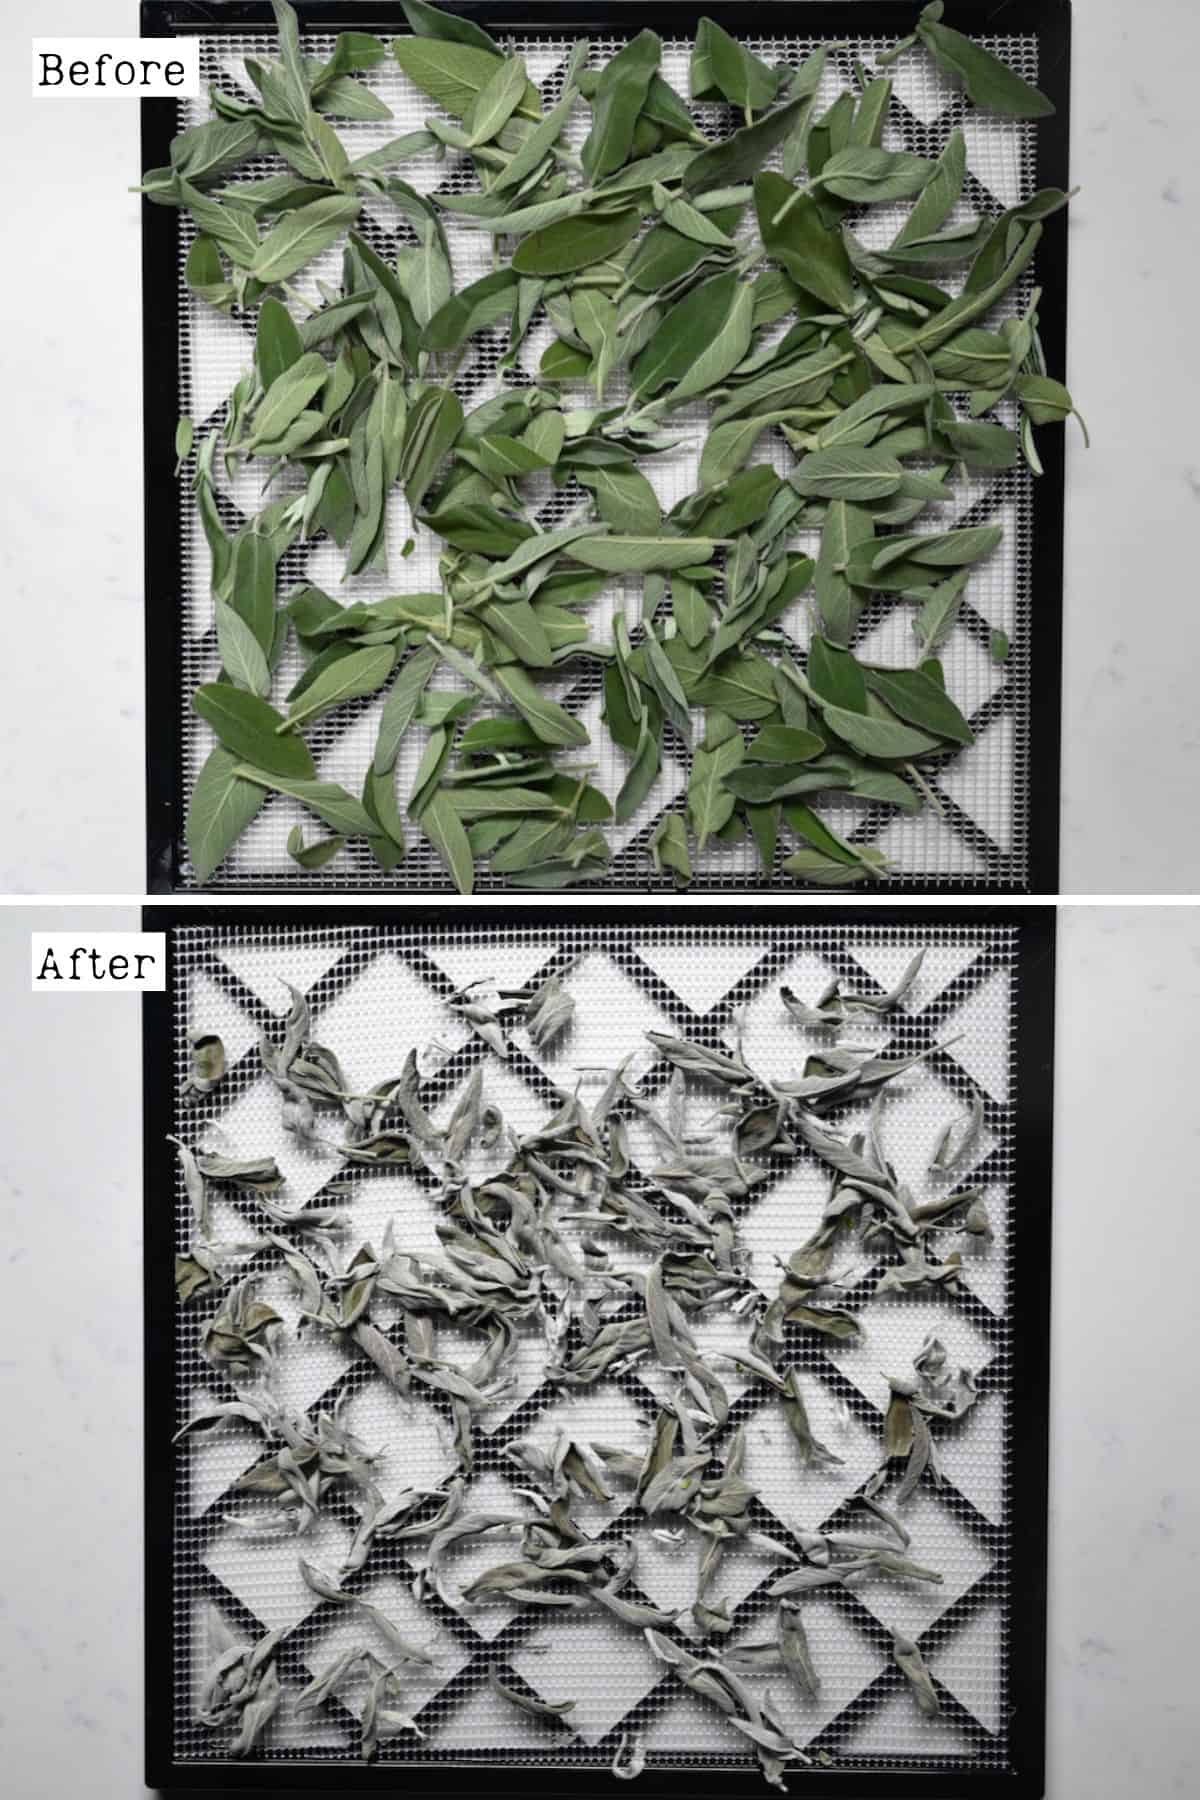
- Spread the leaves in a single layer evenly across a dehydrator tray, ensuring there is space between them for airflow.
- Dehydrate at 95ºF/35ºC – 115ºF/46ºC for between 2-4 hours (the exact time will depend on the temperature, humidity, and your dehydrator model). Use the higher temperature if you live in a more humid area.
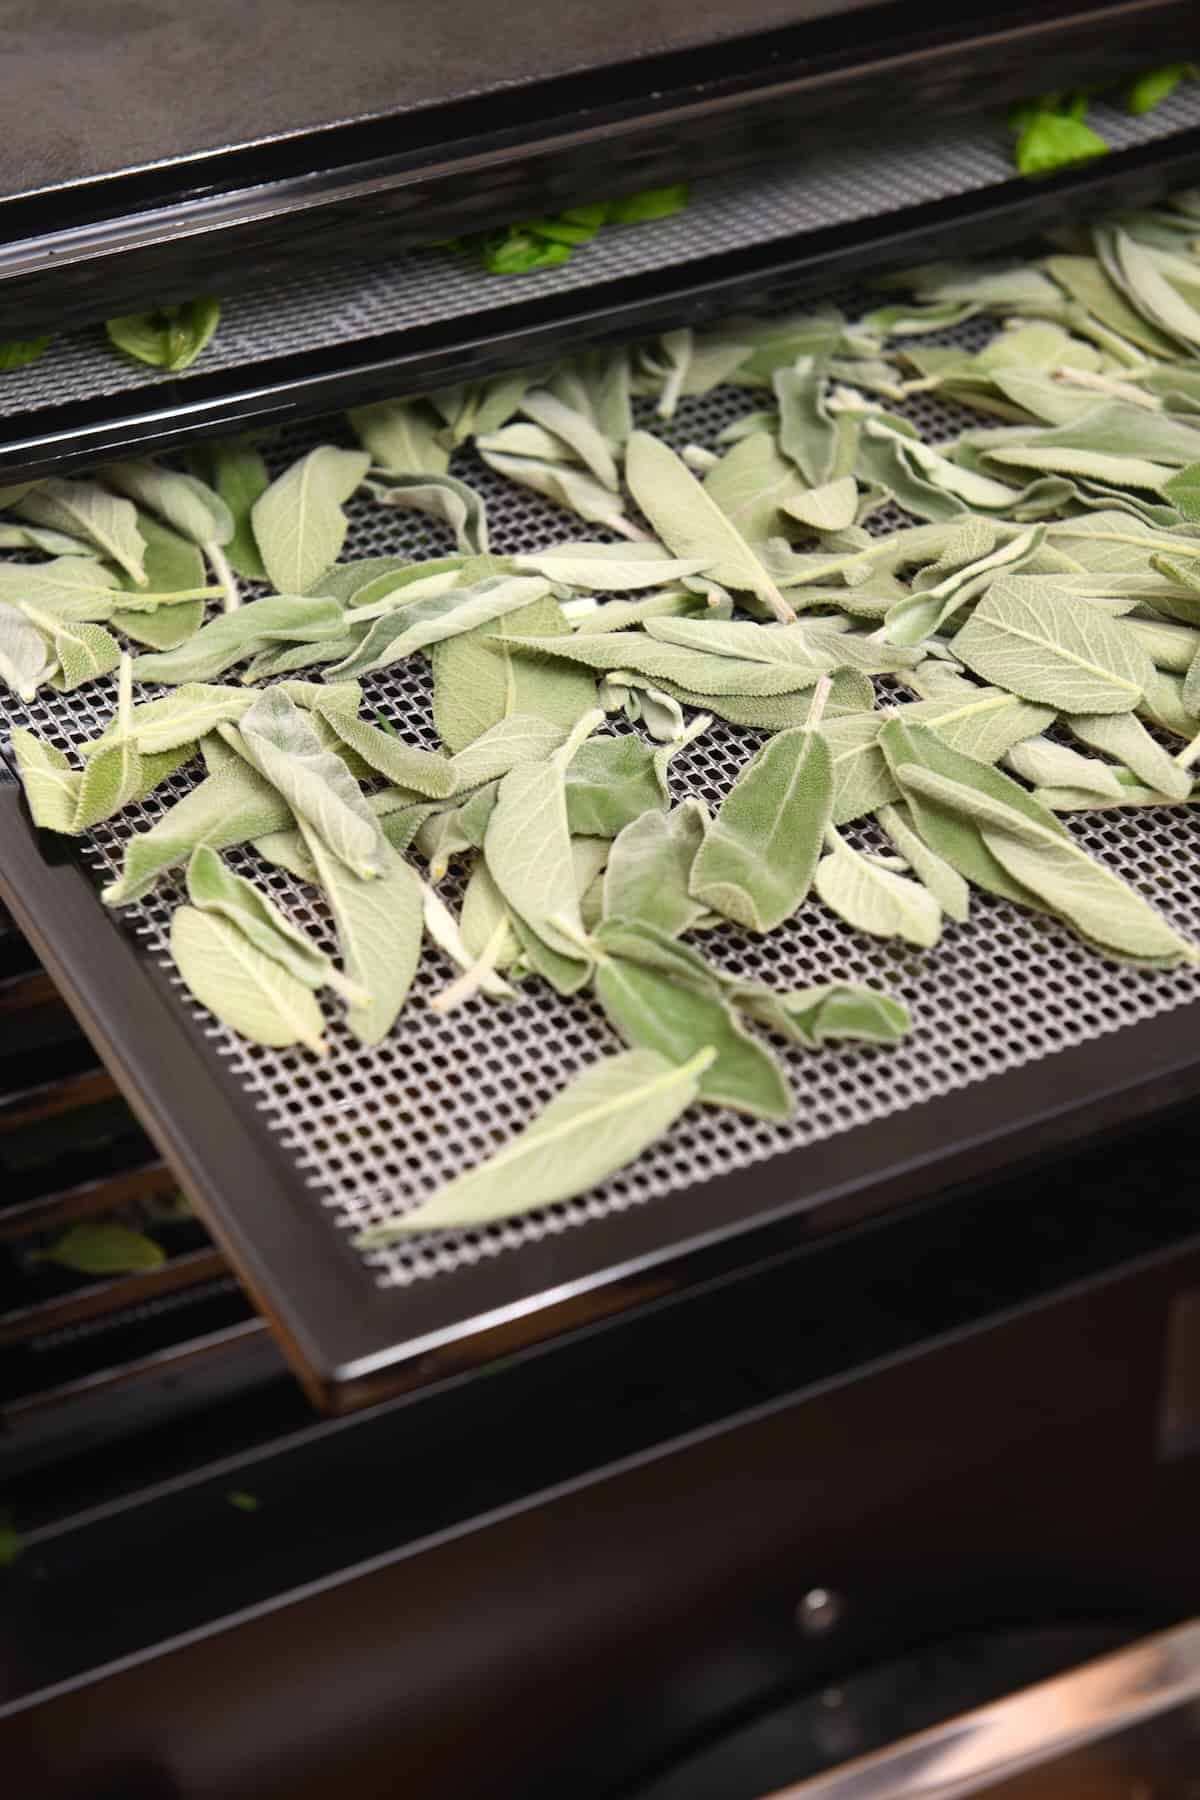
They’re ready when they’re dry and brittle enough to snap/crumble between your fingers (not bend). Allow a leaf to cool for several minutes before testing it.
In the Oven
Drying sage in the oven is a quick method using a tool most households are likely to have.
- Preheat the oven to its lowest temperature (often around 170°F/75°C).
- Spread the pieces evenly across a parchment paper-lined baking sheet, with space in between for airflow.
- Transfer the tray to the oven, leave the oven door propped open with the end of a wooden spoon or another heatproof utensil, and dry for 1-3 hours, monitoring every 20 minutes. It can help to flip them over after the first 30 minutes.
Some modern ovens have a dehydrating feature, allowing you to go as low as 95-100°F (35-38°C). In that case, there’s no need to prop the door open while drying the parsley in the oven.
In the Microwave
Drying sage in a microwave works best for just a few leaves and if you’re pressed for time.
- Spread a layer of sage leaves between two paper towels without overlapping.
- Microwave in 30-second increments on 50% power. Between each cycle, check whether any are dry, remove them, and flip the remaining leaves over. Repeat until all the leaves are brittle and crumbly.
Air Drying
This method will work well for those living in a warm, dry climate but should be avoided by those living in humid or very rainy areas (as it will affect how long, and even if, the leaves will dry).
- Tie 4-6 stalks into bundles with some string/twine or a rubber band and hang them up, leaves facing down, in an area with good air circulation, like an attic or porch (or a room with a dehumidifier).
- Leave the sage bundles to dry, either outside or inside, until brittle. The time to dehydrate sage this way varies based on temperature, humidity, airflow, etc., but this can take several days, up to 2 weeks.
It helps to cover the bundles with a perforated paper bag to protect them from dust and in case any of the leaves drop. Generally, you’ll retain better color and flavor when dehydrating it indoors.
What Can You Use Dried Sage for?
- Within meat rubs and marinades,
- For seasoning poultry,
- Seasoning for roasted vegetables – especially potatoes, butternut squash, & pumpkin,
- Stirred into mashed potatoes,
- Add to homemade stuffing,
- Add to tomato sauces,
- Use in soups and stews,
- Add to sausages,
- Bake into breads.
Dried sage is also popularly used to make a smudge stick for the spiritual practice of smudging.
However, the more important question might be when NOT to use dried sage. For example, when making a simple sauce for pasta/gnocchi & any time a recipe calls for frying the leaves in oil until crisp.
FAQs
As a rough guide, the conversion for most fresh to dry herbs is to use 3x as much fresh. I.e., 1 teaspoon of dried herbs for every 1 tablespoon of fresh. However, when using ground sage, I recommend using ½ tsp.
Note that 2 large sage leaves or 3-4 small ones equal about a teaspoon of dried “rubbed” sage.
Generally speaking, by removing all the water content from dried herbs, they’ll have a more concentrated, stronger flavor. That’s why it’s important not to use a 1:1 ratio of fresh to dried herbs.
Rubbed sage is made by rubbing the dehydrated sage leaves between your fingers until they crumble into uneven, coarse flakes.
Ground sage, however, uses a mortar and pestle or spice grinder to grind the dried leaves down into more of a fine powder, similar to other powdered herbs.
I recommend rubbing them, as it maintains the freshness and flavor for longer.
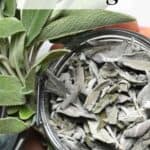
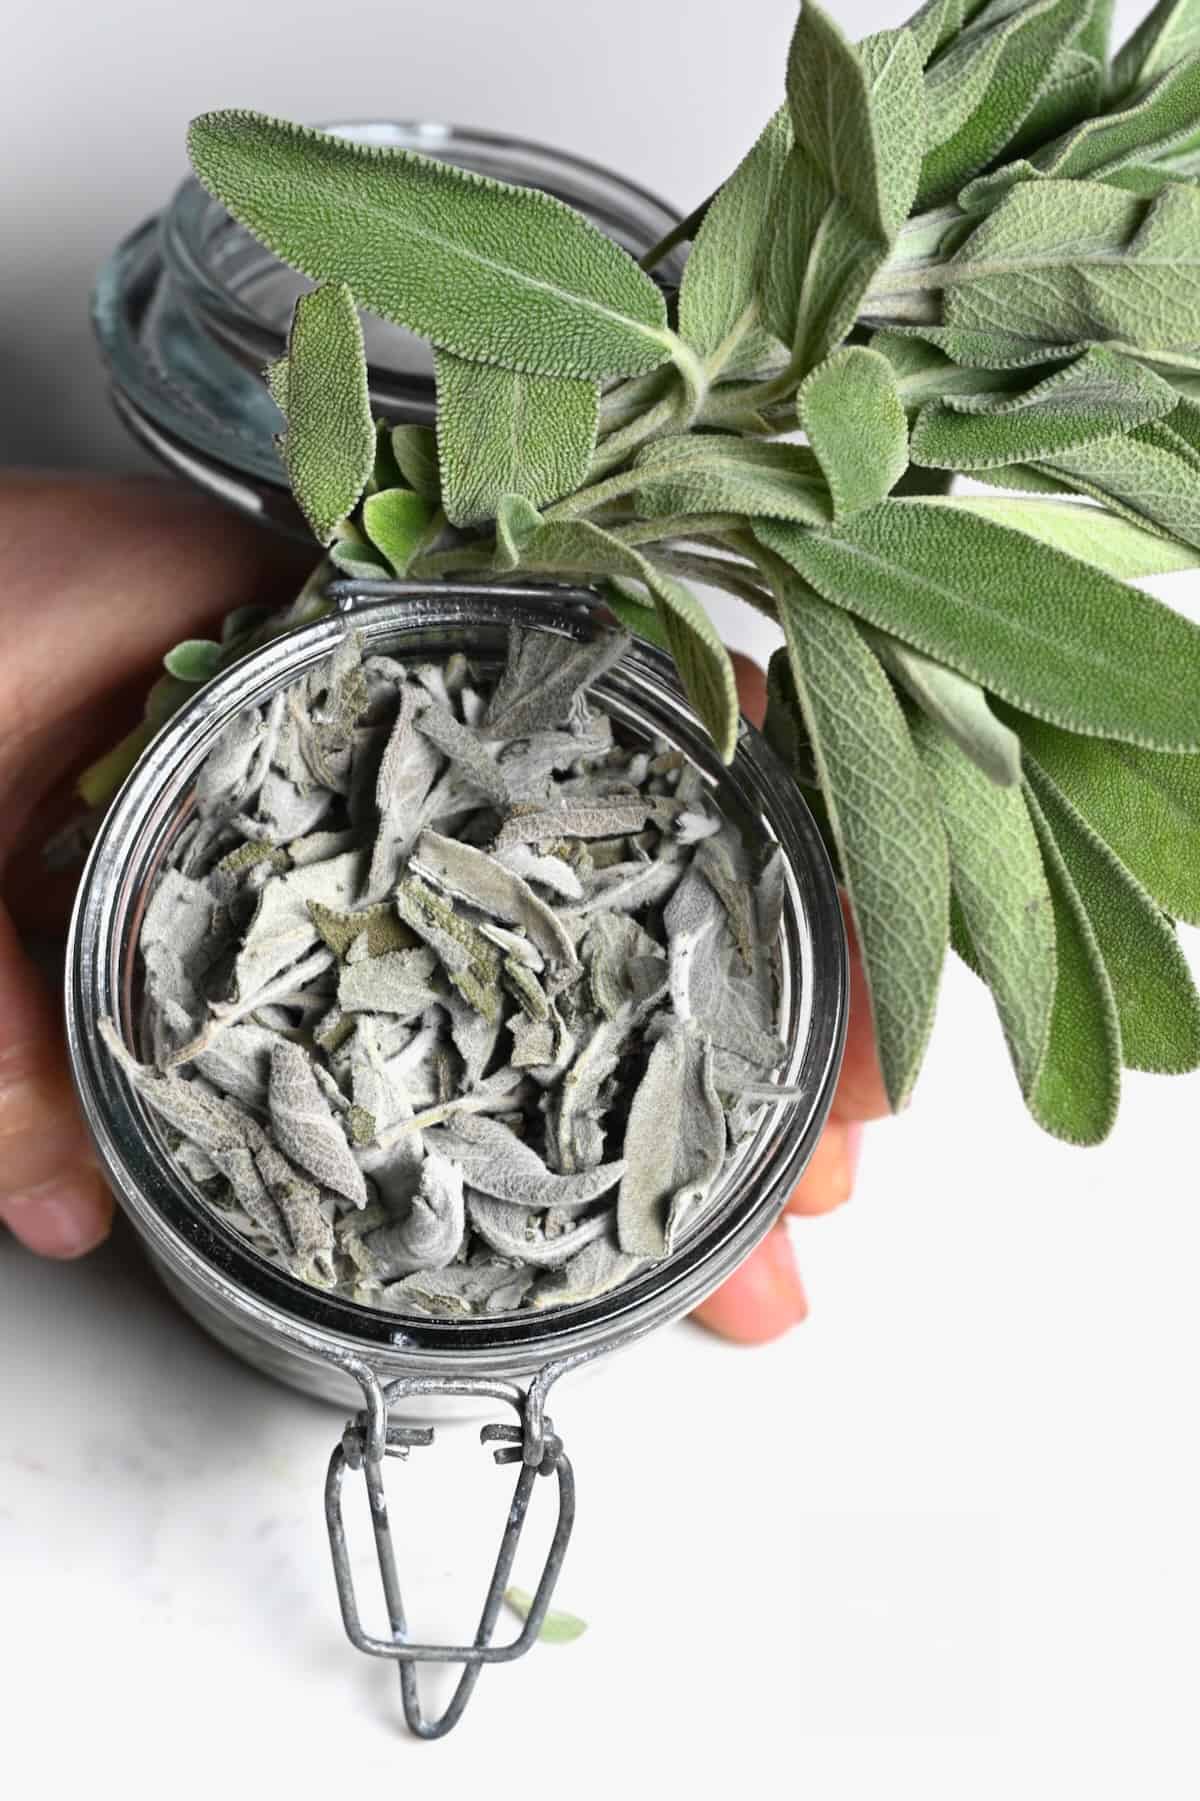
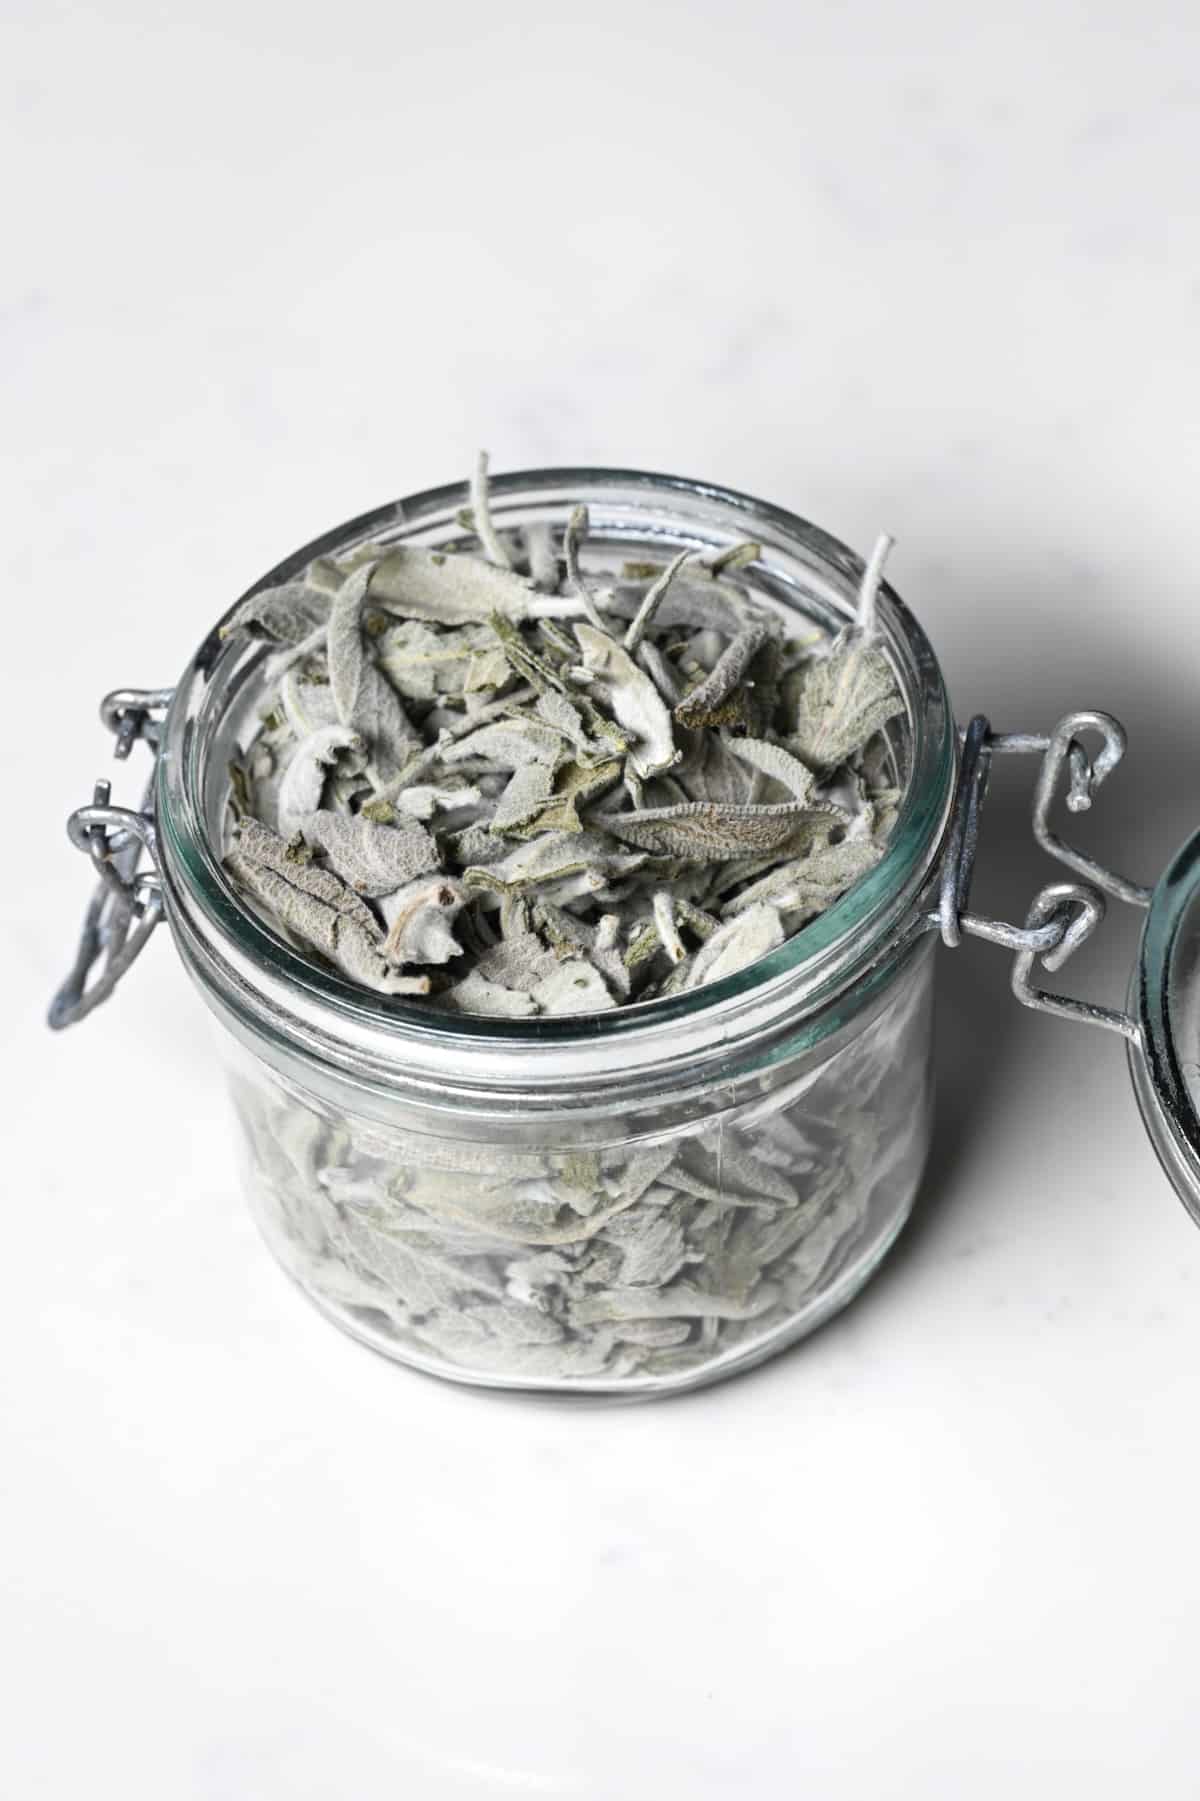
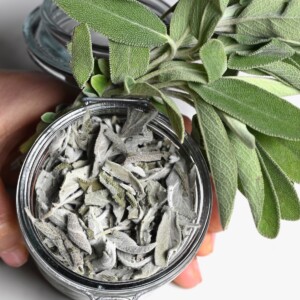
When fully dehydrated, you can store them – whole, rubbed, or powdered – in sterilized dry airtight containers (like glass jars) for up to a year in a cool, dry location away from direct sunlight.
Their flavor is best within the first 3-4 months (1 month only for the ground leaves). An oxygen absorber will help to further prolong the shelf life.
To ensure they’re fully dry, shake the jar once a day for the first few days. If there’s any sticking/clumping, return them to the dehydrator for a little longer.
More Preserving DIYs
If you try any of these methods for dehydrating sage, let me know how it goes in the comments below. I’d appreciate a recipe card rating and would love to see your recipe recreations – tag me on Instagram @Alphafoodie!
How to Dry Sage Leaves (4 Methods)
Equipment
- Dehydrator or oven or microwave
Ingredients
- 4 oz sage or as much as wanted
This will yield about 1 oz/30 g of dried sage
Instructions
- Remove the fresh sage leaves from the stem, and discard any discolored (yellowing or other blemishes) or dry/shriveled leaves.If you are air-drying them, there's no need to remove them from the stem.
- Rinse them in a colander, shake away excess water, then use a tea towel/paper towel or salad spinner to remove ALL remaining liquid.If you harvest directly from a sage plant, only remove about 1/3 of the mature leaves to allow the plant to recover & re-grow. Also, check for any insects/bugs, spider webs, or eggs.
In a Dehydrator
- Spread the leaves in a single layer evenly across a dehydrator tray, ensuring there is space between them for airflow.
- Dehydrate at 95ºF/35ºC – 115ºF/46ºC for between 2-4 hours (the exact time will depend on the temperature, humidity, and your dehydrator model). Use the higher temperature if you live in a more humid area.They're ready when they're dry & brittle enough to snap/crumble between your fingers (not bend).
In the Oven
- Preheat the oven to its lowest temperature (often around 170°F/75°C).
- Spread the pieces evenly across a parchment paper-lined baking sheet, with space in between for airflow.
- Transfer the tray to the oven, leave the oven door propped open with the end of a wooden spoon or another heatproof utensil, and dry for 1-3 hours, monitoring every 20 minutes. It can help to flip them over after the first 30 minutes.Some modern ovens have a dehydrating feature, allowing you to go as low as 95-100°F (35-38°C). In that case, there's no need to prop the door open while drying the parsley in the oven.
In the Microwave
- Spread a layer of sage leaves between two paper towels without overlapping.
- Microwave in 30-second increments on 50% power. Between each cycle, check whether any are dry, remove them, and flip the remaining leaves over. Repeat until all the leaves are brittle and crumbly.
Air Drying
- Tie 4-6 stalks into bundles with some string/twine or a rubber band and hang them up, leaves facing down, in an area with good air circulation, like an attic or porch (or a room with a dehumidifier).
- Leave the sage bundles to dry, outside or inside, until brittle. The time to dehydrate this way varies based on temperature, humidity, airflow, etc., but this can take several days, up to 2 weeks.It helps to cover the bundles with a perforated paper bag to protect them from dust and in case any of the leaves drop. Generally, you'll retain better color and flavor when dehydrating it indoors.
Notes
- Drying time varies: So always check at the shortest interval and every 20-30 minutes afterward.
- Don’t overcrowd them: They need space for airflow to dehydrate properly.
- If you live in a humid area: It’s best to use the higher temperature in a dehumidifier (even up to 125ºF/52ºC). If you want to give air drying a go, watch out for any mold (this isn’t the best method for very humid areas).
- Storage: Store the dried sage – whole, rubbed, or powdered – in sterilized dry airtight containers (like glass jars) for up to a year in a cool, dry location away from direct sunlight. Their flavor is best within the first 3-4 months (1 month only for the ground leaves).
Nutrition
Nutrition information is automatically calculated, so should only be used as an approximation.


