
This post may contain affiliate links. Please read our disclosure policy.


How to make chicken stock (aka “liquid gold”) with raw or leftover roasted bones/carcass. It’s wholesome, nourishing, and packed with nutrients (and collagen if making bone broth)!
Chicken broth (with chicken meat) and chicken stock are flavorful kitchen staples with dozens of uses, including in soups, stews, cooking grains, and sipping on as a restorative broth. Plus, once you learn how to make chicken stock from bones at home (aka bone broth), you’ll never go back to packaged versions!
Unlike store-bought chicken stock, this homemade version is far healthier and of higher quality. You can tweak ingredients, control the amount of sodium, and avoid preservatives. It’s economical, and – best of all – depending on how long you simmer it, you get all the healthful benefits from the chicken bones including collagen, iron, and vitamins.
In this post, I’ll take you through how to use raw or leftover cooked bones (perfect if you’re wondering what to do with a chicken carcass after a roast) to make the homemade chicken stock recipe, perfect for cooking. Or, if you simmer it even longer, how to make chicken bone broth, packed with nutrients to enjoy in cooking or sipping as a healthful elixir.
You might also enjoy these recipes for vegetable stock, bouillon cubes/powder, beef stock, and beef broth!
Want to save this recipe?
What is chicken stock?
Chicken stock is a savory cooking liquid made by simmering chicken bones and cartilage (with connective tissue) with water over several hours (or longer) until the collagen and marrow are released. As a result, the liquid has a thick and gelatinous consistency, silky mouthfeel, and lots of flavor. Plus, it contains plenty of vitamins, minerals, and collagen.
Is chicken stock the same as chicken bone broth?
Yes and no. While chicken bone broth is a type of chicken stock, it usually focuses on using specific bones with lots of connective tissues for maximum collagen and amino acids. In comparison, chicken stock can be made with any raw bones or the carcass of a cooked chicken. Chicken bone broth requires longer to simmer, too, to maximize the nutrients it pulls from the bones.
Chicken stock ingredients
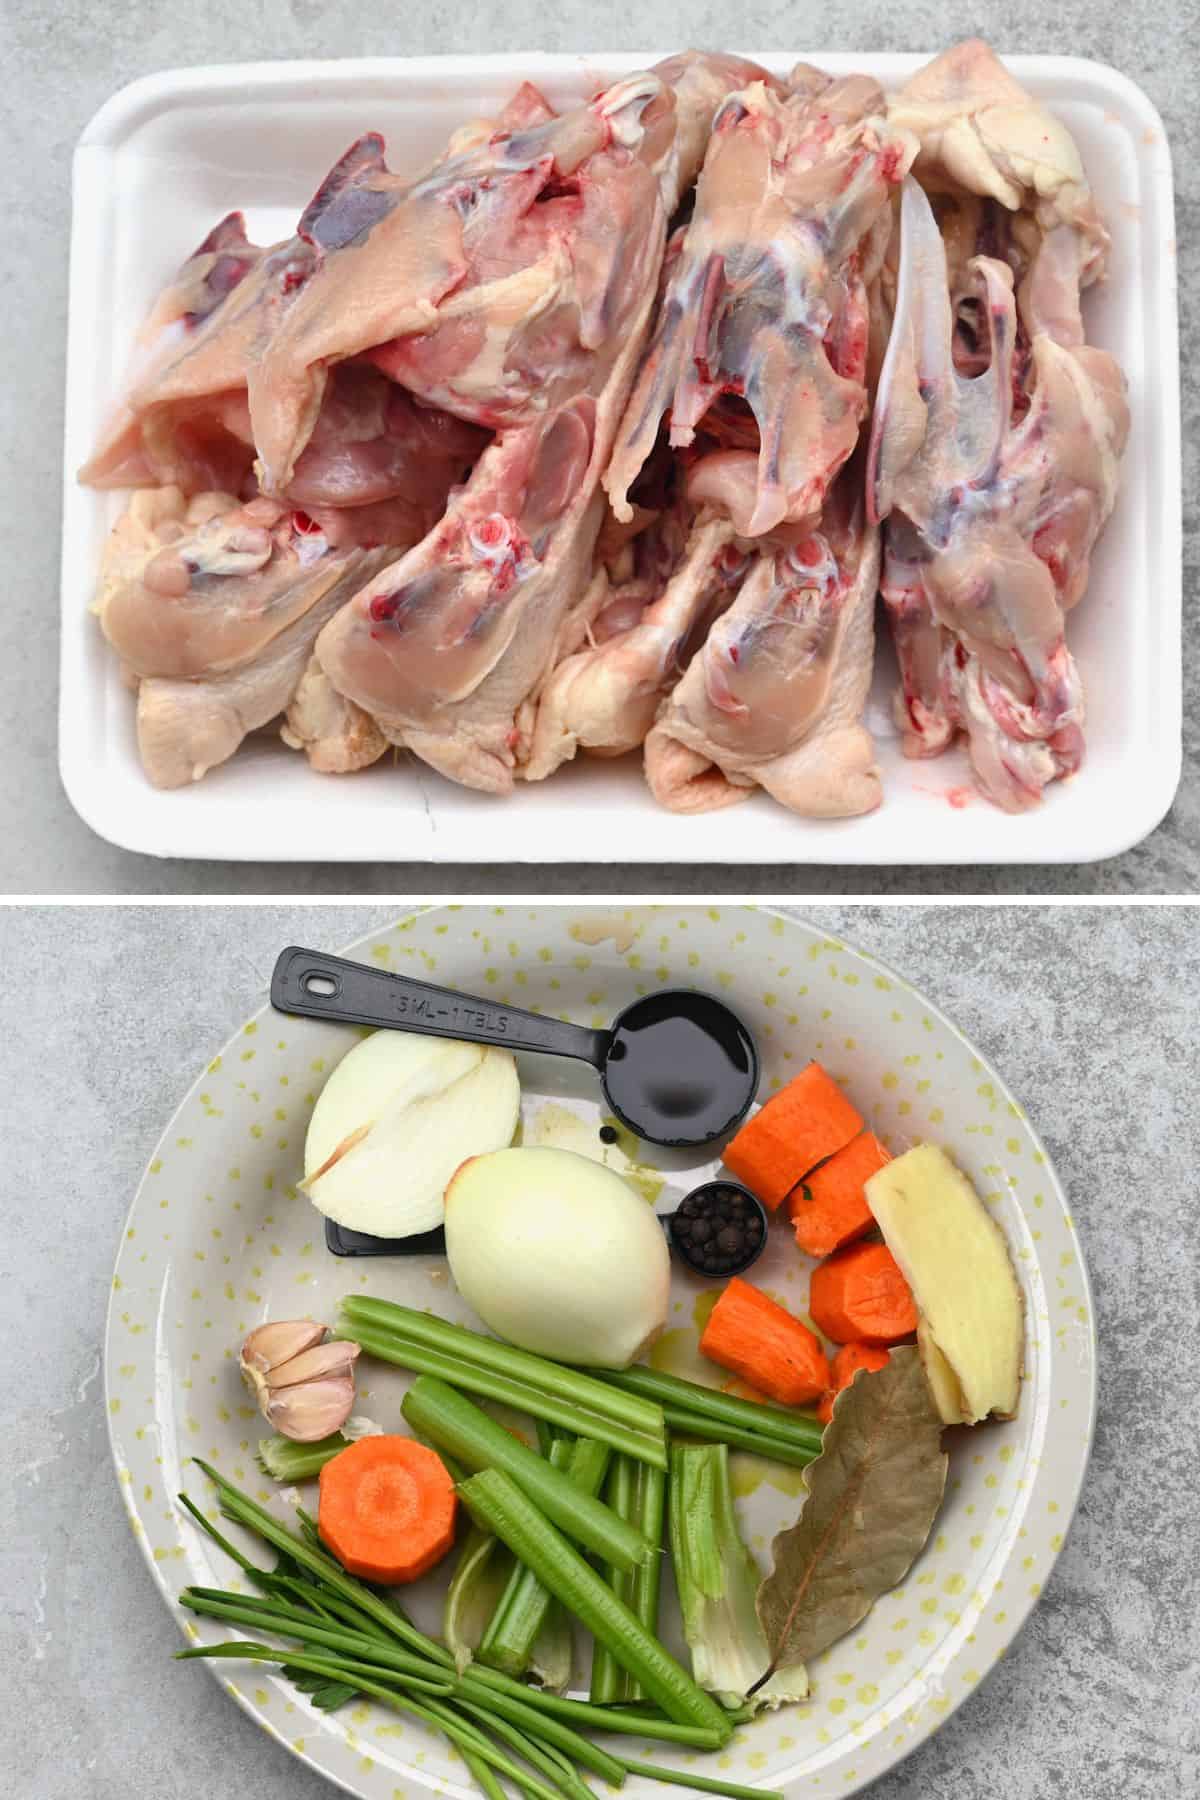
- Chicken Bones: I used a combination of chicken backbones and wings, though you can use any chicken bones or make chicken stock from carcass leftover from a roast. Using pastured (free-range) chicken bones for maximum benefits is best.
For a gelatinous bone broth, use bones that provide the most collagen/connective tissue – joints, knuckles, chicken feet, backs, wing tips, or even the whole chicken carcass.
- Vegetables: While technically optional, adding yellow onions, celery ribs, and carrots (to add sweetness) provides the chicken stock recipe with lots of extra flavor. You can technically use vegetable scraps, but I prefer fresh vegetables for a “cleaner” flavor.
- Herbs/Spices: To create a full-bodied chicken bone stock, I used
- Parsley (stems and leaves; optionally add sprigs of thyme, too),
- Bay leaves,
- Garlic,
- Ginger (optional),
- Black pepper.
- Vinegar: Acidic ingredients like vinegar (apple cider vinegar, sherry vinegar, etc.) or lemon juice help to extract the minerals and “goodness” from the bones.
- Water: To make up the base of the chicken stock recipe.
You can add salt at the end, but I leave it unsalted to season individual dishes/portions.

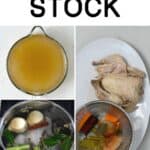
How to make chicken stock
First, prepare the vegetables by peeling and halving the onion, peeling the garlic and ginger, and roughly chopping the carrot and celery.
For more flavor, roast raw chicken bones first. Drizzle them with oil and bake them in the oven at 400ºF/200ºC for 25-30 minutes until lightly browned.
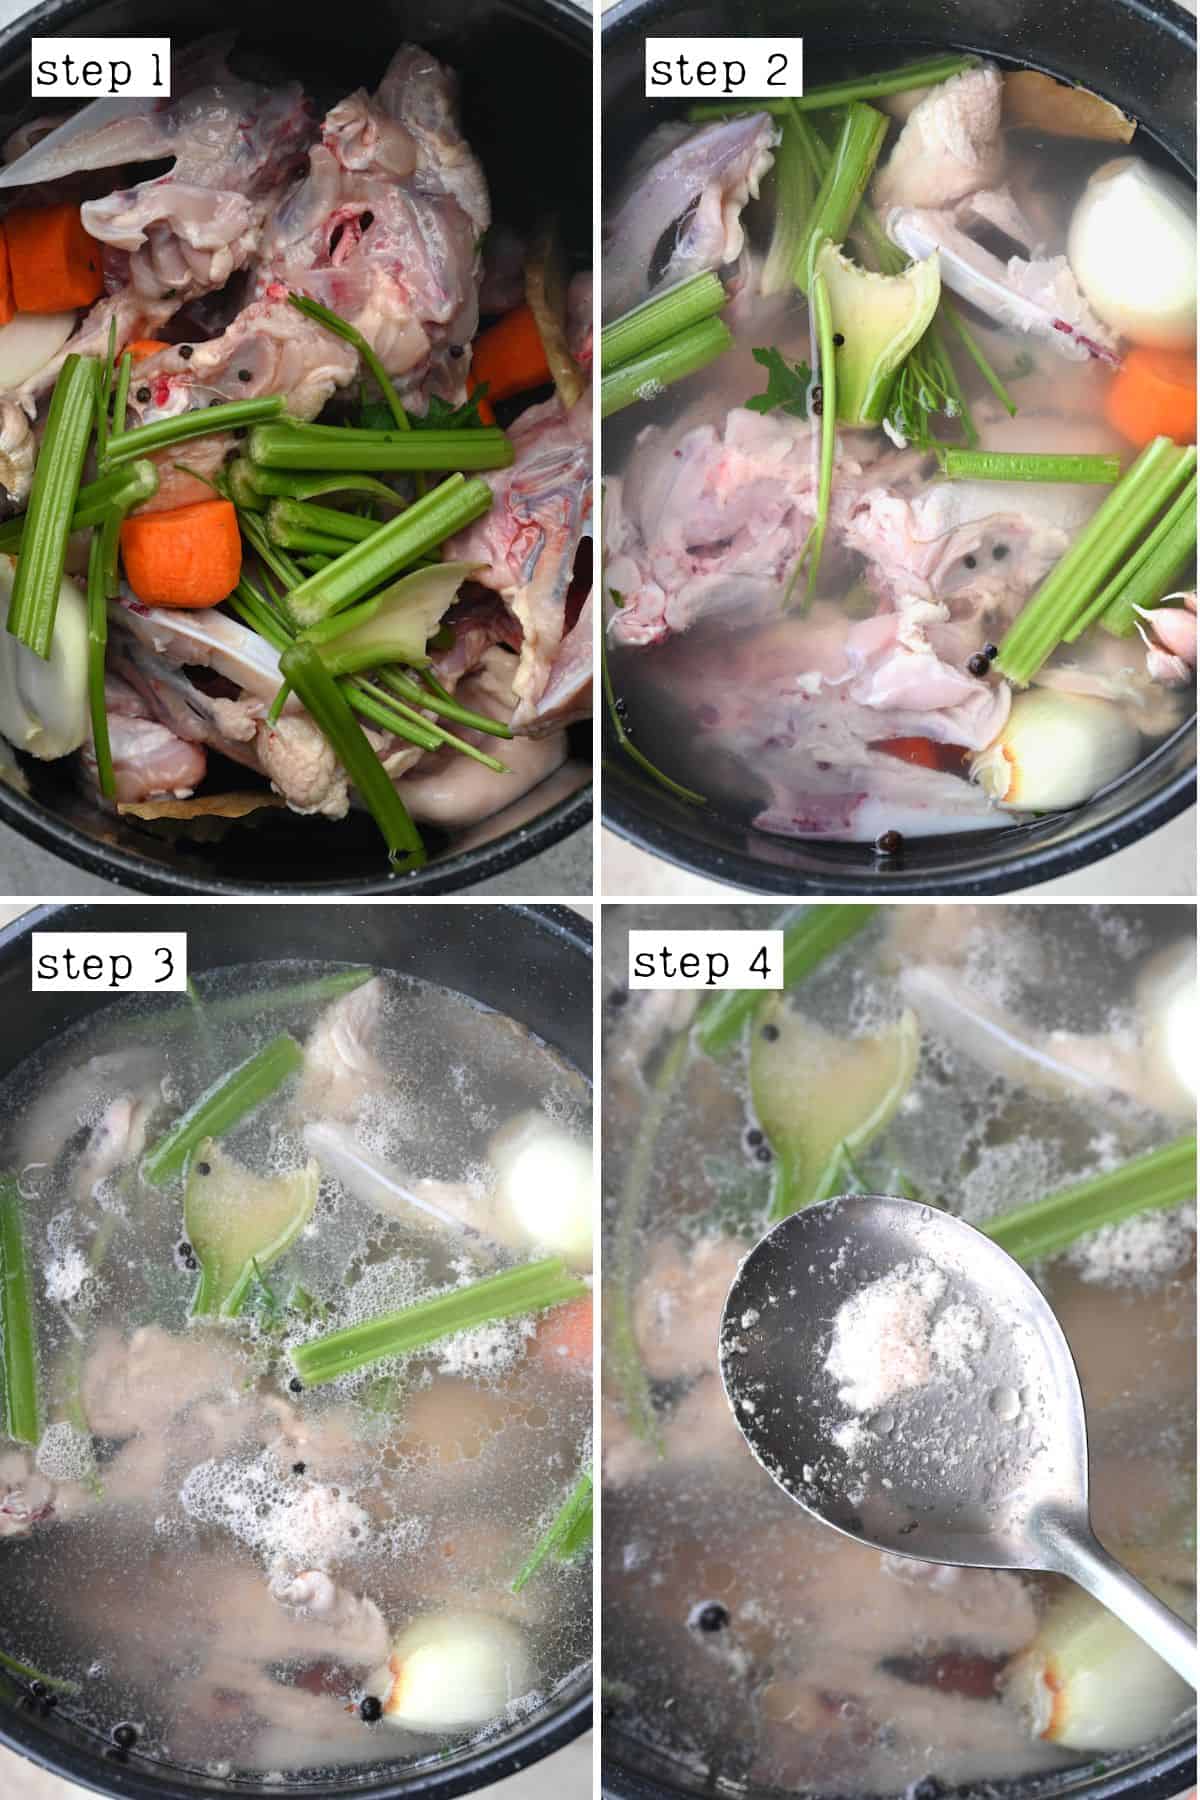
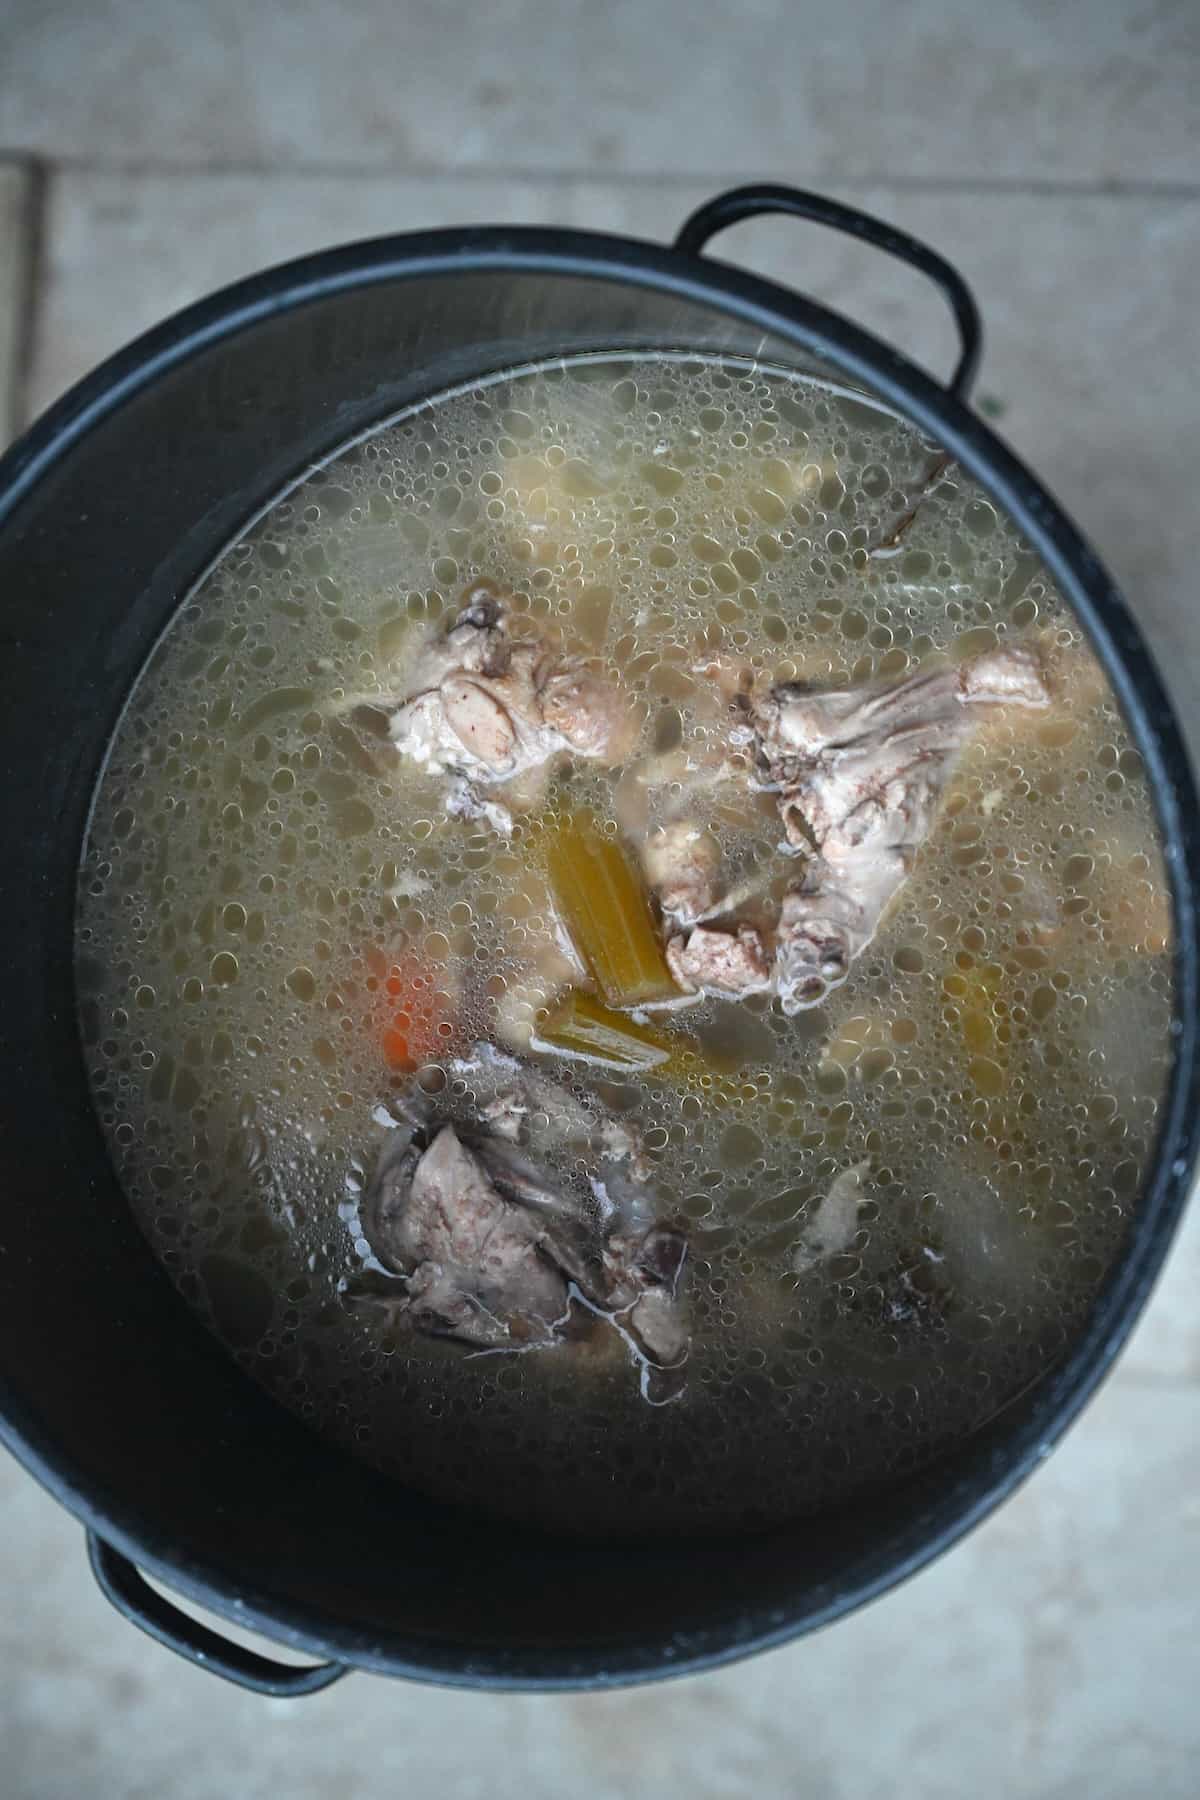
Then, in a heavy-bottomed large stock pot, add all the ingredients and pour in enough cold water until the bones are only just covered.
Bring the mixture to a boil over medium-high heat, then immediately reduce the heat to low and continue to simmer. Use a spoon to skim off any foam that forms at the top of the liquid (this can happen for the first hour). This is important to remove impurities and avoid a cloudy stock.
How long to simmer chicken stock
Simmer the chicken stock, covered, for a minimum of 3 hours.
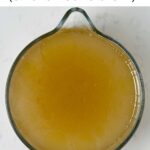
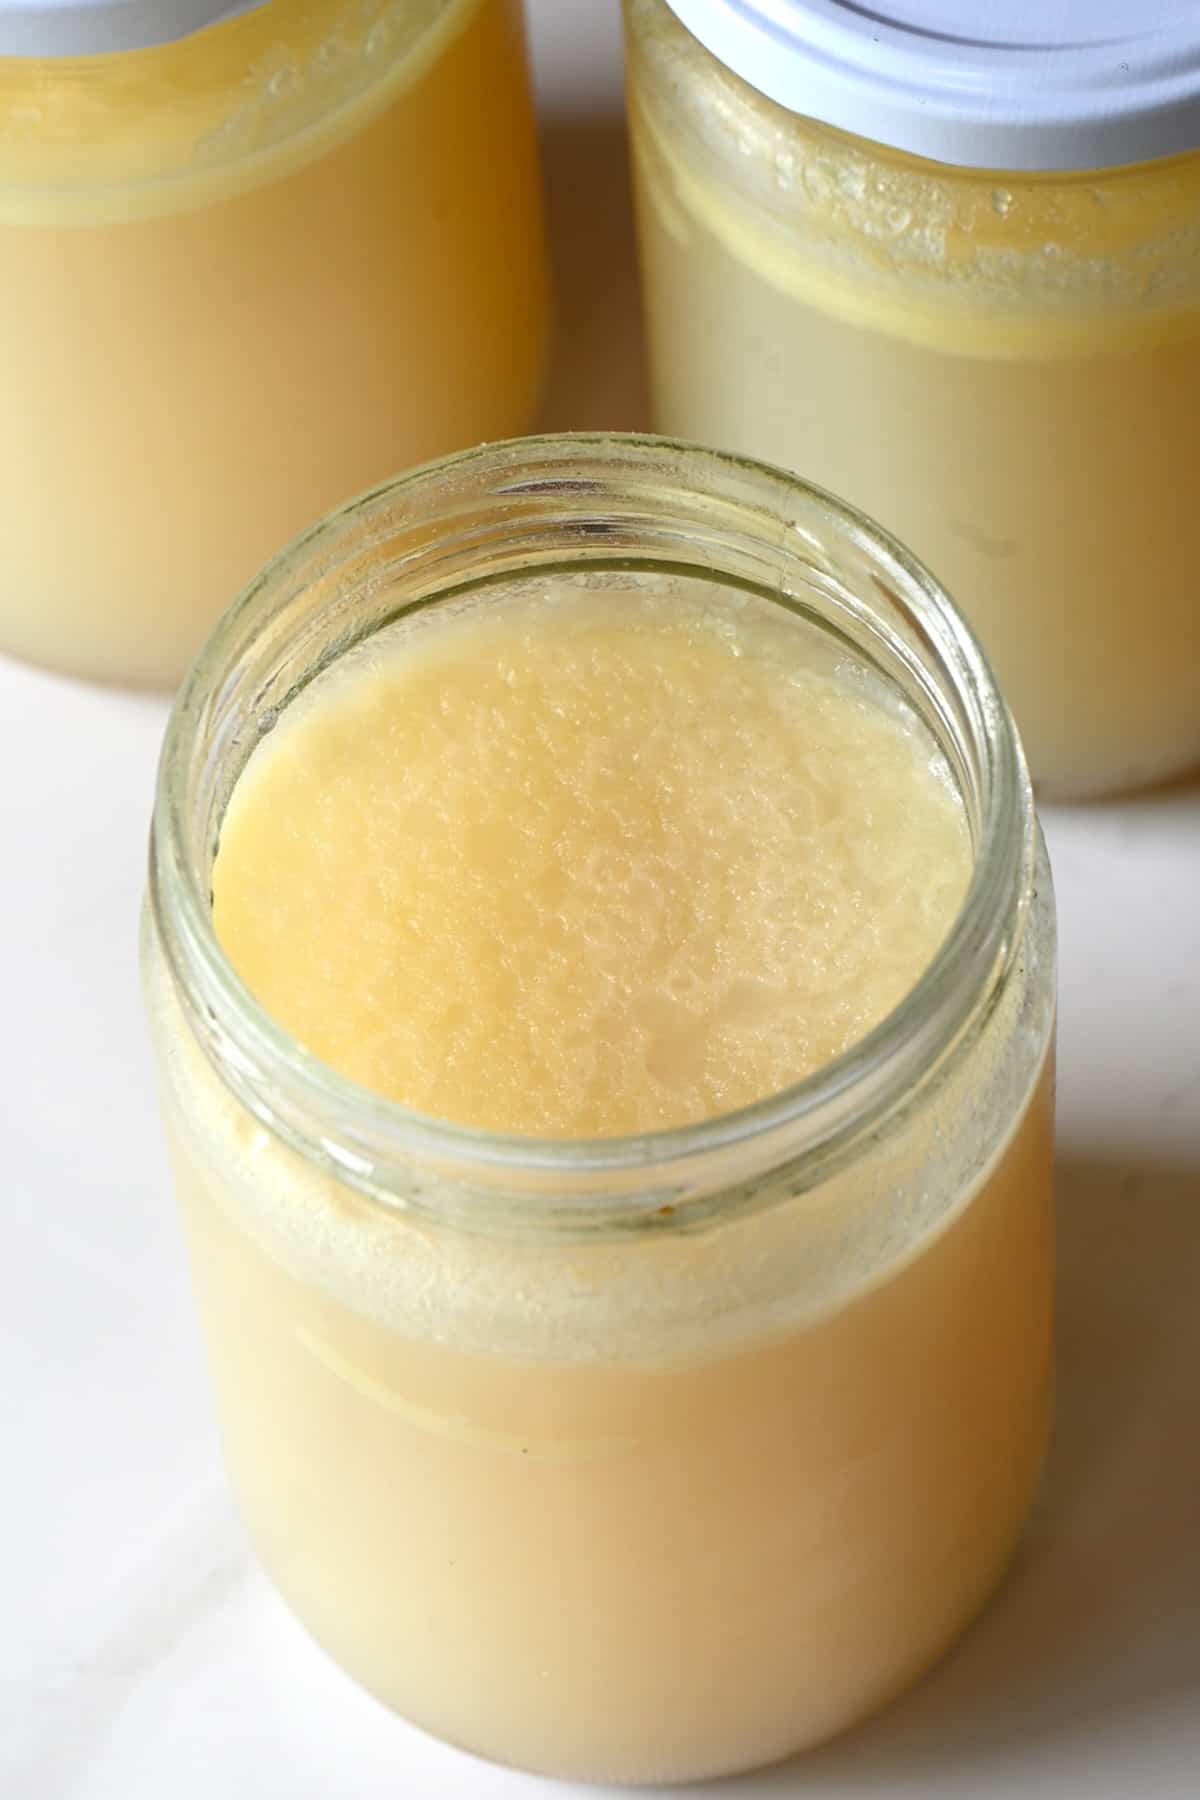
Simmer for up to 24 hours, so the collagen and bone marrow have time to release. Make sure to remove the veg and herbs after the first three, so they don’t cause bitterness. The stock is ready when it’s a golden-amber color and full of flavor. For bone broth, check to see if you can easily snap a bone in half.
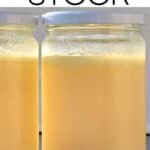
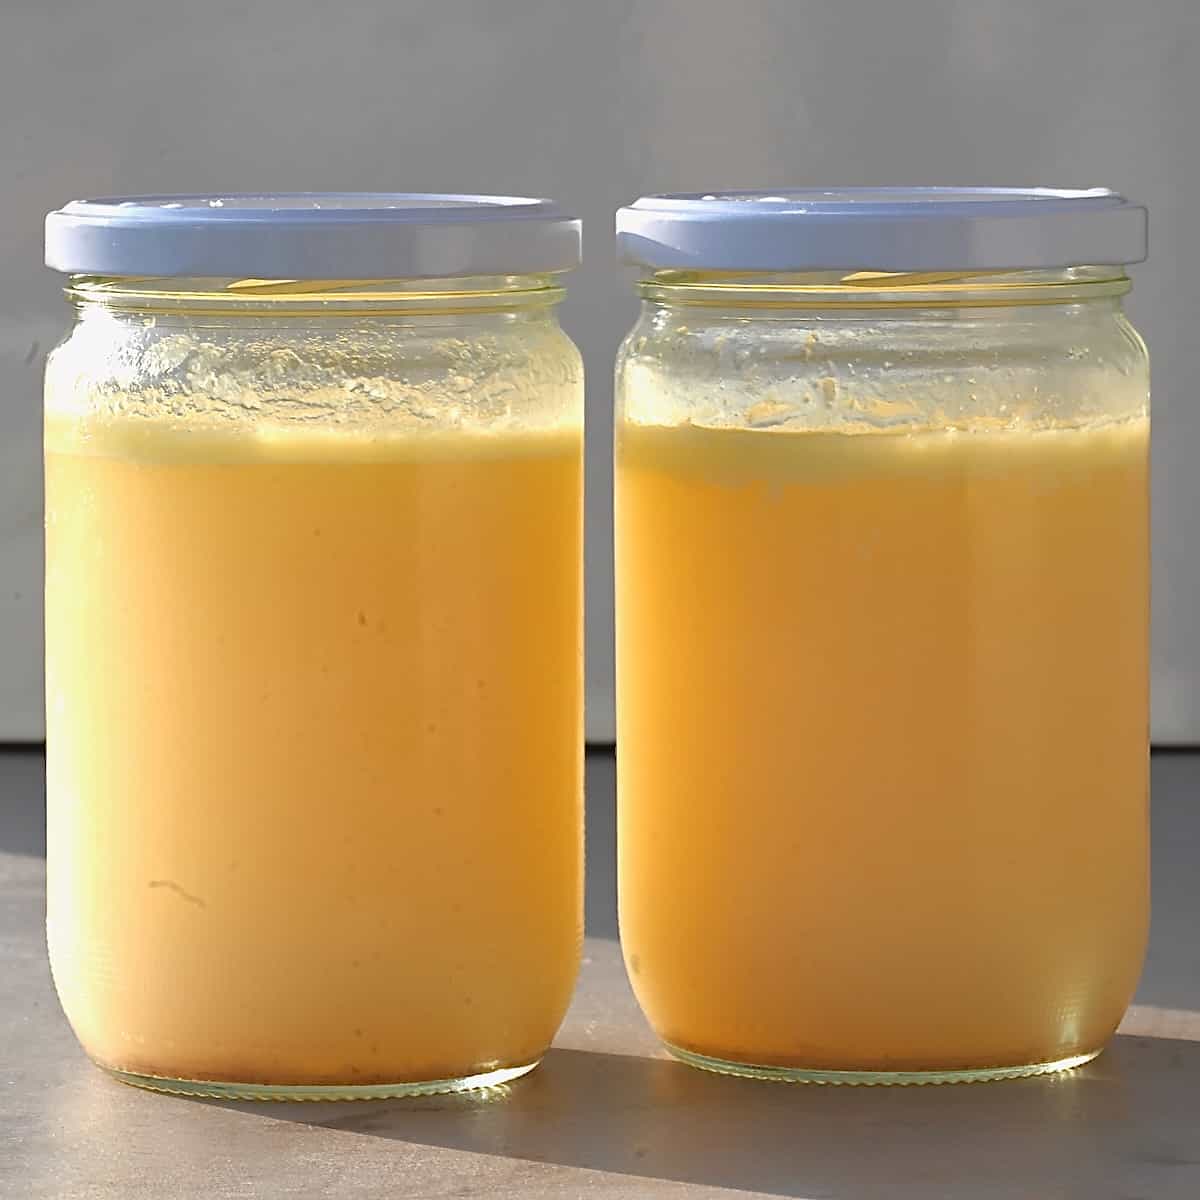
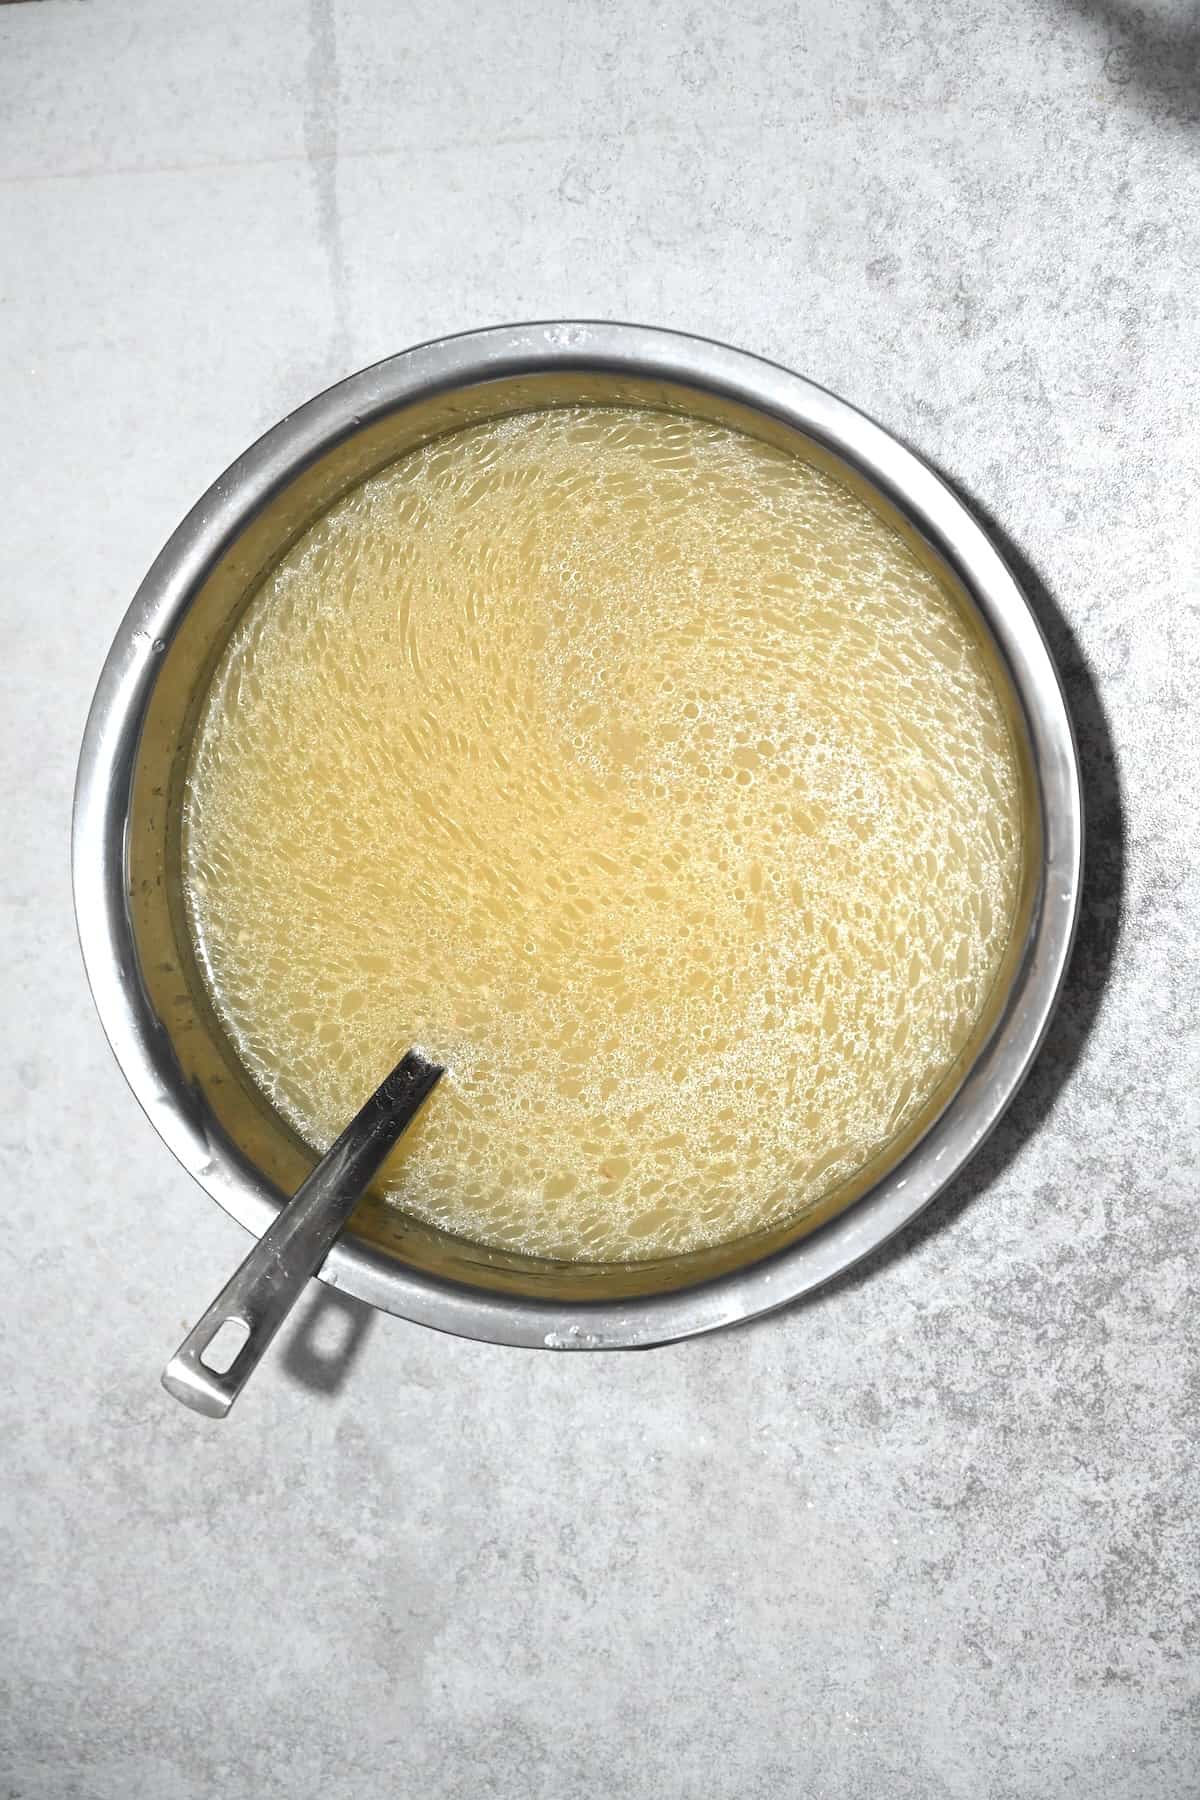
Finally, ladle the mixture through a fine-mesh strainer into a large bowl, add salt (if using), and allow it to cool slightly. Placing the bowl in an ice bath will help to speed up the cooling and avoid bacteria growth. Then decant into jars/containers to store.
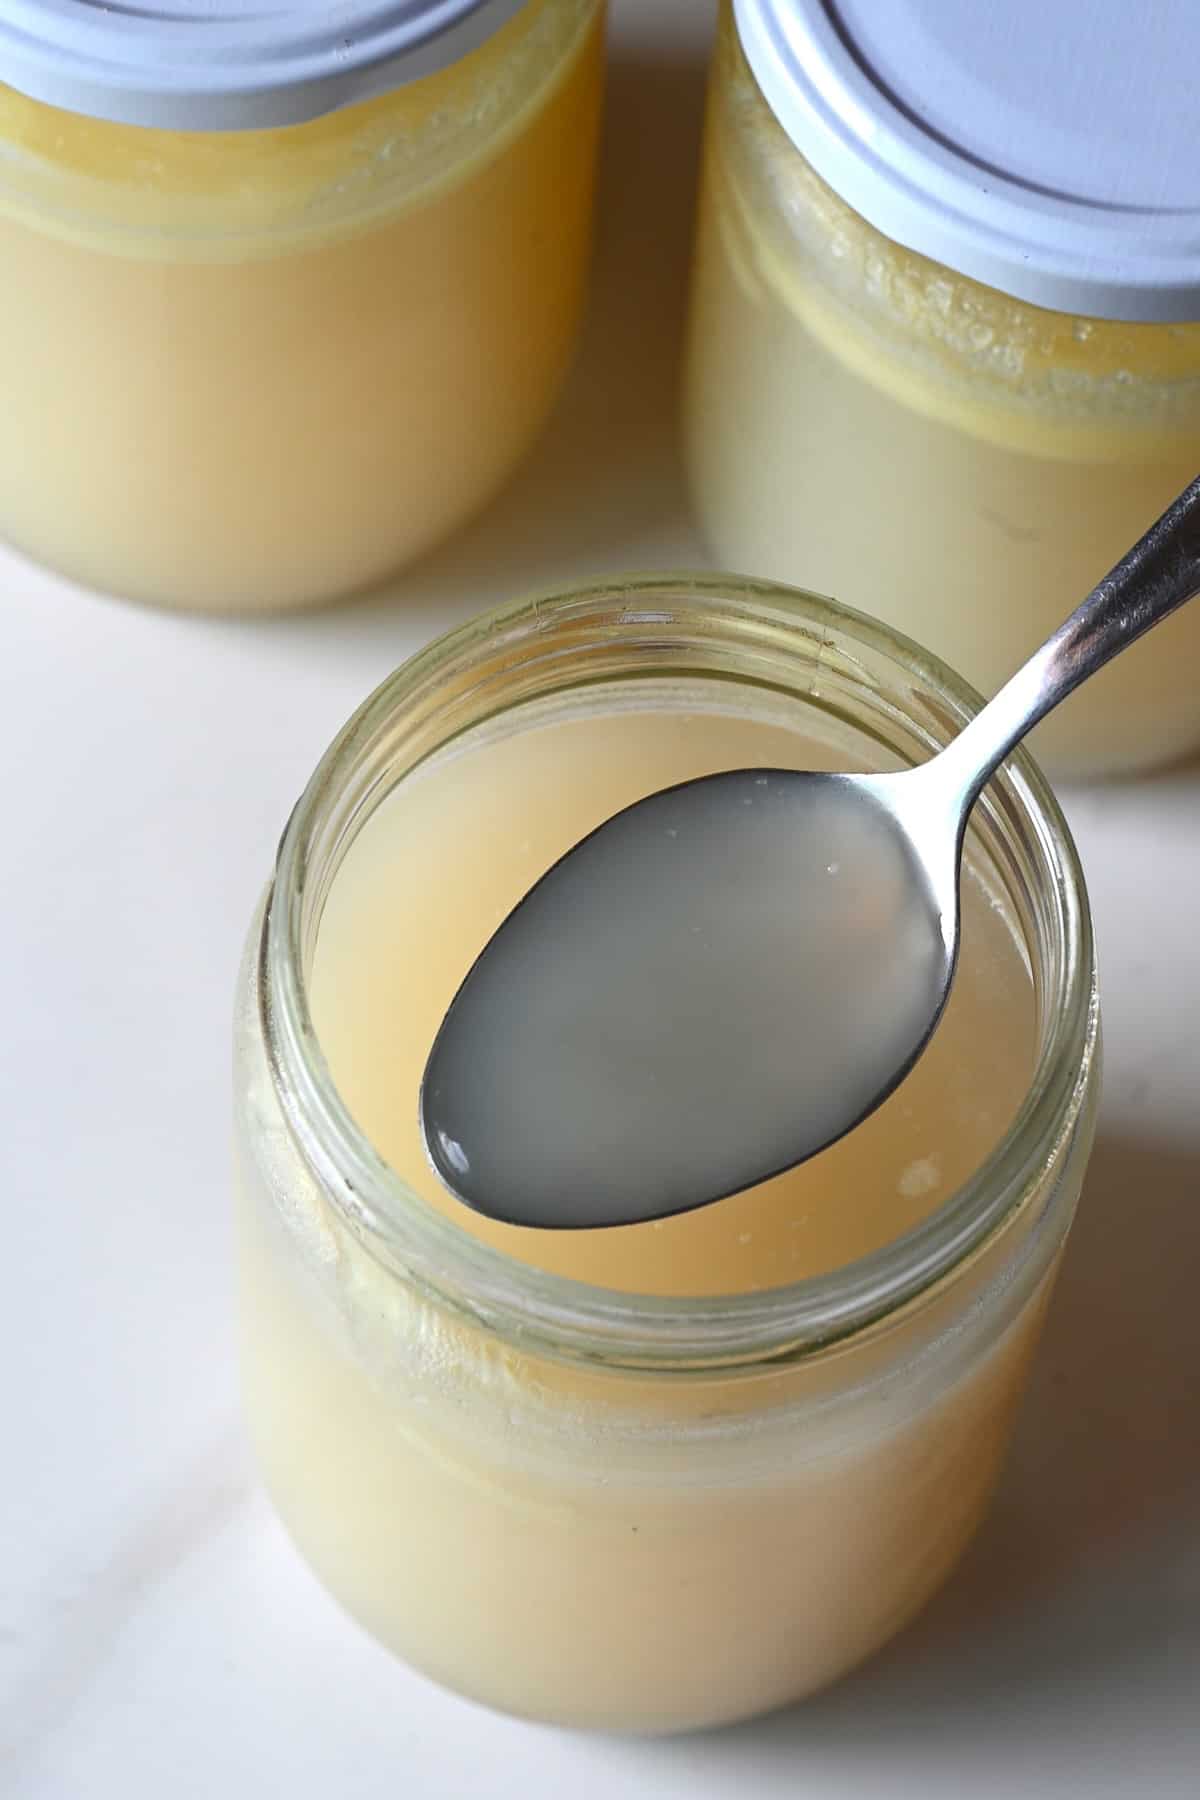
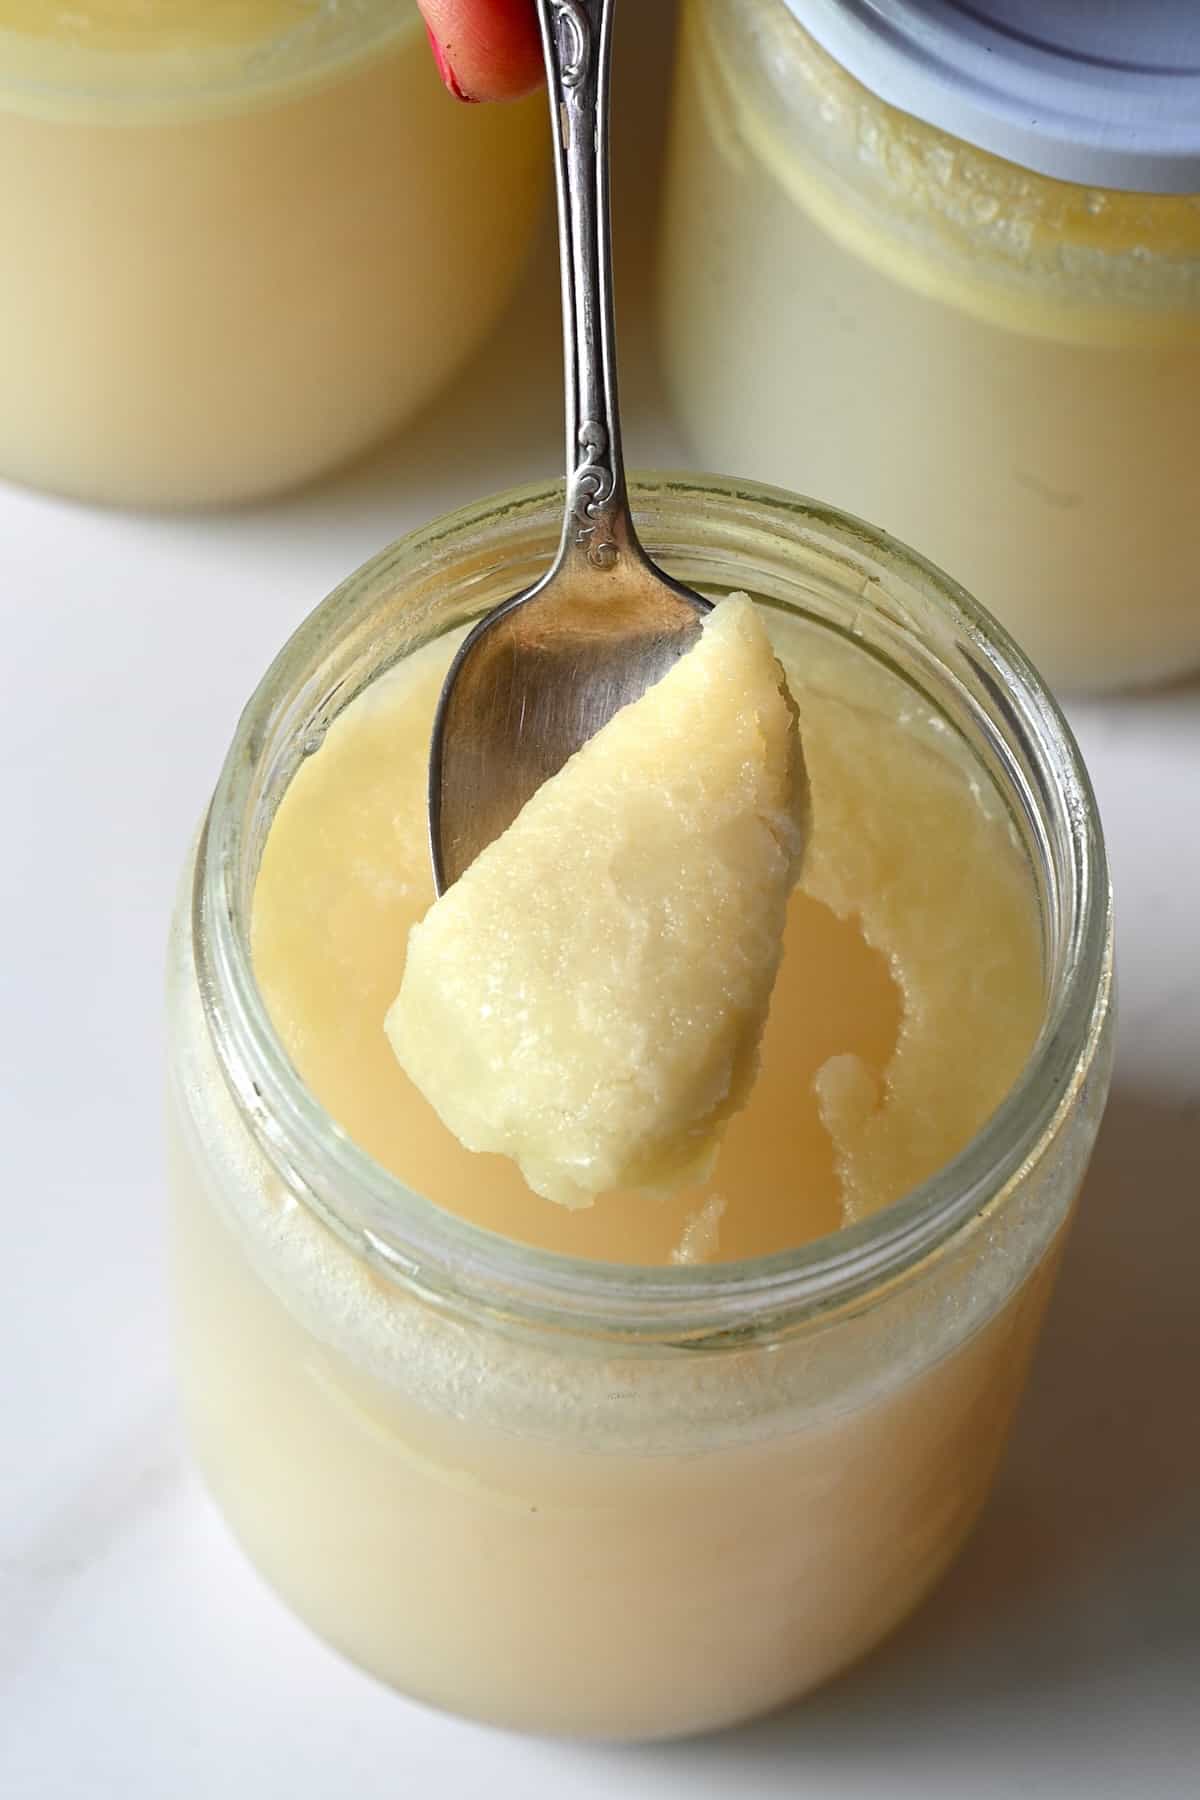
To remove excess grease, let it sit in the fridge overnight. A layer of fat will form on top that you can discard or use as cooking fat. However, I usually leave it as it helps keep bacteria out.
Can I make chicken stock from left-over roasted chicken bones
Yes, you can also save the leftover chicken drippings from the roast to add more flavor to the stock (or to make chicken gravy).
How to concentrate the chicken stock
Continue to simmer the chicken bone broth or stock with the lid off, so the liquid can reduce and concentrate while it cooks.
How to can chicken stock?
When canning chicken stock and any meat product, you’ll need to use pressure canning, not a water bath canner. Guidelines recommend processing at 10 pounds of pressure (increase based on altitude) for 20 minutes for pint jars or 25 minutes for quart jars.
Check the website for Home Food Preservation for more tips about timing and altitude.
Chicken stock uses
It’s unlikely you’re struggling with ideas for what to make with chicken stock. However, here are some of my favorite options/recipes with chicken stock.
- Use it as the base for chicken soup, chicken and rice soup, stews, and casseroles.
- To cook grains (like brown rice), quinoa, polenta, and pasta.
- In pie filling.
- Add flavor to gravies and sauces.
- To cook potatoes and vegetables.
- To drink as-is with a sprinkle of salt and some fresh parsley or cilantro.
FAQs
While chicken broth is often more seasoned, chicken stock has a more natural chicken flavor and nutrients. This is because the slow cooking method breaks down and draws out all the collagen and nutrients from the bones/marrow. This liquid is more loaded with micronutrients, protein, collagen, and marrow.
You can. And if you’re not ready to prepare it immediately, store the bones in the fridge for several days or in the freezer for up to 3 months.
In terms of flavor, I’ve found that cooked bones yield a richer stock and can help with collagen release. However, it can reduce the nutritional value.
More chicken how-to’s
- Chicken Brine Recipe
- How to Cut Chicken Wings
- The Best Air Fryer Chicken Drumsticks
- Frozen Chicken Tenders in Air Fryer
- The Perfect Whole Roasted Chicken
- How to Boil Chicken Breasts (Smell Free Method!)
If you try this recipe for the best chicken stock, let me know how it goes in the comments below. I’d appreciate a recipe card rating and would love to see your recipe recreations – tag me on Instagram @Alphafoodie!
How to Make Chicken Stock
Ingredients
- 46 oz chicken bones any raw bones or chicken carcass leftover from roast; for gelatinous bone broth, use bones that provide the most collagen/connective tissue – joints, knuckles, chicken feet, backs, wing tips, or even the whole chicken carcass
- 18 oz chicken wings
- 12 cups water or more to cover the chicken and veggies
- 5.6 oz onion 1 large
- 4 oz carrot 1 large; optional -adds sweetness
- 2.1 oz celery 3 stalks
- 0.21 oz parsley few stems
- 0.42 oz garlic 3 cloves
- 0.17 oz ginger small piece; optional
- 1 bay leaf large
- 3 sprigs thyme
- ½ tsp whole black peppercorns
- 1 Tbsp apple cider vinegar or white vinegar; don't omit – it helps to draw nutrients from the bones
- salt optional, I didn't add since I can add/customize later
This will make about 5 cups of chicken stock
Instructions
- Prepare the vegetables – peel and halve the onion, peel the garlic and ginger, and roughly chop the carrot and celery.For more flavor, roast raw chicken bones first. Drizzle them with oil and bake them in the oven at 400ºF/200ºC for 25-30 minutes until lightly browned.
- In a heavy-bottomed large stock pot, add all the ingredients and pour in enough cold water until the bones are only just covered.
- Bring the mixture to a boil over medium-high heat, then immediately reduce the heat to low and continue to simmer, using a spoon to skim off any foam that forms at the top of the liquid (this can happen for the first hour). This is important to remove impurities and avoid a cloudy stock.
- Simmer the chicken stock, covered, for a minimum of 3 hours.Or simmer for up to 24 hours, so the collagen and bone marrow have time to release. Make sure to remove the veg and herbs after the first three, so they don't cause bitterness. The stock is ready when it's a golden-amber color and full of flavor. For bone broth, check to see if you can easily snap a bone in half.
- Finally, ladle the mixture through a fine-mesh strainer into a large bowl, add salt (if using), and allow it to cool slightly. Placing the bowl in an ice bath will help speed up the cooling and prevent bacteria growth. Then decant into jars/containers to store.To remove excess grease, let it sit in the fridge overnight. A layer of fat will form on top that you can discard or use as cooking fat. However, I usually leave it as it helps keep bacteria out.
Slow Cooker Chicken Stock
- Add all the ingredients and cook on LOW or between 14-16 hours (up to 24 hours). Then strain it. Remove the vegetables/herbs after 8 hours.
Instant Pot Chicken Stock
- Add all the ingredients (making sure to only fill to the 2/3 full MAX line in the pot), select the Soup/Broth setting, and set the time for 45 minutes for a simple stock or 2 hours (120 minutes) for a gelatinous bone broth. Then allow it to natural pressure release, then strain.
How To Store Chicken Stock?
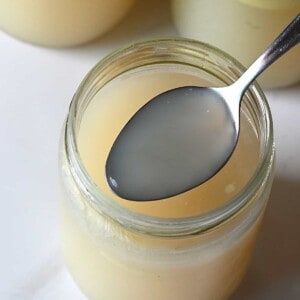
- Fridge: Store the jars of homemade chicken stock in the refrigerator for 5-7 days.Bone broth will gelatinize slightly in the fridge due to the collagen content. However, it will return to a liquid state when reheated.Freezer: Pour the stock into several freezer-safe jars or XL ice cube trays, leaving at least 1-inch headspace (for expansion as it freezes). Then store in the freezer for 3-4 months. Allow it to thaw in the fridge overnight before reheating.Reheat: Either on the stovetop, in the microwave, or by adding it directly to a dish (like soup, stew, etc.).
Notes
- Where to get bones? Collect bones from the meat you prepare in the kitchen and store them in a bag in the freezer OR even ask for them at your local butchers/local farms when ordering meat (they’ll usually provide them at very low cost or even free).
- Simmer time – how long to cook chicken stock? If you plan on using the chicken stock recipe as a cooking liquid, 3-6 hours works.
If you want collagen-rich bone broth, simmer for 12-24 hours. As a general rule, the longer it cooks, the better the taste and the more nutritious it will be. Remove the vegetables/herbs after 3 hours, though, or they can cause bitterness. - Don’t skip the vinegar: This pulls valuable nutrients from the bones.
- Don’t use too much water: Use just enough to cover the bones for a flavorful broth that’s not overly watery.
- Don’t stir the broth. There’s no need, and stirring will yield a cloudier stock.
- For the best flavor: Roast the bones first. This caramelizes them and helps to release fat and nutrients for a richer, more robust flavor and deeper color.
- To concentrate the stock: After straining the mixture, return it to the stove, lid off, to simmer until reduced (easier to store).
- The texture: If you’ve made a chicken bone broth, the goal is to have a jello-like consistency when cooled (which means it’s rich in gelatin). Regular chicken stock (cooked for less time) will only be slightly thick.
Nutrition
Nutrition information is automatically calculated, so should only be used as an approximation.


Thank you.
Thank you
Thank you for your comment!