
This post may contain affiliate links. Please read our disclosure policy.
Make the best date paste at home with just one ingredient, a blender, and a few minutes. This natural sweetener is a must-try alternative to processed sugar.

Using dates is one of my favorite ways to naturally sweeten baked goods, healthy smoothy recipes, and more. However, adding the dates directly into the recipe always results in chunky bits, or it takes forever to blend them with the rest of the ingredients. So, to make my life easier (and tastier), I turn to this date paste recipe and to homemade date syrup.
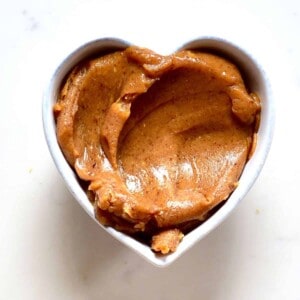
If you are wondering what exactly date paste is, it is just that—whole dates blended into a smooth, homogeneous puree with a rich flavor. The paste is a popular unrefined sweetener thanks to its impressive combination of vitamins, minerals, antioxidants, and fiber. Plus, you can store it for a long time and use it in various ways. I’m sure you’ll enjoy this easy recipe and its natural sweetness as much as I do!

Want to save this recipe?
Recipe video tutorial
What you’ll need

- Dates: You can use any type of date—it all works! I love using Medjool dates; they’re large, soft, sweet, and super delicious. Just make sure the dates are fresh, not dry. Inspect each date for any sandy texture or tiny creatures inside, and discard any that don’t look good. Just give each date a quick check to keep things smooth and tasty—no surprises!
You will also need a blender or food processor. It’s better if your machine is powerful so it can blend the dates alone. Otherwise, if your machine is not too strong, you can soak the dates in hot water in advance or add a bit of hot water when blending them. Note that adding water will shorten the shelf life.
See the printable recipe card below for full information on ingredients and quantities.
How to make date paste
Prepare the dates: If you are using whole dates, first remove the pits. To do so, pull the date in half by hand and release the pits. Alternatively, slice them lengthwise with a knife before popping out the pits.
Don’t throw away the date pits. Instead, you can use them to make date-seed coffee. You could also add them to your compost, plant them, or grind them down into a body scrub!
Optional step: If the dates are too dry or your machine is not very strong, soak the dates in hot water for about 30 minutes. This will soften them, and they will become easier to blend.
Blend into paste: Then, place all the pitted dates into your high-speed blender or food processor and process until smooth and paste-like. Scrape down the sides as needed to ensure everything is blended.
Depending on your machine, this can take some time. Give it a break every few minutes to avoid overheating. Only if you’re struggling to blend it into a paste, add some hot water to your machine, one tablespoon at a time.
The date paste recipe is ready when you achieve a smooth, homogenous, lump-free mixture. Transfer it to an airtight container and store it for later, or enjoy it right away!

How to use it
There are a lot of ways you can use date paste. Here are some of my favorites:
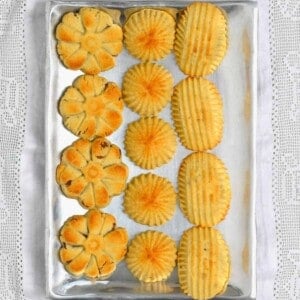
- A filling for desserts: You can use it to fill this Maamoul (Middle Eastern cookies with dates or nuts) or these thumbprint cookies.
- Natural sweetener for drinks: Add it to smoothies or hot drinks like date seed coffee, tea, and hot cocoa.
- As a spread: Spread on toast, bagel, or simit. You can also stir a little into your breakfast oats, oatmeal, or yogurt parfait.
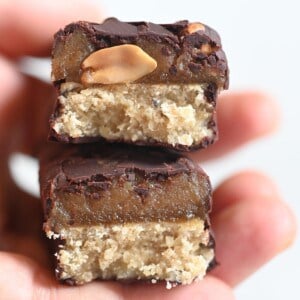
- Instead of whole dates: You can use the paste instead of dates in baked goods and desserts. The puree will be incorporated faster and more easily into your recipes. Try it in these Magnum Ice Creams, date Snickers, or use it with the base ingredients for tarts.
- Instead of sugar: I recommend using a 1:1 ratio of paste instead of refined sugars (one cup of date paste instead of one cup of sugar).
- Instead of honey/maple syrup: When replacing liquid sweeteners like honey/syrup, I tend to use a slightly bigger amount of the paste – either 4:3 (2/3 cup paste for 1/2 cup liquid sweetener) or 2:1 (1 cup date paste for 1/2 cup maple syrup).

FAQs
While this is possible, it definitely won’t be as smooth and will take a bit of arm power. Here are two ways:
– Soak the dates in hot water overnight. Then, mash them with a fork in a bowl until you have a smooth(-ish) consistency.
– After you soak the dates overnight, use a mortar and pestle to “grind” the dates into a paste.
For both, add a little of the soaking water if needed to help you achieve the correct consistency. It can also help to microwave it in 40-second increments between mashing to make the process easier and quicker.
Date paste, when made only with dates, can be kept in an airtight container in the refrigerator for up to 3-4 months or in the freezer for 12+ months.
If water was added, I recommend keeping the paste in an airtight container in the fridge for up to a month or in the freezer for up to 6 months.
This will vary based on the date variety and their freshness. However, I’ve found that around 1 heaped cup of pitted dates (6 oz/170 g) = 1/2 cup of date paste.
You may also like

If you try this date paste recipe, let me know how it goes in the comments below. I’d appreciate a recipe card rating and would love to see your recipe recreations – tag me on Instagram @Alphafoodie!

Date Paste (One Ingredient)
Equipment
Ingredients
- 1 lb dates any type, fresh. I used Medjool dates, pitted (about 26 dates)
This will yield about 1.5 cups.
Instructions
- If needed, remove the date pits. To do so, you can cut or pull apart the date to release the pit.
- Optional: Soak the dates in hot water for 30 minutes to soften them. This is only necessary if the dates are too dry or your machine is not very strong.
- Place the pitted dates into the blender or food processor and process until smooth and paste-like. Depending on your machine, this can take some time. Give it a break every few minutes to avoid overheating.If you’re struggling to blend it into a paste, add some hot water to your machine, one tablespoon at a time.
- When the mixture is smooth, homogenous, and lump-free, the date paste is ready. You can then use it or transfer it to an airtight container and store it for later.
Video
Notes
Nutrition
Nutrition information is automatically calculated, so should only be used as an approximation.


If I’m using date paste in place of sugar, how much of it do I use?
Hi Susan,
It depends where you are replacing the sugar with date paste. In general, you can use 1:1 substitution ratio but keep in mind that in certain recipe (like baked goods), the texture might become slighly softer. I hope this helps.
Hello. In the above recipe, there’s a typo where you give the ratio of water to dates. To check, do you mean 1/4 cup of water to 1 cup of (medjool) dates?
I’ve never made date paste before and due to the blender I have I think I will need to add water, but I don’t want to end up ruining it and it being too thin. Because I want to use it for your banana bread recipe and don’t want to use sugar!
Thanks,
Sharon
Hi Sharon,
Ideally, don’t add any water to make the date paste. If the dates are too dry, you can first soak them in some hot water for 30 minutes, and then they will be easier to blend. If your machine is struggling to blend the dates, you can add one tablespoon of water at a time. Keep in mind that while you can add a little water to help blend them, this will shorten the shelf life. I hope this helps and you give this recipe a try!
I give up! I use dates daily and wanted to make date paste to make it all easier. I tried making paste in my Vitamix. It worked but not easily. It wasn’t worth it.
I looked at your video closer and saw you used a NutraMilk, which I also have. I tried it exactly as you did in your video. Exactly. I even counted the # of dates you used. It still didn’t work! My NutraMilk dies within seconds every time. I know once it gets going it would be fine but it can’t can’t past that. I tried cutting up all the dates into smaller pieces… No difference. I used less dates but so the blade is still covered… No difference.
What am I doing wrong??
I don’t want to add water.
Help!
Hi Ann,
I’m so sorry you’re struggling. Are you using fresh dates? What type of dates are you using? Perhaps you should try to soak your dates in hot water for 30 min before blending.
Loved your recipe’s instructions on the date paste. Thanks for such amazing words.
Thank you so much for your comment. Hope you are enjoying the recipe 🙂
Awesome recipe! Thanks for sharing.
How long will it stay if refrigerated?
Thanks, Tara.
If you make it with no water, you can keep it for 3-4 months in the fridge or over 1 year in the freezer. Check the blog post which has been updated with more information and lots of tips.
Can i make this with chopped dates the kind thats like dried fruit in muesli etc?
You should be able to though the dates will likely need to be soaked first to become easier to blend since they will be a lot drier than whole dates.
Can’t wait to try this!
Can you use dried dates or does it have to be fresh?
That’s a very good question! I’ve only ever made this date paste with Medjool dates, which are ‘fresh’. However, I would imagine that it would work with dried dates too. They will most likely need to add the ‘soaking’ step though, to make them easier to blend.