
This post may contain affiliate links. Please read our disclosure policy.
Learn how to make the best date syrup from scratch with a few simple steps. I also share how to use it to sweeten baked goods and desserts.

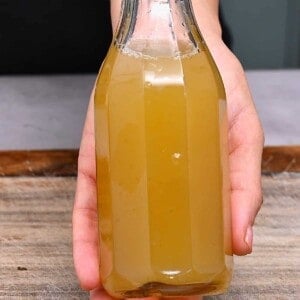
Date syrup (also referred to as Silan, date nectar, and date honey) is one of my favorite natural sweeteners to use alongside homemade date paste. It’s thick and caramel-like in color and has a deep caramel-like flavor with hints of vanilla—it just adds that “something special” to a dish. It’s a healthier alternative to sugar and is a great addition to baking or to sweeten breakfast bowls and desserts.
Learning how to make date syrup is easy—the recipe requires just a bit of time and patience. You simmer the dates in a pan with water and then strain them with a cheesecloth or nut milk bag! Finally, reduce the liquid, and voila, the date syrup recipe is ready.
Best of all, this recipe requires just TWO ingredients—dates and water! It is the perfect recipe to make with leftover dates after enjoying some stuffed dates!

Want to save this recipe?
Recipe video tutorial
Which dates are best for making date syrup?
Use fresh, meaty dates like Medjool, which are naturally soft, sweet, and have high moisture content. This type produces a rich, thick syrup with a deep caramel flavor. Other varieties, such as Deglet Noor, Halawy, or Khadrawy, also work well.
If possible, opt for organic dates—they might be a bit pricier but are worth it for quality. Be sure to inspect the dates for any bugs or worms. If you find one, simply discard that particular date, no need to toss the whole batch. Just make sure they’re fresh and not too dry.

See the printable recipe card below for full information on ingredients and quantities.
How to make date syrup
Pit the dates: If your dates aren’t pitted yet, you need to remove the pits. Start by rinsing them under cold water if they look dusty or need cleaning. Then, use a knife to cut them open or simply pull them apart by hand.

Soak the dates: Place the dates in a large bowl and cover with hot water to soften them. Let them soak for 20-30 minutes until they’re soft and mushy. Be sure to keep the soaking water!

Simmer the dates: Add the soaked dates along with their soaking water to a large saucepan, then pour in the remaining water specified in the recipe. Bring it to a soft boil over medium heat. Once boiling, reduce the heat to a gentle simmer, cover the pot, and simmer for about one hour, stirring occasionally.
Then, allow the mixture to cool down completely before you continue with the next step.

Strain the mixture: Pour the entire mixture through a sieve lined with cheesecloth or a nut milk bag and collect the liquid in a large bowl. Then, squeeze the dates to remove as much of the excess liquid as possible. Work in batches if needed.

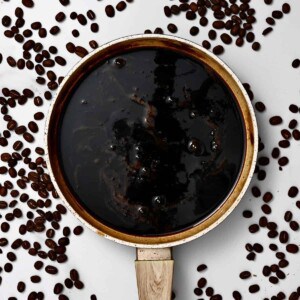
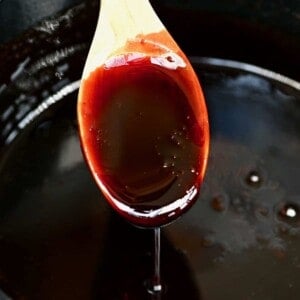
Concentrate the syrup: Pour the date juice back into the pot and simmer over medium-low heat until it is reduced by about half. Doing so will result in a thicker, more concentrated (sweeter) consistency and flavor.
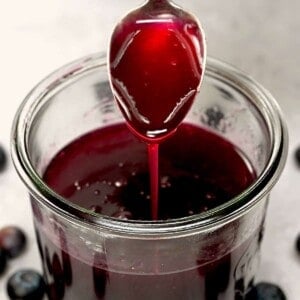
To test for the ideal consistency, dip a spoon in the syrup—it should coat the back of it easily. If the syrup is still too thin, continue simmering. However, note that the syrup will thicken even more when refrigerated.
Once ready, allow the date syrup to cool before transferring it to a sterilized airtight jar or bottle.

FAQs
Once cooled, store the date syrup in the refrigerator for 2-3 weeks. If the syrup starts to smell or becomes discolored/moldy, then it’s past its best. You can also freeze it for up to 3-4 months (in a jar with a bit of headspace for expansion).
There are many ways to use date syrup. Here are some of my favorite ways:
– A healthy sweetener in drinks: Sweeten drinks like tea, coffee (hot or iced tea), or latte. You can also add it to smoothies.
– Add flavor and sweetness to breakfasts: Stir some into oatmeal porridge or baked oatmeal, pour over pancakes or waffles, add a spoonful into yogurt granola cups, etc.
– Use for desserts: Add it in place of liquid sweeteners in cakes and desserts.
– Use instead of sugar: You can also use the syrup instead of sugar when baking. I recommend a 2/3:1 ratio (2/3 cup of date syrup for every 1 cup of sugar).
You can reduce food waste and use the leftover date pulp in ways similar to using date paste. Just note it won’t be as sweet as a lot of the flavor has remained in the syrup. Still, this pulp is perfect for adding to all types of desserts. You can use it to fill Ma’amoul cookies, Makroudh, Kahk, or Kleicha cookies. Use it for making sticky date pudding, date loaf, or date butter. Also, you can use it for no-bake treats or to make date caramel.
You can wash, dry, and grind them into a powder to add to smoothies or skin scrubs. You can also roast and grind them to use as a date coffee or to add to coffee. Alternatively, you can plant them or compost them. I’ve also had people reach out to me to say that they can be fermented into alcohol, made a date pit tea, used for marmalade and flour, etc.
More homemade syrups

If you try this homemade date syrup recipe, let me know how it goes in the comments below. I’d appreciate a recipe card rating and would love to see your recipe recreations – tag me on Instagram @Alphafoodie!
Date Syrup (2 Ingredients)
Ingredients
- 1 lb dates Medjool is best
- 6 cups water
Instructions
- If the dates are not clean, rinse them, then use a knife or your hands to cut or pull apart the dates and remove the pits.
- Soak the dates in a large bowl of hot water for 20-30 minutes until they become soft. Do not discard the water.
- Place the soaked dates along with the soaking water in a large saucepan and add the remaining cups of water. Bring to a soft boil over medium heat. Reduce the heat to a gentle simmer, cover the pot, and simmer for 1 hour, stirring occasionally.
- Allow the mixture to cool down completely.
- Pour the mixture through a sieve lined with cheesecloth or a nut milk bag and collect the liquid in a bowl. Squeeze the dates to remove as much of the excess liquid as possible. Work in batches if needed.
- Pour the date juice back into the pot and simmer over medium-low heat for about 45-60 minutes. The syrup should be reduced by about half, making about 1 cup of date syrup.For the ideal consistency, the syrup should easily coat a spoon dipped in it. If the syrup is still too thin, continue reducing it, but keep in mind that it will thicken even more once refrigerated.
- Once ready, let the date syrup cool, then transfer it to a sterilized airtight jar or bottle.
Video
Notes
Nutrition
Nutrition information is automatically calculated, so should only be used as an approximation.


can you provide what this recipe equivalents might be for recipes?
Hi Joy,
You can also use the syrup instead of sugar when baking. I recommend a 2/3:1 ratio (2/3 cup of date syrup for every 1 cup of sugar). You can also substitute date syrup 1:1 for other liquid sweeteners like honey or maple syrup. Just keep in mind it has a richer, slightly caramel-like flavor, so it may deepen the taste of the final dish.
Can I store date syrup without refrigerating?
Hi Ann,
It’s best to keep it in the fridge, or alternatively, you can freeze it. When you use it, you can gently warm it in the microwave for a few seconds. I hope this helps.
This is beautifully simple. And healthy.
I need to buy moist dates. I have medjool, but they are dry (the way I bought them-bulk). I have several glass jars. Do I need to sterilize them, or just wash thoroughly?
Hi Katherine,
You can rinse the dates well to wash them. Then soak them in warm water for 10-15 minutes if they are too dry! I hope you enjoy the date syrup 🙂
I’m wondering if the water used for soaking the dates is part of the 6 cups of water the recipe calls for? And then you use the soaking liquid and the remainder of the 6 cups to cook the dates? Thank you.
Hi Susan,
Yes, the water used for soaking is part of the 6 cups. You just need enough to cover them, then add the rest when cooking the dates.
“Great guide on making date syrup! Love how natural and simple this sweetener is. Can’t wait to try it—thanks for sharing!”
Thank you for your comment. I hope you have this recipe a try!
Hello. After I made my date syrup, I put it in the fridge and it hardened. How do I soften it?
Hi Julia! Take it out of the fridge and let it sit at room temperature for 15-20 minutes. If it’s still too thick, you can warm it up gently in a saucepan or microwave for a few seconds. Stir it well, and it should be good to go! I hope this helps.
First try came out really good!, loved it
Glad you liked it, Alexa! Happy cooking!
What do you do with the date paste? How do you use?
Hi Shuchi,
You can add it to smoothies and oatmeal. You can also use it in no-bake treats or baked goods (or as a filling for cookies). I hope this helps.
Thank you so much for your recipe and ideas, need syrup for yogurt recipe and couldn’t find it anywhere.
I hope you give this one a try, Paula 🙂