
This post may contain affiliate links. Please read our disclosure policy.
A simple guide to making this homemade Kombucha DIY – including a pomegranate kombucha flavour option – for tangy, fizzy and delicious kombucha every time.
This homemade kombucha DIY has been on my list for a long time, and I’m so happy that I’ve finally managed to document the process to share on my blog. Learning how to make kombucha is surprisingly easy, and once you start making your own, you’ll never want to rebuy store-bought. I’ve even added a simple DIY for pomegranate kombucha here too.
You may like my new turmeric tincture DIY or even turmeric ginger shot recipe. I also have DIYs for things like Virgin coconut oil and organic rose water.
From kombucha to kefir, to probiotic drinks/yogurts – there are plenty of products on the market claiming to be wonderful for your gut.
In fact, many products – particularly probiotic filled drinks- may actually contain probiotics that haven’t survived the making process or won’t survive the trip to your tummy. With that being said – making these products from home is not only fairly simple – but also recommended.
That way, you know exactly what is in your gut-friendly concoction. But also, making and consuming these types of things fresh means you are getting the best of them. Although I do feel the need to add the PSA that making homemade kombucha the correct way is an absolute must. While properly prepared kombucha is great, over-fermented and/or contaminated kombucha can cause some fairly serious problems.
Luckily, I’ve made this kombucha DIY at home numerous times and have never had any issues – but there also signs to look out for to know when you might want to chuck out a batch of kombucha or buy/grow a new SCOBY – which I’ll discuss below.
At the end of the day, when you first start looking into making kombucha, the internet can feel a bit like a never-ending rabbit hole of confusing information, so I’m going to try to layout the information in the simplest way I can.
Want to save this recipe?
So, what is Kombucha?
I assume that if you’re here on this blog post, you may already know what kombucha is. But for those who aren’t quite sure – Kombucha is a tea-based fermented drink. The fermentation process is what makes kombucha so gut-friendly.
The resulting drink is a slightly tart, slightly sweet and fizzy drink that is easily flavoured with a variety of fruits and a great alternative to soda. The fermentation process does also mean that the resulting homemade kombucha diy has a little bit of alcohol. This is usually in trace amounts though and less than 1%.

There are two main ‘terms’ that I think requires a bit of discussion when it comes to making homemade kombucha diy for the first time: SCOBY and Starter Liquid (or Starter Tea).
What is a SCOBY?
To ferment the tea, a mixture of bacteria and yeast is added to the drink in the form of a SCOBY. SCOBY stands for ‘symbiotic culture of bacteria and yeast’ – so you can see why they need the acronym.
Now in terms of what a SCOBY looks like – it’s weird and a little gross. It’s a rubbery, brown-ish puck of ‘stuff’ that can have brown stringy bits hanging from it and some can be lumpy vs smooth. It’s not the most attractive thing to deal with – BUT it’s the magic to making kombucha.
Also, it’s worth noting that you can make your own SCOBY from scratch to use for your homemade kombucha recipes. However, for the sake of simplicity, I bought a SCOBY starter for this recipe. – If you want to make your own though, then check out this article from Healthline.

Tip* If you’re going to buy a SCOBY, make sure it’s from a trusted website (and hopefully, with lots of positive reviews). While purchasing a SCOBY is more expensive than making your own. This one SCOBY will then grow and grow to keep making batch after batch – so the initial cost is well worth it especially as homemade kombucha is much cheaper than store-bought versions. Especially when you want to add different fruit infusions.
Every time you make a new batch of kombucha, your SCOBY ‘mother’ will grow new layers which are called ‘babies’, which can be used to make further kombucha.
Note* it’s important to leave your kombucha jar somewhere that it won’t be moved about during the fermentation process. This is because, each time you nudge the jar – the baby SCOBY will stop growing and a new layer will develop and grow.
Storing your kombucha SCOBY
The best method for long-term Kombucha making is to make a new batch every time your ‘current batch’ is ready. That way, your SCOBY isn’t sitting around at all between fermenting time.
Alternatively, if you’re going away for a couple of weeks – store your SCOBY in a new batch of tea – leaving it to ferment. You’ll probably want to discard the liquid when you return home. But you can then start a new batch of tea.
It’ worth noting that as your SCOBY forms ‘babies’, you only need one SCOBY for your starter liquid, but it’s worth keeping the extra’s for if you want to make a double batch and in-case of mould/ any other reason you’d need to use a new SCOBY.
To store multiple SCOBY
You can create a ‘SCOBY hotel’. I don’t know too much about that myself, so I’m going to link you to a page talking all about SCOBY hotel maintenance or even this page. In essence, though, it’s just another jar you can store all your space SCOBY, while they’re not needed.
Any that you don’t require can be given to a friend or composted.
Note* a SCOBY lasts a very long time. However, if it becomes black or develops mould, then it’s time to throw it away and begin again/ use a different one. Because SCOBY looks a little odd, it can be a bit confusing to know what is and isn’t mould for newbies. The majority of the time – any markings, holes, bumps etc. on your SCOBY are perfectly normal.
Here is a gallery of SCOBY mould, so you see what it looks like – which is very similar to mould found on bread.
What Is Starter Liquid / Starter Tea?
Okay, I told you two terms require a little education when it comes to making homemade kombucha, and ‘starter liquid’ is the second one.
The SCOBY that I bought online actually came packed in with some ‘starter liquid’ – which is basically some already fermented tea. When making a batch of kombucha you brew your sweet tea, and pour in some starter liquid and your SCOBY to the mix. The starter liquid will help to encourage SCOBY growth and fermentation.
You need about 1 cup of starter liquid per gallon (4.5 Litres) of Kombucha and many
When your kombucha has fermented and is ready to transfer to a new jar, then keep aside just enough of the fermented tea to store your SCOBY in, and that will be the starter liquid for your next batch ( similar to how making yogurt can use a starter of pre-made yogurt).
Note* If your SCOBY didn’t come with enough starter liquid then you can use plain store-bought kombucha instead/as well as. You’ll need 1 cup of starter liquid per 4-5 litres ( 1 gallon) of kombucha.
How to Make Kombucha
What’s needed:
NOTE * Use black tea, green tea or white tea that is non-herbal. I actually used pu-erh tea, which is slightly fermented itself and LOVE the results every single time. It produces a really big SCOBY and I find the final taste of my kombucha to be so much amazing. I don’t know how to explain it other than to say it’s just more full-bodied, with additional layers of flavour.
Full amounts are written in the recipe, below.
The how-to steps for homemade kombucha
First things first:
Sterilise the glass container and utensils that you will use for the tea. You can do that by rinsing them with boiling water. You can then heat them in the oven for about 120 Degrees Celsius until they’re completely dry.
Also, note – make sure you don’t use jars with a metal top for this process. Metal can affect the taste and quality of your kombucha. I like to use glass or plastic flip top jars for my homemade kombucha. I ferment it in a wide jar, to begin with then transfer it to a flip top glass bottle for the flavouring/ second ferment.
I’ll then sometimes add individual portions to small metal-capped bottles, as this shouldn’t affect the flavour at this point.
Fermentation/brewing your homemade kombucha DIY:
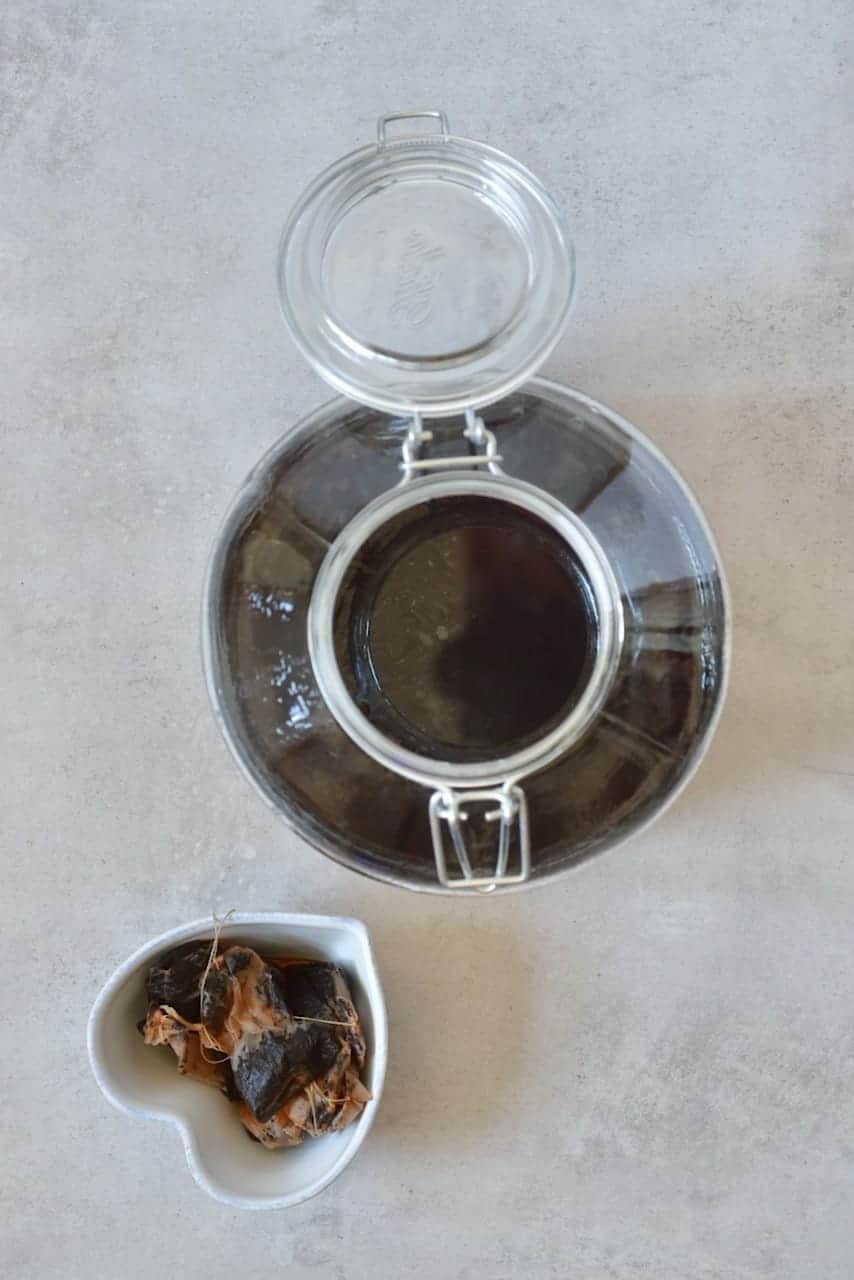
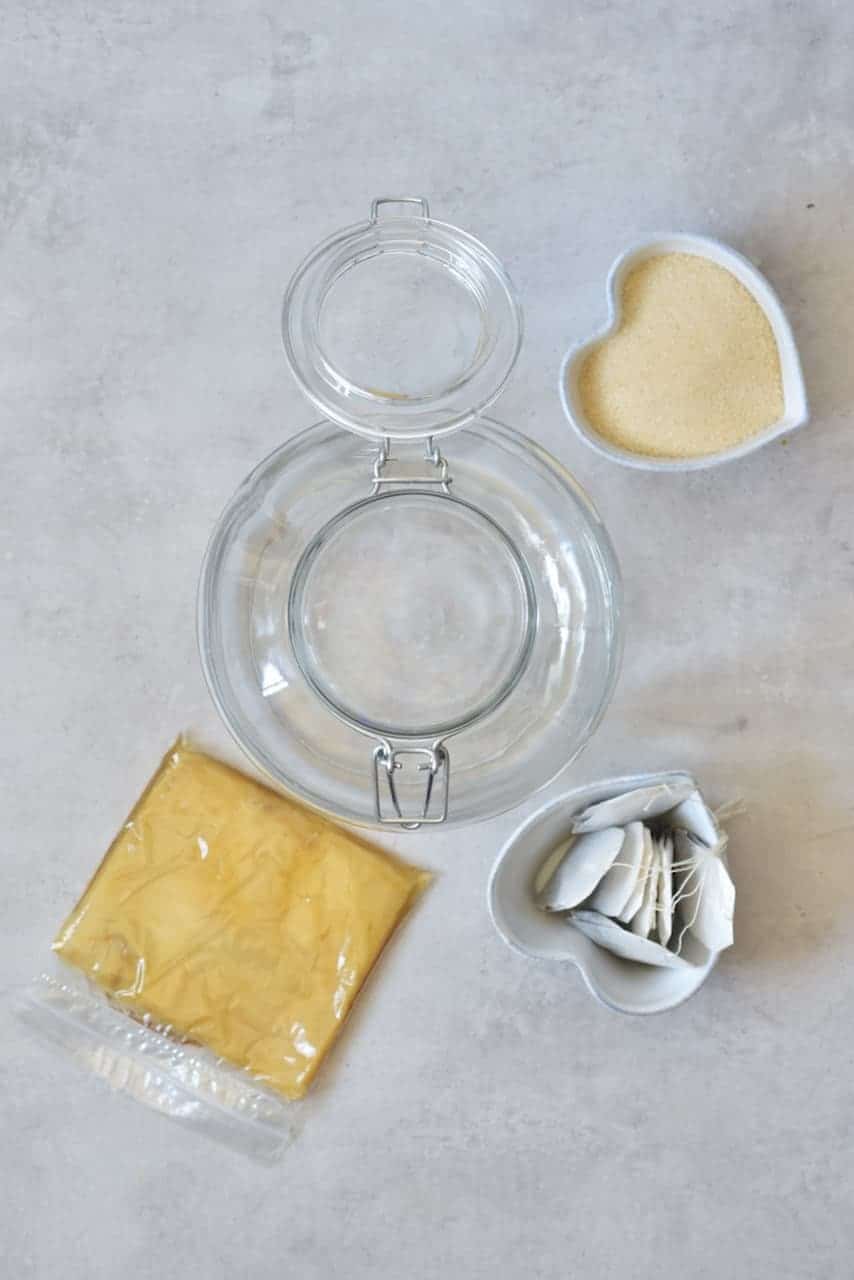
Begin by preparing your sweetened tea. Put the tea bags and sugar in the glass container.
Boil the water and pour in the glass container over the tea and sugar. Stir.
Let the tea steep for 30 minutes, then remove the bags- this is your sweet brewed tea.
Let the tea cool down to room temperature. The liquid needs to be at about 20-25ºC, so the SCOBY can survive in it.
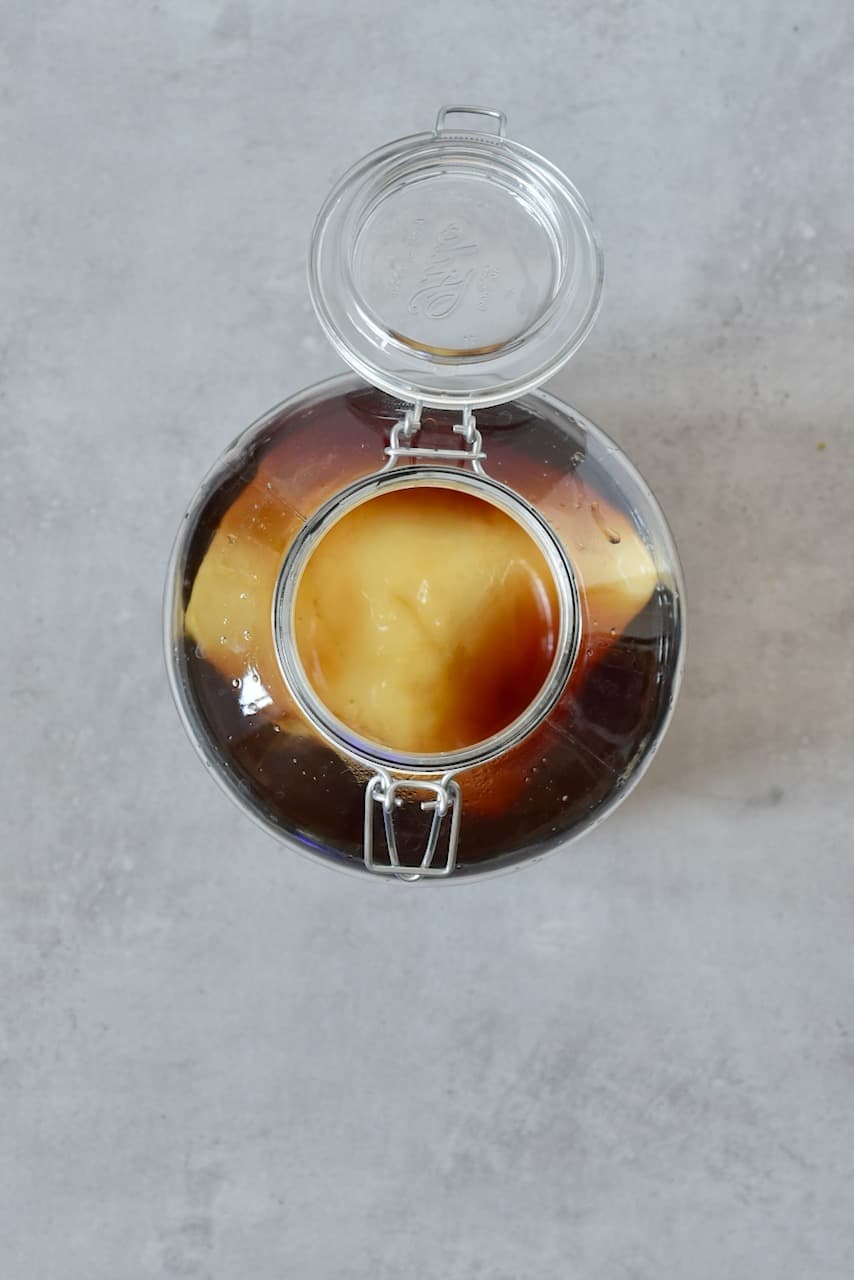
When the tea has cooled down, add the Kombucha culture SCOBY along with the starter liquid. Note that it might float at the surface or sink to the bottom.
Note* your SCOBY might float at the surface. However, it could also sink to the bottom or even float sideways- this is all normal. The SCOBY may also grow little brown strings below it – this is also normal.
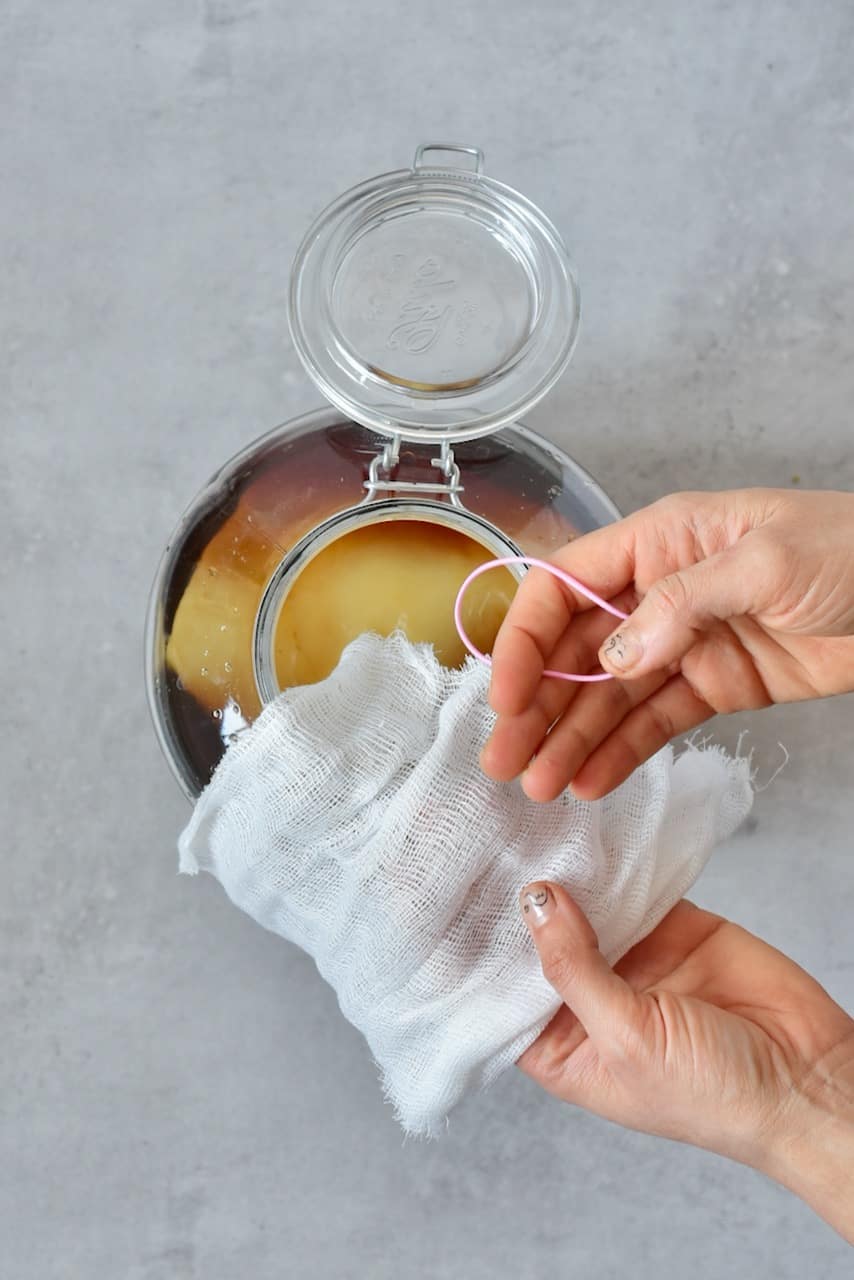
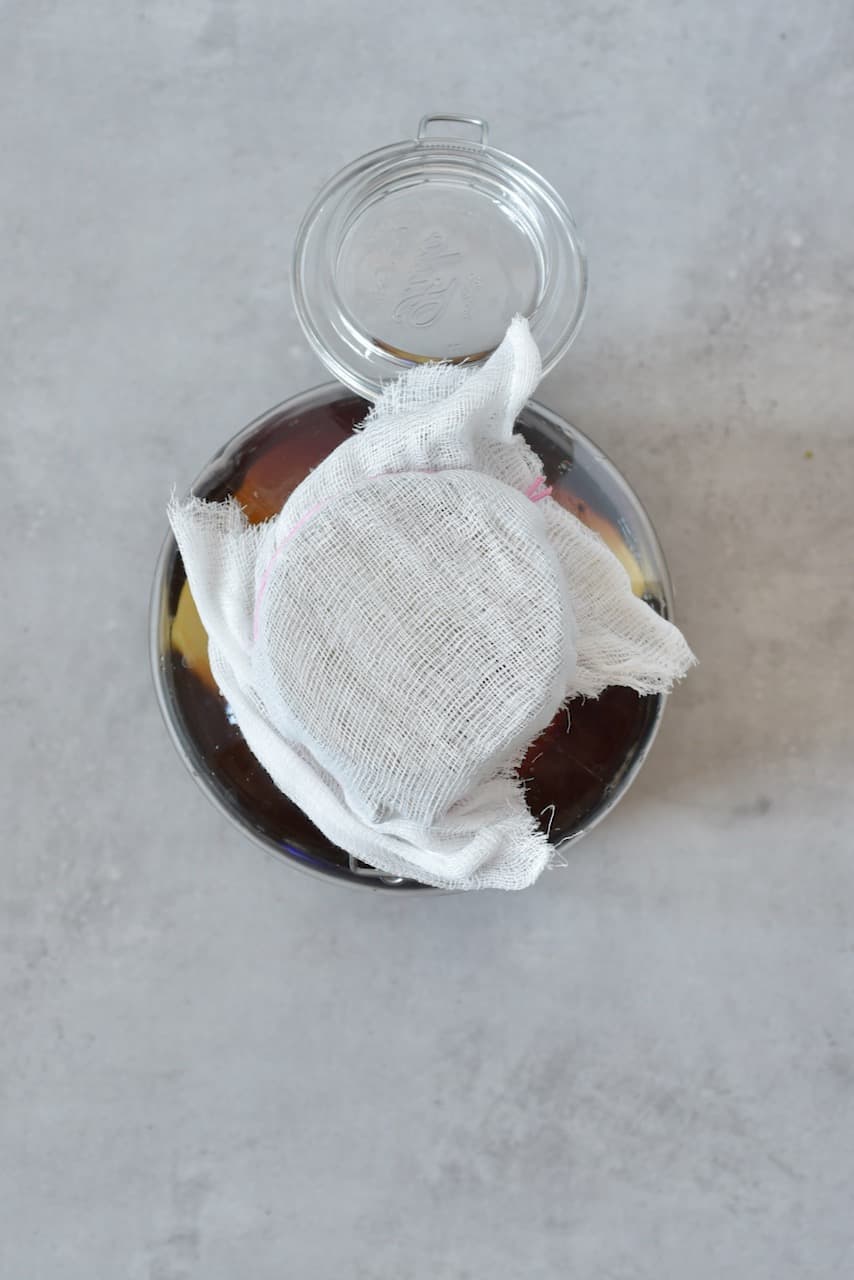
Cover with the material of your choice and secure with the elastic band or a rubber band. This allows for proper air circulation.
I used muslin cloth because I’ve never had issues with flies in my apartment. However, if you’re even slightly worried about this then use a kitchen towel, some breathable cotton or even a couple of paper towels, so no flies will be able to wriggle their way into the jar.
Store in room temperature, away from sunlight (!), for between 7-14 days. Temperature at around 20-23ºC will result in a slower, less sour Kombucha. A little higher temperature of 24-27ºC means the kombucha will ferment faster. Make sure the temperature never goes above 30ºC as then the kombucha will have an unbalanced flavour.
In the UK I’m used to lower temperatures, so I keep it in a warm cupboard in my kitchen and check on it every few days.
Knowing when the kombucha is ready:
Look at the darkness of the tea when you first add the SCOBY. As the liquid ferments, it will become slightly cloudier. This is one sign that the process is working.
You should also notice a difference in smell. Your homemade kombucha will start with a very neutral ‘tea’ aroma but will get more ‘vinegary’ during the fermentation process.
Note* If it begins to smell rotten or ‘cheesy’ though, then this can mean something has gone wrong, and there may be mould on your SCOBY.
After about seven days, taste test a bit of the brew with a clean spoon. If it tastes slightly fruity and not like “regular” tea, it is ready. If it still tastes tea-like, wait a couple more days and try again. Feel free to stop the fermentation at a time when the brew suits best your taste buds and palette.
As you get used to brewing homemade kombucha you’ll quickly learn the fermentation time that suits your taste buds the best. Mine is around 9-10 days.
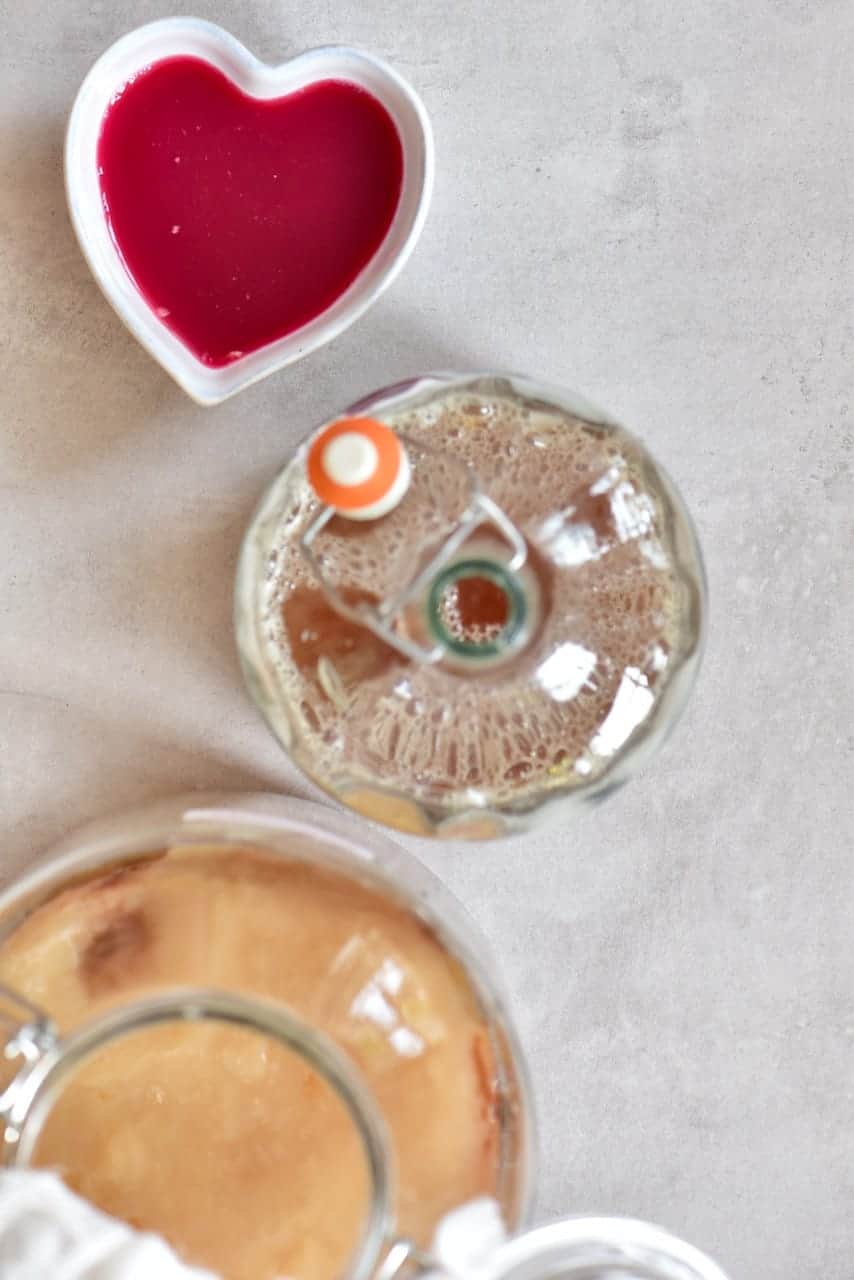
When the brew is ready, pour out most of the liquid into your desired bottles. Keep a bit of the brew, so the SCOBY doesn’t dry out. You can keep the SCOBY this way, even if you are not making more kombucha right way – just keep it in its jar at room temperature, not in the fridge.
Next, you need to decide if you want to flavour your kombucha, for a second ferment. I’ve had different advice regarding the next step, with the leaflet that came with my SCOBY telling me to refrigerate the kombucha for a few hours, allowing it to carbonate – before enjoying.
However, my kombucha-making friends swear by leaving theirs at room temperature -saying that refrigeration stops the carbonation process. I’d say experiment to see if it makes a massive difference for you. Mine carbonated in the fridge as well as out of it.
I’ve personally found that my plain kombucha can get fizzier, the longer it’s left in the fridge. I’ve also heard that it doesn’t really ‘go off’ as such and can be kept indefinitely – if refrigerated-. To be safe, I like to consume mine within a month, though.
Flavouring/second fermentation of your homemade kombucha:
This is my favourite part of the process – where we can flavour our homemade kombucha and allow it to get its second fermentation and carbonates like soda.
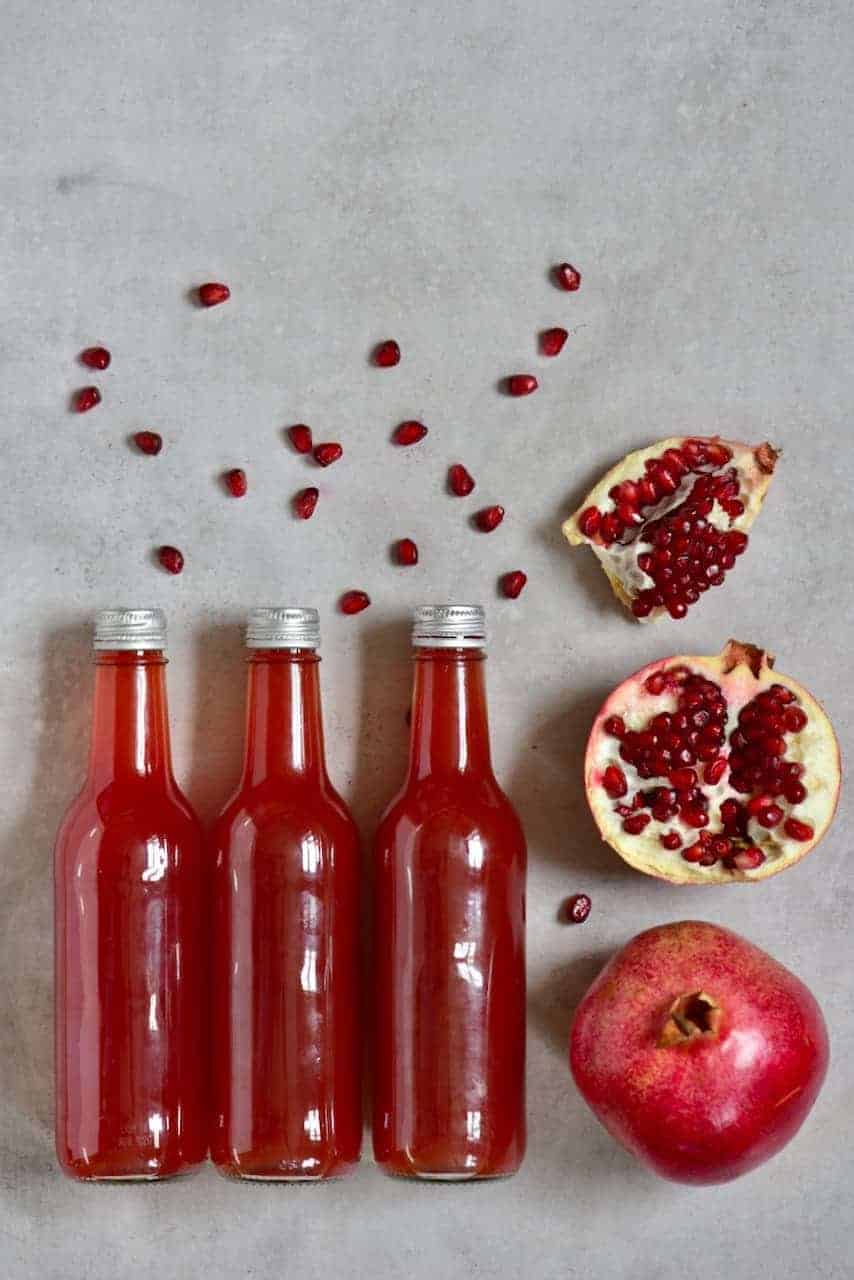
Sweet, fruits added to the kombucha will encourage a lot of carbonation for super bubbly results. My current favourite option is pomegranate kombucha – I love the fresh, punchy flavour.
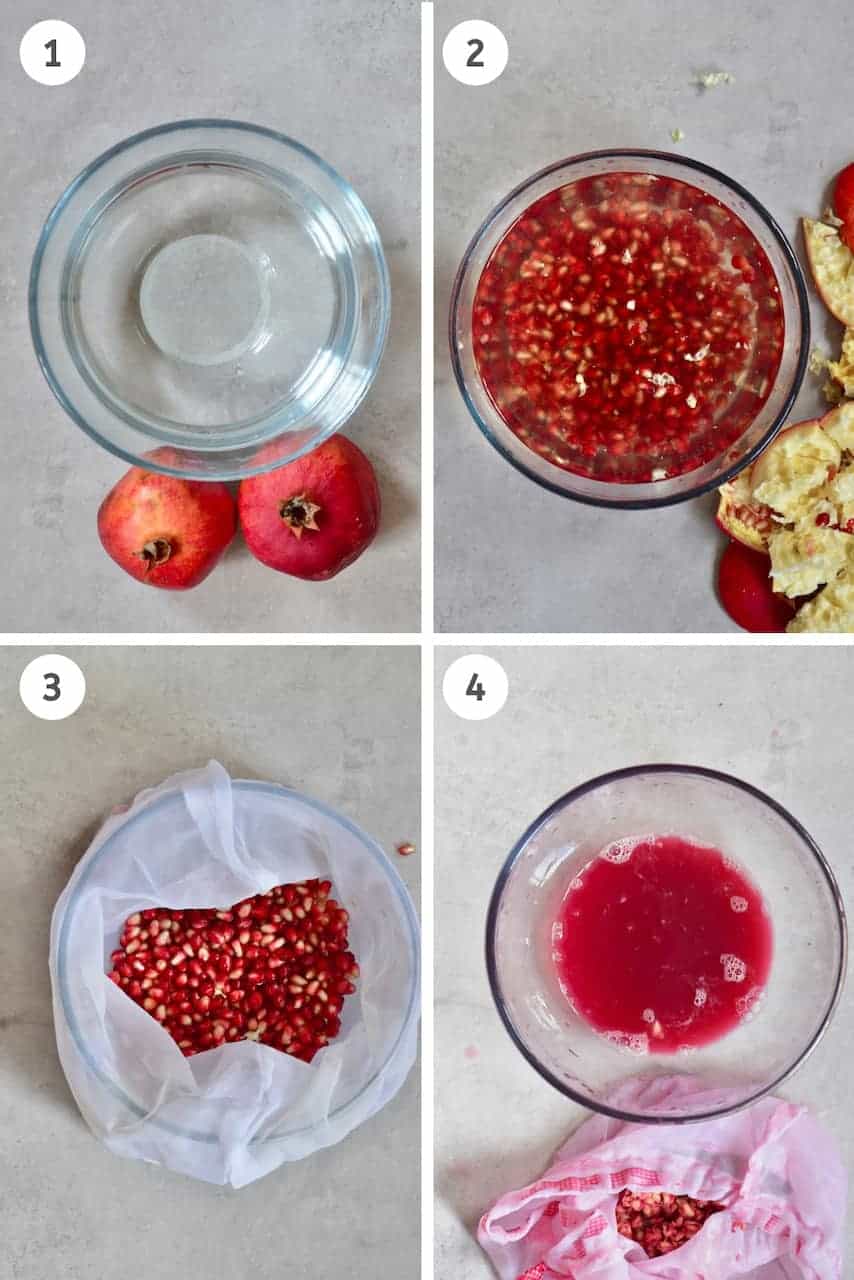
To get pomegranate juice, first, deseed two pomegranates in a bowl of water. This is an easy way to get the seeds cleaned. Then using a nut milk bag or a muslin cloth, squeeze as much juice as you can. This is your fresh pomegranate juice.
To flavour 2 l of pomegranate kombucha, you only need about 3/4 cup of fruit juice. The fruit juice only needs to be about 10% of the total liquid content. Of course, you can add a bit more or less, to suit your taste.
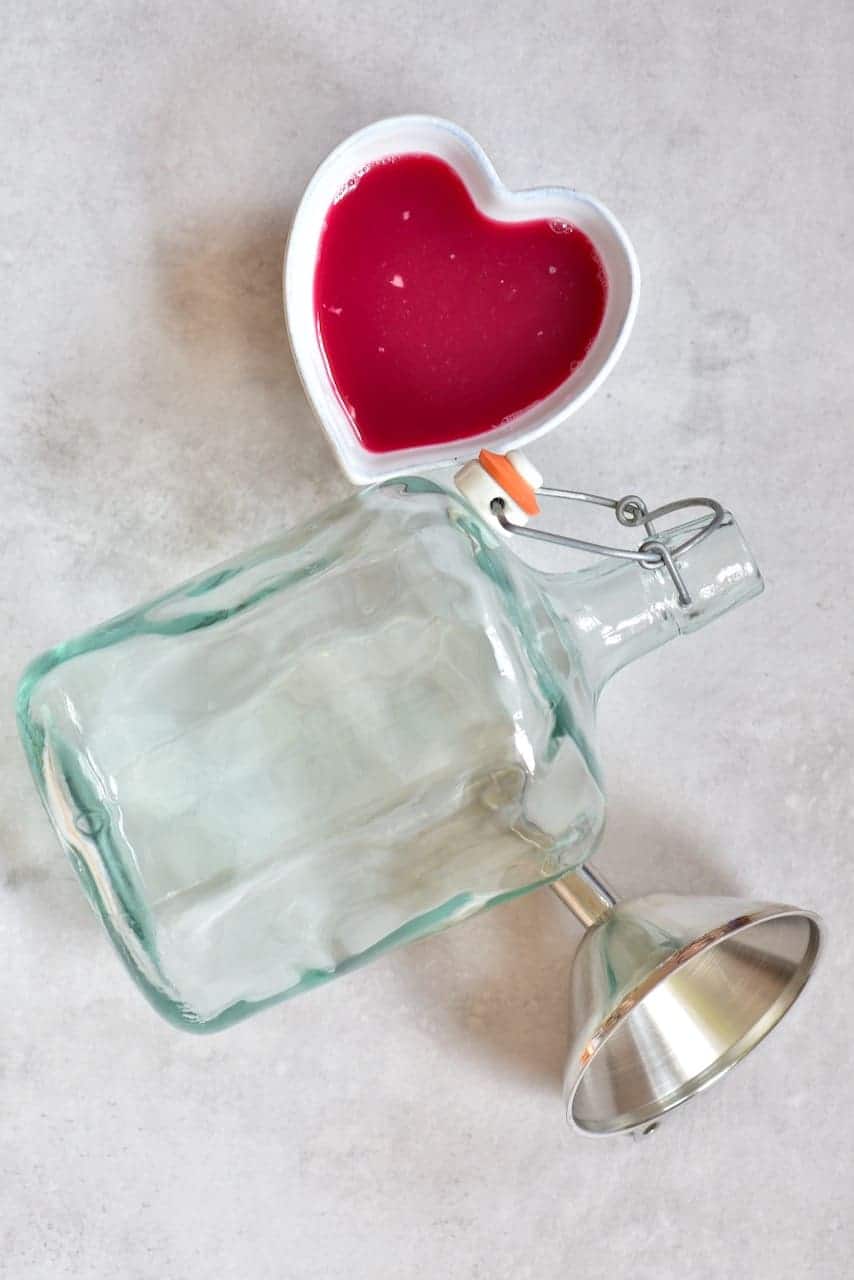
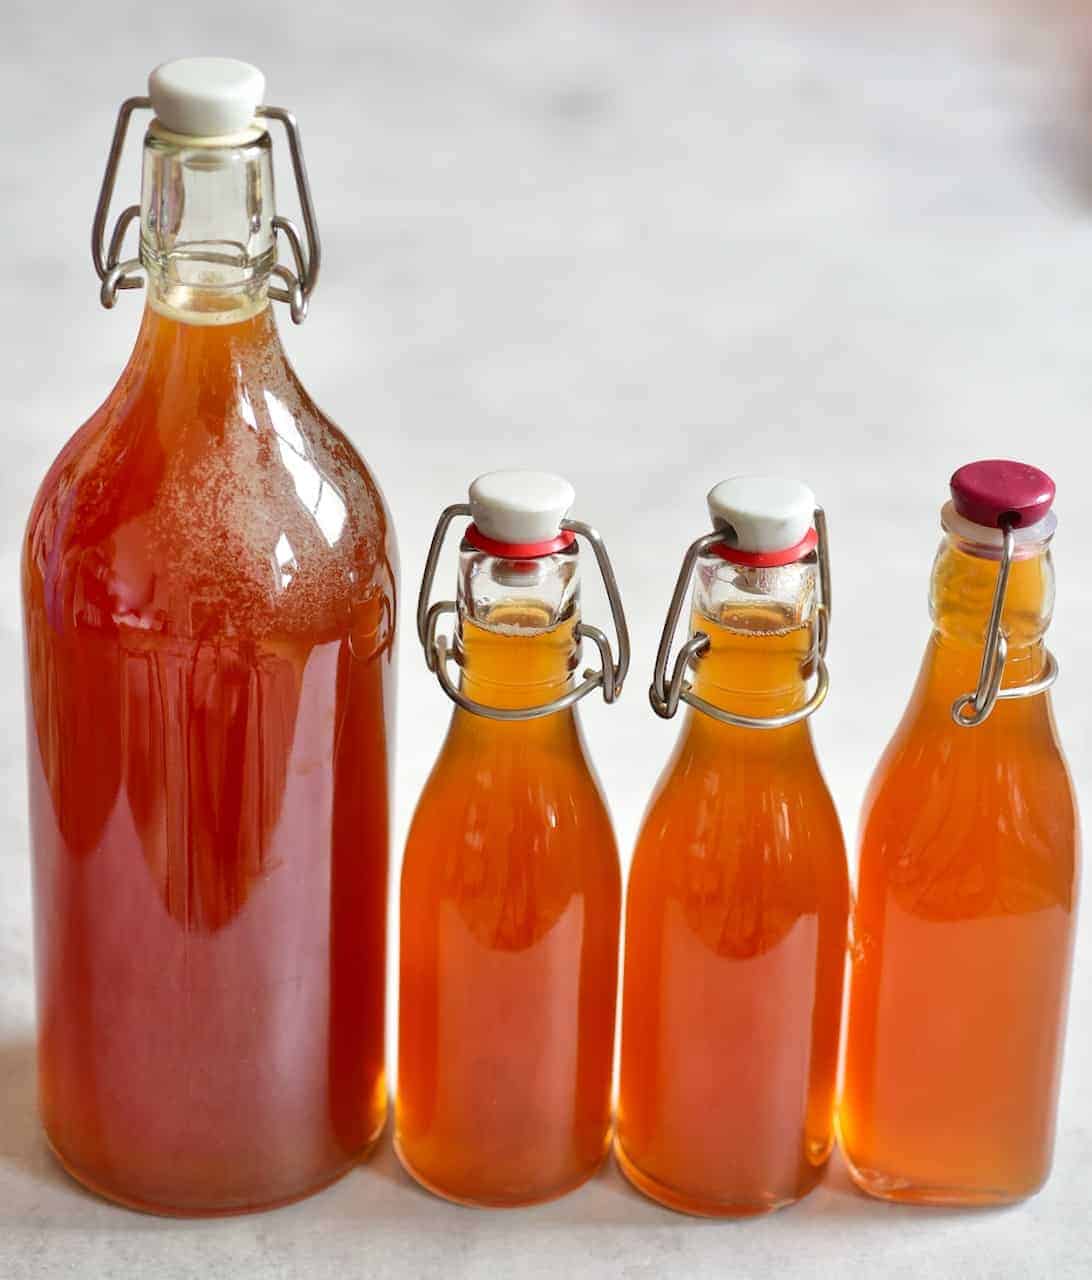
Use bottles (or a big bottle) with caps that can withstand pressure. The natural sugars from the fruit will lead to natural fizz (creation of CO2). Fill up only about 3/4 of the bottles for this pomegranate kombucha.
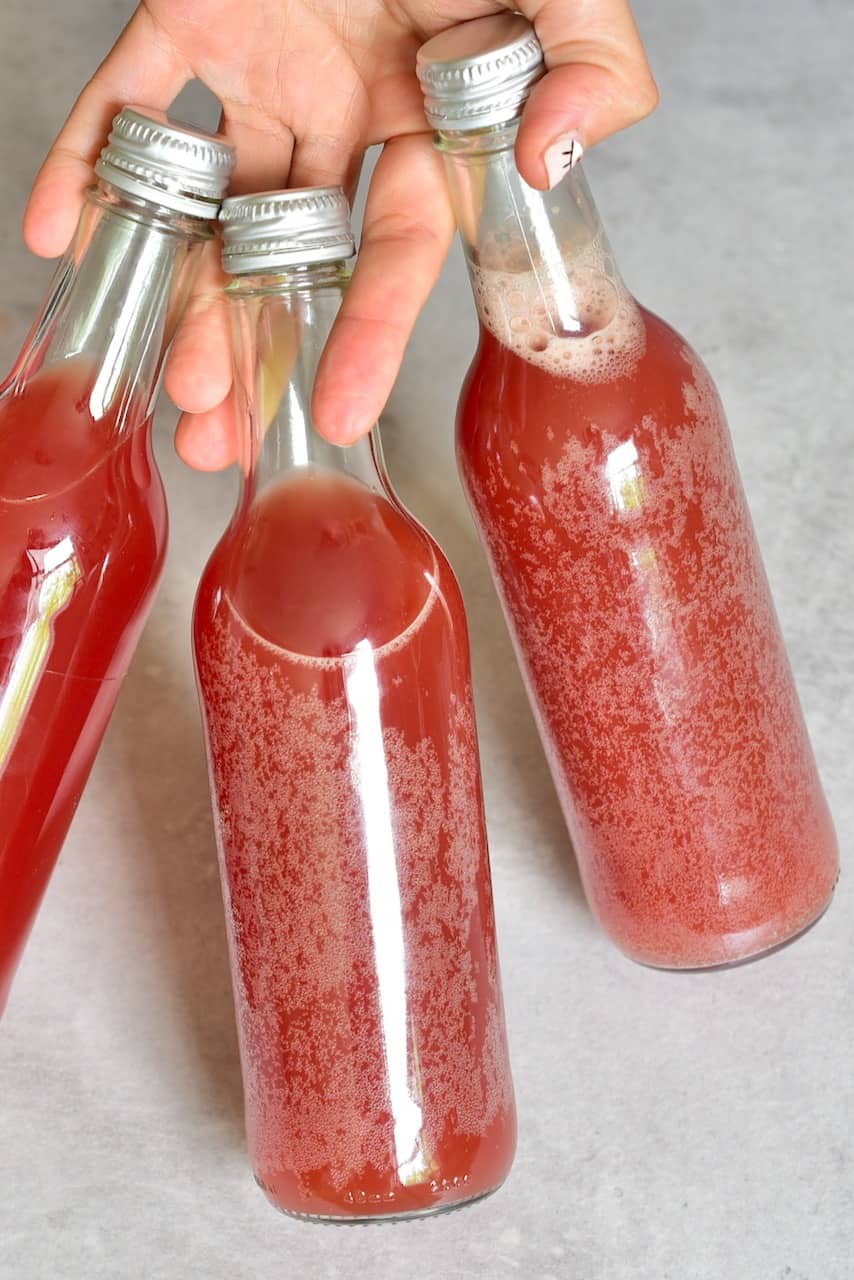
Keep the bottles in room temperature, in a warm dark place for around three days. And every day, “burb” the bottles to remove the pressure (open and close the caps lets the CO2 out).
Taste test the flavoured brewing kombucha in 3 days. The longer you leave it, the fizzier it will get until it suits your taste.
Alternatively, if you’re worried about affecting the carbonation this way, then you could pour your first batch of homemade kombucha into a plastic bottle. When the bottle gets rock hard, this means it’s full of air, and your kombucha will be very fizzy.
You’ll then know for your second batch, how long it took to carbonate adequately and will be able to do it in glass bottles with no ‘burb’ required.
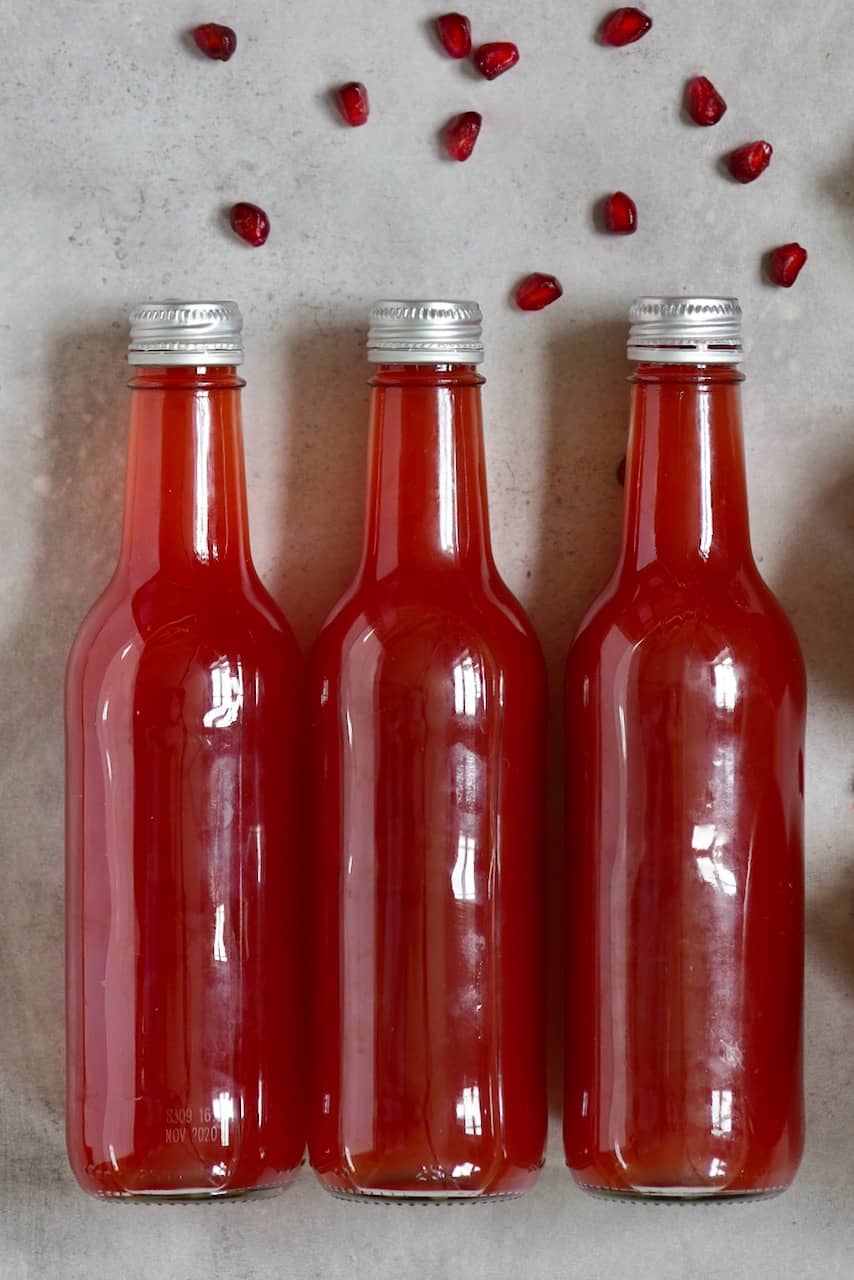
Once ready, refrigerate. As long as it’s refrigerated, I’ve heard you can keep it indefinitely. I usually consume it within 2-4 weeks, while preparing new batches consistently – so I never run out.
Kombucha is best enjoyed cold or over ice. It can also be added to cocktails. I drink kombucha daily since beginning to make my own kombucha at home, and I love it.
If you have any questions about this Kombucha DIY, want to send me pictures of your in-progress, or want to tag me in your final kombucha images, then feel free to tag me @Alphafoodie or leave a comment below.

How-to: DIY Homemade Kombucha
Equipment
- Large glass bottle big enough for 8 cups/2 liters of water
- Cheesecloth (Muslin cloth) or weaved cotton & elastic band or a long thread
Ingredients
- a Kombucha starter culture SCOBY. If you’re wanting to make your own then follow the link in my blog post
- 8 bags Pu'er or pu-erh tea black or green fermented tea – you can also use normal black or green tea bags.
- 1 cup brown sugar
- 8.5 cups water
Instructions
- Begin by sterilising all of your glass containers and utensils by rinsing them with boiling water then drying them in the oven at around 120C, till completely dry.
Fermentation/brewing your homemade kombucha DIY:
- Begin by preparing your sweetened tea. Put the tea bags and sugar in the glass container. Boil the water and pour in the glass container over the tea and sugar. Stir.
- Let the tea steep for 30 minutes, then remove the bags- this is your sweet brewed tea.
- Let the tea cool down to room temperature. The liquid needs to be at about 20-25ºC, so the SCOBY can survive in it. When the tea has cooled down, add the Kombucha culture SCOBY along with the starter liquid. Note that it might float at the surface or sink to the bottom. *
- Cover with the material of your choice and secure with the elastic band or a rubber band. This allows for proper air circulation. I used muslin cloth because I’ve never had issues with flies in my apartment. However, if you’re even slightly worried about this then use a kitchen towel, some breathable cotton or even a couple of paper towels, so no flies will be able to wriggle their way into the jar.
- Store in room temperature, away from sunlight (!), for between 7-14 days. Temperatures at around 20-23ºC will result in a slower, less sour Kombucha. A little higher temperature of 24-27ºC means the kombucha will ferment faster. Make sure the temperature never goes above 30ºC as then the kombucha will have an unbalanced flavour. In the UK I’m used to lower temperatures, so I keep it in a warm cupboard in my kitchen and check on it every few days.
- Knowing when the kombucha is ready:Look at the darkness of the tea when you first add the SCOBY. As the liquid ferments, it will become slightly cloudier. This is one sign that the process is working.
- You should also notice a difference in smell. Your homemade kombucha will start with a very neutral ‘tea’ aroma but will get more ‘vinegary’ during the fermentation process.
- Note* If it begins to smell rotten or ‘cheesy’ though, then this can mean something has gone wrong, and there may be mould on your SCOBY.
- After about seven days, taste test a bit of the brew with a clean spoon. If it tastes slightly fruity and not like "regular" tea, it is ready. If it still tastes tea-like, wait a couple more days and try again. Feel free to stop the fermentation at a time when the brew suits best your taste buds and palette. As you get used to brewing homemade kombucha you’ll quickly learn the fermentation time that suits your taste buds the best. Mine is around 9-10 days.
- When the brew is ready, pour out most of the liquid into your desired bottles. Keep a bit of the brew, so the SCOBY doesn’t dry out. You can keep the SCOBY this way, even if you are not making more kombucha right way – just keep it in its jar at room temperature, not in the fridge.
- Next, you need to decide if you want to flavour your kombucha, for a second ferment. I’ve had different advice regarding the next step, with the leaflet that came with my SCOBY telling me to refrigerate the kombucha for a few hours, allowing it to carbonate – before enjoying. However, my kombucha-making friends swear by leaving theirs at room temperature -saying that refrigeration stops the carbonation process. I’d say experiment to see if it makes a massive difference for you. Mine carbonated in the fridge as well as out of it. I’ve personally found that my plain kombucha can get fizzier, the longer it’s left in the fridge. I’ve also heard that it doesn’t really ‘go off’ as such and can be kept indefinitely – if refrigerated-. To be safe, I like to consume mine within a month, though.
- Flavouring/second fermentation of your homemade kombucha:This is my favourite part of the process – where we can flavour our homemade kombucha and allow it to get its second fermentation and carbonates like soda. Sweet, fruits added to the kombucha will encourage a lot of carbonation for super bubbly results. My current favourite option is pomegranate kombucha – I love the fresh, punchy flavour.
- To get pomegranate juice, first, deseed two pomegranates in a bowl of water. This is an easy way to get the seeds cleaned. Then using a nut milk bag or a muslin cloth, squeeze as much juice as you can. This is your fresh pomegranate juice.
- To flavour 2L of pomegranate kombucha, you only need about 3/4 cup of fruit juice. The fruit juice only needs to be about 10% of the total liquid content. Of course, you can add a bit more or less, to suit your taste.
- Use bottles (or a big bottle) with caps that can withstand pressure. The natural sugars from the fruit will lead to natural fizz (creation of CO2). Fill up only about 3/4 of the bottles for this pomegranate kombucha.
- Keep the bottles in room temperature, in a warm dark place for around three days. And every day, "burb" the bottles to remove the pressure (open and close the caps lets the CO2 out).
- Taste test the flavoured brewing kombucha in 3 days. The longer you leave it, the fizzier it will get until it suits your taste. **
- Once ready, refrigerate. As long as it’s refrigerated, I’ve heard you can keep it indefinitely. I usually consume it within 2-4 weeks, while preparing new batches consistently – so I never run out.
- Kombucha is best enjoyed cold or over ice. It can also be added to cocktails. I drink kombucha daily since beginning to make my own kombucha at home, and I love it.
Video
Notes
- For more tips on storing your SCOBY and more then read the full blog post.
- Also, note – make sure you don’t use jars with a metal top for this process. Metal can affect the taste and quality of your kombucha. I like to use glass or plastic flip-top jars for my homemade kombucha. I ferment it in a wide jar, to begin with then transfer it to a flip-top glass bottle for the flavouring/ second ferment. I’ll then sometimes add individual portions to small metal-capped bottles, as this shouldn’t affect the flavour at this point.
- * your SCOBY might float at the surface. However, it could also sink to the bottom or even float sideways- this is all normal. The SCOBY may also grow little brown strings below it – this is also normal.
- ** Alternatively, if you’re worried about affecting the carbonation this way, then you could pour your first batch of homemade kombucha into a plastic bottle. When the bottle gets rock hard, this means it’s full of air, and your kombucha will be very fizzy. You’ll then know for your second batch, how long it took to carbonate adequately and will be able to do it in glass bottles with no ‘burb’ required.
Nutrition
Nutrition information is automatically calculated, so should only be used as an approximation.


Thank you!
So,hello Samira, first of all I do folllow you on IG and I love everything that you do; even when I can make little beside your recipes XD. My thought is how I can make my own scoby, from my own tea. I’m trying to figure it out.
Hope you’re having an amazing weekend,
Hi Cara,
Thank you so much, so happy to hear! 🙂
If you want to make your own SCOBY, you can follow the same steps on my blog to make the tea and instead of adding a SCOBY with its starter liquid, you just add 1 cup of unflavored, unpasteurized raw kombucha (sometimes you may find a small little SCOBY brewing in the raw kombucha already).
If you follow all the steps on my blog correctly, you will see groups of tiny bubbles forming on the surface and eventually a thin transparent, jelly-like film will form and after a few more days it will thicken and you will have your own SCOBY. I hope this helps 🙂
Thank you!
Love KT so much
Thank you for your comment, Vivie.
This is a very well-written and informative guide to getting started with homemade kombucha!
However I feel like suggesting that people spend $15-$20 on 8oz of starter tea and a pellicle/SCOBY is a bad recommendation. The starter tea in these packs is no different than unflavored commercial kombucha you’d buy at the grocery store at $4 for 12-16 oz, and the commercial stidd works perfectly well as starter tea as long as it’s raw/unpasteurized. I started my kombucha 8 months ago with just a bottle of GTs original kombucha.
And the pellicle that’s included in those expensive starter packs is entirely unnecessary (though it’s definitely one of the more interesting aspects of homemade kombucha). As you mentioned, every brew will produce a pellicle, but many kombucha brewers simply throw this away or compost it after every batch.
Thank you for your suggestion, Edwin! That is also a good alternative method to grow a SCOBY.
is the sugar absolutely necessary for the recipe? I’m doing keto and attempting to avoid it altogether.
Hi Taylere,
Yes, the sugar is necessary as this is what feeds the SCOBY and helps with the fermentation process. However, by the time the kombucha is ready, there is very little sugar left (as it’s been consumed by the culture). You could try using a bit less sugar, but the fermentation might take much longer then. I hope this helps.
So, I have made my first batch! At ten days I liked the flavor so I poured into pre-sanitized bottles (boiled) and added cherry juice from fresh smashed cherries. I drank one immediately, which was so yummy. The rest went on the counter covered in towels. I am burping them about 3 times daily — today I noticed they have each grown a mini SCOBY! I didn’t see that in your instructions… Did I mess up?!?! My brain tells me that is normal as the little SCOBY bits are still in the liquid.. but I worry so I wanted to ask!
Also, should I begin a SCOBY hotel of just flavored ones (I am definitely going to make fruit leather from your recipe so why not the flavored ones as well, right??).
Thank you!
Hi Veronica,
I’m glad to hear you liked it and thank you for your feedback. Yes it’s normal for mini SCOBIES to form in the bottles. I wouldn’t recommend making a flavored SCOBY hotel, it needs to be in a clean/sterile environment and if you introduce any flavorings or fruit, the hotel will start moulding. If you want to make fruit leather with your SCOBIES, I’d suggest following the recipe – and only add any fruit when you blend all the ingredients together. I hope this makes sense.
Thrilled to have found you!
Thank you for this incredibly thorough recipe. I’ve been obsessing about making kombucha, and def feel confident to do it now
Thank you so much! That means a lot as I spend a lot of time to try and make sure that my posts are as useful and helpful as possible for everyone reading 🙂 Let me know how you enjoy your homemade kombucha!
Thank you Samira! I actually grew own scooby and am already excited try out different flavor flavours.
I grew two scoobie mothers, one from an old bottle of kombucha and one from a starter liquid.
If anyone wants to try it on your own, I recommend looking for “Kefirko” in Google. I bought a started from the them since I didn’t believe my DiY will grow
Growing your own scooby sounds so exciting 🙂 Thanks for the tip!