
This post may contain affiliate links. Please read our disclosure policy.
Making homemade milk chocolate doesn’t need to be scary or difficult. This homemade chocolate recipe uses just 4 ingredients and a few simple steps for a creamy, rich, naturally sweetened, raw milk chocolate.
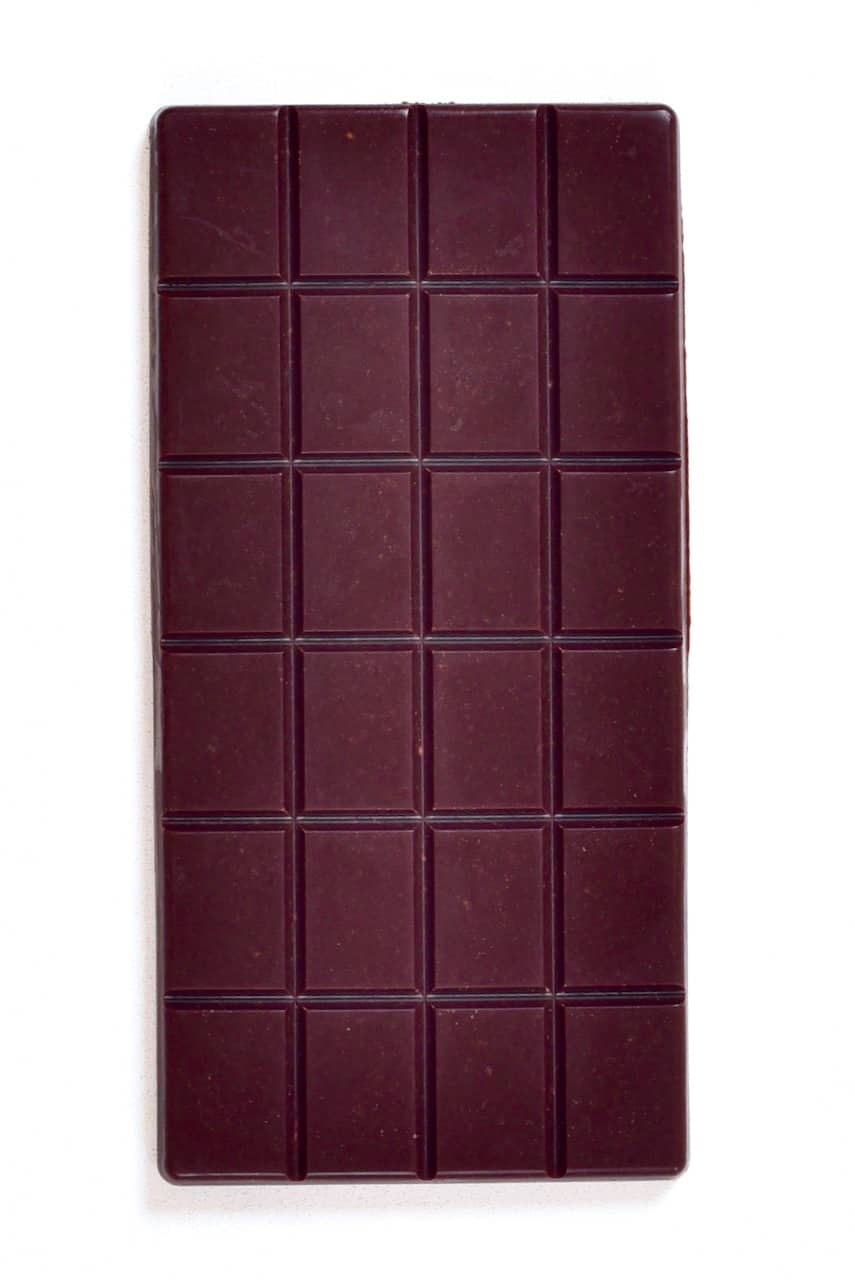
For those deciding to make a homemade chocolate recipe for the first time, dark chocolate is usually the go-to. However, it’s just as simple to make this delicious homemade milk chocolate recipe with just four ingredients and no refined sugars!
This homemade chocolate recipe enables you to be 100% in control of the amount of sweetener included, is easily customized and flavored, and healthier than traditional chocolate due to the use of raw, unprocessed cacao butter and powder.

Learning how to make chocolate at home is also great for those who love white, milk, and dark chocolate, as the process is almost identical – and incredibly simple to flavor too. In fact, if you’re interested in making white chocolate and sweetened or unsweetened dark chocolate, I have a recipe for that too!
In fact, I even have the full method for how to make chocolate from bean to bar; made 100% at home using cocoa beans.
Want to save this recipe?
Cacao vs. Cocoa
Within this recipe, you can use cacao or cocoa butter and powder within the recipe. I have used cacao, though, for several reasons.
I talk about the process of gathering the various individual ingredients from the cocoa pod in my white chocolate post and go through the entire chocolate-making process here. Ultimately cacao refers to products taken from the un-roasted beans – thus the least (minimally) processed option as well as being ‘raw’ compliant for those eating a raw diet. Due to the lack of processing, this is also meant to be the healthiest option (it is more natural).
Cacao is actually one of the highest sources of antioxidants in foods, containing protein, fiber, iron, magnesium, as well as a high amount of flavonoids.
In comparison, cocoa powder has been heat-treated, which will have reduced some of the nutrition. However, it is still fairly good nutritionally and the more cost-effective option of the two.
In terms of flavor, cacao powder is more bitter in flavor but also is a richer ‘chocolate’ flavor. Meanwhile, cocoa powder is slightly more mellow. You can actually make your own cacao powder too!
How To Make Milk Chocolate
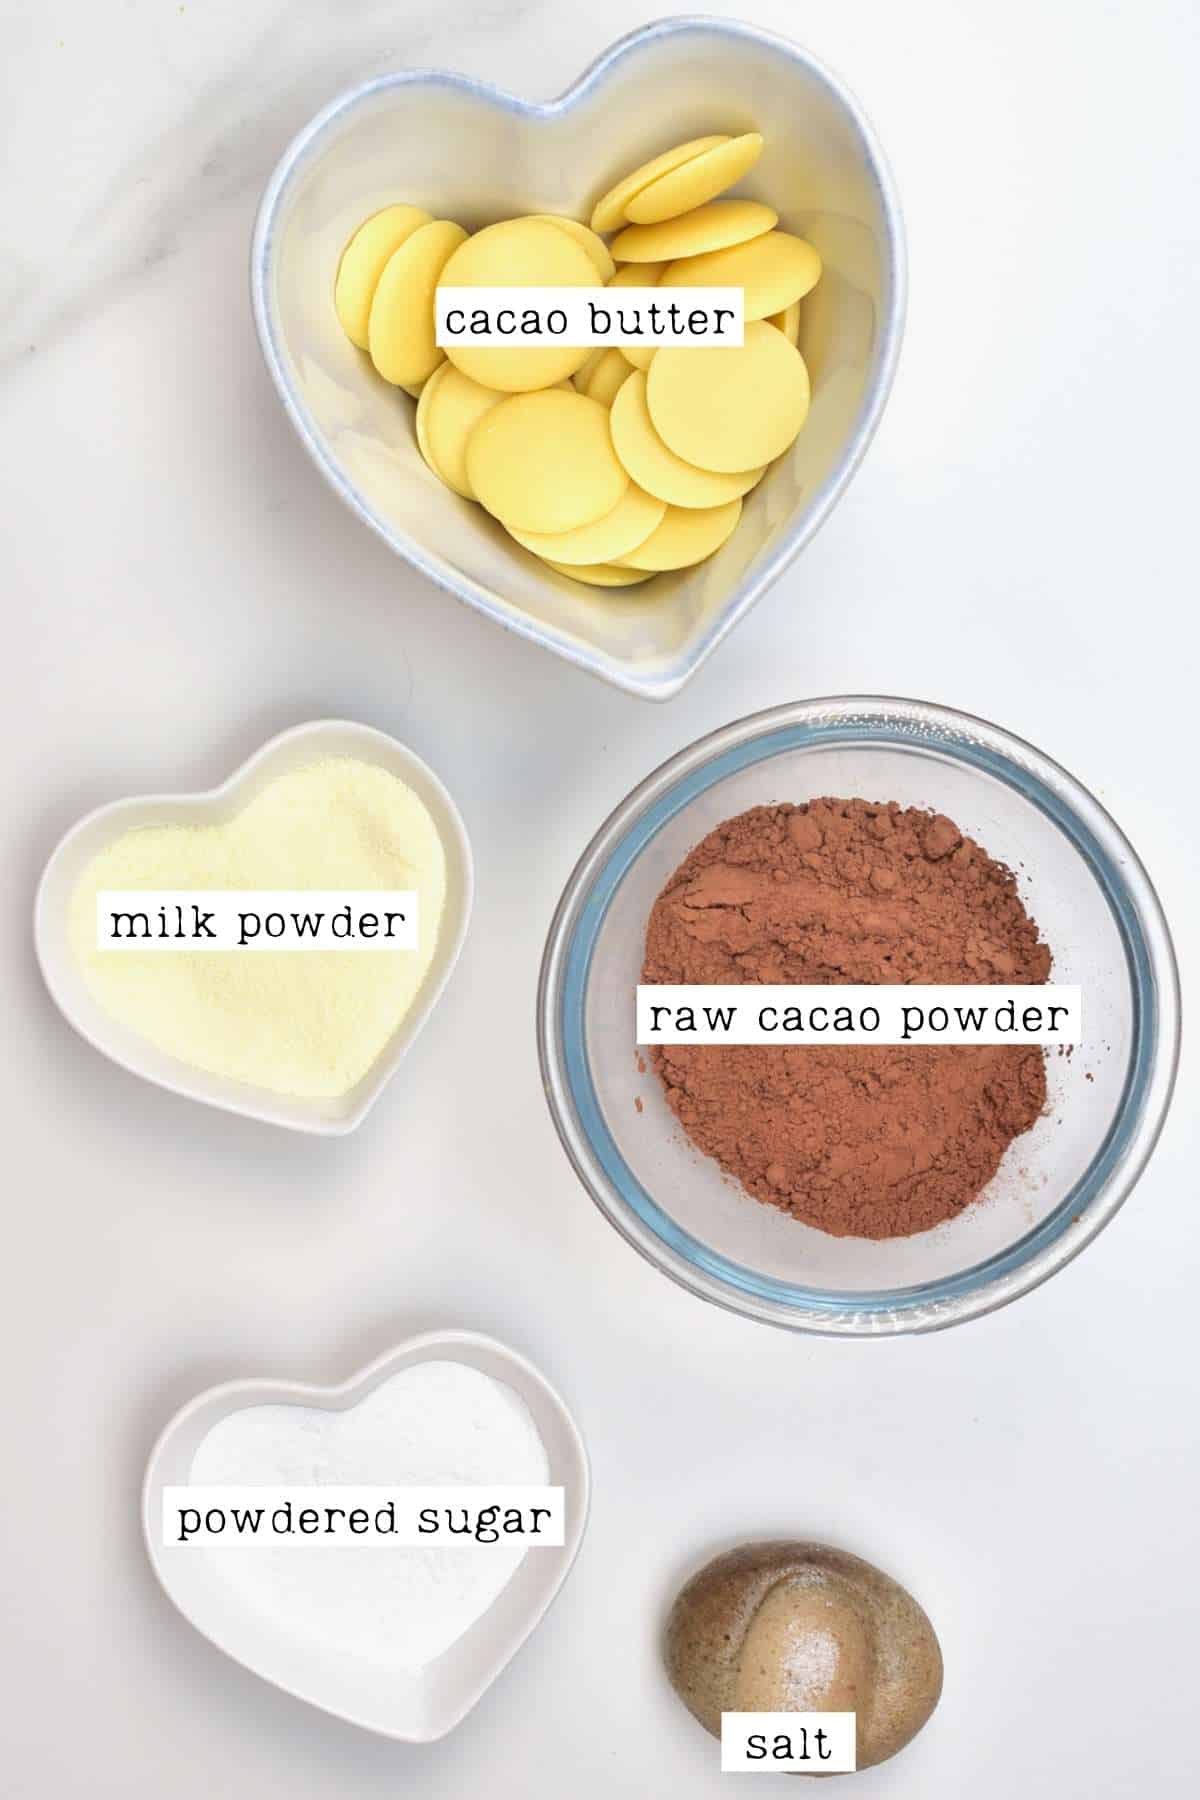
This homemade milk chocolate comprises just 4 ingredients (plus salt) and a few simple steps. The ingredients include:
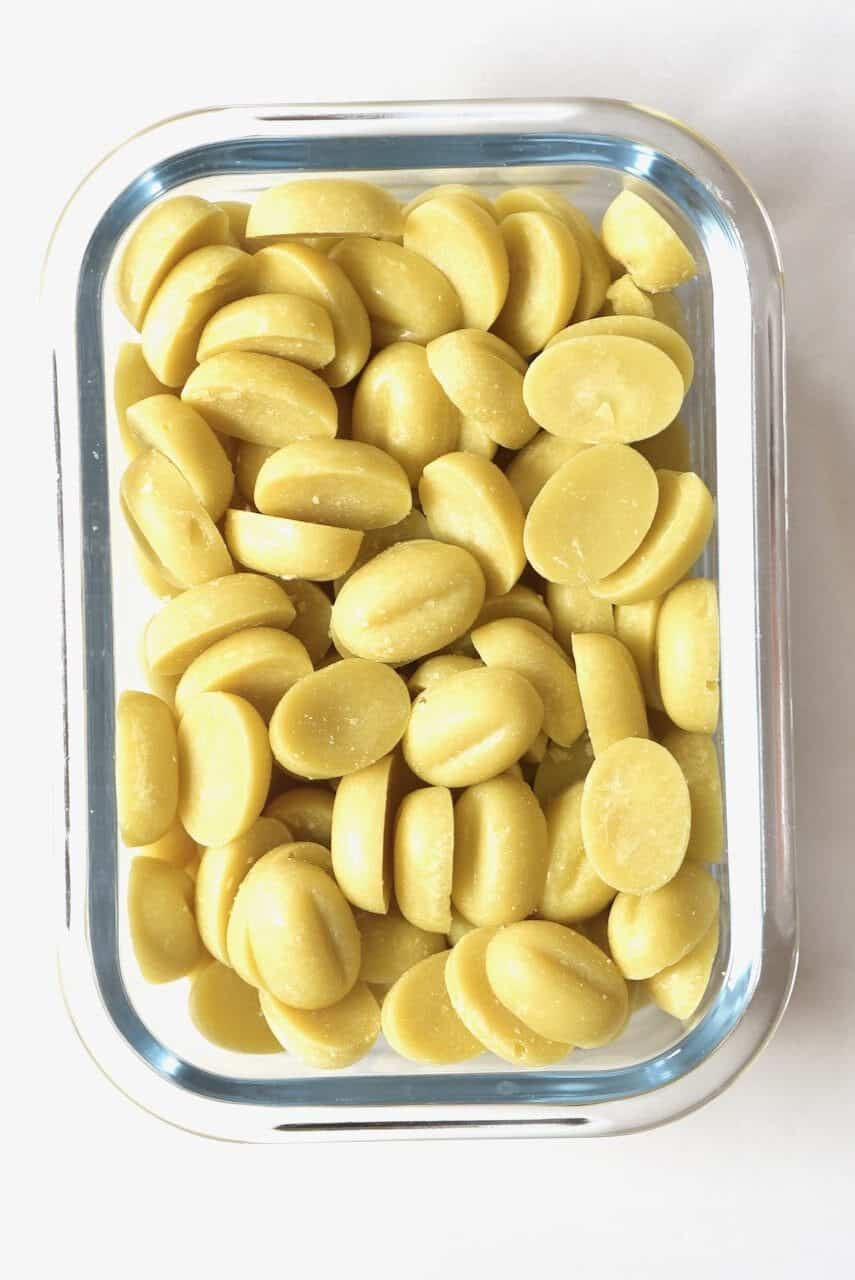
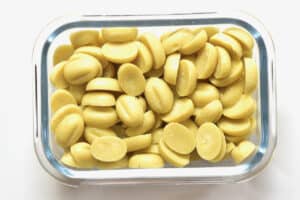
- Cacao Butter (or cocoa butter) – Make sure to use food-grade.
- Dry Milk Powder – or Coconut Milk Powder/soy milk powder for a dairy-free version.
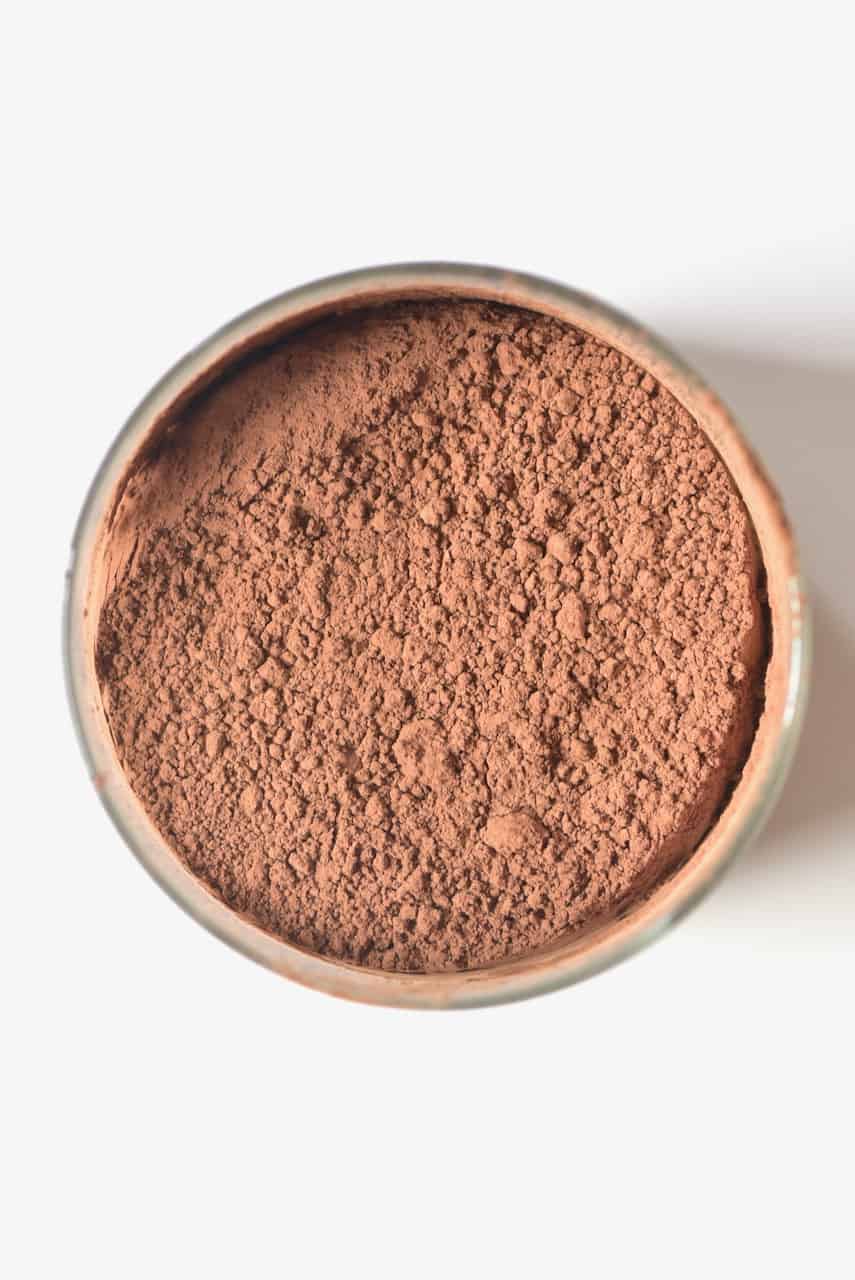
- Cacao Powder (or cocoa powder) – This is usually very easy to source in stores or online. You can even make it at home!
- Salt – Just a pinch of salt really enhances the cacao flavor and adds depth to it.
- (Optional) Sweetener – Use your favorite powdered sugar/sugar-free sweetener: coconut sugar, cane sugar, monk fruit powder, erythritol, etc. AVOID liquid sweetener, though, like maple, as they can cause the chocolate to seize. If you only have granulated sugar, you can make your own powdered sugar.
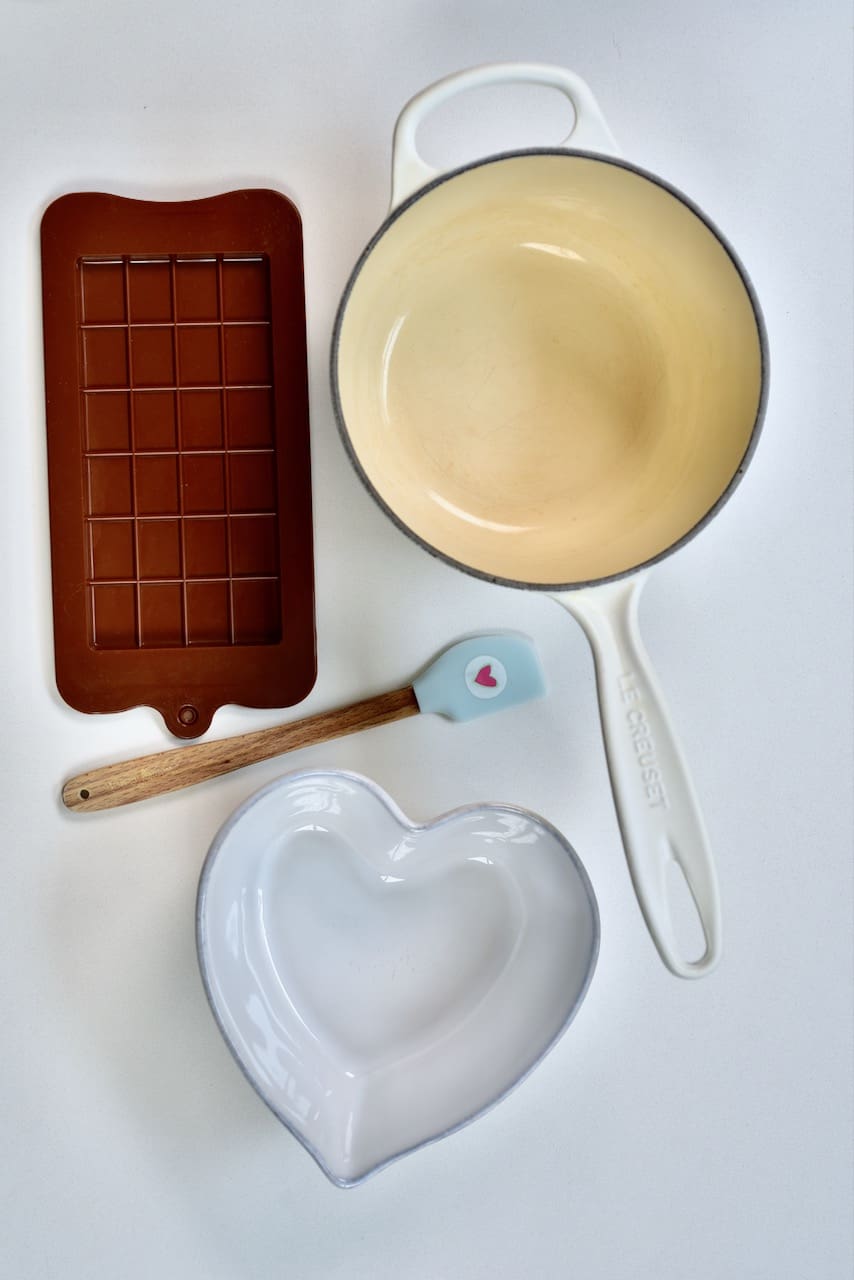
Also Needed
- Chocolate mold – I use a 100g silicone chocolate mold. If you want to use a non-flexible mold, then you’ll need to temper the chocolate. You can even get a chocolate chip mold for homemade milk chocolate chips.
- Double Boiler – You’ll need a small pan with a heat-proof bowl to fit over it.
- Silicone spatula – Avoid using porous materials like wood which could accidentally get water into the homemade milk chocolate and cause it to seize.
The Method
Step 1: Melt the cacao butter
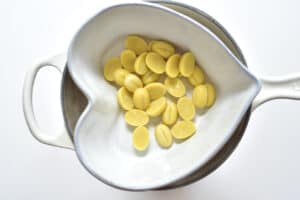
Begin by setting up your double boiler by adding a few inches of water to a medium saucepan and topping with a heat-proof bowl that is slightly larger than the circumference of the pan. Make sure the bottom of the bowl isn’t touching the water.
Bring the water to a gentle simmer over medium-low heat. Meanwhile, if you have a large piece of cacao butter, chop it into small, even pieces. This will help it to melt quickly and evenly without scorching.
Add the cacao butter to the bowl and whisk or stir gently but often, to reduce the scorching risk.
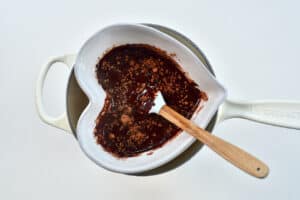
Step 2: Add the remaining ingredients
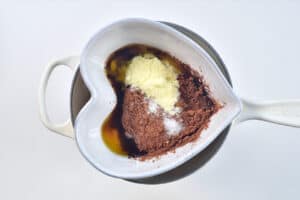
Once completely melted, then sift in the cacao powder and milk powder and stir to combine thoroughly.
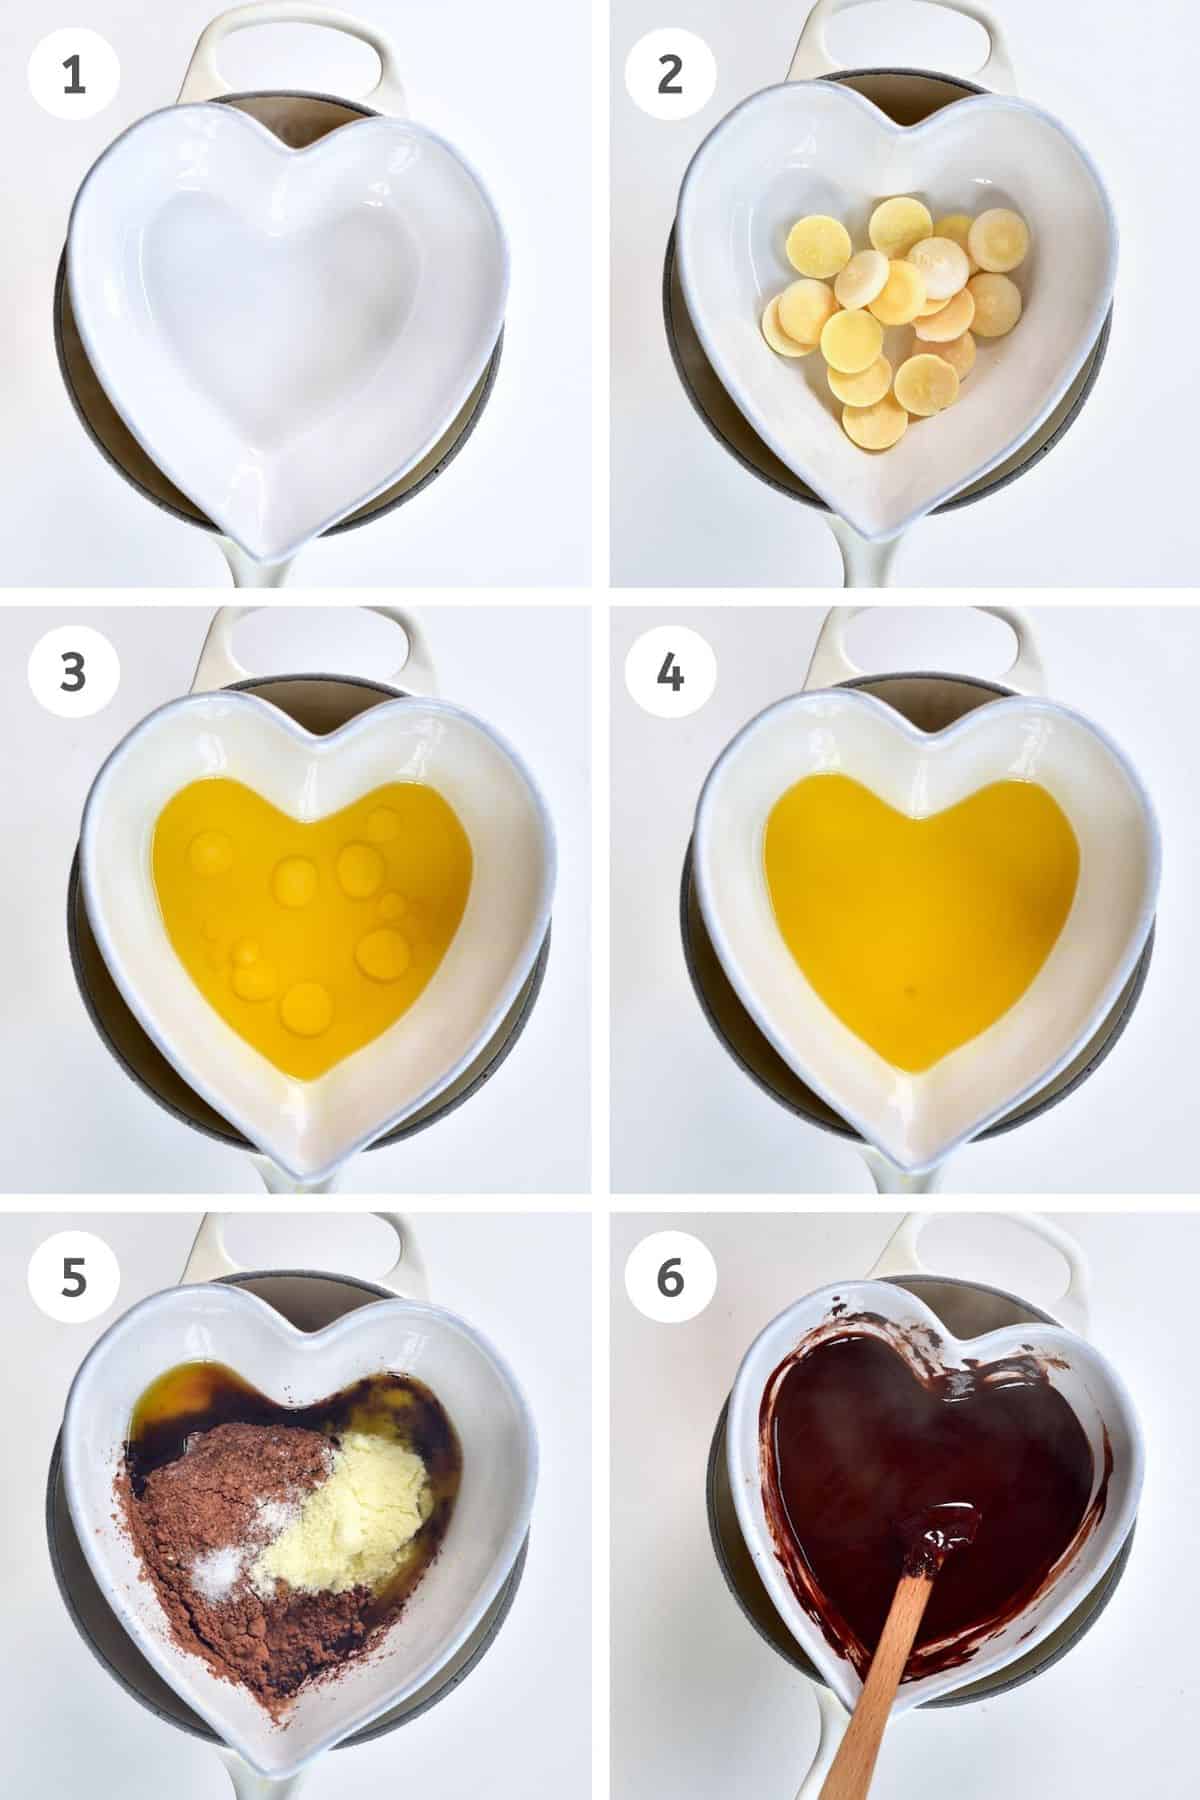
Add the powdered sweetener of your choice (sifting it in to avoid grittiness), and mix once more until smooth and combined. Turn off the heat and remove the bowl from the pan.
Add any additional flavorings at this point once it has been removed from the heat. I.e., vanilla powder, other natural flavor oils, coffee, spices, freeze-dried fruit, etc.
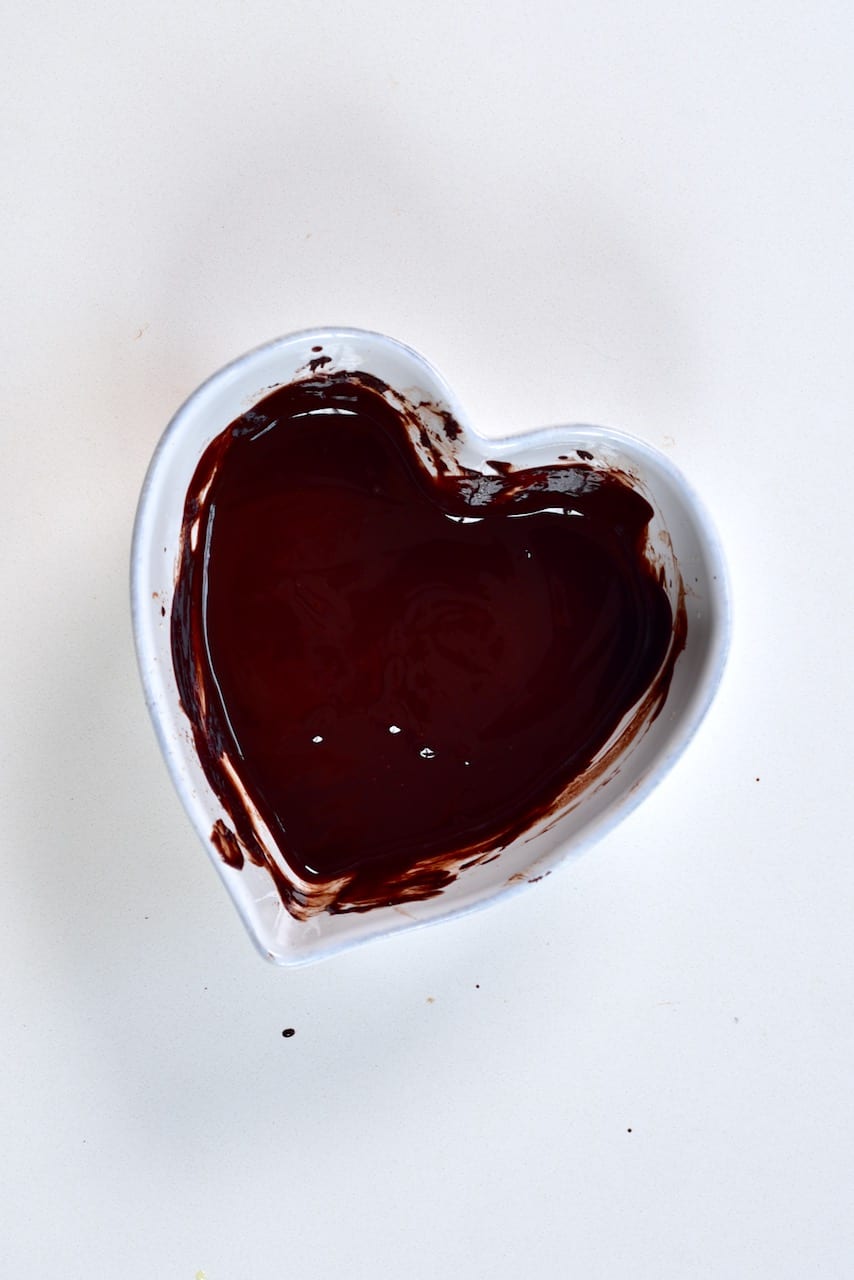
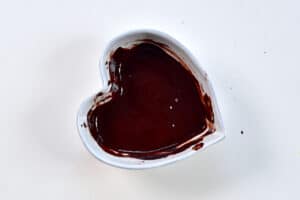
Leave to cool for a few minutes, not too much, or else the chocolate will begin to solidify – just enough to cool down slightly. Give one final stir.
(Optional) Step 3: Grind The Chocolate
If you have a chocolate grinder (chocolate melanger), you can let it run for several hours or even overnight, to grind the chocolate. This will grind the particles within the chocolate into tiny tiny microparticles until they are no longer discernible by the human tongue – like commercial chocolate, so you never have to worry about gritty homemade chocolate.
You can also do this by hand with a mortar and pestle (just until your arm gets tired) – this won’t work as well as the professional machine, but every little will help for the smoothest of textures.
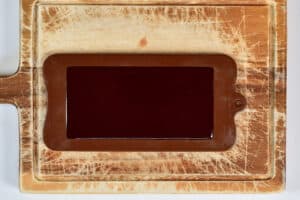
Step 4: Mold the milk chocolate
Pour the mixture into the candy mold(s) of your choice and leave it in the freezer to set.
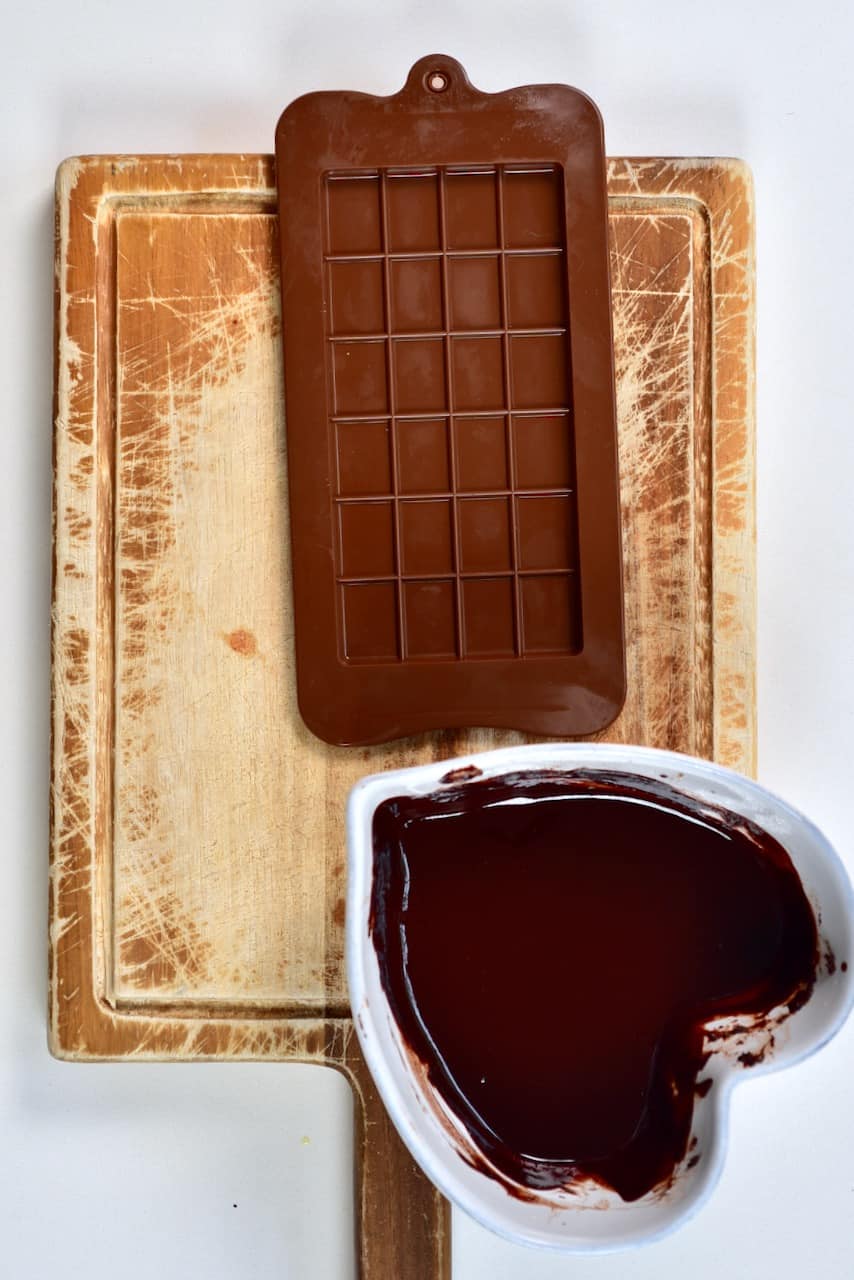
This should only take 20-30 minutes and then can be transferred to the fridge (or kept in the freezer).


How to Store
Due to being untempered, this homemade milk chocolate is best stored in the fridge, with a shelf life of two weeks. You can also store the chocolate in the freezer for a few months, likely 3-4 months, although they’ve never lasted longer than a couple of weeks before I’ve eaten it all.
FAQs
You sure can – if you want to make any truffles/ filled chocolates or use non-flexible chocolate molds, then make sure to temper the chocolate first.
If, at any point, your chocolate seizes, then slowly add a little additional cacao butter or vegetable shortening (1 tsp at a time), and it should help bring it back together.
Oddly, even though we do everything possible to avoid any water getting into the chocolate, if your chocolate happens to seize, you could add water to fix the chocolate. There seems to be something about the % of water added that will loosen it up again. However, it’s then best used to drizzle rather than to mold into chocolate bars as it won’t mold and set or temper.
Further Notes & Recipe Variations
- You can use coconut oil instead of cocoa butter if preferred. In fact, this can be somewhat easier to work with. However, it won’t be able to be tempered.
- Make sure to use food-grade cacao butter, as some are sold for cosmetic purposes.
- Make sure to use unsweetened cocoa, if using cocoa powder, to control the sugar content.
- Check out my white chocolate post for the best way to flavor homemade chocolate along with several flavor combinations.
- If you want to make topped chocolate bars, then sprinkle your toppings of choice into the silicone molds before pouring over the melted milk chocolate.
- I never temper chocolate I’ve made just for snacking at home. However, feel free to temper the chocolate if you’d prefer, as untempered chocolate is more prone to melting easily at room temperature and needs to be stored in the fridge. It also won’t have the signature ‘snap’ of tempered chocolate.
- Chef’s Note: I originally used maple syrup when sweetening this homemade milk chocolate. However, liquid sweeteners are known for causing the chocolate to seize, so I now don’t recommend this method (it works occasionally but more often than not you’ll end up with a mess!). Stick to dried powdered sugar instead!
Related Recipes & DIYs
- How To Make White Chocolate
- How To Make Healthy Dark Chocolate
- Homemade Filled Chocolates (Vegan Chocolate Candy)
- How To Temper Chocolate (Multiple Methods)
- Simple Hot Cocoa Recipe (+ Hot Chocolate Bar Ideas)
- How to make chocolate: From bean to bar!
If you use this method to make milk chocolate, let me know your thoughts and questions in the comments. I’d also really appreciate a recipe rating and would love to see your recreations – just tag @AlphaFoodie.

How To Make Milk Chocolate
Equipment
Ingredients
- 1.4 ounces cacao butter
- 0.52 ounces raw cacao powder
- 2 Tbsp Powdered sugar of your choice – coconut sugar, monk fruit powder, cane sugar, etc.
- 0.7 ounces milk powder for vegan milk chocolate use coconut milk powder
- ⅛ tsp sea salt or less- just a small pinch is needed
Instructions
- Set up your double boiler by adding a few inches of water to a medium saucepan, and topping with a heat-proof bowl that is slightly larger than the circumference of the pan. Make sure the bottom of the bowl isn't touching the water. Bring the water to a gentle simmer over medium-low heat.

- Meanwhile, if you have a large piece of cacao butter, chop it into small, even pieces. This will help it to melt quickly and evenly, without scorching.
- Add the cacao butter to the bowl and whisk or stir gently but often, to reduce the risk of scorching.
- Once completely melted then sift in the cacao powder and milk powder and stir to thoroughly combine.
- Add the powdered sweetener of your choice, and mix once more, until smooth and combined. Turn off the heat and remove the bowl from the pan.*
- Leave to cool for a few minutes, not too much, or else the chocolate will begin to solidify – just enough to slightly cool down. Give one final stir. Optional Step: Grind The ChocolateIf you have a chocolate grinder (chocolate melanger), you can let it run for several hours to grind the chocolate. This will grind the particles within the chocolate into tiny tiny microparticles until they are no longer discernible by the human tongue – like commercial chocolate, so you never have to worry about gritty homemade chocolate. You can also do this by hand with a mortar and pestle (just until your arm gets tired) – this won't work as well as the professional machine, but every little bit will help for the smoothest of textures.
- Pour the mixture into the candy mold/s of your choice and leave it to set (you can place it in the fridge or freezer to set). You can then transfer the chocolate to an airtight container and keep it in the fridge (or the freezer).
Notes
- You can use coconut oil instead of cocoa butter if preferred. In fact, this can be somewhat easier to work with. However, it won’t be able to be tempered.
- Make sure to use food-grade cacao butter as some are sold for cosmetic purposes
- Make sure to use unsweetened cocoa, if using cocoa powder, to be in control of the sugar content.
- Check out my white chocolate post for the best way to flavor homemade chocolate along with several flavor combinations.
- If you want to make topped chocolate bars then sprinkle your toppings of choice into the silicone molds before pouring over the melted milk chocolate.
- I never temper chocolate I’ve made just for snacking at home. However, feel free to temper the chocolate if you’d prefer as untempered chocolate is more prone to melting easily at room temperature.
- Chef’s Note: I originally used maple syrup when sweetening this homemade milk chocolate. However, liquid sweeteners are known for causing the chocolate to seize so I now don’t recommend this method. Stick to dried powdered sugar instead!
- If, at any point, your chocolate seizes then slowly add a little additional cacao butter or vegetable shortening (1 tsp at a time) and it should help bring it back together. You could also add water to fix the chocolate – however, it’s then best used to drizzle rather than to mold into chocolate bars.
Nutrition
Nutrition information is automatically calculated, so should only be used as an approximation.


Hello!
Is it ok to use maple syrup to make milk chocolate? Im little confused as u said no liquid sweetener for white chocolate..
Hi there,
For foolproof chocolate, it would be better to use powdered sugar and no liquid sweetener (or any liquids for that matter). Maple syrup can cause the chocolate to seize.
I have made a ton of dark chocolate using this method with no issues, but as soon as I add the milk powder, the mixture becomes grainy. I’m positive no water is getting in, and I’ve tried 3 different milk powders. Any ideas?
Hi there,
Was it grainy after grinding it? What grinding method did you try?
You may have to grind it for longer – this will result in a smoother texture. You can also try grinding just the milk powder in advance so it’s very fine. Let me know how it goes.
Hi Samira,
What kind of milk powder should be used? I used non-instant whole milk powder and as soon as I add it in with the cacao powder it becomes very grainy. I tried it twice with the same result. Am I supposed to use instant milk powder?
Hi Alina,
I recommend blending or grinding it, then sieving, to make the milk powder even smoother. You can also blend/grind the chocolate mixture to make it less grainy.
Hi, do you know any boutique / small business chocolate makers in Dubai ?
Hi Paul,
No, unfortunately not. I hope you managed 🙂
Hi, I made yesterday but mine didn’t harden in the freezer what did I wrong. It was delicious
Hi Sandra,
Did your chocolate seize at any point? Did you perhaps use a liquid sweetener?
Hi,
This is a great recipe but sometimes when i add the mapel syrup the mixture splits, can you explain to me why? Is it because i added it when the mixture was to hot?
Michelle
Hi Michelle,
It’s best not to use maple syrup or any liquids in the process as they can cause the chocolate to seize/split. I recommend using powdered sugar or powdered sweeteners. If you need to use maple syrup, make sure it is at room temperature and incorporate it slowly once the chocolate is removed from the heat.
Hi Samira.. How many grams of milk chocolate does the recipe above yield? Thx
Hello Diana,
The recipe yields about 110 grams of milk chocolate. I hope this helps.
Hello Samira,
I’m going to try to make this for my boyfriend for our 6 year anniversary, but since he’s not a big fan of maple syrup I was wondering if I can substitute it for powdered sugar and if so how much should I put? Thanks!
Hi Carmen, I am so sorry if this is a late reply :-(. Of course you can do that, normally for every ¾ cup of maple syrup, the replacement is one cup of sugar. I hope this helps,
Hi! Would love to try this recipe but we can’t easily get powder milk here.. can I substitute with liquid full fat milk?
Thanks!
Lubna
Hi Lubna,
Unfortunately, it’s best not to add any liquid ingredients (like normal milk) when making milk chocolate.
You can make your own powdered milk if you follow this recipe:
https://www.alphafoodie.com/how-to-make-powdered-milk-at-home/
Alternatively, you can replace the powdered milk with coconut milk powder or almond milk powder. I hope this helps.
I don’t exactly have the access to powdered milk and i think it would be too hard to make powdered milk from start. Do you think it is ok to use just normal milk for this recepie?
Hi Siddhi,
You can try making the powdered milk yourself – the milk just needs to be dehydrated, there is a recipe for that here on the blog.
Alternatively, you can replace the powdered milk with coconut milk powder or almond milk powder. It’s best not to add watery ingredients (like normal milk) when making white chocolate that’s why milk powder is normally used! I hope this helps.
Hello, we’ve made this using coconut butter and it’s really tasty… But not necessarily set. It holds its form but its more the texture of the inside of a lindt truffle, if that makes sense? A harder version of a gen ache. Where did we go wrong? I was hoping to make a batch and snap it up to give as Christmas presents but as it is we wouldn’t be able to do this as it would be mush!
Thanks!
Hi! You didn’t do anything wrong, it’s just that coconut butter is notorious for not setting unless frozen. Cocoa butter would be the way to go.
Thanks for the comment, Shay!
Hi Philippa,
Sorry for the late reply. The key to making “snappable” chocolate is in tempering it. That is possible with any recipe that contains cocoa butter and cocoa solids (the powder) so will be possible. You can check my post How to Temper Chocolate for the method https://www.alphafoodie.com/how-to-temper-chocolate/
How would you temper this? I’ve never made chocolate before, but want to try for a gift for someone, but would rather the chocolate be tempered. Do I need to let it solidify first and then go through the tempering process? Thanks!
Hi Nina,
Thank you for your comment. To temper chocolate, it’s very convenient to have a thermometer. The process involves heating up ⅔ of the chocolate to about 100ºF, then adding the rest to melt and letting everything cool down to about 80ºF, then heating it again to about 85ºF. I am working on a blog post describing the process in detail as well as adding a lot of tips and best practices.
Would the tempering be done before adding the cacao powder into the butter, etc? Or should I temper after completing the entire process of making milk chocolate?
Hi Geodino,
I never temper chocolate I’ve made just for snacking. If needed, I’d recommend tempering it after the chocolate bar is ready and you’ve completed the entire process.
When you grind the chocolate to help with texture do you do so before it’s set up? Or after? I plan on tempering the chocolate also.
Hi Lace,
You will have to grind the chocolate after it cooled down a bit but before it solidifies. Then you can temper it which will also help for a smoother texture.
Is this correct? Mold it into a chocolate bar and THEN temper it?
I assumed you’d temper it BEFORE molding it??
Thanks!
Hi Marie,
That’s correct – you temper it BEFORE molding it. I meant you temper it after you complete the process of incorporating the ingredients.
Hi, I made your chocolate and it was lovely. I’m going to try tempering the next batch, however I read that you can’t temper chocolate that is made with coconut oil as it’s a chemical process of the cacao butter. I used coconut oil for the last batch so do I need to use cacao butter instead this time? Thanks
Hi Rachel,
Glad you liked it. Yes, that’s correct. If you want to temper it, you will need to use cacao butter. I have a post on how to temper it if you want to give it a try:
https://www.alphafoodie.com/how-to-temper-chocolate/
In your further notes you say
If, at any point, your chocolate seizes then slowly adding a little additional water help bring it back together.
Did you mean more cacao butter? I have never made chocolate but I have melted it to pour in molds and if water gets inthe melted chocolate it changes the texture to unusable.
Hi Cindy,
Apologies for this, it’s meant to be cacao butter, not water. You are right that water should not be mixed in the chocolate. The cacao butter will help when the chocolate seized. Will update to correct this.