This post may contain affiliate links. Please read our disclosure policy.
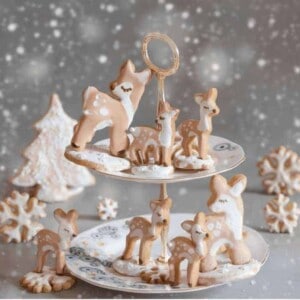
Bambi-licious fawn and snowflake orange Christmas sugar cookies (or whatever cutters you prefer), a beautiful and delicious Christmas biscuits recipe to share and enjoy!
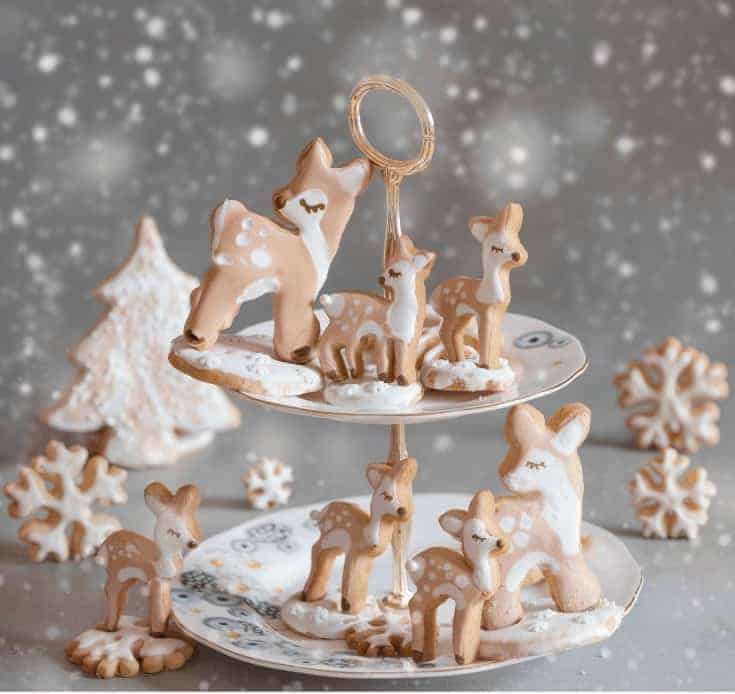
Christmas sugar cookies are one of my absolute favorite cookies to bake ever, let alone the Christmas biscuits recipe. These orange sugar cookies are lightly orange-scented, with just enough bite and deliciously sweet flavor and they make for a beautiful option for decorated Christmas sugar cookies.
Every single Christmas, without fail, I have to make a Christmas biscuits recipe to feel like the festive season has begun. Usually, this means I’m in the kitchen knocking out a large batch of homemade gingerbread cookies or even a giant gingerbread house.
But these orange sugar cookies have officially come in as the massive competition for my usual favorite. I love to serve these as part of a Christmas afternoon tea, make some for homemade edible Christmas gifts. Plus these decorated Christmas sugar cookies more than count as a fantastic alternative to gingerbread biscuits.
Although let’s be honest, I’m going to be making a batch of both because why not.
Note* If you want to give these sugar cookies as part of a gift, I love to create a little afternoon tea gift basket with some favorite tea selections, these orange sugar cookies.
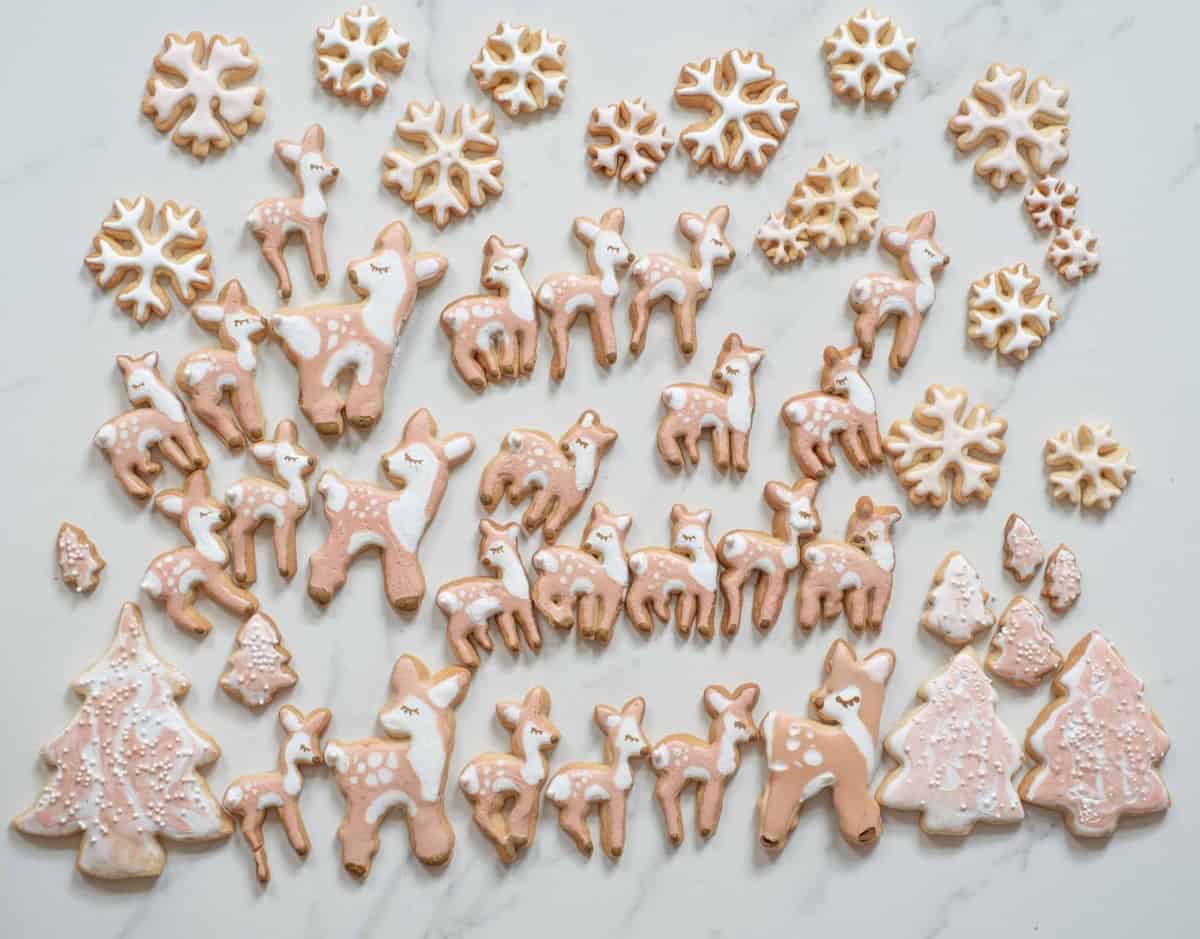
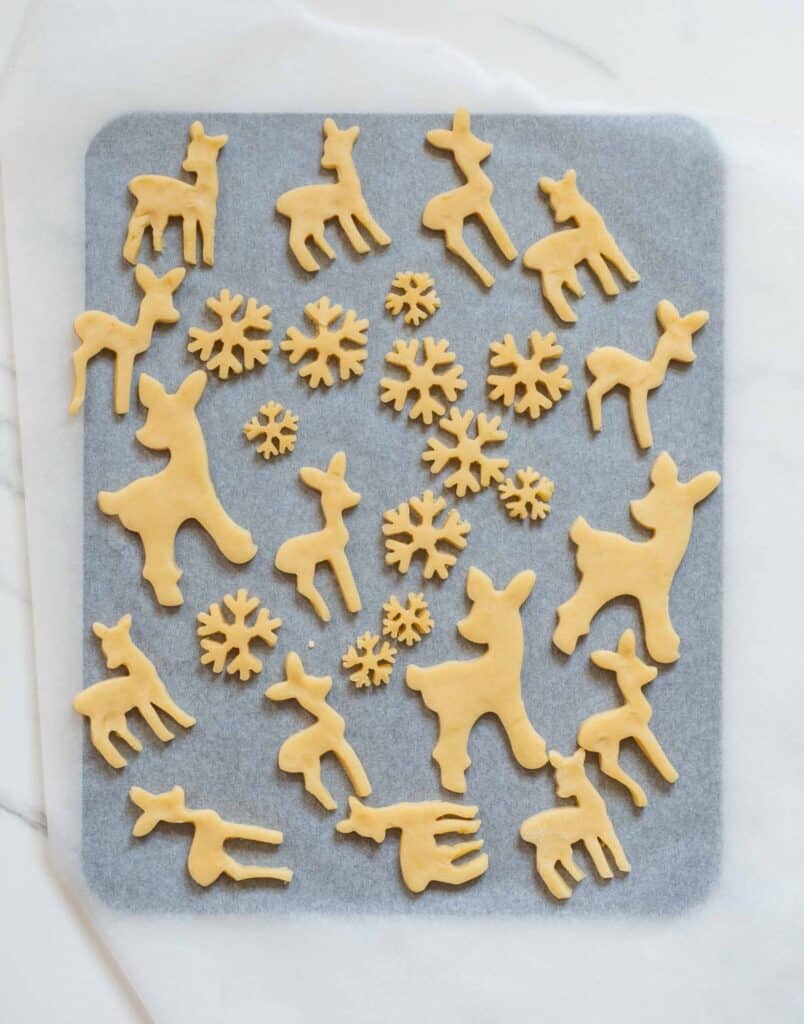
I loved letting my creative side loose when icing these orange sugar cookies too. I chose to create a variety of different shapes, including fawn, Christmas tree, and snowflake cookies, and iced these in various ways. The cookie cutters you use is entirely up to you, although I suggest giving the fawn ones a go.
The icing may look a bit complicated but trust me, after one test cookie, you’ll be on a roll!
Want to save this recipe?
How to make Christmas Sugar Cookies
As simple as this sugar cookie recipe is, there are a few issues that can occur when baking them. I’d try and address a few here for you and ‘troubleshoot’ those issues.
Why do my sugar cookies spread in the oven? There are a few reasons why cookies can spread in the oven. First and foremost, this can be because of the baking powder in the recipe. I did a few experiments to get the perfect amount for this recipe. However, if you’re still having issues, I suggest halving the baking powder in the recipe.
Don’t use butter that is too soft. Some sugar cookie recipes call for room-temperature butter, this isn’t one of them. I used cold butter cut into small cubes because I used a stand mixer to cream the butter and sugar. Therefore, to avoid the mixer overheating the butter, I begin with it cold.
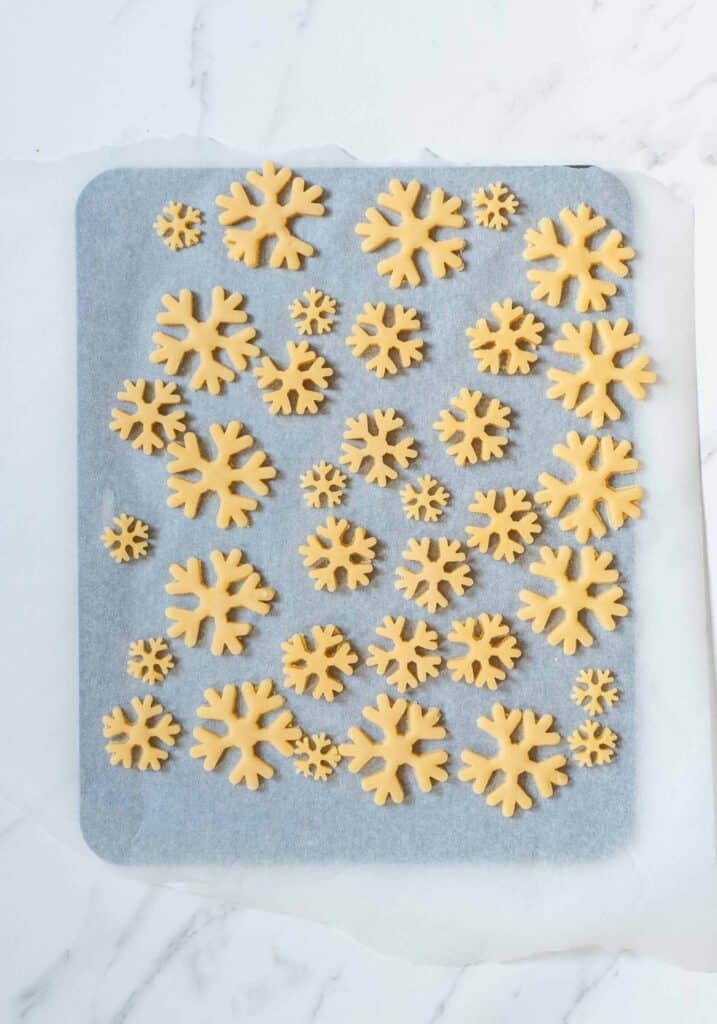
This recipe also calls for chilling the sugar cookie dough. Not only does this make the dough easier to deal with, but a chilled dough is less likely to spread in the oven. Place your cut cookies onto a parchment paper lined tray and chill in the freezer for 10 minutes before baking.
Lastly, try to avoid rolling the dough too much. I like to roll mine out into a large sheet and strategically use cookie cutters to use as much of the sheet as possible. With the leftover dough, I will aim to roll this out one more time for final cookies.
Why are my sugar cookies greasy? The answer to this once again comes down to making sure your butter isn’t too warm. If you’re mixing this sugar cookie dough by hand and want to use room-temperature butter then there a few ways to do this.
The best way is to leave your butter out of the fridge for about an hour. If you want to speed up the process, then chop your butter into small cubes first.
Never microwave it! I know it’s hard to resist when it only takes a few seconds but it will melt your butter and soften it in un-even ways and can have a massive effect on the texture and baking of your Christmas sugar cookies.
Why is my sugar cookie dough crumbly? With my Christmas orange sugar cookie recipe, this shouldn’t be an issue. However, if you are finding that your sugar cookie is crumbly, then I’d usually suggest adding a bit more ‘fat’ to the mix. I like to do this by adding 1-2 tbsp (maximum) of vegetable oil and mixing till thoroughly incorporated.
Vegetable oil helps the cookies maintain moisture – perhaps even more so than butter- without affecting the cooking process, in my experience. You’ll be surprised at how well vegetable oil works to creating delicious sugar cookie texture and moisture.
Alternatively, I’ve seen suggestions to add a tablespoon of cream. I haven’t personally tried this method; however, it seems to work well for many.
And that’s it for my troubleshooting. However, If I didn’t answer your query here then feel free to ask questions in the comments below.
Without further ado, let’s get into the orange sugar cookies Recipe.
How to Make this Christmas Sugar Cookie Recipe
The first note I’d like to make is that the recipe doesn’t come with a specific ‘yield’ amount. Because I often experiment with cookie-cutters, I tend to get different amounts of cookies from this dough every time. I like to think of this Christmas biscuits recipe as being the perfect ‘party-sized’ portion though.
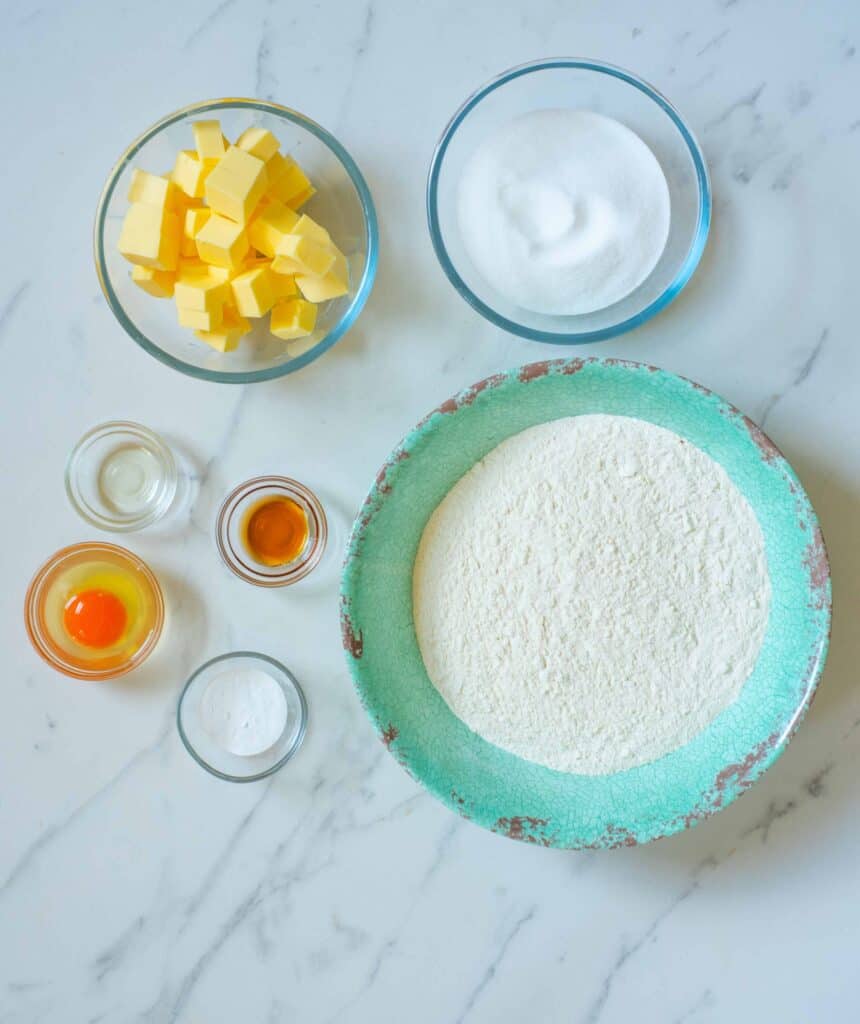
You’ll need two groups of ingredients for this recipe. The first is everything required for the orange sugar cookies; flour, sugar, baking powder, butter, vanilla extract, orange extract, egg.
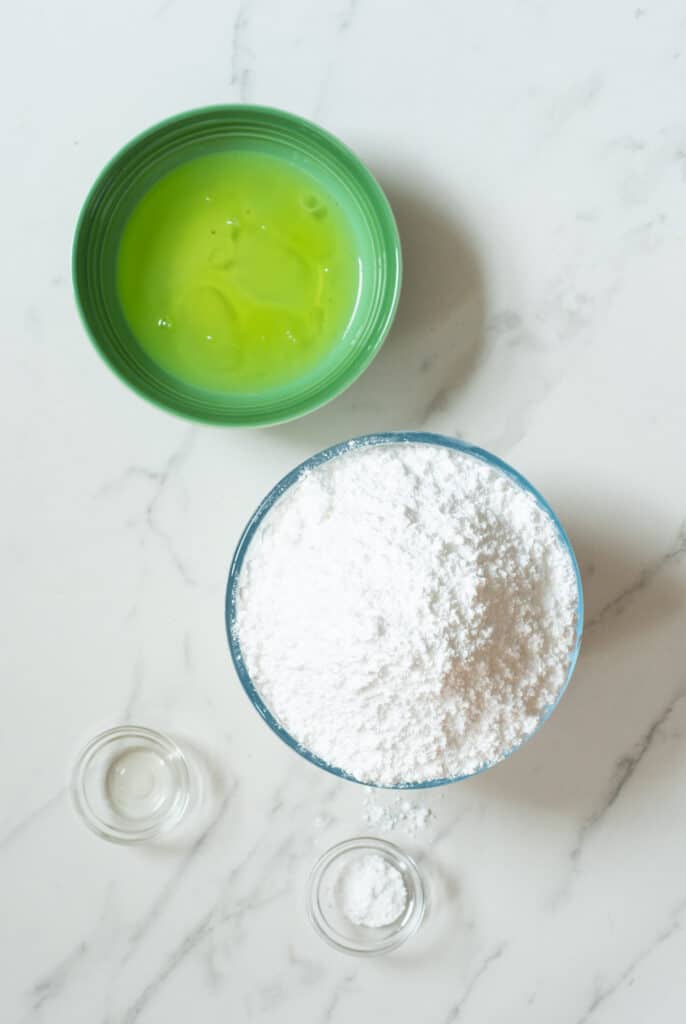
Second is the royal icing ingredients; egg whites, lemon juice, and icing sugar.
Note * For extra orange flavor, you can use the orange zest of half an orange in the recipe.
I’ve also suggested using pink, green, and orange/brown natural food colorings, having piping bags on-hand, and having some melted dark chocolate in a squeezy bottle.
The method
To begin making the orange sugar cookies, preheat the oven to 180ºC degrees and line two large baking trays with baking paper.
In a stand mixer, cream the butter and sugar together until fluffy.
You can also mix this batter by hand. However, I’d then suggest using room temperature butter (see my tips above).

Once fluffy, then add the egg and extracts till incorporated.

Meanwhile, sift the flour and baking powder into a separate large bowl and then mix till combined. Once the butter mixture is ready then begin to add the dry ingredients flour mix, one cup at a time till thick and crumbly then knead lightly for a minute with well-floured hands. Be careful not to overmix the dough as this can lead to tough cookies.
The ingredients need to be ‘just combined’ i then just lightly ‘knead’ the dough by pulling it together to form a single dough ball.

To roll the cookies out my favorite method is to lay a piece of baking paper onto my surface, place the dough on top and cover with another piece of paper (although not always necessary) and roll out until about 1/4 inch in thickness.
For perfectly even dough thickness you can use rolling pic ‘spacers’ that fit onto your rolling pin and make sure the dough is perfectly even.
I then like to chill the dough in the freezer for ten minutes. This isn’t 100% necessary as we will be chilling it after cutting the cookies anyway. However, I feel like it makes the cookies easier to cut out.

To cut the cookies dip the cutters lightly into flour then cut out the various shapes. Flour the surface, if needed, however, be aware that too much flour will affect the dough consistency.
I like to try and cut out as many cookies as I can with the first sheet of rolled dough then re-roll the scraps once more, to make the most out of the dough.
Try not to re-roll the dough out more than twice as this can lead to spreading cookies in the oven and textural issues.

Place the cookies back in the freezer for 10 minutes before baking. This will stop the cookies from spreading in the oven.
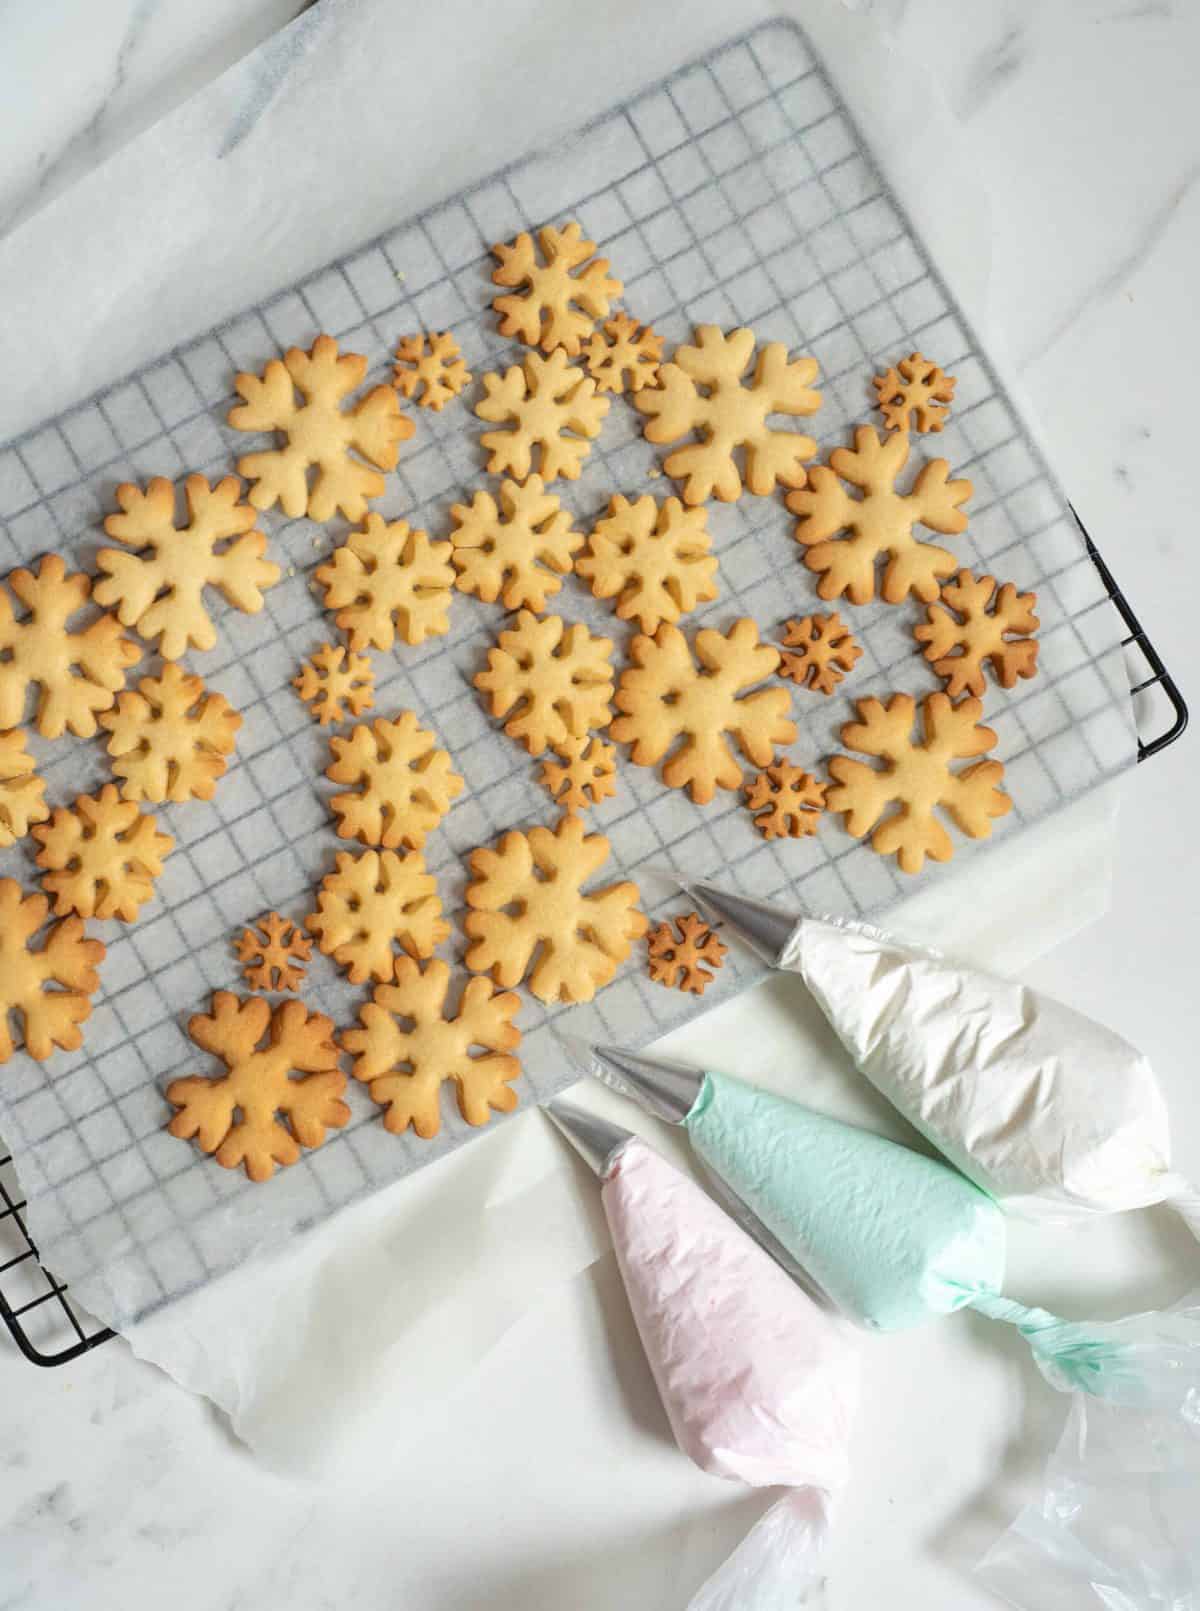
Bake in the oven on a baking sheet with parchment paper, until very lightly browned. This should take around 8-10 minutes – be careful not to leave them to burn. Leave them to cool completely on wire racks.
Confession time, I probably slightly over-baked these as the various intricate bits of the shapes are fairly brown. I over-compensated to make sure the cookies would be hard enough for the icing process.
In reality, sugar cookies are very light even after baking so 5-8 minutes should be more than enough.


Meanwhile, for the Royal Icing:
Beat the egg whites till light and foamy and then gradually add in the lemon juice and sifted icing sugar until you have a soft and creamy white icing.

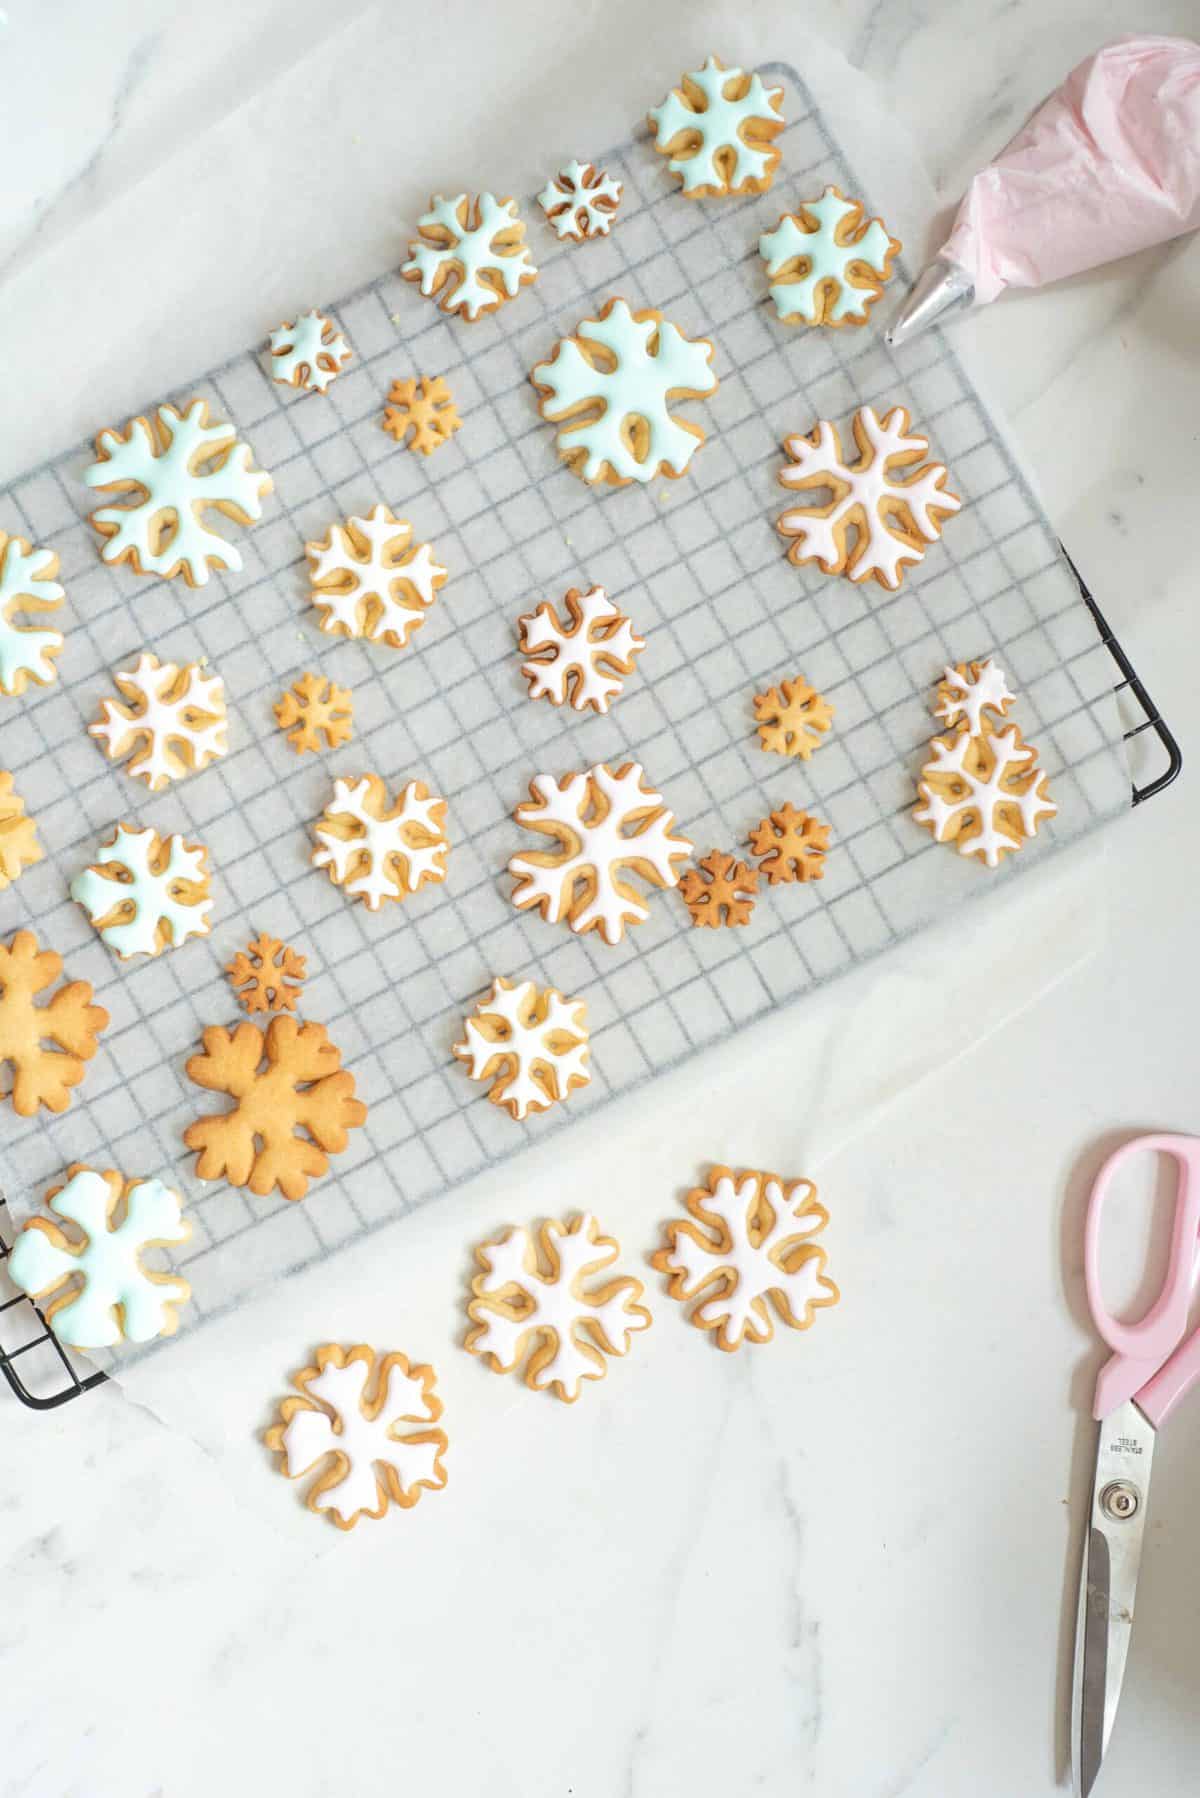
Divide between three bowls and add a couple of drops of pink, green, and orange/brown to each dish. I like to start by adding a couple of drops and building from there, so my colors don’t get too vibrant. I chose pink and green for my snowflakes, however, feel free to swap these out with other colors.
Note* Some people like to create a ‘border’ icing which is thicker and then add more liquid to create a ‘flooder’ icing. However, I didn’t find this necessary for these cookies so kept to the one mix of medium consistency.


Place each color of icing into a piping bag, twisted at the top, with a narrow nozzle – ready to pipe.
If you don’t have any icing nozzles available, don’t worry – you can also use the piping bag and cut a tiny hole at the bottom of the bag. I find that nozzles give me cleaner lines though and more control of the patterns.

To decorate the snowflake cookies
For the snowflake cookies, I simply piped out the shape that I wanted without any ‘border’, then left to dry.

To decorate the fawn cookies
For the Bambi fawn cookies, I first used an edible pen to mark out a few areas. This isn’t necessary but definitely helps create cleaner iced lines when piping.
I used brown and white for the body and melted dark chocolate for the tiny details, like the eyes and nose. You can see my video to watch the exact method: Bambi cookies – orange Christmas sugar cookies.
I wasn’t too precious with these. However, if you want perfectly even icing, use a toothpick to even out areas that the icing has pooled weirdly. You can also use it for popping any bubbles in the icing.
Leave the Christmas sugar cookies to dry completely and then transfer to an airtight container. Store these in a cool, dry place for 3-5 days.
As always, if you give this recipe a try, let me know your thoughts in the comments. Also, feel free to tag me in your recreations @Alphafoodie.
Orange Christmas Sugar Cookies – Fawns and Snowflakes
Ingredients
For the Cookies:
- 2 cups all-purpose flour
- 2/3 cup sugar
- 1 1/3 tsp baking powder
- 2/3 cup butter cold and cut into cubes
- 3/4 tsp vanilla extract
- 1/3 tsp orange extract or your favourite! other options I like are almond, pistachio and hazelnut
- 1 egg
For the Royal Icing:
- 3 egg whites
- 1 1/2 tsp lemon juice
- 4 cups icing sugar
- Pink, green and orange/brown natural food colourings
- Melted dark chocolate in a squeezy bottle.
Instructions
For the Cookies
- Preheat the oven to 180ºC degrees and line 2-3 medium/large baking trays with baking paper.
- In a stand mixer, cream the butter and sugar together until fluffy, then add the egg and extract * till incorporated. **
- Meanwhile, sift the flour and baking powder into a large bowl and mix till combined.
- Once the butter mixture is ready then begin to add the dry ingredients flour mix, one cup at a time till thick and crumbly then knead lightly for a minute with well-floured hands. Be careful not to overmix the dough as this can lead to tough cookies.
- To roll the cookies out my favourite method is to lay a piece of baking paper onto my surface, place the dough on top and cover with another piece of paper (although not always necessary) and roll out until about 1/4 inch in thickness.***
- Chill the dough in the freezer for ten minutes. This isn't 100% necessary as we will be chilling it after cutting the cookies anyway. However, I feel like it makes the cookies easier to cut out.
- To cut the cookies dip the cutters lightly into flour then cut out the various shapes. Flour the surface, if needed, however, be aware that too much flour will affect the dough consistency. I like to try and cut out as many cookies as I can with the first sheet of rolled dough then re-roll the scraps once more, to make the most out of the dough. ****
- Place the cookies back in the freezer for 10 minutes before baking. This will stop the cookies from spreading in the oven.
- Bake in the oven on a baking sheet with parchment paper, until very lightly browned. This should take around 8-10 minutes and then leave them to cool completely on wire racks.
For the Royal Icing
- Beat the egg whites till light and foamy and then gradually add in the lemon juice and sifted icing sugar until you have a soft and creamy white icing.
- Divide between three bowls and add a couple of drops of pink, green and an orange/brown to each dish. I like to start by adding a couple of drops and building from there, so my colours don’t get too vibrant. I chose pink and green for my snowflakes, however, feel free to swap these out with other colours. *****
- Place each colour of icing into a piping bag, twisted at the top, with a narrow nozzle – ready to pipe. If you don’t have any icing nozzles available, don’t worry – you can also use the piping bag and cut a tiny hole at the bottom of the bag. I find that nozzles give me cleaner lines though and more control of the patterns.
To decorate the cookies
- To decorate the snowflake cookies:For the snowflake cookies, I simply piped out the shape that I wanted without any 'border', then left to dry
- For the Bambi fawn cookies, I first used an edible pen to mark out a few areas. This isn't necessary but definitely helps create cleaner iced lines when piping.I used brown and white for the body and melted dark chocolate for the tiny details, like the eyes and nose. You can see my video to watch the exact method: Bambi cookies – orange Christmas sugar cookies.I wasn't too precious with these. However, if you want perfectly even icing, use a toothpick to even out areas that the icing has pooled weirdly. You can also use it for popping any bubbles in the icing.Leave the Christmas sugar cookies to dry completely and then transfer to an airtight container. Store these in a cool, dry place for 3-5 days.
Notes
Nutrition
Nutrition information is automatically calculated, so should only be used as an approximation.


Samira! What a detailed recipe, thank you! And I love the freezer-before-baking tip❤️ Take care, Dee xx
First of all, these are cutest and most adorable cookies I’ve seen in my life. English is not my first language but The instruccions are so easy to follow, thank you!
I just have one question, do they have a butter flavor? or with the orange, it doesn’t have an strong taste?
Your blog is so calm and nice, it’s a pleasure to read it <3