
This post may contain affiliate links. Please read our disclosure policy.


Take advantage of summer produce with this quick and simple Southern fried squash. All you need is 5 ingredients, 20 minutes, and either yellow summer squash or zucchini (or both!). Gluten-free and egg-free optional!

Fried squash is an extremely popular Southern summer side dish or appetizer. I am more than happy to finally introduce it to my kitchen in the UK.
Zucchini is available year-round in the UK. But yellow squash only pops up in limited shops and farmers’ markets in late spring and summer. I was recently able to get my hands on some, though. So I couldn’t wait to put it to work in some classic yellow squash recipes!
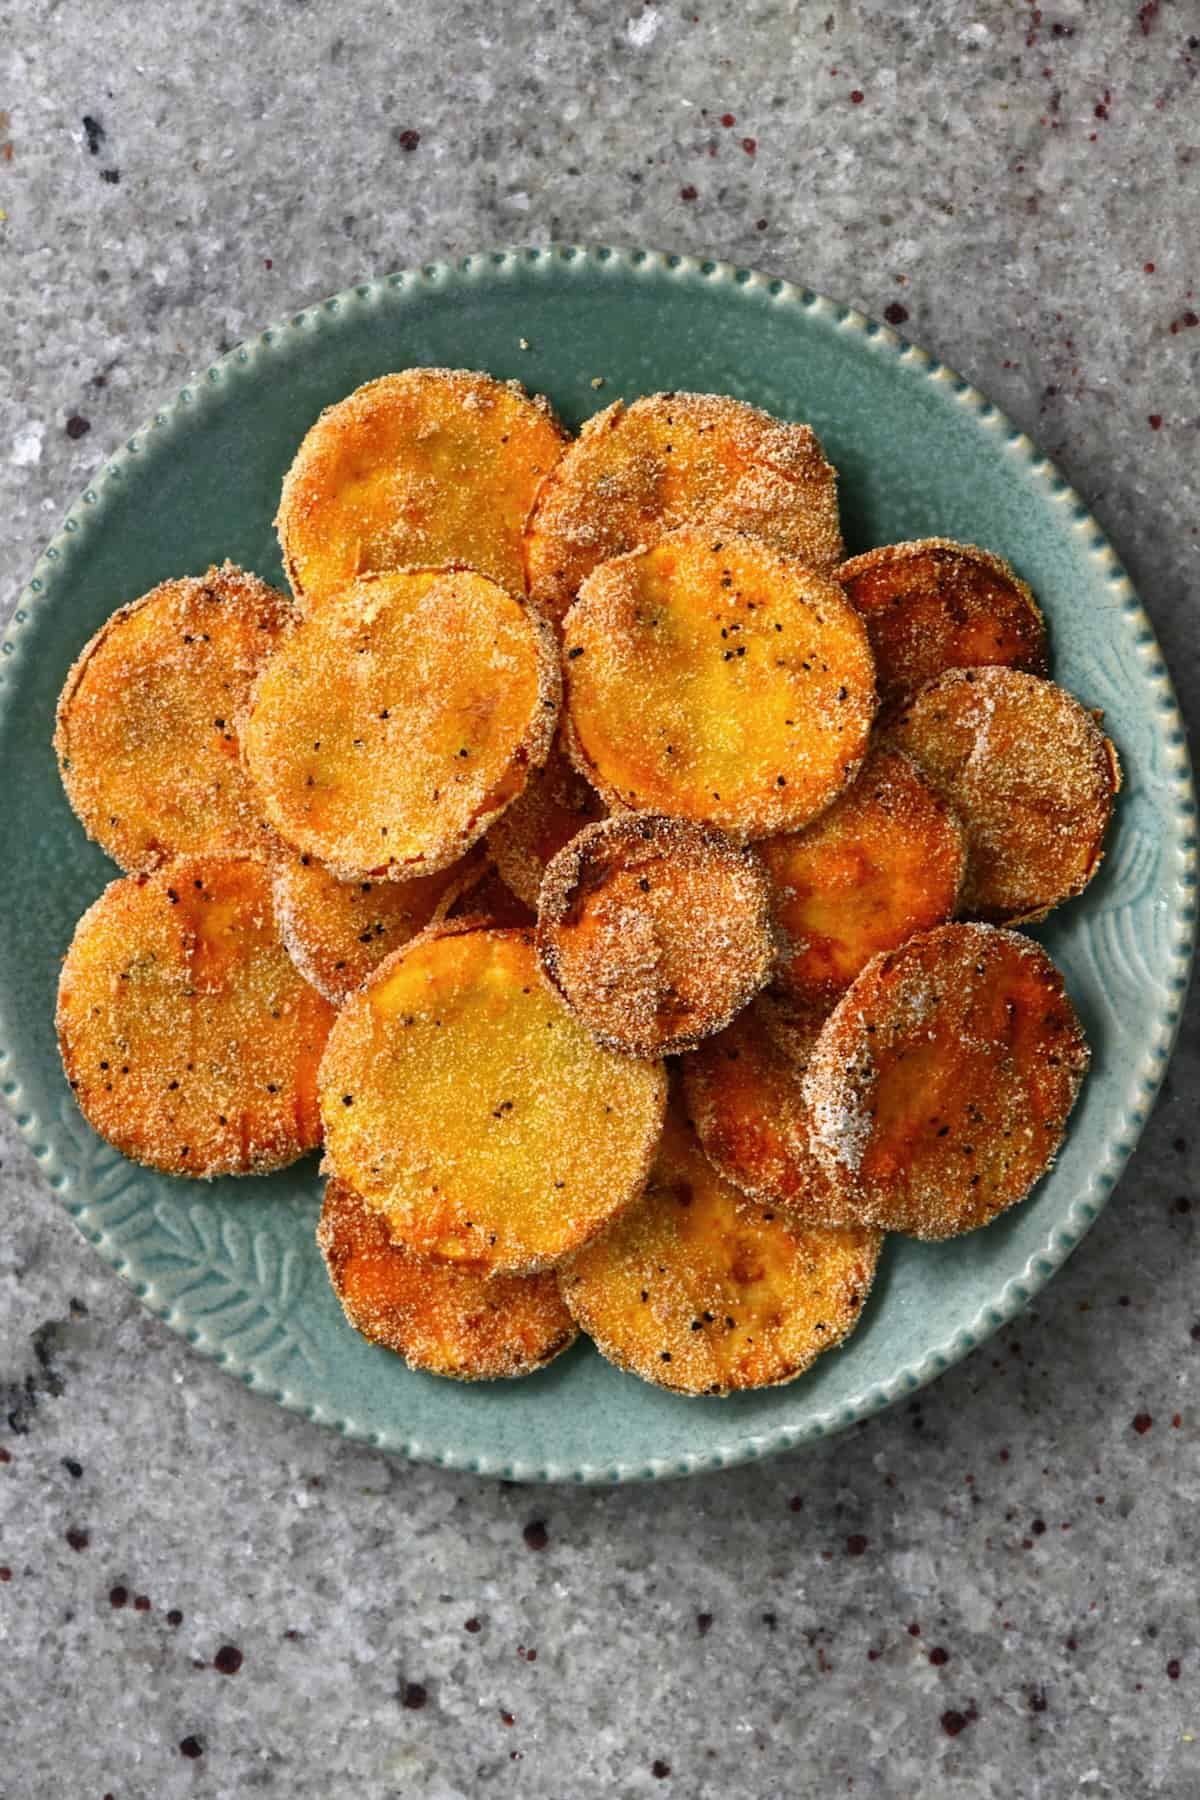
With a cornmeal coating, this fried yellow squash is wonderfully crisp and golden outside with a tender middle. Enjoy it served at a BBQ, or as part of a larger meal. Plus, you can make it with either yellow squash or zucchini!

Best of all, this fried zucchini/yellow squash recipe is super simple. All you need is a handful of ingredients with a fuss-free method. There are several ways to adapt it to your dietary and flavor requirements. Check out the FAQs below for a bonus air fryer squash method!
Zucchini and yellow squash are interchangeable in most recipes. So you might also enjoy using them to make a squash casserole, grilled zucchini, air-fried fries, or even pan-fried zucchini. It’s practically impossible to run out of ways to enjoy them!
Want to save this recipe?
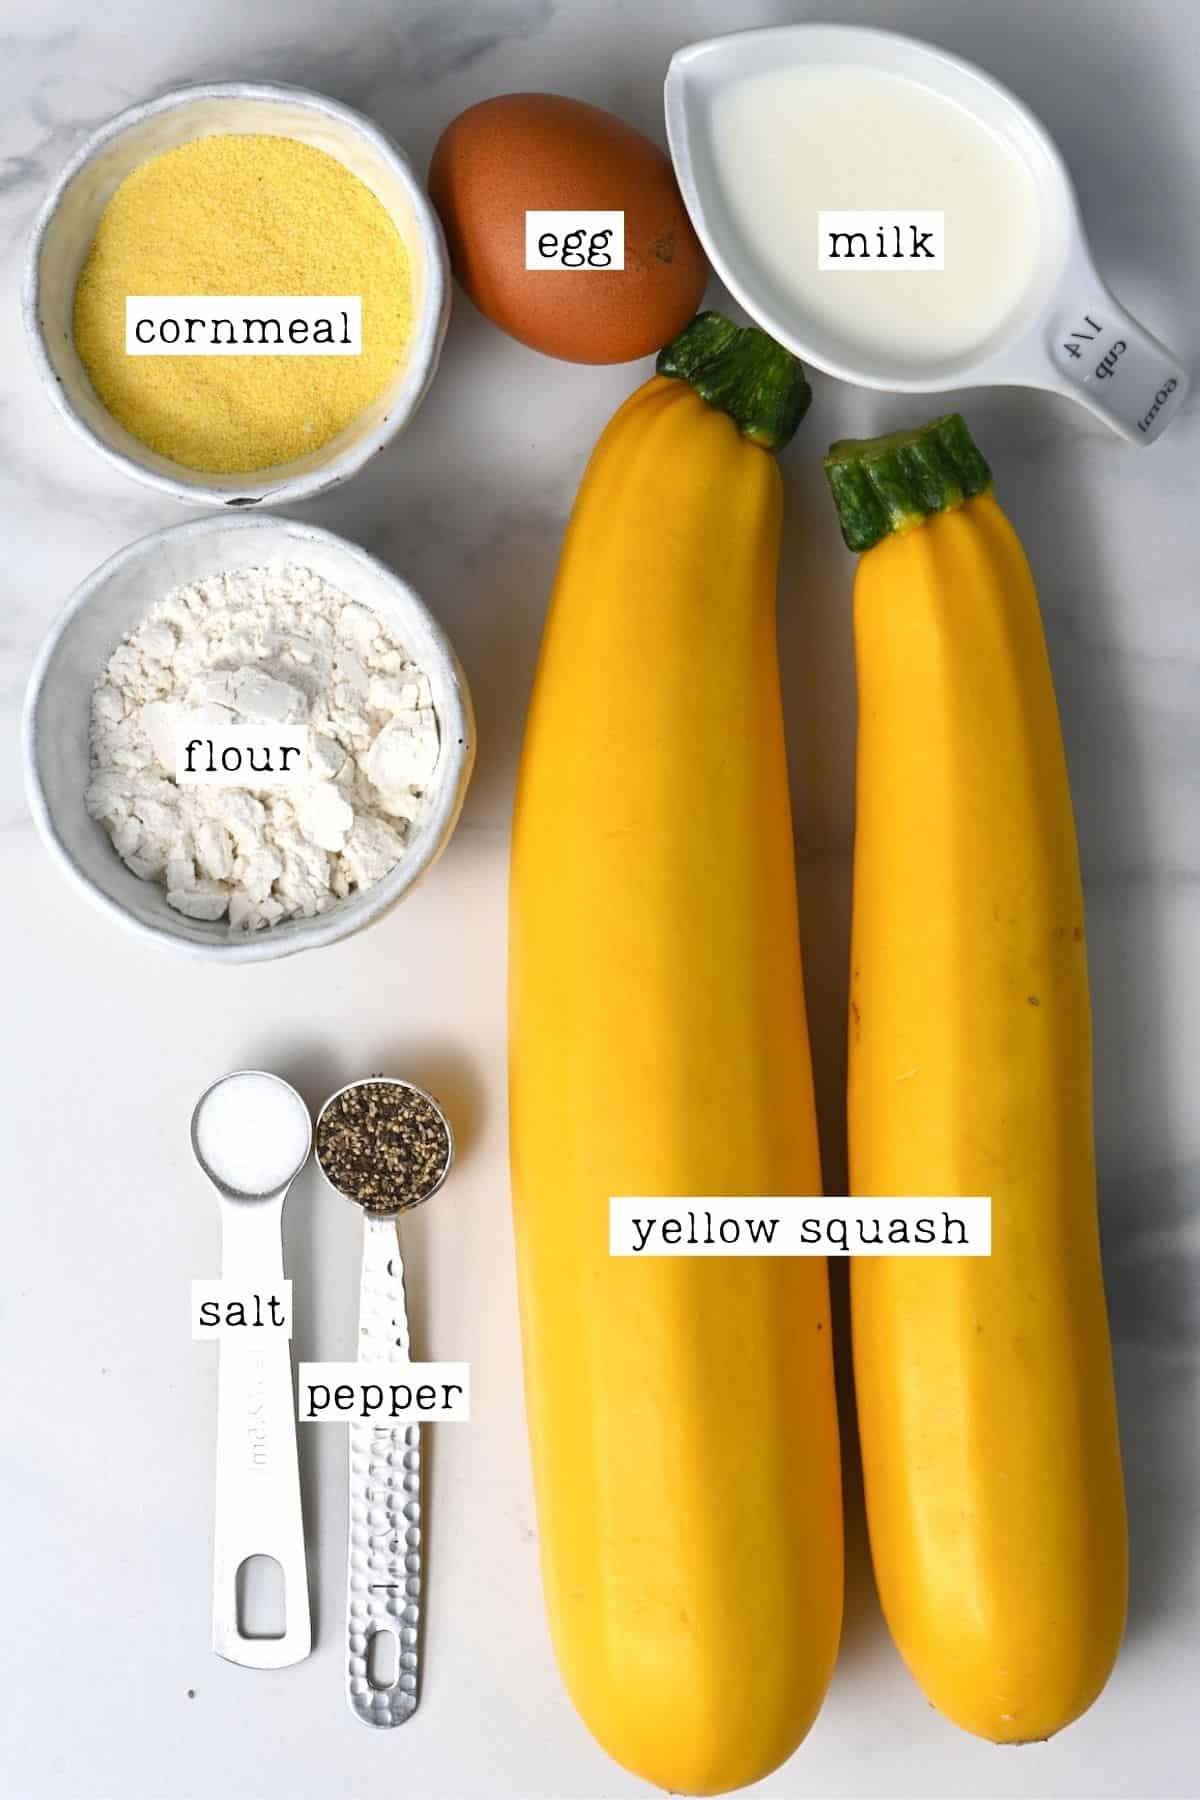
The Ingredients
- Yellow squash: Also called summer squash. Or you could also make fried zucchini (or a combination of the two) with this recipe.
- Egg: Needed when breading the squash.
- Milk: Use regular or (unsweetened) dairy-free milk.
- Flour: Regular all-purpose flour.
- Cornmeal: I prefer to use yellow cornmeal over white, but either will work. Use fine cornmeal for the crispiest results. Alternatively, use a cornmeal substitute.
- Salt & Pepper. You can season with other spices too, like garlic powder, paprika, etc. Check the Recipe Notes below for more suggestions.
- Oil: Use any neutral, high heat frying oil like vegetable oil, canola oil, etc. Avoid oils with a low smoke point (like olive oil).
How to Make Fried Squash?
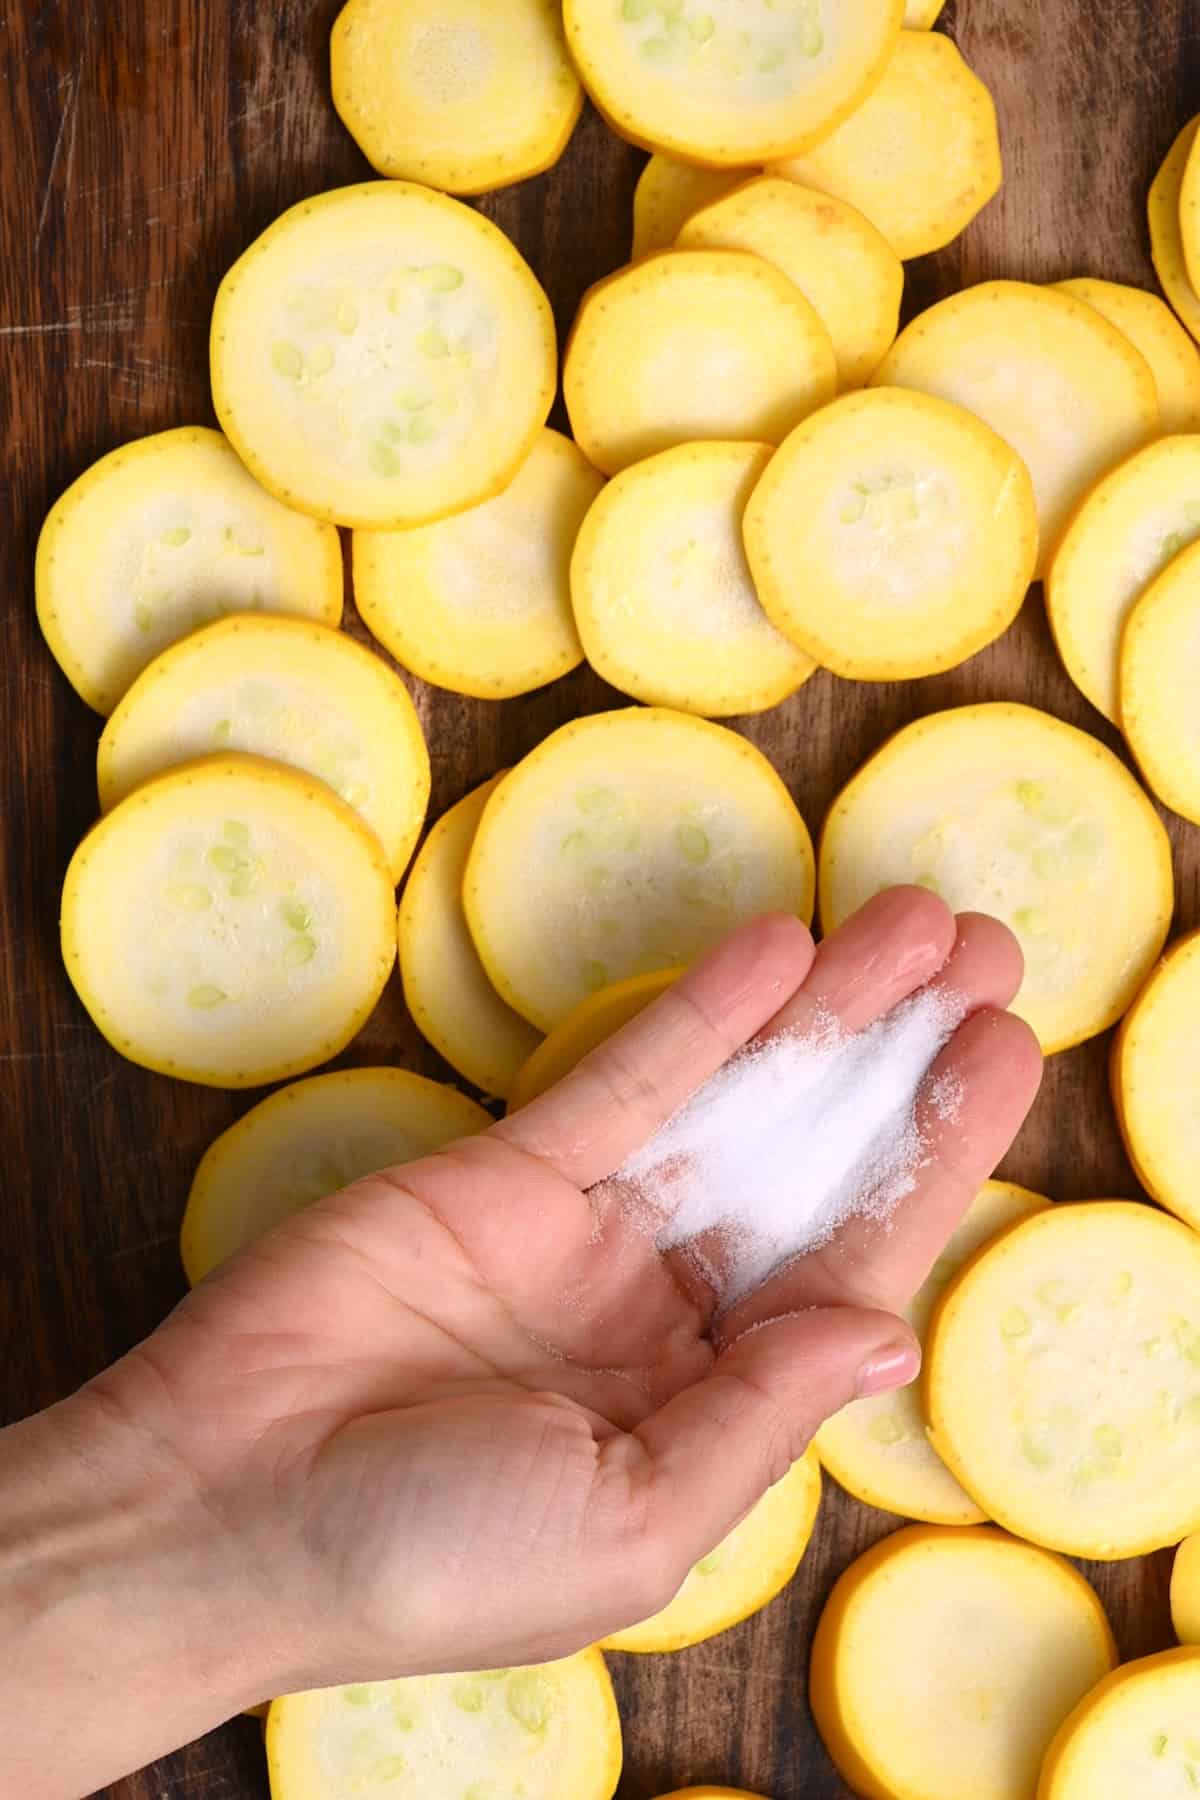
Step 1: Prepare the Summer Squash Slices
First, rinse and dry the summer squash (or zucchini) and cut it into slices around ¼-inch thick. You can use a sharp knife, though a mandoline or food processor slicing disk will provide the most consistent results.
You can slice it anywhere between 1/4-1/8-inch. The thinner you slice the pieces, the more chip-like they’ll be.
Then, sprinkle the slices with salt. Leave them spread across a wire rack or drain in a colander over the sink.
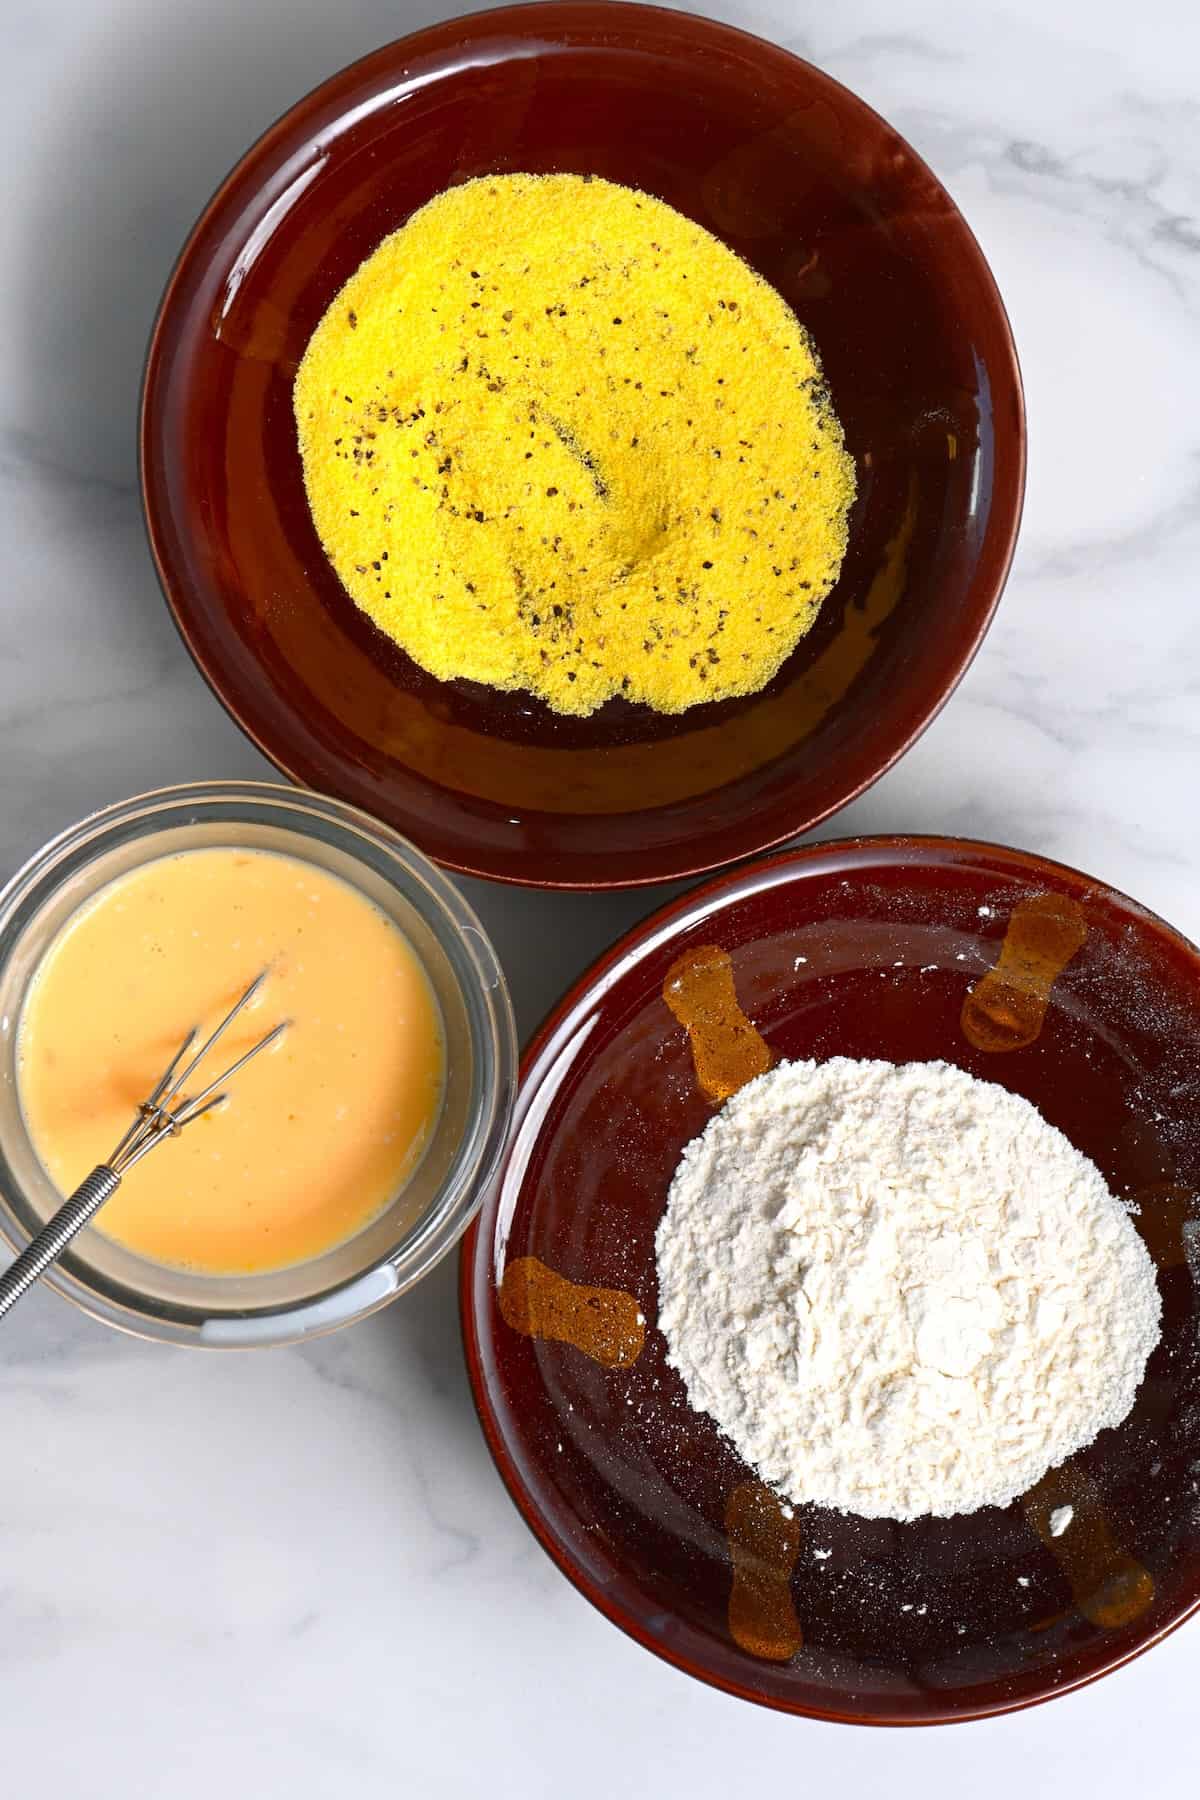
Meanwhile, prepare the breading station. You’ll need three small plates or bowls. In the first, whisk the egg and milk.
In the second, add the cornmeal and pepper. Finally, in the third, add the flour.
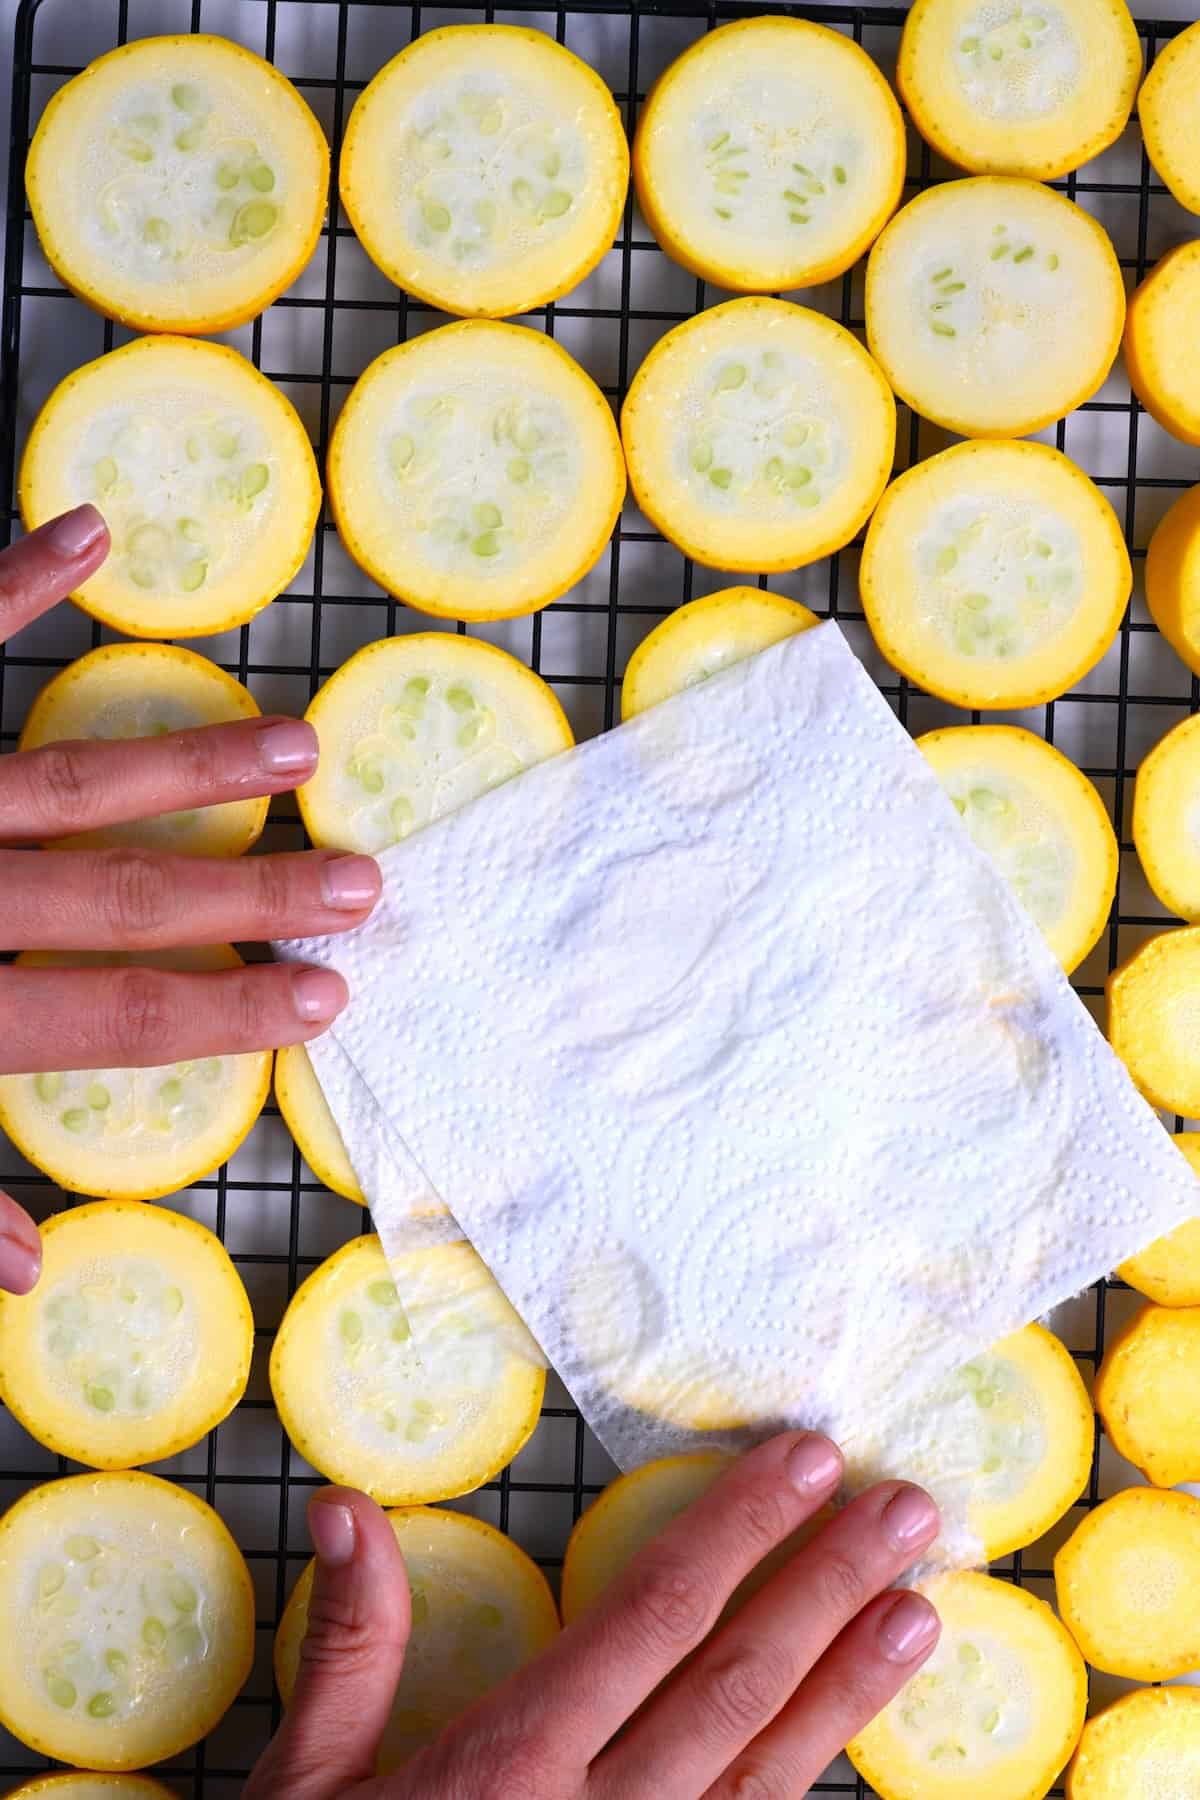
After 25-30 minutes of draining, use clean paper towels to pat the squash pieces dry. There’s no need to rinse them.
Step 2: Dredge the Sliced Squash
Dip each slice first into the flour, shaking away any excess.
Then, dip them in the egg mixture and finally into the cornmeal.
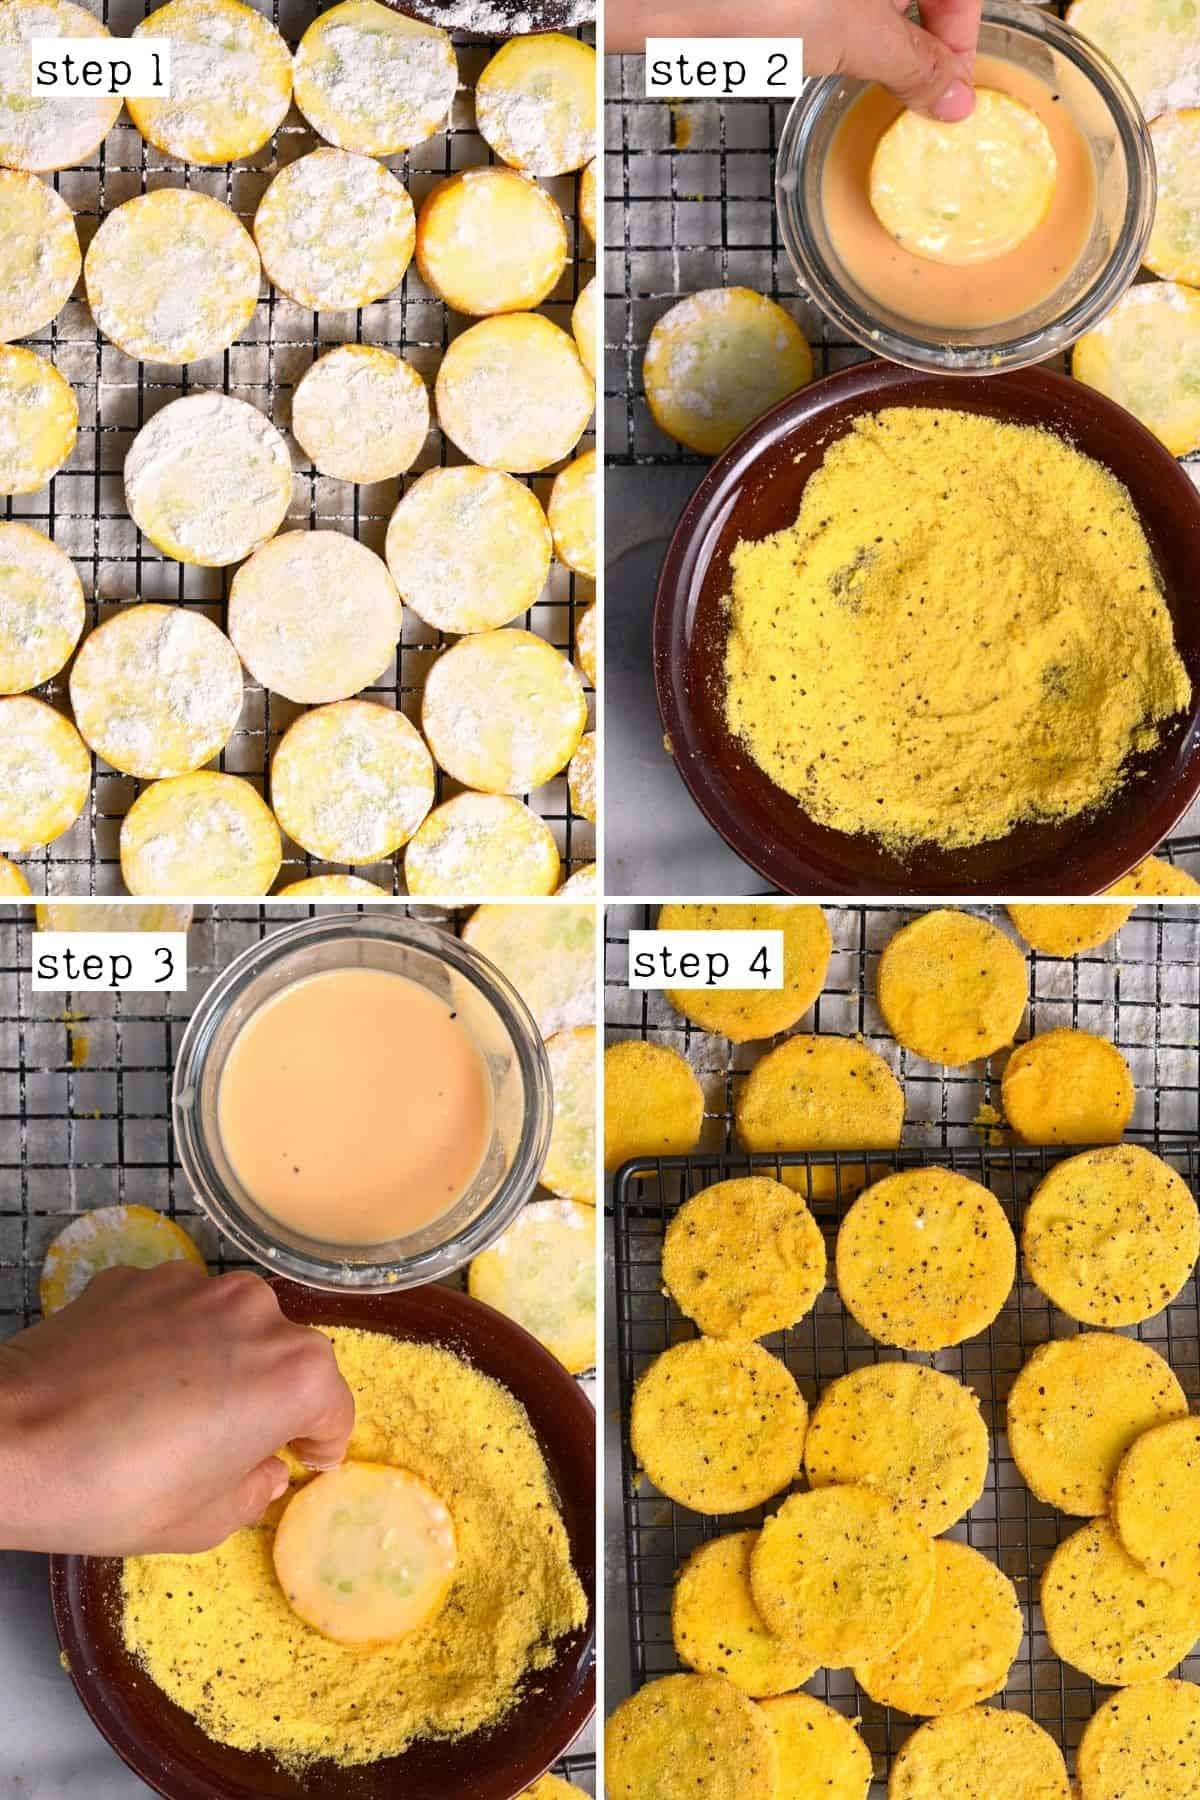
Meanwhile, prepare the oil. You can either use a deep-fat fryer or a deep, large skillet. Add about ½-inch of oil and heat over medium heat.
Step 3: Fry the Squash
Before adding any food to the pan, make sure the oil is hot. If you don’t have an oil thermometer/digital laser thermometer, use a wooden skewer or wooden spoon to dip into the oil. When the oil is ready, bubbles should form around the wood immediately and float up to the surface of the oil.
Once the oil is hot, carefully transfer some of the breaded squash slices to the oil with a wide slotted spoon. Cook the yellow squash for 1-2 minutes on each side, until golden brown and crisp.
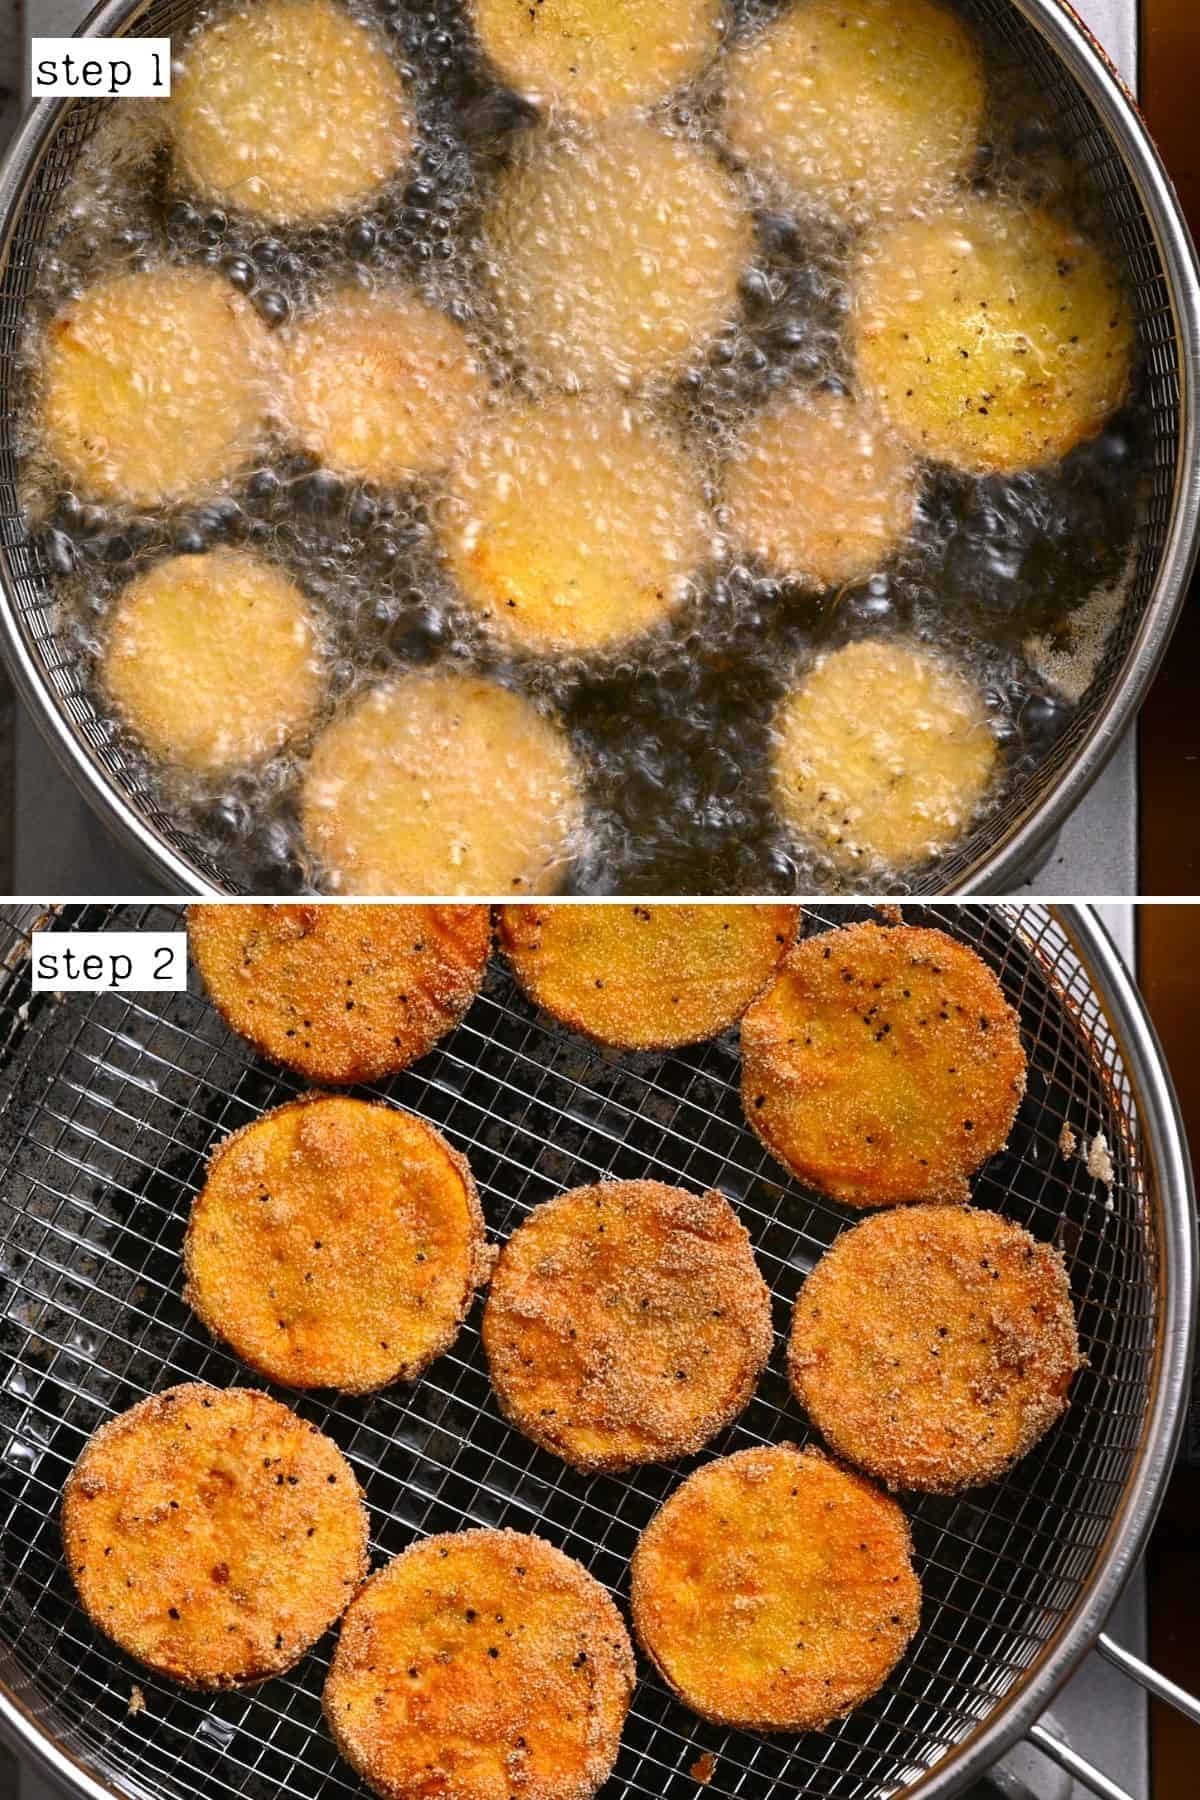
It’s important not to add too many to the pan at once so the oil temperature and cooking are not affected. I recommend adding enough for a single layer, with no overlapping and some space to spare.
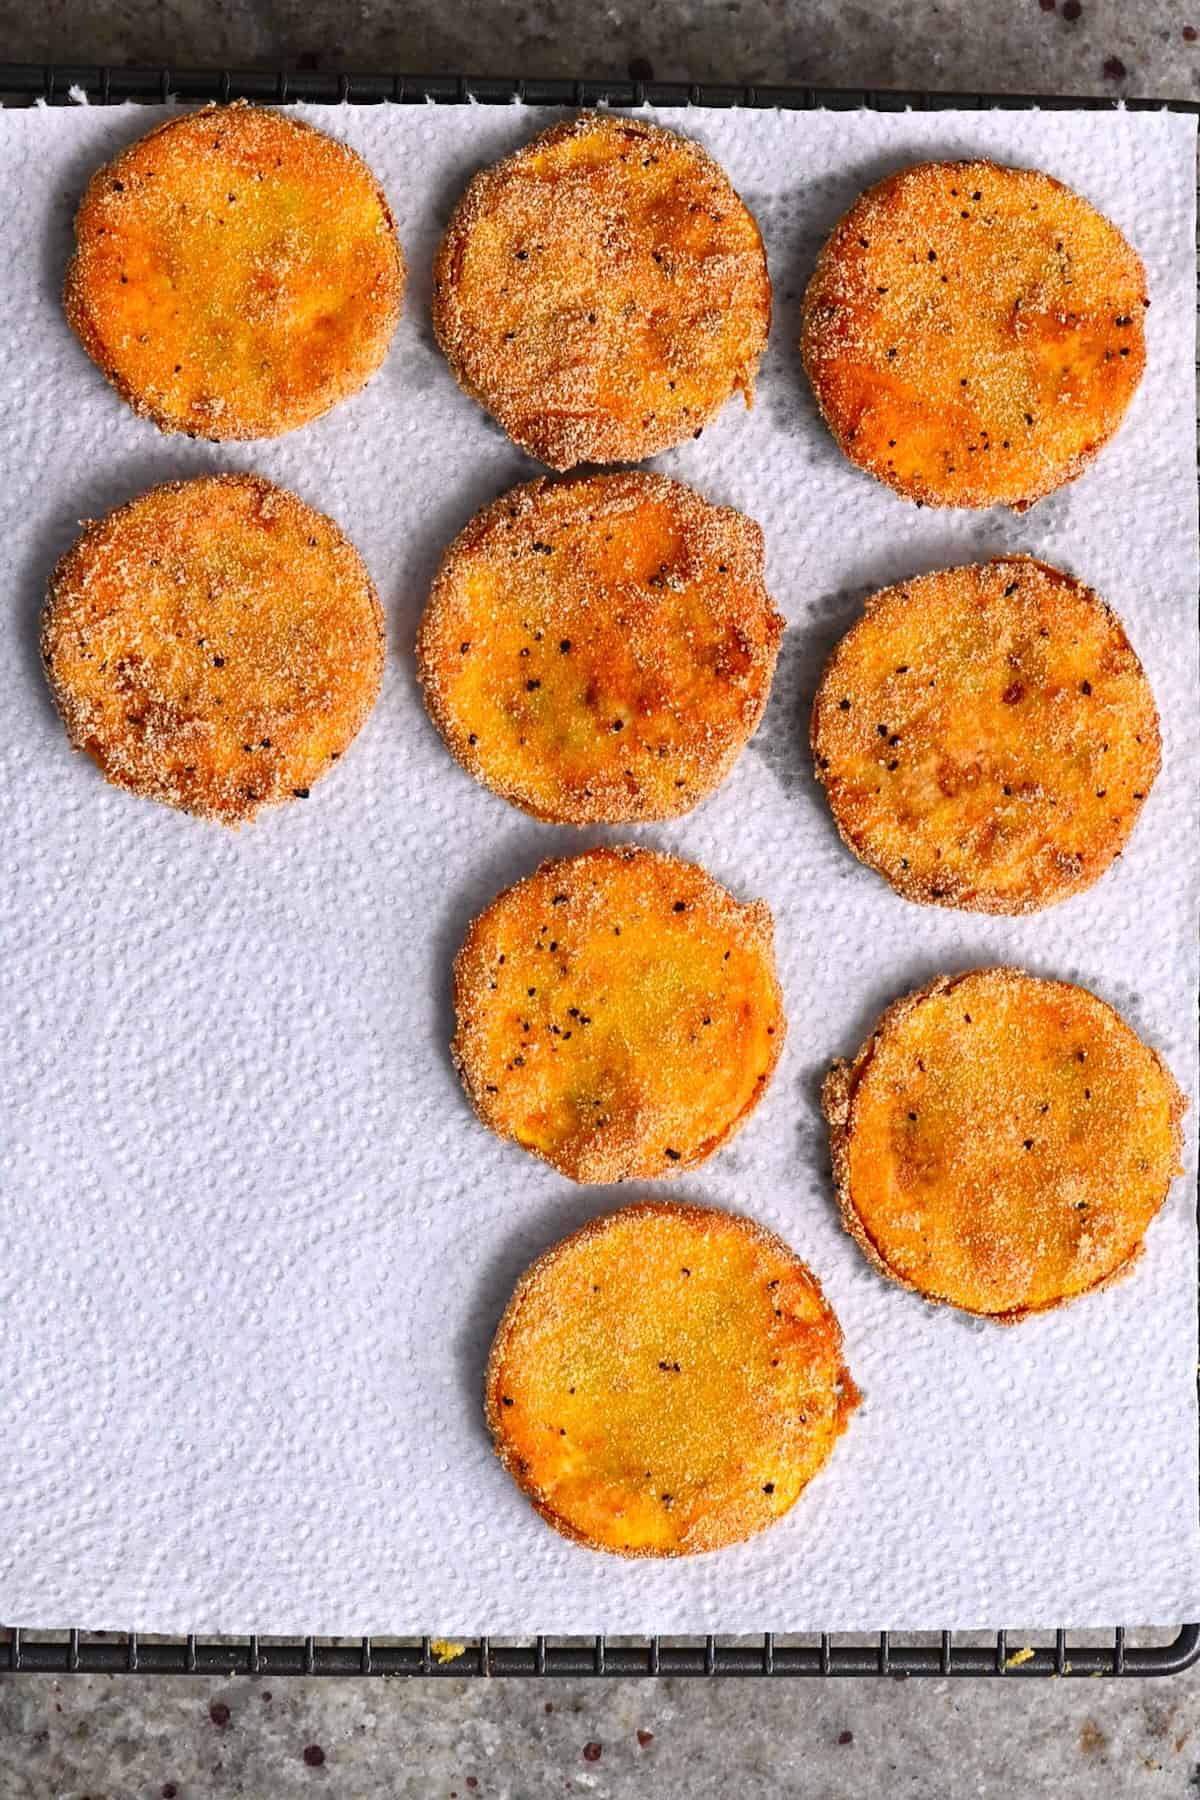
Finally, remove the fried squash from the oil. Transfer it to a couple of layers of kitchen paper to soak up any excess oil. Repeat with all the remaining squash, then enjoy immediately or place them on a cooling rack until you’re ready to serve.
How To Avoid Soggy Fried Squash?
There are a few top tips to achieve wonderfully crispy fried squash.
- Don’t skip the salting stage: This will draw out excess liquid from the squash to keep it crisp.
- Ensure the oil is hot enough: You need hot oil between 350-375ºF/176-190ºC for deep frying. Either use an oil thermometer or the wooden skewer method above.
You can also test the oil temperature with a kernel of popcorn. Place it in the pan as the oil is heating. It will pop when the oil is between 350-360ºF/176-182ºC.
- Don’t overcrowd the pan! This goes hand in hand with the above, as it can cause the temperature to drop and lead to soggy slices.
- Slice the pieces evenly: If some are thinner or thicker than others, they’ll fry at different rates. Then you end up with some overdone and some underdone.
Storage Instructions
To keep warm: place the fried squash on a baking sheet in the oven at 250ºF/120ºC until serving.
Store: As with most deep-fried foods, this is best enjoyed immediately from the fryer for the crispiest, best results. Allow any leftovers to cool entirely. Then store them in an airtight container in the refrigerator for 2 days.
Reheat: After storing, the fried summer squash will be very soft. Bring back some of the crispiness by reheating them under a broiler or in an air fryer/oven. Do so for several minutes at 375ºF/190ºC.
Can you freeze the pre-cooked breaded zucchini/squash?
It’s possible to flash freeze the pieces, not touching, on a large tray. Then transfer them to a large Ziplock bag. You can freeze the breaded squash for several months.
What to Server with Fried Squash?
You can enjoy the fried squash as an appetizer with dipping sauces (like marinara, ranch, yogurt dill sauce, etc.). Or as a side with:
- Burgers – like this sweet potato black bean burger or pumpkin bean burger.
- Chicken shish tawook and grilled chicken dish.
- Lebanese lamb kofta and kebab.
- Marinated tofu or tempeh.
- Cooked fish like baked salmon or grilled fish.
- BBQ skewers like shrimp skewers, chicken skewers, tofu skewers, etc.
- Add to salad and grain bowls.
- Serve the fried yellow squash over and alongside pasta dishes.
- Enjoy it with other side dishes like fried okra, fried green tomatoes, and more!
It’s the perfect quick and easy dish for cookouts/BBQs! Let me know in the comments what you serve it with!

FAQs
No, it doesn’t. I also recommend you don’t peel it as the skin will help the squash hold its shape when cooked.
I haven’t tried air fryer yellow squash (yet). However, having cooked various zucchini recipes in the air fryer, it should work.
I recommend spraying the pieces with a little oil and air frying them at 375ºF/190ºC for 8-10 minutes, flipping halfway.
Yes, the method will be the same for making breaded deep-fried zucchini.
I haven’t tried this method with butternut squash, though I imagine it would work. Cook it until browned and crispy and tender in the middle. The frying time will likely take slightly longer than summer squash/zucchini.
I prefer not to, as it releases excess liquid from the yellow squash to allow it to remain wonderfully crispy. However, it is technically possible to skip it. Just make sure to pat all the pieces dry with a kitchen towel before adding the coating.
More Simple Vegetable Side Dishes
- Air fryer zucchini fries
- 10-minute air fryer green beans
- Caramelized onions
- Roasted onions
- Fried Mushrooms Recipe
If you try this simple fried squash recipe, I’d love to hear your thoughts and questions below. Also, I’d appreciate a recipe card rating below, and feel free to tag me in your recipe recreations on Instagram @Alphafoodie!

Crispy Fried Squash (or Zucchini)
Equipment
- Mandoline optional
Ingredients
- 1 lb yellow squash 2 medium ones or zucchini
- 1/2 tsp salt or a bit more, needed to salt the slices
- 1 egg for an egg-free version, just use milk
- 1/4 cup milk dairy or fairy-free (unsweetened)
- 1/2 cup cornmeal
- 1/4 tsp black pepper
- 3 Tbsp all-purpose flour or GF all-purpose flour
- oil for frying, enough to fill 1/2 inch; vegetable oil or canola oil work well
Check the Notes below for optional add-ins!
Instructions
Step 1: Prepare the Summer Squash Slices
- Rinse and dry the summer squash (or zucchini) and cut it into slices around ¼-inch thick. You can use a sharp knife, though a mandoline or food processor slicing disk will provide the most consistent results.You can slice it anywhere between 1/4-1/8-inch. The thinner you slice the pieces, the more chip-like they'll be.
- Sprinkle the slices with salt and leave them spread across a wire rack or drain in a colander over the sink.
- Meanwhile, prepare the breading station. You’ll need three small plates or bowls. In the first, whisk the egg and milk. In the second, add the cornmeal and pepper. Finally, in the third, add the flour.
- After 25-30 minutes of draining, use clean paper towels to pat the squash pieces dry. There’s no need to rinse them.
Step 2: Dredge the Slices
- Dip each slice first into the flour, shaking away any excess.
- Dip them in the egg mixture and finally into the cornmeal.
- Meanwhile, prepare the oil. You can either use a deep-fat fryer or a deep, large skillet. Add about ½-inch of oil and heat over medium heat.
Step 3: Fry the Squash
- Before adding any food to the pan, make sure the oil is hot. If you don't have an oil thermometer/digital laser thermometer, use a wooden skewer or wooden spoon to dip into the oil. When the oil is ready, bubbles should form around the wood immediately and float up to the surface of the oil.
- Once the oil is hot, carefully transfer some of the breaded squash slices to the oil with a wide slotted spoon and allow them to cook for 1-2 minutes per side, until golden brown and crisp.It's important not to add too many to the pan at once, or it will affect the oil temperature and cooking. I recommend adding enough for a single layer, with no overlapping and some space to spare.
- Remove the fried squash from the oil and transfer it to a couple of layers of kitchen paper to soak up any excess oil. Repeat with all the remaining squash, then enjoy immediately or place them on a cooling rack until you're ready to serve.
Storage Instructions
- To keep warm: If you're making a large batch of fried squash and just want to keep them warm until serving, I recommend placing them on a baking sheet in the oven at 250ºF/120ºC.Store: As with most deep-fried foods, this fried yellow squash is best enjoyed immediately from the fryer for the crispiest, best results. However, if you have any leftovers, allow them to cool entirely, then store them in an airtight container in the refrigerator for 2 days.Reheat: After storing, the fried summer squash will be very soft. The best way to bring back some of the crispiness is to reheat them under a broiler or in an air fryer/ oven for several minutes at 375Fº/190ºC until warmed through.
Notes
- Don’t skip the salting stage: This will draw out excess liquid from the squash to keep it crisp.
- Ensure the oil is hot enough: You need oil between 350-375ºF/176-190ºC for deep frying. Either use an oil thermometer or the wooden skewer method above.
- Don’t overcrowd the pan: This goes hand in hand with the above, as it can cause the temperature to drop and lead to soggy breaded zucchini/squash.
- Slice the pieces evenly: If some are thinner or thicker than others, they’ll fry at different rates, and you’ll end up with some overdone and some underdone pieces.
- Egg-free: Use just milk with no egg for vegan fried squash.
- Gluten-free: Use gluten-free all-purpose flour. Cornmeal is naturally gluten-free.
- Breadcrumbs: Instead of cornmeal, use panko breadcrumbs or Italian breadcrumbs.
- Heat: Add a small amount of hot sauce/chili sauce to the milk mixture. Or add some chili powder or red pepper flakes to the cornmeal mixture. Cajun seasoning would also work well.
- Parmesan: Mix some freshly grated parmesan into the cornmeal coating. For a vegan version, use some nutritional yeast instead.
- Spices: Season the flour with onion powder, garlic powder, and/or smoked paprika.
- Herbs: Add Italian seasoning or other dried herbs like oregano or thyme to the cornmeal coating.
Nutrition
Nutrition information is automatically calculated, so should only be used as an approximation.


I had to use Italian breadcrumbs instead of cornmeal like I had planned and to be honest, that made them a little over-seasoned. Once they cooled, though? They were good! Next time I’ll use cornmeal and I bet they’ll be perfect from the time they come out of the pan.
Hey Teleia! Thanks for the feedback! I totally get what you mean about the breadcrumbs. Cornmeal should definitely give you that perfect crunch. Hope the next batch turns out just right! 🙂
Spent the evening making thisbrexipe (no substitutions). It would seem using cornmeal as the main coating and frying it does make a crispy bite… However, it is the cornmeal grain that hardens and gets crunchy. I think a more flour based coating is ideal for us, as neither my husband nor I enjoyed this recipe version. That being said, sprinkling with salt to draw out the moisture was a great tip!
Hey I appreciate you giving the recipe a try and sharing your feedback! Cornmeal does create a crunchier, grainier texture, so if you prefer a softer crisp, a flour-based coating (or even a mix of flour and cornmeal) might work better for you. I’m glad you found the salt trick helpful! Thanks for your thoughts, and I’d love to hear how it turns out if you try a flour-based version.