
This post may contain affiliate links. Please read our disclosure policy.
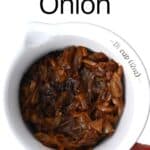

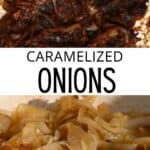

How to caramelize onions perfectly every time! They’re rich, sweet, and have a practically melt-in-the-mouth, jammy texture – perfect for adding to soups, pasta, burgers, tarts, and more!
Onions are an aromatic addition to almost any meal. I’ve already shared methods for making onion powder, crispy fried onions, and roasted onions, but now it’s the turn for perhaps the best one yet: how to caramelize onions.
Like roasted garlic, these easy caramelized onions are little flavor bombs, perfect for ramping up the flavor in tons of dishes. The caramelization process yields tender and jammy onions with a savory yet sweet flavor with tons of addictive depth!
Want to save this recipe?
What Are Caramelized Onions?
Caramelization is simply the browning of sugar, leading to a sweeter, deeper flavor and rich brown color. Caramelized onions rely on the natural sugars within the onions, which are cooked low and slow, so they become tender.
Luckily, the process for caramelizing onions is very simple, though time-consuming. I’ve even shared three methods below: caramelized onions in the oven, in a crockpot, or on the stovetop.
That way, you can choose the best way to caramelize onions for yourself – whether it’s a hands-off approach, the one that takes the least time, etc. Detailed notes for each method are below.
The Ingredients
This caramelized onions recipe only requires three ingredients plus water:
- Onions: I used medium yellow onions (also called brown onions). However, this method should also work for caramelized red onions, sweet onions, and white onions, too.
- Oil: I used olive oil, but a combination of oil and butter would also work and provide a richer flavor.
- Sea salt: added to taste.
- Water: you need a little liquid to help deglaze the pan while the onions caramelize. Water will do so without affecting the flavor at all.

Other Deglazing Options:
If you want to add more flavor this way, there are several ingredients you could use instead of water:
- Vegetable stock,
- Chicken stock,,
- Apple juice,
- Cider,
- Marsala wine,
- Light beer,
- Balsamic vinegar or red wine vinegar.
For the alcohol/vinegar, I recommend using just a small amount for the final deglazing of the pan, using water or stock at the beginning if needed.
Optional Add-ins and Variations
- Sugar: you can add a small amount of sugar (regular or light brown sugar) to help with the browning process – a small pinch per onion.
- Thyme: to help infuse the onions with extra flavor.
- Garlic: if you decide to make the caramelized onions in the oven, tossing in a few garlic cloves is great. Enjoy them with the onions or for other meals entirely.
How to Caramelize Onions?
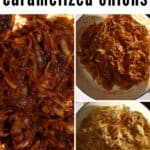
The Stove Top Method
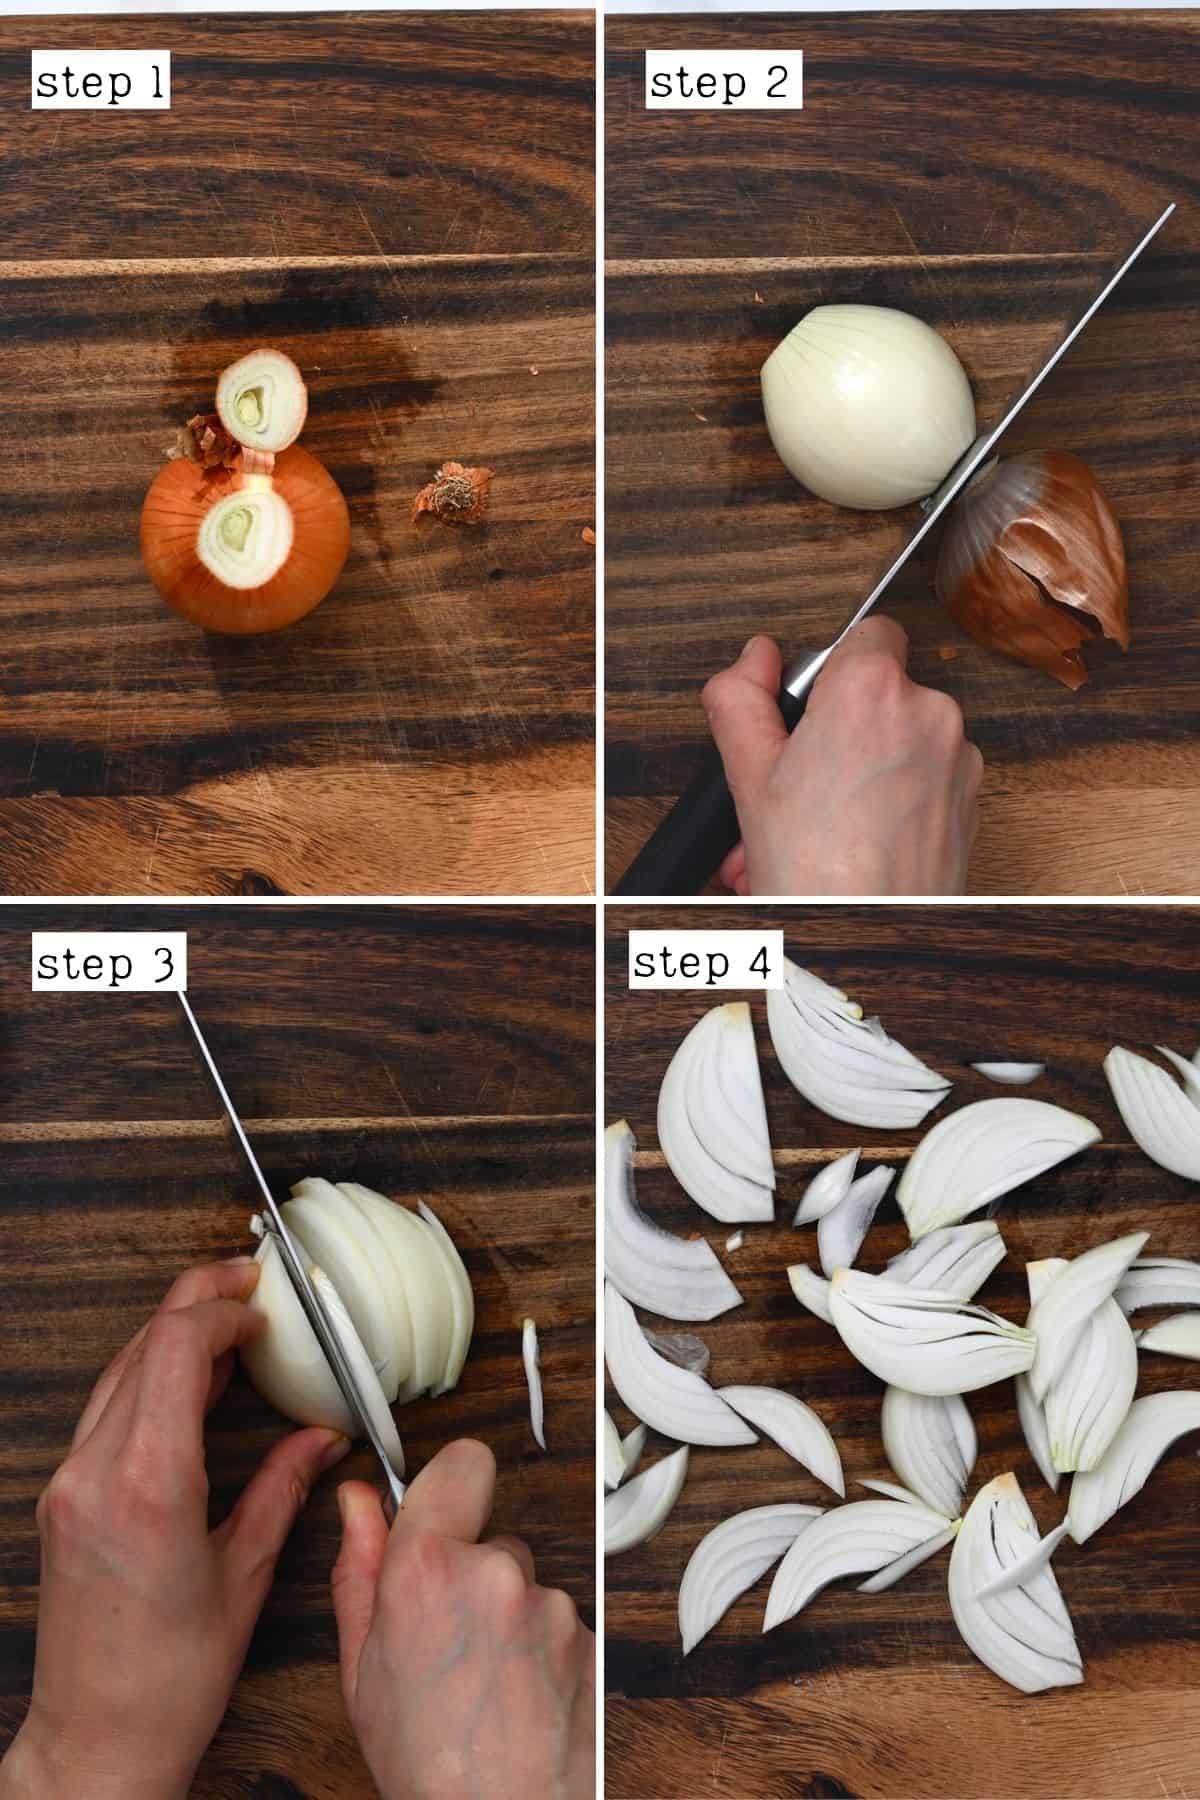
- First, slice each onion’s root and stem end before slicing them in half lengthwise.
- Peel away any onion skin and then use a sharp knife to slice the onion. I made my slices around every ¼-inch thin. Of course, you can cut into thin slices if preferred.
For more tips on how to peel and chop onions, check my step-by-step guide.
- Then, heat the oil in a large, wide skillet over medium heat until it shimmers.
- Add the onions and salt (which will draw out the moisture from the onions) and sauté for 5 minutes until they begin to soften.
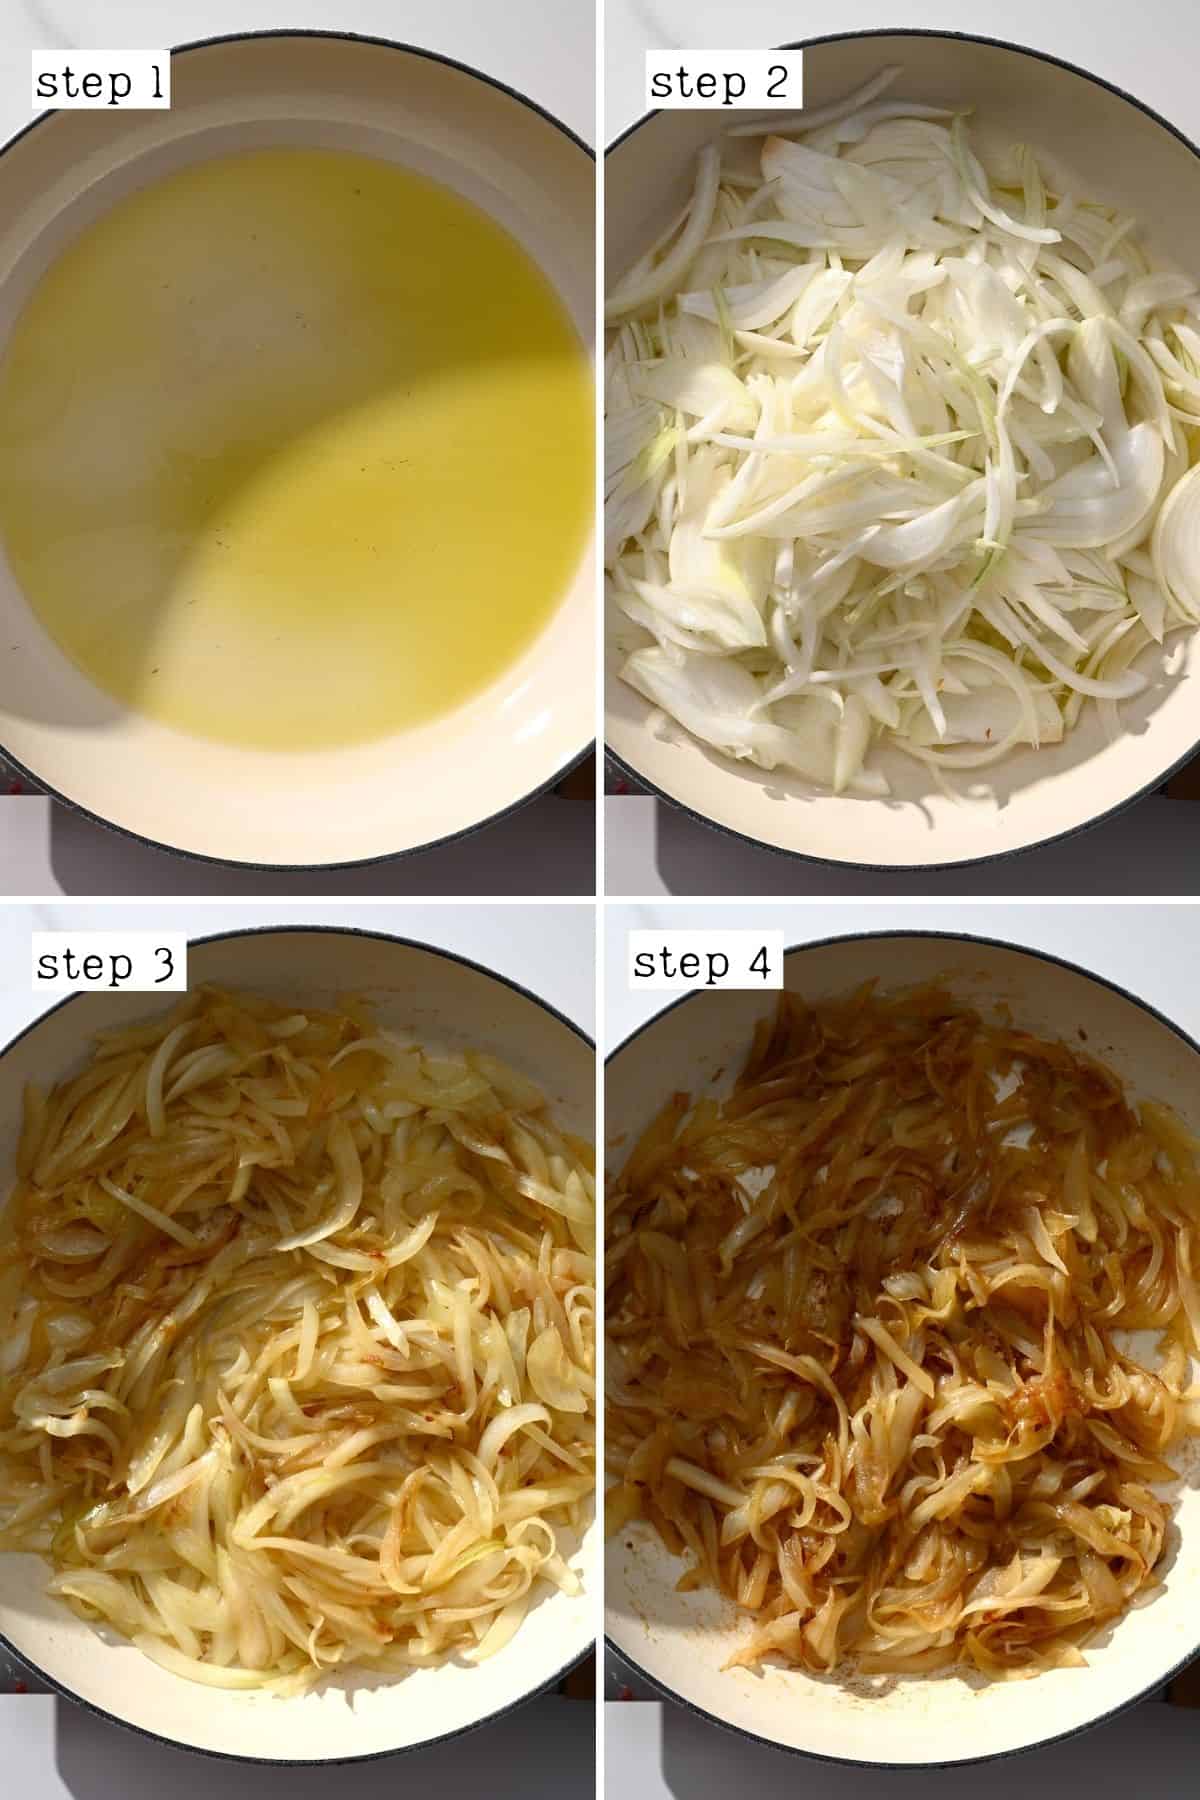
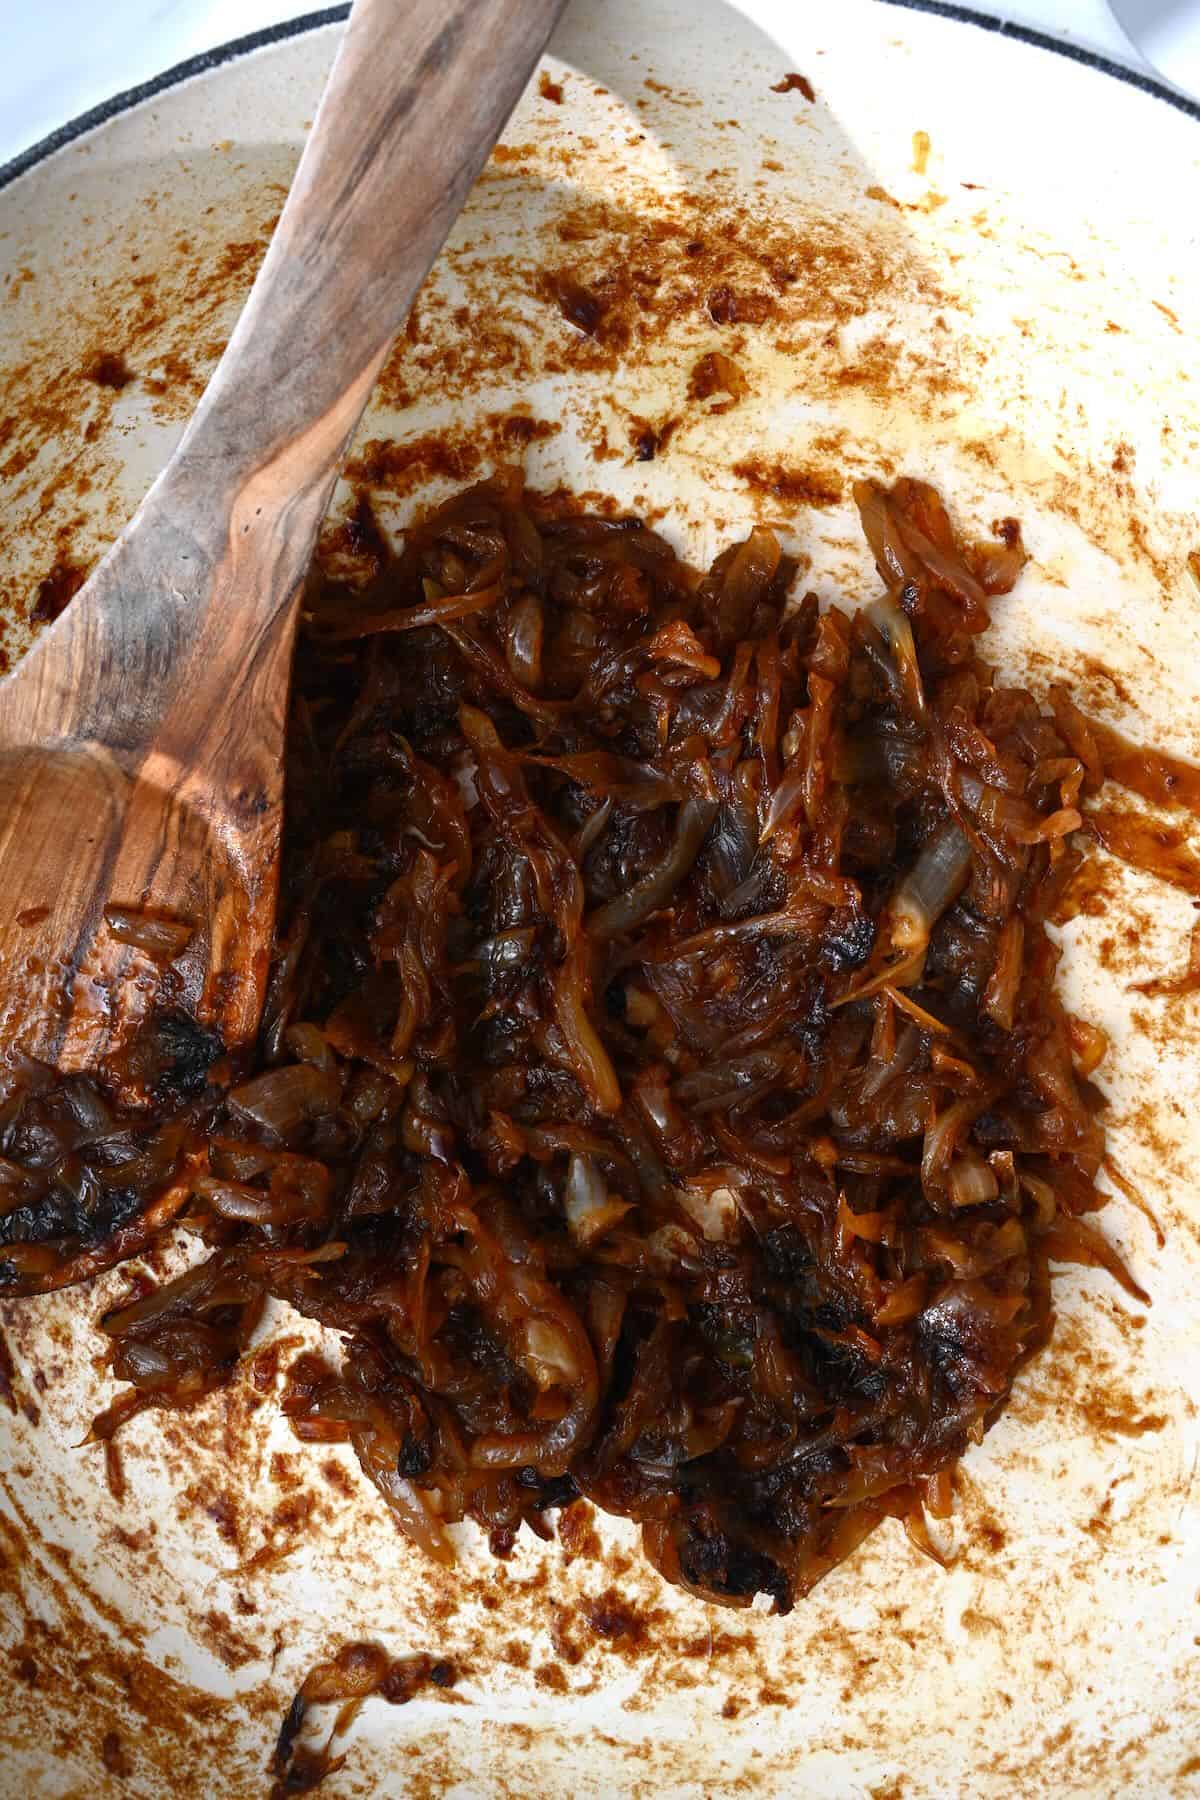
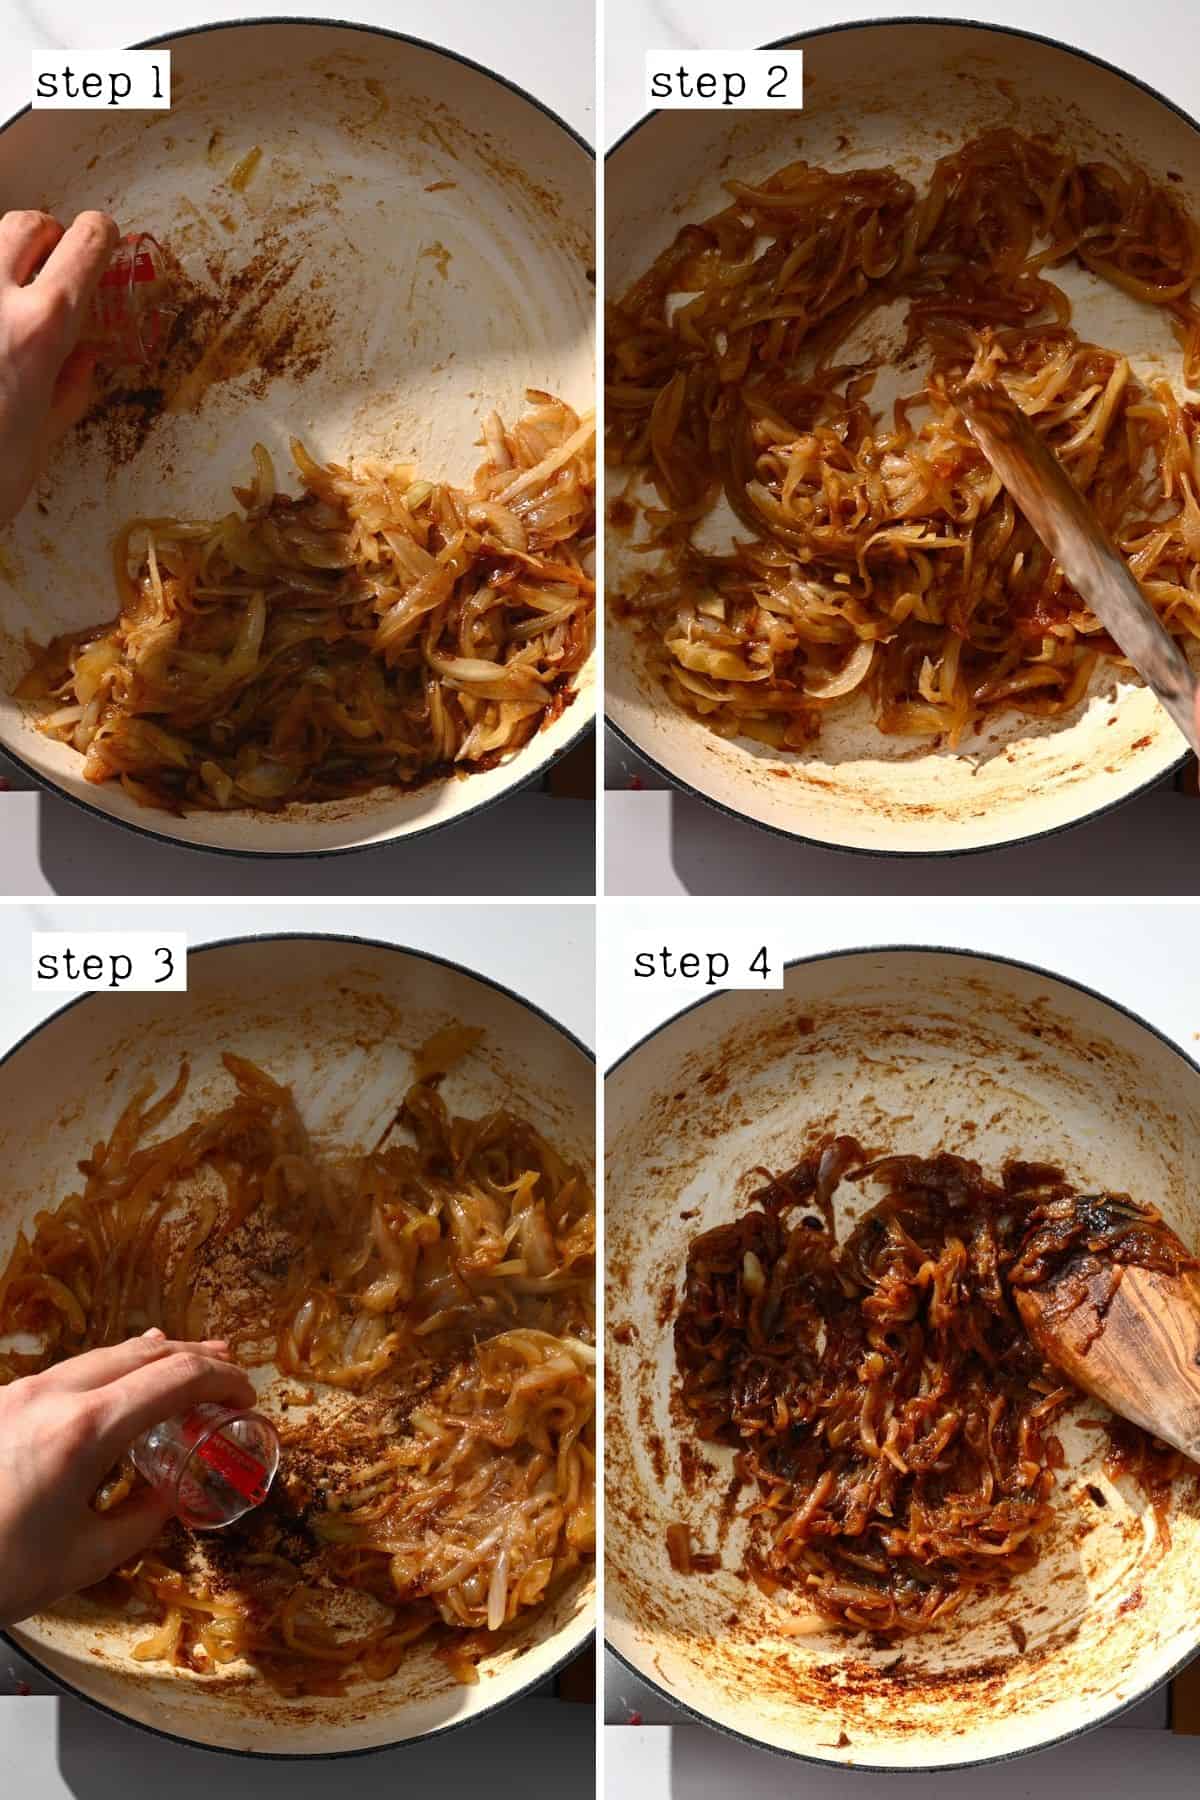
- Reduce the heat to medium-low, cook stirring often until the onions are golden brown and caramelized. During the process, add a splash of water (about 1-2 Tbsp) as needed to deglaze the pan and stop the onions from drying out.
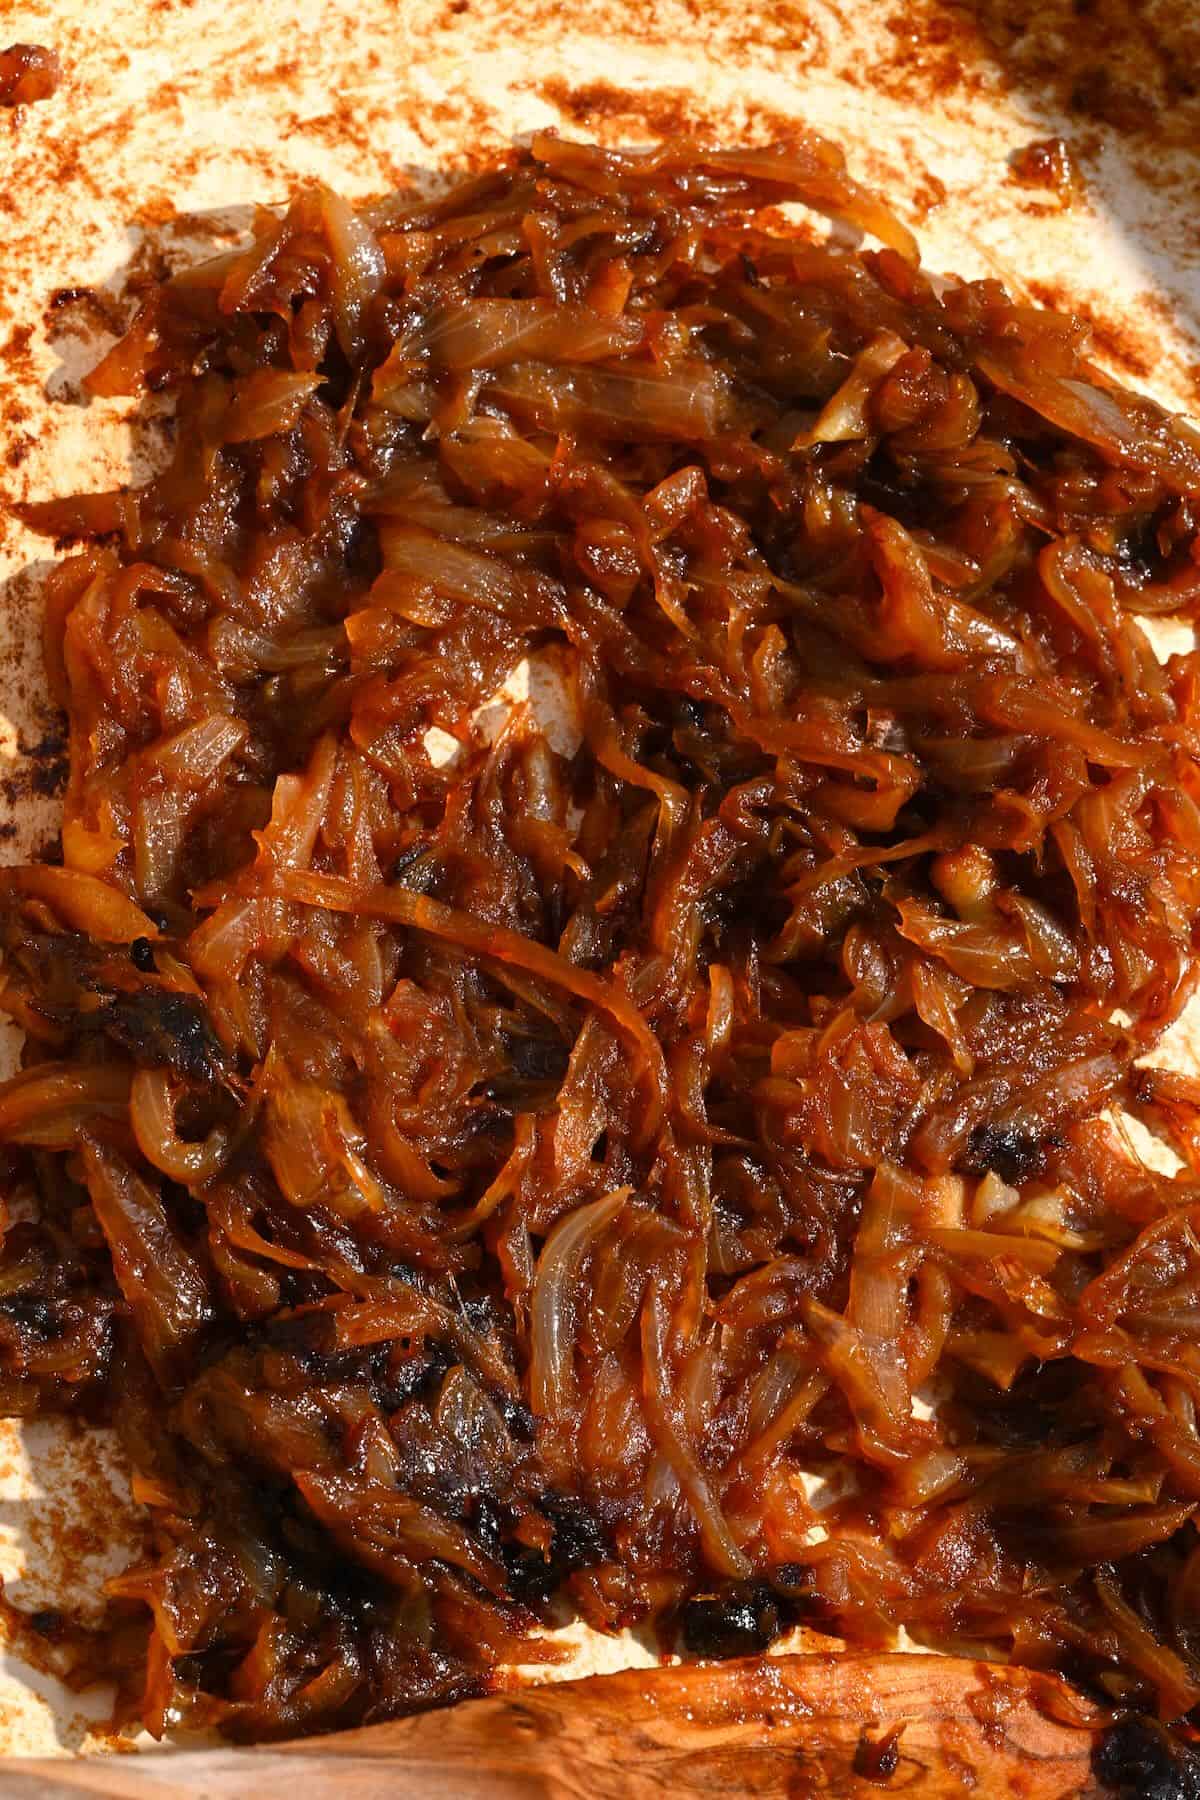
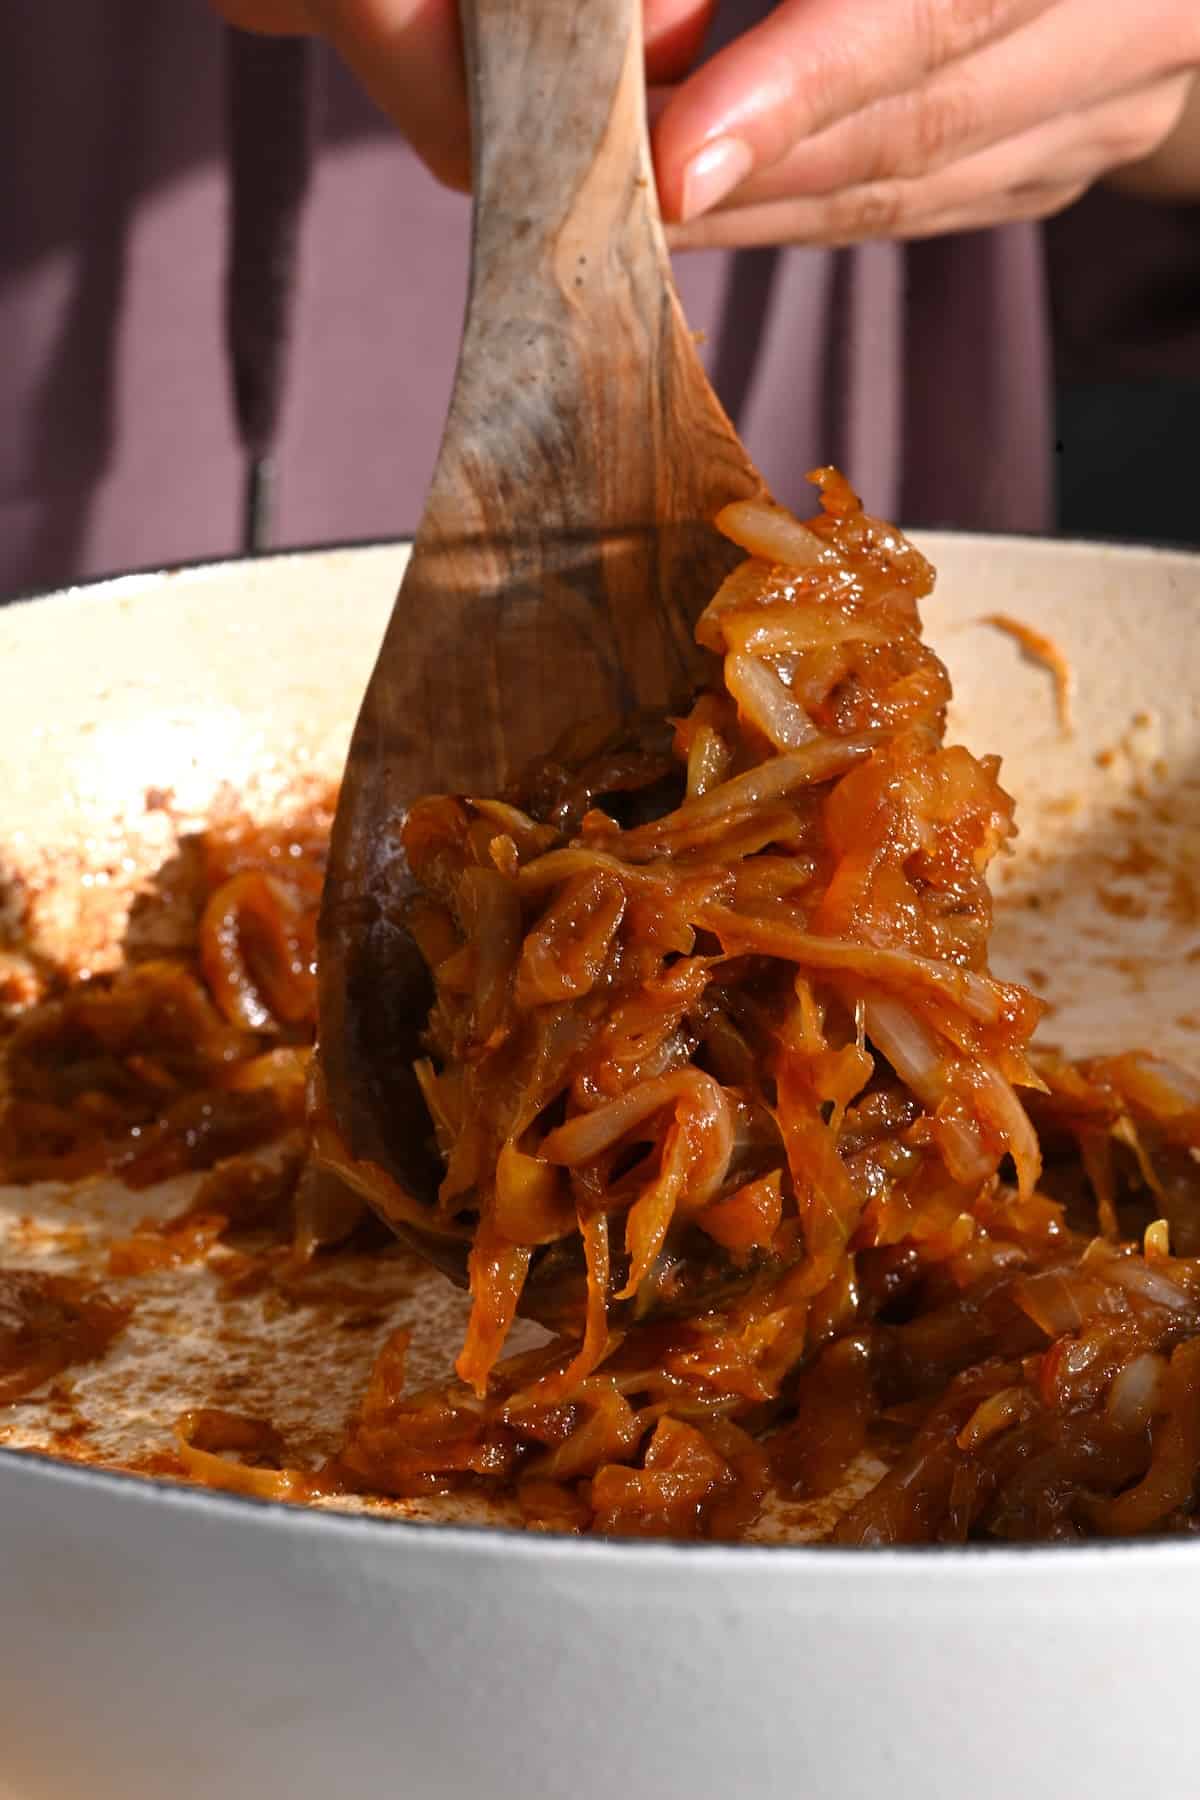
This entire process can take between 40 minutes and 1 ¾ hr depending on the pan, onion thickness, and how big of a batch you’re making (as well as how brown you want them to be). I recommend first taste testing at 30 minutes and every 10-15 minutes until they reach your desired level.
If the onions seem like they’re becoming crispy/burnt, reduce the heat even lower. The aim is for soft, tender, melt-in-the-mouth caramelized onions, NOT brown and crispy.
How To Caramelize Onions In The Oven?
While the results aren’t as even as the traditional method, making caramelized onions in the oven is a great way to achieve good results without having to hover over a hot pan.
- First, preheat the oven to 400ºF/200ºC and slice the onions as written above.
- Spread them on a large parchment paper-lined baking tray and drizzle with olive oil and a sprinkle of salt. Add a couple of tablespoons of water (to help steam and soften the onion).
- Then, roast in the oven for between 35-55 minutes, stirring every 8-10 minutes until the onions are rich brown in color and super tender and jammy.
The more often you stir/toss the onions, the more even the caramelization will be.
The Crock Pot Method
The main benefit to caramelizing onions in a crockpot over other versions is how hands-off the method is. Plus, you’re able to set it up before going to sleep or at the beginning of the day. Then, when it’s time for your meal, they’re ready to go (though not quite as browned as the stovetop method).
- Turn the crockpot on LOW and add a 50/50 combination of oil and butter, leaving it to melt while you chop the onions.
- Then, add the onion slices, salt, and 1-2 Tbsp sugar to the pot and stir.
- Cover and cook on LOW for 10-13 hours (depending on how caramelized you want them), stirring every few hours.
You don’t necessarily have to stir them if, for example, you’re sleeping for 8 hours during the process. However, I’ve found that I prefer the results, stirring them at least 3-4 times during the process.
If the onions seem a bit too soupy even at the 8-9hr mark, leave the lid slightly ajar for the remainder of the period (or for at least 3-4 hours). You could also drain any excess liquid and add it to soups and stews for extra flavor.
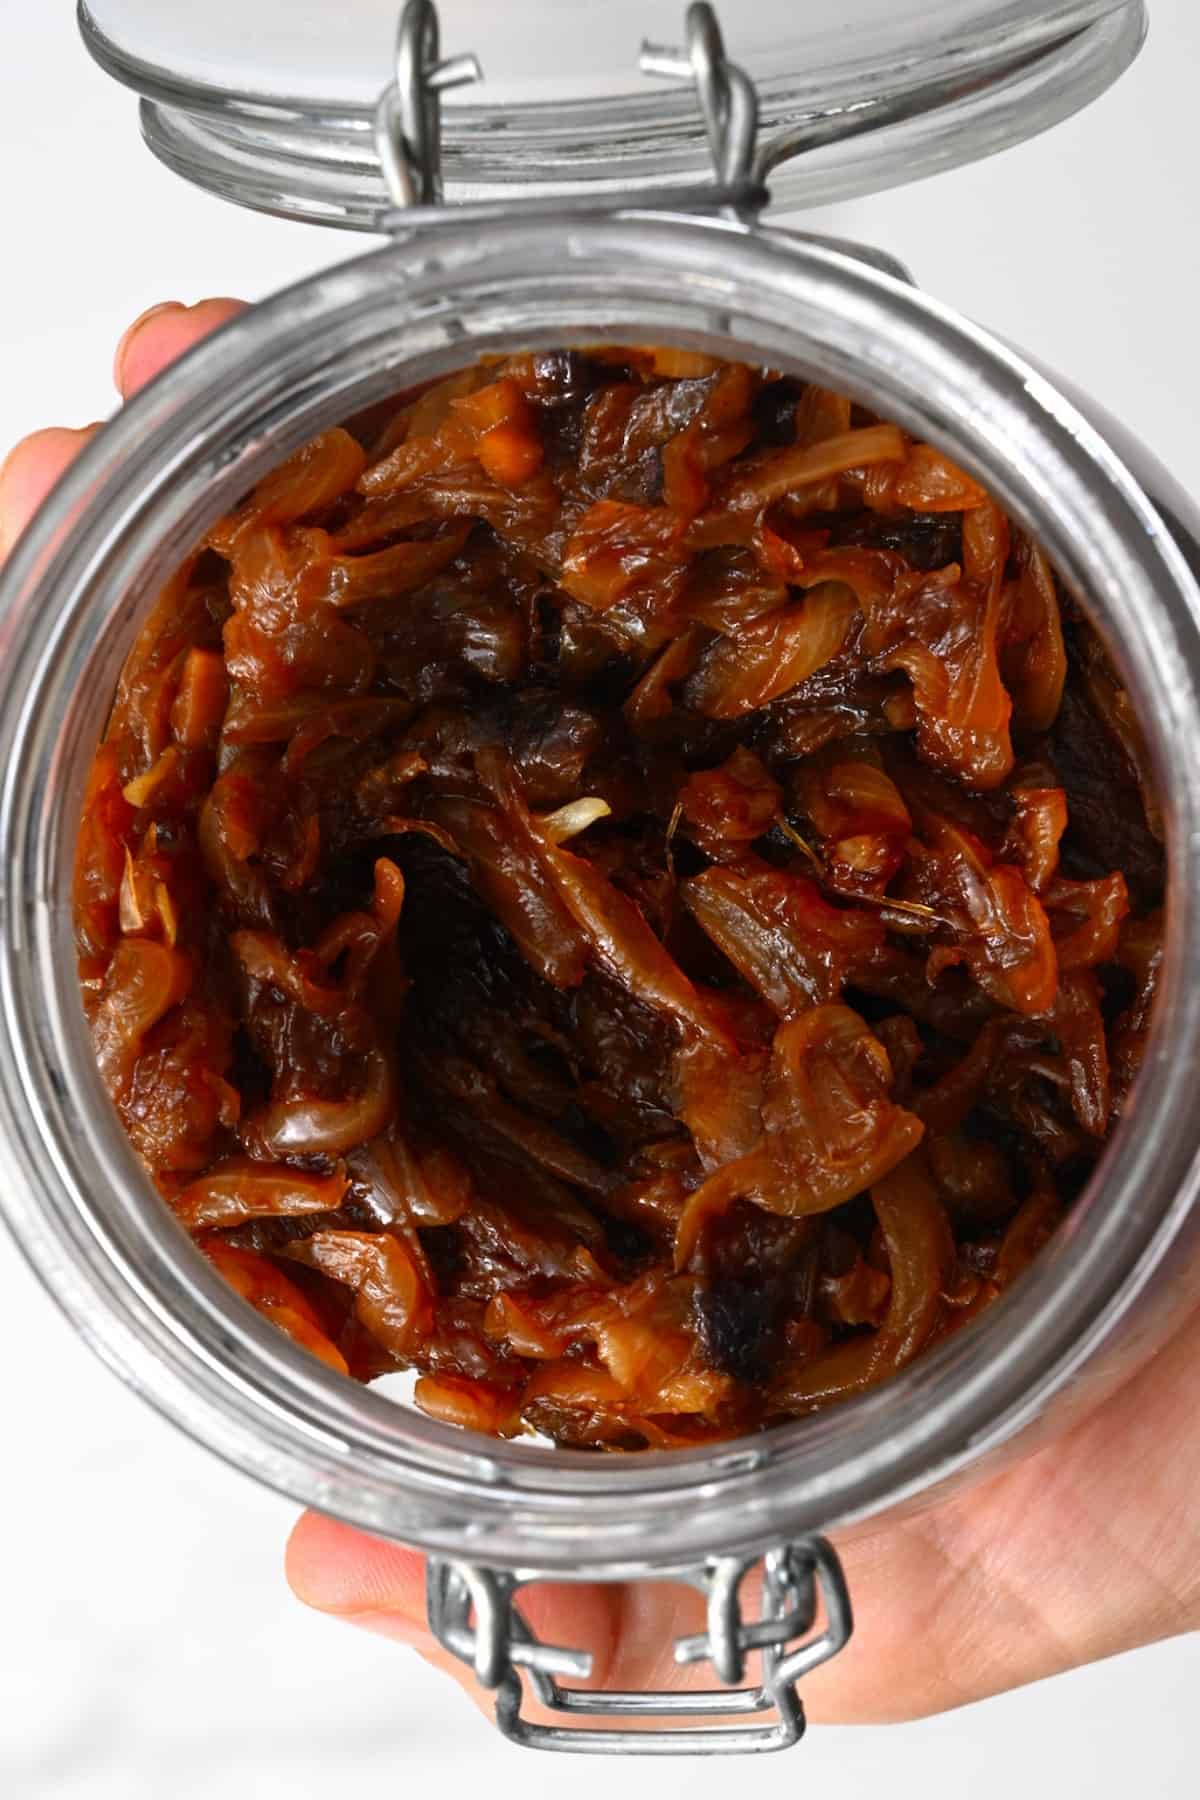
How to Make Ahead and Store?
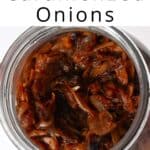
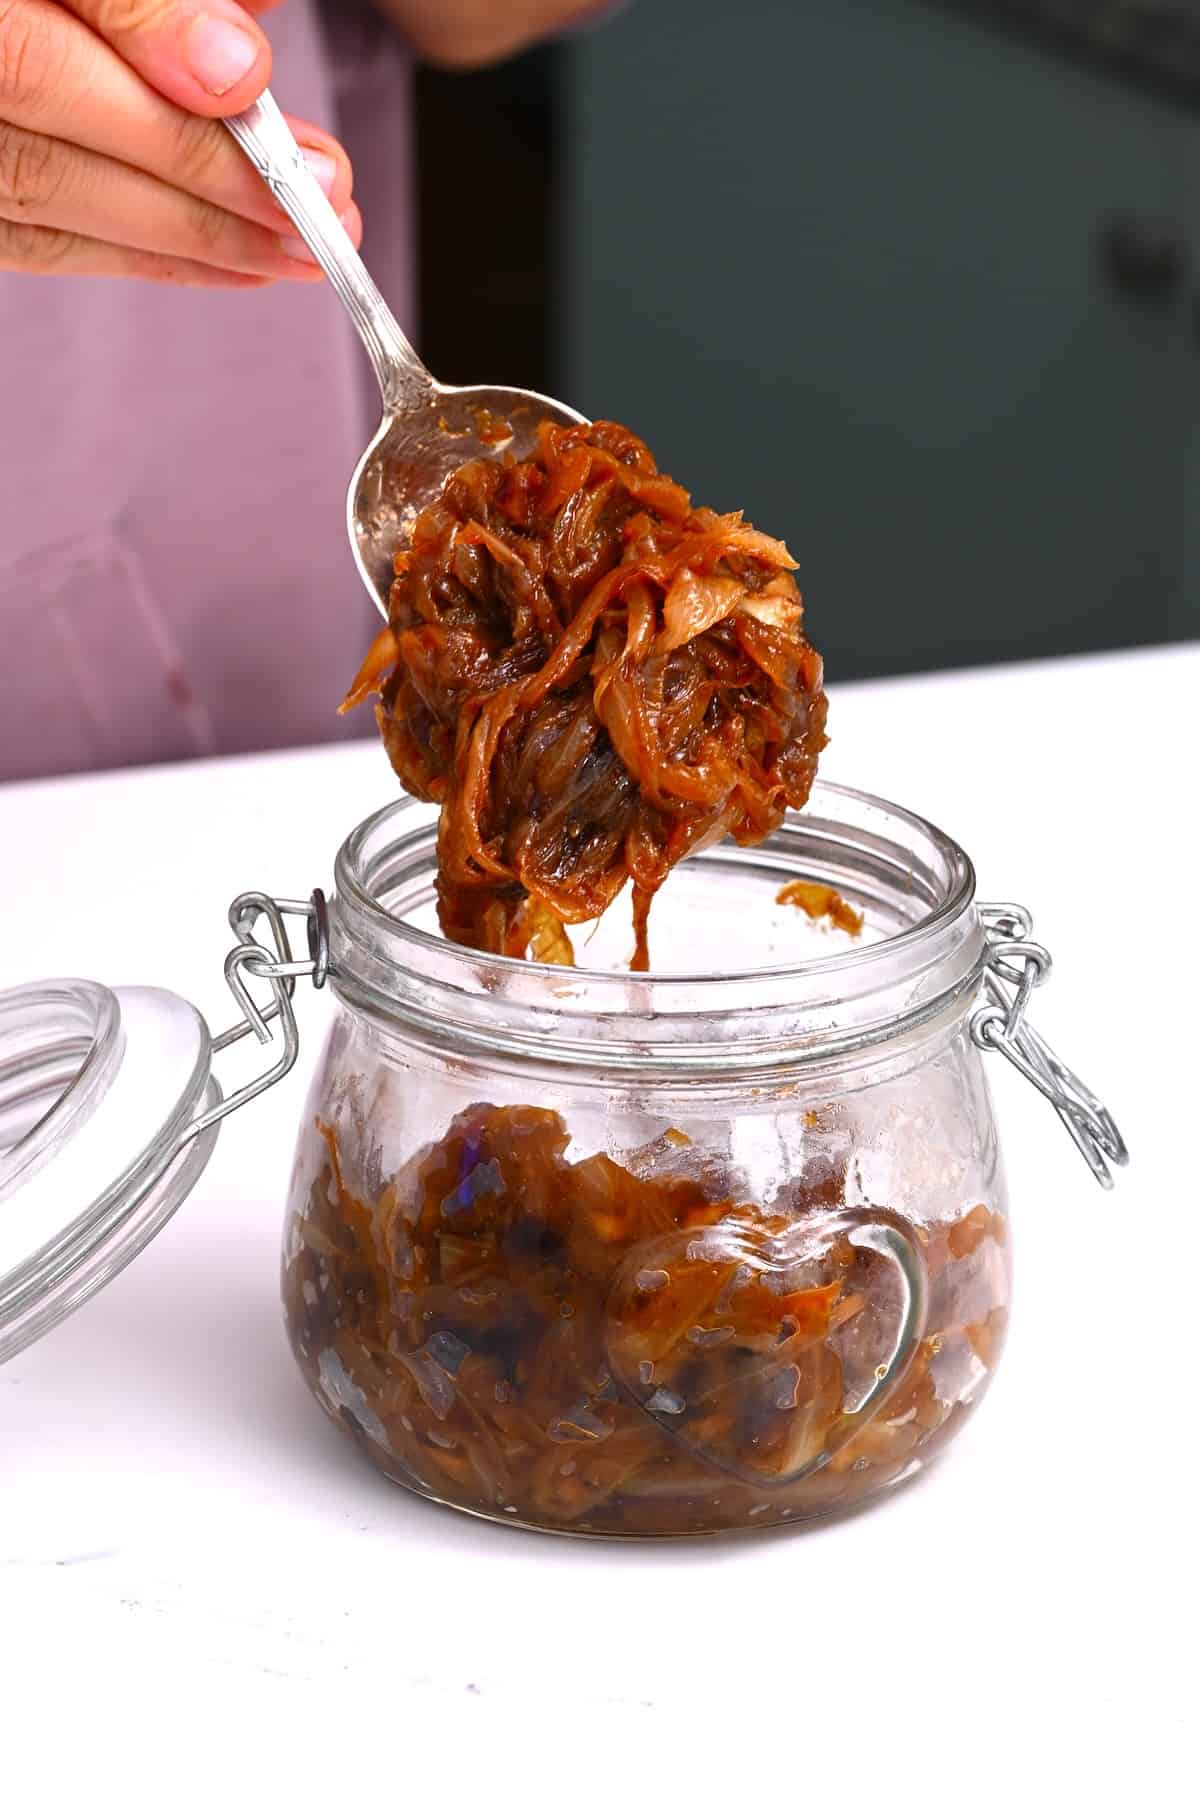
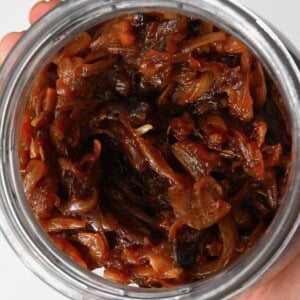
Store: allow the caramelized onions to cool, then store them in an airtight container in the fridge for up to 1 week.
Freeze: transfer the cooled jammy onions to either a freezer-safe container/Ziplock bag OR portion it into a large silicone ice cube tray for easy thawing. Store them in the freezer for up to 3 months.
Allow them to thaw in the refrigerator overnight before enjoying/reheating.
Reheat: I usually just add the onions directly into my recipe of choice as a way to reheat them. Microwave or stovetop would also work. If needed, add a splash of water/stock to avoid sticking in the pan.
How to Use Caramelized Onions?
- To top focaccia.
- As a pizza topping.
- To make a caramelized onion tart.
- Add to caramelized onion dip.
- Mix into soup (like French onion soup) or use as a soup topper.
- Add to a grilled cheese sandwich and other sandwiches.
- Use to top a grilled burger or hotdog.
- Stir into pasta dishes (like mac and cheese).
- Add to casseroles.
- In an omelette, frittata, or quiche.
- Add to a cheeseboard/charcuterie board.
- To top baked cheese.
- Serve with sausages and mashed potatoes.
FAQs
Absolutely, caramelized red onions add wonderful color to dishes and use the same methods to prepare.
This recipe works with any onion: yellow, sweet onion, red onion. So experiment with what you have! I love the results of yellow onions most for flavor complexity.
While there are methods out there that promise “quick caramelized onions”, the truth is that they simply don’t live up to what they should be. For authentic caramelized onions, you need to use a low and slow method.
While several factors can affect the timing (including batch size, onion thickness, the pan, and heat), the process will take a minimum of around 40 minutes, right up to an hour and 45 minutes. I’ve found the sweet spot is usually somewhere close to an hour.
There isn’t an exact figure for you here. You want to leave the onions alone enough for them to have the chance to brown. However, you don’t want them to become crispy or burned.
I recommend waiting until you’re seeing brown bits at the bottom of your pan, then stir well. Every few minutes should be fine, deglazing the pan when necessary. Towards the end of the process, it may be closer to every minute.
Not unless you want to. The process will caramelize all the natural sugars found in the onions, so extra isn’t necessary. Some like to add a small amount just to help the process along.
Tips For The Best Results
- Slice the onions evenly. That way, they’ll cook evenly, too.
- Cooking time varies: based on the batch size, exact heat, pan used, and how brown you want them to be.
- Avoid overcrowding: it can affect the browning process. You want all the onions to have contact with the bottom of the pan. For a large skillet/pan, I recommend caramelizing a maximum of 4-5 onions at one time.
- Don’t let the onions dry out: deglaze the pan when necessary to ensure the best flavor and caramelization.
- Monitor the heat: reduce the heat if the onions start to burn. If they are caramelizing but super slowly, increase it slightly. It can help to increase it at the end for a last POW for caramelization.
- The best pan to use: it’s best to avoid non-stick cookware. It reduces all the brown bits that gather on the bottom of the pan. These brown bits infuse the onions with tons of depth when we scrape them up and deglaze the pan. Instead, use a stainless steel or cast-iron skillet.
- Cook in bulk: even if you only need a small amount, I recommend cooking 4-5 onions at a time. You can store leftovers in the fridge or freezer for another time.
- The yield: caramelized onions shrink by about 4-5x their raw size.
More Flavor Enhancing Recipes
- Roasted cherry tomatoes
- Garlic confit
- How to make black garlic
- Fried Onions
- Simple Roasted Onions
- How to Make Onion Jam
If you try any of these caramelized onions methods, I’d love to hear your thoughts/questions below. Also, I’d appreciate a recipe card rating below, and tag me in your recipe recreations on Instagram @Alphafoodie!
How To Caramelize Onions
Ingredients
- 1.1 lb onions 5 medium-sized; yellow, sweet, red, or white
- 1/4 cup olive oil or a 50/50 blend of oil and butter
- 1/2 tsp salt
- 1/2 cup water check the notes below for substitutes
This will yield about 1.25 cups/6.77 oz/192 g caramelized onions.
Instructions
The Stove Top Method
- Slice each onion’s root and stem end before slicing them in half lengthwise.
- Peel away any onion skin and then use a sharp knife to slice the onion. I made my slices around every ¼-inch thin. Of course, you can slice them even thinner if preferred.
- In a large, wide skillet (the more surface area, the better), heat the oil over medium heat until it shimmers.
- Add the onions and salt (which will draw out the moisture from the onions) and sauté for 5 minutes until they begin to soften.
- Reduce the heat to medium-low, stirring often, until the onions are golden brown and caramelized. During the process, add a splash of water (about 1-2 Tbsp) as needed to deglaze the pan and stop the onions from drying out.This entire process can take between 40 minutes–1 ¾ hr. depending on the pan, onions, and how big of a batch you’re making (as well as how brown you want them to be). I recommend first taste testing at 30 minutes and every 10-15 minutes until they reach your desired level.If the onions seem like they’re becoming crispy, reduce the heat even lower. The aim is for soft, tender, melt-in-the-mouth caramelized onions, NOT brown and crispy onions.
The Oven Method
- Preheat the oven to 400ºF/200ºC and slice the onions as written above.
- Spread them on a large parchment paper-lined baking tray and drizzle with olive oil and a sprinkle of salt. At the same time, add a couple of tablespoons of water (to help steam and soften the onion).
- Roast in the oven for between 35-55 minutes, stirring every 8-10 minutes until the onions are rich brown in color and super tender and jammy.The more often you stir/toss the onions, the more even the caramelization will be.
The Crock Pot Method
- Turn the crockpot on LOW and add a 50/50 combination of oil and butter, leaving it to melt while you chop the onions.
- Add the onion slices, salt, and 1-2 Tbsp sugar to the pot and stir.
- Cover and cook on LOW for 10-13 hours (depending on how caramelized you want them), stirring every few hours.You don’t necessarily have to stir them if, for example, you’re sleeping for 8 hours during the process. However, I’ve found that I prefer the results, stirring them at least 3-4 times during the process.
- If the onions seem a bit too soupy even at the 8-9hr mark, leaving the lid slightly ajar for the remainder of the period (or for at least 3-4 hours) can help make the onions super jammy. You could also drain any excess liquid and add it to soups and stews for extra flavor.
How to Make Ahead and Store?
- Store: allow the caramelized onions to cool, then store them in an airtight container in the fridge for up to 1 week. Freeze: transfer the cooled jammy onions to either a freezer-safe container/Ziplock bag OR portion it into a large silicone ice cube tray for easy thawing. Store in the freezer for up to 3 months. Allow them to thaw in the refrigerator overnight before enjoying/reheating.Reheat: I usually just add the onions directly into my recipe of choice as a way to reheat them. Microwave or stovetop would also work. If needed, add a splash of water/stock to avoid sticking in the pan.
Notes
- Slice the onions evenly: that way, they’ll caramelize evenly, too.
- Cooking time varies: based on the batch size, exact heat, pan used, and how brown you want them to be.
- Avoid overcrowding: it can affect the caramelization process. You want all the onions to have contact with the bottom of the pan. For a large skillet/pan, I recommend caramelizing a maximum of 3-4 onions at one time.
- Don’t let the onions dry out: deglaze the pan when necessary to ensure the best flavor and caramelization.
- Monitor the heat: reduce the heat if the onions start to burn. If they are caramelizing but super slowly, increase it slightly. It can help to increase it at the end for the last POW for caramelization.
- The best pan to use: it’s best to avoid non-stick cookware. It reduces all the brown bits that gather on the bottom of the pan. These brown bits infuse the onions with tons of depth when we scrape them up and deglaze the pan. Instead, use a stainless steel or cast-iron skillet.
- Cook in bulk: even if you only need a small amount, I highly recommend cooking 3-4 onions worth at a time since the process is lengthy. You can store leftovers in the fridge or freezer for another time.
- The yield: caramelized onions shrink by about 4-5x their raw size.
- Vegetable stock,
- Chicken stock,
- Apple juice,
- Cider,
- Marsala wine,
- Light beer,
- Balsamic vinegar or red wine vinegar.
Nutrition
Nutrition information is automatically calculated, so should only be used as an approximation.


