
This post may contain affiliate links. Please read our disclosure policy.
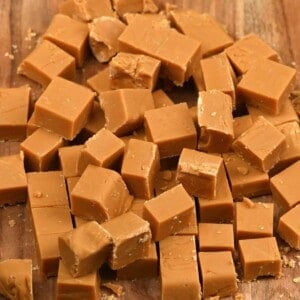
Homemade caramel fudge the way it should be — creamy, rich, and melt-in-your-mouth smooth.

This old-fashioned caramel fudge is made with just 4 main ingredients: sugar, butter, milk, and sweetened condensed milk. No fancy gear, no candy thermometer. Just a bit of patience and some good stirring (okay, a lot of stirring) — and you get that golden, buttery, slightly chewy texture that’s impossible to stop eating.
It’s the kind of treat I make when I want something nostalgic but still impressive enough to gift. And if you love this, you might also like my healthy chocolate fudge or homemade caramel sauce — both super simple and just as satisfying.

Watch how to make it
Ingredients

- Condensed milk: The secret to that ultra-creamy, melt-in-the-mouth finish. I used my recipe homemade condensed milk, but store-bought works just as well.
- Sugar – I used demerara sugar for a richer caramel flavor, but light brown or regular white sugar work just fine too.
- Unsalted Butter: Helps create that smooth, creamy texture. If you’re using salted butter, just skip the added pinch of salt later.
- Whole milk – Loosens the mixture as it cooks. Stick with full-fat dairy for the best texture.
- Sea salt: Just a pinch helps balance the sweetness. You can also sprinkle a little flaky salt on top for a salted caramel finish.
See the printable recipe card below for full information on ingredients and quantities.
How to make caramel fudge
Melt and simmer the ingredients: Add the sugar, butter, milk, and sweetened condensed milk to a saucepan over low heat. Stir gently as the butter melts and everything starts to combine. Once smooth, bring the mixture to a soft boil and simmer for about 10 minutes, stirring constantly. Scrape the bottom and sides of the pan regularly to keep it from catching or burning.

Check for the right temperature (the soft ball stage): The fudge is ready when it hits about 240–245ºF (115–120ºC). If you have a candy thermometer, clip it to the side of the pan. I sometimes use an infrared thermometer — both work!
No thermometer? No problem. Just drop a tiny spoonful of the mixture into a bowl of ice water. If you can roll it into a soft ball that holds its shape and doesn’t stick to your fingers, it’s ready. If it’s still runny or too sticky, let it simmer for a few more minutes and test again.

Cool and whisk: Once the fudge reaches the soft ball stage, take it off the heat and let it sit for a few minutes to cool slightly. If you’re adding anything extra — like vanilla, flaky salt, or chopped nuts — now’s the time to stir them in.
Then, whisk the mixture until it thickens. This can take up to 10 minutes, and you’ll feel it start to lose its shine and get heavier as it sets. The longer you whisk, the more crumbly the fudge will be once cooled — so stop as soon as it turns matte and starts to hold shape.

Pour, Set, and Slice: Pour the mixture into a parchment-lined tray — I used an 8-inch (20 cm) square pan. Spread it out evenly and press the top down gently with a spoon or spatula to smooth it out.
Cover the surface with another piece of parchment, then let it cool at room temperature. Once it’s no longer warm, transfer it to the fridge and chill until firm.
When set, slice into small bite-sized squares. I usually go for 1 to 1.5 inches, but no need to be exact — just make them snackable!

Store: Place the caramel fudge cubes in an airtight container and keep them in the fridge, pantry, or a cool cupboard. They’ll stay fresh for at least 2 weeks (even longer in the fridge).
If you’re gifting them, wrap the squares in wax paper or pop them into a festive tin — they make a beautiful treat for birthdays, holidays, or homemade hampers.

FAQs
No — they’re not the same. This recipe needs sweetened condensed milk for that thick, creamy texture. Evaporated milk won’t give the same result.
No problem. After simmering for around 10 minutes, drop a little of the mixture into a bowl of ice-cold water. If you can roll it into a soft ball that doesn’t stick to your fingers, it’s ready.
Usually, yes! Return it to the pan, add a splash of water (up to ½ cup), and reheat it gently. Let it simmer again and test for the soft ball stage. Then cool and beat as before.
If it still doesn’t set, don’t toss it — drizzle it over ice cream, spread it on toast, or turn it into a next-level caramel sauce.
Yes! Wrap the pieces individually and store them in an airtight container. They’ll keep in the freezer for up to 2 months. Let them thaw in the fridge before serving.
Recipe notes
- Use a non-stick saucepan – I like using a heavy, high-quality non-stick pan to make cleanup easier. A heavy-bottomed stainless steel pan also works well for even heat distribution.
- Choose the right tools – Metal spoons heat up fast while stirring. A wooden spoon or silicone spatula is much more comfortable for this.
- Whisk or beat the fudge – Once it’s off the heat, whisk the mixture to cool and thicken it. I prefer whisking over beating with a spoon — it’s faster and gives a smoother result.
- Line the tray properly – Don’t skip this! Parchment paper makes it so much easier to remove the fudge once it sets. Let the paper overhang the sides so you can lift it out cleanly.
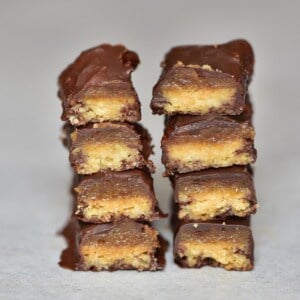
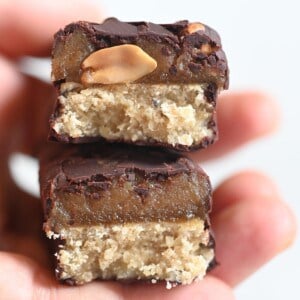
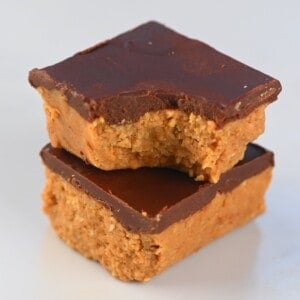
More caramel treats to try
If you try this caramel fudge recipe, let me know how it goes in the comments below. I’d appreciate a recipe card rating and would love to see your recipe recreations – tag me on Instagram @Alphafoodie!
Caramel Fudge
Equipment
- Parchment paper hang it over the sides of the tray
Ingredients
- 1 can sweetened condensed milk (13–14 oz can)
- ⅔ cup whole milk
- 2 ¼ cups sugar demerara, turbinado, light brown, etc
- ½ cup butter unsalted
Instructions
- Add the condensed milk, milk, sugar, and butter to a saucepan. Heat over low heat and stir until everything melts together and the mixture becomes smooth and creamy.
- Bring to a soft boil and simmer for 10 minutes, stirring constantly to prevent burning. Scrape the bottom of the pan regularly.
- Check that the mixture reaches 240–245ºF (115–120ºC) using a thermometer.If you don’t have a thermometer, drop a small spoonful into a bowl of ice water. If it forms a soft ball that doesn’t stick to your fingers, it’s ready. If not, continue simmering for a few more minutes and test again.
- Remove from the heat and let it cool for a few minutes.
- Whisk the mixture using an electric mixer or wooden spoon until it thickens, turns matte, and begins to set. This may take up to 10 minutes.
- Pour the mixture into a parchment-lined 8-inch (20 cm) tray and smooth the top. Cover with another sheet of parchment. Let it cool to room temperature, then transfer to the fridge to chill until fully set.
- Slice into 1–1.5 inch squares and enjoy or store in an airtight container.
Video
Notes
Nutrition
Nutrition information is automatically calculated, so should only be used as an approximation.


I do not recommend. The fudge did not set up and it was just a wet, gooey mess of ingredients.
Hi Sarah! I’m sorry to hear that the fudge didn’t turn out right. Sometimes fudge can be tricky! Make sure to let it cool completely before cutting. If it’s too gooey, it might need a bit more time on the heat. Hope this helps!
I’ve tried making this recipe twice now and both times it starts to separate and has white bits in it while I’m cooking it, can someone tell me where I’m going wrong?
Hi Paul! Sorry you’ve hit this twice – how frustrating, and apologies for the slow reply. White bits and separation in caramel fudge usually mean the sugar is crystallizing or the mixture is splitting from cooking too hot/fast or stirring at the wrong stage. Try keeping the heat gentle and steady, stir just to combine rather than constantly, and avoid scraping sugar crystals from the sides of the pan into the mix. If it starts to separate, taking it off the heat and stirring in a splash of warm cream can sometimes bring it back together. Hope your next batch is a smooth one! 😊
Can I use brown sugar
Hi Ethan,
Yes, you can use brown sugar.
Delicious – recipe easy to follow and very successful !
Glad you liked it, Gill!
can I use foil instead of parchment paper?
Hi Emmma,
Yes, you should be able to use foil. Let me know how it goes 🙂
Hi there! I’m really keen on trying this yummy recipe. I would like to know if I can use muscavado sugar as a substitute for the other brown sugars mentioned?
Hi Dee,
You can use muscovado sugar if wanted but keep in mind that it has a lot more molasses (when compared to turbinado and demerara) and it will have a stronger flavor.
Thanks for your response is granulated sugar okay to use?
Hi,
It should work just fine, let me know if you tried it.
For years I have tried to make fudge with varying degrees of success. Finally a recipe that works! Mine came out perfectly.
Thank you!
Thank you for your comment, Sue. So happy you are enjoying it. 🙂
Do you think I can brown the butter before adding the rest of the ingredients? Should I brown it and then let it cool? Or should I just add the ingredients to the hot butter?
Hi Mimi,
You should be able to brown the butter first and then add all the other ingredients, just make sure the butter doesn’t scorch on the bottom while browning it. I hope this helps, let me know how it turned out. 🙂
Curious to know what anyone would think about adding a little Caramel extract (instead of vanilla)? Or would this maybe be too over powering?
Hi Kristi,
It’s definitely worth a try! 🙂 Let me know if you did.
It looks so easy and yummy. Would love to try one day.
Thank you for your comment!
I have made this twice now. The first time I was short 1/2 cup of brown sugar, so I used 1/2 cup of granulated sugar and you could feel the gritty texture when it had completely cooled. The taste was still amazing! But the second time I did all 2 cups of light brown sugar and it came out wonderfully!
I will definitely be making this again! Thanks for sharing!!
Thank you so much for your comment. Veronice! So happy you are enjoying the recipe!