
This post may contain affiliate links. Please read our disclosure policy.
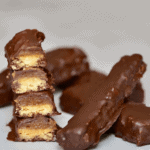
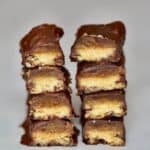


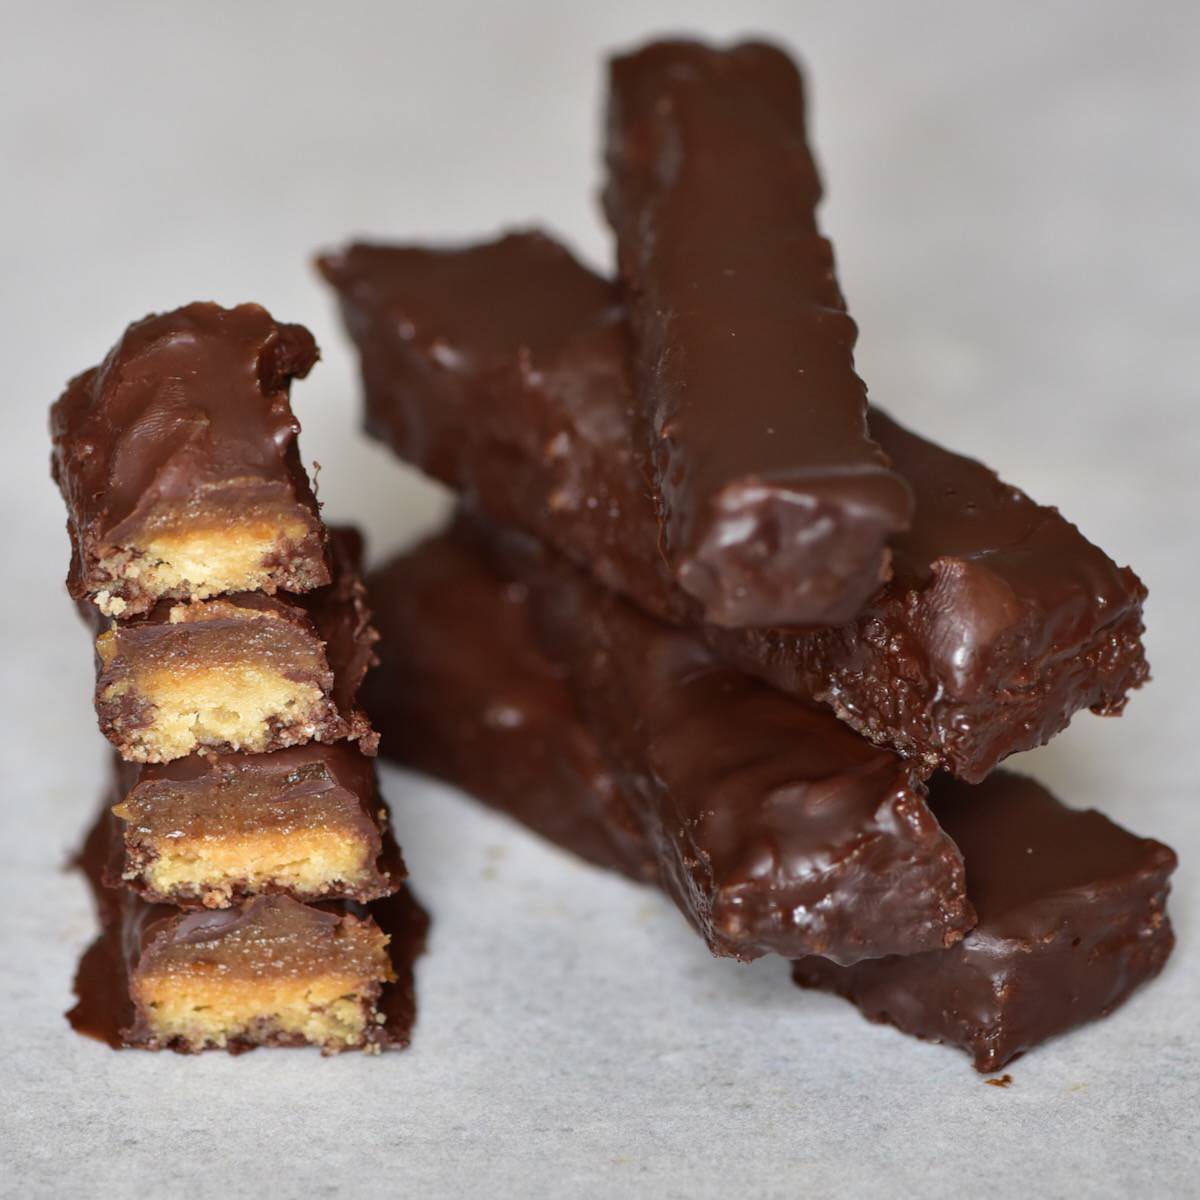
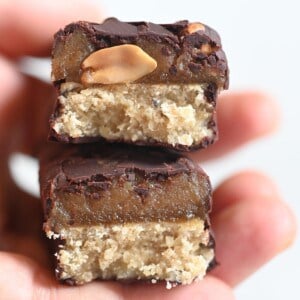
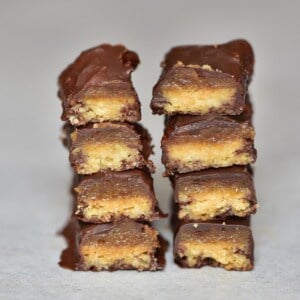
These vegan and gluten-free copycat peanut butter Twix bars are full of creamy caramel, crunchy shortbread, and smooth chocolate. The ultimate sweet treat!
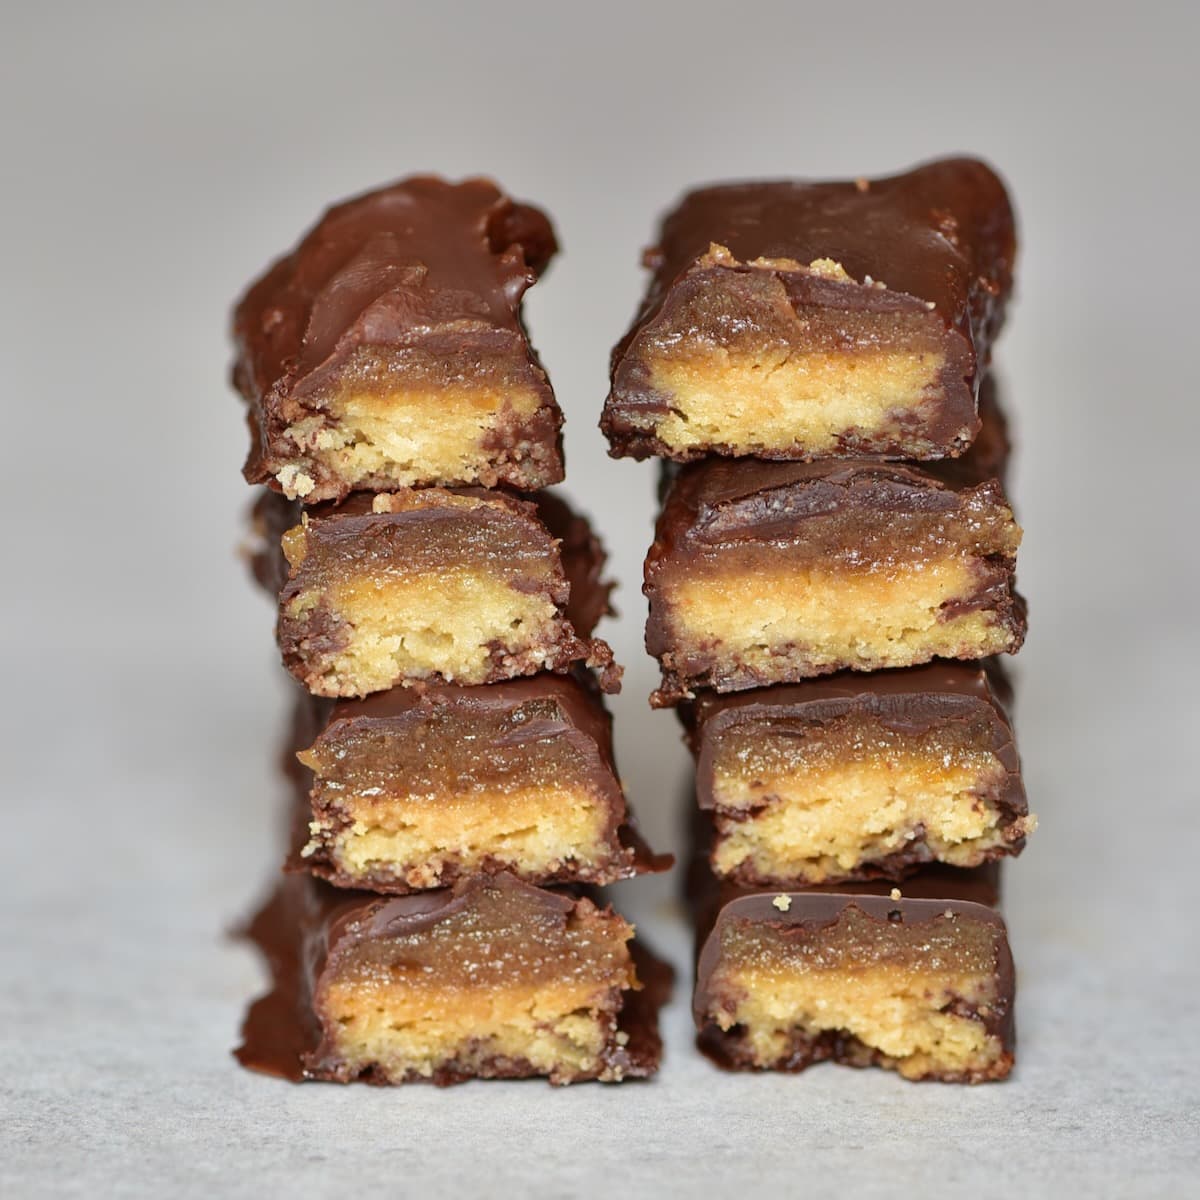
Satisfy your sweet tooth without worrying about what’s inside with these easy homemade Twix bars – you’d never guess these simple ingredients would make something so delicious! With a date caramel, light almond flour shortbread base, and crisp chocolate coating, you’ll never go back to the original after you’ve tried these.
Want to save this recipe?
Watch how to make it
Ingredients
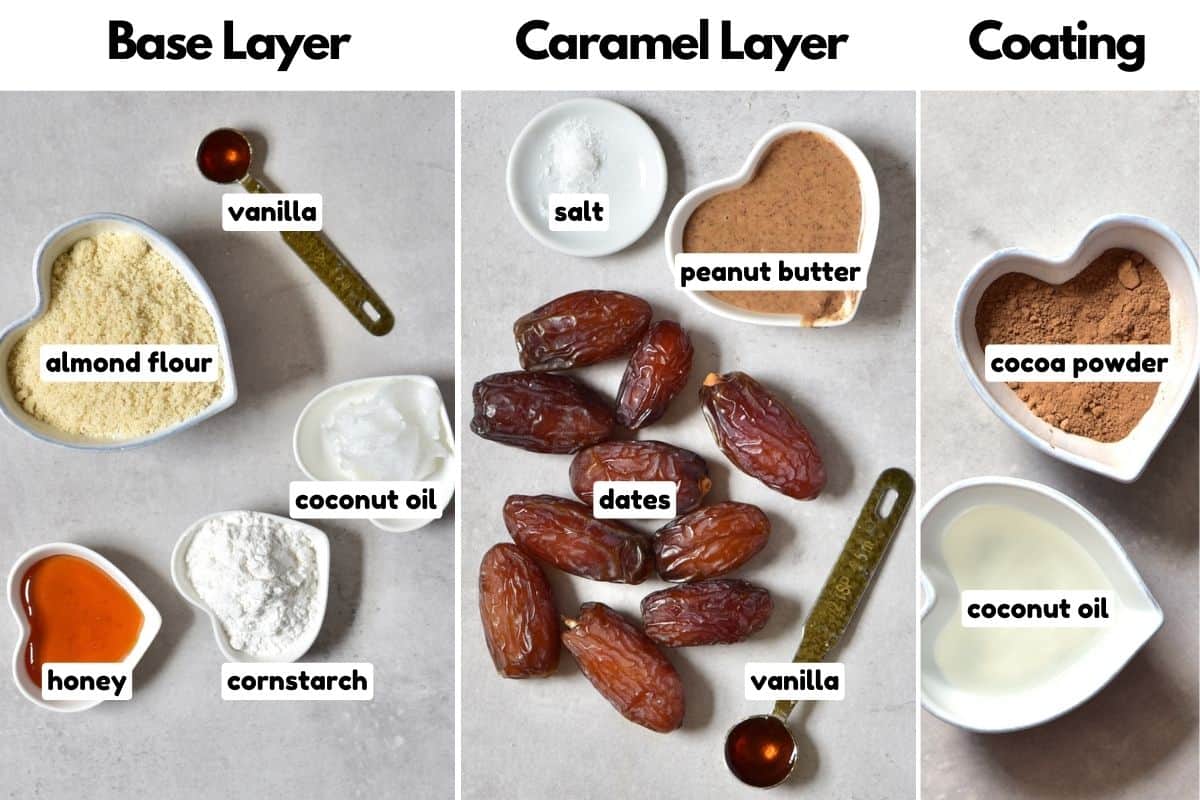
For The Shortbread Base
- Almond Flour: Use packed, blanched almond flour with a fine texture.
- Cornstarch
- Honey: To make this recipe completely vegan, use maple syrup or agave, or make your own vegan-friendly honey.
- Coconut Oil
- Vanilla Extract
For The Caramel Layer
- Dates: Pitted, larger dates are best.
- Vanilla Extract
- Peanut Butter: Opt for creamy peanut butter that has a thinner, pourable consistency. You can make your own or use your favorite.
- Salt
And For The Chocolate Topping
- Cocoa Powder
- Coconut Oil
How to make peanut butter Twix bars
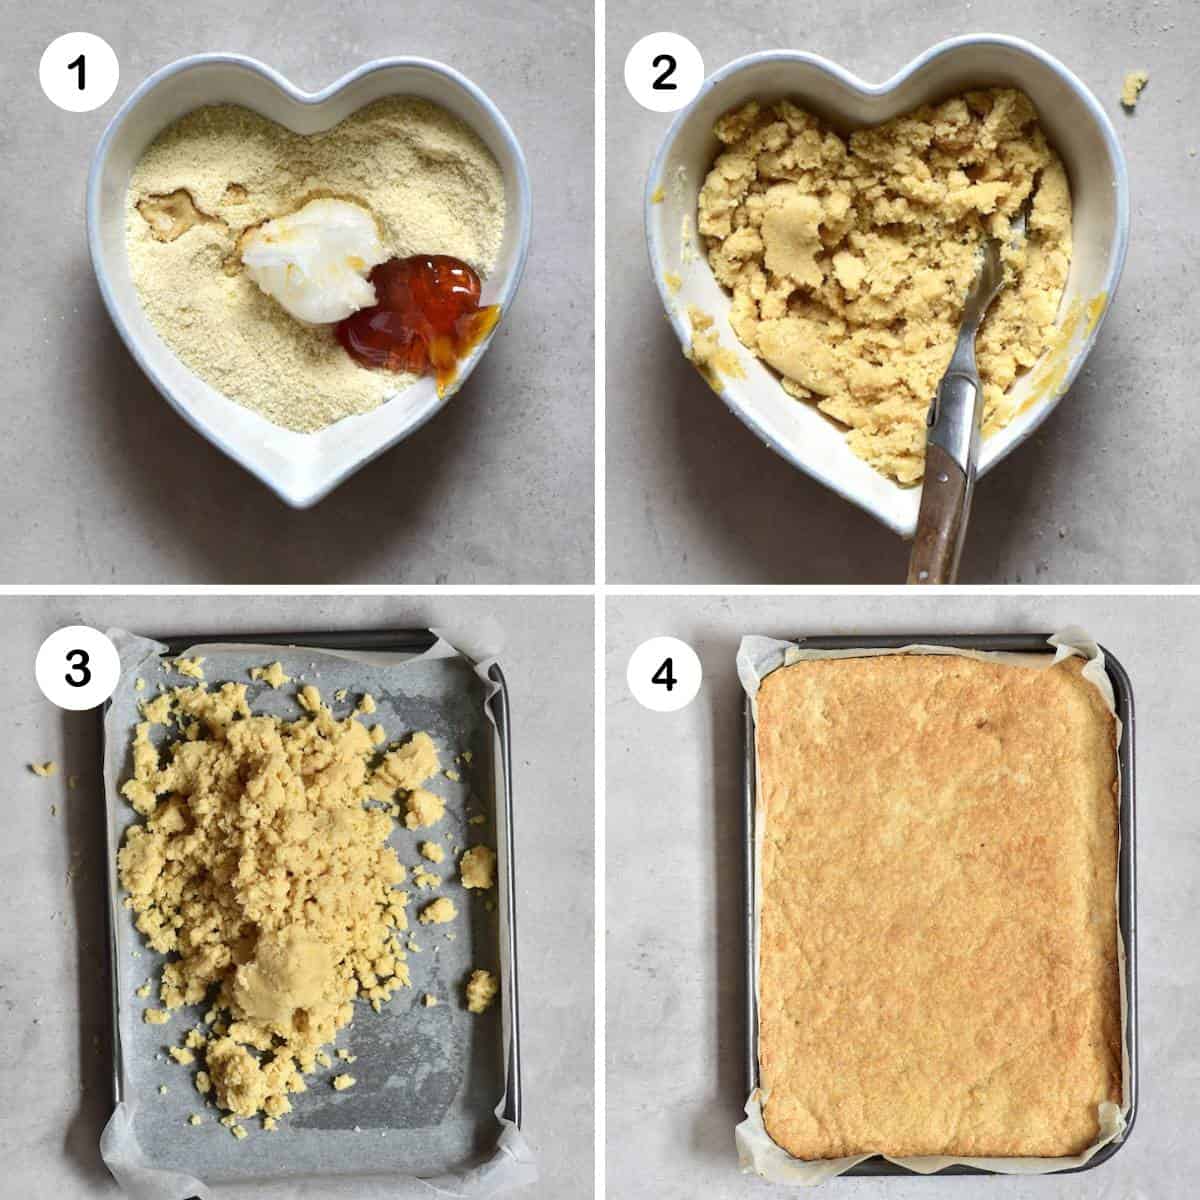
Make The Shortbread Base: In a bowl, combine the almond flour, honey, cornstarch, coconut oil, and vanilla and mix until they form a thick texture. Pour out onto a square pan lined with parchment paper and use a spatula to spread into one, even layer.
Bake in the oven at 325ºF/170ºC (fan assisted) for 10-15 minutes, until a light golden color. Remove from the oven and leave to cool.
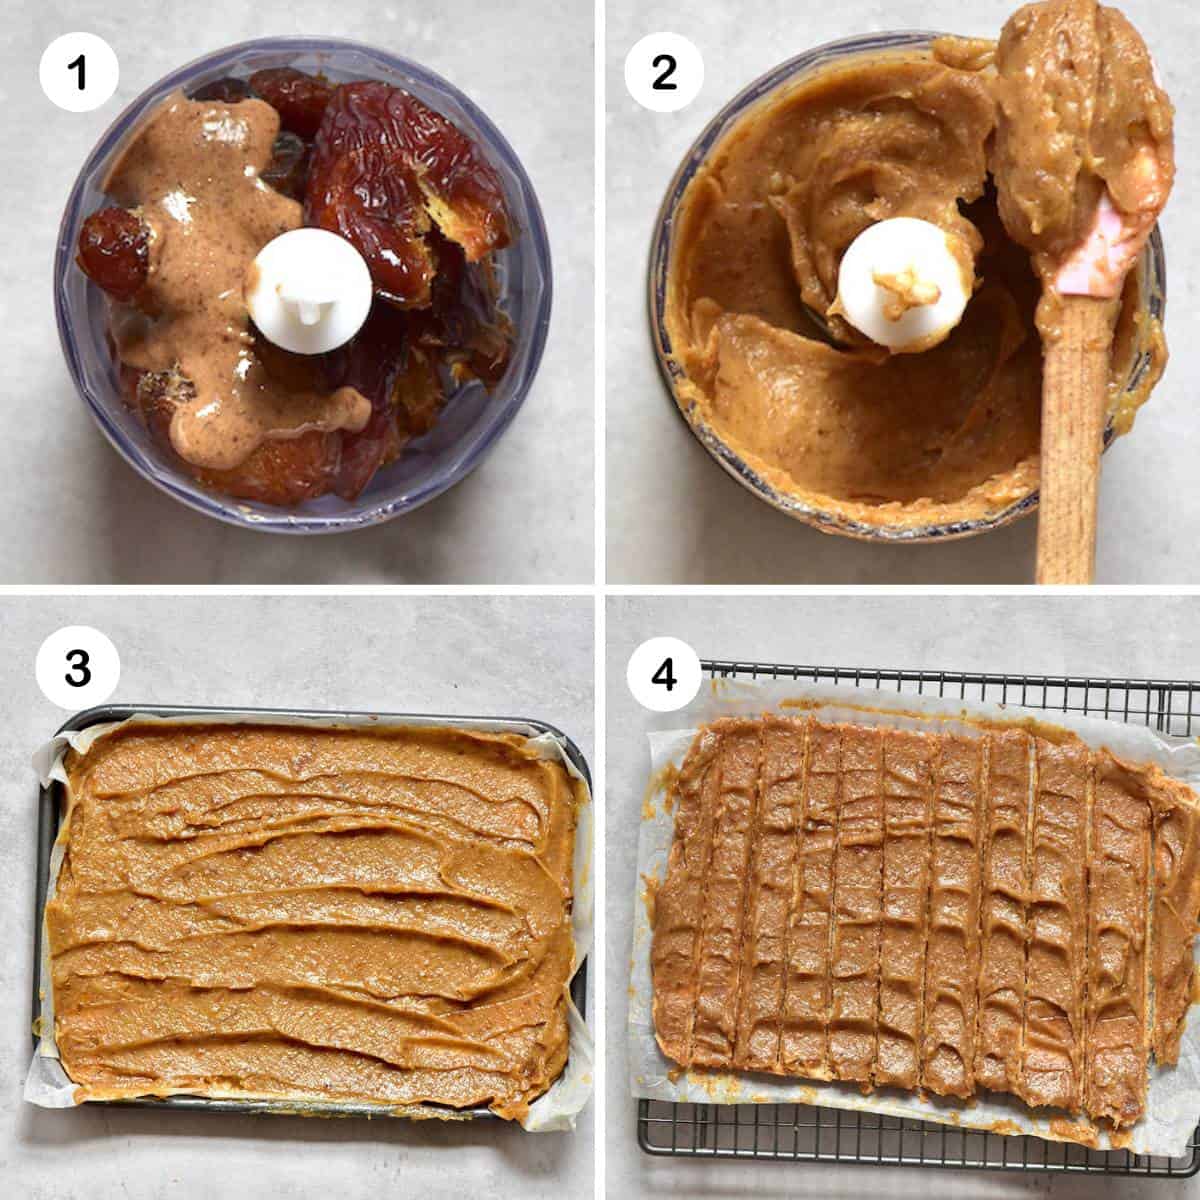
Make The Caramel: If your dates are dried, soak them for 10-15 minutes in hot water before using. Then, add the dates, vanilla extract, peanut butter, and salt to a food processor and blend until a smooth and creamy caramel has formed.
Spread the caramel over the biscuit base first layer and freeze for 30-45 minutes until hard. Remove the base from the tin and cut it in even pieces, then return to the freezer for 10-15 minutes more.
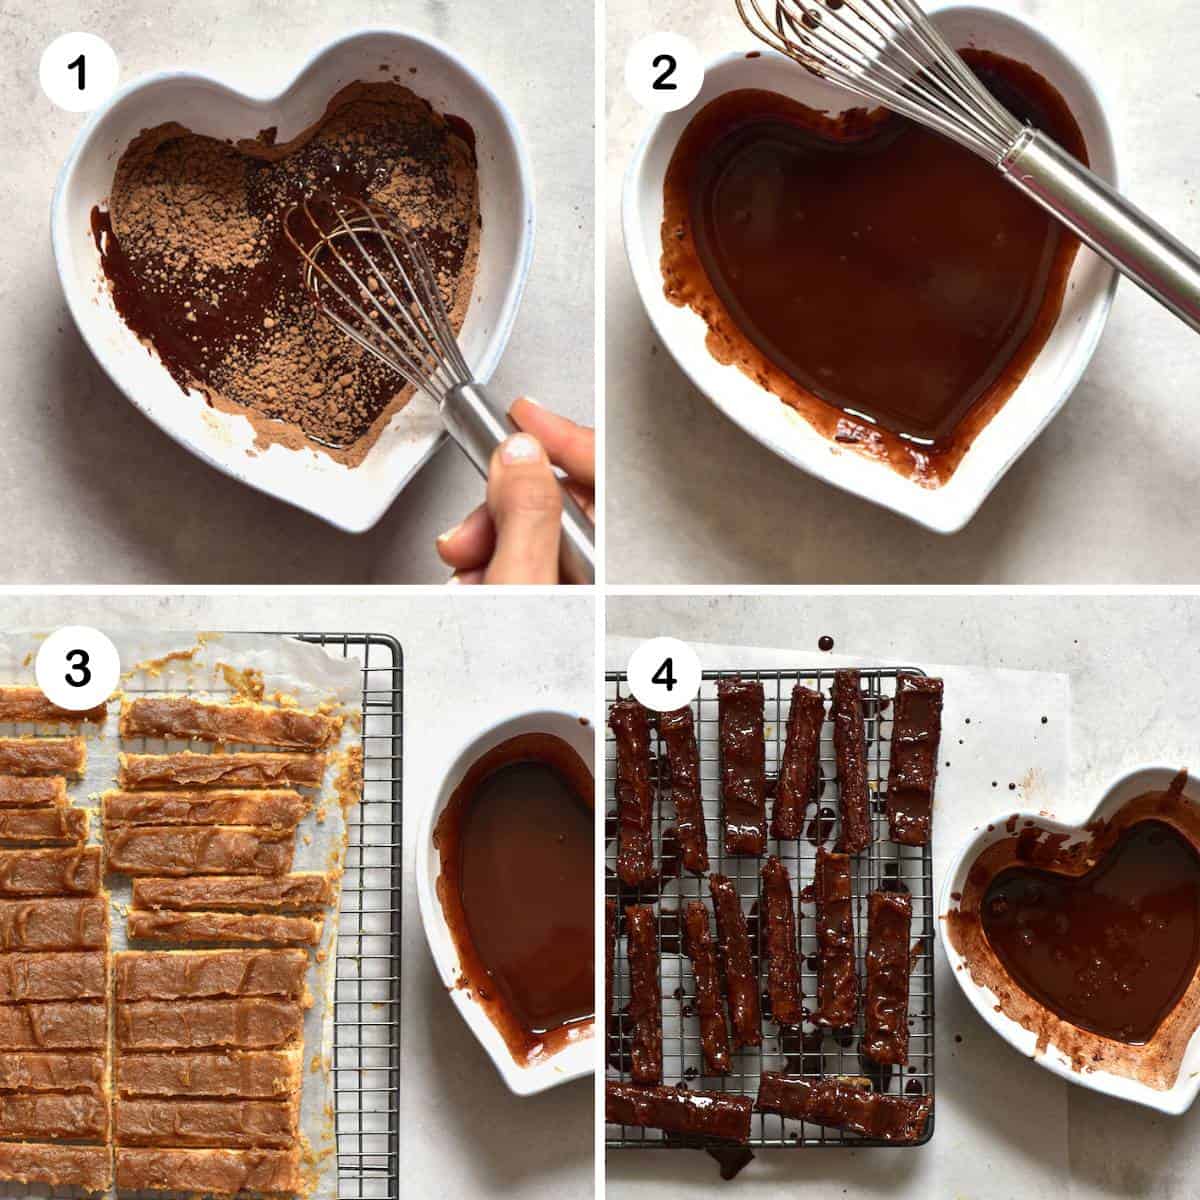
Assemble The Peanut Butter Twix Bars: Melt the coconut oil and mix with the cocoa powder, making sure there are no lumps. Next, using a fork, dip each peanut butter bar into the chocolate mixture, then freeze for 10-15 minutes. Repeat a second time and set for a further 10-15 minutes, then enjoy.
How to store
In The Fridge: Once set, keep the peanut butter Twix bars in an airtight container in the fridge for up to a week.
Freeze and Thaw: Transfer to a freezer-safe container – they should keep for up to 2 months. To enjoy, let a frozen peanut butter Twix thaw for 10-15 minutes before eating.
Other healthier candy bars
If you try these peanut butter Twix bars, let me know how it goes in the comments below. I’d appreciate a recipe card rating and would love to see your recipe recreations – tag me on Instagram @Alphafoodie!
Peanut Butter Twix Bars
Ingredients
Base layer:
- 1 cup almond flour
- ¼ cup cornstarch
- 2 tbsp coconut oil
- 1 tbsp honey
- ½ tsp vanilla extract
Caramel layer:
- 10-11 dates
- 1 tbsp peanut butter
- ½ tsp vanilla extract
- Pinch salt
- water just a bit if needed
Chocolate coating:
- 1/2 cup cocoa powder
- 1/2 cup coconut oil
Instructions
For The Shortbread Layer
- Add all the shortbread ingredients to a bowl and mix until combined and starting to form a dough.
- Put the mixture into a baking tray lined with parchment paper and press down to form an even layer of shortbread. Bake at 170°C/325°F for 10-15 minutes until golden brown. Leave to cool in the fridge.
For The Caramel Layer
- If your dates are dry, let them soak in boiling water for 10-15 minutes before using.
- Add all the caramel ingredients to a food processor and blitz until it forms a creamy, smooth consistency.
- Pour the caramel over the shortbread layer and spread to an even thickness. Leave to cool for 10-15 minutes or until the caramel has hardened. Then, cut into even pieces and return to the freezer.
For The Chocolate Layer
- Melt the coconut oil, then mix in the cocoa powder until a thin liquid has formed.
- Using a fork, dip each peanut butter twix bar into the chocolate. Freeze for 10-15 minutes, then repeat for a double dip to make sure the bars are fully coated. Enjoy!
Video
Notes
Nutrition
Nutrition information is automatically calculated, so should only be used as an approximation.


Hi
I made these yummy bars I had potato starch on hand use that held great together the cookie base .
I made my ground almonds meal in processor in my caramel mixture I added vanilla powder .
I didn’t put any salt in mixture I added to the chocolate topping it’s gives its sweet and salted topping yummy .I use semisweet chipits 1/2 cup of coconut oil .Looks fancy when you cut in cubes my grand girls loves when young Gramie comes over…thanks for great recipes…
Thank you for your comment, Johanne. Glad you adapted the recipe to how you like it 🙂
I have home made almond flour and the base wasn’t thickening like yours so I doubled the oil, and after baking it… it all crumbled under the caramel. I’ve tried to save it but will see. Any recommendations for next time?
Hi Danielle,
Doubling the oil would definitely make it crumble more. The reason I used rice malt syrup is to help the dough stick together. If you used rice malt syrup (or honey), then next time I would try maybe replacing the coconut oil with butter? Mine didn’t crumble. My coconut oil to start with was more on the solid consistency. You need a sticky Dough. Sometimes I add some gluten free flour too (it helps). Hope that helps :-).
Ok, makes sense! I think my homemade flour just absorbed things differently too so I’ll play with it more and use your suggestions too. My hubs is a sugar-aholic and LOVED the bars though. SUPER TASTY, LOVE!
Thank you❤✌