
This post may contain affiliate links. Please read our disclosure policy.
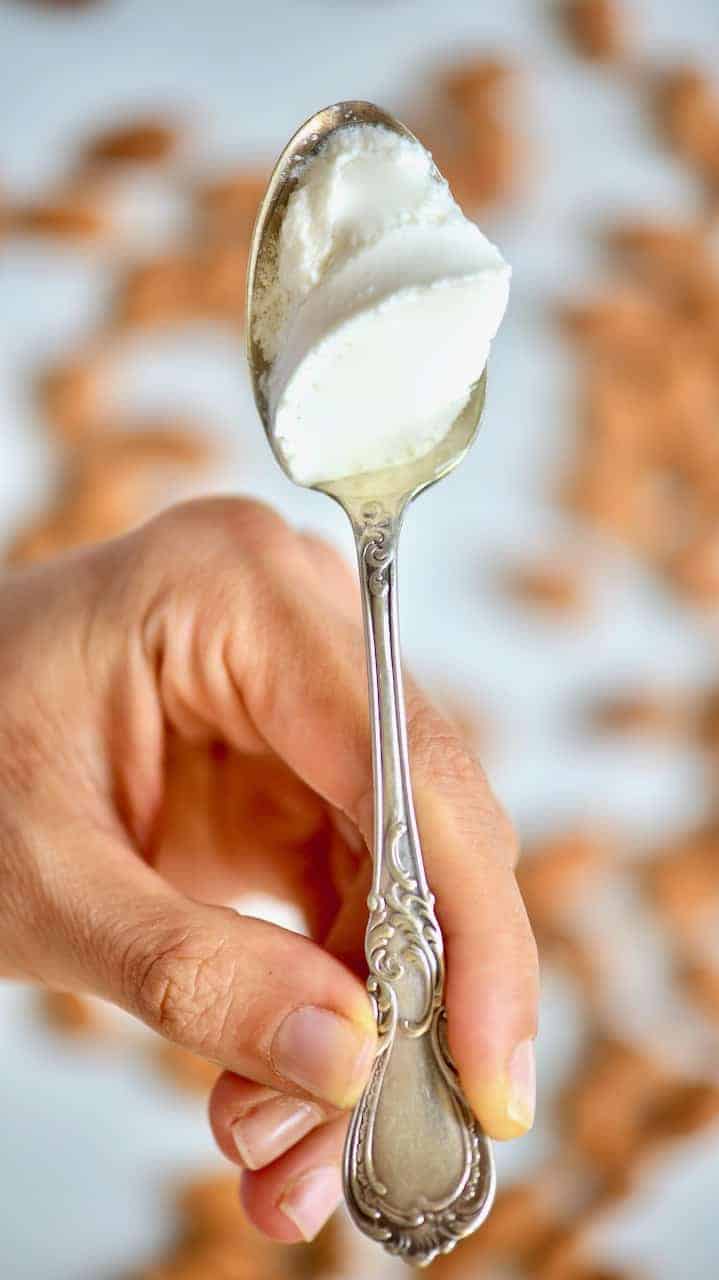
A simple homemade almond yogurt made using just four ingredients and a super simple method – for a thick, creamy, dairy-free yogurt.
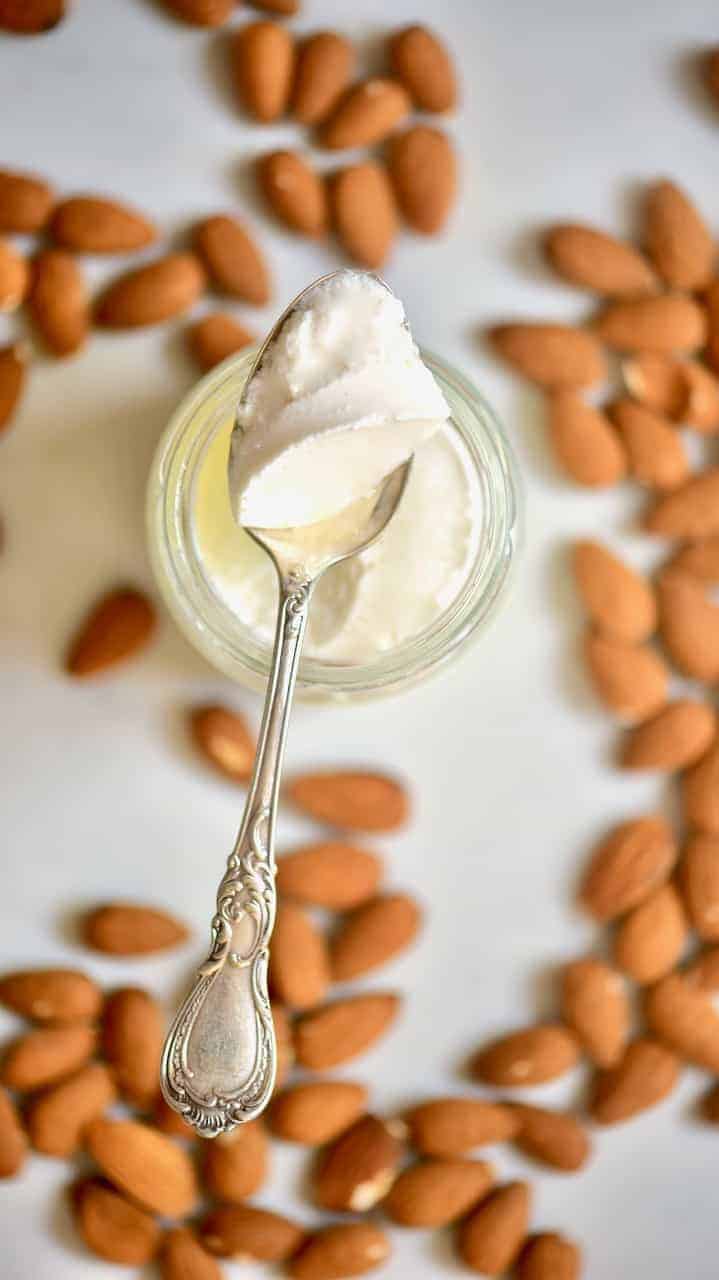
This post has been a long time in the making; you wouldn’t believe how happy I am that it’s ready. This simple homemade almond milk yogurt is a great dairy-free yogurt recipe for any of you who are lactose intolerant, soy-free, and/or aren’t keen on homemade coconut yogurt yet want to make homemade yogurt easily at home.
Just like my coconut yogurt though, this recipe took countless tried-and-failed attempts at getting it ‘just right’ to be able to make the perfect consistency of dairy-free yogurt. Unfortunately, when using ingredients like almond milk, that don’t (and won’t) thicken in the same way that dairy yogurts do, it can take quite a bit of experimentation to find methods that work well.
Luckily, I’ve found two methods that work particularly well, and I’m now very happily making my own almond yogurt – swapping it out with other homemade yogurt recipes that I know every few weeks. The best thing that this recipe only takes four ingredients and is a super simple method for foolproof almond yogurt every time.
Want to save this recipe?
A few notes about making this almond milk yogurt
1. Always use homemade almond milk
I always intended this DIY to be entirely from scratch. However, curiosity led me to try to make almond milk yogurt from a variety of branded almond milk, and I never did find a version that I was happy with. Making homemade almond milk is so ridiculously simple anyway that it just makes sense to do it from scratch.
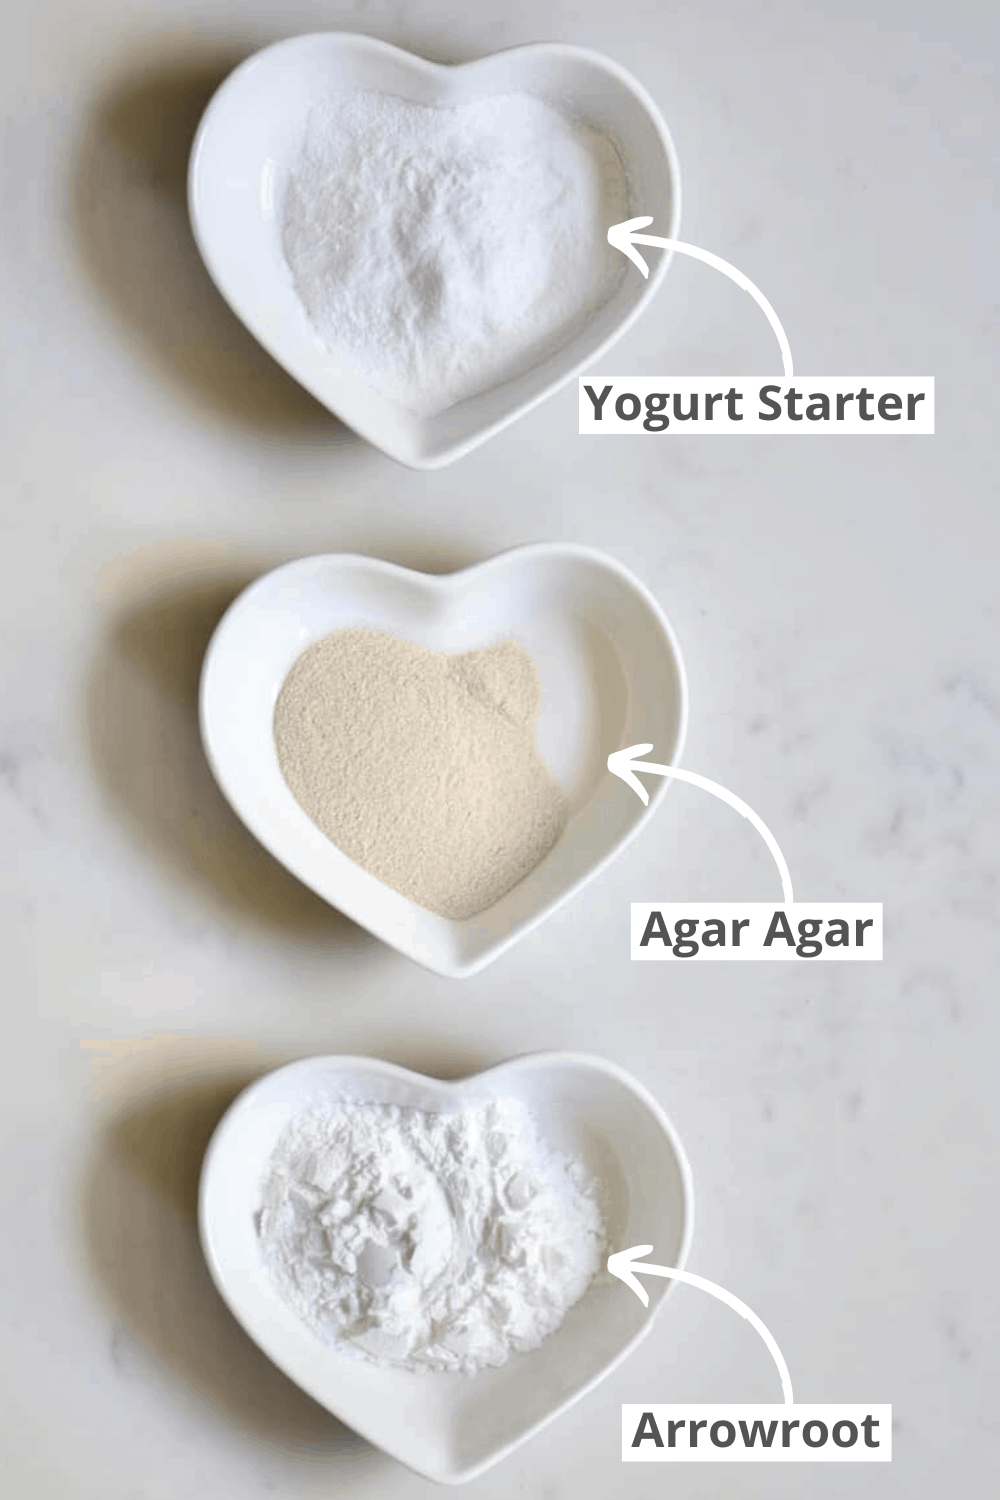
2. You’ll need a thickener/s
Unfortunately, plant-based yogurt alternatives just don’t thicken up enough on their own with just the yogurt starter, unlike dairy-based products. I’ve tried numerous methods, and thickeners (believe me I’ve tried them all) and found two methods that worked best for me.
Method 1: A mixture of Agar agar & Arrowroot (my preferred consistency and method)
Method 2: Cornstarch & xanthan gum
Obviously, I know that many people turn to these homemade yogurt recipes to avoid all the nasty preservatives, gums, thickeners, and other additives in store-bought options so, for that reason, option two may not appeal to everyone. However, as it worked well for me, I thought I’d include the option.
Luckily, homemade still manages to keep this recipe much cleaner than commercial alternatives anyway, with no added sugars, and I’d never share a recipe with ingredients that I’m not 100% happy with consuming myself.
A note about Xanthan Gum
With the above being said, I thought I’d add a little section on the, perhaps controversial, xanthan gum in this recipe. Having tried and failed to make this yogurt with various thickeners, I decided to try xanthan gum and was very happy with the results.
I know that there is some general controversy around gums in general. However, with the research I’ve been able to do, I’m happy to include this in my diet minimally. If you want to read an evidence-based article on xanthan gum, its benefits, side effects, and more than you can on Healthline.
Method 2 was actually the first method I’d tried that genuinely worked well. However, for those that don’t want to use the gum then have no fear because method 1, using arrowroot and agar-agar is something I tested next and, if anything, the results are even better!
How to make almond milk yogurt
Needed
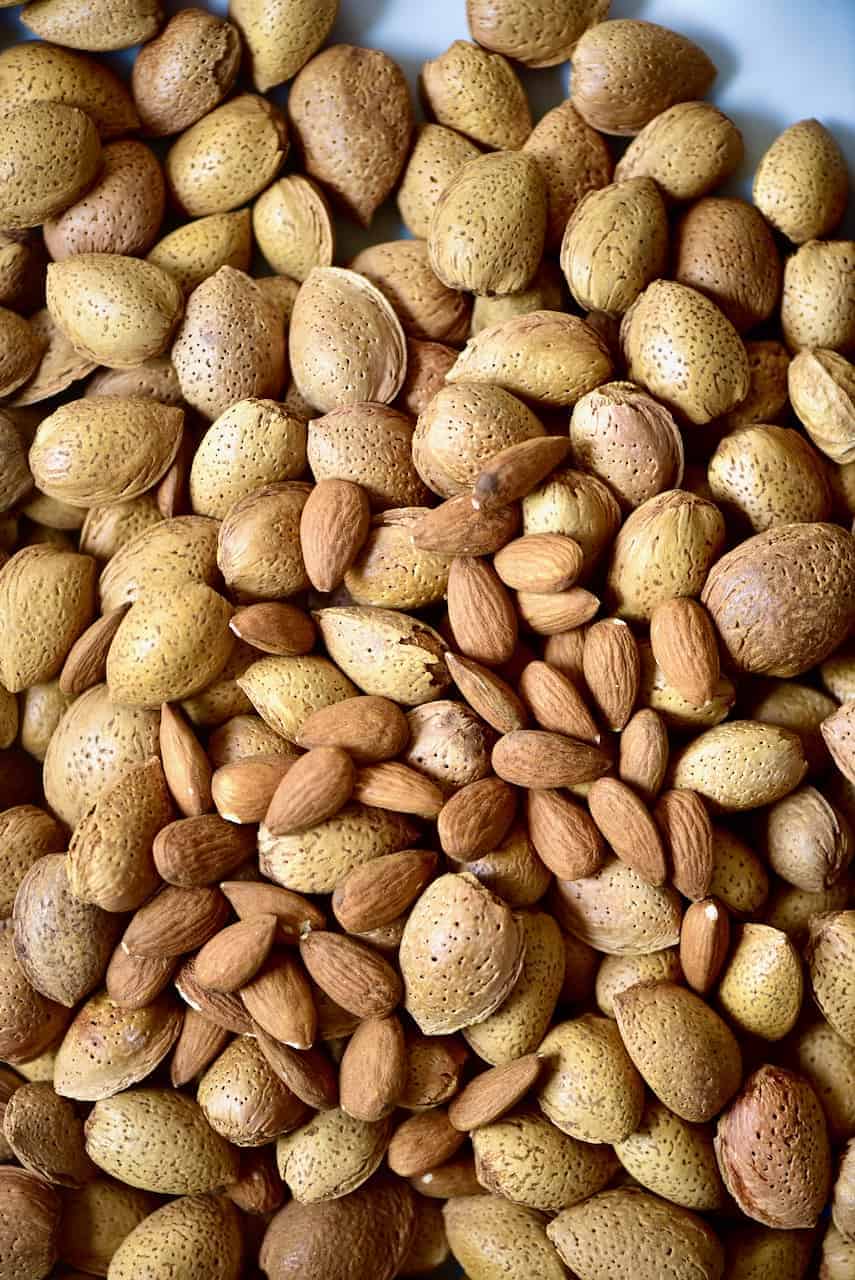
- raw almonds, filtered water (to make the almond milk)
- yogurt starter
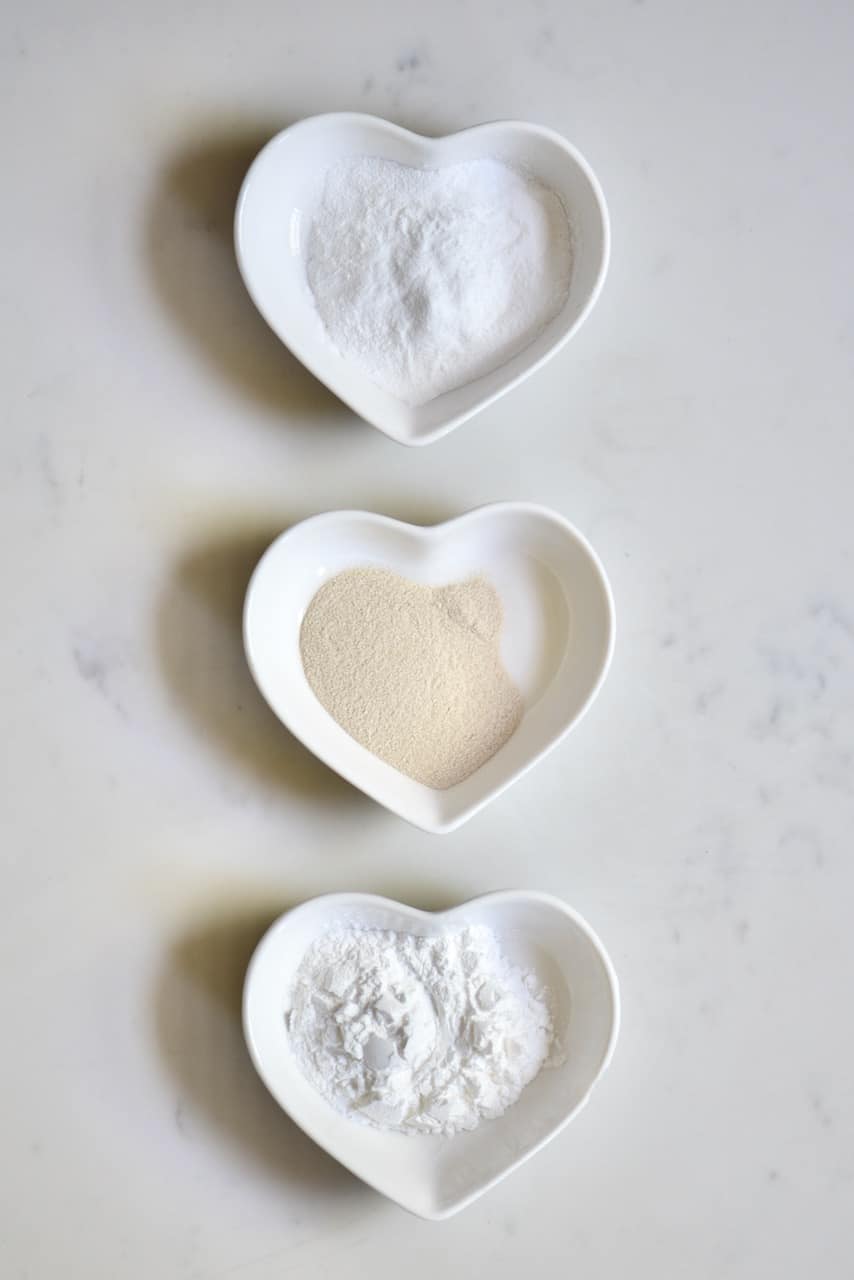
- agar agar and arrowroot – to thicken the yogurt (or alternatively, cornstarch and xanthan gum)
You will also need a food thermometer.
The steps
Step 1: First, sterilize your tools
Before you begin making the almond yogurt, sterilize all your tools. This includes the pot and bowl for the milk, the glass jar (or small jars) to store the yogurt, and the spatula and/or spoon you will be using.
Also, make sure you use wooden or silicone utensils. Metal spoons can cause a reaction with the warm milk, and it won’t turn into yogurt. To sterilize the tools, you can wash them with hot soapy water and then put them in the oven (no plastic parts) for 10 minutes at 160ºC.
Step 2: Make the Almond milk
Next, make fresh almond milk by blending the almonds with fresh water. I describe in detail how to make almond milk. However, it usually takes between 1-2 minutes to blend into rich, creamy almond milk thoroughly.
Note* Don’t throw away the leftover pulp – you can add it to smoothies or cereals. I give a lot more ideas my post homemade almond milk.
Step 3: Prepare the Almond Milk Yogurt
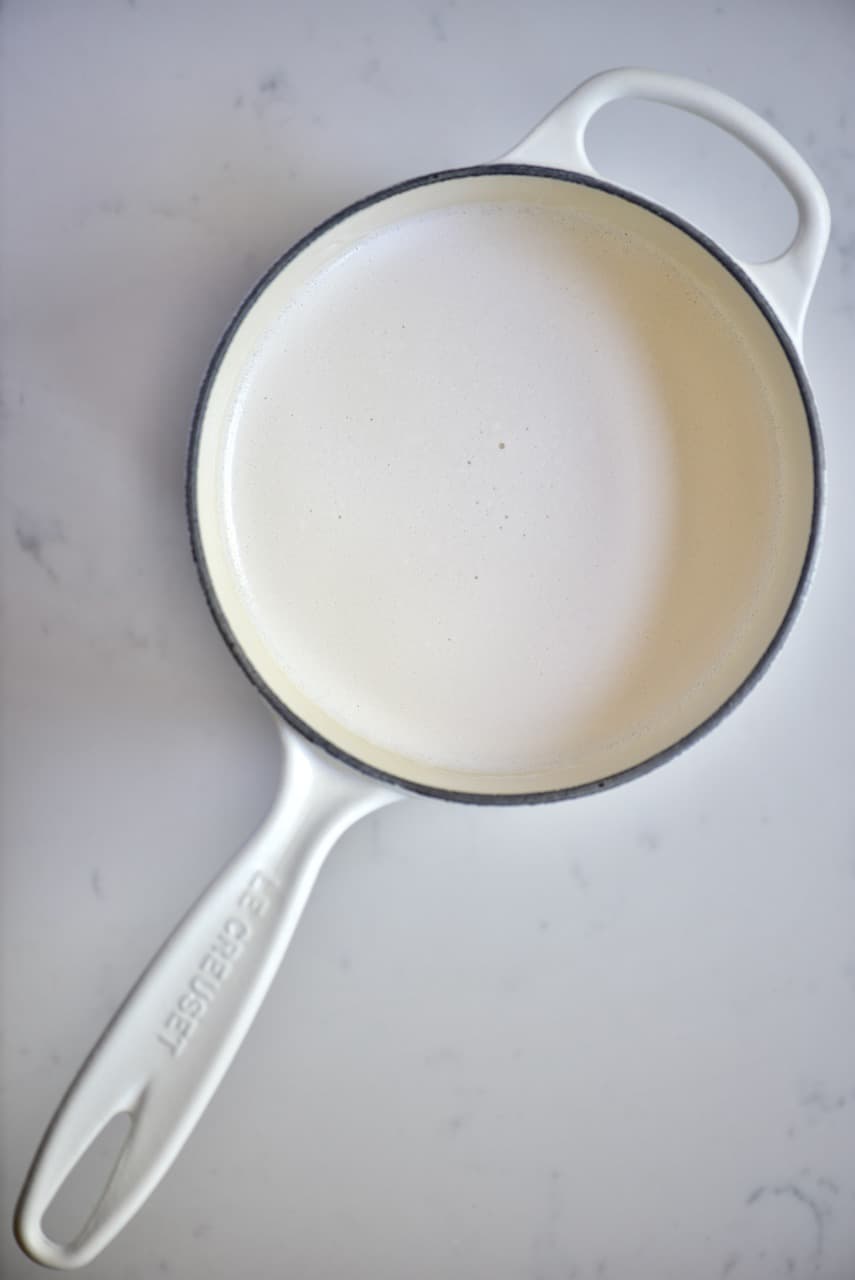
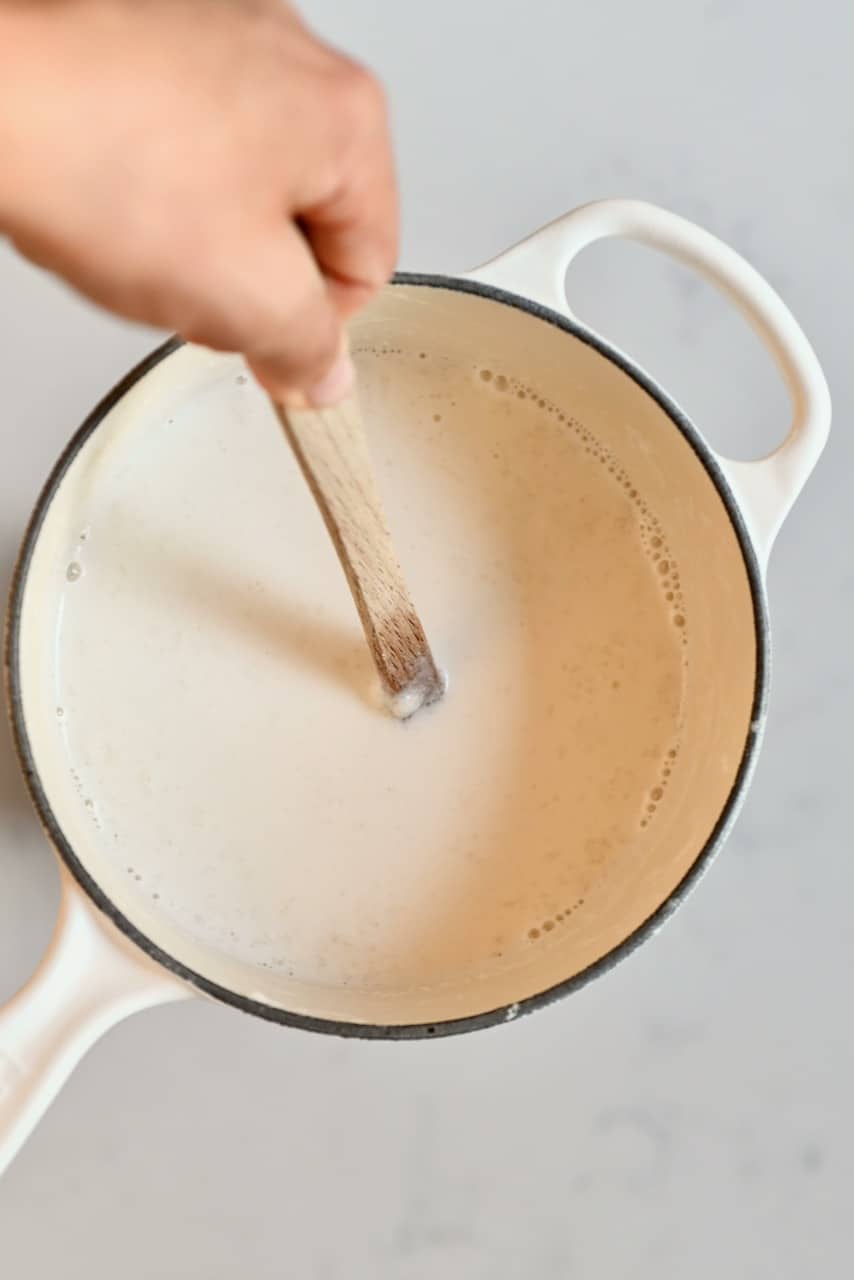
Pour the almond milk into a saucepan. Mix the arrowroot and agar-agar with a bit of cold almond milk and stir thoroughly to dissolve Add the mixture to the saucepan.

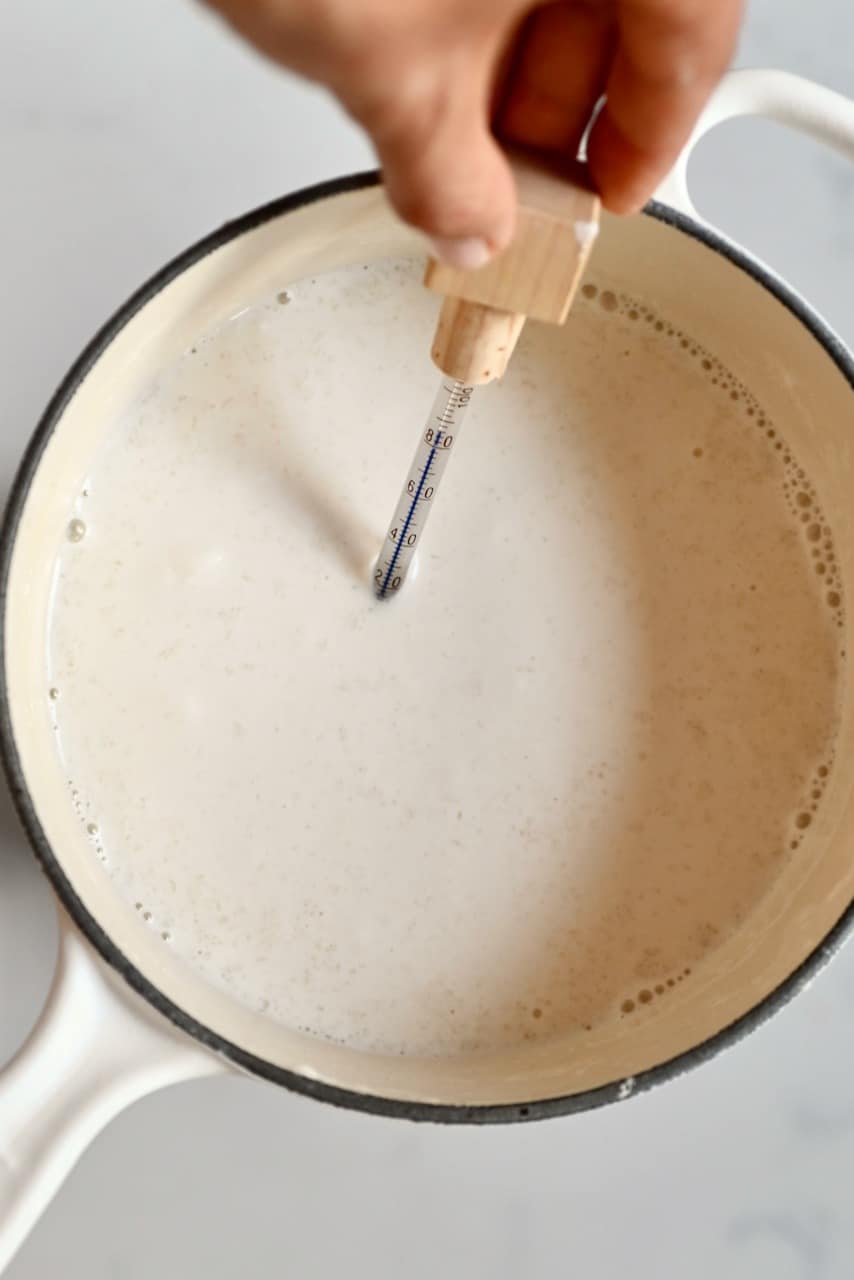
Heat on a low-medium heat until the milk reaches about 85ºC/185ºF. Stir occasionally, so the milk doesn’t stick to the bottom of the pot.
Depending on the exact temperature of your stove, heating the milk can take up to 30-40 minutes as this process needs to happen slowly at low-medium heat.
Once the temperature reaches 85ºC/185ºF, switch off the heat. If you don’t have a thermometer, switch off the heat before the milk starts boiling (right about when the simmering small bubbles start changing into bigger ones).
Set aside and leave the milk to cool down to about 45ºC/113ºF. This can take another 30-40 minutes.
If you don’t have a thermometer, you can dip your pinkie (clean!) in the warm milk and try to keep it there for 7-10 seconds before it starts to hurt. Be careful with this and touch the mixture lightly before plunging your finger into it, so you don’t get burnt.
The temperature needs to lower to about 45ºC/113ºF so that the heat doesn’t kill the yogurt starter.
Once the milk has cooled down, add your starter of choice and stir gently.
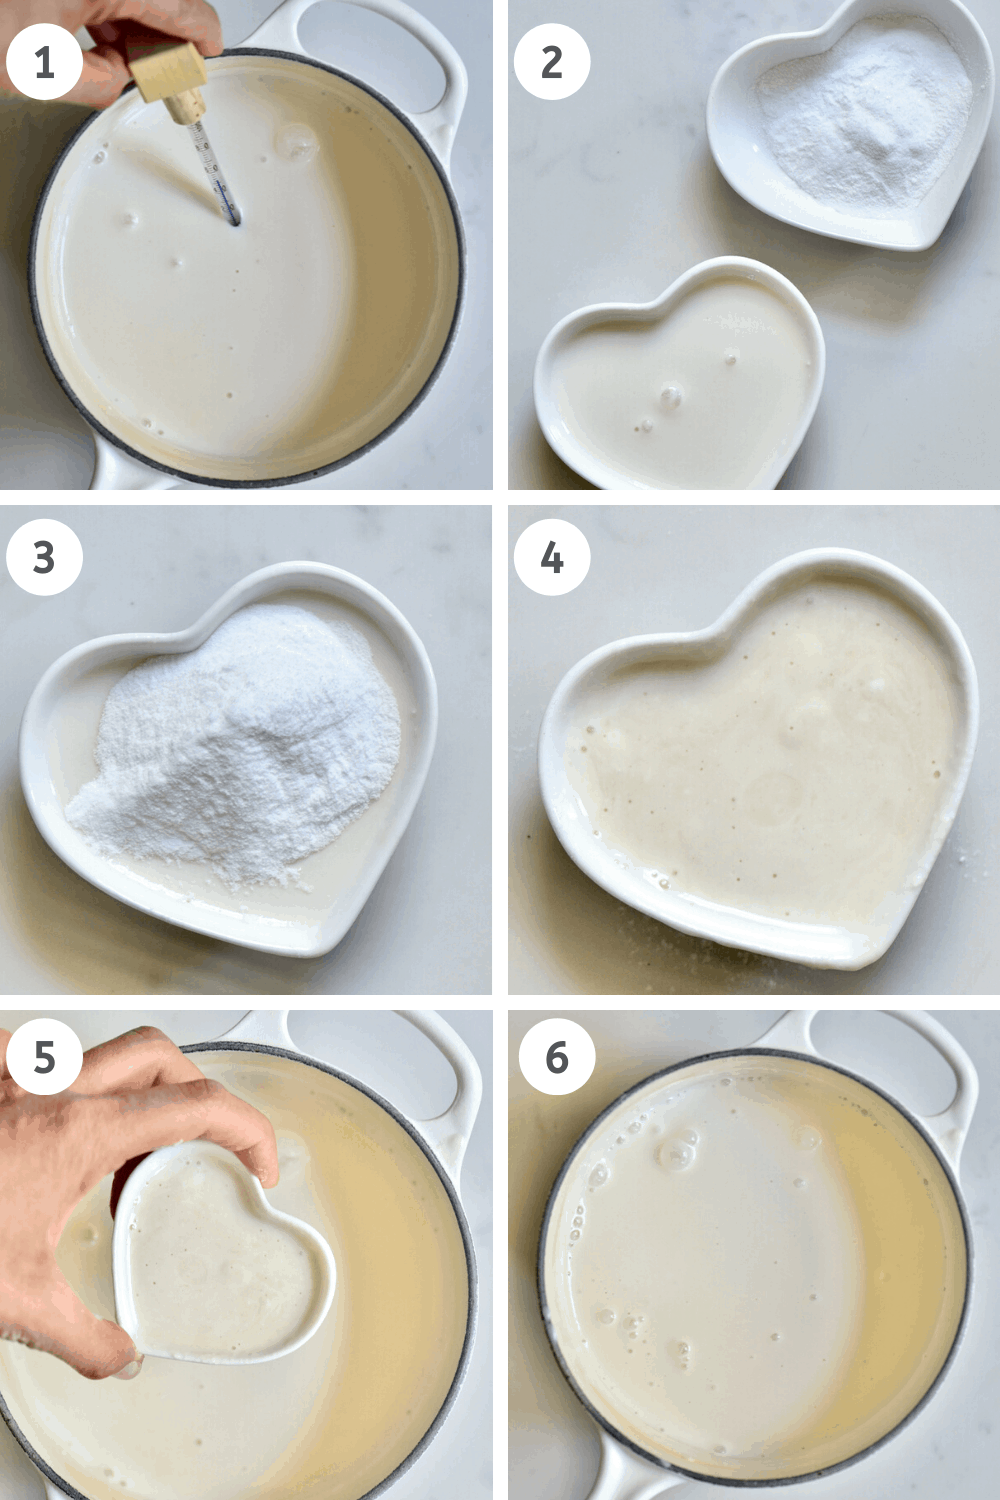
If using a powder starter, dissolve it with a bit of milk to create a ‘slurry’ then pour in the pot.
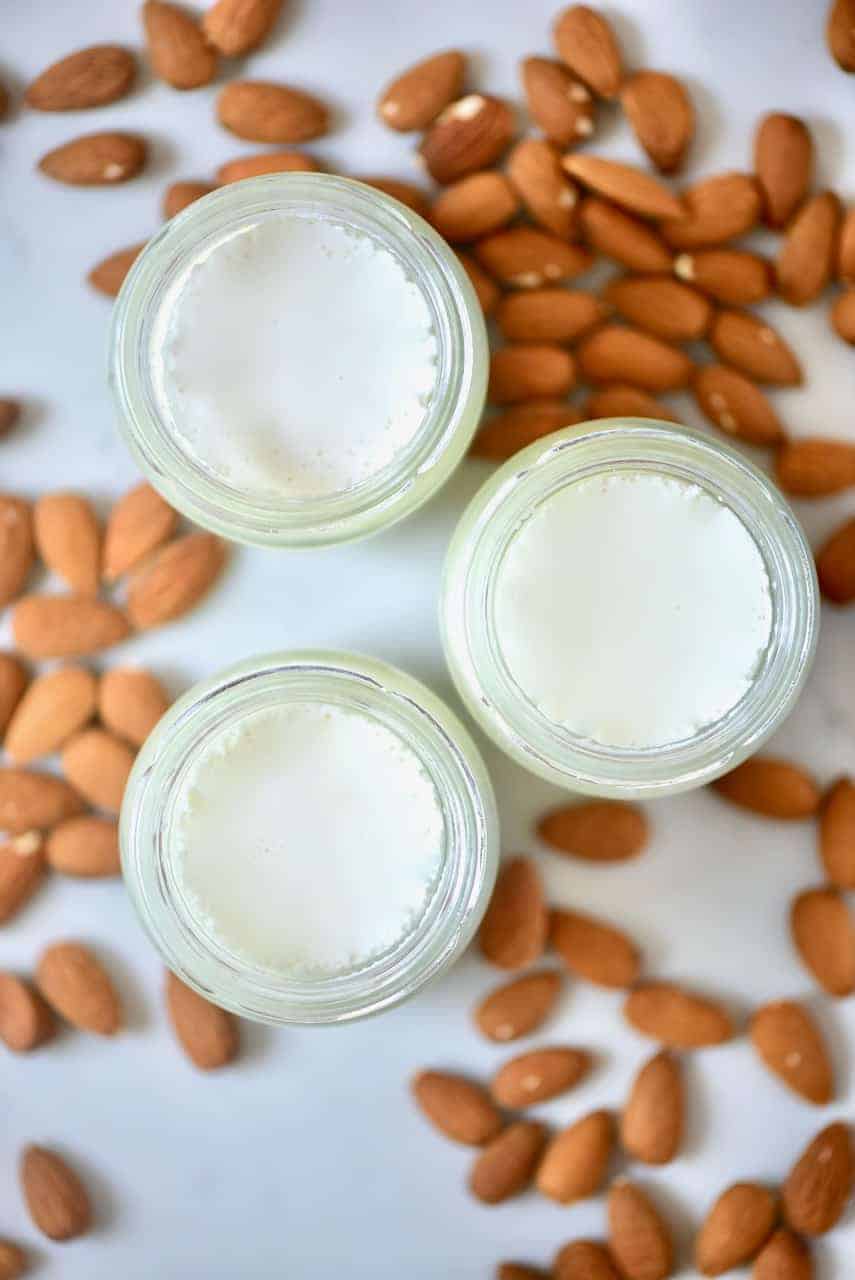
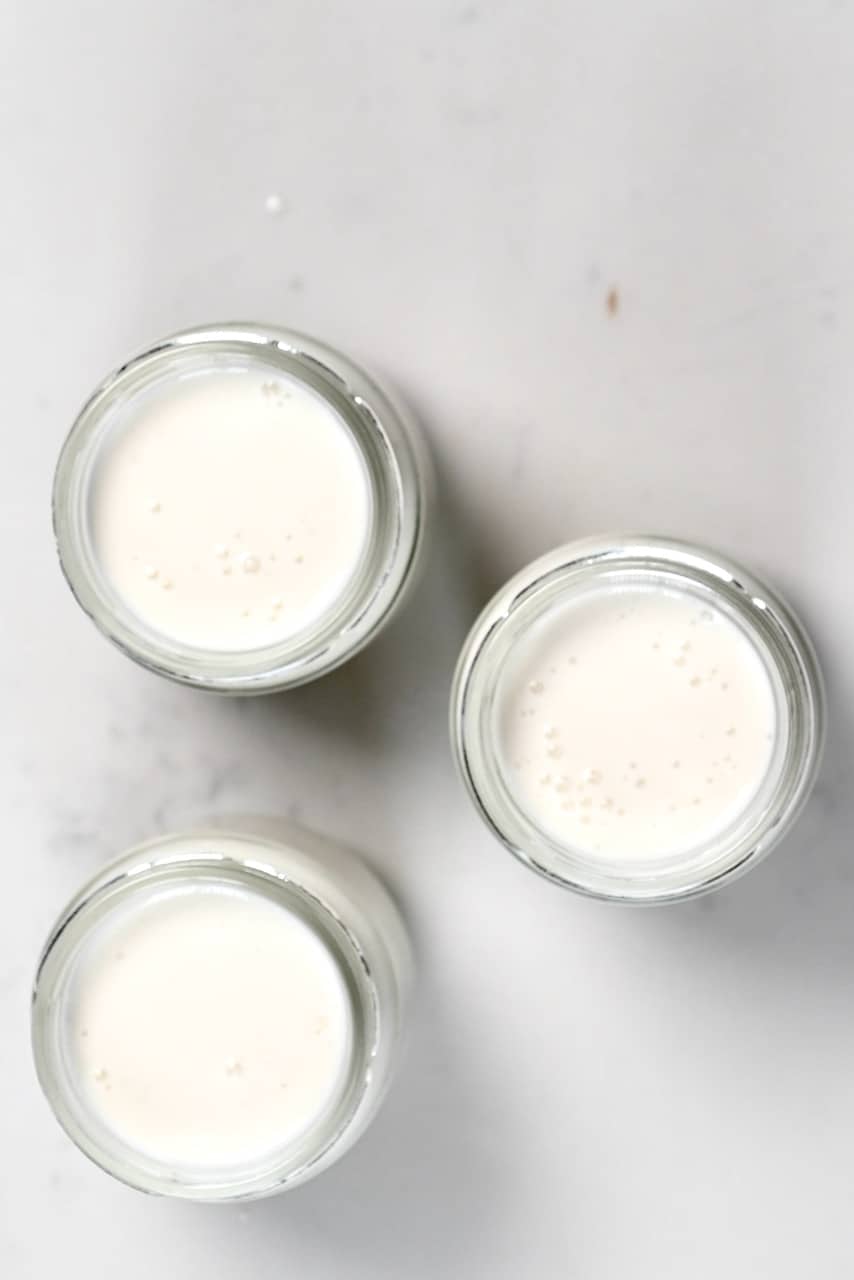
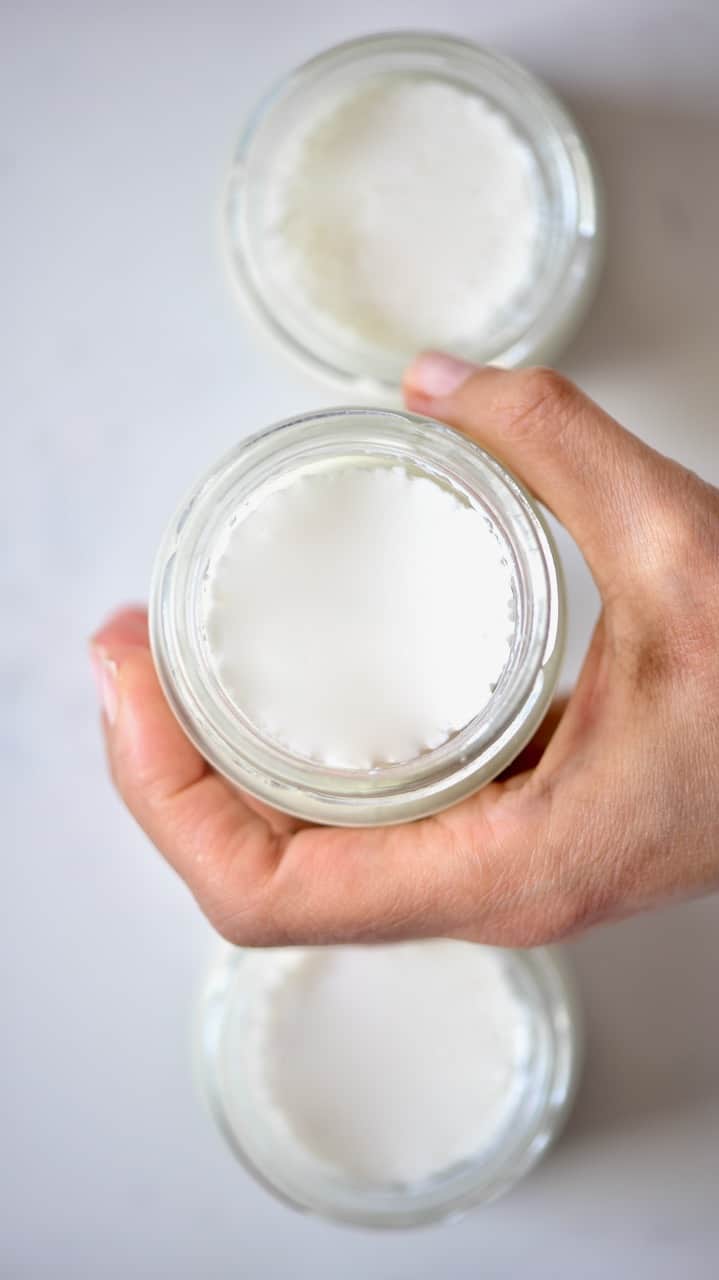
Sieve the mixture to remove any lumps and possible bits of the almonds. Pour in your desired sterilized jar(s). I like to pour individual portions into small pots to grab and go whenever I want.

Step 4: Incubate The Yogurt
Place the glass jar/s in a warm environment to “incubate” overnight. I wrapped mine in a warm blanket and left to intubate for 12 hours. The longer it ferments, the tangier the yogurt will taste.
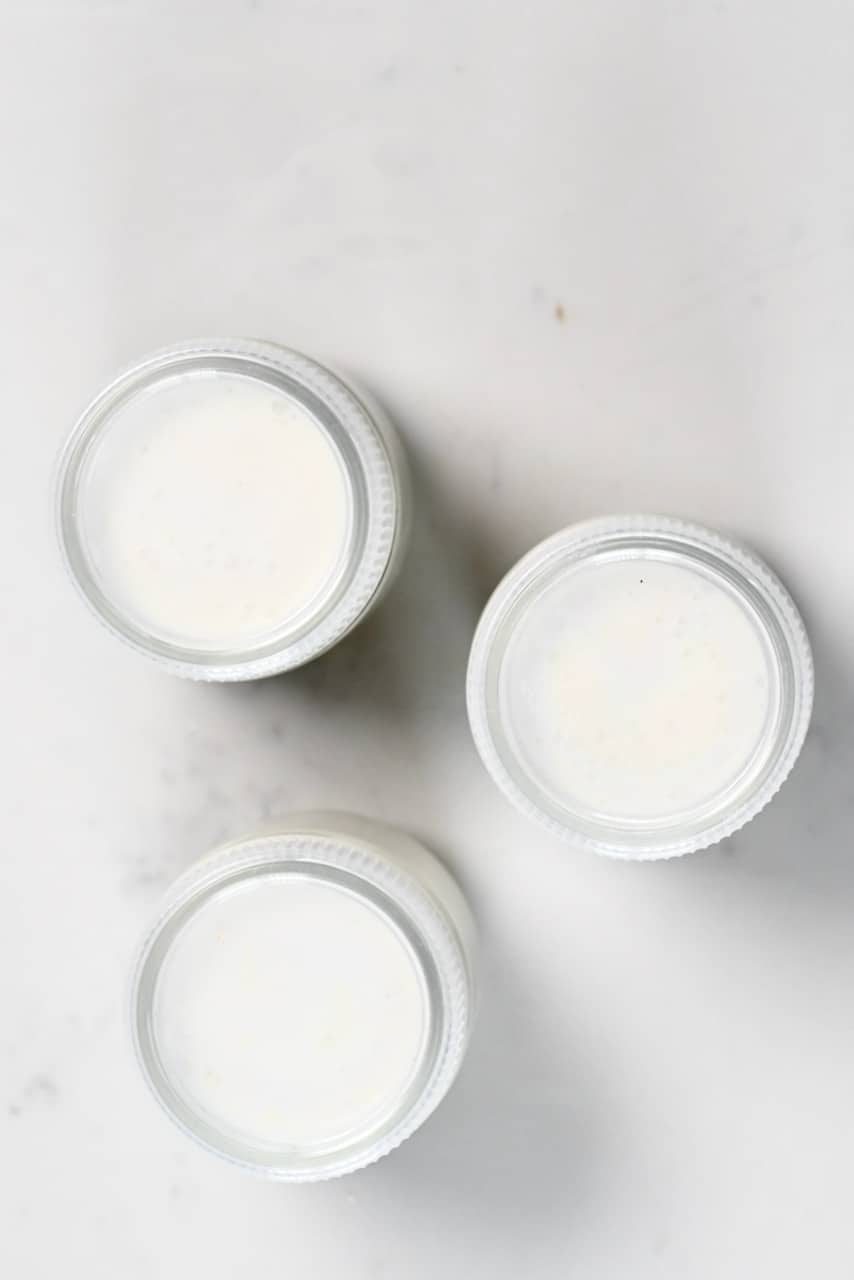
After the incubation period, refrigerate for another 6 hours.
If you want the yogurt very thick and sour, you can incubate it for up to 24 hours. Then move it to the refrigerator.
Enjoy! Keep in the fridge for 4-5 days.
Flavoring options
It’s best to only flavor the amount of yogurt you are planning on consuming right away. This is another reason I love to store them in individual jars. However, here are some options to flavor your yogurt.
- You can add jams or pureed fresh fruit to the yogurt just before eating
- You can also add some nut butter or even homemade easy Nutella.
- If you prefer plain yogurt, you can drizzle some maple syrup or other natural sweetener.
- Another option is to add vanilla bean seeds.
You can then use this yogurt for various recipes including these Rainbow Ice Lollies, Healthy Yogurt Bark Recipe, or even these Healthy Yogurt Granola Cups.
If you have any questions, leave a comment below Also, I love seeing your recreations so feel free to tag me on Instagram @AlphaFoodie. Let me know what your favorite way of eating this yogurt is.

Homemade Dairy-free Almond Yogurt
Equipment
Ingredients
- 1.5 cups almonds
- 4 cups water
- 1 packet powder yogurt starter 0.18 oz/5 g
Thickener
- Method 1: 1/2 Tbsp arrowroot powder & 1/2 Tbsp agar agar
- Method 2: 1/2 Tbsp corn starch & 1/2 tsp xanthan gum
Instructions
Step 1: Sterilize tools
- Sterilize all tools you will use and don’t use metal spoons/spatula as they can cause a reaction with the warm milk, and it won't turn into yogurt. To sterilize the tools, wash them with hot soapy water and then put them in the oven (no plastic parts) for 10 minutes at 160ºC/325ºF to fully dry.
Step 2: Make the Almond milk
- Make fresh almond milk by blending the almonds with fresh water. I describe in detail how to make your own almond milk in this blogpost. However, this usually takes between 1-2 minutes to thoroughly blend into rich, creamy almond milk.*
Step 3: Prepare the Almond Milk Yogurt
- Pour the almond milk into a saucepan. Mix the arrowroot and agar agar (or cornstarch and xanthan gum) with a bit of cold almond milk and stir thoroughly to make sure they are dissolved into a slurry. Add the mixture to the saucepan.
- Heat on a low-medium heat until the milk reaches about 85ºC/185ºF. Stir occasionally, so the milk doesn't stick to the bottom of the pot.
- Depending on the exact temperature of your stove, heating the milk can take up to 30-40 minutes as this process needs to happen slowly at low-medium heat.
- Once the temperature reaches 85ºC/185F, switch off the heat. If you don’t have a thermometer, switch off the heat before the milk starts boiling (right about when the simmering small bubbles start changing into bigger ones).
- Set aside and leave the milk to cool down to about 45ºC/113ºF. This can take another 30-40 minutes.
- If you don’t have a thermometer, you can dip your pinkie (clean!) in the warm milk and try to keep it there for 7-10 seconds before it starts to hurt. Be careful with this and touch the mixture lightly before plunging your finger into it, so you don’t get burnt.
The temperature needs to lower to about 45ºC/113ºF so that the heat doesn’t kill the yogurt starter. - Once the milk has cooled down, add your starter of choice and stir gently.
If using a powder starter, first dissolve it with a bit of the milk to create a ‘surry’ and then pour in the pot. - Sieve the mixture to remove any lumps and possible bits of the almonds. Pour in your desired sterilized jar(s). I like to pour individual portions into small pots to grab and go whenever I want.
- Place the glass jar(s) in a warm environment (wrapped with a warm blanket) to "incubate" overnight (for best results – incubate for 12 hours). The longer it ferments, the tangier the yogurt will taste.
- After the incubation period, refrigerate for another 6 hours. If you want the yogurt very thick and sour, you can incubate it for up to 24 hours before moving it to the fridge. Enjoy! Keep in the fridge for 4-5 days.
Video
Notes
Nutrition
Nutrition information is automatically calculated, so should only be used as an approximation.


Hello, am looking forward to trying this as it’s difficult to find soymilk that has no additives (and am hoping for better success). Thank you! Any ideas on how long to put it in an instant pot (yogurt setting) for?
Hi C! I hope you have great success with the almond yogurt. 😊 The Instant Pot yogurt setting just acts as a warm incubation environment, so you can follow the same timing as the recipe: incubate for about 12 hours for the best results, and up to 24 hours if you’d like it thicker and tangier. After that, refrigerate for around 6 hours to set. One note: almond milk doesn’t thicken like dairy, so the recipe relies on a thickener (agar agar and arrowroot, or cornstarch and xanthan gum), which makes a big difference in the final texture. Let me know how it turns out!
I followed the recipe but my yogurt wasn’t has thick and creamy as yours in the picture.
Should I add more agar agar and arrow root?
I used probiotics as a starter.
Thank you
Hi Aixa! 😊 If your almond yogurt came out thinner than the photo, you can absolutely bump up the thickeners a little, try slightly more agar agar and/or arrow root, adding gradually so it doesn’t turn rubbery. Make sure the agar is brought to a proper boil to activate fully, and let the yogurt set chilled for several hours. Using probiotics as a starter is fine, though potency varies between brands, which can also affect thickness and tang. Hope your next batch is nice and creamy!
Hello
Could I use only arrow root on its own for thickness?
And for a starter could I use probiotics?
Thank you
Hi Aixa! 😊 You could try arrowroot on its own, but it’ll give a softer, more starchy set rather than the firmer gel that agar provides, so the texture will be different. The recipe uses both for a reason. And yes, probiotics work well as a starter! Just note that potency varies by brand, which can affect how thick and tangy your yogurt turns out. Hope it comes out lovely!
You say not to use metal utensils but my saucepan is metal. Won’t that impede the process just like a metal spoon?
Hi there,
Using metal pans for heating the milk is OK as long as you’re not using reactive materials like aluminum. Stainless steel pans are perfectly safe for the heating step. I hope this helps.
Can you confirm that this recipe will not work with store-bought almond milk because homemade almond milk is thicker and thus needed to get the right consistency? This was implied in a previous comment but not clear.
Hi Casey.
Homemade almond milk is indeed much thicker and creamier, which helps the yogurt set properly. Store-bought versions are often too thin and often contain additives that can affect the fermentation process. I recommend making homemade almond milk to use in the almond yogurt. Let me know how it goes if you give it a try!