
This post may contain affiliate links. Please read our disclosure policy.
Make almond milk at home with just almonds, water, and a blender—ready in 10 minutes! It’s a fun, healthier alternative to store-bought, perfectly creamy with a mellow flavor, and entirely customizable to your taste!

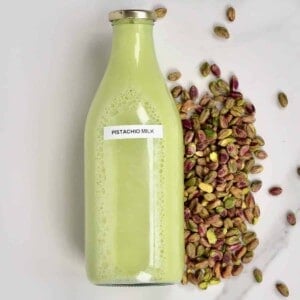
For years, homemade plant-based milks have been a regular part of my kitchen. From homemade coconut milk to homemade pistachio milk and almond milk, making it from scratch feels both rewarding and special.
Sure, store-bought options are convenient, but homemade almond milk is unmatched—richer, fresher, and tailored to your liking. It’s also cost-effective (buy almonds in bulk!) and quick to prepare.
All you need are soaked almonds and water. Blend them together, and voilà—a smooth, nutty, vegan milk alternative free from unwanted additives, thickeners, or stabilizers. Plus, almonds are packed with heart-healthy fats, antioxidants, and essential nutrients. Don’t toss the leftover pulp—it’s great for other recipes!

For those looking to take it a step further, homemade almond milk yogurt is another creamy favorite that’s been sparking a lot of excitement among my readers.
Watch how to make it
Ingredients

- Almonds: Use raw, unsalted almonds for the best results. You can use unsalted roasted almonds if you’re in a pinch, but the milk might be a bit less creamy with more pulp.
Water: Filtered water is great, but tap water works if it’s safe.
Sea Salt (Optional): A pinch brings out the flavor.
The ratio of almonds to water: Start with 1 cup of raw, unsalted almonds and 2.5 cups of water for a balanced consistency. For creamier almond milk, use less water—about 2 cups per 1 cup of almonds. For a thinner, lighter consistency, just add more water. Adjust to your preference—check the recipe card below!
See the printable recipe card below for full information on ingredients and quantities.
How to make almond milk from scratch
Soak: First, place the almonds in a large bowl and cover them with cold or room-temperature water. Let them soak for 8-12 hours. Soaking softens the almonds, making them easier to blend and more digestible. Plus, it helps reduce antinutrients, like phytic acid, for better nutrient absorption.

Blend: After soaking, drain and rinse the almonds. Transfer them to a blender and add fresh water, along with a pinch of salt (optional). Then, blend until creamy and milky, which usually takes a couple of minutes in a high-speed blender.

Strain: Finally, pour the almond milk mixture through a nut milk bag (or layers of cheesecloth over a fine-mesh strainer) and strain any remaining pulp/solids. Then, squeeze well to extract as much liquid as possible.
Enjoy it right away, or funnel it into a glass bottle and store it in the fridge.

FUN FACT: If you don’t have raw almonds, you can still make a quick almond milk in 2 minutes: no soaking, no straining, no waste! Here’s how:
– All you need is 1 Tbsp of almond butter per 1 cup of water.
– Blend in a high-speed blender for about 40-60 seconds until smooth and creamy—voila! This method is quicker, but the richness and flavor of freshly made almond milk from scratch is definitely a different experience!
If you’re curious about making your almond butter, check out my homemade almond butter recipe.
Ways to use almond milk
You can enjoy your homemade almond milk in many of the same ways as regular dairy milk:
- Drink it plain, or flavor it with vanilla, maple, honey, cocoa, or cinnamon.
- Use it in coffee, iced coffee, hot chocolate, or tea.
- Blend it into your smoothies.
- Pour it over cereal, granola, hot oatmeal, overnight oats, or chia pudding for breakfast.
- Make creamy, dairy-free homemade almond yogurt with my simple recipe.
- Bake with it to create dairy-free cakes, pancakes, and more.
- Add it to soups and sauces as a milk or cream alternative.

How long does it last
- In the fridge: Store the almond milk in an airtight, sterilized bottle in the refrigerator for 4-5 days. It’s normal for it to separate while it sits in the fridge, so make sure to shake it each time before using it. If it has a sour smell and taste, discard it.
- In the freezer: I like to freeze mine in ice-cube trays so it’s “portioned,” and I can take a few cubes as needed. Freeze for up to 3 months.
- To reheat: Do so slowly over low-medium heat, stirring often so it doesn’t come to a boil. This will prevent it from curdling.
What to do with almond pulp
Don’t waste the leftover almond pulp. There are so many ways to use it, too. Here are some of my favorites:
- Add to smoothies: Use the almond pulp for extra fiber and texture.
- Top your breakfast bowls: For extra nutrients, add a spoonful or two to yogurt bowls or fruit and yogurt parfaits or stir it into your oatmeal.
- Dry it out: Spread the pulp on a baking sheet and dry it in the oven at 200ºF/90ºC for about 1 ½ to 2 hours. Once thoroughly dried, blend it to resemble almond flour or almond meal. You can then use it to:
- Make homemade granola: A crunchy and nutty addition.
- Bake with it: Add it to quick breads, brownies, or your favorite cookie recipe.
- Make energy balls or bars: Mix the dried pulp with some seeds, nuts, and dried fruit for a nutritious and delicious snack. Try it in these no-bake protein balls.
- Make raw tarts: Add it to the tart base for raw desserts or tarts.
More nut milk recipes
If you try this homemade almond milk recipe, let me know how it goes in the comments below. I’d appreciate a recipe card rating and would love to see your recipe recreations – tag me on Instagram @Alphafoodie!

Homemade Almond Milk
Ingredients
- 1.5 cup almonds raw unsalted
- 4 cups water
- 1/8 tsp sea salt optional
Instructions
- In a large bowl, soak the almonds in cold/room-temperature water for 8-12 hours. Make sure they are covered by a couple of inches of water.
- Drain and rinse the nuts.
- Blend the almonds with fresh water in a blender until creamy and milky (usually a couple of minutes in a high-speed blender).
- Strain the remaining pulp with a nut milk bag (or pour the mixture over layers of cheesecloth over a fine-mesh strainer). Squeeze well to extract as much liquid as possible.Enjoy the fresh almond milk right away or transfer it to a bottle and put it in the fridge.
Video
Notes
Shake it well each time before using it. To freeze: Pour the mixture into ice-cube trays so it’s “portioned” and freeze for up to 3 months. Remove a few cubes as needed. How to flavor almond milk: Add sweeteners (maple syrup, agave, honey, or dates) and flavorings (vanilla, cacao, or spices) to taste while blending, then strain. The ratio of almonds to water: For a balanced consistency, start with 1 cup of raw, unsalted almonds and 2.5 cups of water. For creamier almond milk, use 2 cups of water per 1 cup of almonds. To make it thinner, simply add more water. Adjust the ratio to suit your preference! Check the blog post for serving ideas and what to do with the leftover pulp!
Nutrition
Nutrition information is automatically calculated, so should only be used as an approximation.


I was wanting to try your recipe to make almond yogurt. I like a thick, creamy, Greek-like yogurt. If I make the thicker milk (with the higher almonds to water ratio), will I mess up your almond yogurt recipe?
Hi Christy,
It should still work, let me know if you gave it a try! 🙂
When I saw this and other nut milks and butter recipes on your blog I was amazed! I bought the NutraMilk after I saw you using it on your IG for so many recipes, and I’ve been using it so much!
Thank you for showing us not only great recipes but also awesome tools. I know it is not essential to make almond milk, but I’ve really been using it for making so many nut butters and milks in so little time.
I made almond milk yesterday night, and I think I’ll never buy it from stores, ever again!
Hi, love your blog.
I’ve been experimenting with non dairy milks for a while. I love the simplicity if your recipe. My question is why is it necessary to drain the soak water?
Hi Joseph,
Thank you! You don’t have to drain the water, but you will see after soaking it that the water isn’t very clean. Nuts are usually covered in dirt, tannins, and unwanted chemicals and acids that might be lingering on the surface.
This will make sure there are no pesticides or any of these nasty residues in the milk. That’s why I recommend draining the soak water. I hope this helps.
Hi Samira,
Your recipe looks great! I only have a food processor. Can I use that instead, or do I have to use a blender? Thank you!
Hi Andrea,
Thank you, of course you can use food processor. It will work perfectly fine! Just use a cheesecloth to filter the pulp out. You can dry the leftover and use in baking or freeze in an ice cube tray to use in smoothies, oatmeal etc. Also you can add sweeteners or spices etc.
Delicious!
Hi!
Love your little super machine! Question: how do you calculate the nutrition info? Do you subtract the amount of pulp from what you started with?
Thanks!
Hi Vanessa,
Thank you so much for your comment.
The nutritional information is calculated with an online database and, even though I provide accurate metrics, these figures should be considered only as estimates. Also, the nutritional info will vary a bit depending on which method for making the milk is used. While my machine leaves very little pulp, if I was to sieve the liquid through a nut milk bag, there would be more pulp left. I hope this helps.
Thank you!
I absolutely love your website Samira. It makes me want to continue to cook healthy and delicious recipes for my family. That’s it. Just wanted to say thank you.
Hi Celina, you’re so so very kind, thank you so much for your feedback, it means so much to me. Sending lots of love x
What is the make and model of the blender you have?
Hi Carolyn,
I often use my Blendtec but any blender can work for this recipe.
hi!
I wonder what blender do you use, it’s so useful
thanks!
Hi Tasha,
I’ve added the links to tools I use on my shop page
I hope you try the almond milk and like it. 🙂
Loved the almond milk! Tastes so much better than the store bought ones. I also reduced the ratio to 1:3 as my blender wasn’t big enough to add 4 cups of water. But I loved the consistency because it was creamier! Thank you for your notes on your blog on how to make this!!!
Thank you for your comment, Jeanie. Glad you’ve been able to adjust the recipe to fit your blender.
Can I make a double batch in my nutramilk? My family goes through one batch a day. 4 cups just isn’t enough.
Hi Jess, of course you can! The NutraMilk jar has a capacity of up to 2 liters (8 cups). 🙂
Can you use roasted almonds?
unfortunately, because roasted almonds are drier/ more brittle than raw ones – this will usually end up in a way less creamy almond milk. You can try it though and see what you think – just make sure they’re not salted! 🙂
In LOVE LOVE with all your homemade healthy recipes. Thanking you soo sooo much. I was always hunting for a person like you, who is kind enough to share everything in detail. Keep posting with much more WONDERFUL HEALTHY RECIPES & Home garden tutorials too. God Bless You overall & especially for your efforts & talents 🙂
I’m so glad you’re enjoying the recipes 🙂 It’s lovely to hear when people enjoy them as much as I do.
How to make a nut milk with which you can make a thick foam cappuccino? Usually homemade nu milks aren’t that thick. Do you have suggestions?
Hi Jole,
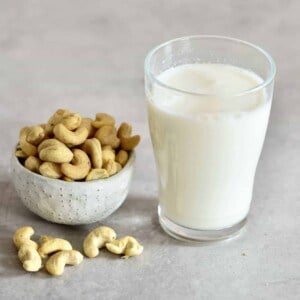
There is a recipe for oat milk creamer here on the blog and it allows for a thick foam. You can also add a few cashews to the almond milk to allow it to foam better or make cashew creamer (recipe also available here on the blog.)