
This post may contain affiliate links. Please read our disclosure policy.
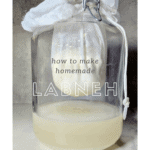


Tangy homemade labneh is so easy to make, you’ll be wondering why you didn’t DIY this Middle Eastern delicacy sooner!
In my house, there’s one thing you’ll always find in the fridge – labneh cheese. A staple favorite from my childhood, its closest Western comparison is like thick cream cheese, though I’m inclined to say my labneh is far tastier. I’ve prepared this easy labneh recipe that’s budget-friendly and easy to customize. With just one ingredient, you too can create a delicious labneh dip.
Want to save this recipe?
What is labneh
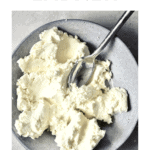
So, what is labneh cheese? Lebneh is a thick, fresh cheese from the Middle East. With a texture like cream cheese and a taste like Greek yogurt, labneh recipes are great bases for flavor and spice or just to be eaten on its own. This creamy yogurt cheese has many uses, from sprinkling over salads and making a dip to rolling into balls for snacking.
What Does Labneh Taste Like
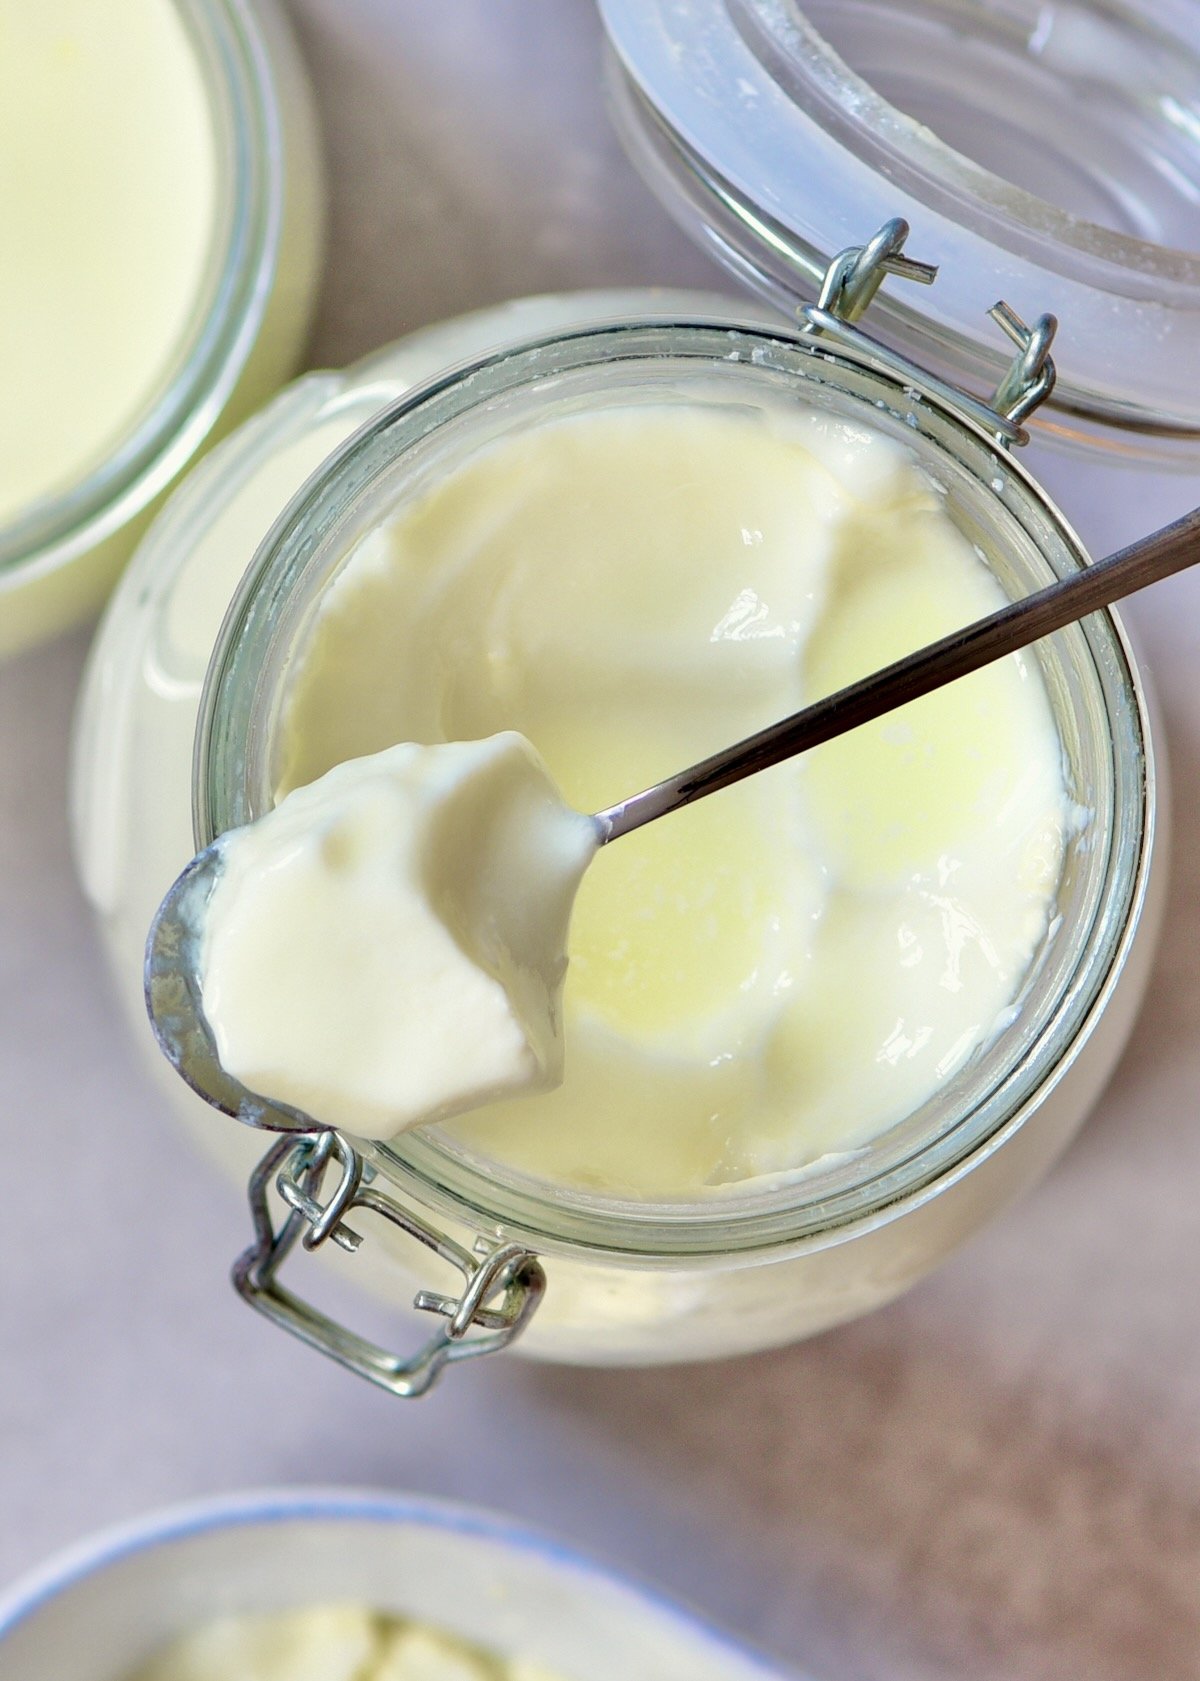
Tart and tangy, most of the flavor comes from the strained yogurt it’s made out of. Like cream cheese, labneh has a thick and creamy texture. It’s tangy and is often used as a base to carry other flavors.
Labneh Vs Laban – What’s the Difference
While both are very popular in Middle Eastern cuisine, the main difference between Labneh and Laban is texture. Laban is a drink made from fermented milk, whereas Labneh is made from strained yogurt. It has a much thicker texture than Laban. Laban is also much sweeter than traditional labneh.
Labneh Vs Cream Cheese
Cream cheese is made using cream and whole milk, curdled, and then strained to get its trademark softness. It makes a great American Labneh cheese substitute if you’re really in a pinch. On the other hand, lebnah is made of yogurt, which is strained to remove the water.
Labneh Vs Greek Yogurt
Labne and Greek yogurt are very similar – with one exception. Greek yogurt is strained once and labneh dip is strained twice. The latter is also much thicker than traditional Greek yogurt.
Is labneh healthy
Yes! Made from cultured yogurt, it is a natural probiotic and very high in protein, healthy fats, Vitamin A, and calcium.
What is labneh made of
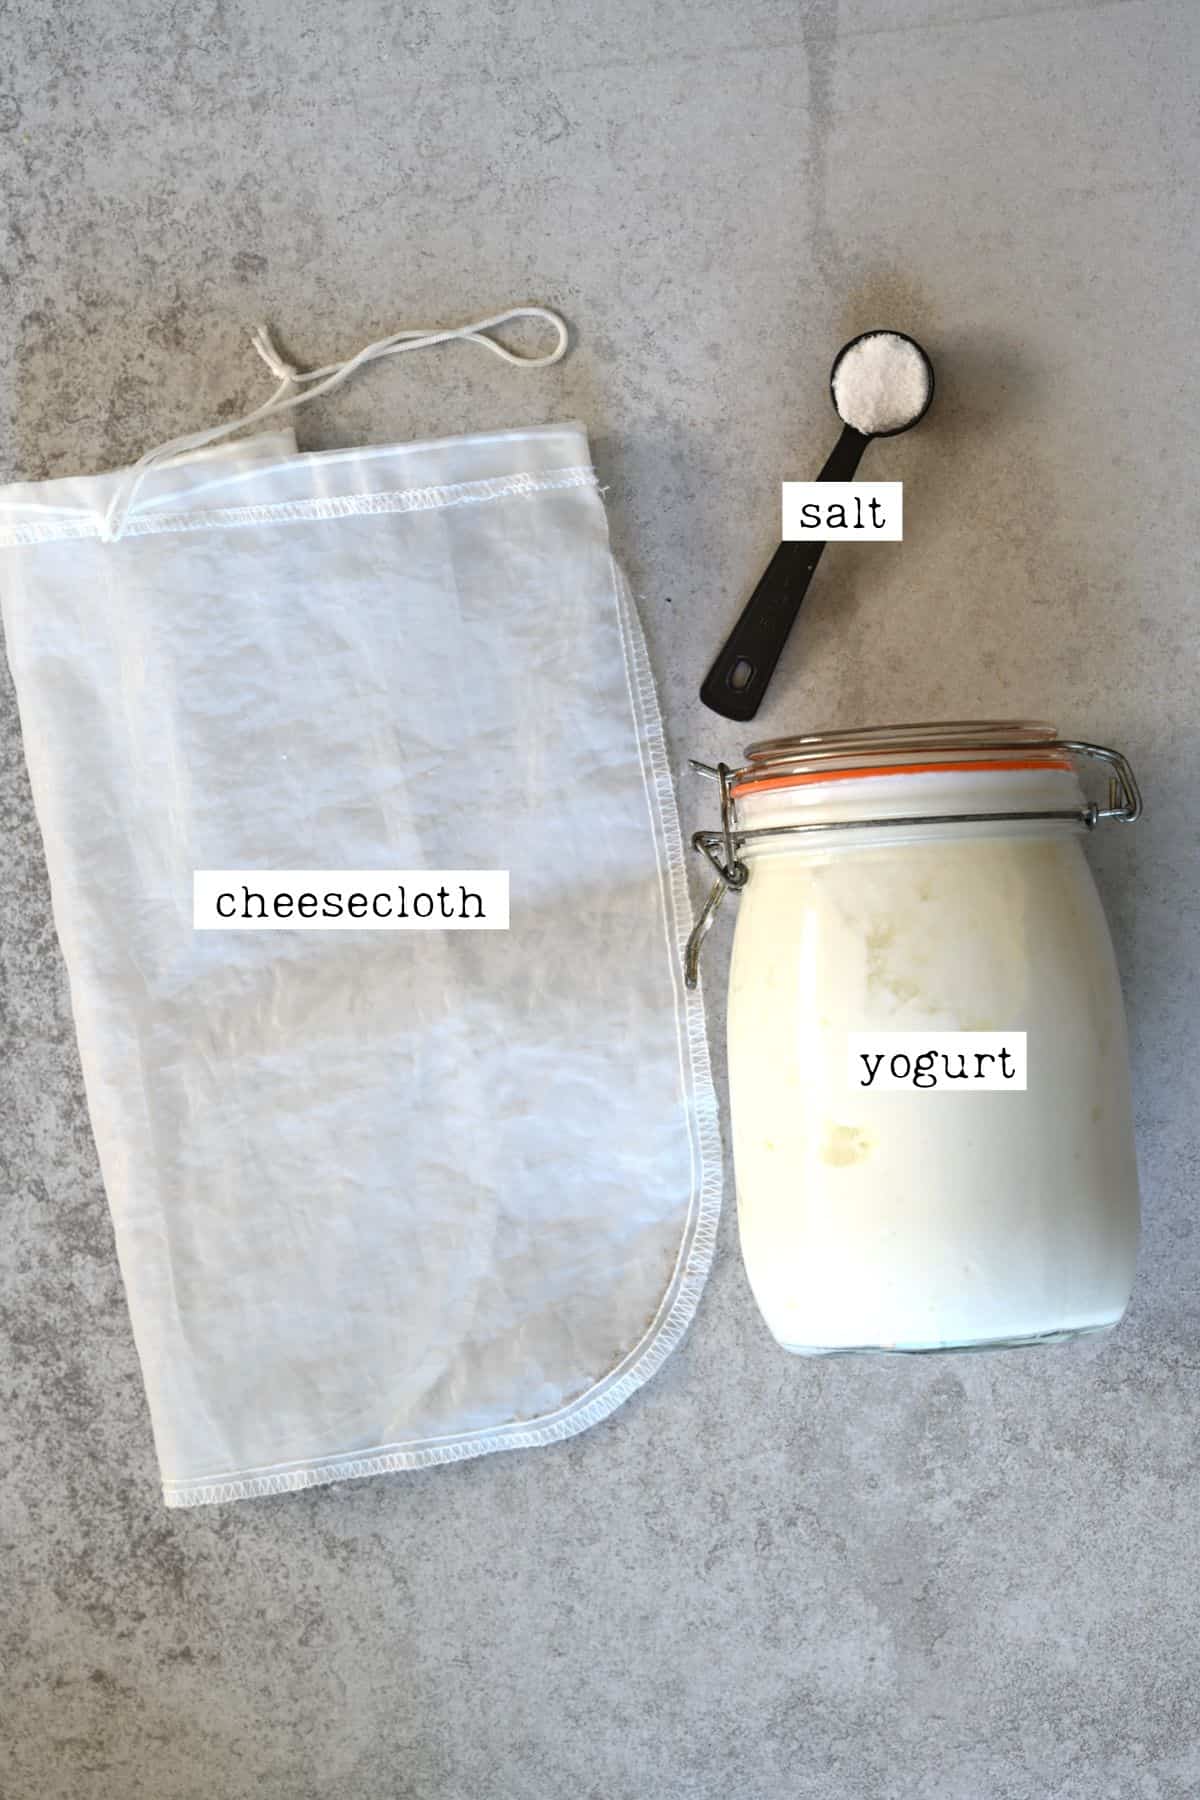
- Yogurt: For labneh dip, you’ll want natural/regular yogurt. You can use whole milk (full fat) or Greek. You’ll get about half the weight of what you start with. For example, 70 oz (2kg) of yogurt will yield 35 oz (1kg) of labneh and 35 oz (1kg) of leftover whey.
- Salt: Just a pinch.
You will also need a cheesecloth or nut milk bag to help strain the yogurt
How to make labneh
For this recipe, there are two methods you can follow.
From Milk
If you’re making labneh cheese with milk, you first need to make whole-milk yogurt. You’ll need a yogurt starter (in the form of a powdered yogurt starter or a few spoonfuls of natural yogurt) and whole milk. You can find my full recipe for Natural Yogurt.
Once you have your yogurt, proceed with the next steps.
From Greek Yogurt
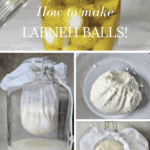
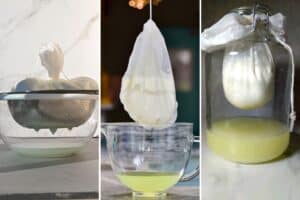
Pour the yogurt and salt into a few layers of cheesecloth. Then hang it over a large bowl or jar. You can place the cheesecloth over a strainer/sieve or suspend it from a doorknob of your kitchen cupboard (with a bowl below it to collect the whey).
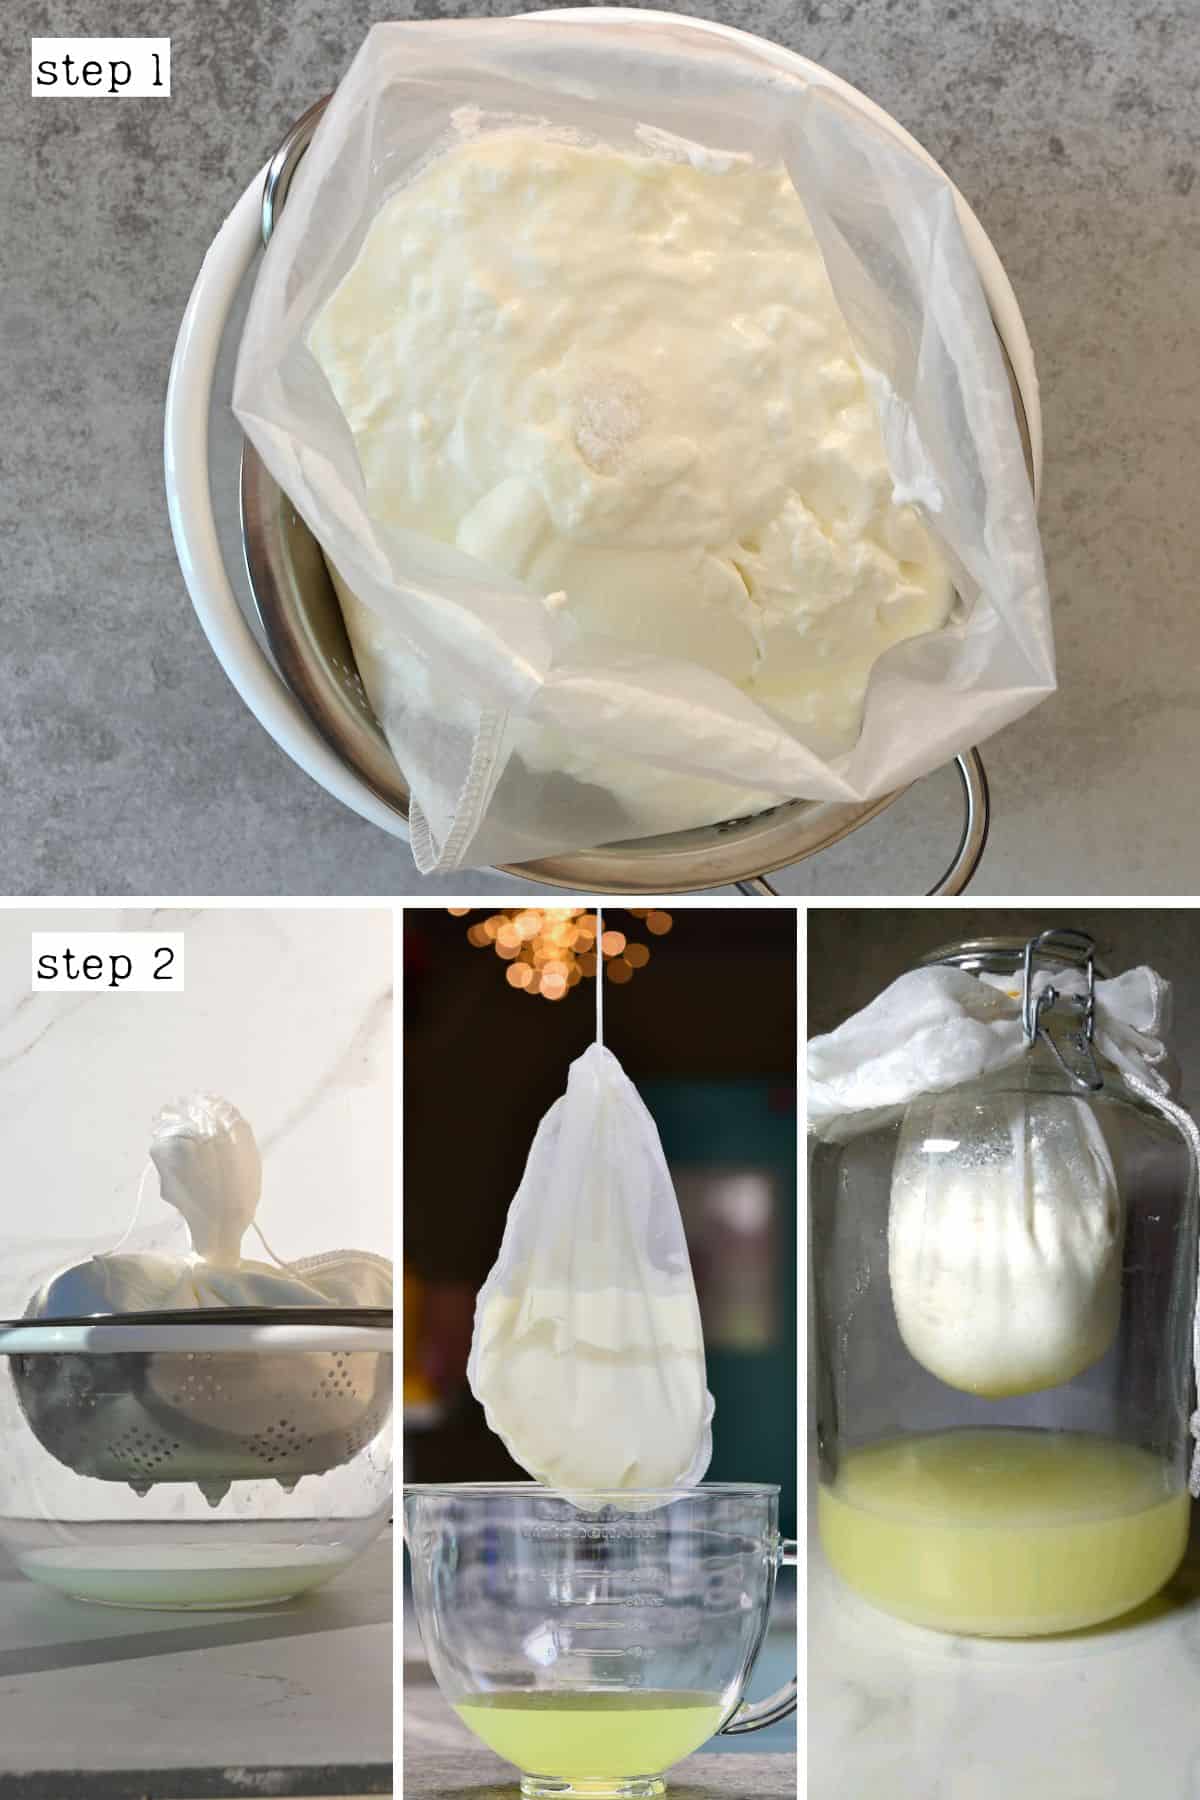
Allow the liquid to strain for at least 6 hours. Strain it overnight or for up to 24 hours for a thick consistency. The longer you strain it, the thicker the labneh yogurt will be.
If needed, place the bowl in the refrigerator though you can keep it at room temperature if it’s not too warm.

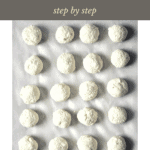
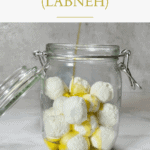
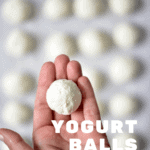
How to make labneh balls
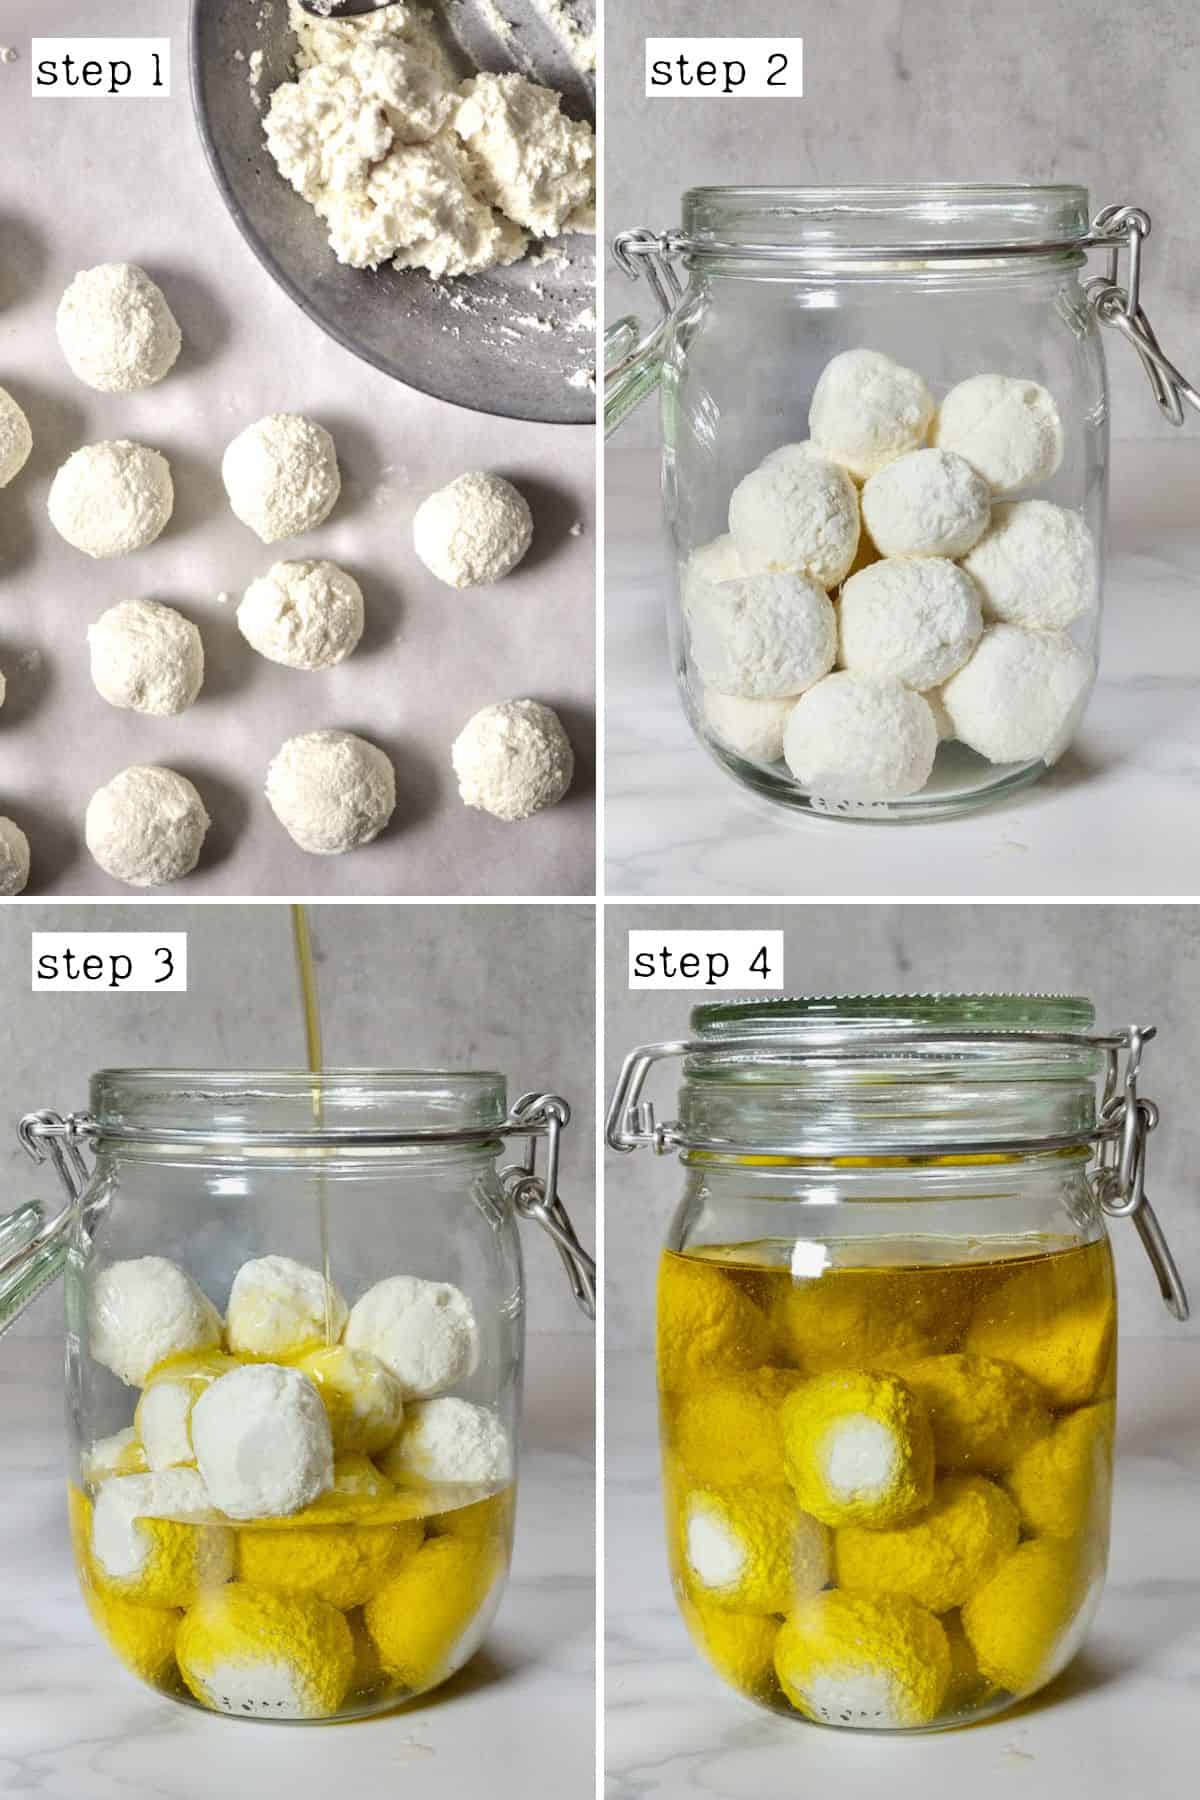
Once the lebne is strained, you can shape it onto balls to prepare it for longer preservation.
Form the balls – use 2-3 Tbsp per ball. Carefully place them in a jar. Then fill it with olive oil.
If the balls remain fully submerged in the oil, the quality will be preserved.
How to eat labneh
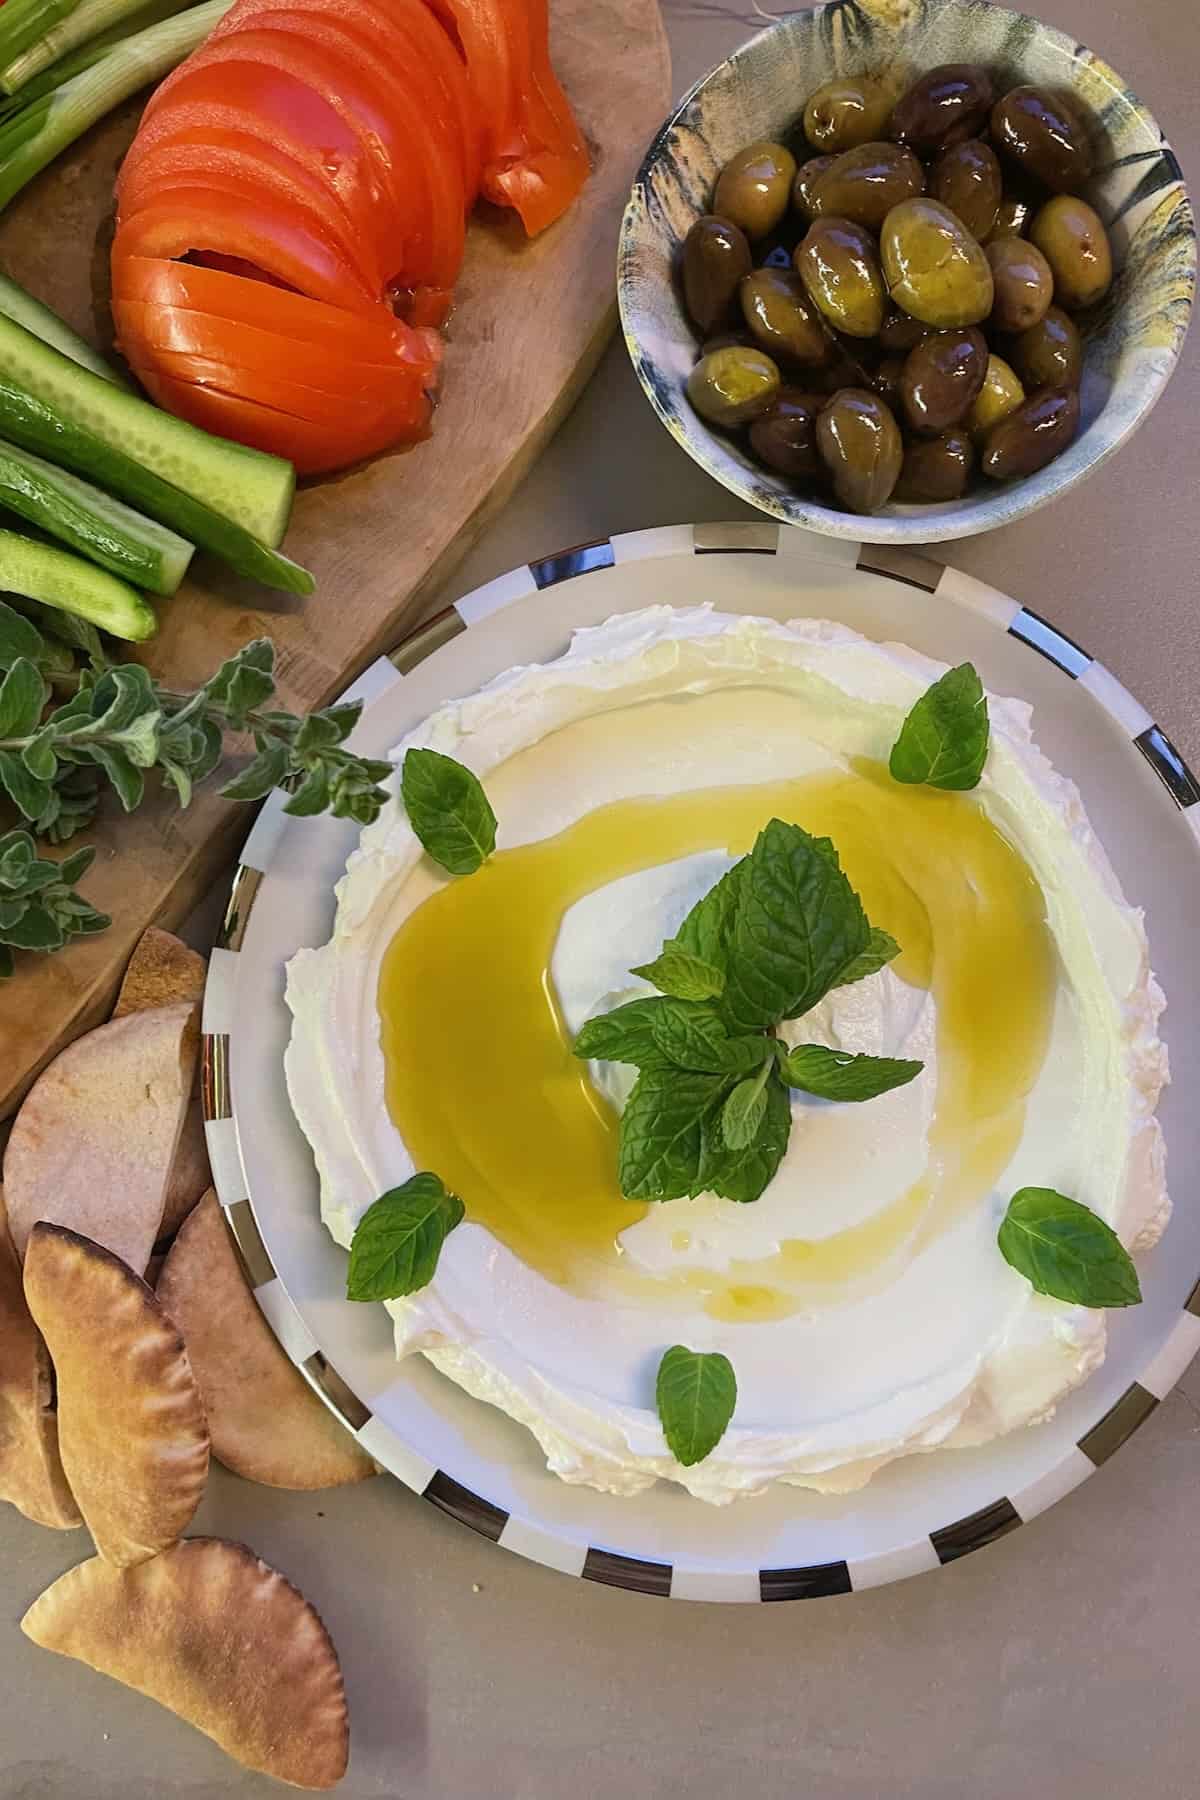
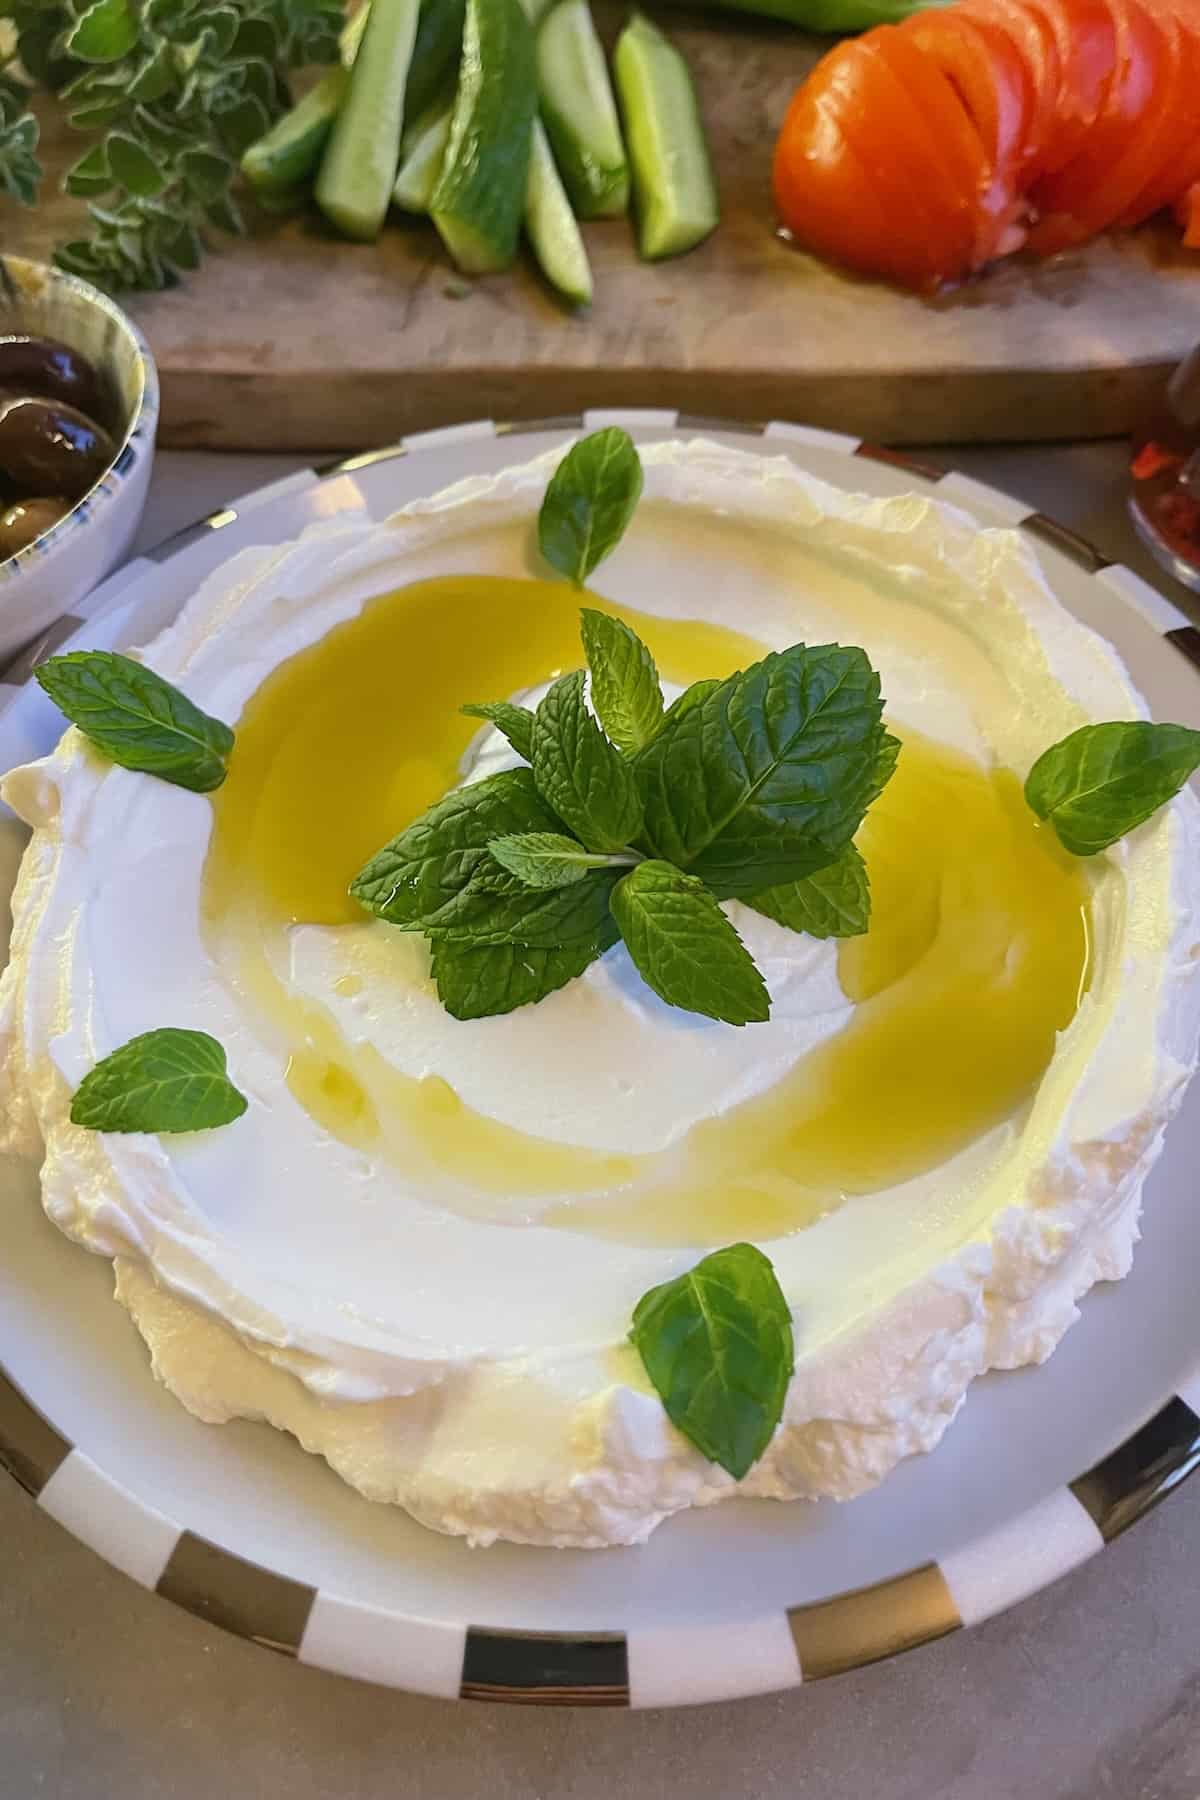
Labneh pairs well with za’atar or fresh herbs. Its taste is naturally subtle, so for maximum flavor, serve spread in a bowl. Drizzle extra-virgin olive oil and sprinkle red pepper flakes.
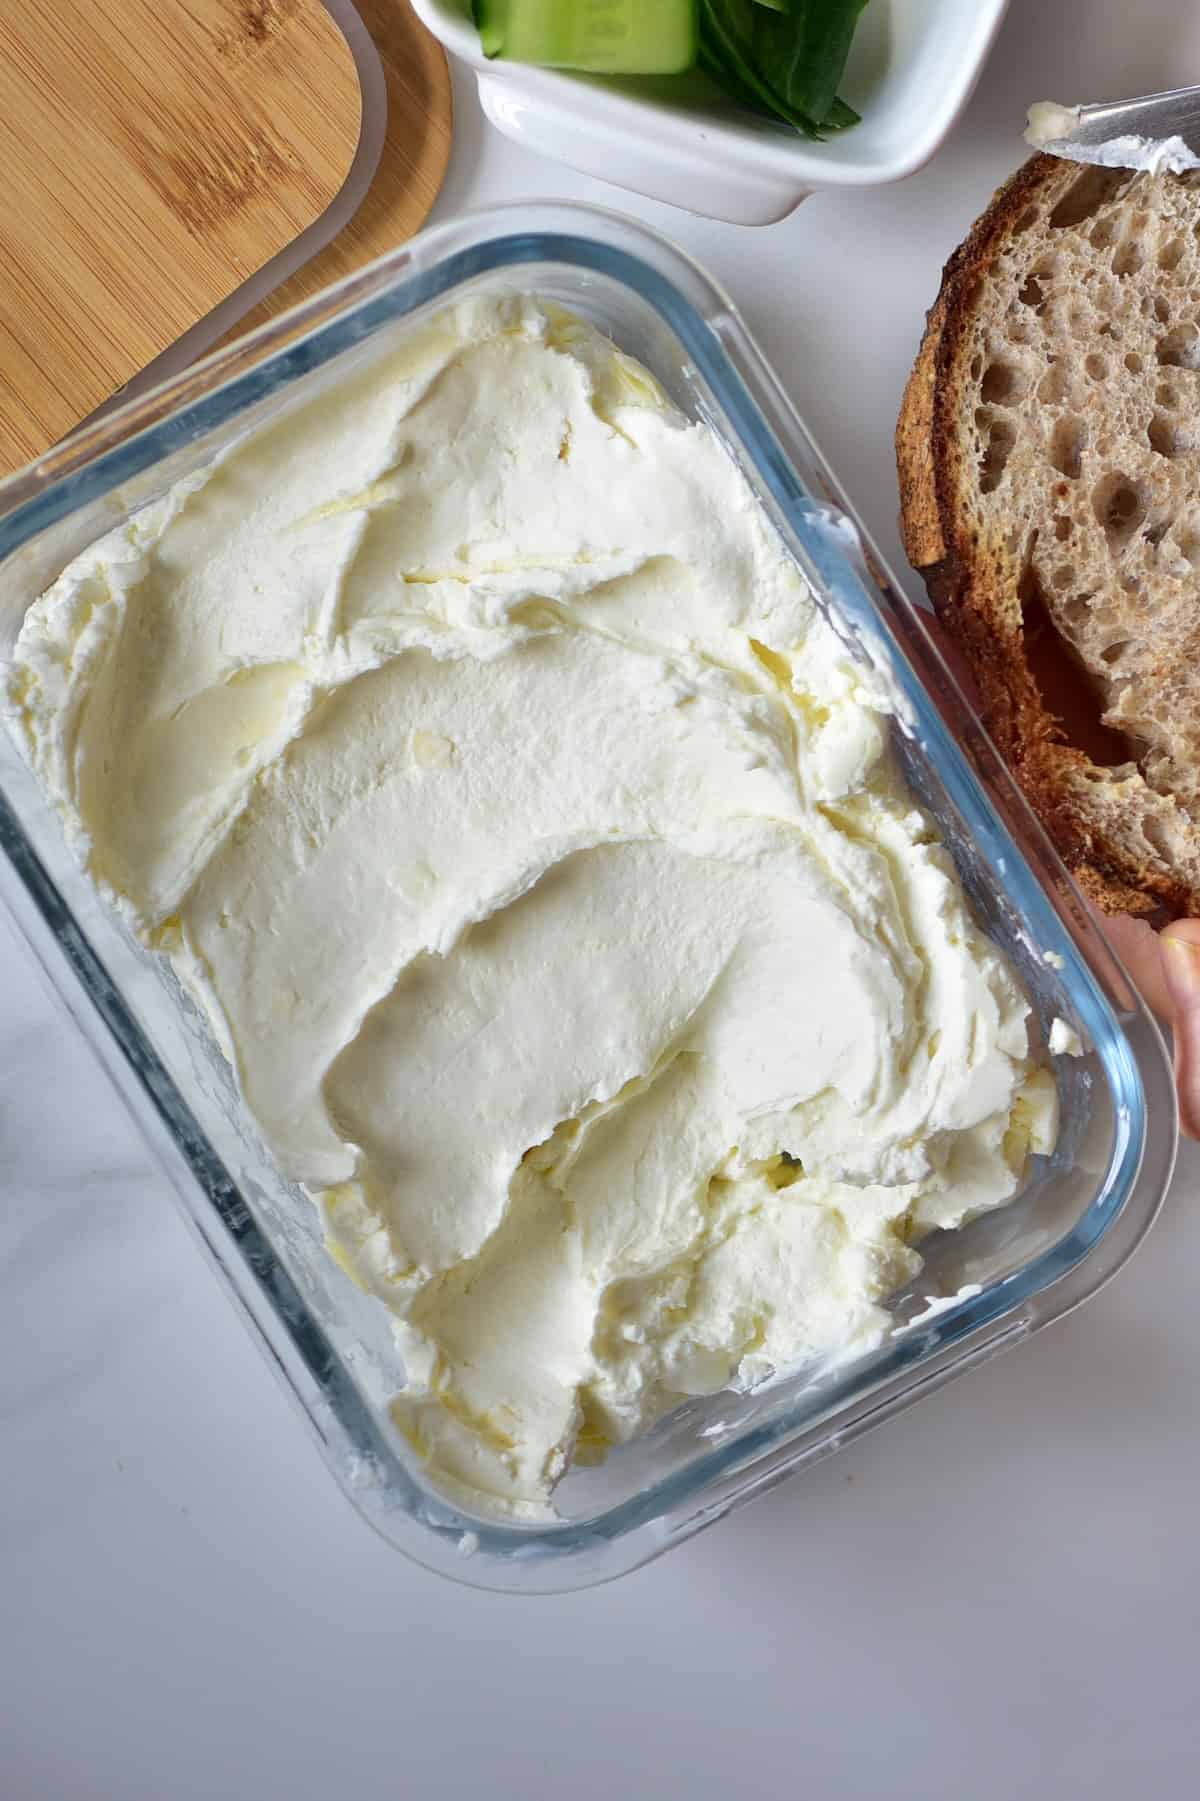
Serve with Markouk or warm pita bread, olives, and fresh veggies. It’s great as a part of a mezze platter. Make it into a labneh dip for crudites and crackers or spoon it liberally over wraps and sandwiches. I love adding roasted roasted cherry tomatoes on top and digging in!

Labneh Sandwich
One of my favorite labneh uses is to make a delicious cousin to avocado toast – labneh toast. Spread generously over toasted bread or bagel and top with seasonings and vegetables of your choice. I like cucumber, lemon zest, and za atar, but you can use whatever you want.
How long does labneh last
Store in an airtight container in the refrigerator for up to 2 weeks. The balls in oil will keep for up to 6 months in a dark place – though they can last even longer.
FAQs
Yes, though it will do better if formed into balls before freezing.
Yes. Natural yogurt has cultured bacteria in it, which grow during the fermentation process.
When stored in a dark place and completely submerged it can last for up to six months.
More Middle Eastern recipes
If you try this labneh recipe, let me know how it goes in the comments below. I’d appreciate a recipe card rating and would love to see your recipe recreations – tag me on Instagram @Alphafoodie!

Homemade Labneh Recipe
Equipment
- Cheesecloth (Muslin cloth) or nut milk bag
Ingredients
- 8 cups plain yogurt this can be homemade or store-bought
- 1/4 tsp salt optional
- olive oil if making labneh balls
Instructions
Make Labneh from Milk
- If you're making labneh with milk, you first need to make yogurt. You'll need a yogurt starter (in the form of a powdered yogurt starter or a few spoonfuls of natural yogurt) along with whole milk. You can find my full recipe for Natural Yogurt.Once you have your yogurt, proceed with the next steps.
Make Labneh From Yogurt
- Pour the yogurt and salt into a cheesecloth.
- Hang it over a large bowl or jar to strain. You can place the cheesecloth over a strainer/sieve or suspend it from a doorknob of your kitchen cupboard (with a bowl below it to collect the whey). See the photo for ideas.

- Allow the liquid to strain for at least 6 hours, up to 24 hours. The longer you let it strain, the thicker the labneh yogurt will be. If needed, place the bowl in the refrigerator though you can keep it at room temperature if it's not too warm.
Make Labneh Balls (for long preservation)
- Once the lebne is strained, you can shape it onto balls to prepare it for longer preservation.Form the balls – use 2-3 Tbsp per ball.
- Carefully place the balls in a jar. Then fill it with olive oil. As long as the balls stay completely submerged in the oil, their quality will be preserved.
Storage Instructions
- Store the fresh labneh in an airtight container in the refrigerator for up to 2 weeks. The labneh balls in oil will keep for up to 6 months in a dark place – though they can last even longer.
Video
Notes
- Lemon juice – to assist in fermenting and creating acid whey.
- Any other additional ingredients and flavoring are better added once the labneh is ready.
- Drink it – add it to smoothies and juices, or drink it as-is.
- Use for baking bread, muffins, and tortillas – you can use whey instead of water.
- Add to soup recipes in place of some vegetable stock.
- Add to hummus, to thin out the mixture.
Nutrition
Nutrition information is automatically calculated, so should only be used as an approximation.


Do you mix the yoghurt and the salt before putting in the cheese cloth or do you just sprinkle the salt on top?
Hi there,
You can just sprinkle it on top before straining the yogurt. I hope you give it a try.
Does the labneh in oil need to be kept in the refrigerator or does storing it in a pantry work well?
You can store it in the pantry. Just make sure all the labneh balls are submerged in the oil to stay protected.
Should the labneh be kept in the fridge while the whey is draining?
Hi Clive,
No need to keep the labneh in the fridge while draining. You can keep it on your countertop.
Is there any other oil that can be used to preserve labneh? Like sesame oil? From where I’m from its hard to get olive oil.
Hi Prina,
I’ve only ever used olive oil. But you should be able to use any oil – any should preserve the labneh just as well. Just keep in mind that the flavor might change a bit, especially if you use very flavorful oil like sesame oil. Let me know how it goes.
Do we need to throw out the preserving oil once the labneh balls are all finished or could it be reused? If it can, for how many batches?
Thankyou!!
Hi Samarah,
You can reuse the oil as flavored oil in salad dressings or for cooking.
I obviously have been here before because you posted my way of using whey for cooking rice. I came today with a query about the change of colour in the oil I store my labneh ball’s in but inadvertently you have answered my query..I have not been keeping them in the dark!
However my way of cooking rice in whey which you posted in September 2020is not correctly reported. Add rice to twice the weight of simmering whey then turn heat right down and cook for 15 mins covered. Turn off heat and leave for a further 15 mins without removing the lid. I find your blog very useful
In making the balls, how long could i keep them in or out of the refrigerator without totally submerging them in olive oil, maybe just rubbing a light coating on each ball. Its not a large batch, maybe 15 balls.
Hi Mikki,
You can store them in the fridge for up to 2 weeks in an air-tight container without the oil.
Amazing recipe! Made frozen yogurt with different flavours too. Thanks for sharing.
Thanks for your comment, Meera!
I put my labneh balls in a jar, covered them with virgin olive oil and put them in the fridge. Next day they were balls in set jelly! Don’t know what went wrong. I took them out and as they warmed up the oil went back to liquid and balls were able to be eaten.
Hi Pauline,
Olive oil can become cloudy and solidify when refrigerated, this is completely normal and nothing to be worried about. 🙂
Hi!
Can I resuse the olive oil for the next batches of labneh that i make? So that I always have a jar of labneh around haha 😉
Hi Freja,
You can reuse the oil to make salad dressings or for cooking as well 🙂
Used Frivan acidophilus yogurt drained using panyhose stocking in a thermos cup w/lid in fridge( I prefer using super fine stockings rather than cheese cloth when draining yogurt) Every few hours twist bag tighter use lid to hold bag in place. Easily rolled into firm balls 2 days later beautiful delicious in lemon potatoe salad!! This recipe did not work with my homemade yogurt and a weight on top like a different recipe suggested!Fyi Everything is going to depend on the yogurt you use and how you drain it sticking with my knee high stocking method then just throw away when your done! Dollar store has 3 pairs for $1 PS: oil fingers/hands b4 rolling and you’ll get super smooth mozerella looking balls my spouse thought they actually were mozzarella! Lol
Thank you for your tips, Melissa.