
This post may contain affiliate links. Please read our disclosure policy.

How to make easy peel hard-boiled eggs with a simple yet foolproof method and top tips for perfectly cooked eggs that are so easy to peel every single time!
Looking for perfectly cooked, easy peel hard boiled eggs? As much as I love boiling eggs for meal prep, how to make eggs easier to peel (without causing divots and gouging egg whites) eluded me for years. With a lot of trial and error, though, I’ve discovered the best way to make hard-boiled eggs that are so easy to peel.
While I’ve already shared the best way to peel hard boiled eggs, learning how to make hard-boiled eggs easy to peel actually begins long before the actual peeling stage. In fact, the eggs you choose and the cooking method are just as important as what you do after they’ve cooked.
Want to save this recipe?
How to boil eggs so they peel easily?
It’s all got to do with the water temperature! A particularly popular method of boiling eggs is the “cold start” method which has you place them in cold water and slowly bring them to a boil. Unfortunately, slow-cooked egg whites tend to bond more strongly to the shell membrane, making them a nightmare to peel.
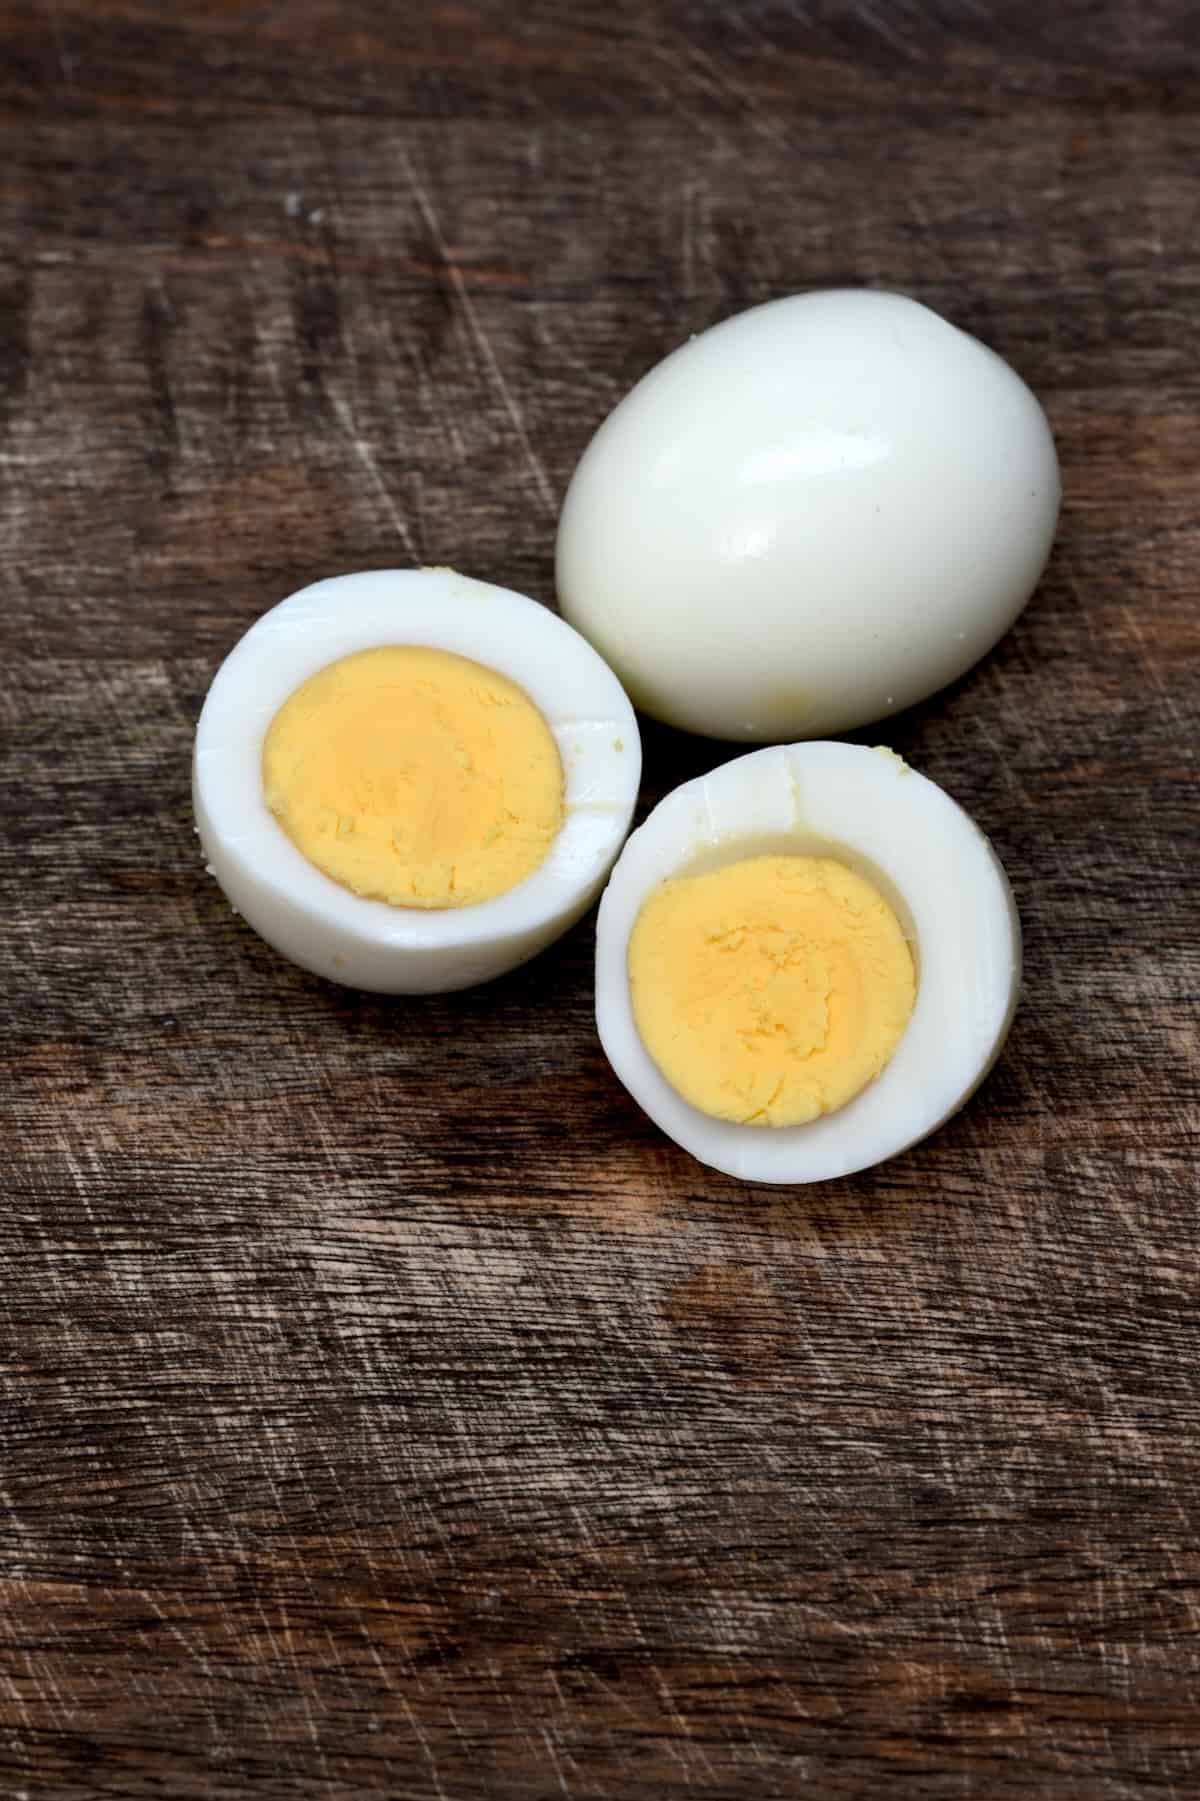
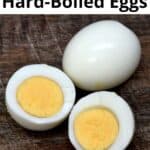
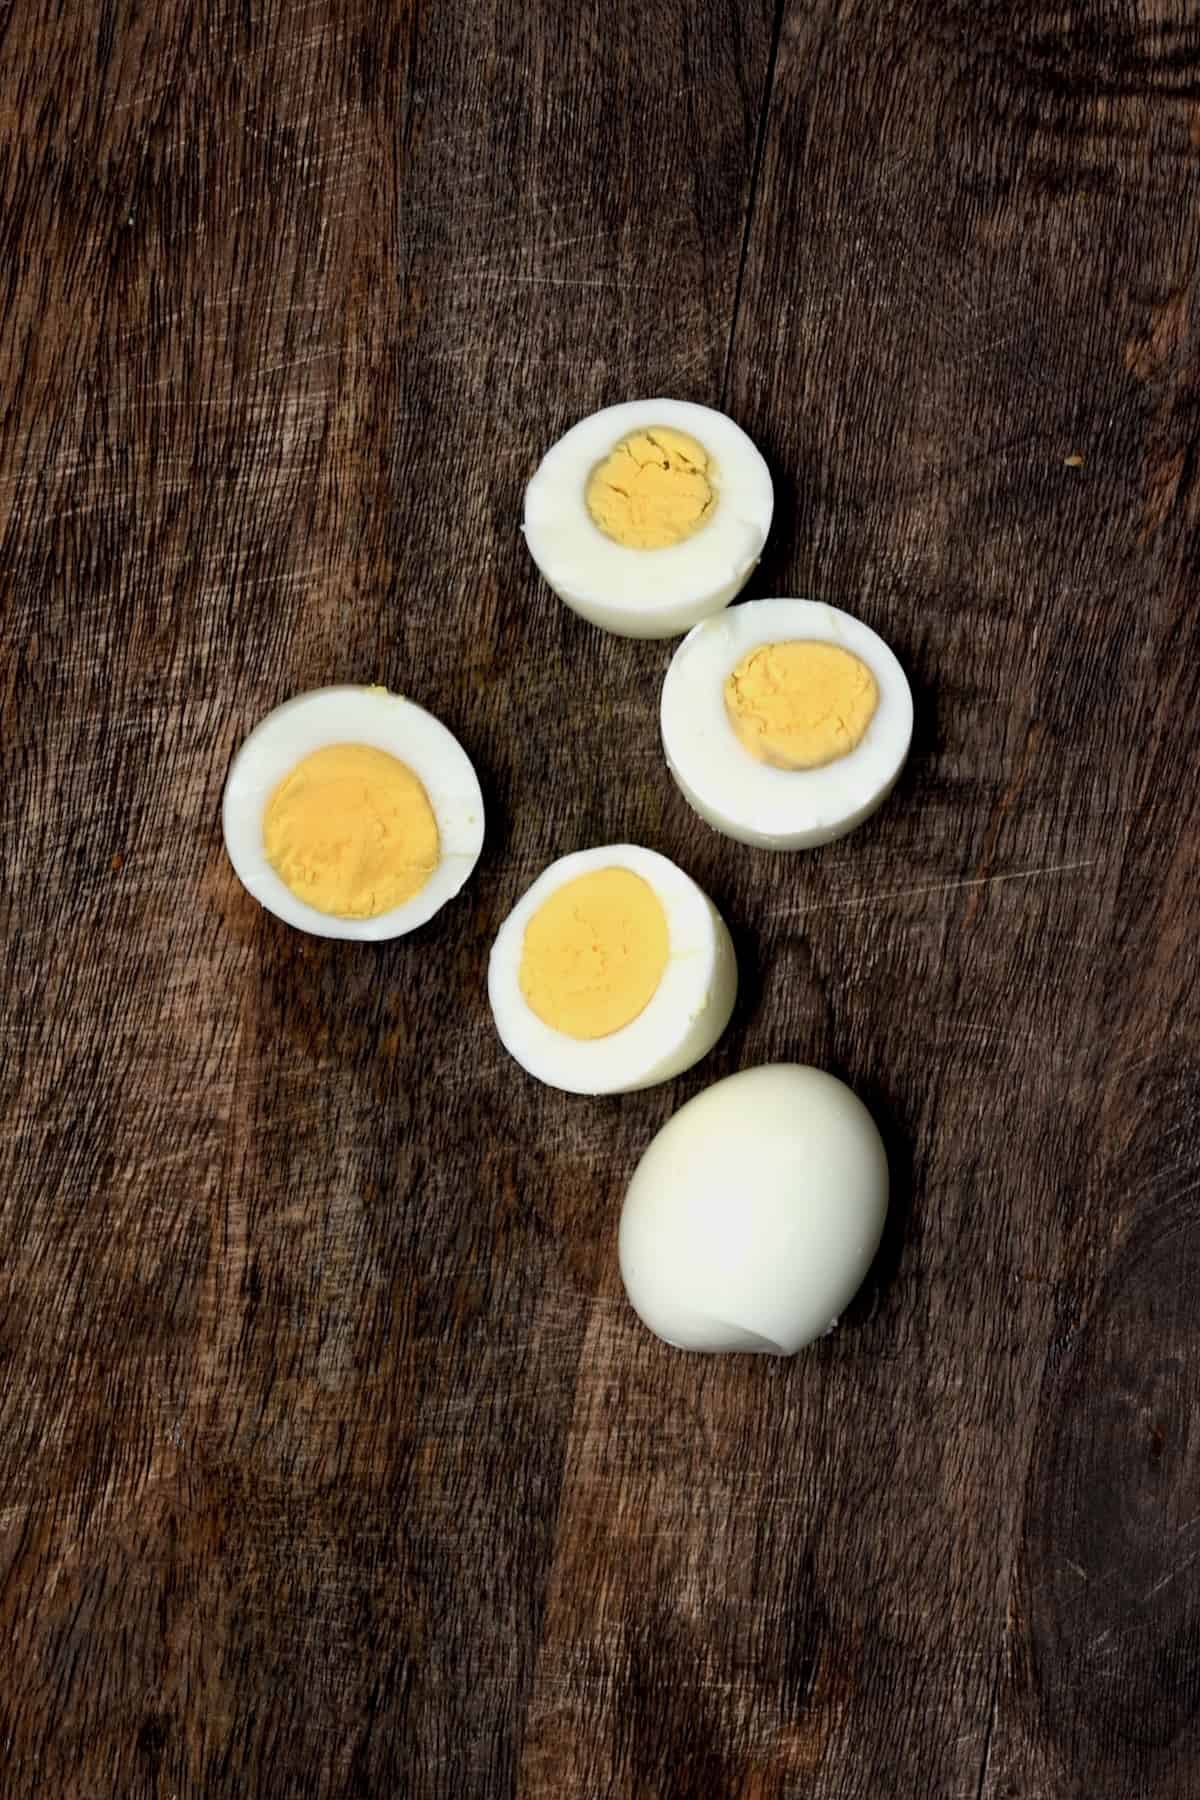
In comparison, this hot water method has you cook eggs directly in boiling water for enough time for the whites to set, then lower the heat to finish the cooking. It produces perfectly cooked, tender egg whites (not rubbery!) and creamy yet set egg yolks (with no green/gray rings) while using science to make them easier to peel.
You can also make perfect hard-boiled eggs in an Instant Pot or boiled eggs in an Air Fryer and learn how to make perfectly poached eggs or fluffy scrambled eggs.
Step-by-step instructions to make hard-boiled eggs
For this method, I’ve used room-temperature large eggs. Generally, medium eggs will require 1-2 minutes less (doing a test run is a good idea).
Step 1: Add enough water to a medium-large saucepan to submerge the eggs you want to cook. Then bring the water to a rolling boil over high heat.
Step 2: Gently lower the eggs into the water (I use a slotted spoon) and allow them to boil vigorously for exactly 30 seconds.
Step 3: Add the ice cubes to the water and allow it to return to a boil. Then reduce to a simmer and cook for 12 minutes.
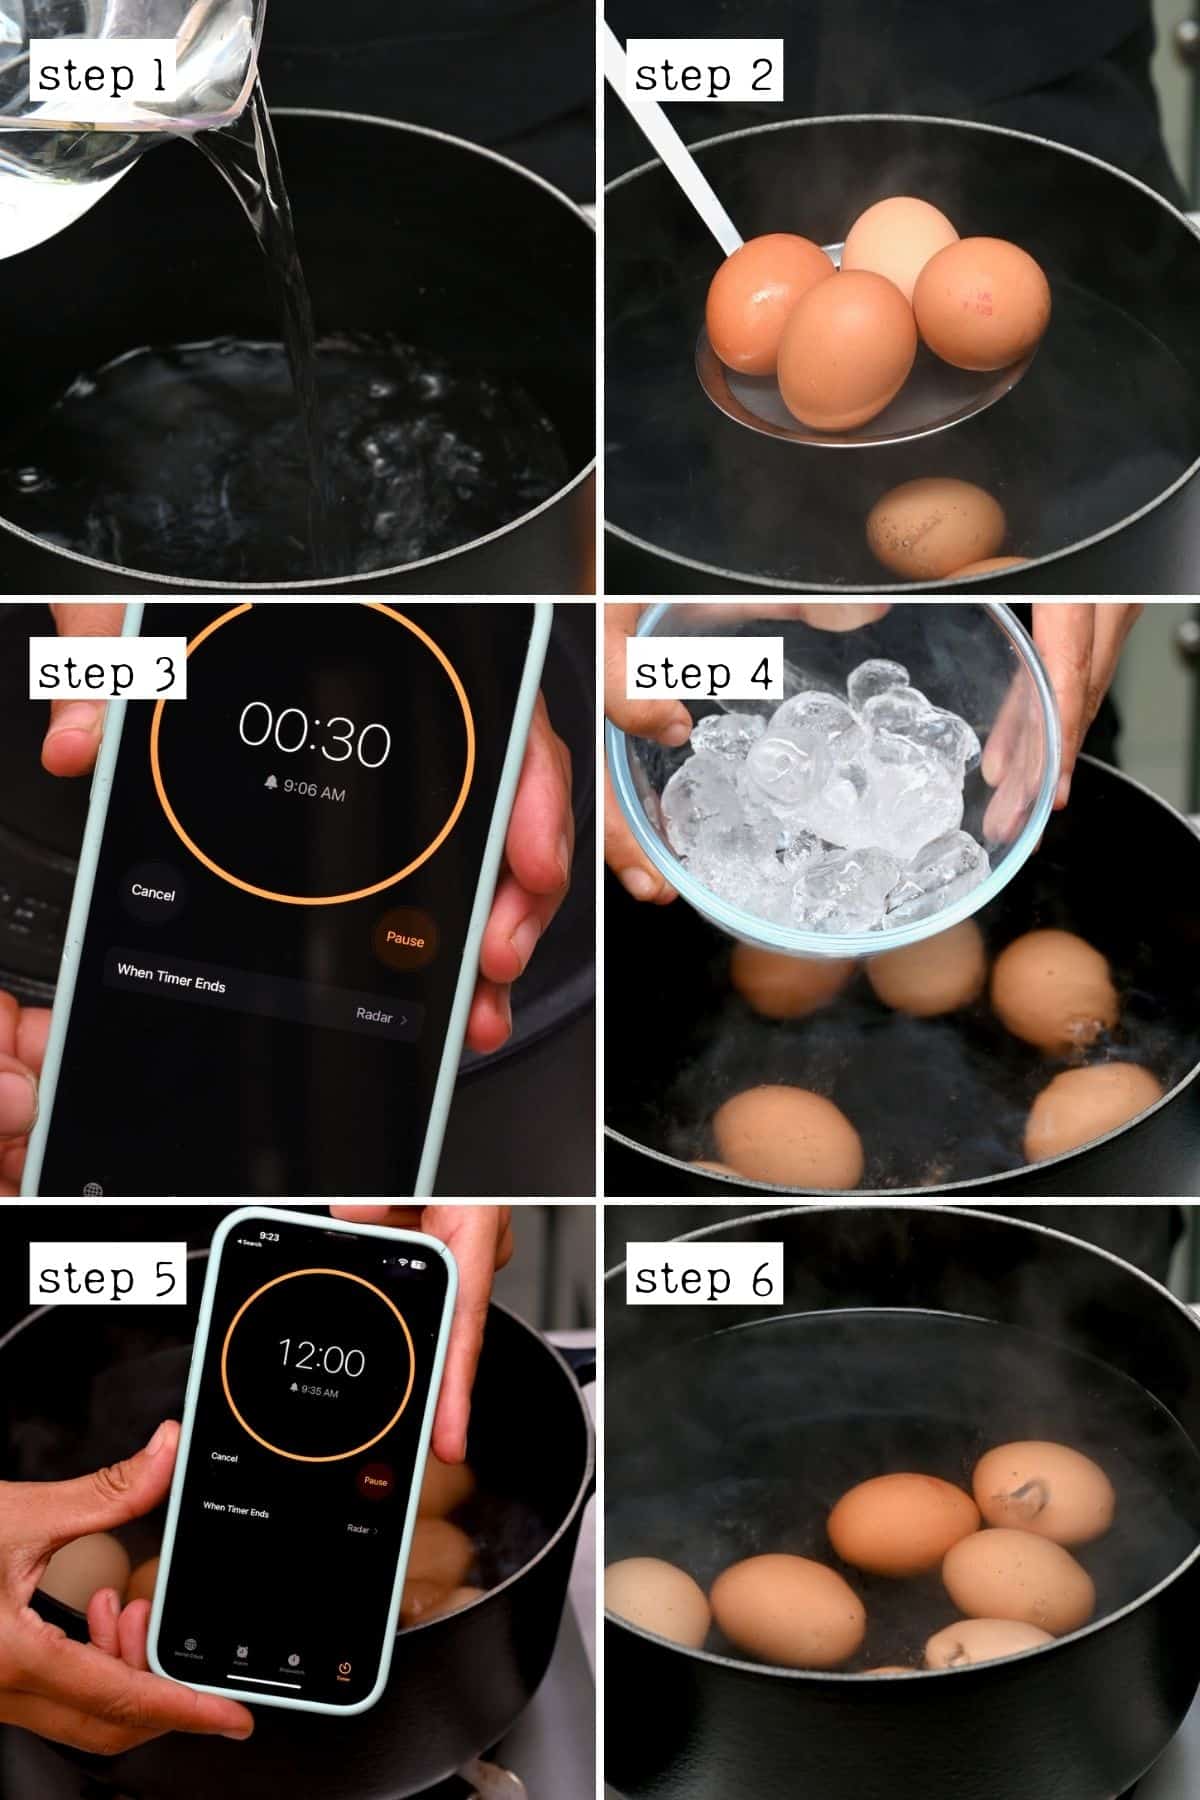
If you don’t have ice, then after 30 seconds, turn the burner to low heat for a very gentle simmer for 13 minutes. Do a test run if using this method, as the timings may vary.
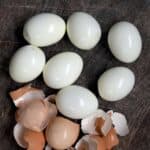
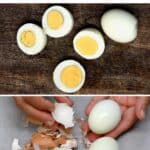
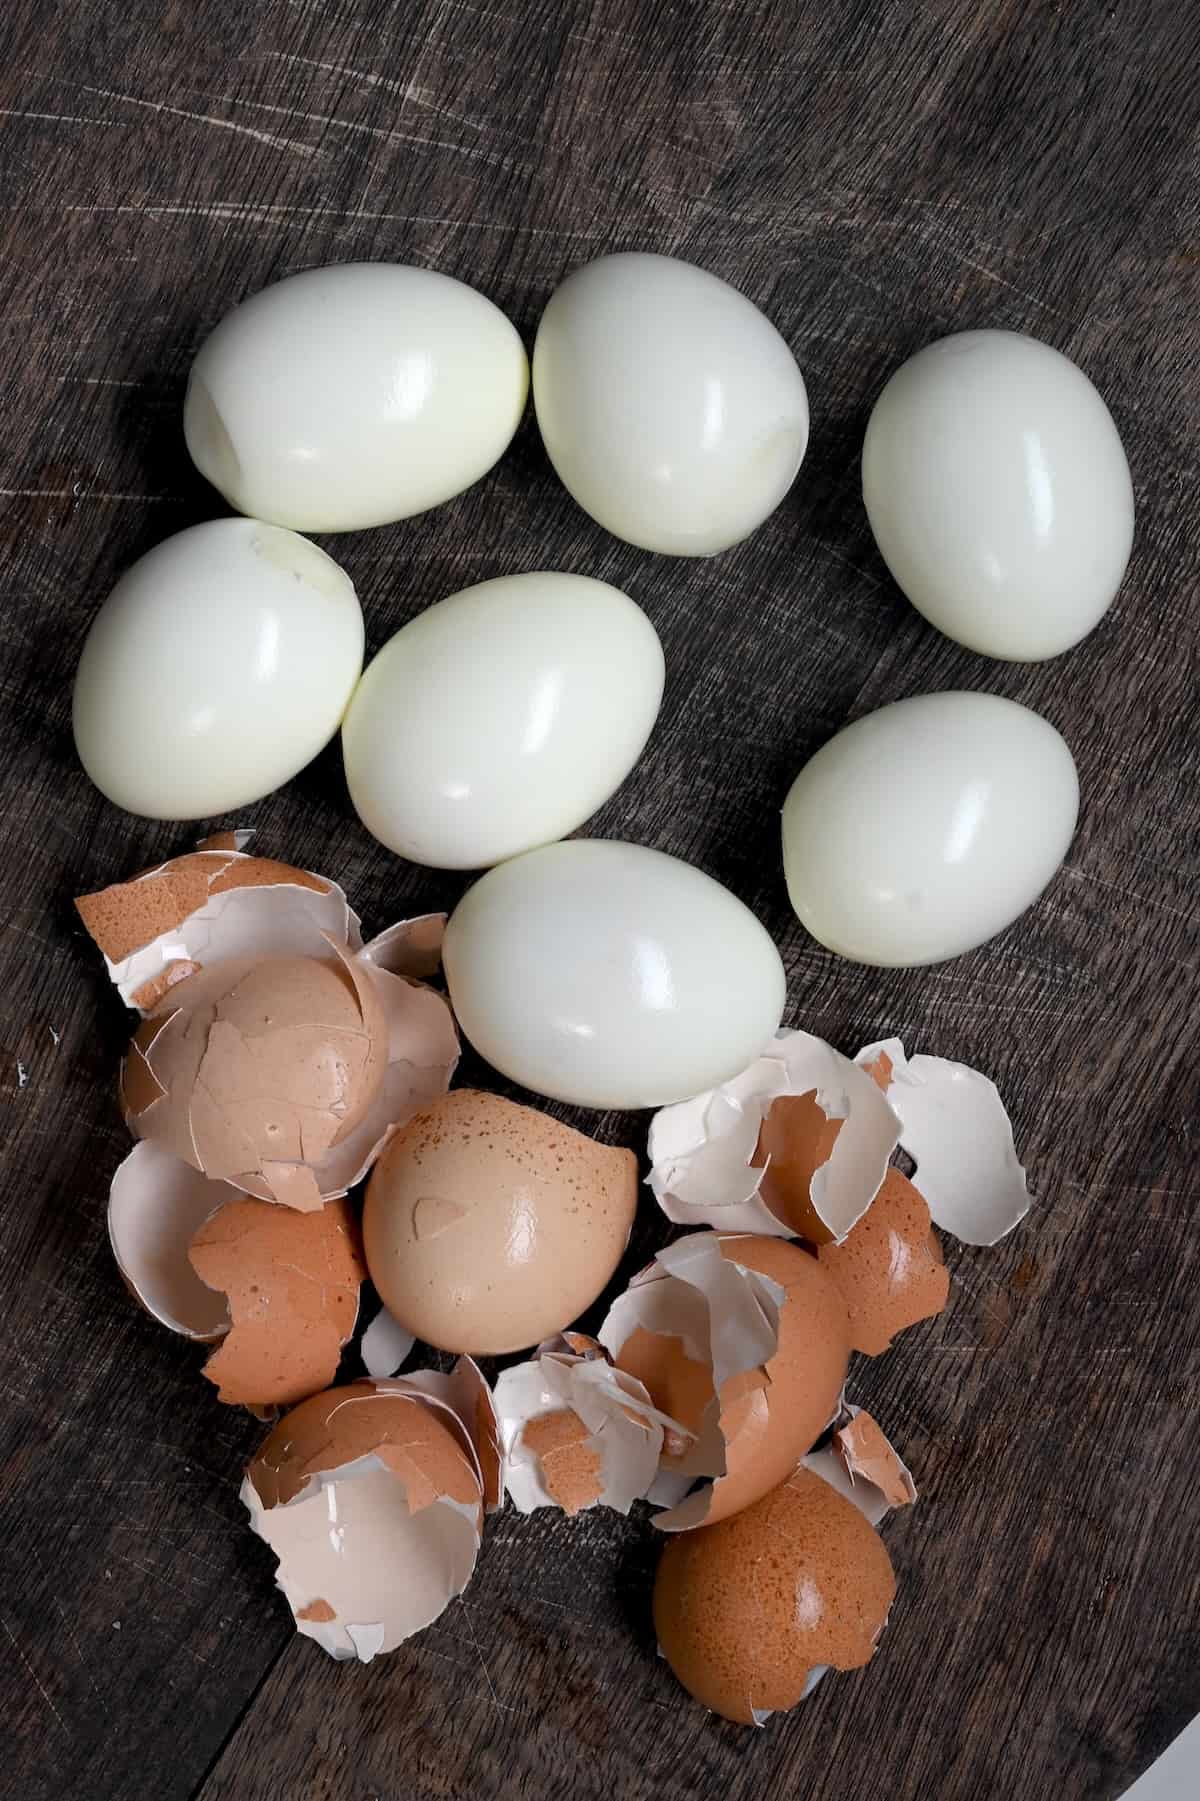
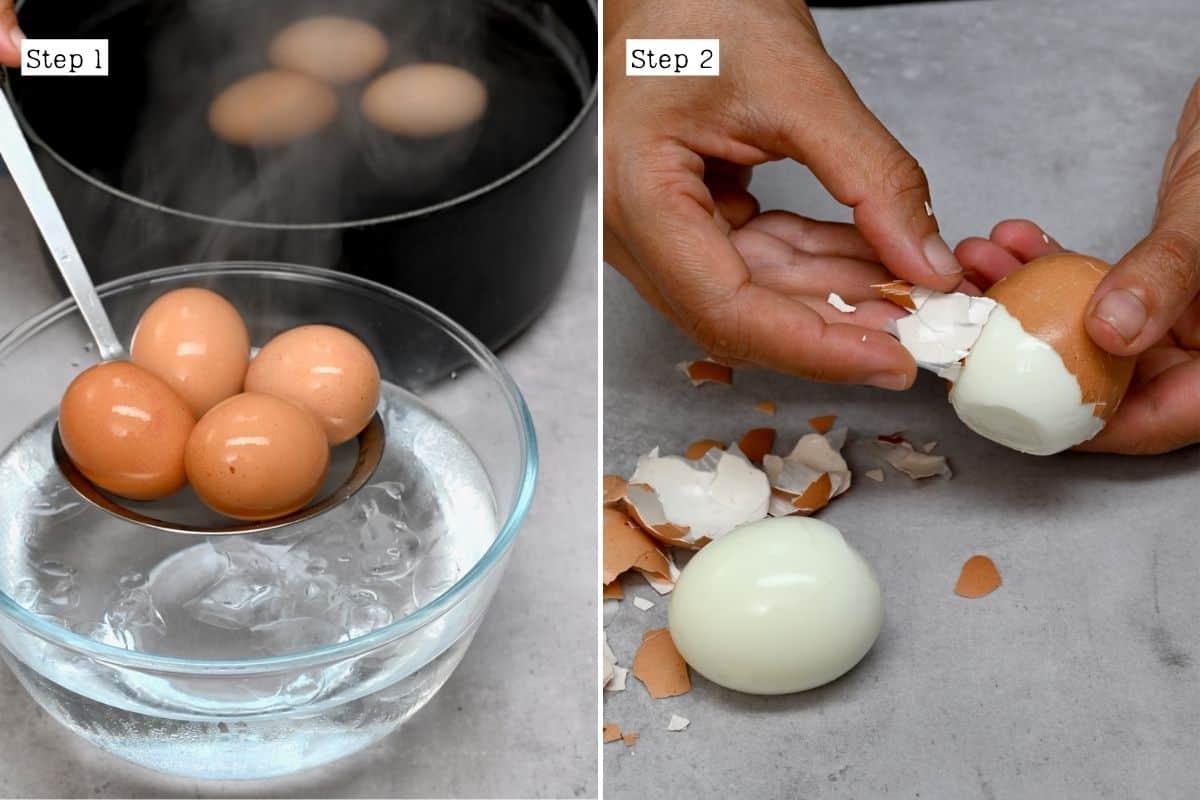
Step 4: Transfer the hard-boiled eggs to a large bowl of ice water to halt the cooking process, and then peel the eggs directly in the water (or follow this method to easily peel hard boiled eggs every single time by rolling them on the counter!).
After learning how to hard boil eggs and how to peel them, learn how to store boiled eggs (in the peel and peeled boiled eggs).
How long do hard-boiled eggs last?
Generally speaking, boiled eggs will last 5-7 days when stored in an airtight container in the refrigerator. Check out how long boiled eggs last for all the information on storing eggs (peel-on or off) in the fridge or freezer.
Tips for perfectly hard-boiled eggs that peel easily
- Start with older eggs: While this isn’t necessary for great results, starting with eggs that have been in your fridge for a few days vs. farm-fresh eggs usually makes for easier peeling as the protein isn’t as “sticky.” Save the latter for poaching eggs and frying.
- Use room temperature eggs: This ensures even cooking and prevents the eggs from cracking when submerged in boiling water.
- Don’t overcrowd the pot: It works best to boil them in a single layer covered by at least 1 inch of water for up to 6 eggs or 2 inches for more.
- Use a timer: Making the best hard boiled eggs is a precise art, so using a timer is important for achieving perfectly cooked results.
- Start with Boiling water: A boiling hot start will ensure evenly cooked egg whites and super easy peel eggs. When you then rapidly cool the water, it will prevent the whites from fusing into the shell membrane.
- Shock them in an ice bath: Immediately transfer cooked eggs to an ice-water bath (or under running cold water). This halts the cooking process and, if you crack them first, can create a barrier between the white and shell to make them easier to peel.
- Do a test run: The size of your egg, its temperature, the water temperature, and even the altitude can affect cooking time, so it’s best to boil practice eggs. I recommend removing one 30 seconds before my recommended time, one on time, and one 30 seconds after. Then check the results to see if you need to tweak the method.
Other Tricks for How to Make Boiled Eggs Easy to Peel
There are several other popular tricks for how to make boiled eggs easy to peel. These include adding 1-2 teaspoons of salt, baking soda, or vinegar to the cooking water and/or making a tiny hole in the base of the shell with a thumbtack.
I’ve never found salt helps much, though adding vinegar to the water (which thins the eggshells) and/or pricking holes in the eggs can make them slightly easier to peel.
How to use hard-boiled eggs
- Over a lox bagel or avocado toast,
- Deviled egg potato salad or Nicoise salad or Cobb salad,
- Creamy egg salad sandwiches,
- Pickled eggs (3 ways),
- In kedgeree,
- To make Scotch eggs,
- With flaky salt & black pepper.
If you try this easy method for easy peel hard boiled eggs, let me know how it goes in the comments below. I’d appreciate a recipe card rating and would love to see your recipe recreations – tag me on Instagram @Alphafoodie!

Easy Peel Hard-Boiled Eggs
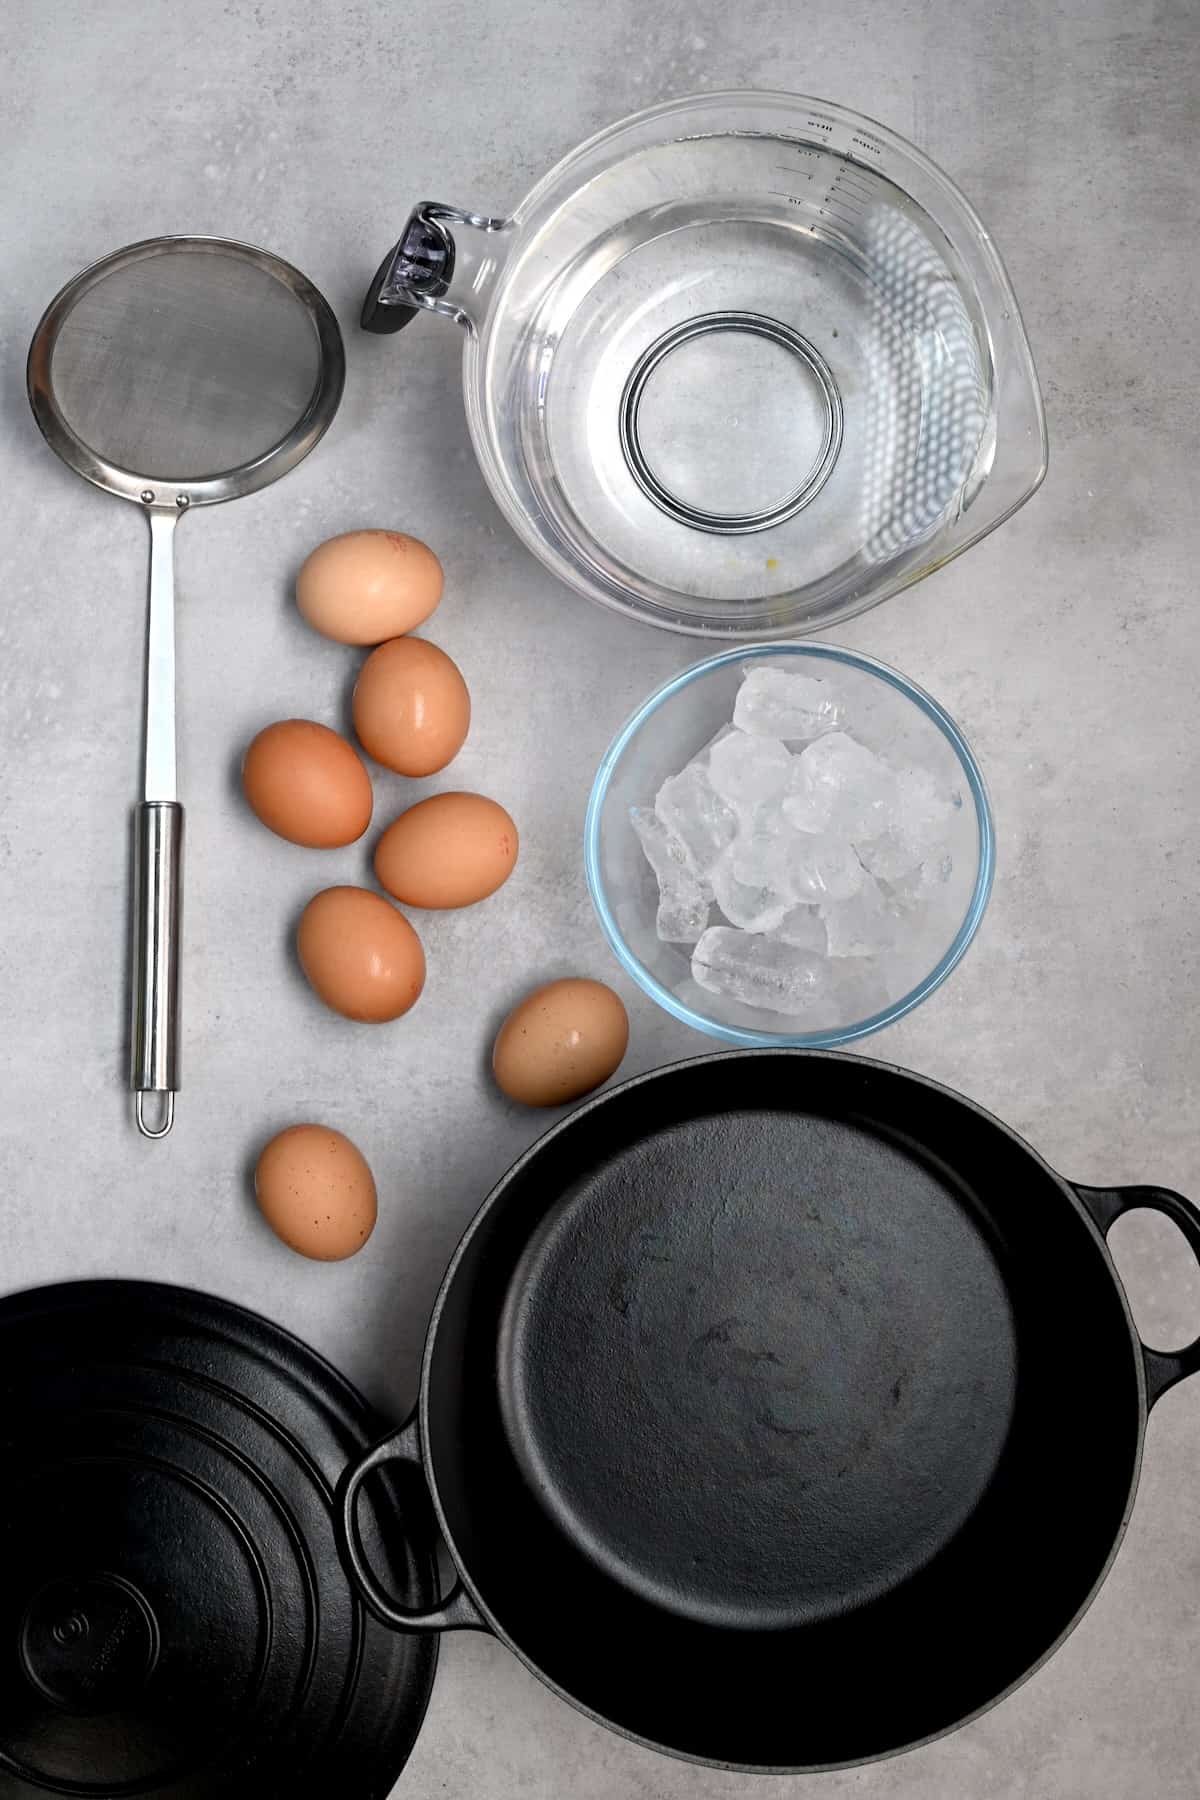
Ingredients
- 4 eggs or as many as wanted; large, room-temperature
- water to boil and cool the eggs
- ice cubes to cool the eggs
Instructions
- Add enough water to a medium-large saucepan to submerge the eggs you want to cook and bring the water to a rolling boil over high heat.
- Gently lower the eggs into the water (I use a slotted spoon) and allow them to boil vigorously for exactly 30 seconds.
- Add the ice cubes to the water, allow it to return to a boil, then reduce to a simmer and cook for 12 minutes.If you don’t have any ice, then after 30 seconds, turn the burner to low heat for a very gentle simmer for 13 minutes. Do a test run if using this method, as the timings may vary.
- Transfer the hard-boiled eggs to a bowl of ice water to halt the cooking process, and then peel the eggs directly in the water (or follow this method to easily peel hard-boiled eggs every single time!).
Video
Notes
Nutrition
Nutrition information is automatically calculated, so should only be used as an approximation.


The eggs peeled perfectly! Thank you!
So happy it worked for you, Natalie! 😊
Hello. These did peel perfectly but they popped when i placed them gently in the boiling water letting a bit of egg out… I did bring them to room temp. Otherwise i followed directions placing ice in the water after 30 seconds…The only difference was i turned the heat off and set the timer for 12 minutes. I only used/peeled one so far but man it was sooo easy! And they were cooked perfectly… Thank you and if you have a tip on how i can prevent it from cracking upon entering the water let me know❄️
Hi Wendy! So glad they peeled perfectly and cooked just right. 😊 To stop them cracking as they go in: lower each egg gently on a spoon, and since you bring them to room temp, the bigger help is to either lower them into already-simmering (not hard-rolling) water, or prick the wide end with a pin first to release pressure from the air pocket. A tiny splash of vinegar in the water also helps any leaks seal quickly. Thanks for the lovely review!
Haven’t try but will definately
Glad to hear it, Attie 🙂 Let me know how it goes.