
This post may contain affiliate links. Please read our disclosure policy.

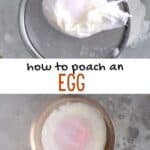


How do you poach an egg properly every single time? Or how about two or more? Follow my methods and top tips below for the perfect poached egg without a poacher! I’m talking creamy yolk encased in a firm but not rubbery white!
I’ve had a little bit of an obsession with International egg dishes over the last year. When there are options like Turkish Menemen, Italian eggs in purgatory, and French baked eggs … how could I not?! Well, last week, I decided to make delicious Turkish poached eggs (cilbir) and realized it was the perfect time to share my advice on the age-old question “how do you poach an egg?”.
Use the table of contents below to skip directly to your desired section of the page!
It may just be me, but poached eggs are like the “fancy egg” of the breakfast world. Sure, scrambled egg is delicious, and who doesn’t enjoy a sunny-side-up fried egg, but there’s something so “elegant” about a perfectly poached egg. With its custardy yolk encased in whites that are “just firm enough,” practically begging to be gently broken, allowing the yolk to escape. However, when made incorrectly, you can end up with a straggly, wispy mess of whites and yolk.
So obviously, learning how to make poached eggs (especially making the perfect poached egg) can be a bit of a learning curve. Even more so, learning how to poach multiple eggs, how to poach an egg without vinegar, with a silicone cup, with a vortex, etc. There are just so many methods to choose from. However, below I’ve included my preferred methods for singular and multiple eggs and the TOP TIPS for the best results every single time with tried-and-tested methods and tips!
And if you want to learn more egg how-to’s, check out these posts for how to pasteurize eggs, separate egg yolks and whites, or perfectly boil eggs (soft, medium, or hard)!
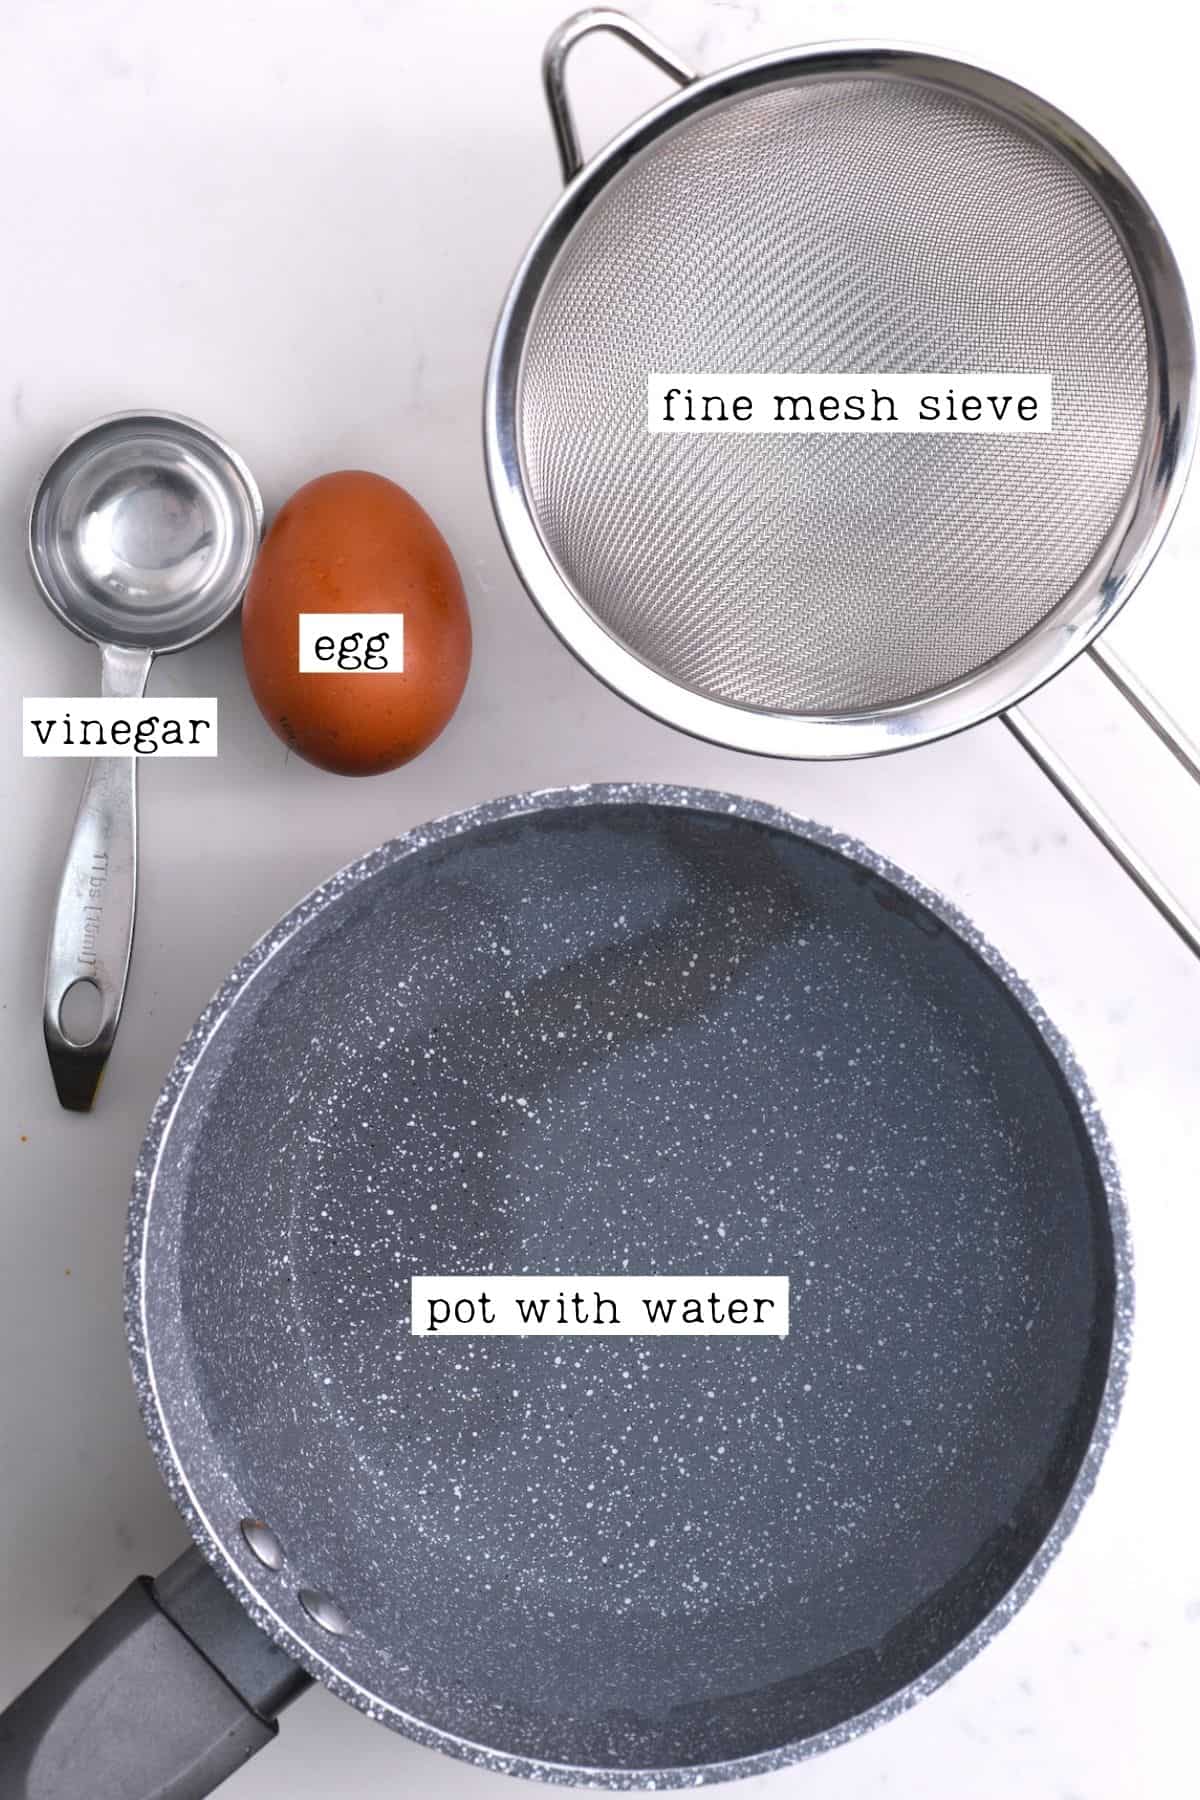
What You’ll Need
There are only a handful of things you need to make the perfect poached egg, including:
- Eggs: to make the poached eggs, you’ll need the eggs – it’s best to use fresh eggs that are at room temperature.
- Vinegar: vinegar will help keep the egg from becoming wispy by coagulating the egg whites. You can use any light-colored vinegar like white vinegar, apple cider vinegar, wine vinegar, etc. Lemon juice would also work.
- Saucepan: you’ll need a medium to large saucepan (plus water to poach the eggs in).
- Small sieve: use a fine-mesh sieve to drain watery egg white from the eggs.
- Slotted spoon: to remove the poached eggs from the saucepan once cooked.
- Timer: if you don’t have a kitchen timer, you can use the timer on your phone.
You may also want to use an ice bath (a bowl filled with cold water and ice).
How to Make Poached Eggs?
The Whirlpool Method
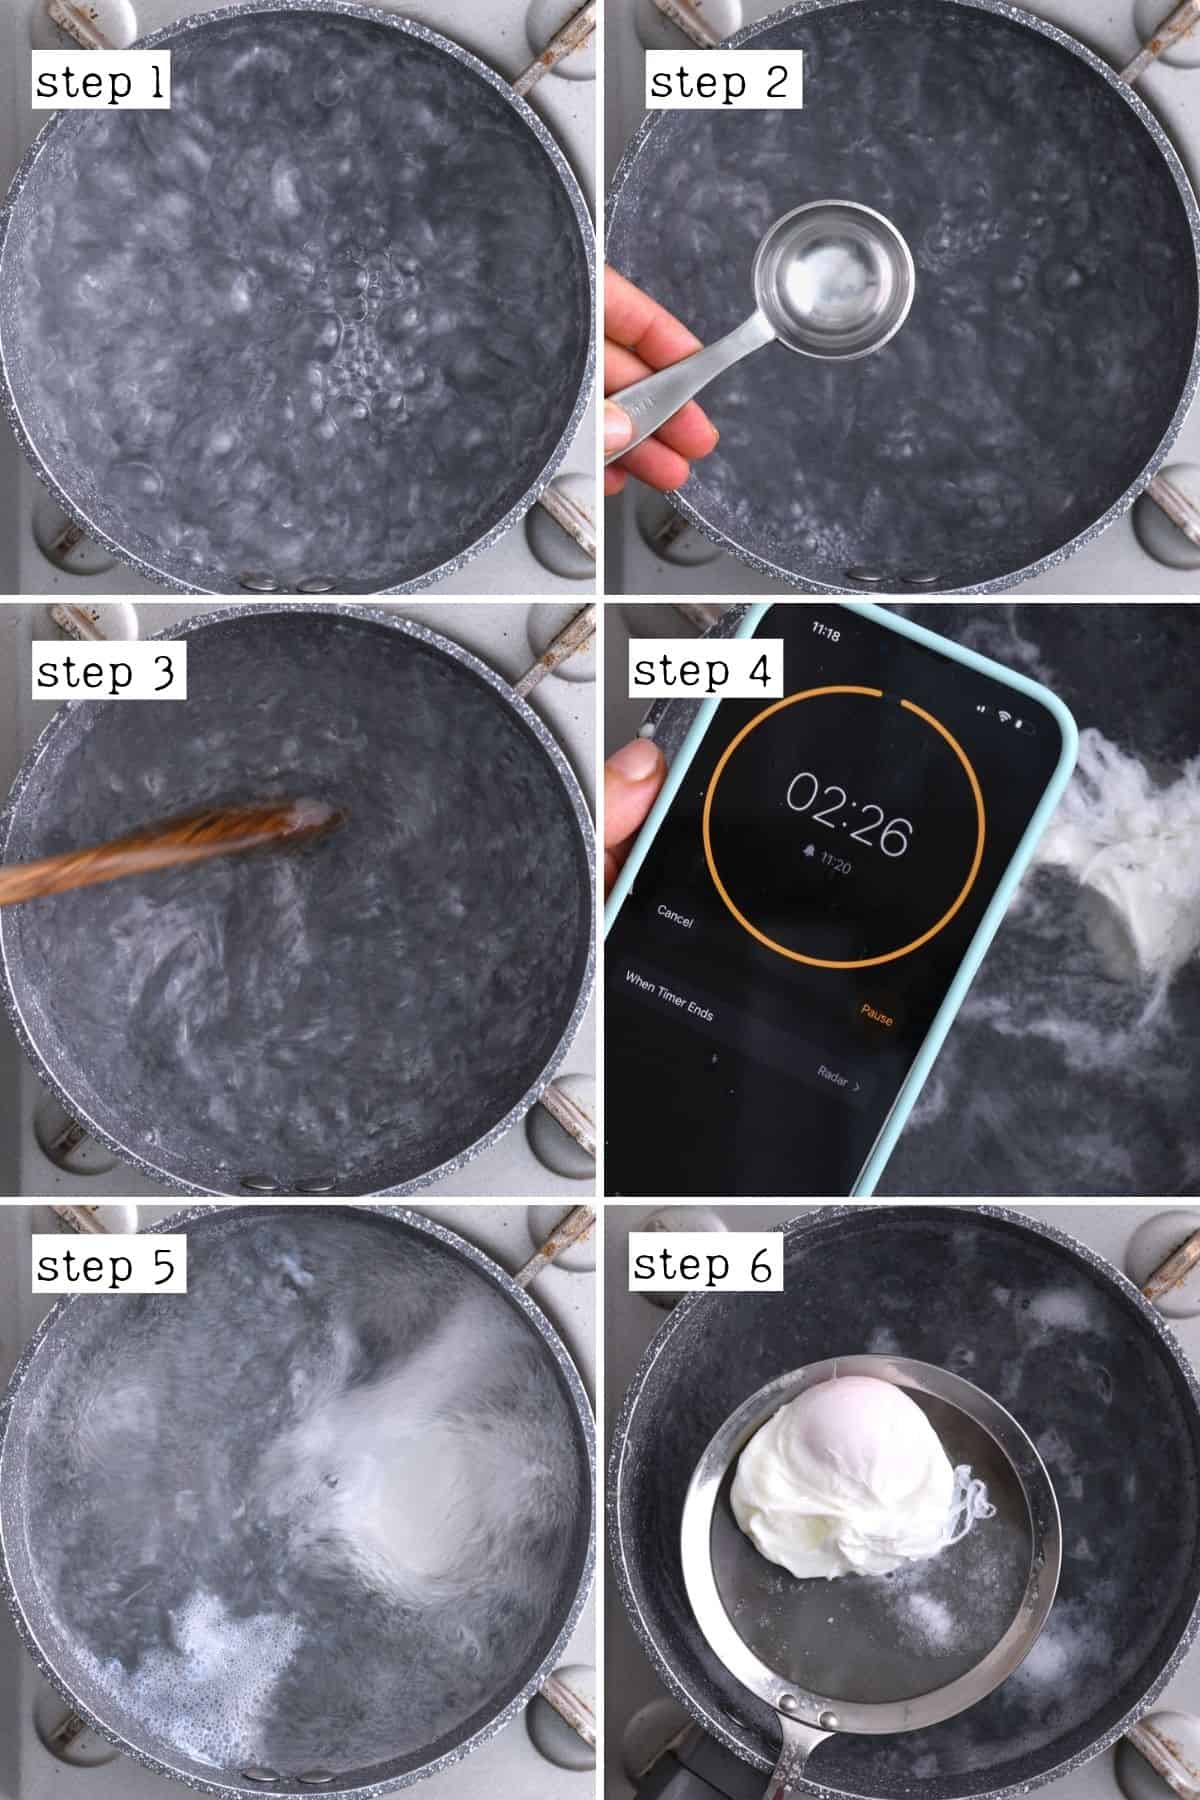
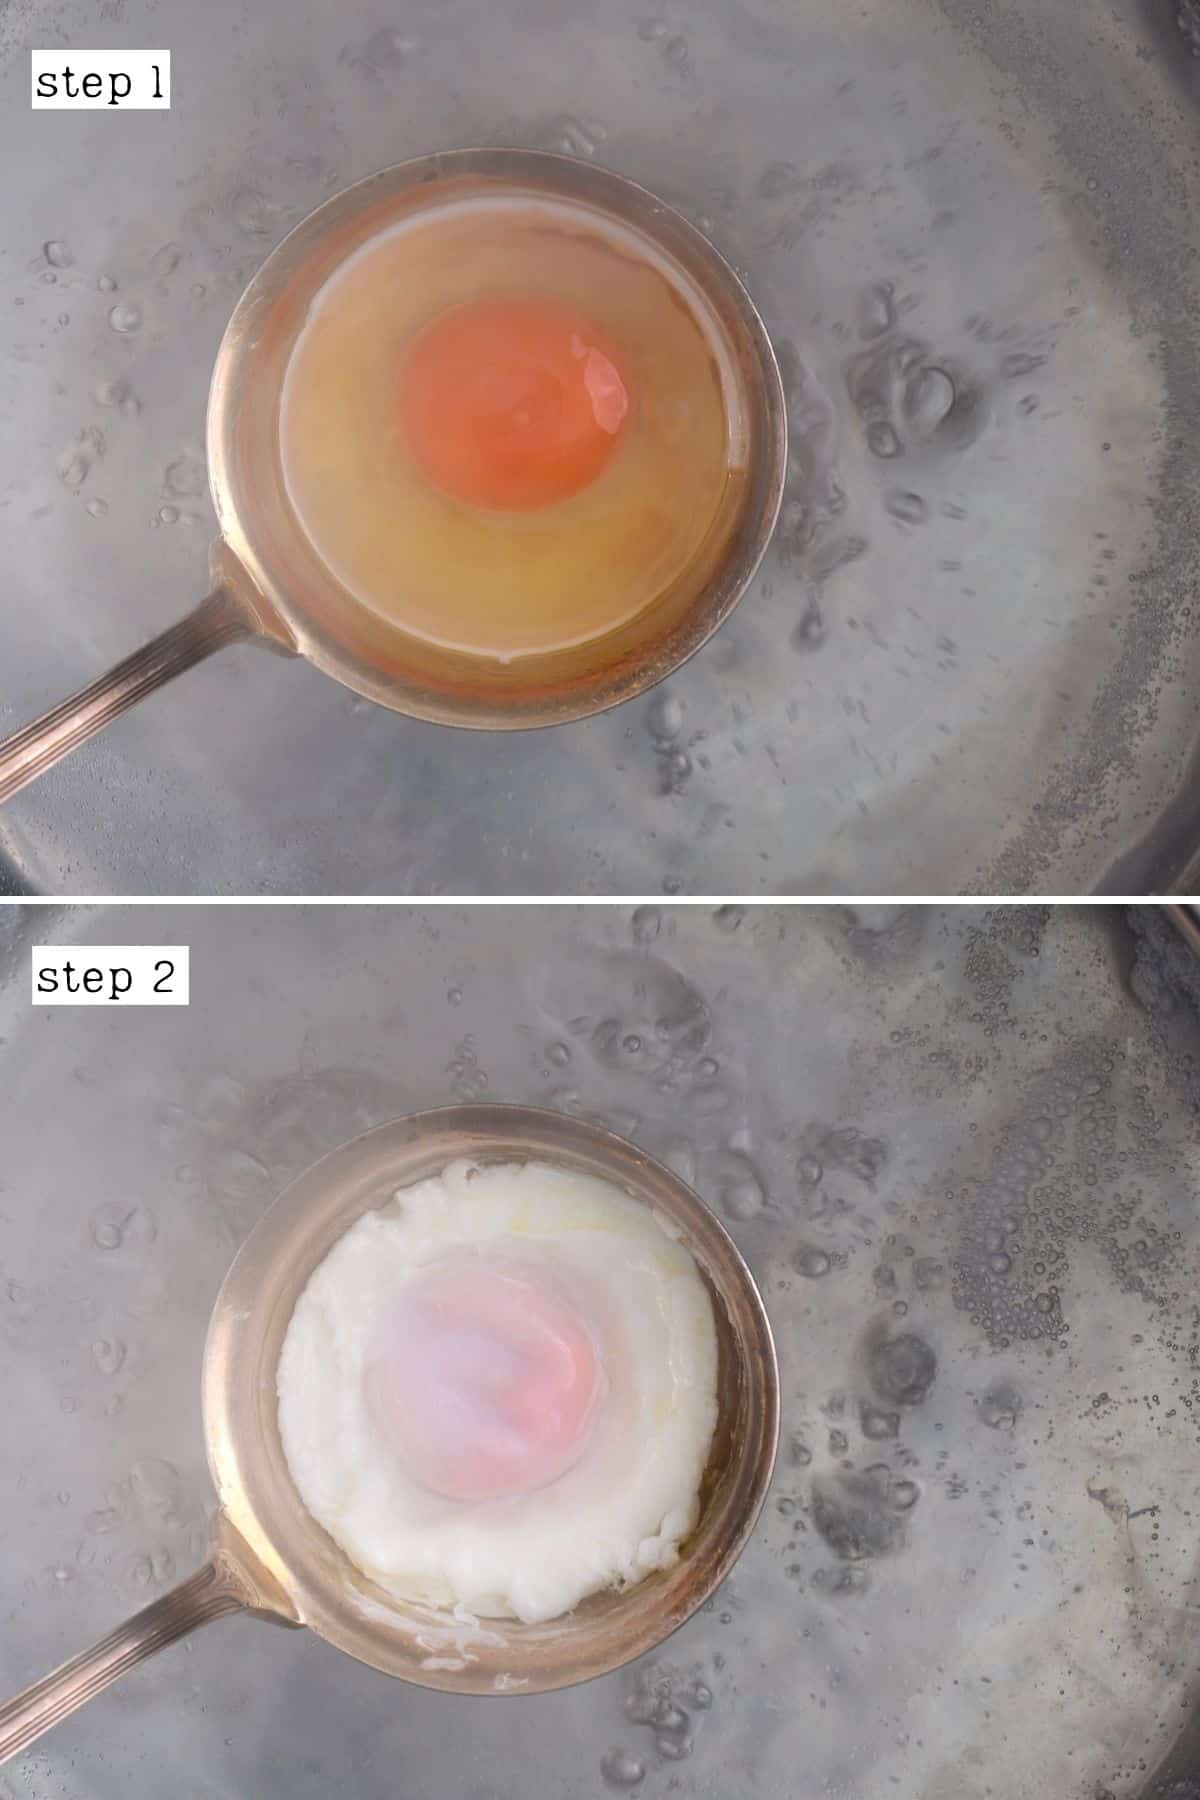
First, fill a medium-large saucepan with at least 4-inches of water (10cm) and bring to a sub-boil (the point that bubbles are just starting to form) over medium-high heat.
Meanwhile, crack an egg into the fine-mesh sieve over a small bowl. Gently swirl the sieve in a circular motion to allow any watery egg white to filter through into the container below, being careful not to crack the yolk. Then, transfer the egg to a small bowl/ramekin.
Why sieve eggs before poaching?
The best-poached eggs come from fresh eggs. The longer the eggs age, the more watery the whites can become, leading to lots of stringy/wispy bits when poaching. Since we don’t know exactly how fresh supermarket eggs are, sieving them is an easy step to do for the best results.
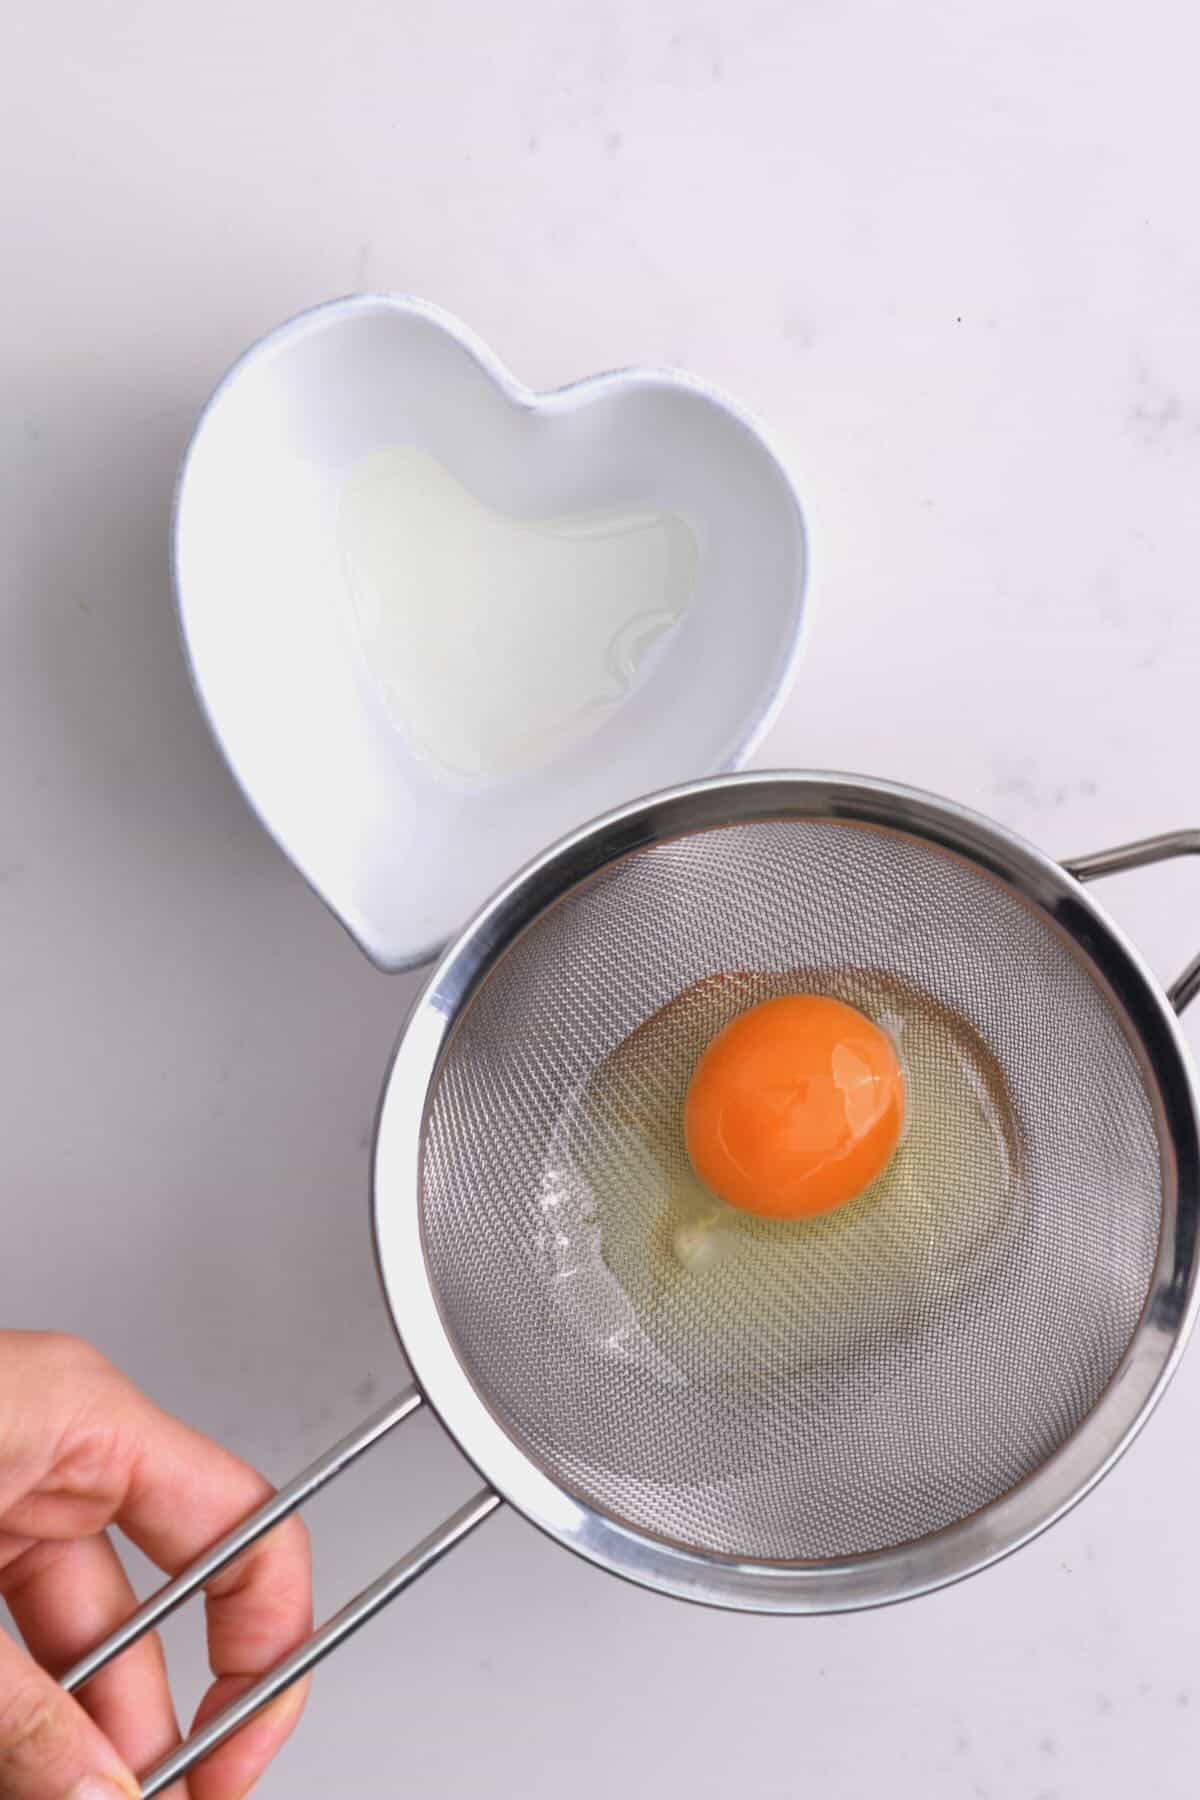
To strain multiple eggs: you can use a flat-bottomed colander instead of a fine-mesh sieve. This way, you can crack 4-6 eggs into the strainer simultaneously and even gently lower the entire strainer into a large saucepan filled with water for poaching.
Once the water in the pan is in the sub-boiling stage, reduce to a very gentle simmer, and add the vinegar.
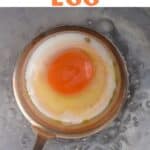
Use a spoon to stir the water in the pan, creating a “vortex” (whirlpool), and then gently pour the egg into the center. The swirling water helps keep the egg together and create the shape we’re looking for.
Why make a vortex?
By creating the swirling vortex in the water, the movement helps to hold the egg together. Ending up in more spherical results, as the egg wraps around itself. Without the movement, eggs can still poach but won’t be quite as impressively shaped.
If you’re making 2 poached eggs, allow the first one to gently form and move to the side of a pan before pouring in the second egg (so they don’t stick). Any more than two, and it’s best to cook them in batches.
If you want to poach two eggs as “one,” crack the eggs into the same ramekin and very gently tip into the water simultaneously.
Then allow the egg to cook, untouched, for between 3-4 minutes (setting a timer as every second counts!), based on how soft you want the yolk to be. I usually aim for 3 minutes, which means the white is set, but the yolk within is wonderfully creamy/custardy still.
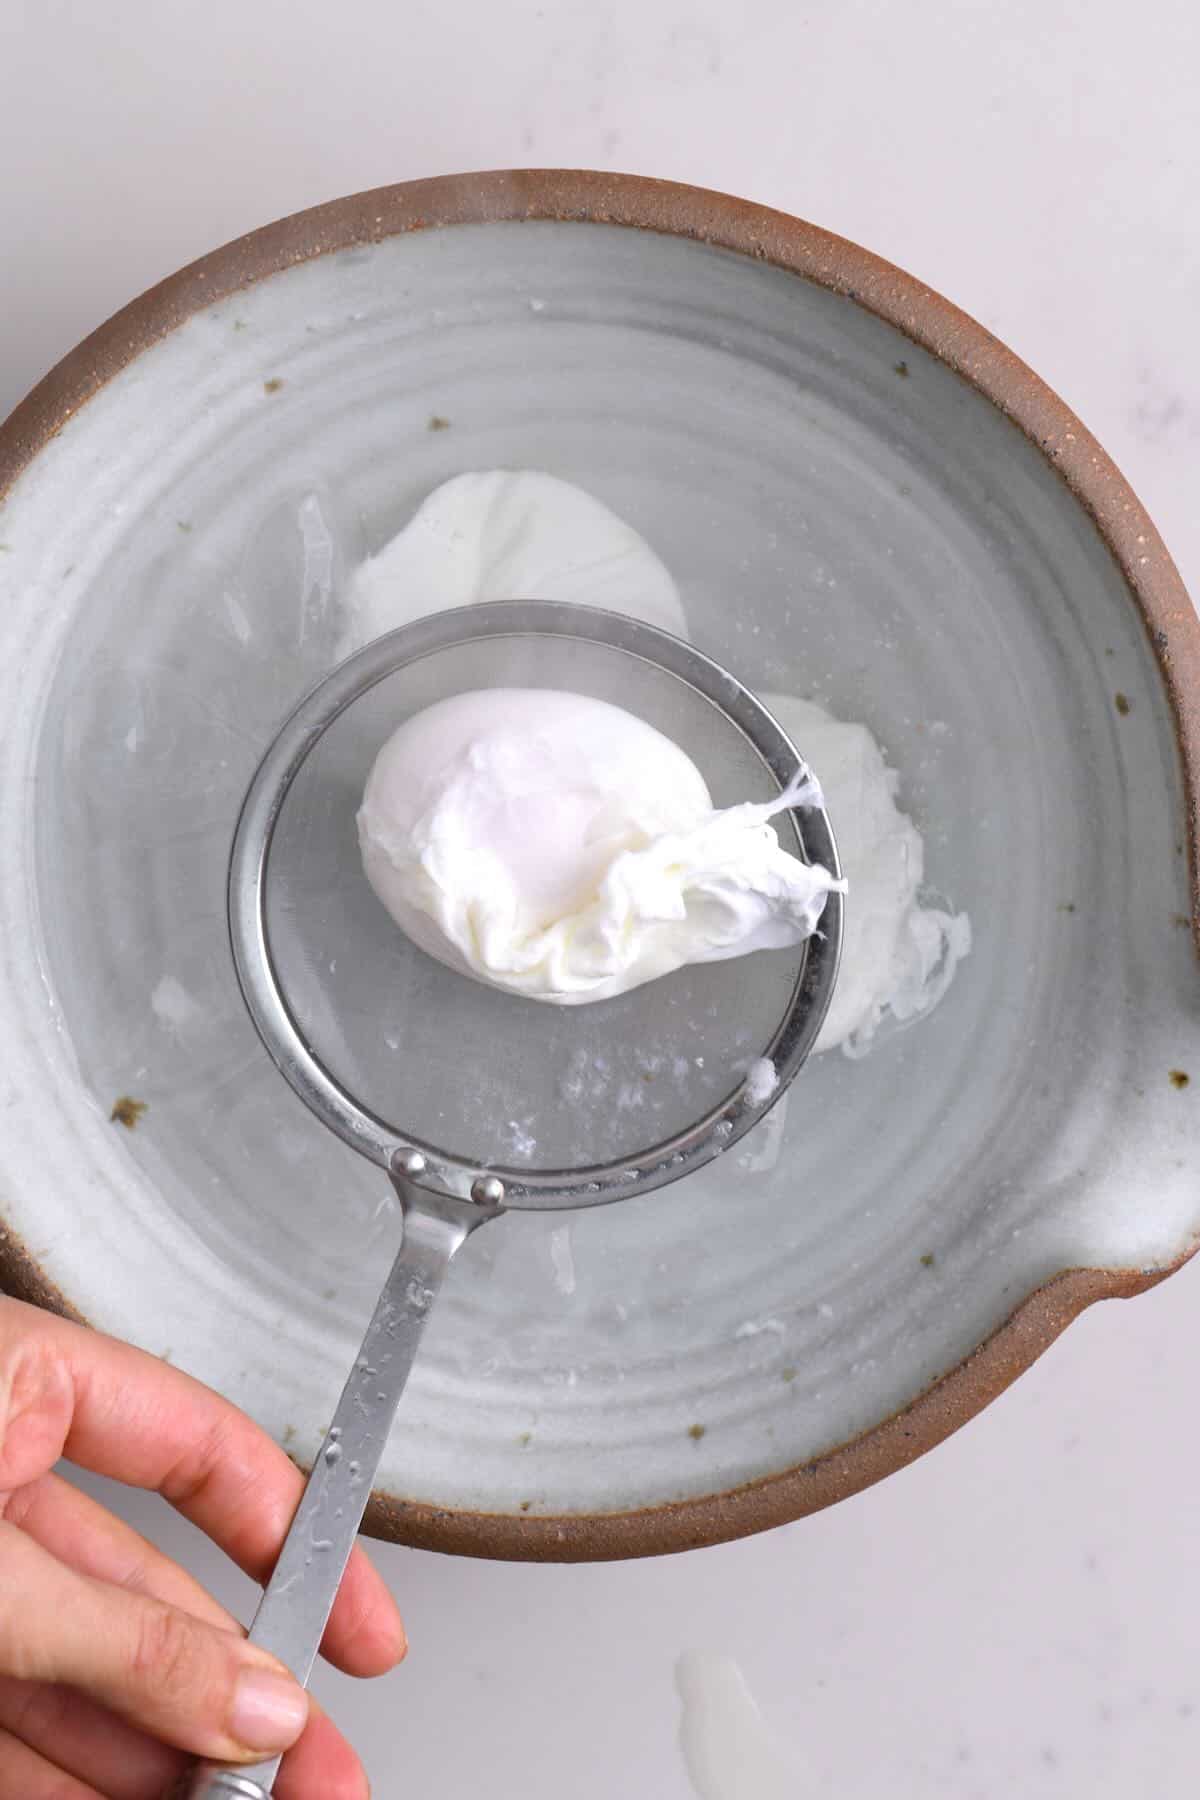
When the timer goes off, use a slotted spoon to remove the poached egg/s from the saucepan.
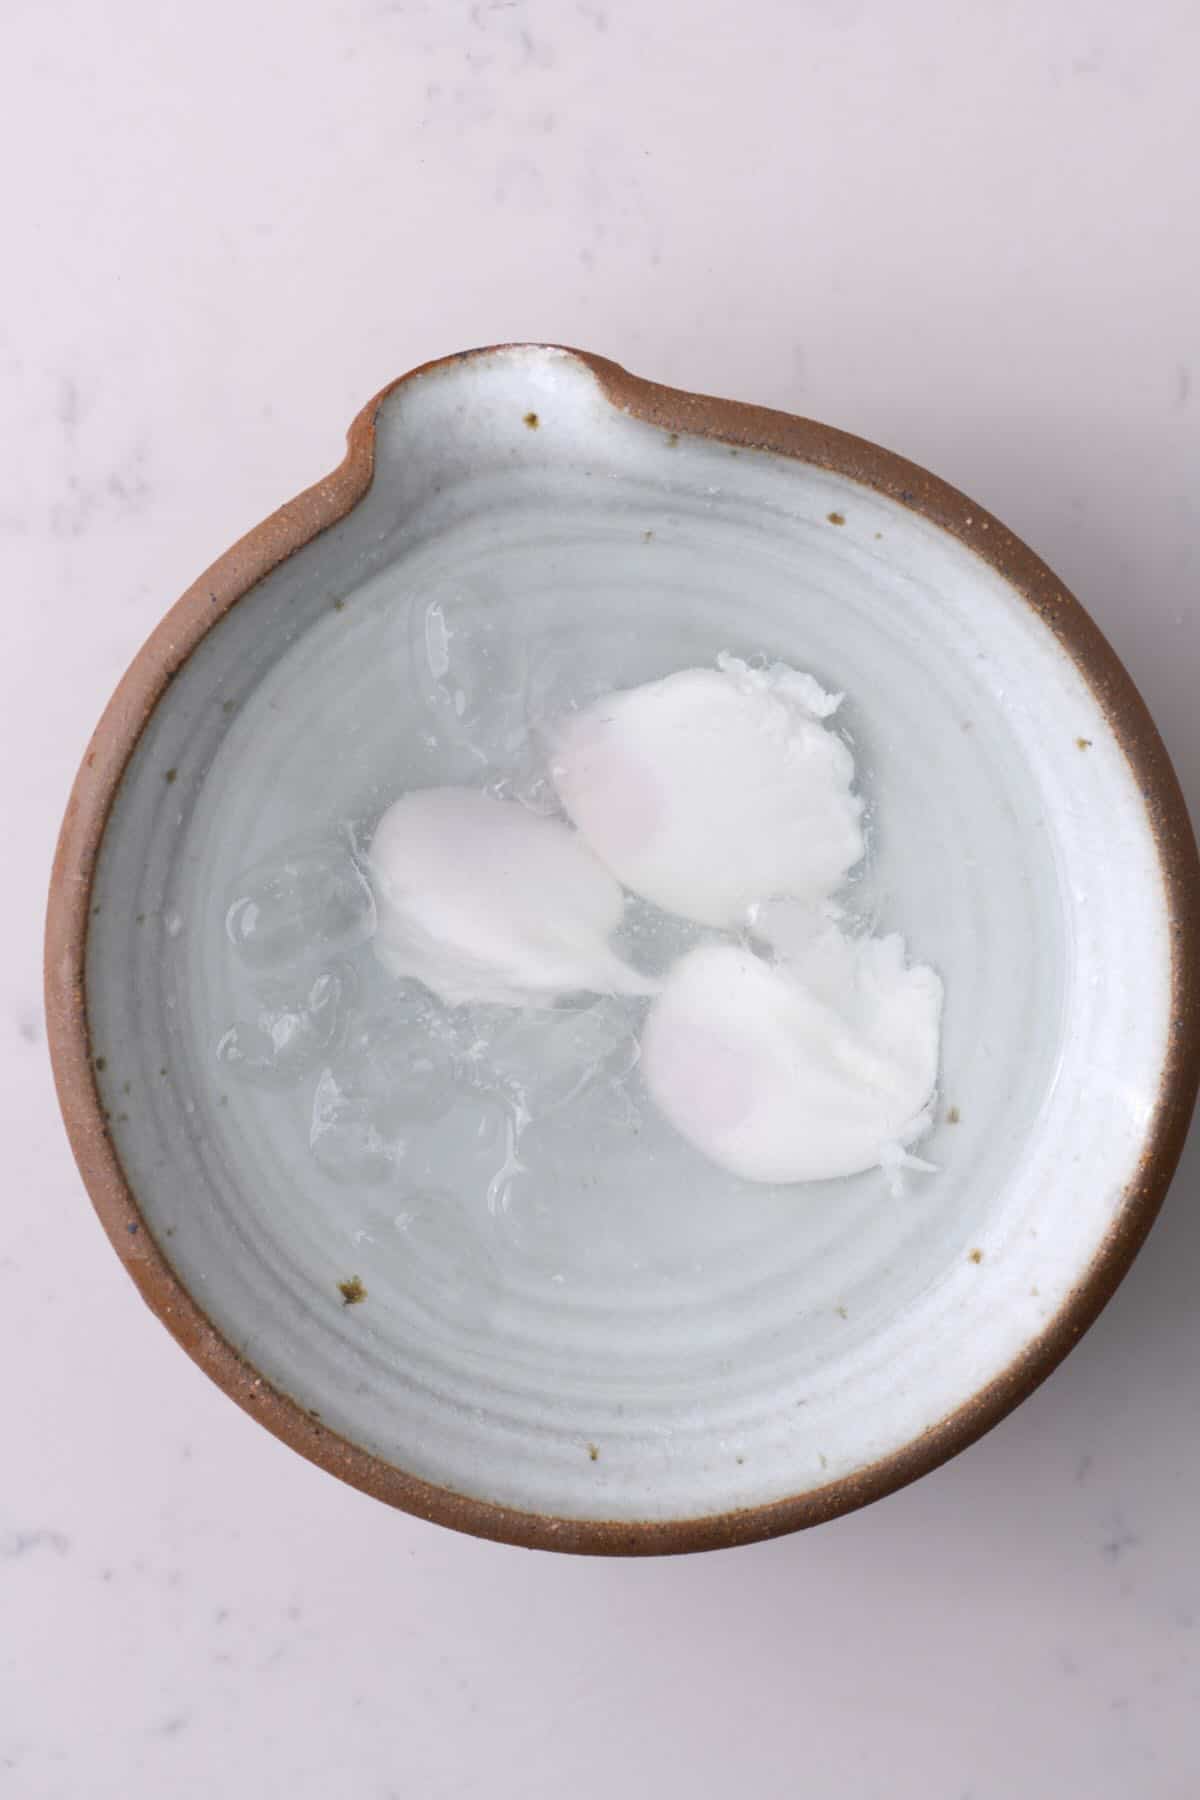
You can optionally transfer to an ice bath (which will help stop the residual heat from further cooking the egg), then transfer to a paper towel to drain excess water before adding to your dish of choice.
Bonus Ladle Method
This “spoon hack” reduces all risk of wispy egg whites BUT requires you to hold the ladle during the entire cooking process, so isn’t my preferred method.
- Bring a pot of water to a boil and grease the inside of a clean ladle.
- Then crack the egg into the ladle and lower it into the water gently to the top of the water (but not submerged).
- Gently allow some water to slip in the ladle, trickling in slowly until it covers the egg.
- Cook for between 3-3 ½ minutes, to your desired level and then remove from the water.
How Do You Poach Multiple Eggs?
For 2-3 Eggs
This method is the one I’ve had the most luck with so far (and can be easier than the vortex method for those new to poaching).
- First, bring a large saucepan of water to the pre-boil (bubbles just beginning to form) stage.
- Crack the egg into a ramekin/bowl (optionally sieve it first to remove any watery egg; I highly recommend you do this step).
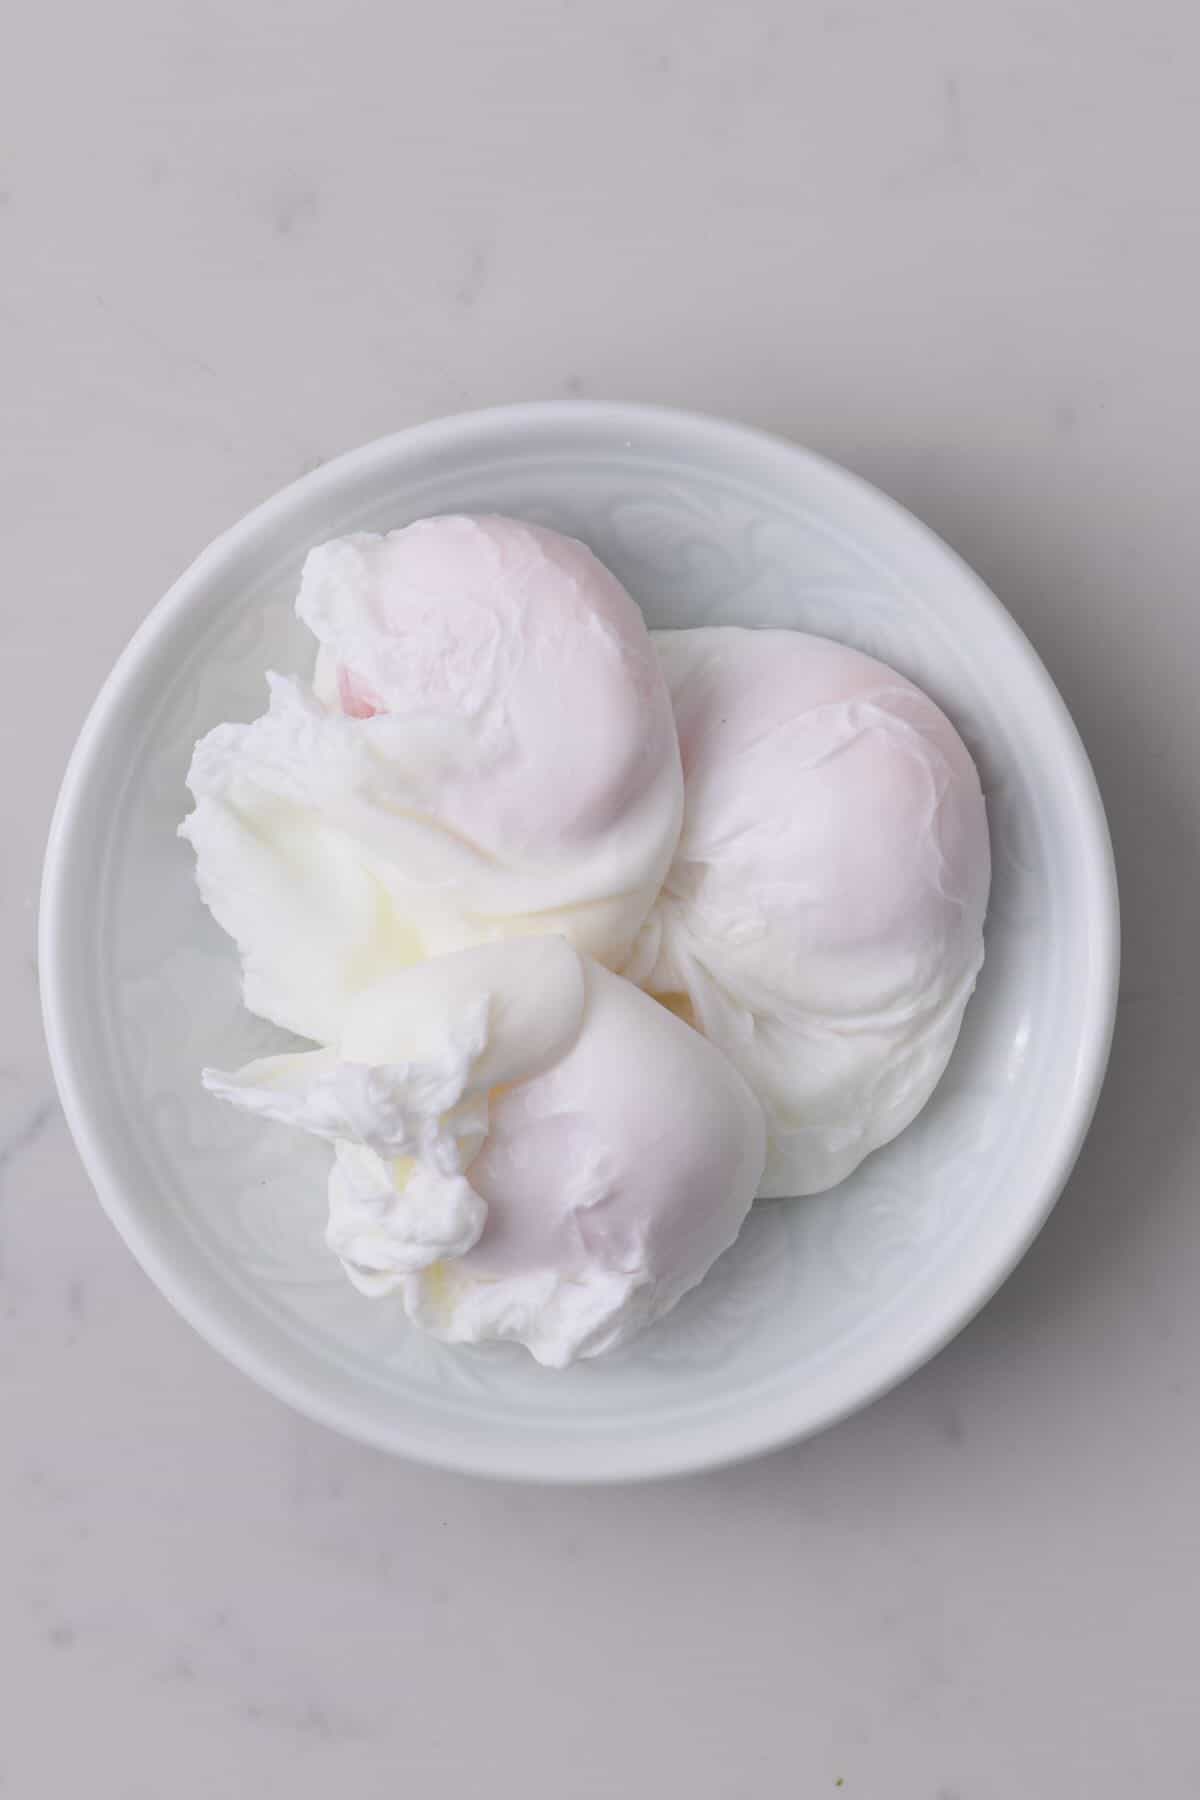
- Carefully tip the egg into the saucepan and then allow it to cook, untouched, for two minutes (with a timer). Repeat with the further eggs if you want to make 2-3 eggs (in different areas of the pot).
- After two minutes, remove the saucepan from the heat and allow it to sit untouched for a further 8-10 minutes before removing the eggs with a slotted spoon.
For 3+ Eggs (Clingfilm Method)
This method is very easy to do, with no risk of “wispies” (meaning it’ll work even with older eggs). However, the shape will be different from a “classic” poached egg, as it will take the shape of the clingfilm parcel.
This method also allows you to season the egg within the pouch with fresh herbs, chili flakes, black pepper, etc.
- Place a piece of food-safe clingfilm in a small bowl (a sandwich bag should also work, though I haven’t tried), grease it lightly with oil/cooking spray, and crack the egg into it.
- Then, twist the top of the clingfilm and tie it in a knot to make a “pouch” and repeat with the remaining eggs you wish to poach.
- Meanwhile, bring a large saucepan of water to a pre-boil “simmer” stage and place the pouches in the water. Cook for 4 minutes, or until the whites are cooked with a tender yolk (gently press a parcel with a spoon to test how tender it is).
How to Serve Poached Eggs?
There are tons of ways that you can enjoy a perfectly poached egg as part of a meal (especially brunch or a light meal!) including:
- On toast: avocado toast, mushroom toast, and various other toppings.
- Eggs benedict, eggs florentine, and similar English muffin dishes with hollandaise.
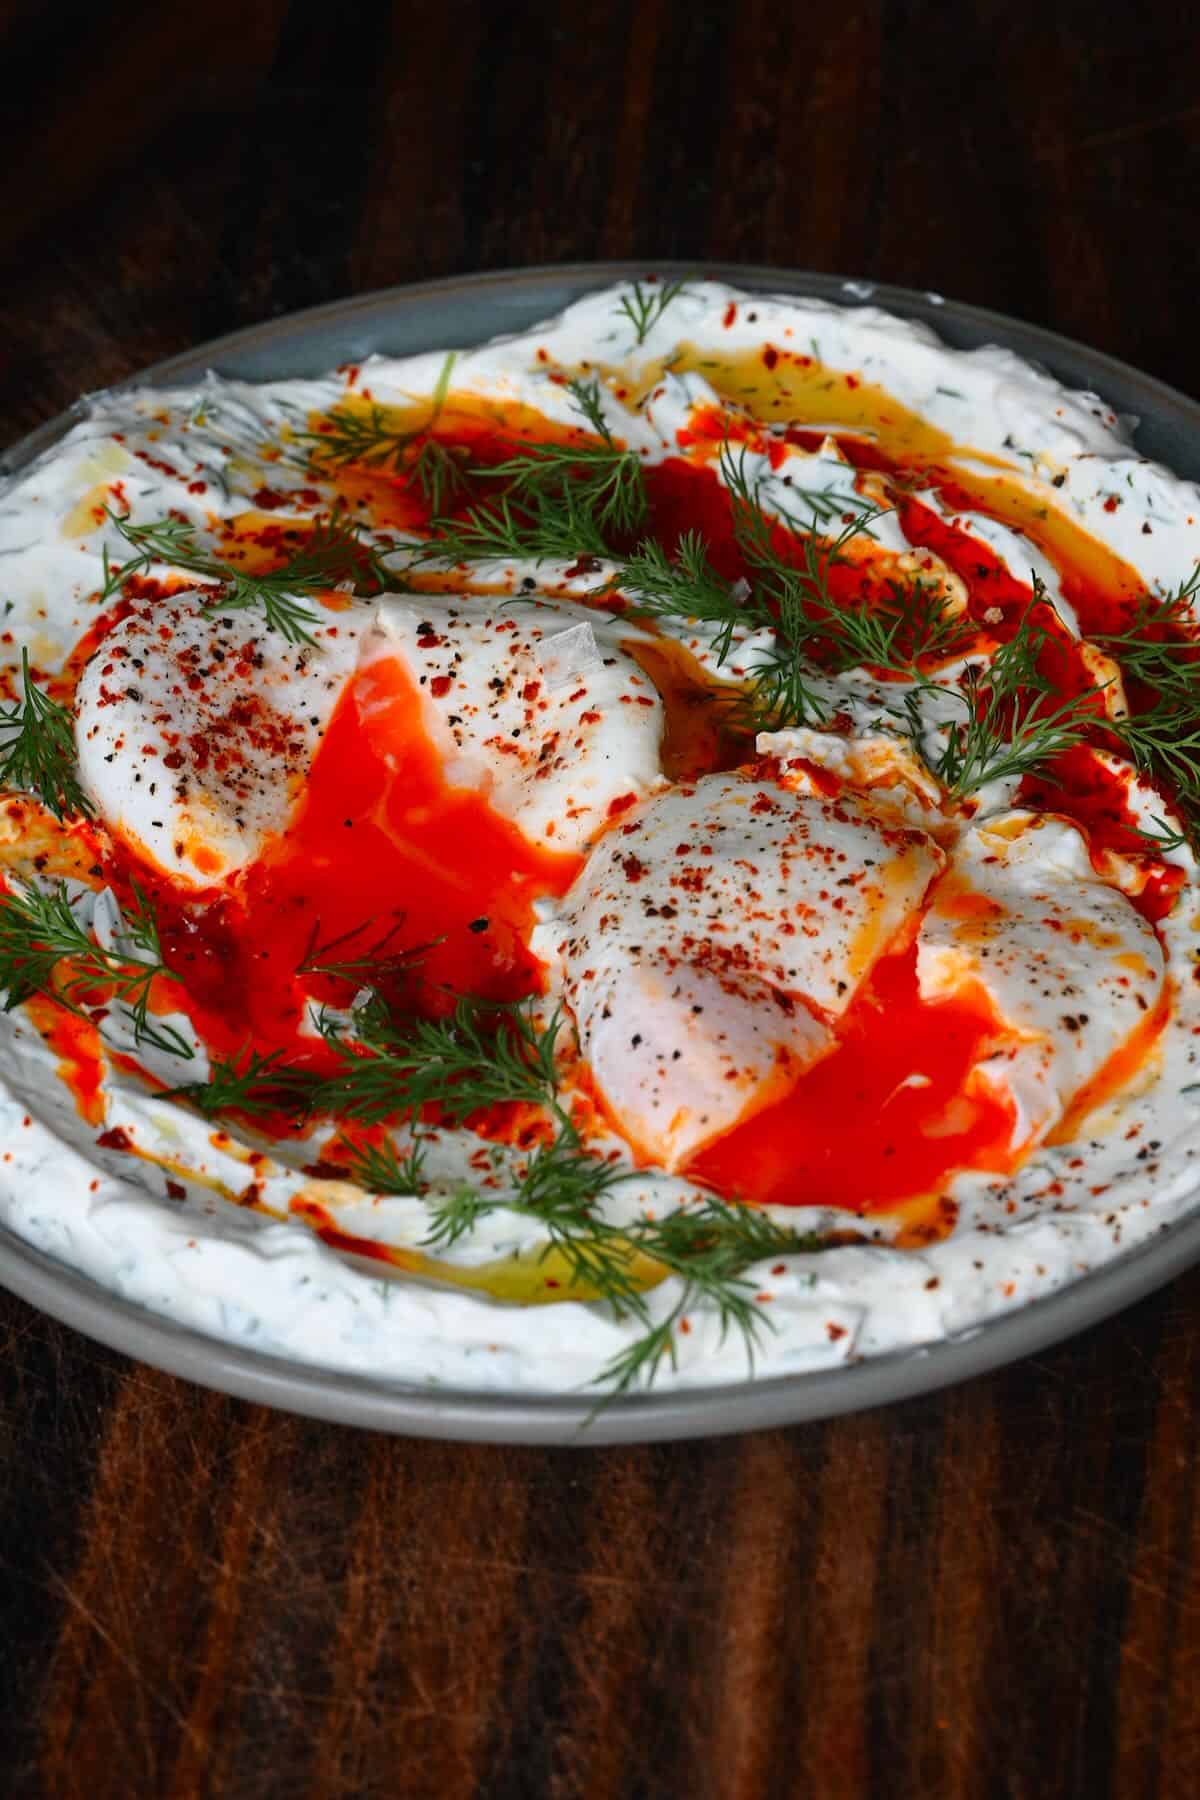
- To make cilbir (Turkish poached eggs in garlic yogurt).
- To top fritters, fishcakes, latkes, and other “patties”.
- Added to a kedgeree in place of boiled eggs.
- To top pasta – like creamy carbonara, pesto zoodles, or this green spinach pasta salad.
- As a pizza topper – like this butternut squash pizza.
- Served with asparagus or broccolini and hollandaise sauce.
- As part of a breakfast hash (like this sweet potato hash).
- To top risotto, polenta, and grits.
- Over savory oatmeal.
- In breakfast tacos or over tostadas.
- Serve with baked salmon over a bed of sauteed spinach or other sautéed greens.
- To add to shakshuka (if you don’t want to poach them directly in the dish).
I could probably go on for days, but let me know how you enjoy poached eggs in the comments!
FAQs
I’ve found that between 3-4 minutes is perfect, with 3 minutes hitting the sweet spot of firm white with a wonderfully runny yolk. Of course, this may vary slightly based on the temperature of the water and how vigorously it’s bubbling, etc. For that reason, I recommend making a “test” egg your first time, so you can tweak the method if necessary.
Technically you can, though I prefer not to, as you run the risk of overcooking the yolks when reheating them. However, if you do want to, I recommend storing any cooked and cooled (use an ice bath) poached eggs in an airtight container in the fridge for up to 3 days.
Add the eggs to a mug/bowl with boiling water to reheat them. They should be warm within 30-40 seconds.
This is actually really simple. Place the egg/s in a large bowl or glass of water. If it lies horizontally at the bottom, it’s fresh. If it’s standing up, it’s less so. And, if it’s beginning to float, even less so. The best poached eggs will be made with the freshest eggs.
No – you could also use lemon juice or even skip it entirely. Though I have found that the vinegar definitely does help in forming a better shape (with less wispy pieces).
Not everyone is a fan of these “molded” options, both for the shape and the extra cooking time needed. However, they are a very fuss-free way to make your morning eggs. Simply lightly spray or grease the silicone molds. Then crack the eggs into them. Allow them to float in a pot of simmering boiling water (covered with the lid) for around 5 minutes.
Using the egg vortex is just one of many egg poaching methods (my preferred option for 1-2 eggs). However, you can certainly successfully poach an egg in still water, too.
Top Tips to Make The Perfect Poached Egg
- Use fresh eggs: the fresher the egg (within 2 days of being laid is best!), the better the shape and quality of your poached egg. The longer an egg ages, the waterier the white becomes. Why is the watery white an issue? Because this turns into that stringy, fluffy mess in the water.
- Use shallow water: Around 4-inches (10cm) is the sweet spot. Enough water for movement but to avoid the ‘flattened shape’ of ones made in shallow water.
- Use a gentle simmer: If the water is boiling too vigorously, it will affect the eggs’ shape and cause more breakage/wispy pieces.
- Add the egg low to the water: The higher you drop it from, the more chance it may disintegrate, or the yolk can become damaged. So instead, gently drop it into the water right above the surface.
- Use a small bowl/ramekin: Rather than cracking an egg (even a fresh one) directly into the pan. It makes it easier to control and transfer to the pan.
- Avoid adding salt: Adding salt to the water results in messy poached eggs with lots of stringy, wispy bits.
- When making 2+ poached eggs with vortex: While it’s possible to make 2 poached eggs using the vortex method, it takes practice. I recommend mastering one before attempting two at a time.
- Practice makes perfect: While using the best methods and tips will help, learning how to make poached eggs is still an art. I’m the only one who sees my morning poached eggs most of the time, so a little bit of wispiness here and there is no big deal!
More Simple Egg Recipes
- Easy Pickled Eggs
- French Baked Eggs
- Menemen (Turkish Scrambled Eggs)
- Eggs in Purgatory
- Simple Shakshuka
- Sweet Potato Breakfast Hash
- Savory Oatmeal with Egg
- Vegetable Omelette
- Air Fryer Boiled Eggs (Soft, Medium, + Hard Boiled)
If you try these methods for how to make poached eggs, I’d love to hear your thoughts/questions below. Also, I’d appreciate a recipe card rating below, and tag me in your recipe recreations on Instagram @Alphafoodie!

How Do You Poach an Egg? (+ Top Tips | Multiple Methods)
Ingredients
- 1 egg fresh, large egg
- 1 Tbsp vinegar light-colored vinegar like white vinegar, apple cider vinegar, or use lemon juice
- water enough to fill at least 4 inches
Instructions
The Whirlpool Method
- Fill a medium-large saucepan with at least 4-inches of water (10cm) and bring to a sub-boil (the point that bubbles are just starting to form) over medium-high heat.
- Meanwhile, crack an egg into the fine-mesh sieve over a small bowl. Gently swirl the sieve in a circular motion to allow any watery egg white to filter through into the container below, being careful not to crack the yolk. Then, transfer the egg to a small bowl/ramekin.
- Once the water in the pan is in the sub-boiling stage, reduce to a very gentle simmer, and add the vinegar.
- Use a spoon to stir the water in the pan, creating a "vortex" (whirlpool), and then gently pour the egg into the center. The swirling water helps keep the egg together and create the shape we're looking for.If you're making 2 poached eggs, allow the first one to gently form and move to the side of a pan before pouring in the second egg (so they don't stick). Any more than two, and it's best to cook them in batches.If you want to poach two eggs as "one," crack the eggs into the same ramekin and very gently tip into the water simultaneously.
- Allow the egg to cook, untouched, for between 3-4 minutes (setting a timer as every second counts!), based on how soft you want the yolk to be. I usually aim for 3 minutes, which means the white is set, but the yolk within is wonderfully creamy/custardy still.
- When the timer goes off, use a slotted spoon to remove the poached egg/s from the saucepan.You can optionally transfer to an ice bath (which will help stop the residual heat from further cooking the egg), then transfer to a paper towel to drain excess water before adding to your dish of choice.
The Ladle Method
- Bring a pot of water to a boil and grease the inside of a clean ladle.
- Then crack the egg into the ladle and lower it into the water gently to the top of the water (but not submerged).
- Gently allow some water to slip in the ladle, trickling in slowly until it covers the egg.
- Cook for between 3-3 ½ minutes, to your desired level and then remove from the water.
Check the blog post for additional methods (for multiple eggs) on how to use clingfilm, still water, and silicone egg cups!
Notes
- Use fresh eggs: the fresher the egg (within 2 days of being laid is best!), the better the shape and quality of your poached egg. The longer an egg ages, the waterier the white becomes. Why is the watery white an issue? Because this turns into that stringy, fluffy mess in the water.
- Use shallow water: around 4 inches (10 cm) was the sweet spot. Enough water for movement but to avoid the “flattened shape” of ones made in shallow water.
- Use a gentle simmer: if the water is boiling too vigorously, it will affect the shape of the egg and cause more breakage/wispy pieces.
- Add the egg low to the water: the higher you drop it from, the more chance it may disintegrate, or the yolk can become damaged. So instead, gently drop it into the water right above the surface.
- Use a small bowl/ramekin: rather than cracking an egg (even a fresh one) directly into the pan. It makes it easier to control and transfer to the pan.
- Avoid adding salt: adding salt to the water results in messy poached eggs with lots of stringy, wispy bits.
- When making 2+ poached eggs with vortex: while it’s possible to make 2 poached eggs using the vortex method, it takes practice. I recommend mastering one before attempting two at a time.
- Practice makes perfect: while using the best methods and tips will help, learning how to make poached eggs is still an art. I’m the only one who sees my morning poached eggs most of the time, so a little bit of wispiness here and there is no big deal!
Nutrition
Nutrition information is automatically calculated, so should only be used as an approximation.


You really do have one of the best cooking sites. You give not only great tasting recipes but wonderful details with step-by-step instructions and photos and your photography is beautiful.
Hi Cherylynn! Thank you so much for such kind words. 😊 Comments like this truly make my day and motivate me to keep sharing detailed recipes and photos. So glad you’re enjoying the site!