
This post may contain affiliate links. Please read our disclosure policy.

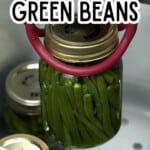

Follow my easy step-by-step guide to pressure canning green beans and make your delicious produce last all year long.
Since I learned how to can green beans at home, I’ve never been without a few jars to add extra greens to my dishes. It’s the perfect way to lock in their peak freshness and taste, as well as making them last infinitely longer than fresh or frozen. Pressure canning green beans may look intimidating, but it’s much easier than you might think!
Once you get used to it, you will be canning chickpeas, canning tomatoes, and much more. Check out my Complete Guide to Pressure Canning for all my top tips!
Want to save this recipe?
Video tutorial
Ingredients and tools needed

- Fresh Green Beans: Any fresh kind will do. I’m using classic green beans for this recipe, but haricot verts will also work with this method.
- Canning salt: For each pint jar (500 ml), you need 1/2 tsp salt.
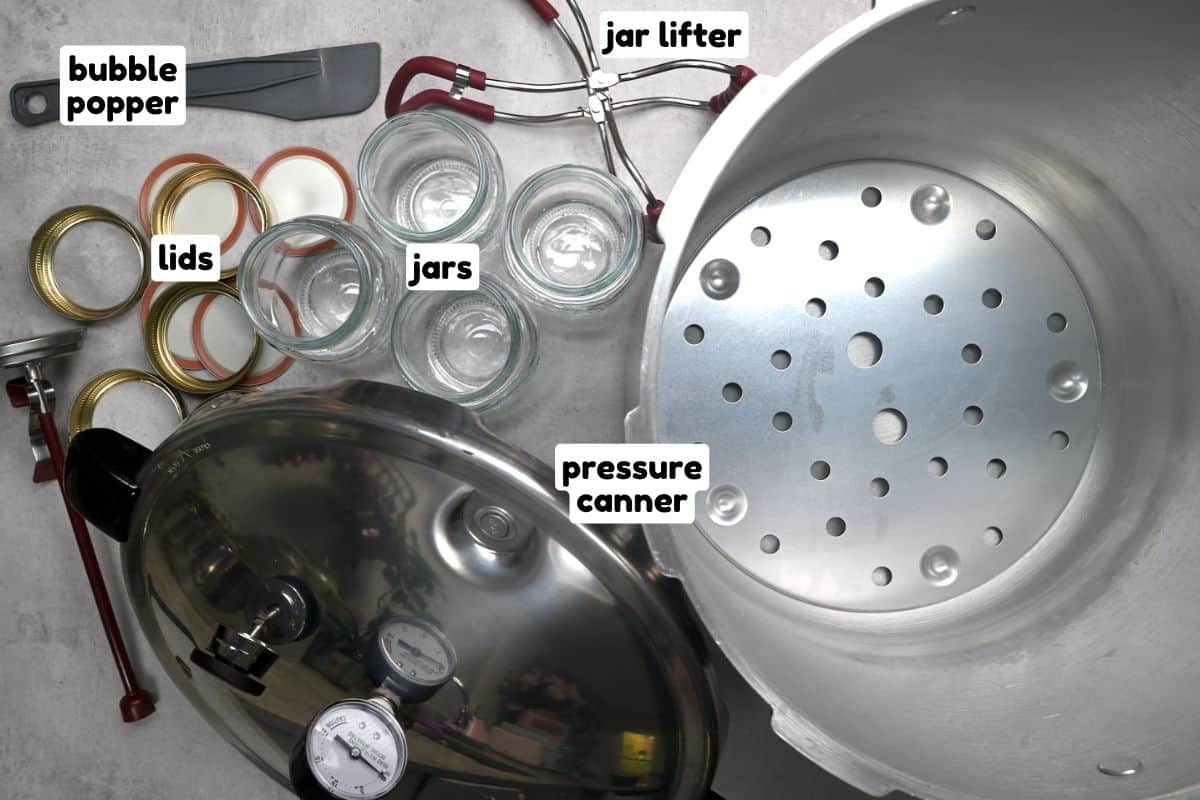
- Canning Equipment: Pressure canner, pint jars, lids, bubble popper, jar lifter.
How to can green beans
I prefer using the hot-pack Canning method for green beans, though you can use the raw-pack; both are described below.
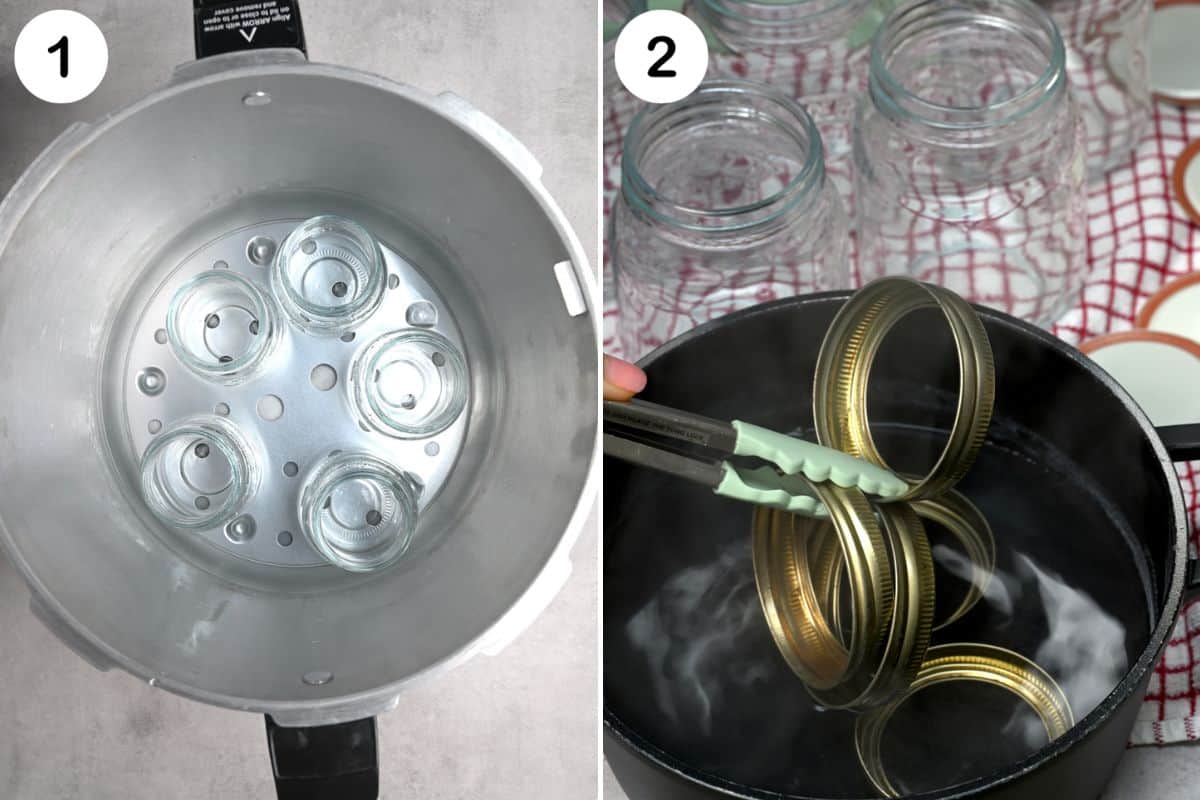
Prepare the Jars and Lids: Wash all equipment – jars, lids, bubble popper, and jar lifter – in hot, soapy water. Set the tools aside to air dry.
Then, fit the trivet in the pressure canner and place the jars upright. Add water to the jars (about halfway) and about 3 inches of water to the canner. Bring to a soft boil over medium heat, reducing to a simmer to keep warm while you prepare the green beans.
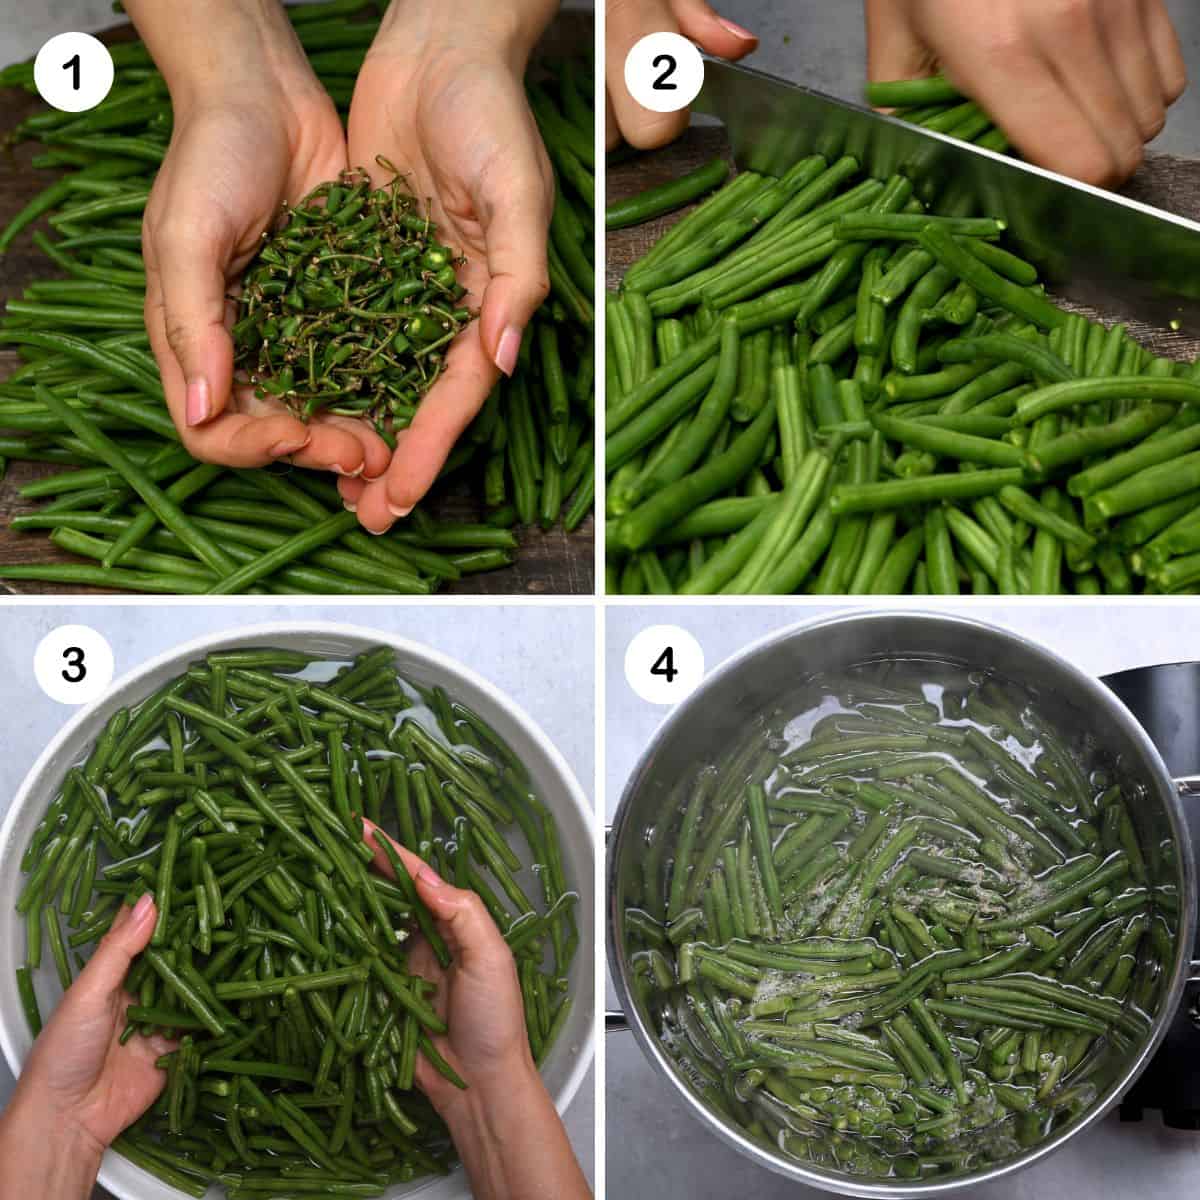
Prepare the Green Beans: Sort the fresh beans, discarding any bad ones. Then trim the ends of the beans and cut them in half so they fit in the jars – they should be about 2 inches in size. Wash the beans well.
- For the raw-pack method, proceed with packing the jars.
- For the hot-pack method, add the beans to a stainless steel saucepan. Cover completely with water and bring to a boil. Cook for five minutes until just softened but still tender and crisp. Remove the beans from the saucepan and reserve the cooking liquid for packing.
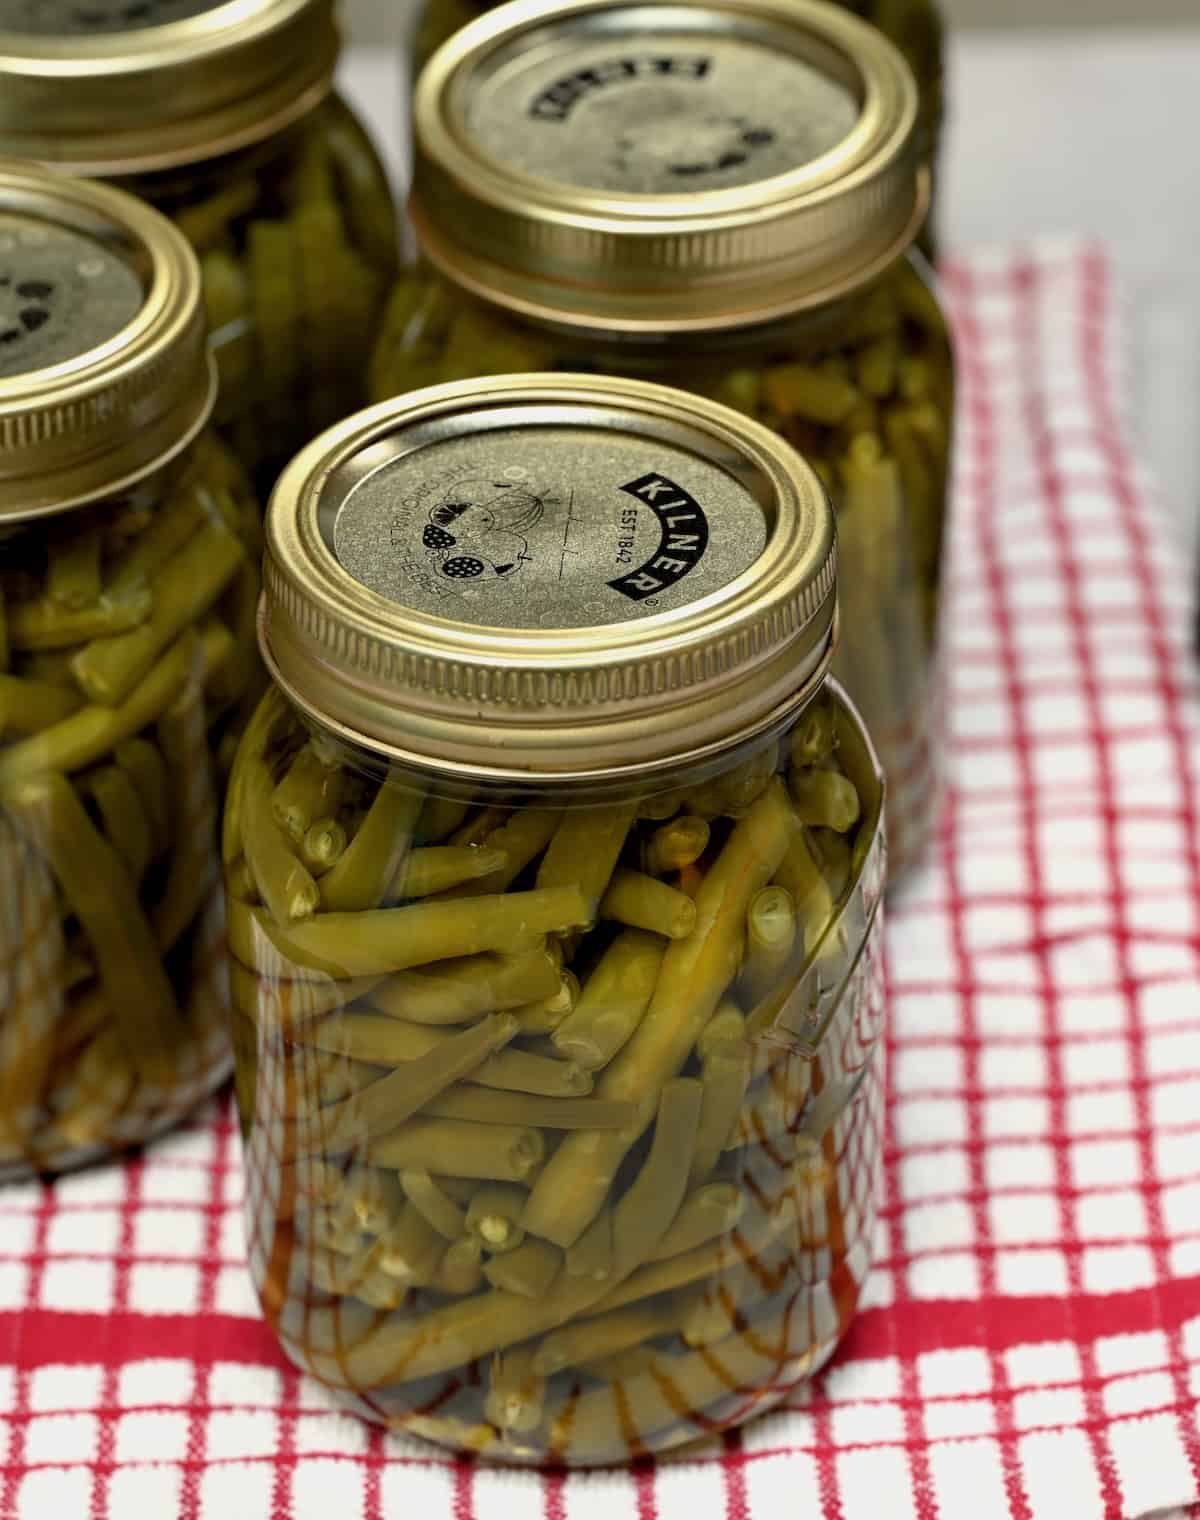
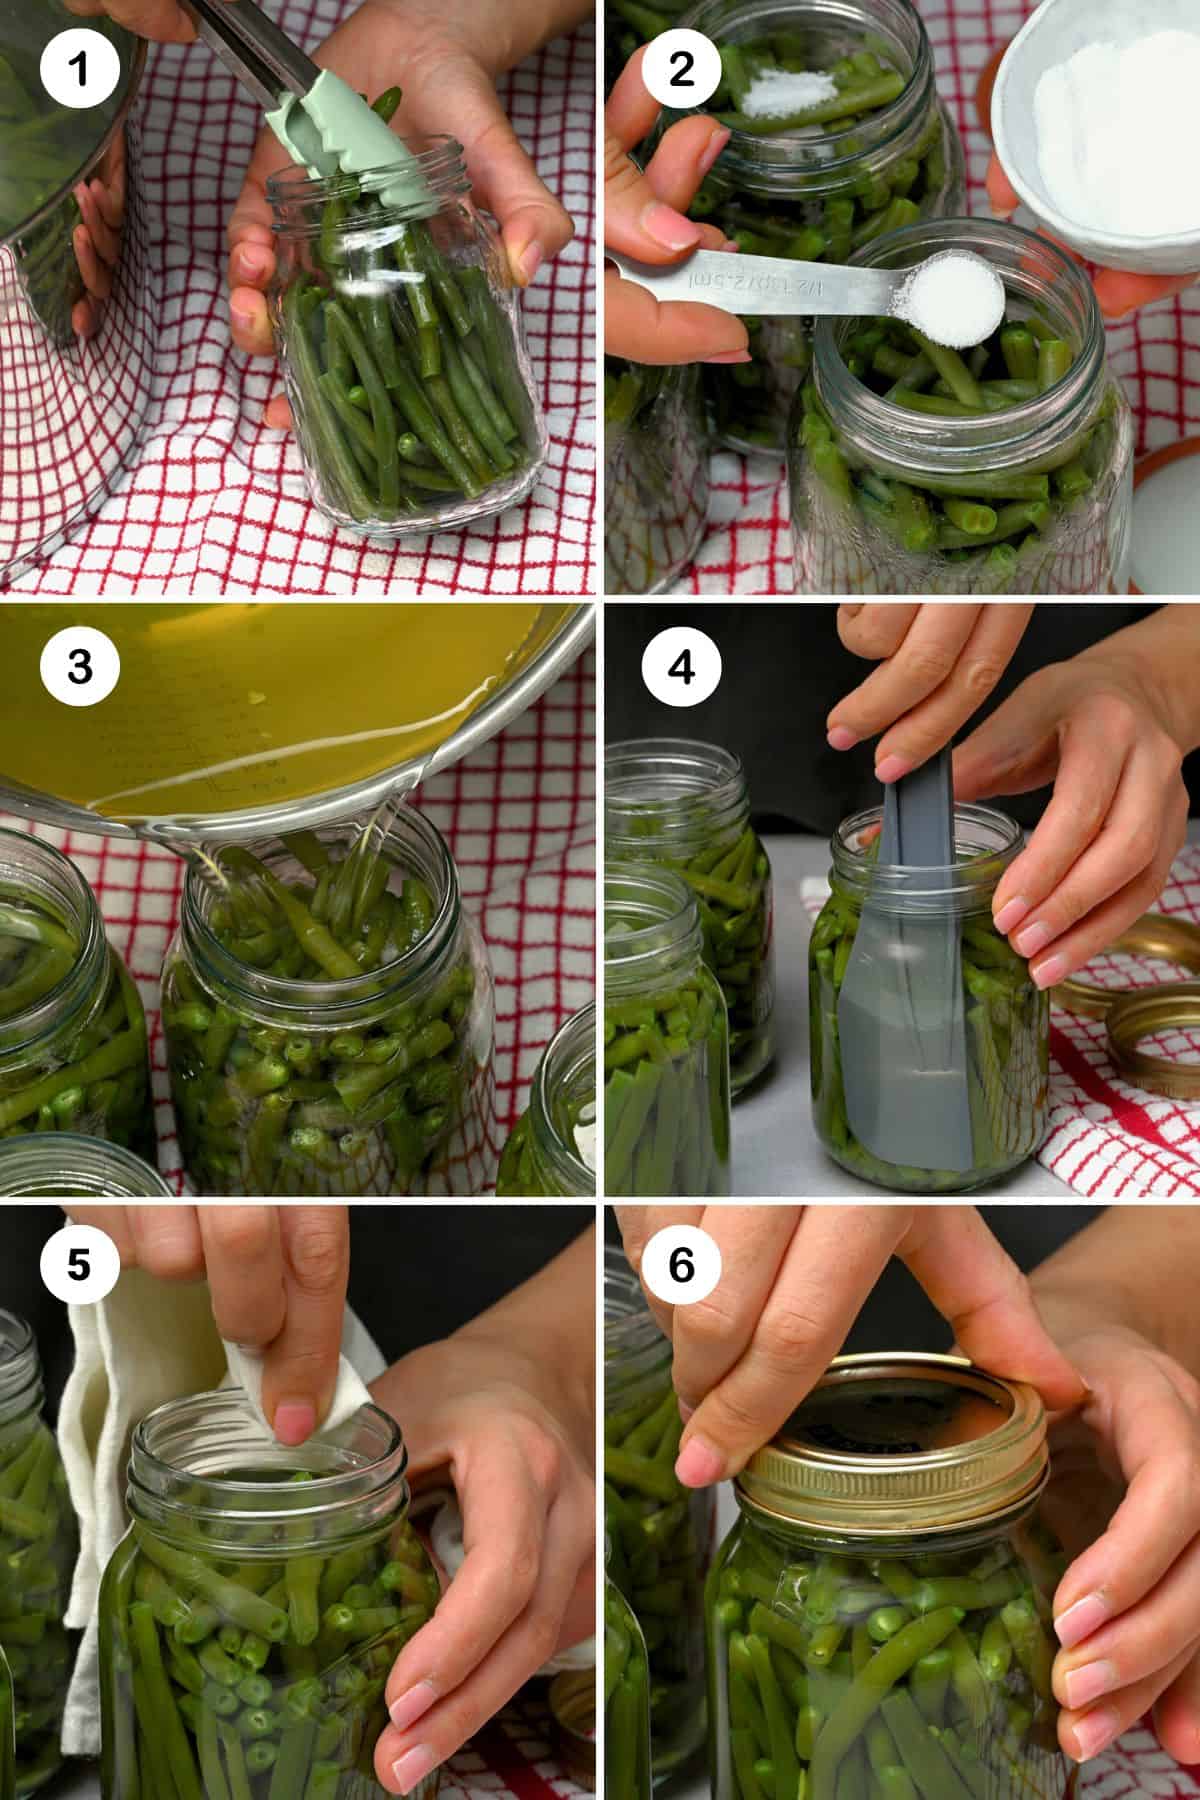
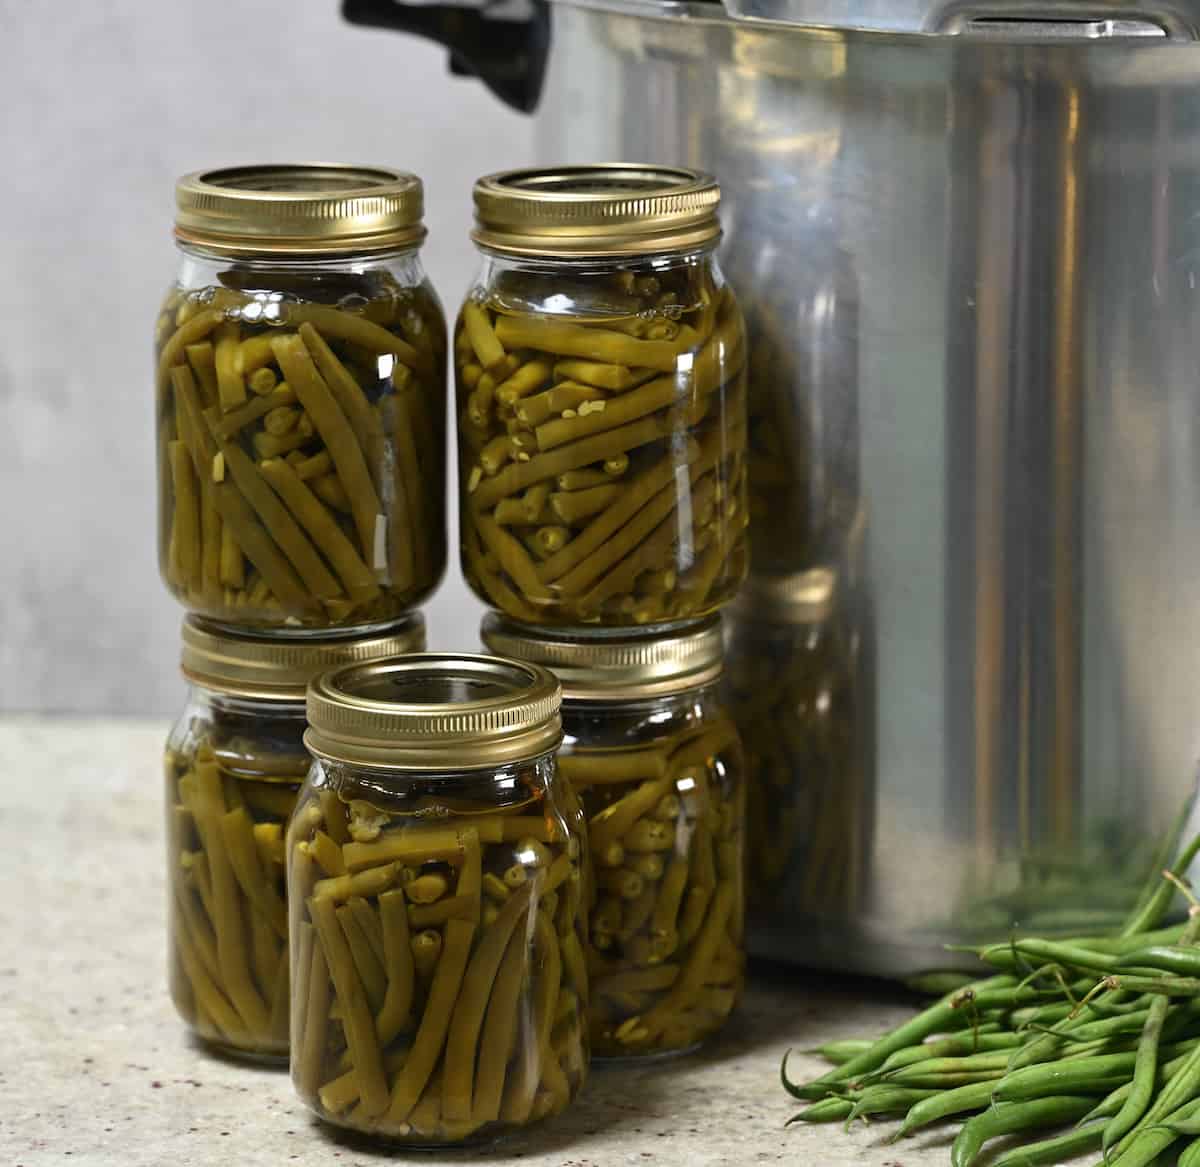
Pack the Jars: Using a clean utensil (I use ordinary cooking tongs for grip), tightly pack the jars with the green beans, leaving 1 inch (2.5 cm) headspace. Add the correct amount of canning salt to the jar.
Fill with Water: Pour the reserved cooking liquid from the beans into the packed jars. If using the raw-pack method, use fresh boiling water. Make sure to leave 1 inch (2.5 cm) of headspace between the top of the water and the rim.
Remove Air Bubbles: Using a bubble popper or a blunt knife, press down on the beans to remove any air bubbles. Then, add extra liquid if needed to adjust the headspace. If the gap is too large, it can create a “false seal” and unseal the jar over time. If it is too little, it may cause the jars to leak.
Wipe the Rims and Seal: Wipe the rims of the jars with a clean kitchen towel. Then center the lids and screw on the band until finger-tight.
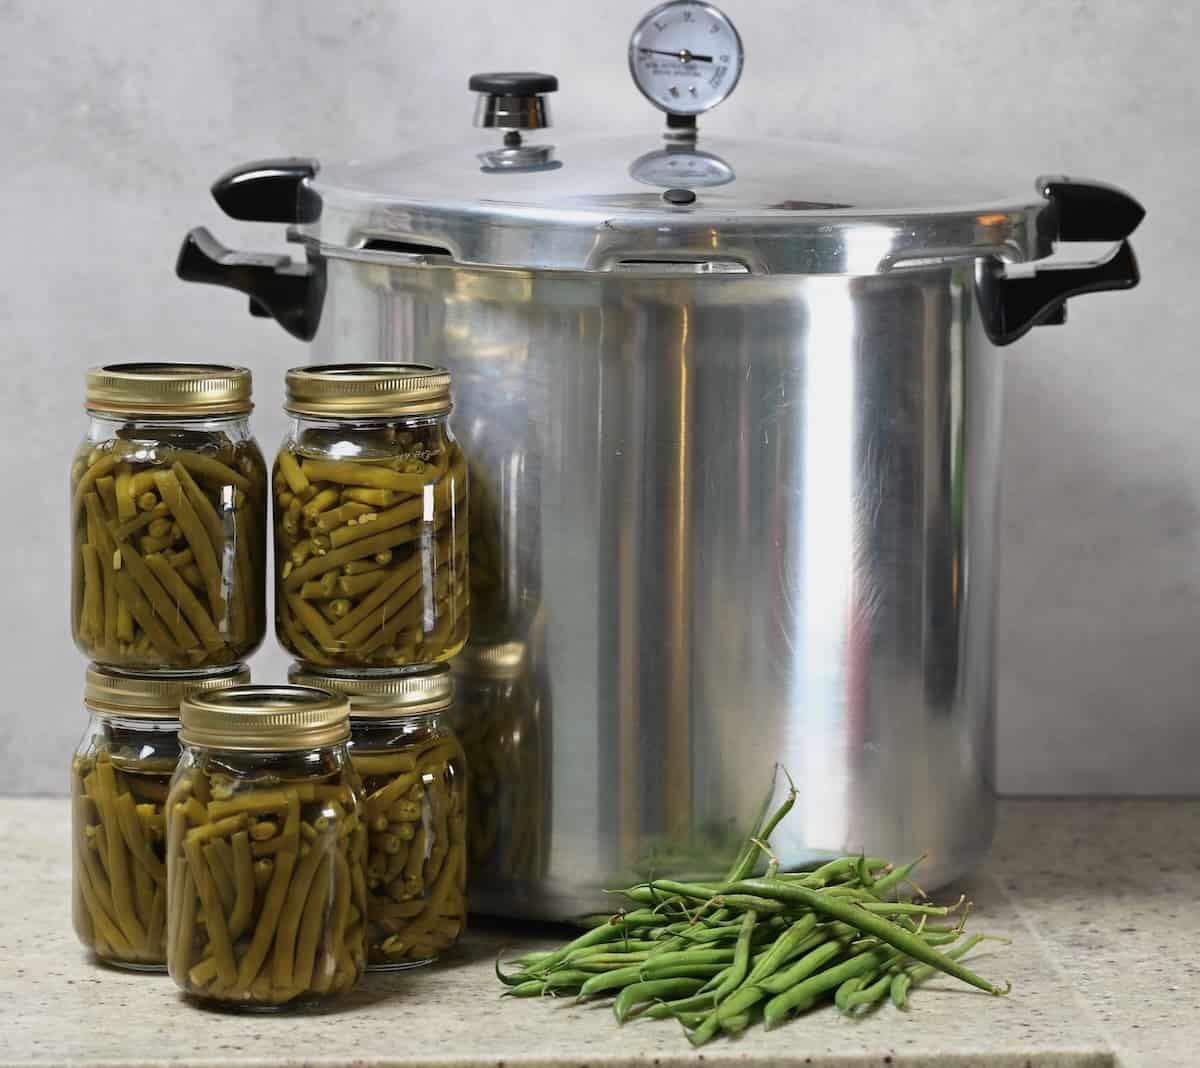
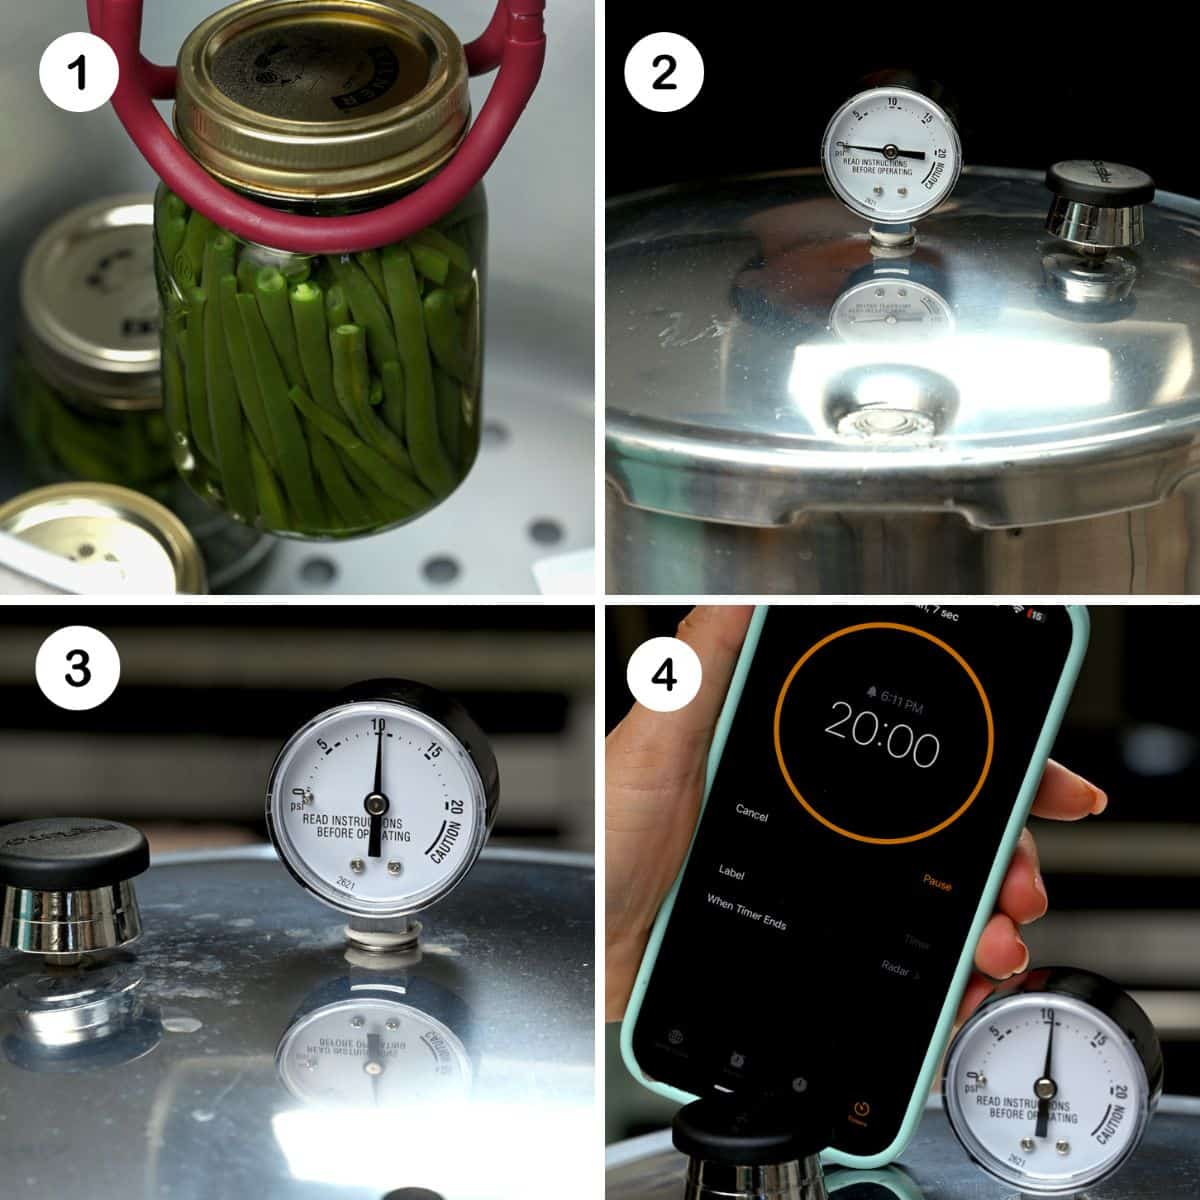
Process the Jars: Place the jars in the warm pressure canner, ensuring they don’t touch each other, then adjust the water level. Lock the canner lid and bring to a boil over medium-high heat. First, allow the steam to vent for 10 minutes, then close the vent.
For a Dial Gauge Pressure Canner, once the gauge reaches 11 PSI (for altitudes up to 1,000 ft), start the processing time – 20 minutes for pint jars or 25 minutes for quart jars. For higher altitudes, adjust the pressure as necessary.
If using a Weighted Gauge Pressure Canner, heat until you achieve 10 lbs pressure for altitudes up to 1,000 ft. Then, maintain the pressure for another 20 minutes for pint jars or 25 minutes for quart jars. If you’re at a higher altitude, you need to adjust the pressure to 15 lbs. Start the processing when the gauge begins to wiggle.
Check my detailed pressure canning guide for more tips about adjusting the pressure and processing time.
Cool: Once the processing time is done, turn off the heat. Then, let pressure return to zero naturally and wait a couple more minutes before opening the vent. Remove the lid, wait for 10 minutes, and then finally remove the jars from the canner. Set them aside to cool for 24 hours undisturbed.
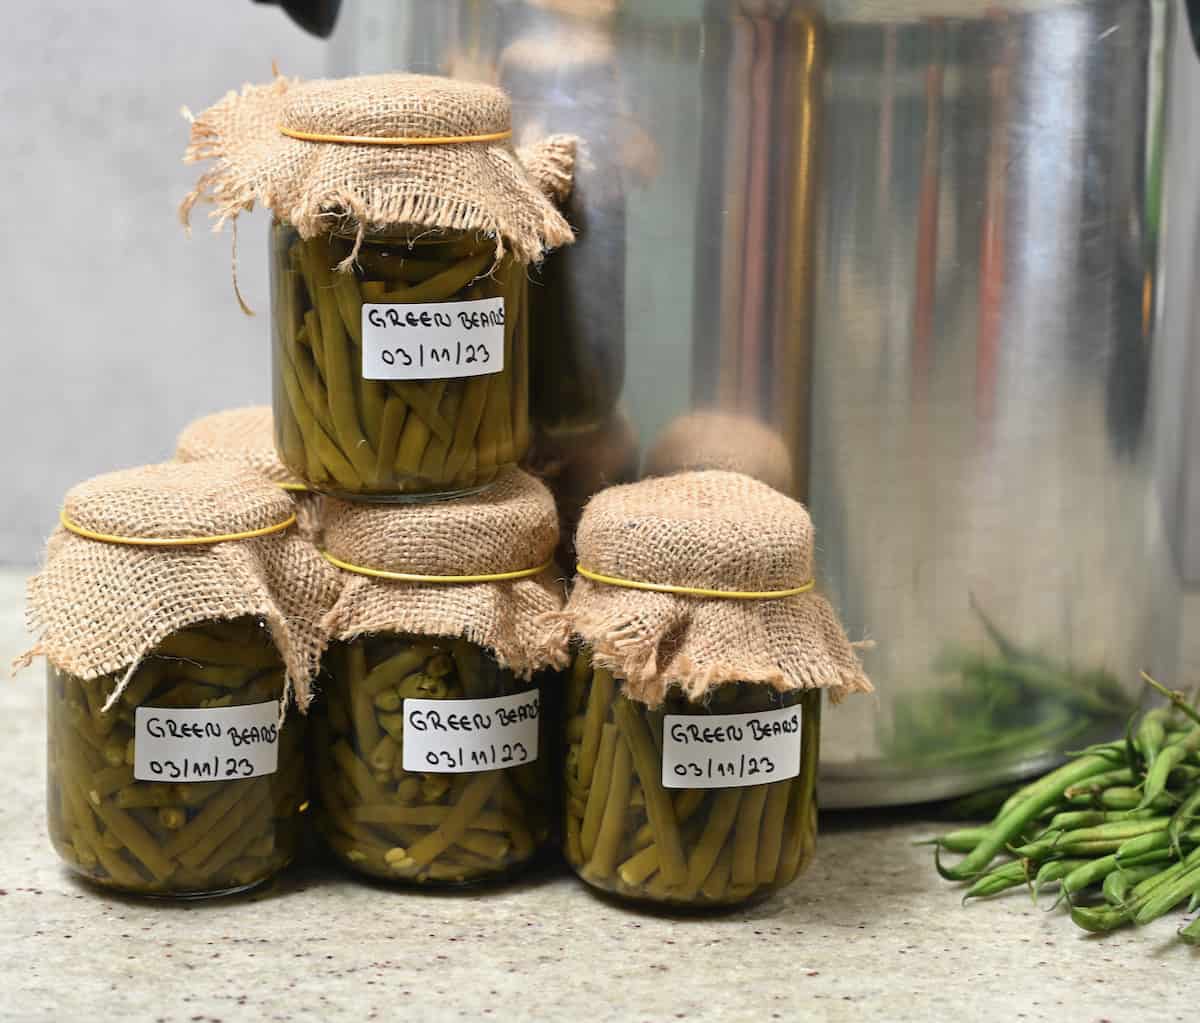
Check seals: Check the seal on the jar. The top of the lid should be concave (sunken in) so it doesn’t pop back when you press it. This shows a correct seal. If the jar isn’t properly sealed, use it right away, keep it in the fridge for a short time, or re-can it.
Label and Store: Label the jars and store them in a cool, dark place like a pantry or a cupboard.
When you want to eat the canned beans, check the jar upon opening it. The jar should make a popping sound when opened as the pressure is released. Check that there is no mold or foul smell, and if needed, taste the beans to ensure they have been properly preserved.
Can you can green beans raw?
Yes, this is known as the cold pack method or “raw pack method.” It involves directly packing raw green beans into jars. However, I prefer the hot pack method – it preserves the beans’ color better and makes them last longer. Plus, it works well with firm vegetables like green beans.
Related recipes
If you try this process for canning green beans, let me know how it goes in the comments below. I’d appreciate a recipe card rating and would love to see your recipe recreations – tag me on Instagram @Alphafoodie!

How To Can Green Beans
Equipment
- 5 Canning jars (16 oz) 1 pint-sized each (500 ml)
- Bubble remover or a clean blunt knife
Ingredients
- 5.5 lb green beans you need about 1-1.25 lb per pint jar
- 2.5 tsp canning salt
Instructions
Preparing the tools
- Wash the canner, the jars, the lids, and all your tools with hot soapy water. Set the tools aside to air dry.
- Fit the trivet in the pressure canner and place the jars upright. Add water to the jars (about halfway) and about 3 inches of water to the canner. Bring to a soft boil over medium heat, reducing to a simmer to keep warm while you prepare the green beans.
Prepare the beans
- Select young, crisp fresh green beans and discard any bad ones. Trim ends and cut or break into 2-inch (5 cm) pieces. Wash the beans well and drain. Note: for the raw-pack method, continue with packing the jars.
- For the hot pack method, first, boil the beans. Place them in a stainless steel saucepan, cover completely with water, and bring to a boil. Cook for five minutes until just softened but still tender and crisp.
- Remove the beans from the saucepan and reserve the cooking liquid for packing.
Pack the jars
- Pack the beans into the hot jars, leaving 1 inch (2.5 cm) headspace for a proper seal. Add the correct amount of canning salt to each jar.
- For the hot-pack method, pour the reserved cooking liquid from the beans into the packed jars. For the raw-pack method, add fresh boiling water to the packed jars.Leave 1 inch (2.5 cm) of headspace between the top of the water and the rim.
- Use a bubble popper or a blunt knife to press down on the beans to remove any air bubbles. If needed, add extra liquid to adjust the headspace.
- Wipe the rims of the jars with a clean kitchen towel. Then center the lids and screw on the band until finger-tight.
Pressure can
- Place the jars in the warm pressure canner, ensuring they don't touch each other, then adjust the water level. Lock the lid and bring to a boil over medium-high heat. First, allow the steam to vent for 10 minutes, then close the vent.
- For a Dial Gauge Pressure Canner, once the gauge reaches 11 PSI (for altitudes up to 1,000 ft), start the processing time – 20 minutes for pint jars or 25 minutes for quart jars. For higher altitudes, adjust the pressure as necessary.For a Weighted Gauge Pressure Canner, heat until you achieve 10 lbs pressure for altitudes up to 1,000 ft. Then, maintain the pressure for another 20 minutes for pint jars or 25 minutes for quart jars. If you're at a higher altitude, you need to adjust the pressure to 15 lbs. Start the processing when the gauge begins to wiggle.
- Once the processing time is done, turn off the heat. Then, let pressure return to zero naturally and wait a couple more minutes before opening the vent. Remove the canner lid, wait for 10 minutes, and then finally remove the jars from the canner. Set them aside to cool for 24 hours undisturbed.
- Check the seal on the jar. The top of the lid should be concave (sunken in) so it doesn't pop back when you press it. If a jar isn't properly sealed, use it right away, keep it in the fridge for a short time, or re-can it. Label the jars and store them in a cool, dark place like a pantry or a cupboard.
Video
Notes
Nutrition
Nutrition information is automatically calculated, so should only be used as an approximation.


