
This post may contain affiliate links. Please read our disclosure policy.
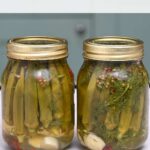


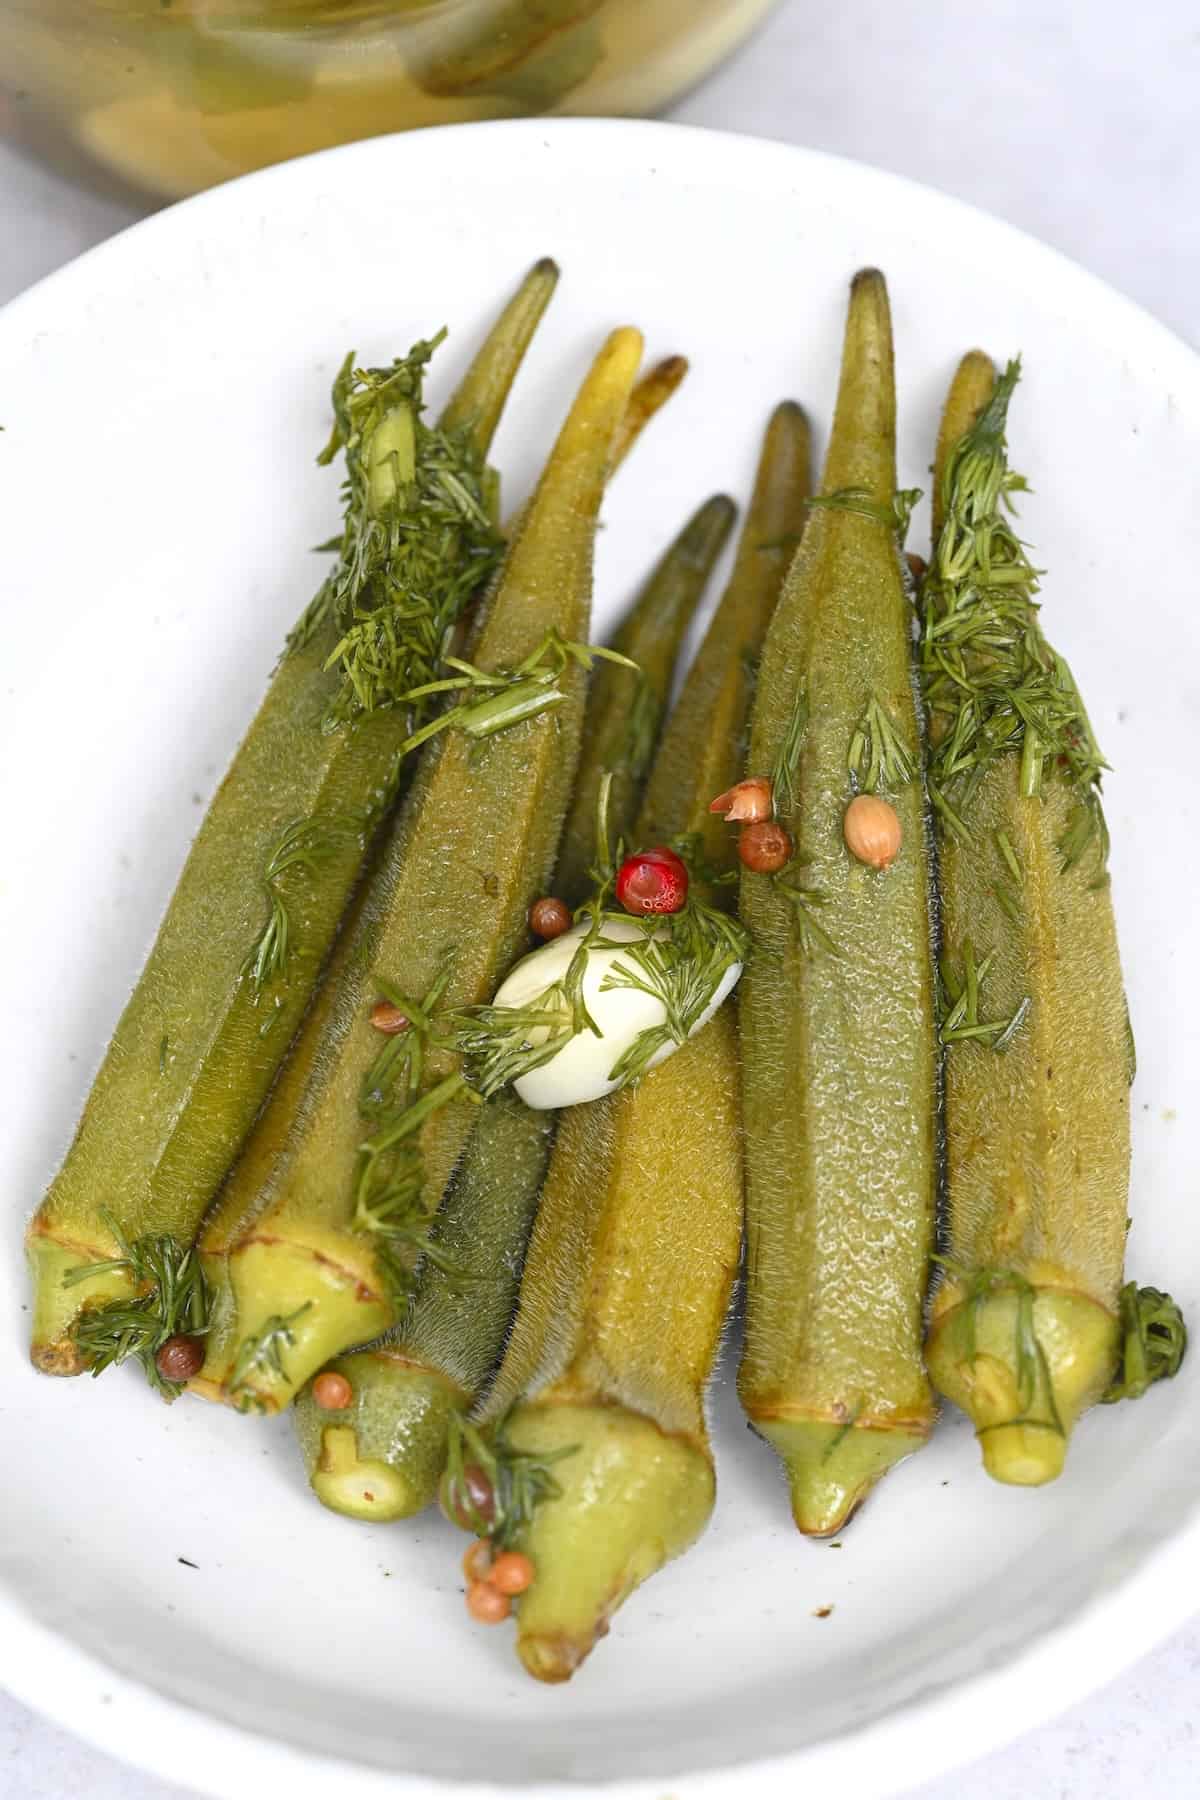
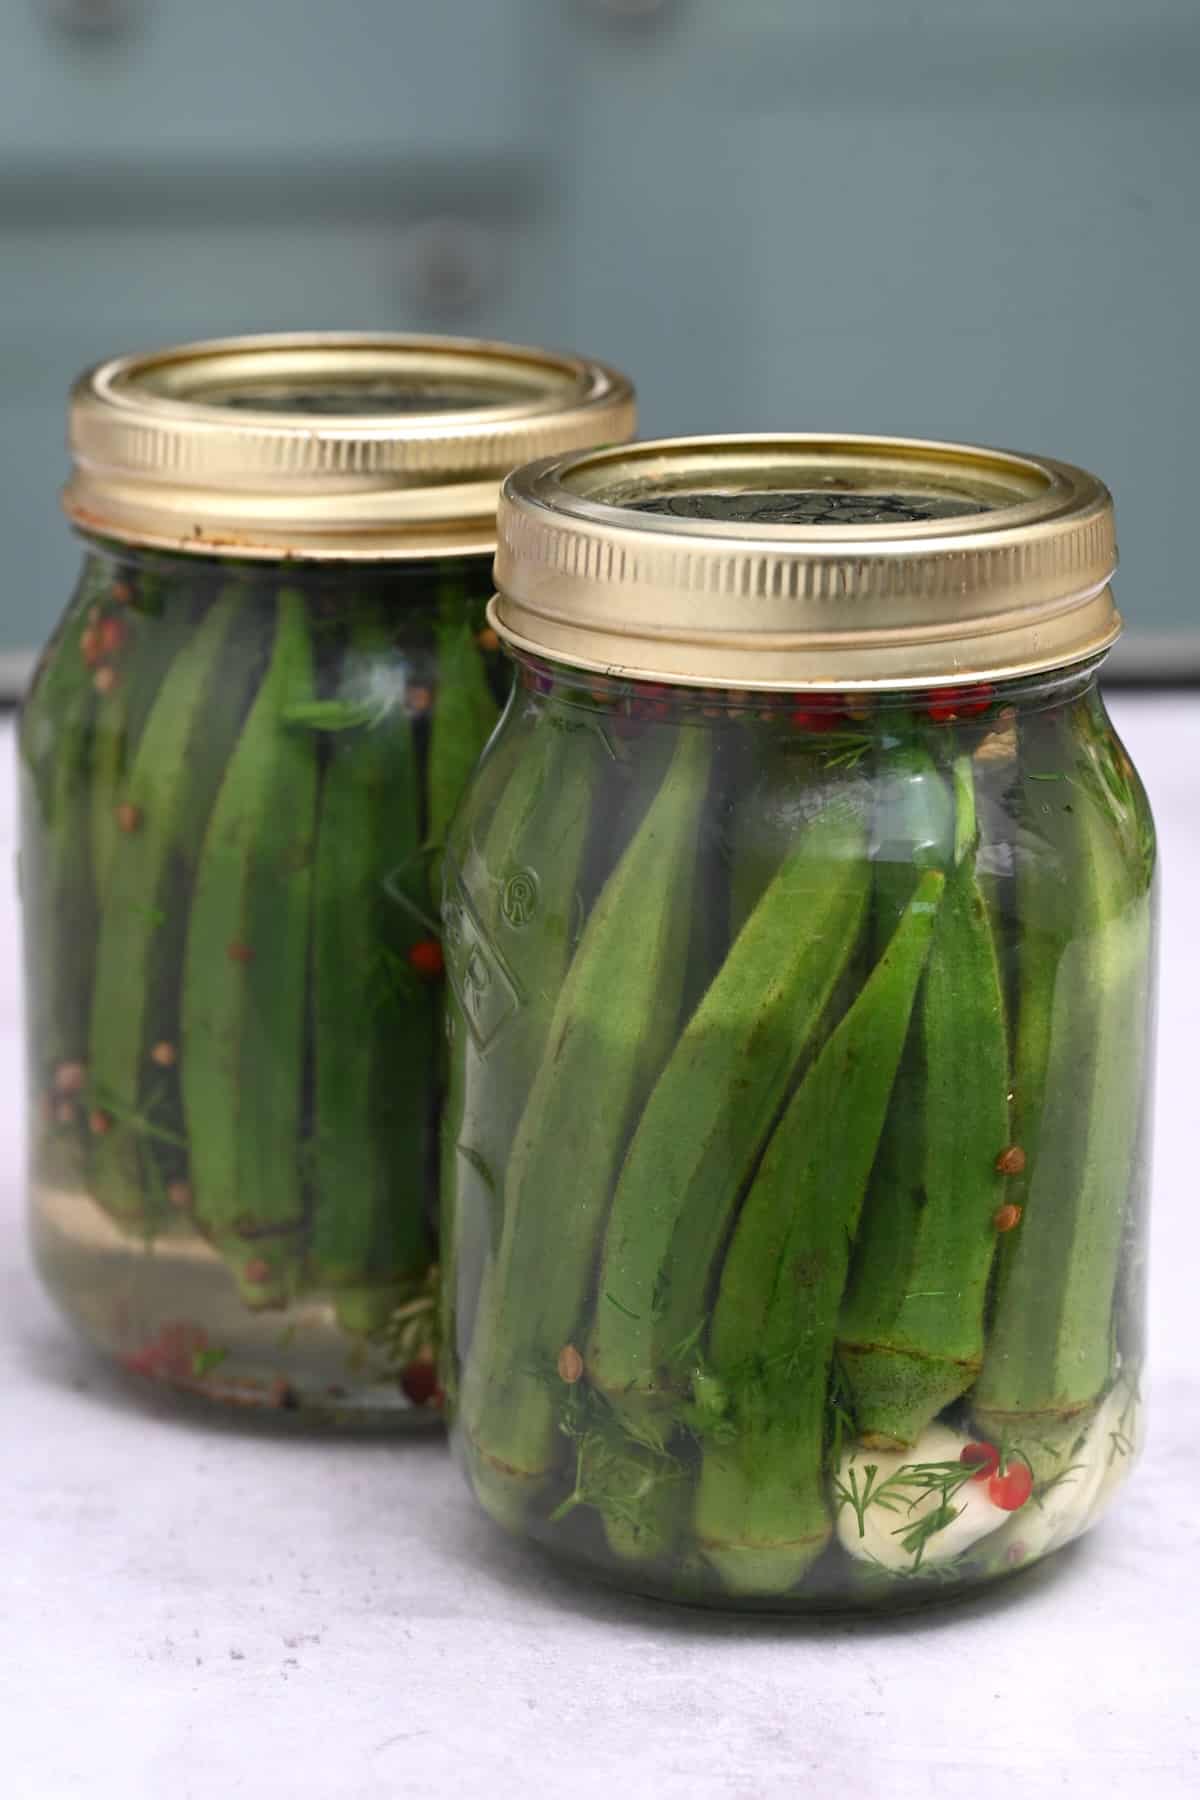
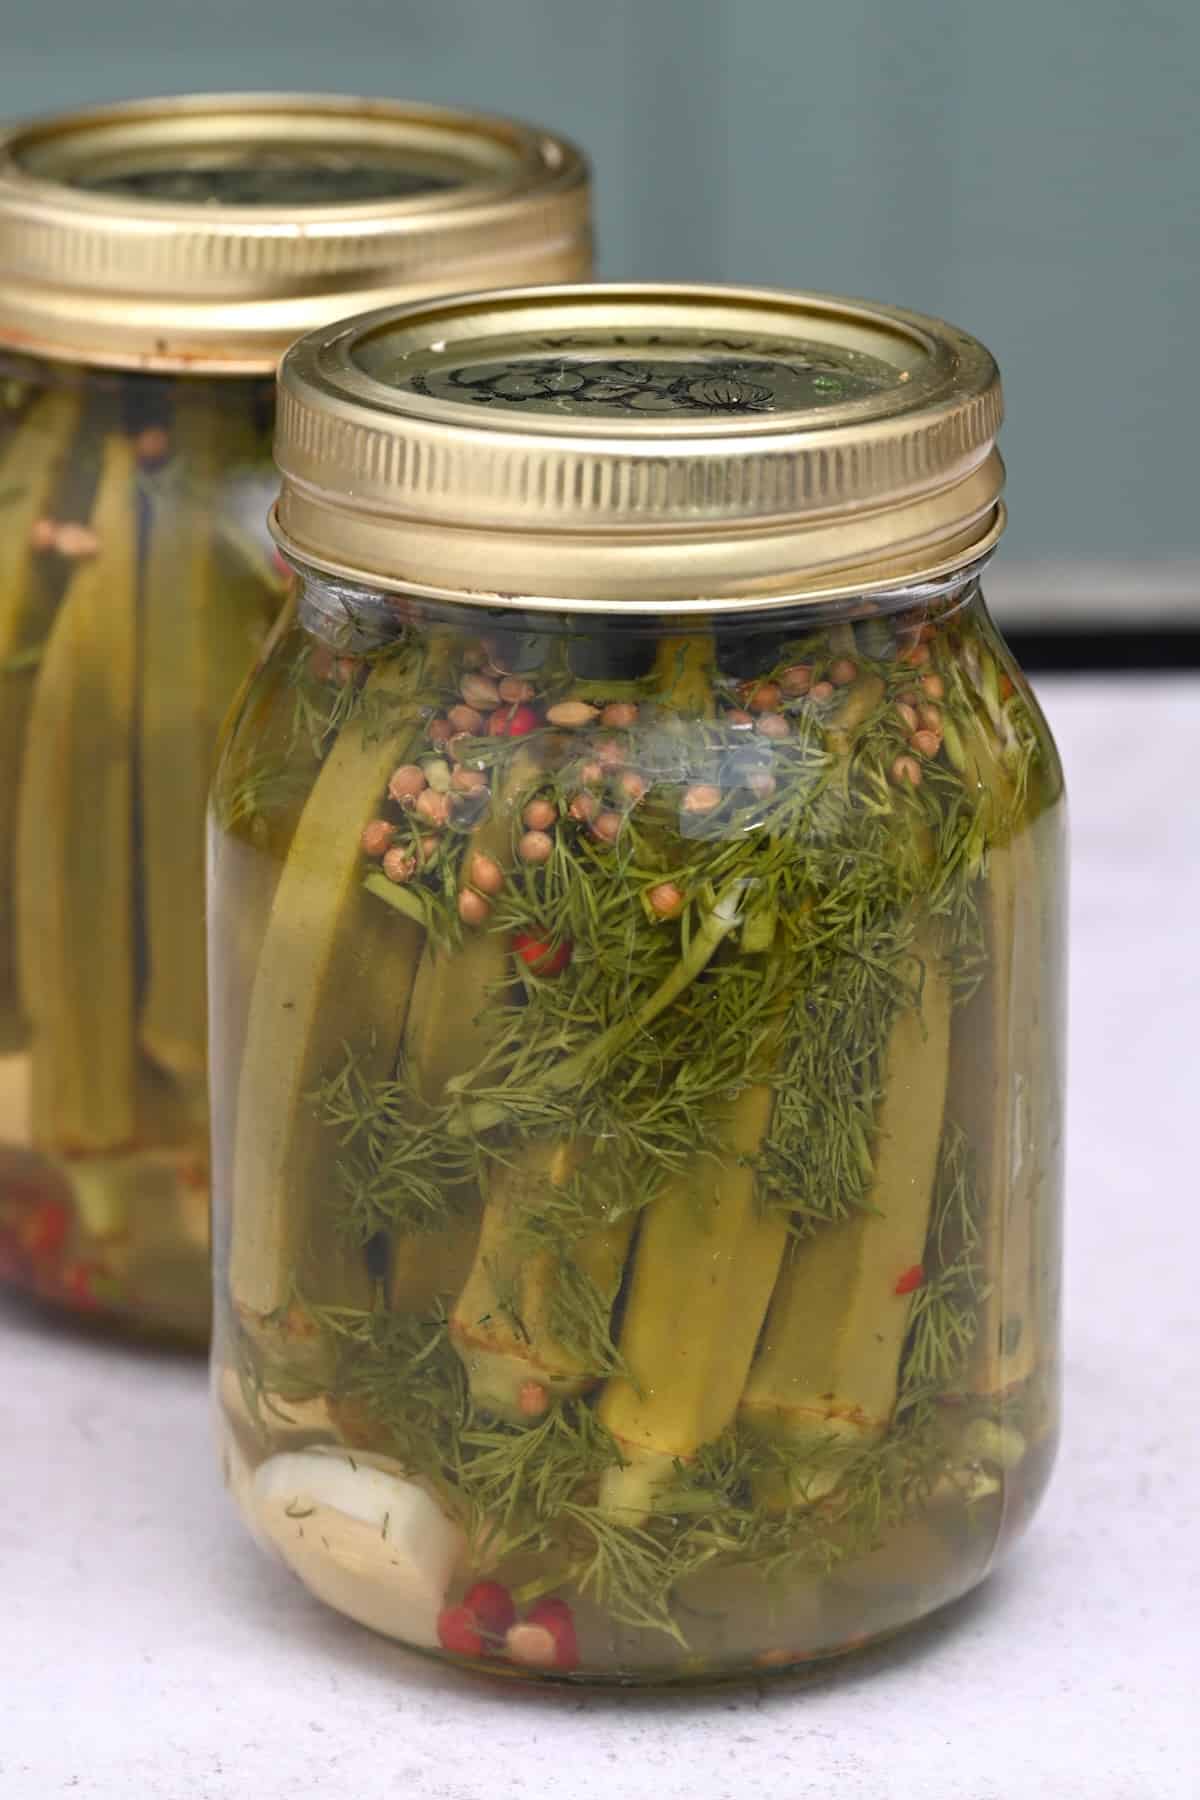
Crunchy pickled okra will help you enjoy the taste of summer year-round! They’re tangy, crisp (and not slimy!), with a simple garlic and dill-based pickling spice. Quick fridge pickles or water bath canning methods below!
I’ll admit, I haven’t shared many recipes with okra on my blog. However, in all the times I’ve used okra, I’ve panicked about the sliminess that can occur from preparing them incorrectly. Luckily, by learning how to make pickled okra, you’ll learn an excellent food preservation method. Plus, this Southern treat is also crunchy and firm, just the way you want pickles to be!
Even better, in this post, I’ll show you two methods. The first is a quick refrigerator method which is great for smaller batches. The second is a longer-term water bath canned method. It allows you to store the okra pickles in your pantry for up to a year of delicious okra pickles!
The process for pickling okra is super simple. With just a handful of pantry staples and okra, you can prepare this tasty treat in just 5 steps and under 30 minutes. Once prepared, these tasty Southern-inspired pickles can be used in place of dill pickles in most instances. Keep reading for my favorite serving recommendations!
Want to save this recipe?
The Pickled Okra Ingredients
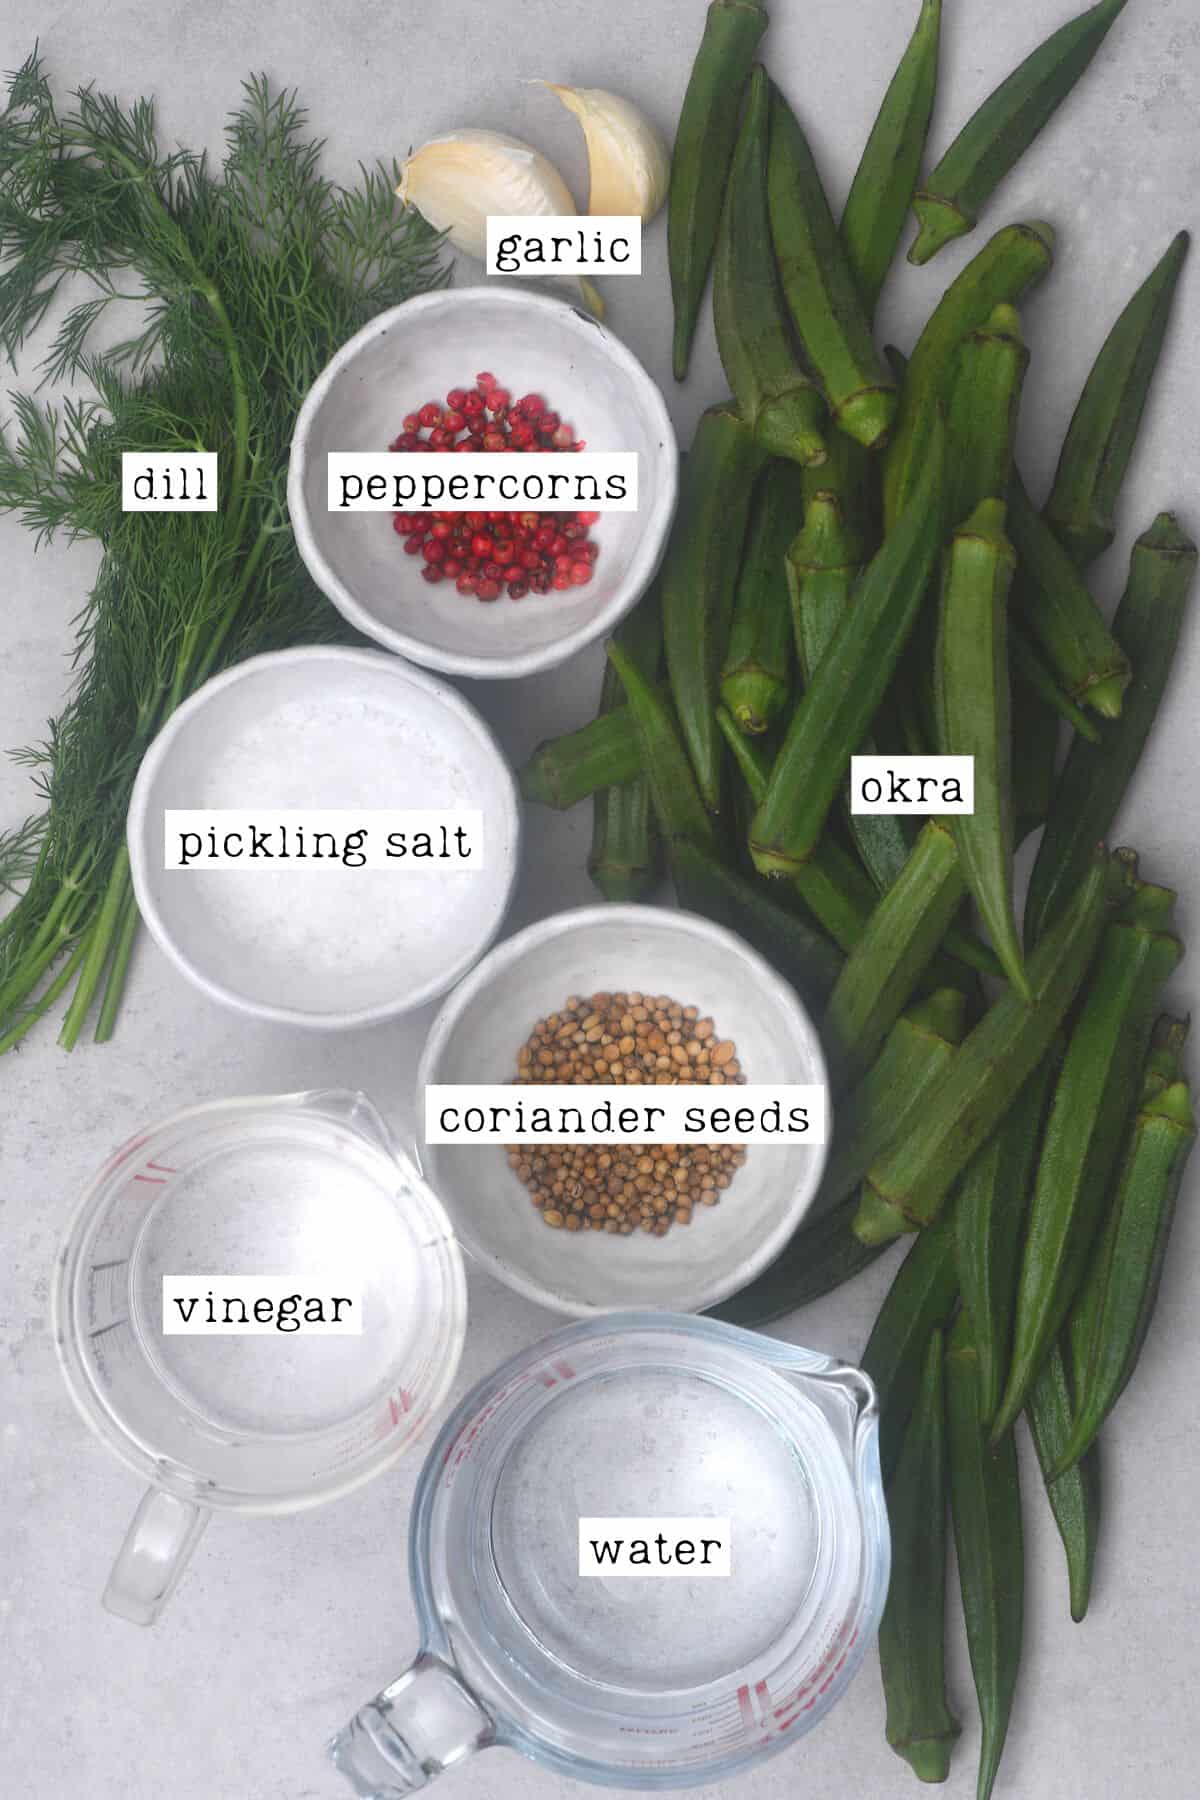
This easy recipe for pickled okra requires just a few ingredients:
- Fresh okra: Use fresh, young okra pods.
- Vinegar: I used distilled white vinegar this time. However, you can experiment with different vinegar varieties for a slightly different flavors. Try apple cider vinegar, white balsamic, or a combination of the two.
- Water: If you can, use filtered water, though it isn’t necessary.
- Pickling salt: Alternatively, kosher salt will work.
- Herbs: I used a combination of garlic, fresh dill, coriander seeds, and whole (pink) peppercorns for this easy pickled okra recipe.
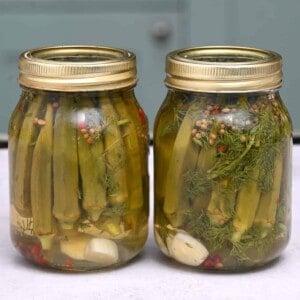
You will also need two 16oz/500ml/pint canning jars with lids.
What Type of Okra Is Best For Pickling?
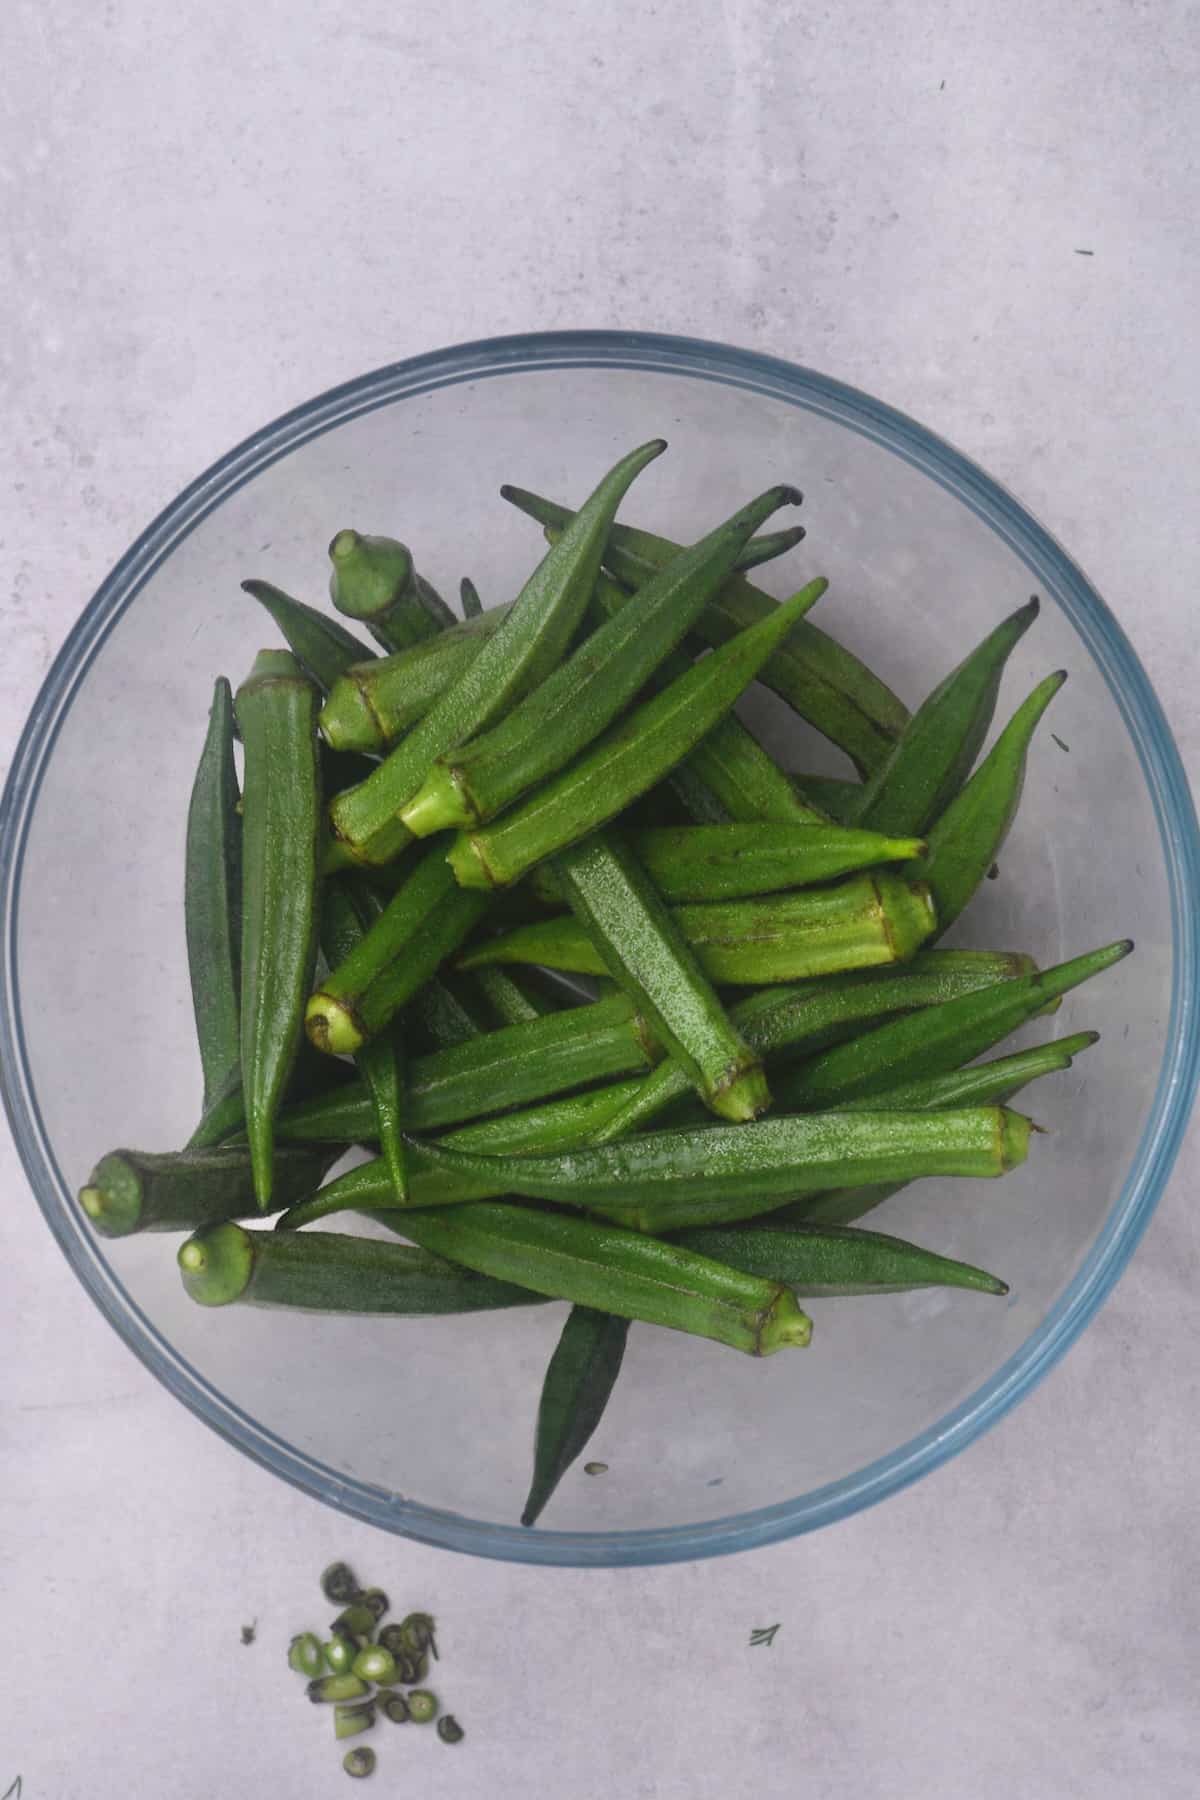
Choosing okra for pickling is an important job. Select okra that is young, tender, and free from blemishes. They also need to be the correct length for your jar (in this case, between 3-4 inches).
In terms of specific types of okra, you can experiment to find your desired results. Some options include Louisiana Green Velvet, Perkins Long Pod, and Clemson Spineless. However, any okra should work.
The fresher the okra, the better, as older ones are likely to yield slimy pickles.
What Is Pickling Salt
Pickling salt goes by several names like “canning salt” or “preserving salt”. It doesn’t have any anti-caking agents which are usually added to commercial salt. So this means you can avoid a cloudy brine.
How to Make Pickled Okra
There are just a few simple steps to follow for how to pickle okra and for canning okra.
How to Sterilize Canning Jars
First, preheat the oven to 325ºF/160ºC. Then wash the jars (and lids) in hot soapy water, rinsing them well to remove all the suds.
Then place the jars (not including rubber/plastic parts or non-heat-proof elements) in the oven for 10-15 minutes. Or until the jars are completely dry.
Meanwhile, if you plan to water bath can the jar of pickles, then prepare a large heavy-based saucepan. Add a trivet or steamer rack at the bottom (or canner) for canning. And fill it with enough water to submerge the jars.
How to Prepare Okra For Pickling
Rinse the okra well and pat them dry.
Then, use a small paring knife to trim the stems to around ¼ inch, avoiding cutting through the pods.
Prepare the Pickling Brine
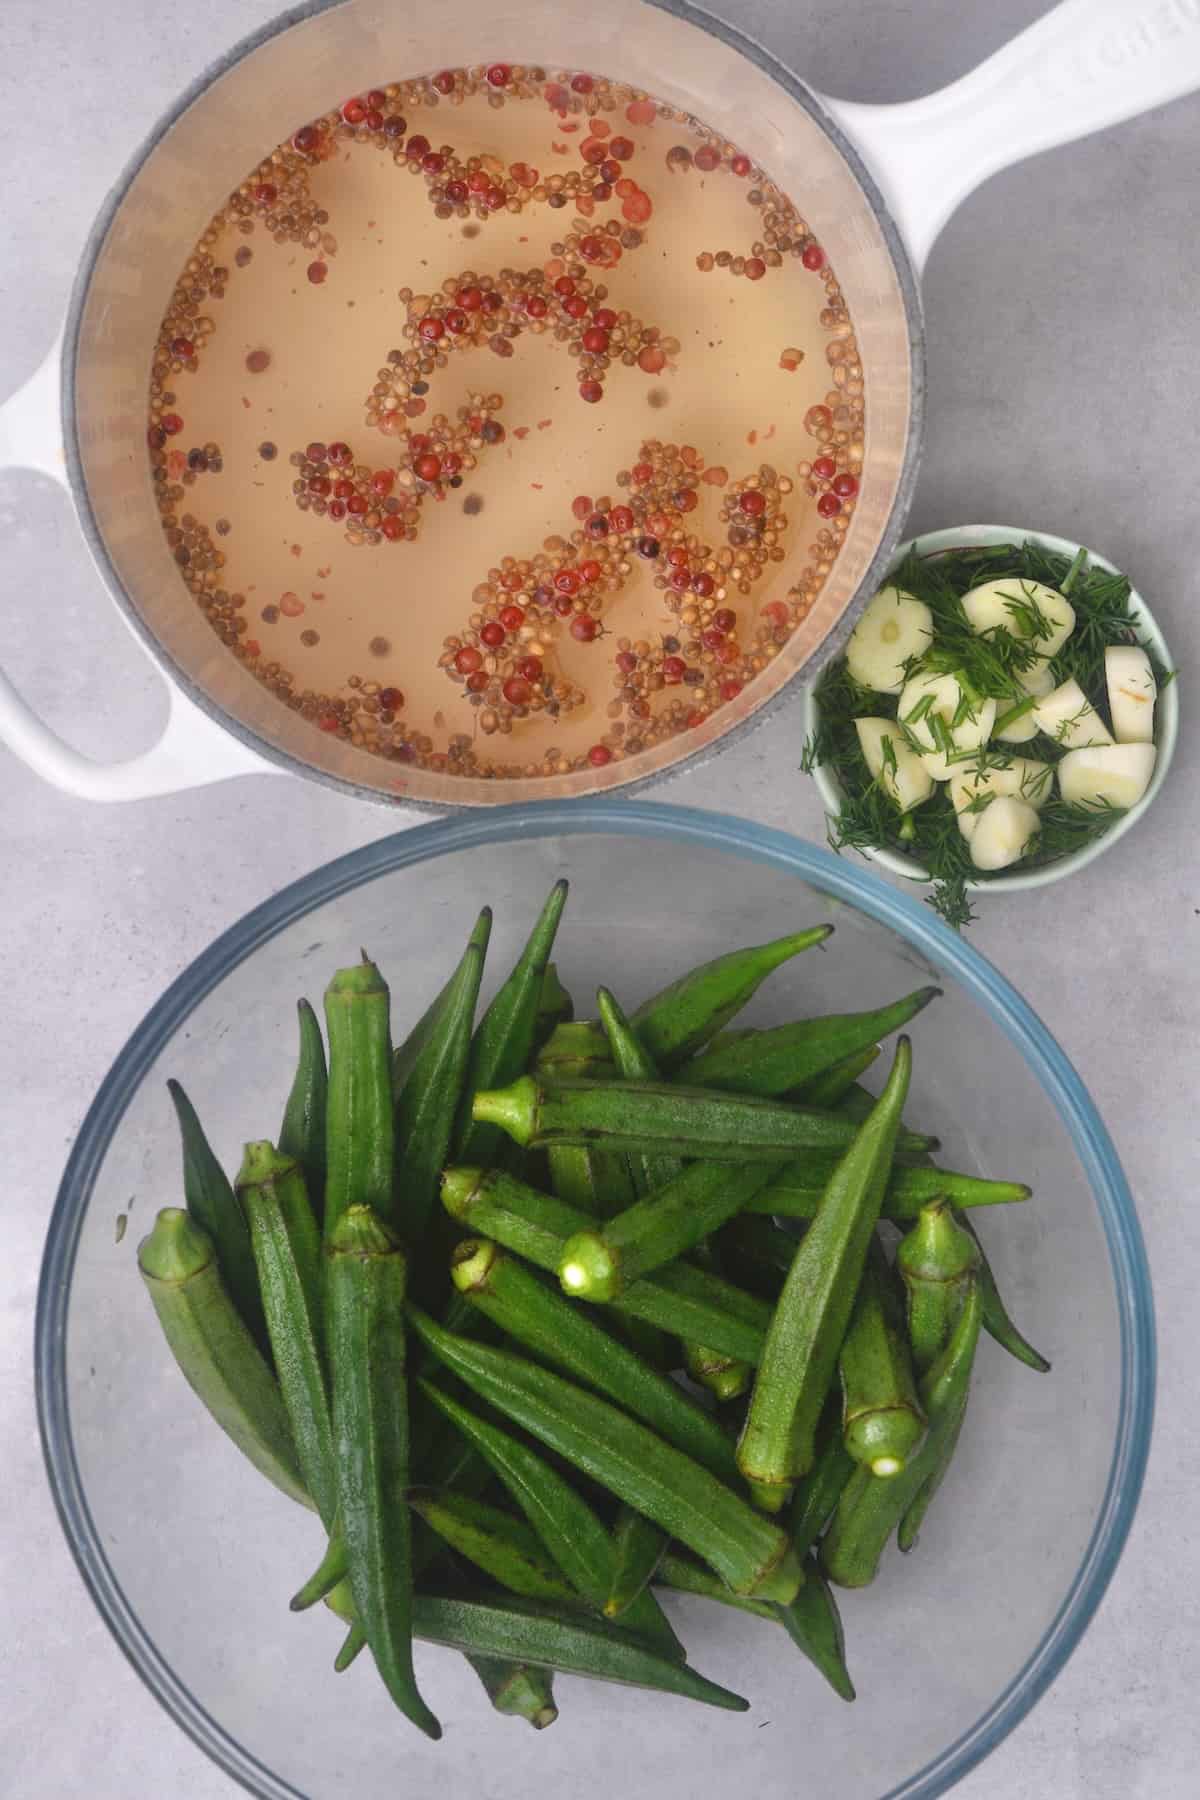
To prepare the pickling liquid, combine the vinegar, water, coriander seeds, peppercorns, and pickling salt in a large saucepan.
Bring to a boil over medium heat, stirring until the salt dissolves (around 2 minutes). Then, reduce the heat to low until you’re ready to pour the vinegar mixture into the jars.
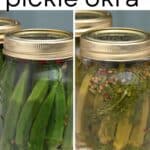
Transfer The Ingredients to The Jars
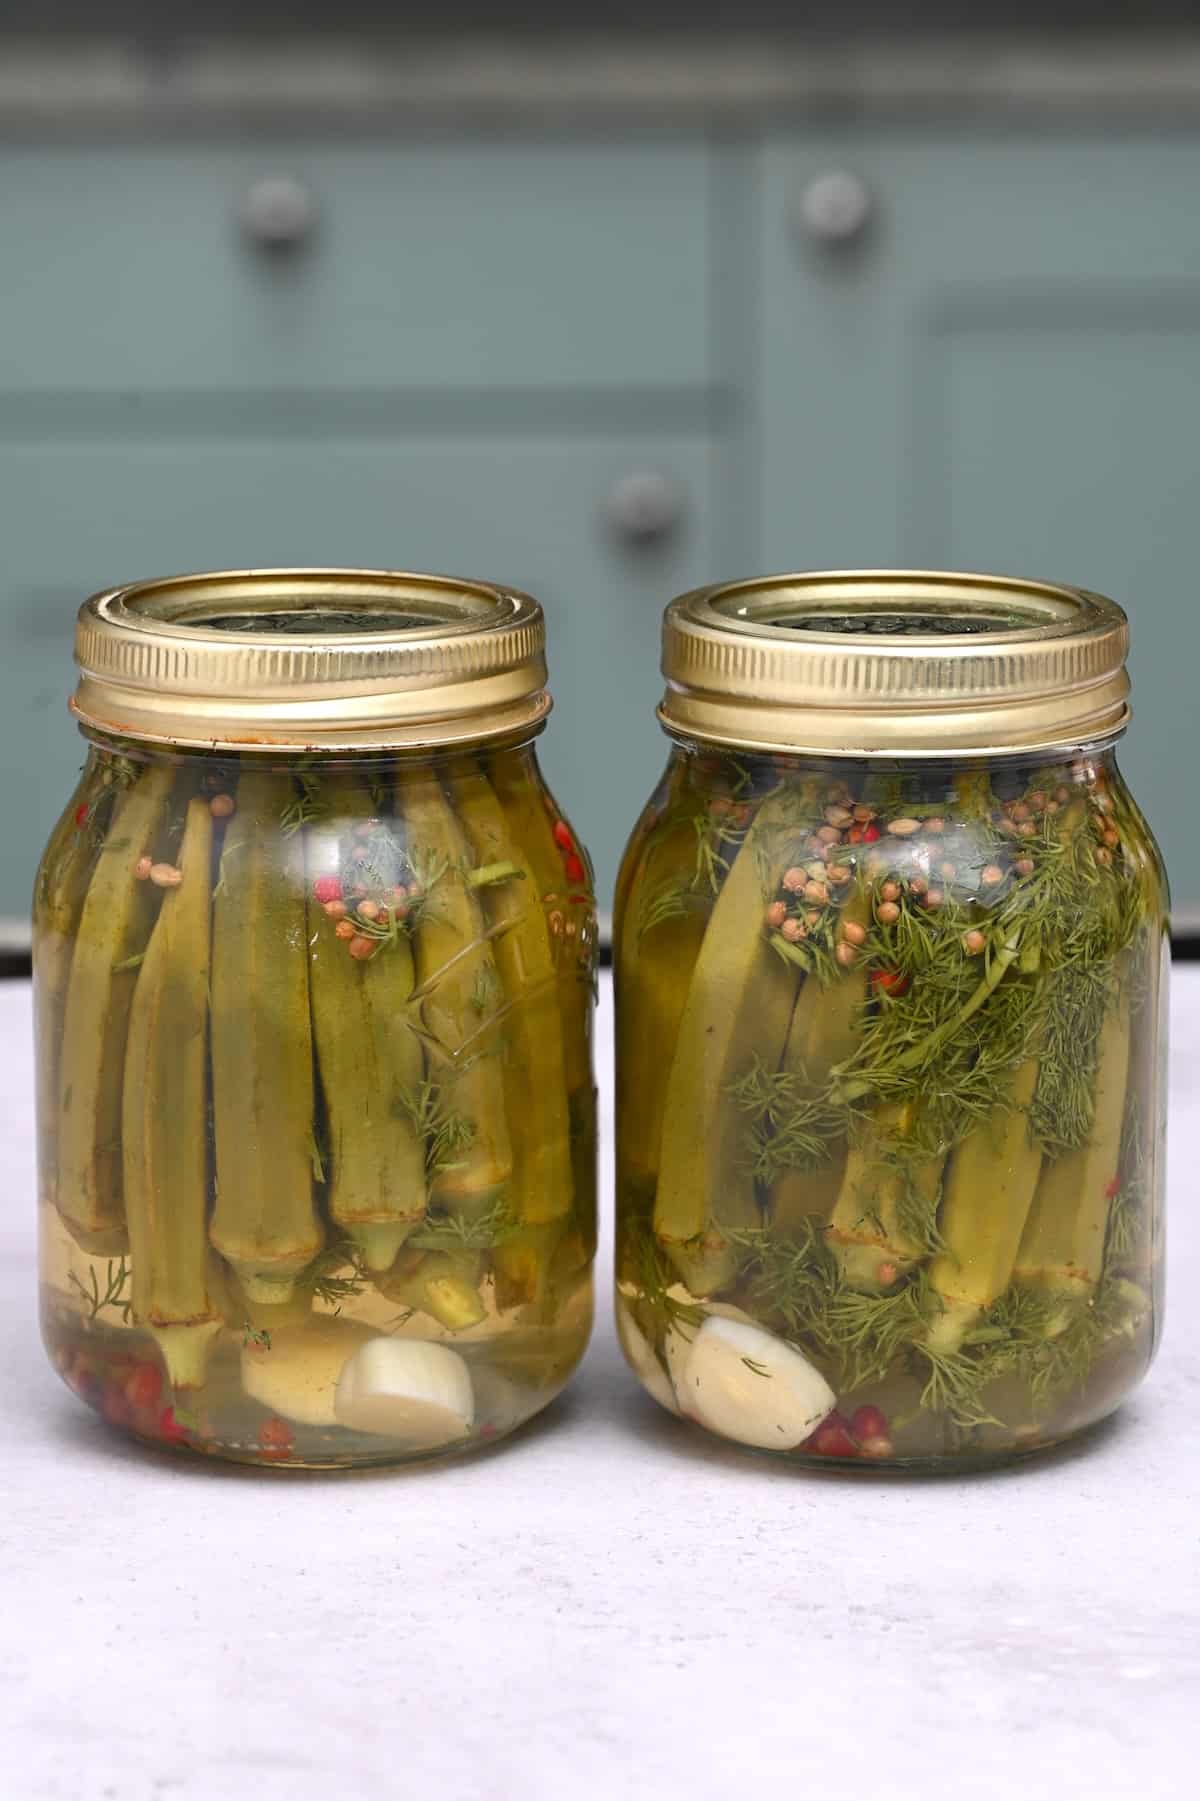
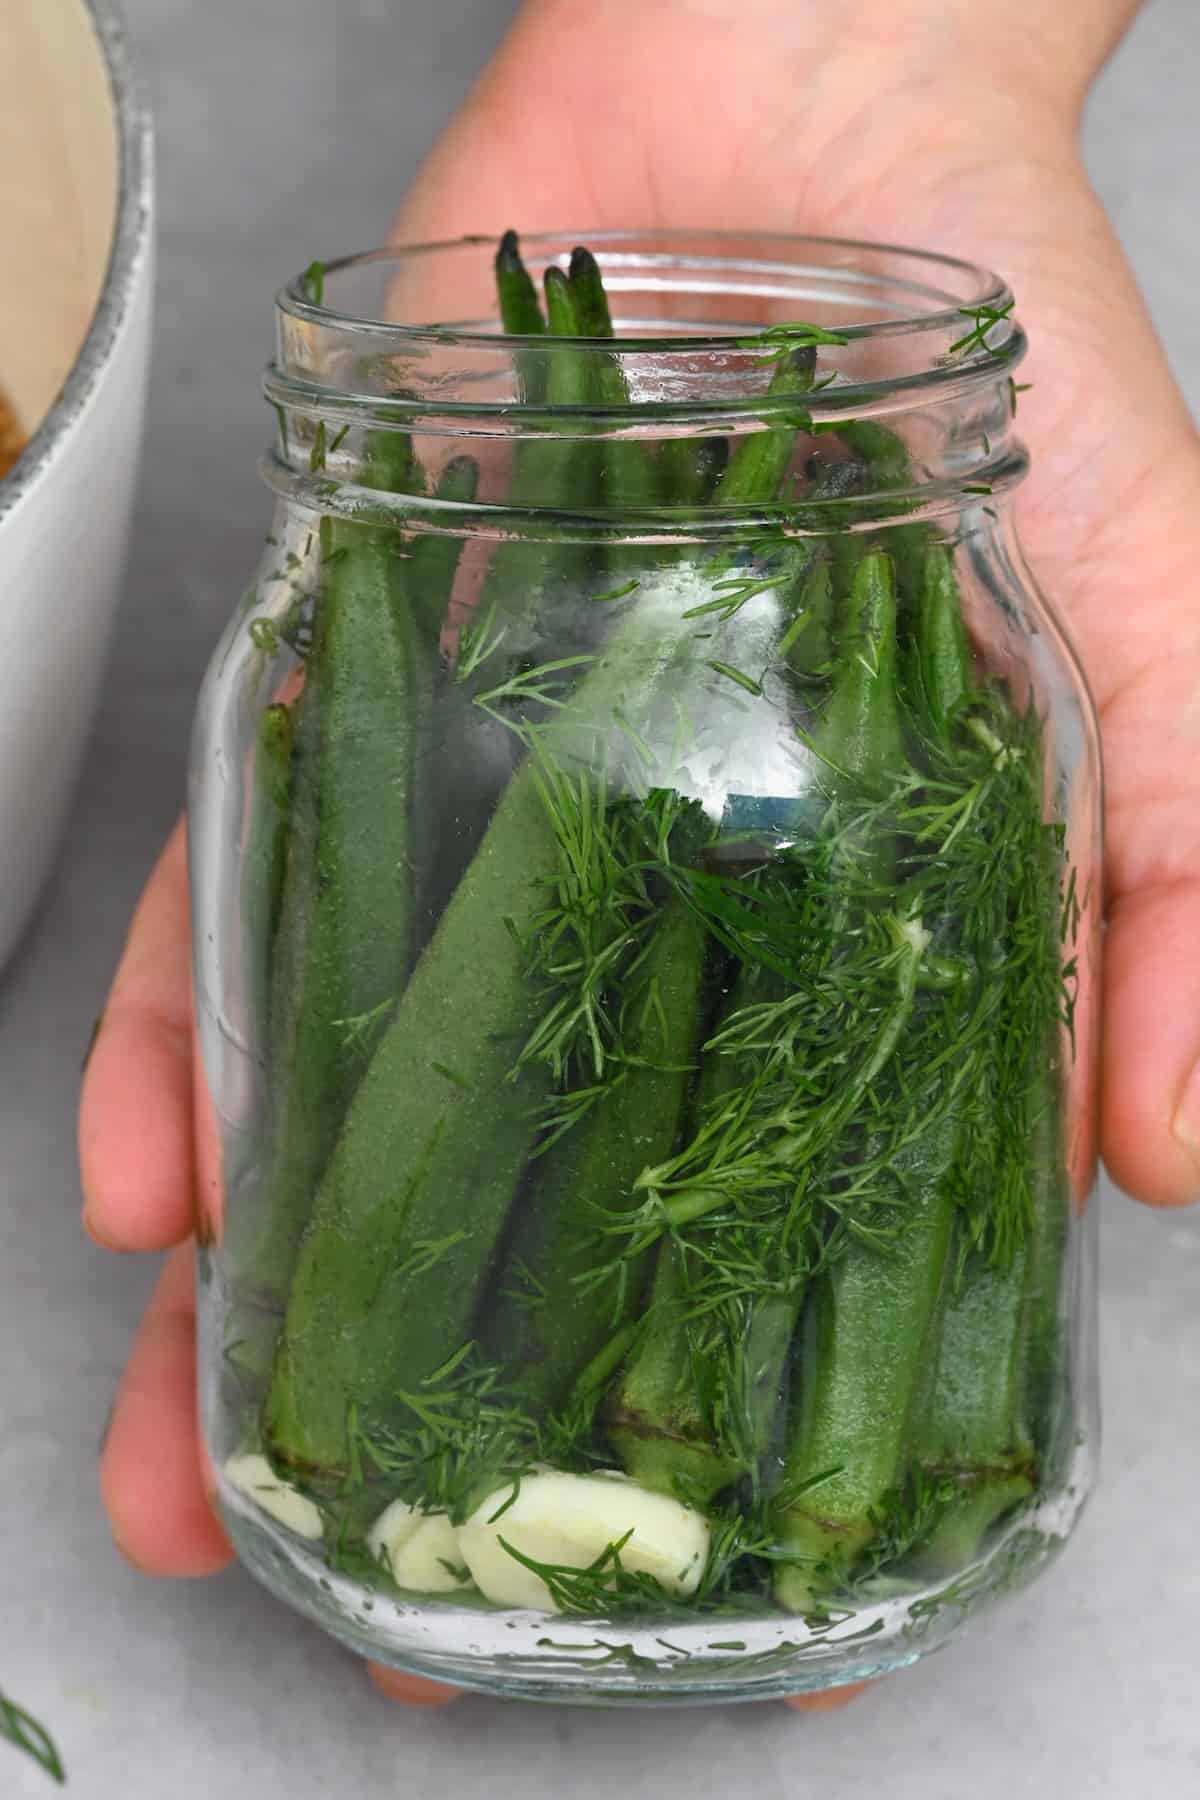
First, place a garlic clove and some dill into each jar. Then pack the okra in tightly (vertically – with some upright and some upside down to help pack them in). Make sure to leave at least ½-inch (1cm) of empty headspace at the top of the jar.
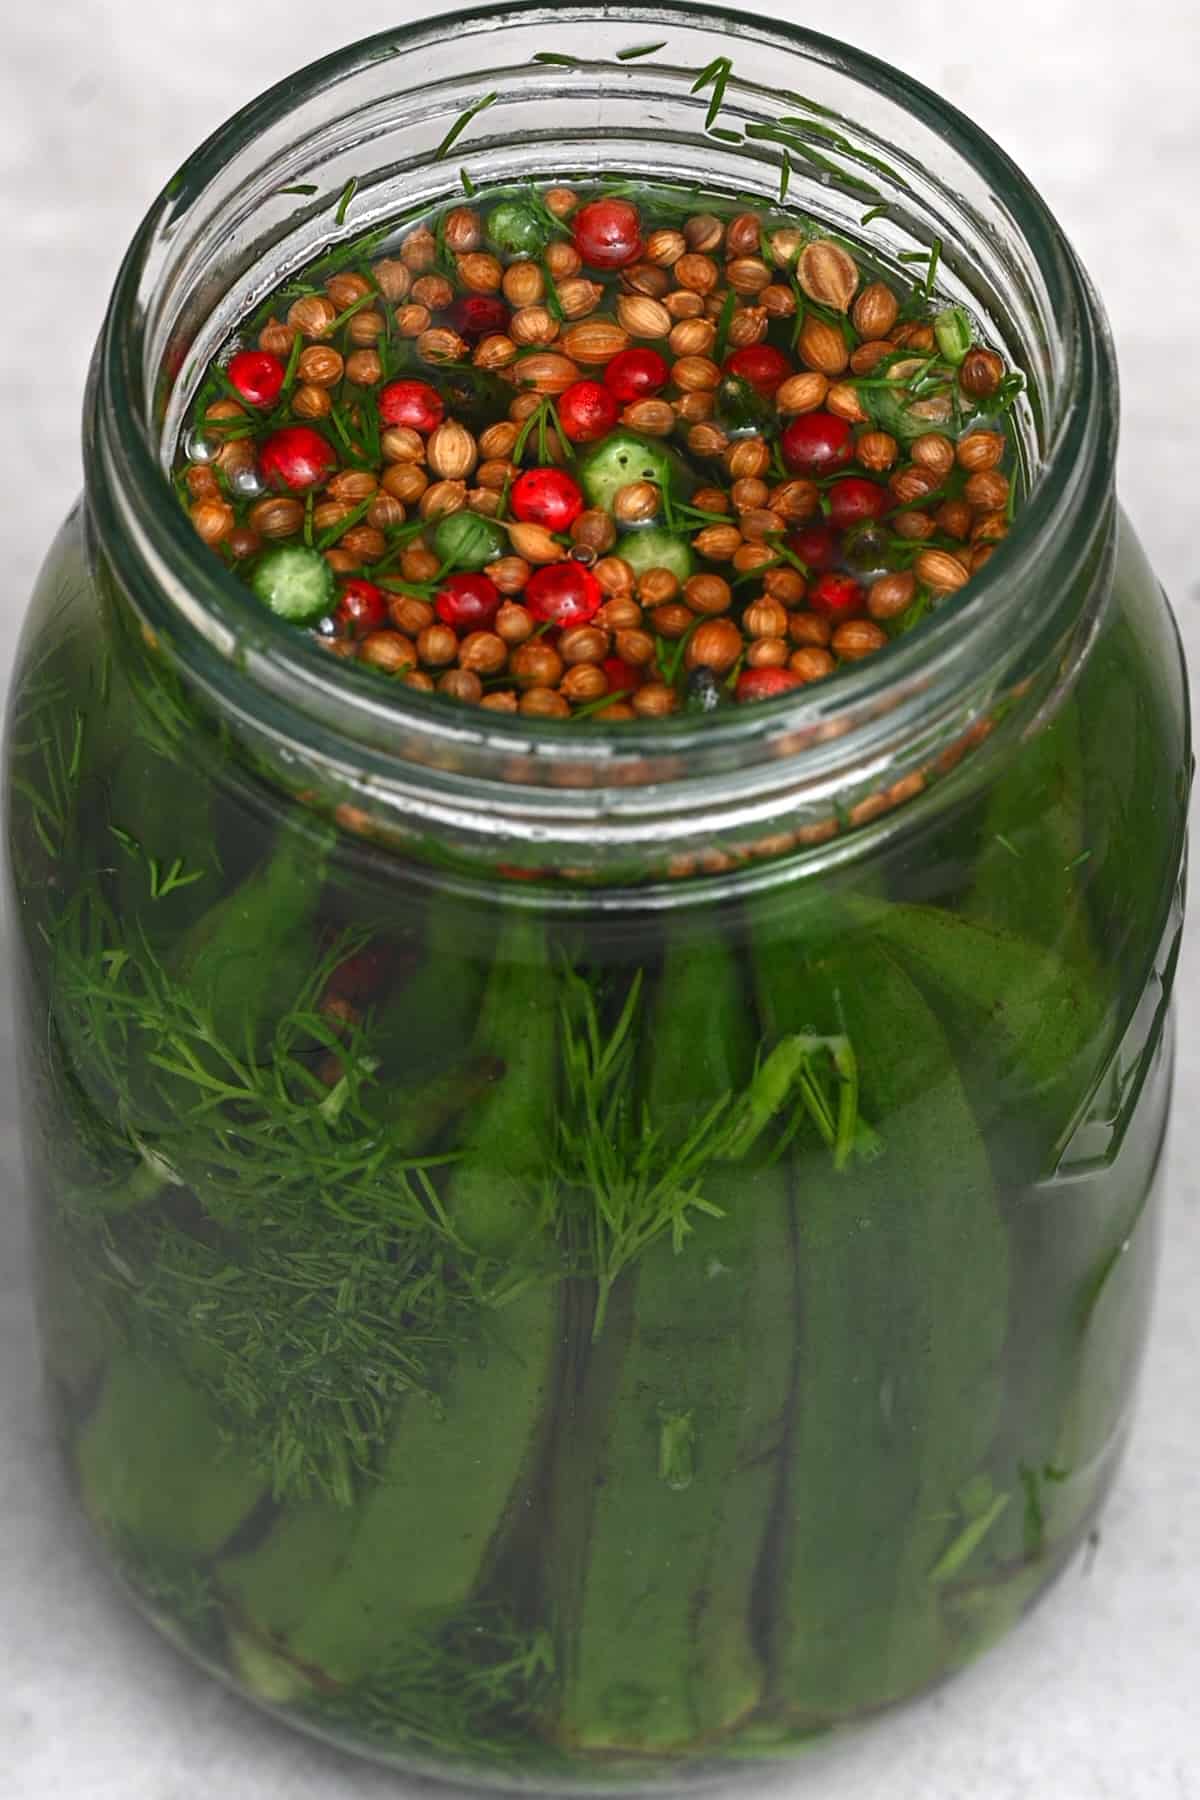
Pour the hot brine over the okra, ensuring it’s entirely submerged, and the headspace is still there.
Give the jars a tap against the counter to release air bubbles. Run a sterilized butter knife between the okra and sides of the jar in case air bubbles are trapped. It can be a good idea to wiggle and press the okra with the knife, too. This encourages all the loose air to release.
Okra is filled with air, so don’t be surprised if lots of air bubbles release at the beginning. Keep an eye out for a few minutes. The liquid may go down and the tops of the stems may become unsubmerged.
To speed this process up, you can create several vertical slits on the sides of the okra. However, I usually avoid this, as cutting into the pods may lead to sliminess.
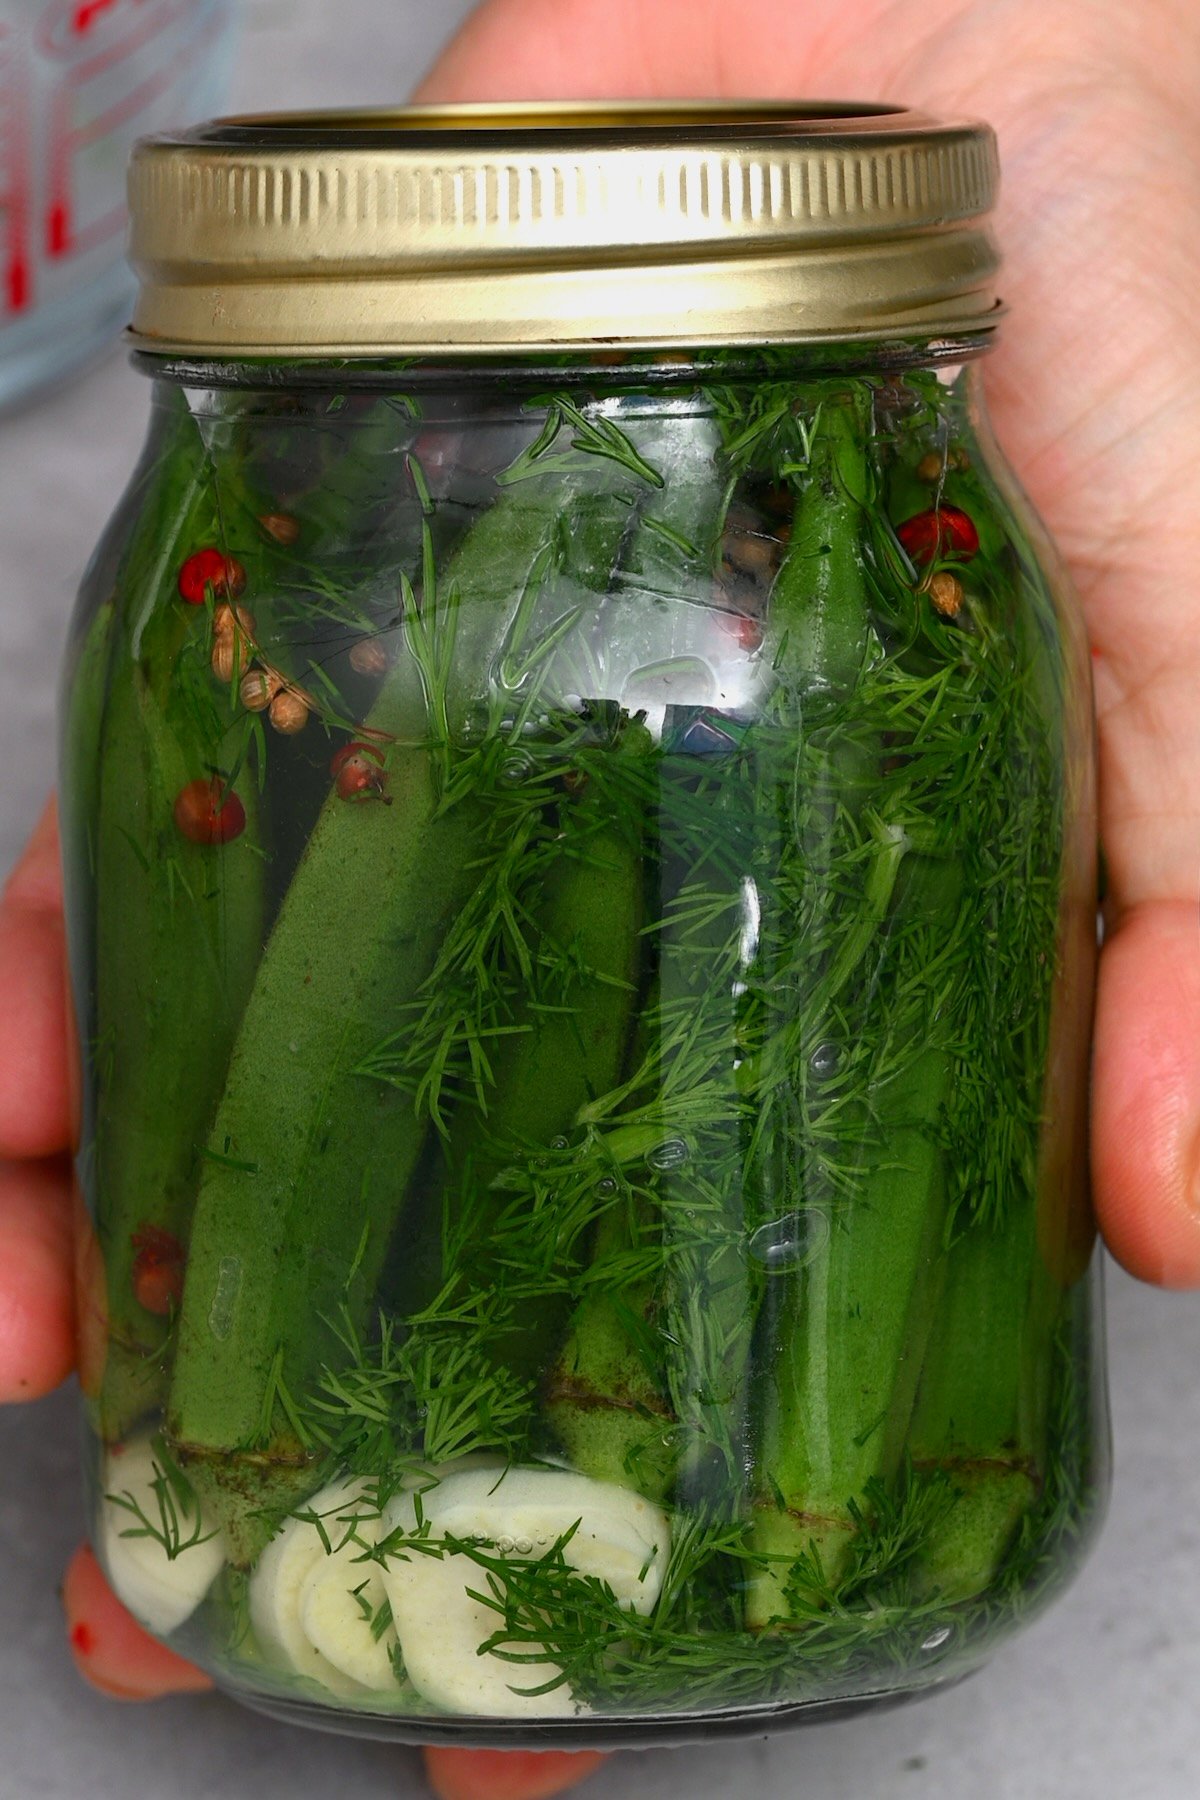
Finally, wipe the rim of each jar with a clean cloth if necessary and screw the lids on finger-tight.
For quick pickeled okra, simply allow the jars to cool and then transfer them to the fridge at this point.
I recommend allowing them to “rest” in the fridge for at least 24 hours to 48 hours before enjoying the okra pickles. This allows the flavors to develop. The longer you let them sit, the better they’ll taste.
How To Water Bath Can Okra?
Carefully transfer the sealed jars to the hot water bath/pot, ensuring they’re submerged in 1-2 inches of water. Then, add the lid to the pan, bring it to a rolling boil, and allow it to boil for 15 minutes.
Remove the lid from the saucepan and wait 5 minutes with the heat off. Then finally, remove the hot jars (you can use a jar lifter). Set them aside on a kitchen-towel-lined counter (not a cold surface, or the glass may crack!) to cool down completely. Then store them in your pantry.
As the jars cool, you’ll hear a “pop” when the lids have properly sealed.
If you want more details & top tips on water bath canning, check out my beginner’s guide to water bath canning!
How Long Does Pickled Okra Last
Fridge pickled okra can be stored in the refrigerator for 1-2 months. Always use clean utensils in the jar to ensure optimal shelf life.
Canned okra pickles can be stored in a cool, dark location (away from direct sunlight) for up to a year!
How to Use Pickled Okra?
There are plenty of ways to enjoy pickled ocra. Here are just a few of my favorite recommendations.
- Serve as part of a charcuterie board (particularly a Southern appetizers board) with cheese and crackers.
- Add to cocktails, like Bloody Mary or Martini.
- Serve alongside casseroles.
- Enjoy with BBQed proteins like grilled meat and chicken.
- Mix into salads and coleslaws.
- Enjoy the okra pickles in stews, soups, and sauces.
- Over sandwiches, burgers, and wraps.
- Use as a garnish for dips– like creamy hummus.

FAQs
Tough okra will make tough okra pickles. For the best pickles, I recommend using young, tender pods.
I wouldn’t recommend it. The thawing process will make the okra cell walls more fragile/collapsible and likely to make slimy okra pickled.
I find that the hot pickling liquid cooks the okra enough without the need for further cooking before canning.
While this can be a sign of spoilage, several other potential causes exist. For example, using regular salt instead of pickling salt can cause cloudiness.
Likewise, apple cider vinegar has a “mother,” which can lead to cloudiness. Hard water may also affect the clarity of the liquid, as can using okra that is too old.
More Easy Pickled Recipes
- Quick Pickled Cabbage
- Pickled Green Tomatoes
- Quick Pickled Red Onions
- Pickled Daikon Radish
- Quick Pickled Asparagus
- Quick Pickled Beets
If you try this easy pickled okra recipe, let me know how it goes in the comments below. I’d appreciate a recipe card rating and would love to see your recipe recreations – tag me on Instagram @Alphafoodie!
Crunchy Pickled Okra (Canning and Preserving)
Equipment
- 2 Canning jars (16 oz) (each 500ml/pint)
Ingredients
- 28 oz okra
- 1.5 cups water
- 1.5 cups white vinegar
- 3 Tbsp pickling salt
- 2 cloves garlic
- 1 tsp coriander seeds
- 1 tsp peppercorn
- dill fresh, few stems
Instructions
Sterilize the Canning Jars
- Preheat the oven to 325ºF/160ºC. Then wash the jars (and lids) in hot soapy water, rinsing them well to remove all the suds.
- Place the jars (not including rubber/plastic parts or non-heat-proof elements) in the oven for 10-15 minutes, or until the jars are completely dry.
- Meanwhile, if you plan to water bath can the jar of pickles, then prepare a large heavy-based saucepan with a trivet or steamer rack at the bottom (or canner) for canning, filling it with enough water to submerge the jars.
Prepare the Okra
- Rinse the okra well and pat them dry.
- Use a small paring knife to trim the stems to around ¼ inch, avoiding cutting through the pods.
Prepare the Pickling Brine
- Combine the vinegar, water, coriander seeds, peppercorns, and pickling salt in a large saucepan.
- Bring the mixture to a boil over medium heat, stirring until the salt dissolves (around 2 minutes). Then, reduce the heat to low until you're ready to pour the vinegar mixture into the jars.
Transfer The Ingredients to The Jars
- Place a garlic clove and some dill into each jar. Then pack the okra in tightly (vertically – with some upright and some upside down to help pack them in), leaving at least ½-inch (1cm) of empty headspace at the top of the jar.
- Pour the hot brine over the okra, ensuring it's entirely submerged, and the headspace is still there.
- Give the jars a tap against the counter to release air bubbles and run a sterilized butter knife between the okra and sides of the jar in case air bubbles are trapped. It can be a good idea to wiggle and press the okra with the knife, too, to encourage all the loose air to release.Keep an eye out for a few minutes, as the liquid may go down and the tops of the stems may become unsubmerged. To speed this process up, you can create several vertical slits in the sides of the okra. However, I usually avoid this, as cutting into the pods may lead to sliminess.
- Wipe the rim of each jar with a clean cloth if necessary and screw the lids on finger-tight.
- For quick pickled okra, simply allow the jars to cool and then transfer them to the fridge at this point. Allow them to "rest" in the fridge for at least 24-48 hours before enjoying the okra pickles.For water bath canned okra, continue with the next step.
Water Bath Can the Okra (optional step)
- Carefully transfer the sealed jars to the hot water bath/ pot, ensuring they're submerged in 1-2 inches of water. Then, add the lid to the pan, bring it to a rolling boil, and allow it to boil for 15 minutes.
- Remove the lid from the saucepan and wait 5 minutes with the heat off. Then finally, remove the jars and set them aside on a kitchen-towel-lined counter (not a cold surface, or the glass may crack!) to cool down completely before storing them in your pantry.
- As the jars cool, you'll hear a "pop" when the lids have fully sealed.
Storage Recommendations
- Fridge pickled okra: Skip the water bath canning and store the jars in the refrigerator for 1-2 months. Always use clean utensils in the jar to ensure optimal shelf life.Canned okra pickles: Store the jars in a cool, dark location (away from direct sunlight) for up to a year!
Video
Notes
- Ensure the okra is FRESH: You’re more likely to end up with slimy pickled okra otherwise. Generally, the fresher the okra, the crunchier the pickles.
- For even crisper okra pickles: You could soak the pods in a pickling lime solution (following the package instructions).
- If any cans don’t seal: Just pop them in the fridge and enjoy them within 1-2 months.
- Pack the jars tightly: Okra has air inside, so if they aren’t packed tightly into the jar, they’ll end up floating above the liquid.
- Experiment with your pickling spice: You can play with several ingredients to pursue the best pickled okra recipe.
- Mustard seeds
- Celery seeds
- Fennel seeds
- Dill seed
- Red pepper flakes
- Jalapeño/chili (dried or fresh slices)
- Lemon slices
- Pink peppercorns
- Bay leaves
- Oregano
- Ginger slices
- Cilantro
Nutrition
Nutrition information is automatically calculated, so should only be used as an approximation.


Will this work with less/no salt?
Hi Linda,
Salt is necessary to preserve the okra properly, so it’s best to use the recommended amount. I hope this helps!
How long does it take for the okra to be ready if you arent refrigerating?
Hi Cynthia! For okra you can store without refrigerating, you’d use the water bath canning method in the post. Once the jars are processed, sealed (you’ll hear the lids “pop”) and fully cooled, they’re shelf-stable in a cool, dark spot for up to a year. They’re safe to eat as soon as they’ve sealed and cooled, though like most pickles the flavor improves the longer they sit, so letting them rest a while before opening is worth it. Just a safety note: the recipe uses either the quick fridge method or proper water bath canning, so I wouldn’t leave okra to pickle at room temperature any other way. Hope that helps! 😊