
This post may contain affiliate links. Please read our disclosure policy.
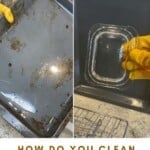


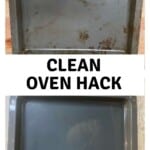


How to clean an oven with baking soda (with and without chemicals). This method teaches you how to clean the entire oven: oven racks, oven glass (window), etc., with a simple, non-laborious method!
Does this situation sound familiar to anyone? The little experience you have of cleaning your oven involved heavy-duty gloves, oven cleaner packed full of ‘warnings,’ chemicals, and noxious gases enough to burn your eyebrows off, and a job that seemed like it would take an entire weekend to complete. So then you put it off and put it off, eventually making the task seem so monumental that it never gets done… oh yeah, no, me neither…
Luckily, when I moved from London a few months ago, I made a vow that I’d keep on top of the oven situation (and the microwave cleaning too) – without having to resort to scary chemical-laden oven cleaners or noxious gases. For that reason, I researched and experimented and learned how to clean an oven with baking soda that works every single time!

The method uses a simple combination of baking soda and vinegar, with an option to ramp up the cleaning power with hydrogen peroxide if preferred (but it’s not necessary for those who want to keep things all-natural). Let’s jump right in!
Want to save this recipe?
What You’ll Need
- Baking soda: while you can get this in most grocery stores, you’ll be able to buy it cheaper, specifically for cleaning.
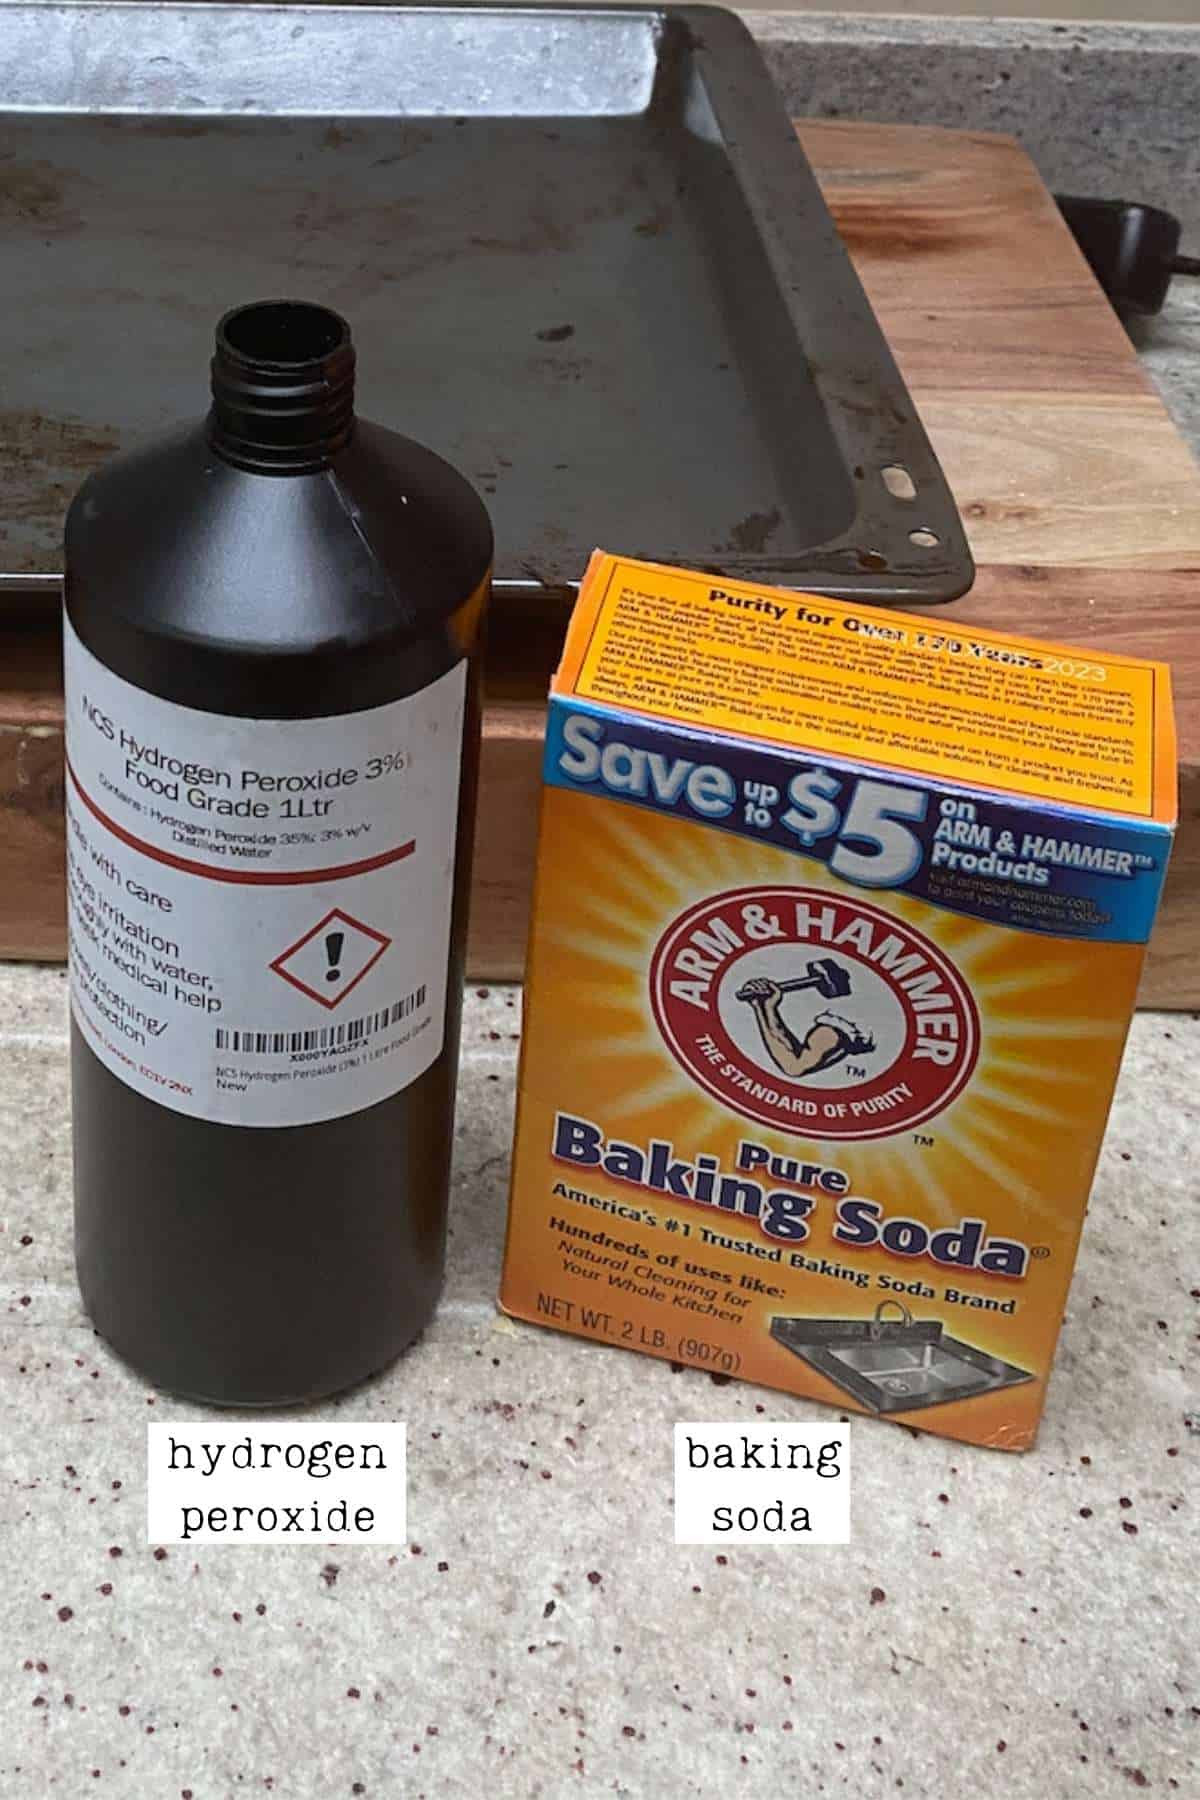
- Hydrogen peroxide: or white vinegar if you’d prefer an all-natural version. I’ve found that the two work fairly similarly, although the peroxide makes the process ever so slightly easier/faster.
- Gloves: cleaning gloves are good to use regardless of if you’re using natural or chemical options.
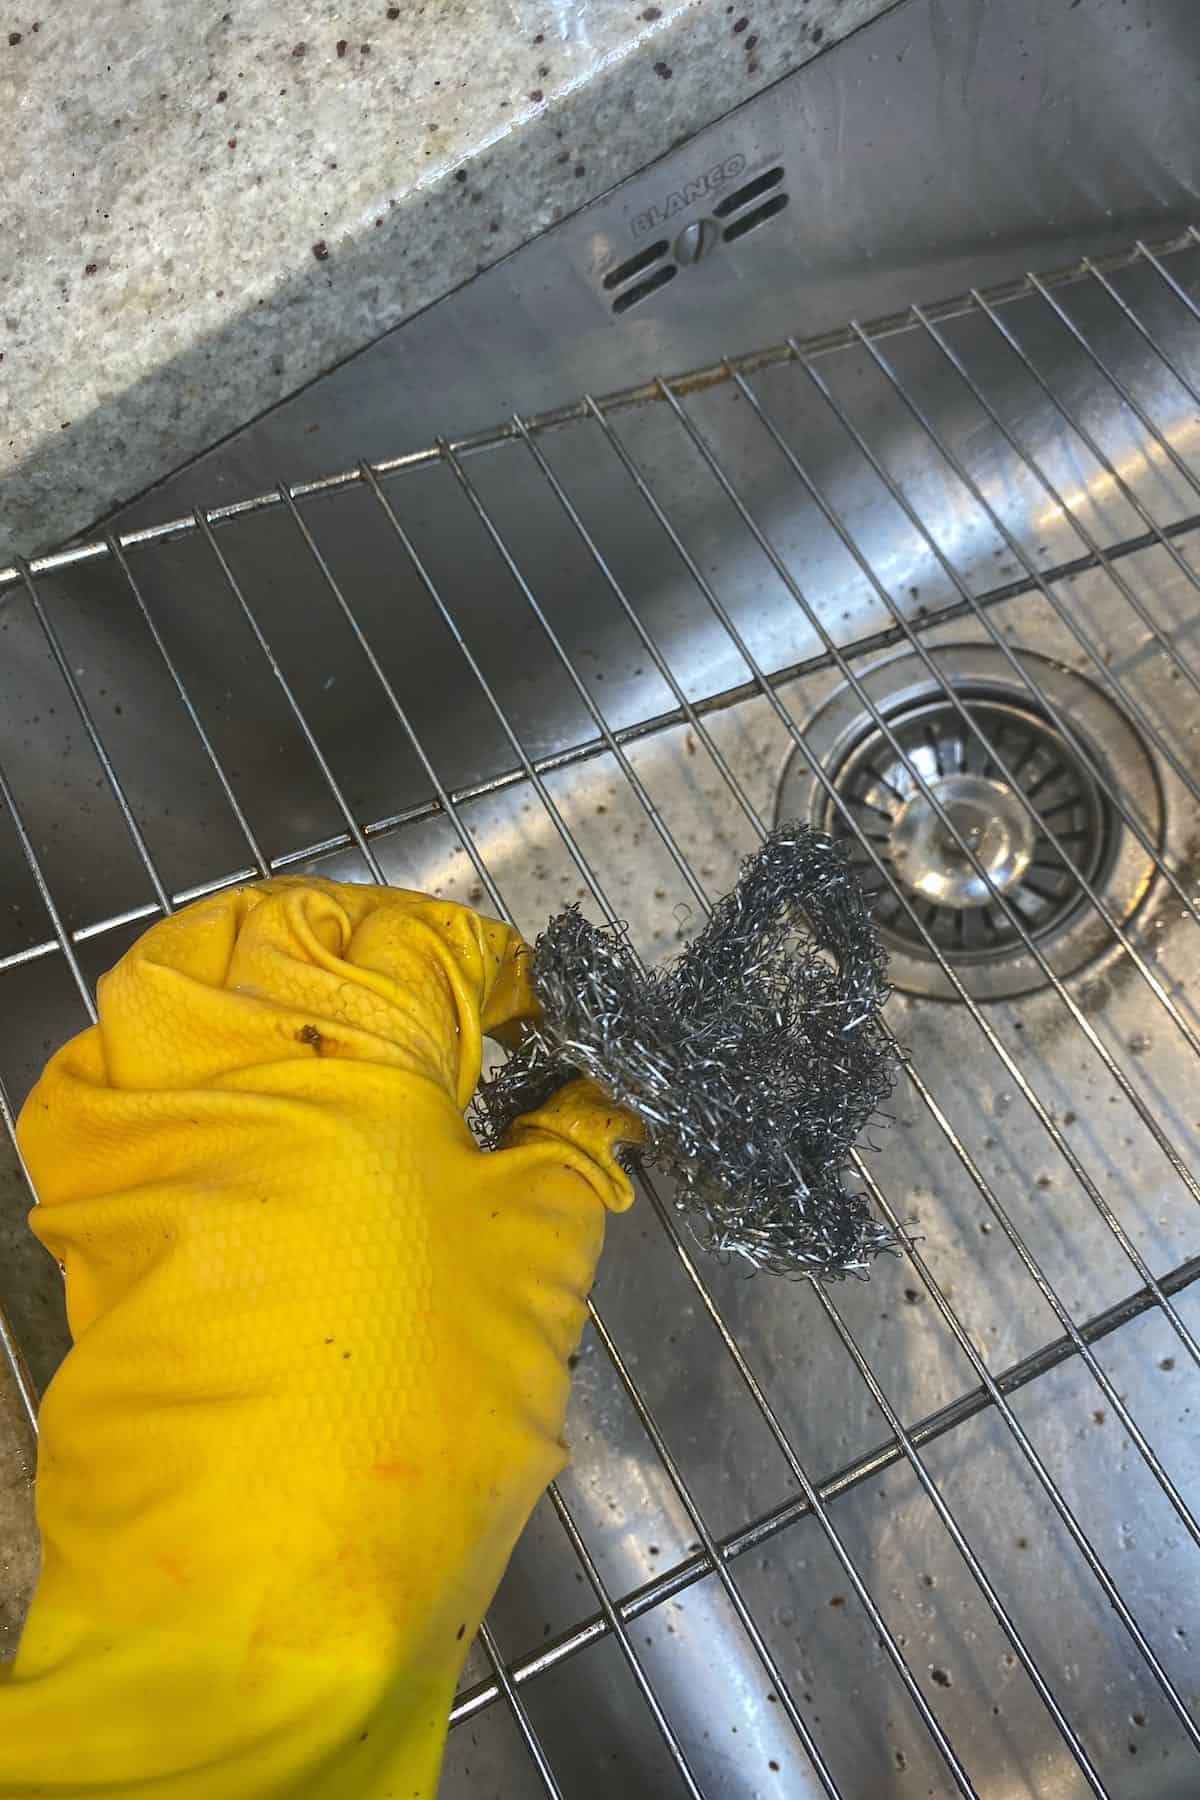
- Brush: or something to scrub the inside of the oven – I often use a stainless steel scourer. But feel free to use something slightly softer.
- Cleaning cloth: any cloth will work, but microfiber cloths are a great general-purpose option for cleaning. You’ll need one damp cloth and one dry cloth.
How To Clean An Oven With Baking Soda
Step 1: How to remove the oven door
Note: I’m not sure if this works the same for most ovens. However, this is the method that works for my own – and many others’ ovens. It’s not necessary but definitely makes cleaning the oven easier – without it being in the way.
To remove the oven door, first, open the oven door fully, and you’ll notice the two metal hinges connecting the door to the oven. On these hinges, there will be latches, locking the hinges in place.
Whichever way the latches currently lay on the hinge, you’ll need to flip it up and over completely to unlock the hinges. If the latches are stuck at all, you can usually use a tool (like a screwdriver) to help you push it open.
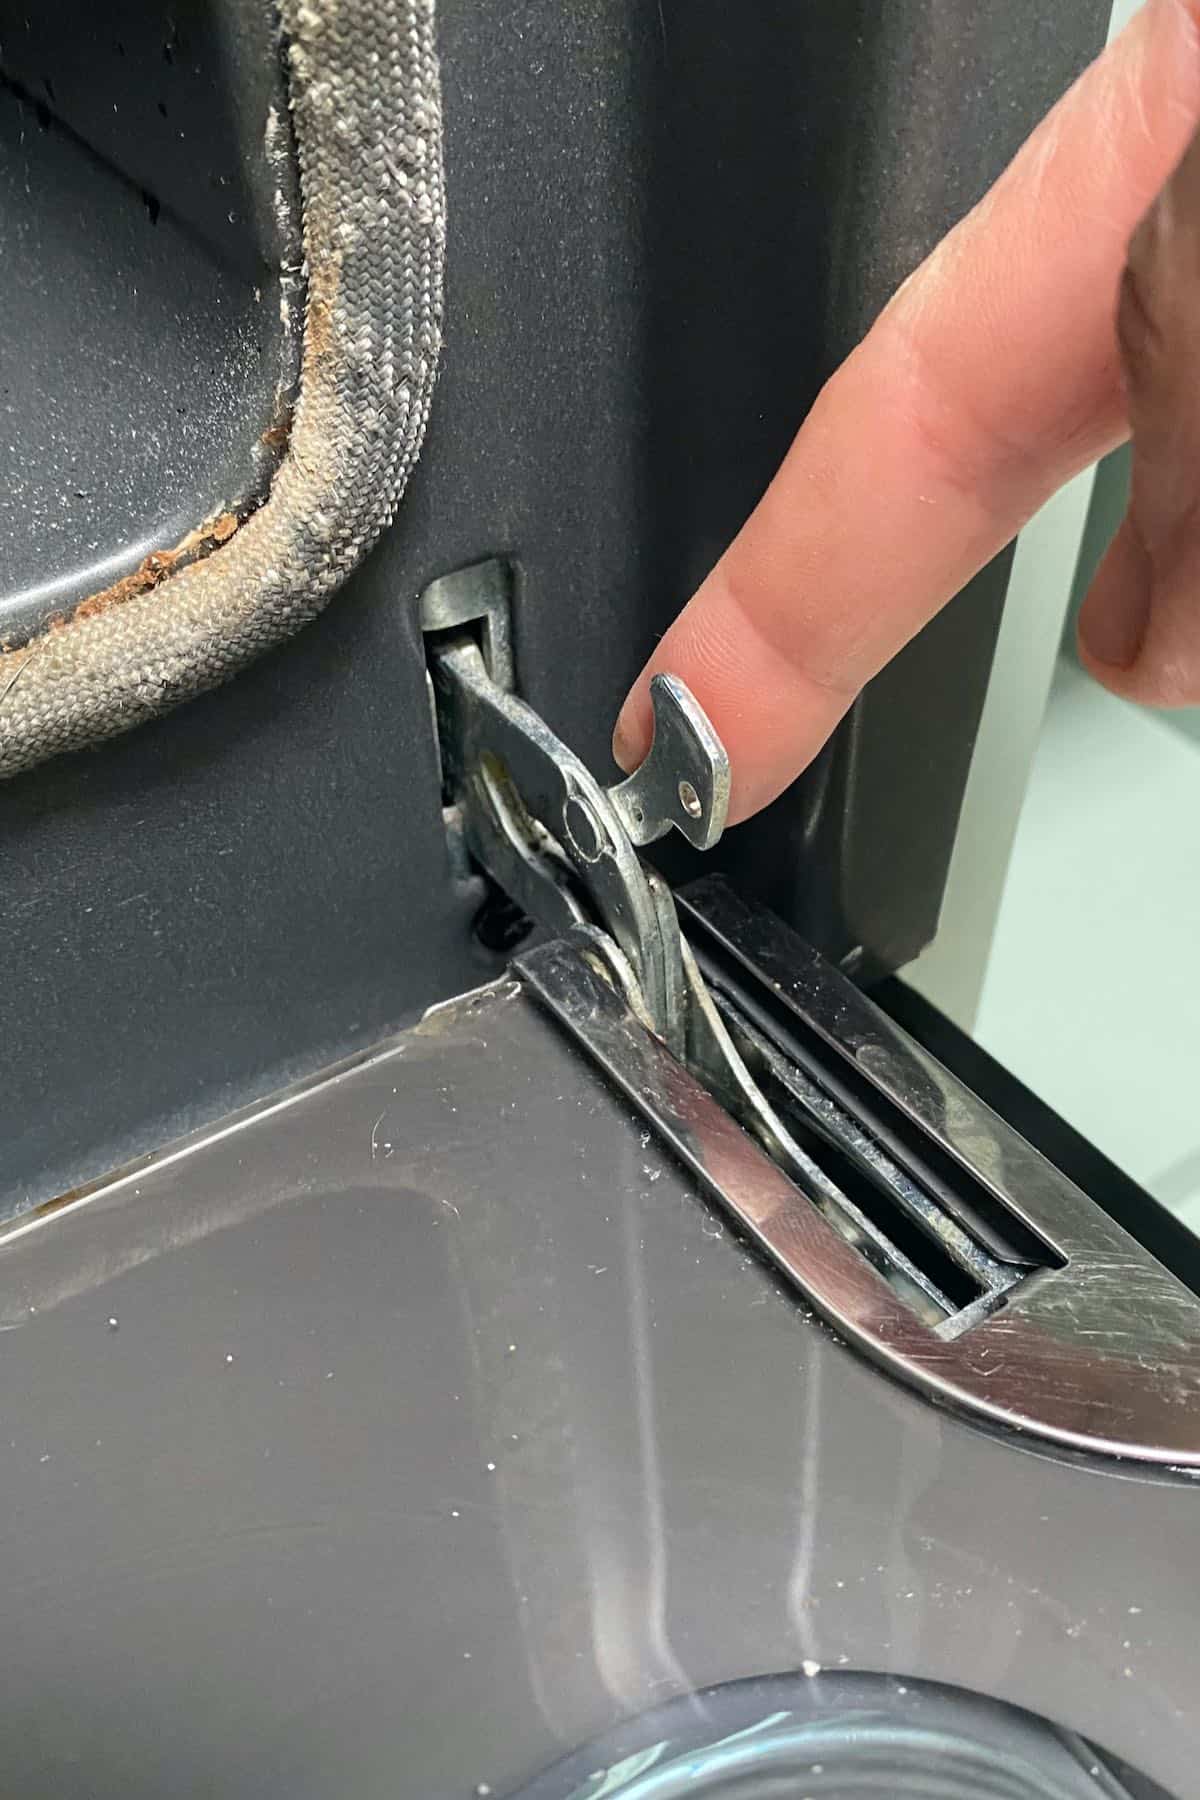
Once the latches are released, then partially close the door again until it’s about 1/3 of the way open. Hold the door firmly on bth sides, then lift the door upwards and pull it towards you. You’ll likely need to wiggle it slightly to release it from the hinges.
Place it down safely on a flat surface while you clean the inside of the oven. It may be best to lay a blanket or something underneath to avoid scratching your floor/surface and the oven door.
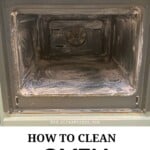
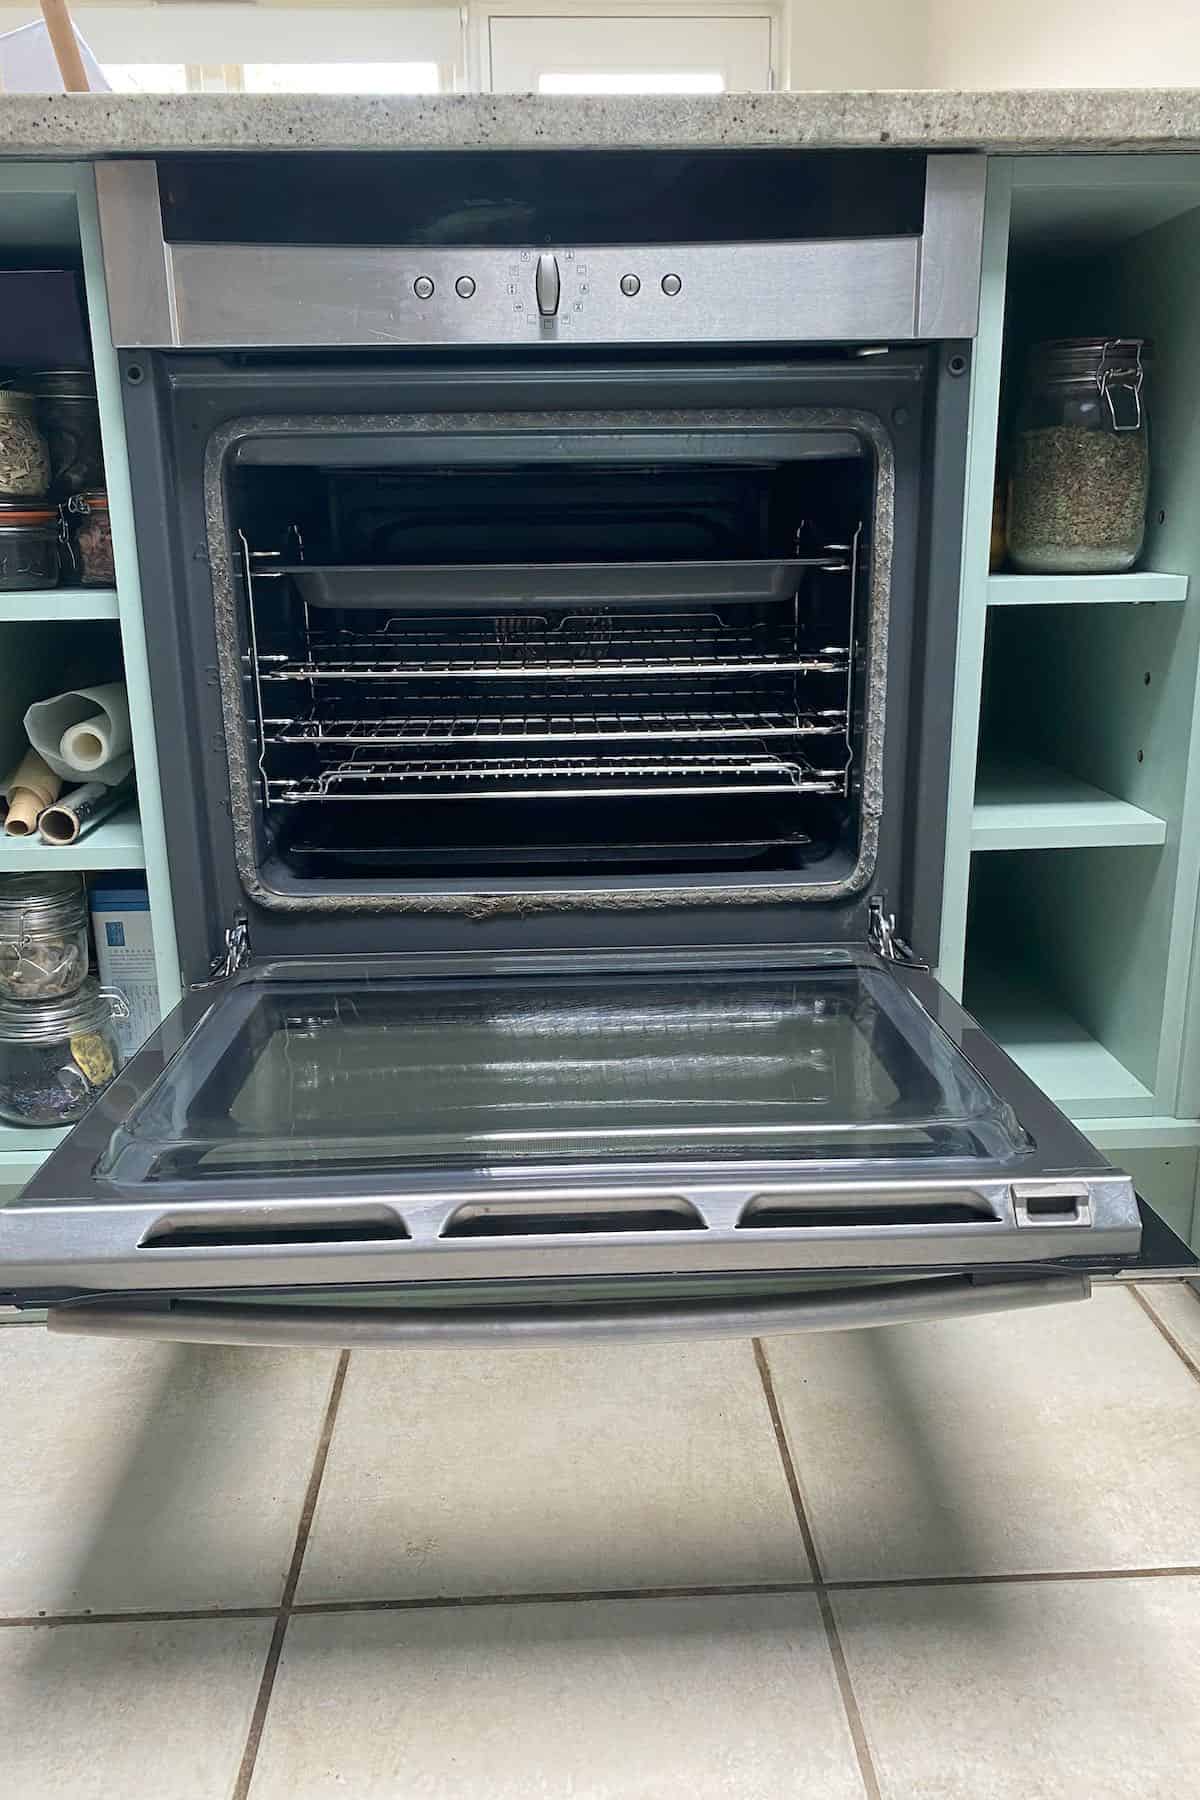
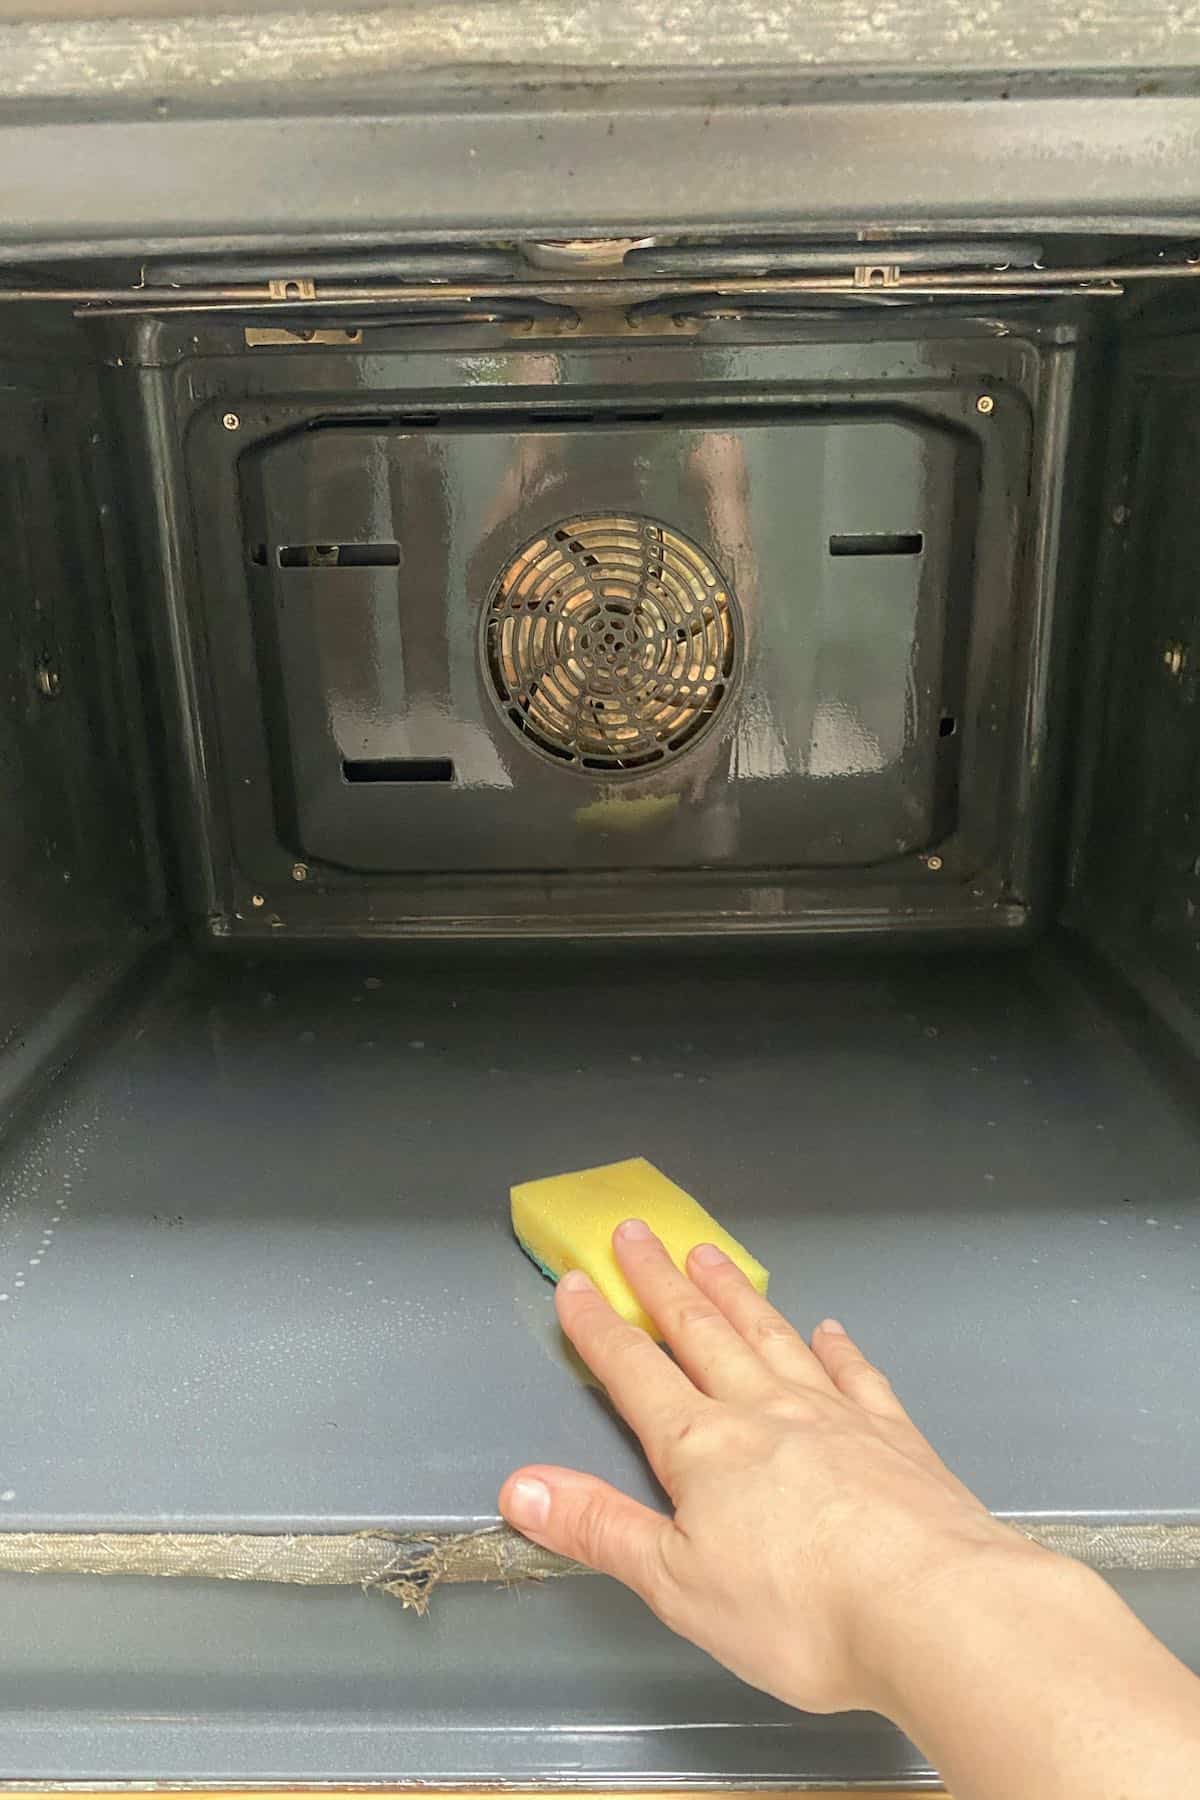
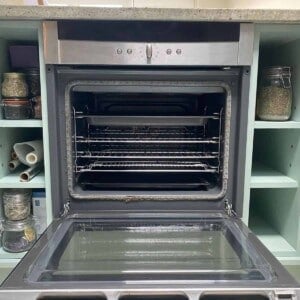
Step 2: Clean the inside of the oven
First, put on protective gloves – even if you’re using the vinegar and baking soda mixture (not the hydrogen peroxide).
Let’s start with the obvious first step – empty your oven. Remove the baking trays and wire racks. You can also detach the oven rails (on which you slide the tray/racks) by lightly lifting up and pulling them out.
Then you’ll want to remove any loose food and debris from the bottom of the oven. You can wipe this away and/or use a vacuum to do this.
The next step is to prepare the oven cleaner. Do this by combining water with baking soda – enough to make a thick, pasty consistency. I usually use around 2:1 – 3:1 baking soda to water, but usually, I eyeball the amount.
Alternatively, use hydrogen peroxide instead of water. This method cleans quicker/better and requires less scrubbing, I’ve found.
Spread the paste around the inside of your oven (you can do this by hand). If there are any particularly grimy or burnt-on areas, add a little extra paste to those areas.

Avoid putting the paste on any of the heating elements inside the oven, though.
Allow the mixture to sit for at least 1 hour (if there’s no much mess), or overnight if the oven requires a deeper clean and you want to avoid scrubbing too much.
After that, dampen your sponge/brush/cloth with a little warm water and wipe away the baking soda paste. If you have any stubborn areas, you can scrub them lightly in a circular motion or use a spatula to scrape them away.
After removing as much of the residue as possible, you can use a little vinegar-water mixture (1:1) and spray the oven. This will cause the remaining baking soda to bubble up and foam – making it easy to wipe away the remaining baking soda mixture.
Tip: Ensure that all the residue is 100% removed and nothing is in contact with the heating elements. Otherwise, you’ll end up smoking out the oven.
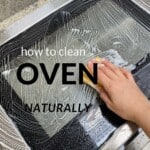
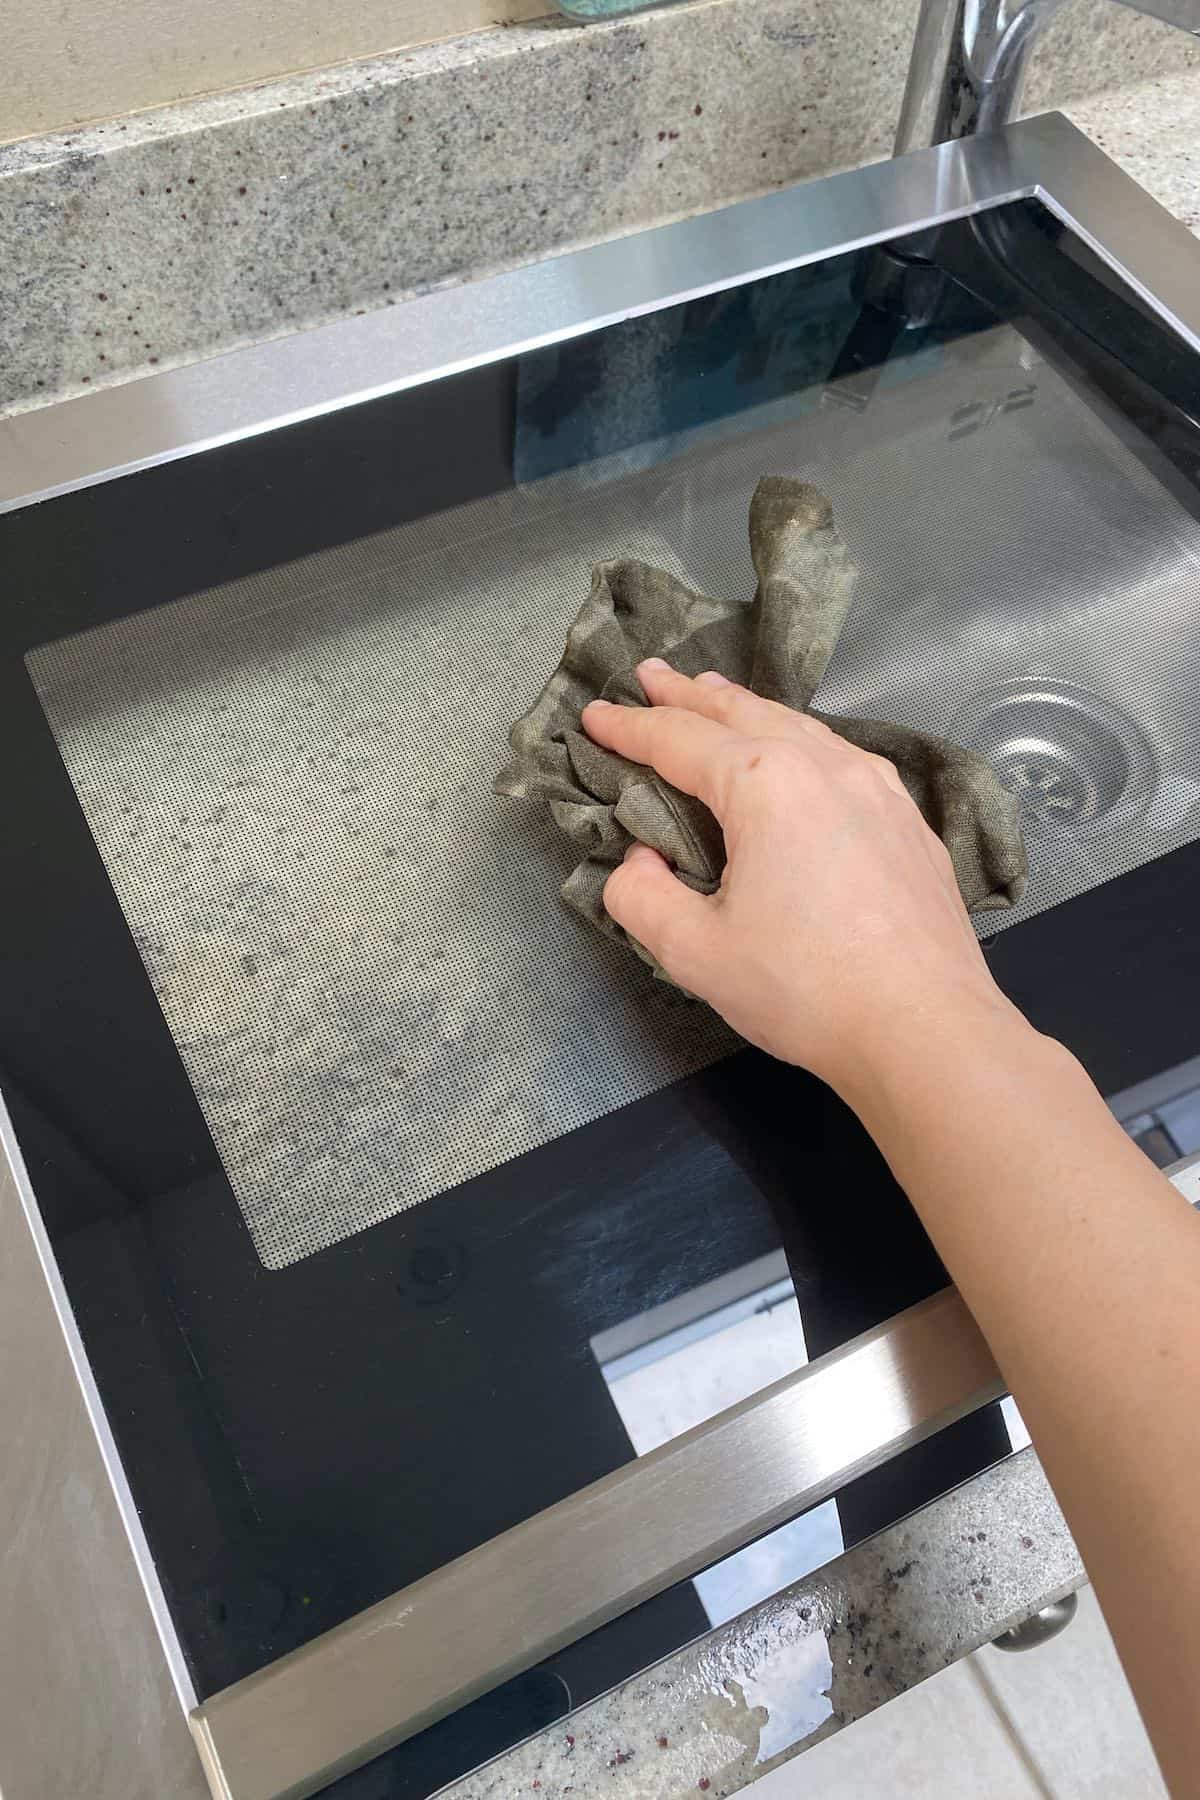
Step 3: Clean The Oven Door
To clean the glass oven door, you can use the same method as above, with a baking soda paste left to work for a while, then wiped away with a damp cloth followed by a dry cloth.
Top Tip: Don’t use any harsh brush/scourer on the glass as it can scratch the glass.
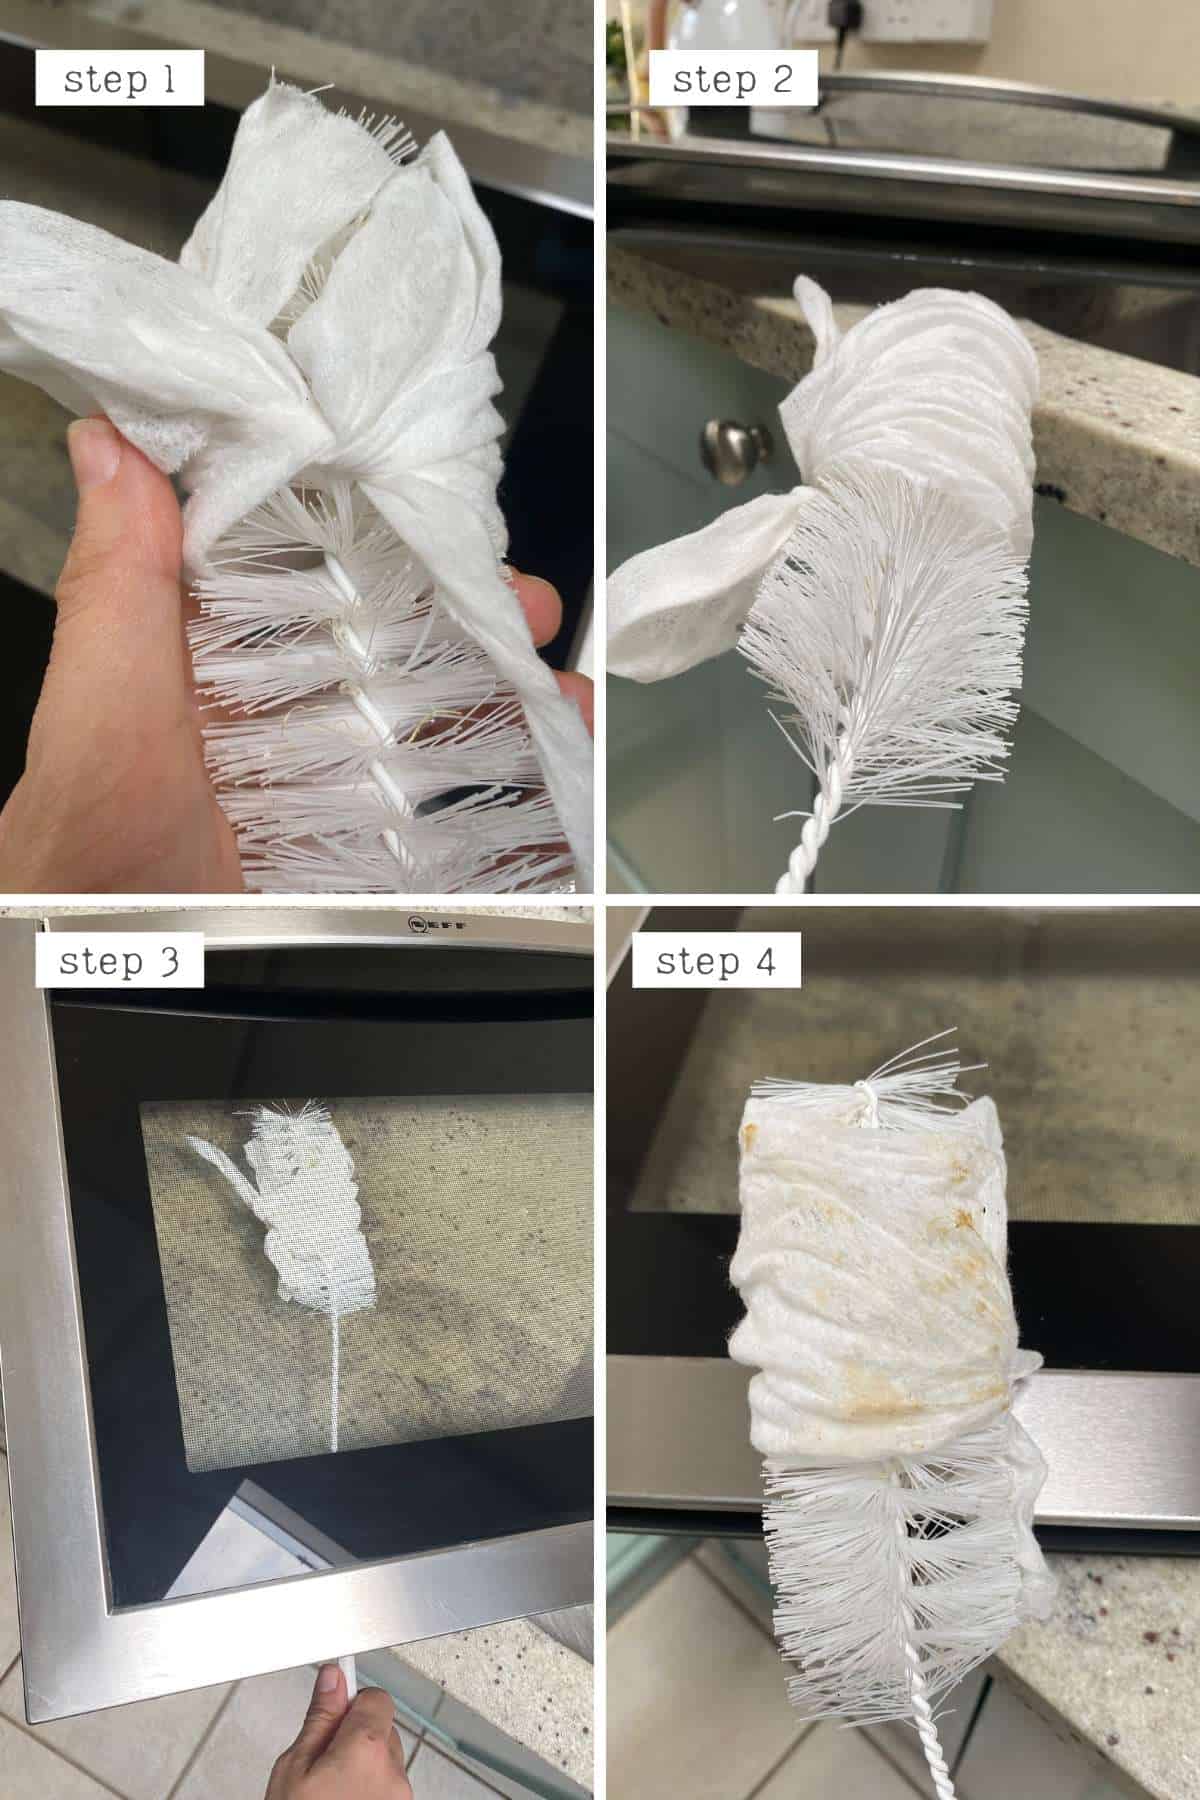
Many ovens have two layers of glass, too – with the bit between that often gets grimy and seems impossible to clean. You could remove the glass with screws – but who wants to do that?!
Instead, you can usually wrap a cloth/kitchen towel around a long kitchen brush or ruler to push down into this space and wipe it.
Step 4: Clean The Oven Rails, Wire Racks, and Baking Trays
Soak all of the oven racks and trays together in either a spare plastic storage box, your sink (if it’s large enough), or the bathtub.
To do this, lay the racks and trays down, sprinkle them with baking soda and a bit of hydrogen peroxide or vinegar, and then completely cover them with hot water to task for at least two hours or overnight.
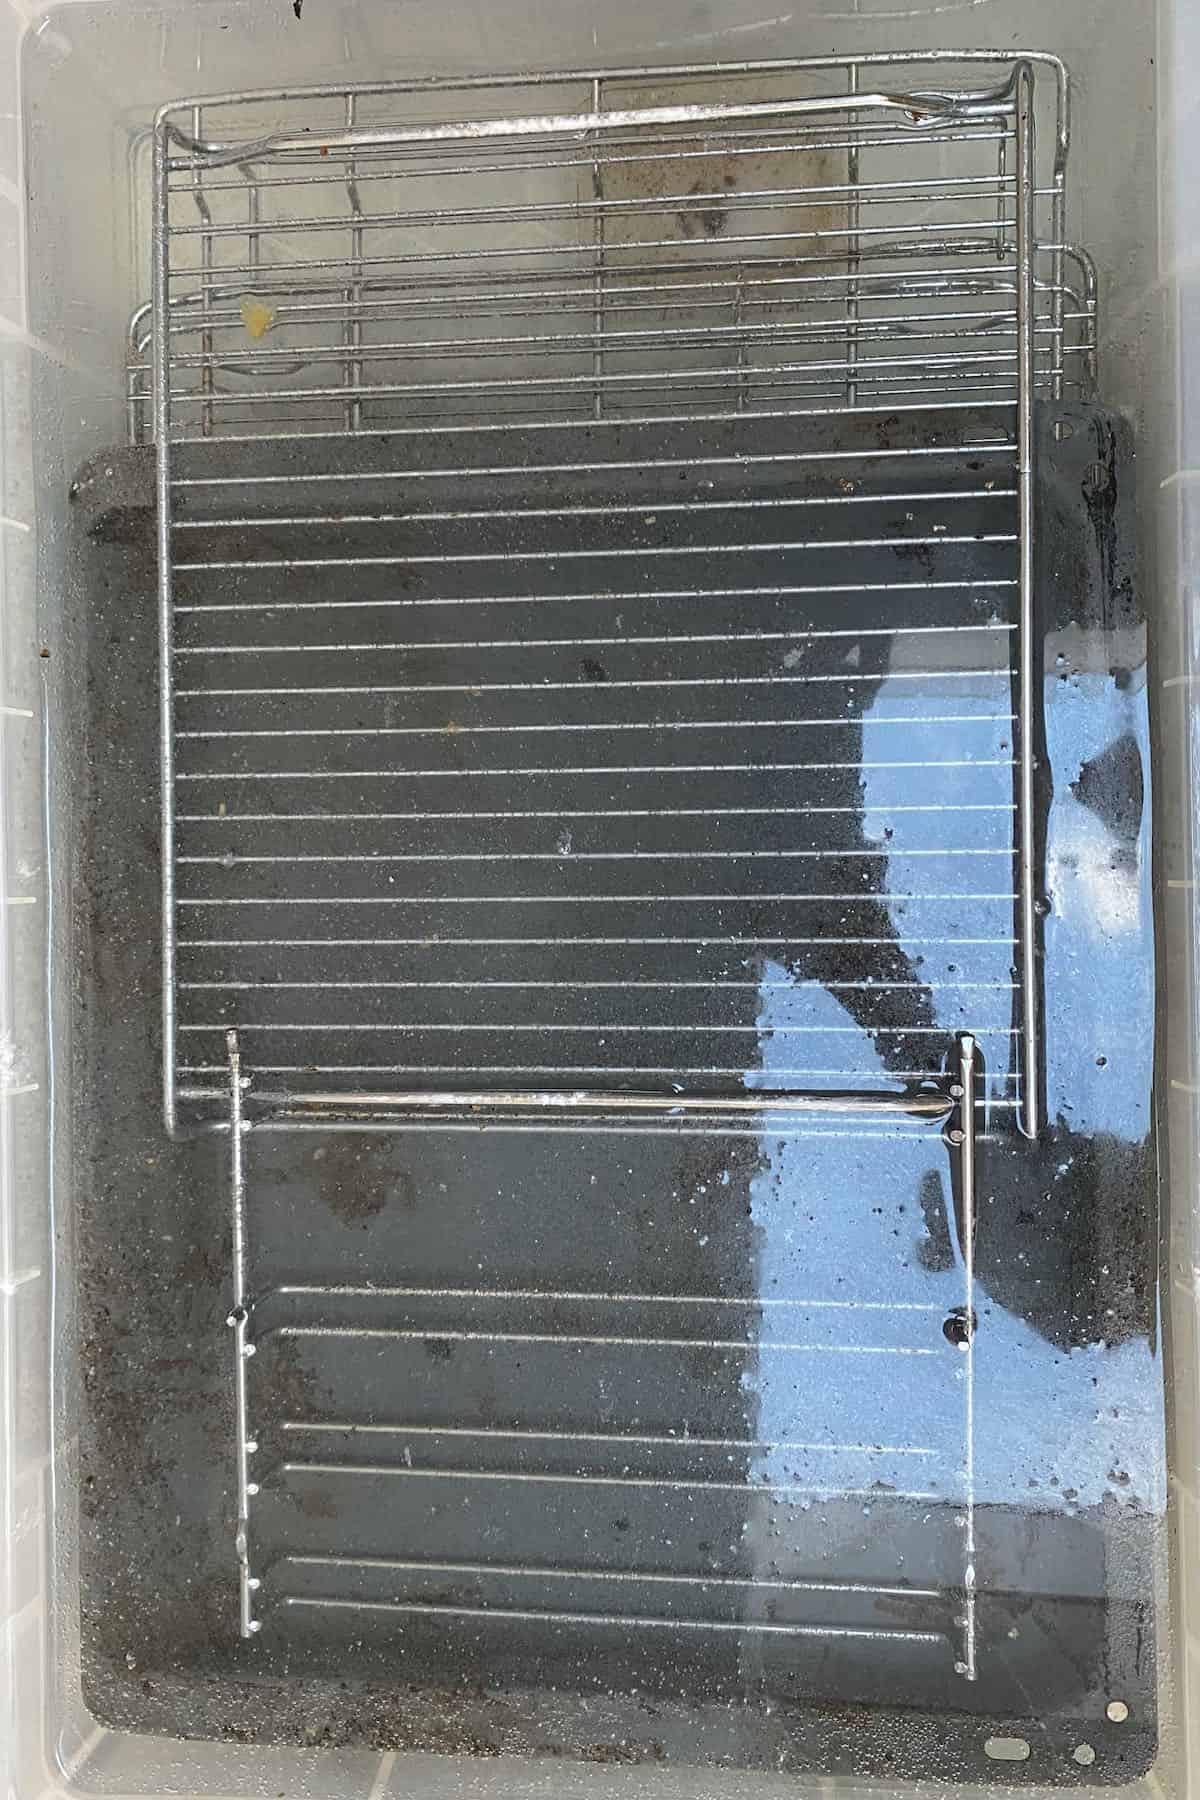
Note: Some oven racks may be dishwasher safe – check your oven manual to find out.
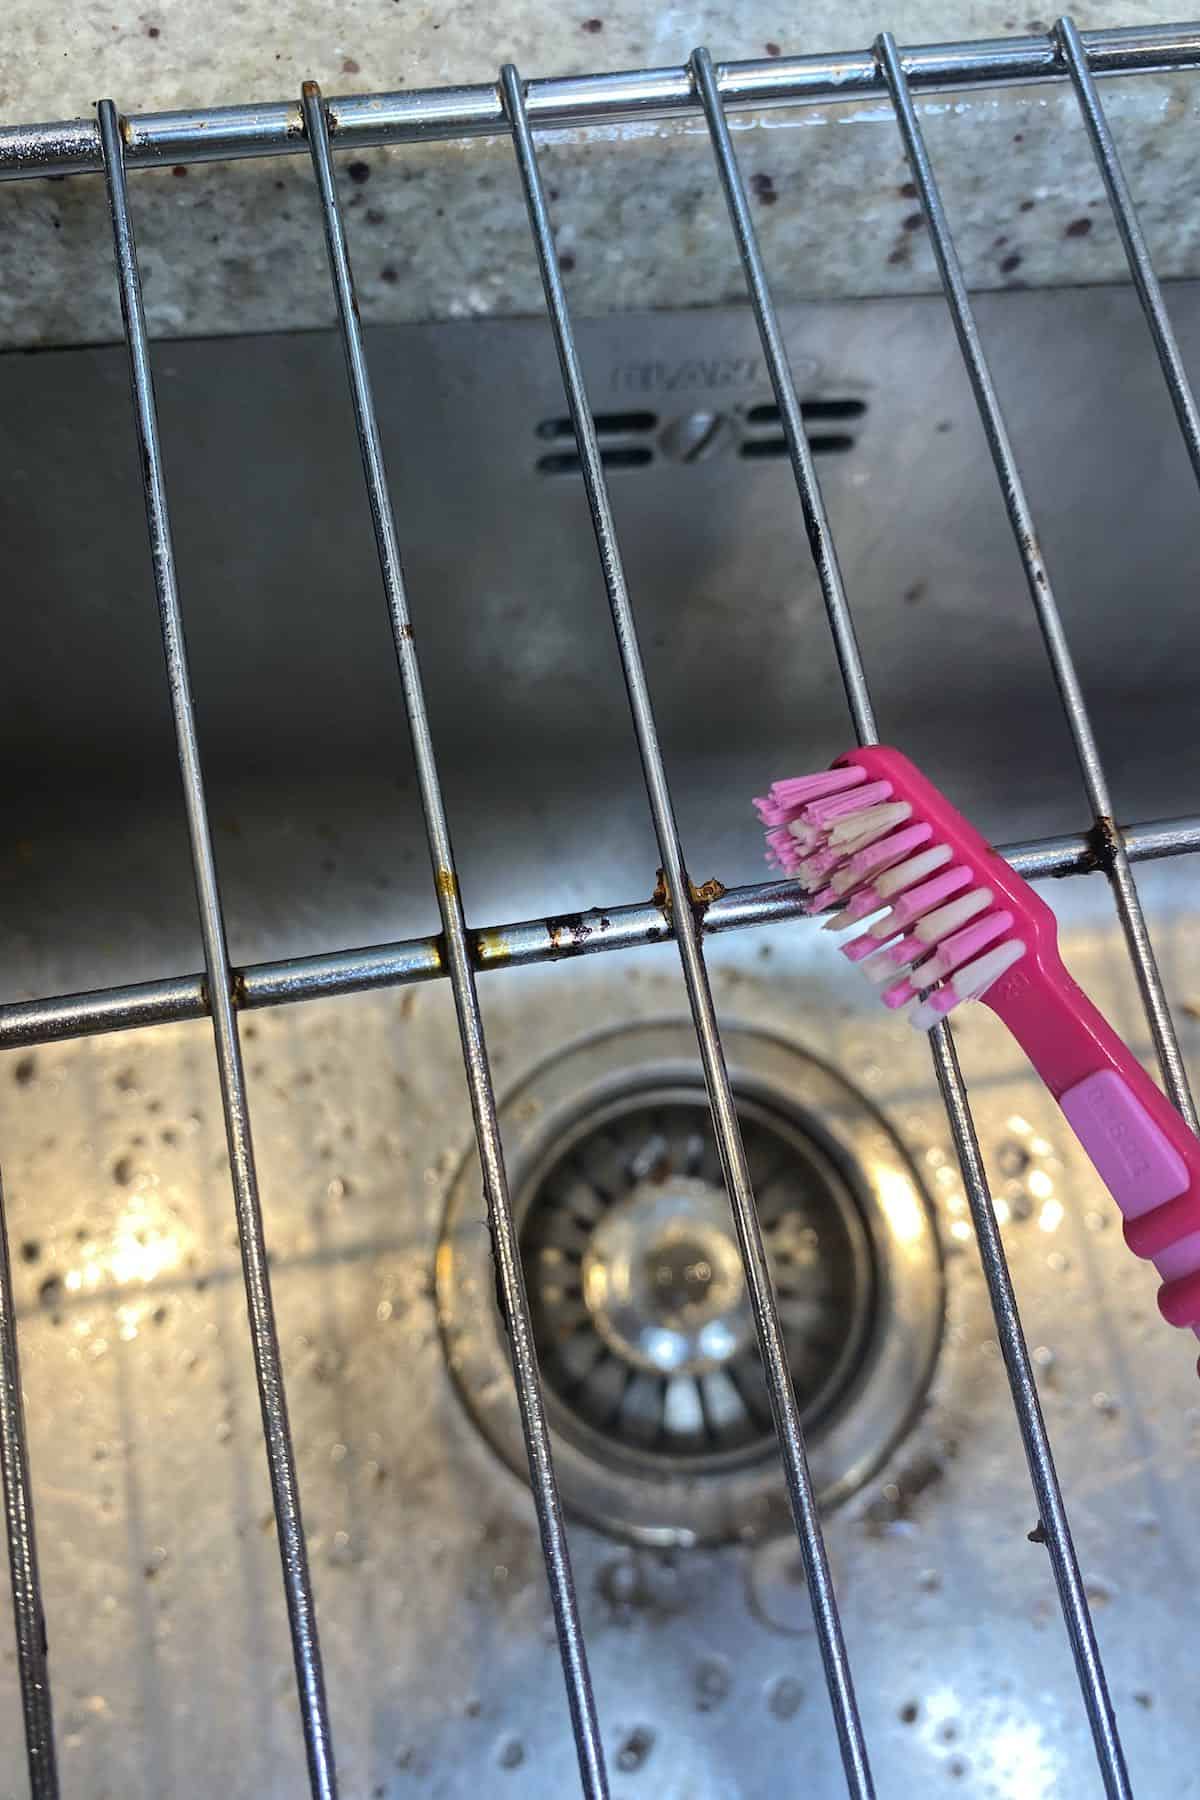
After soaking, give the racks a little scrub for any built-up dirt using a small brush (or even an old toothbrush). The key is to allow them to soak long enough that scrubbing is minimized.
After scrubbing, you can rinse and wipe down with the dry cloth and place the oven rails, wire racks, and baking tray back in the oven. Make sure to place each rail on the correct side – usually, each has its designated side, either left or right. If they have curved rods, these should be at the front.
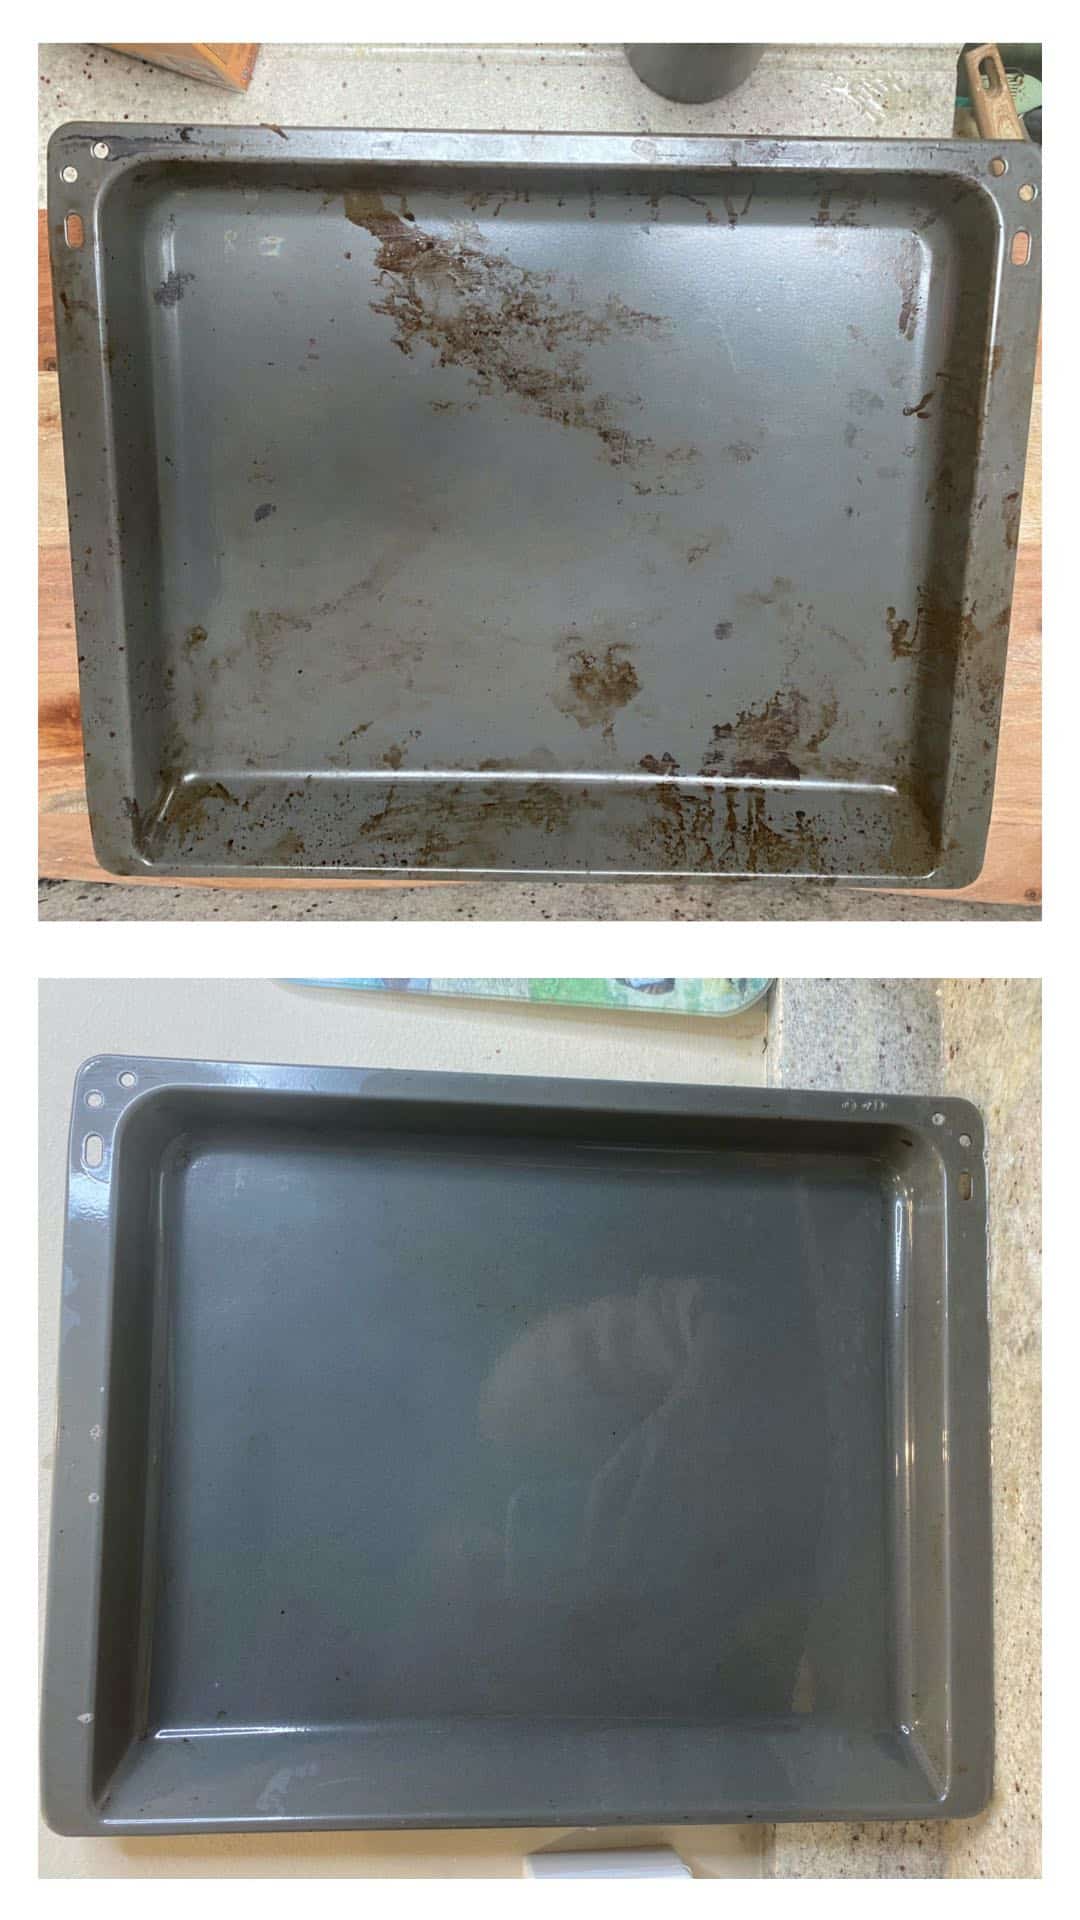
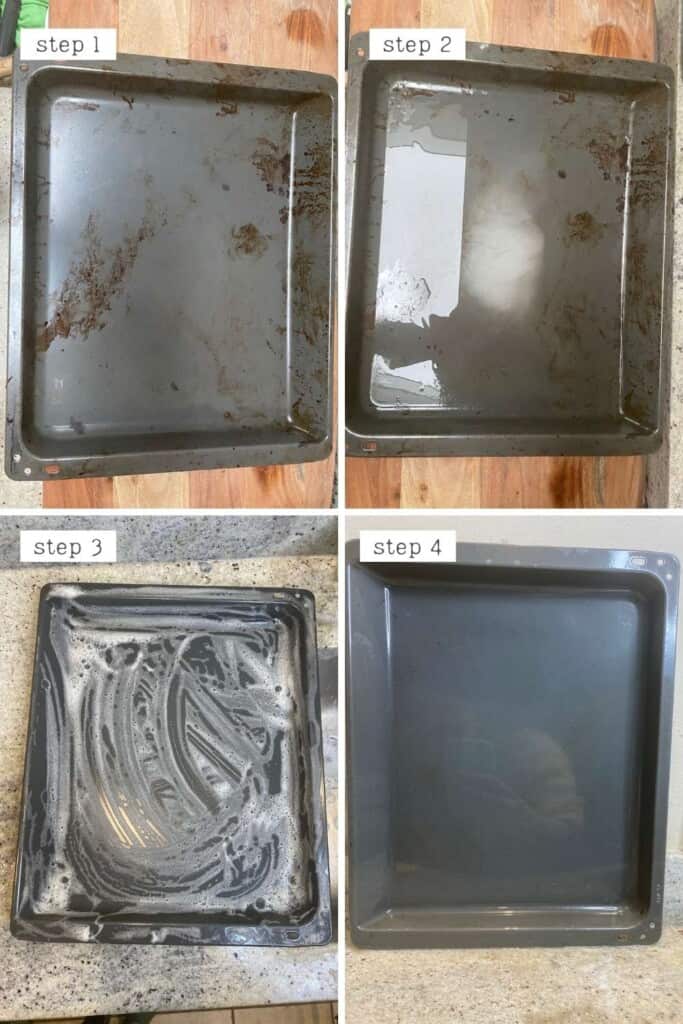
The oven trays can be easily cleaned on a more regular basis. Just place them on a flat surface, sprinkle them with baking soda and a bit of hydrogen peroxide or vinegar, and fill them up with hot water.
Let them sit like this for 30 minutes (or longer, depending on their condition), then rinse them with soapy water and wipe them down with a dry cloth.
Step 5: Put the Oven Door Back Again
This process is basically the reverse of removing it. Align the door with the hinge slots at a slight angle and push the hinges into the slots – all the way.
To test if you’ve done it correctly, try to open the door the entire way – you shouldn’t have any issues doing this. If you do, then remove the door and try again.
Once the door is successfully in position, then re-lock the latches.
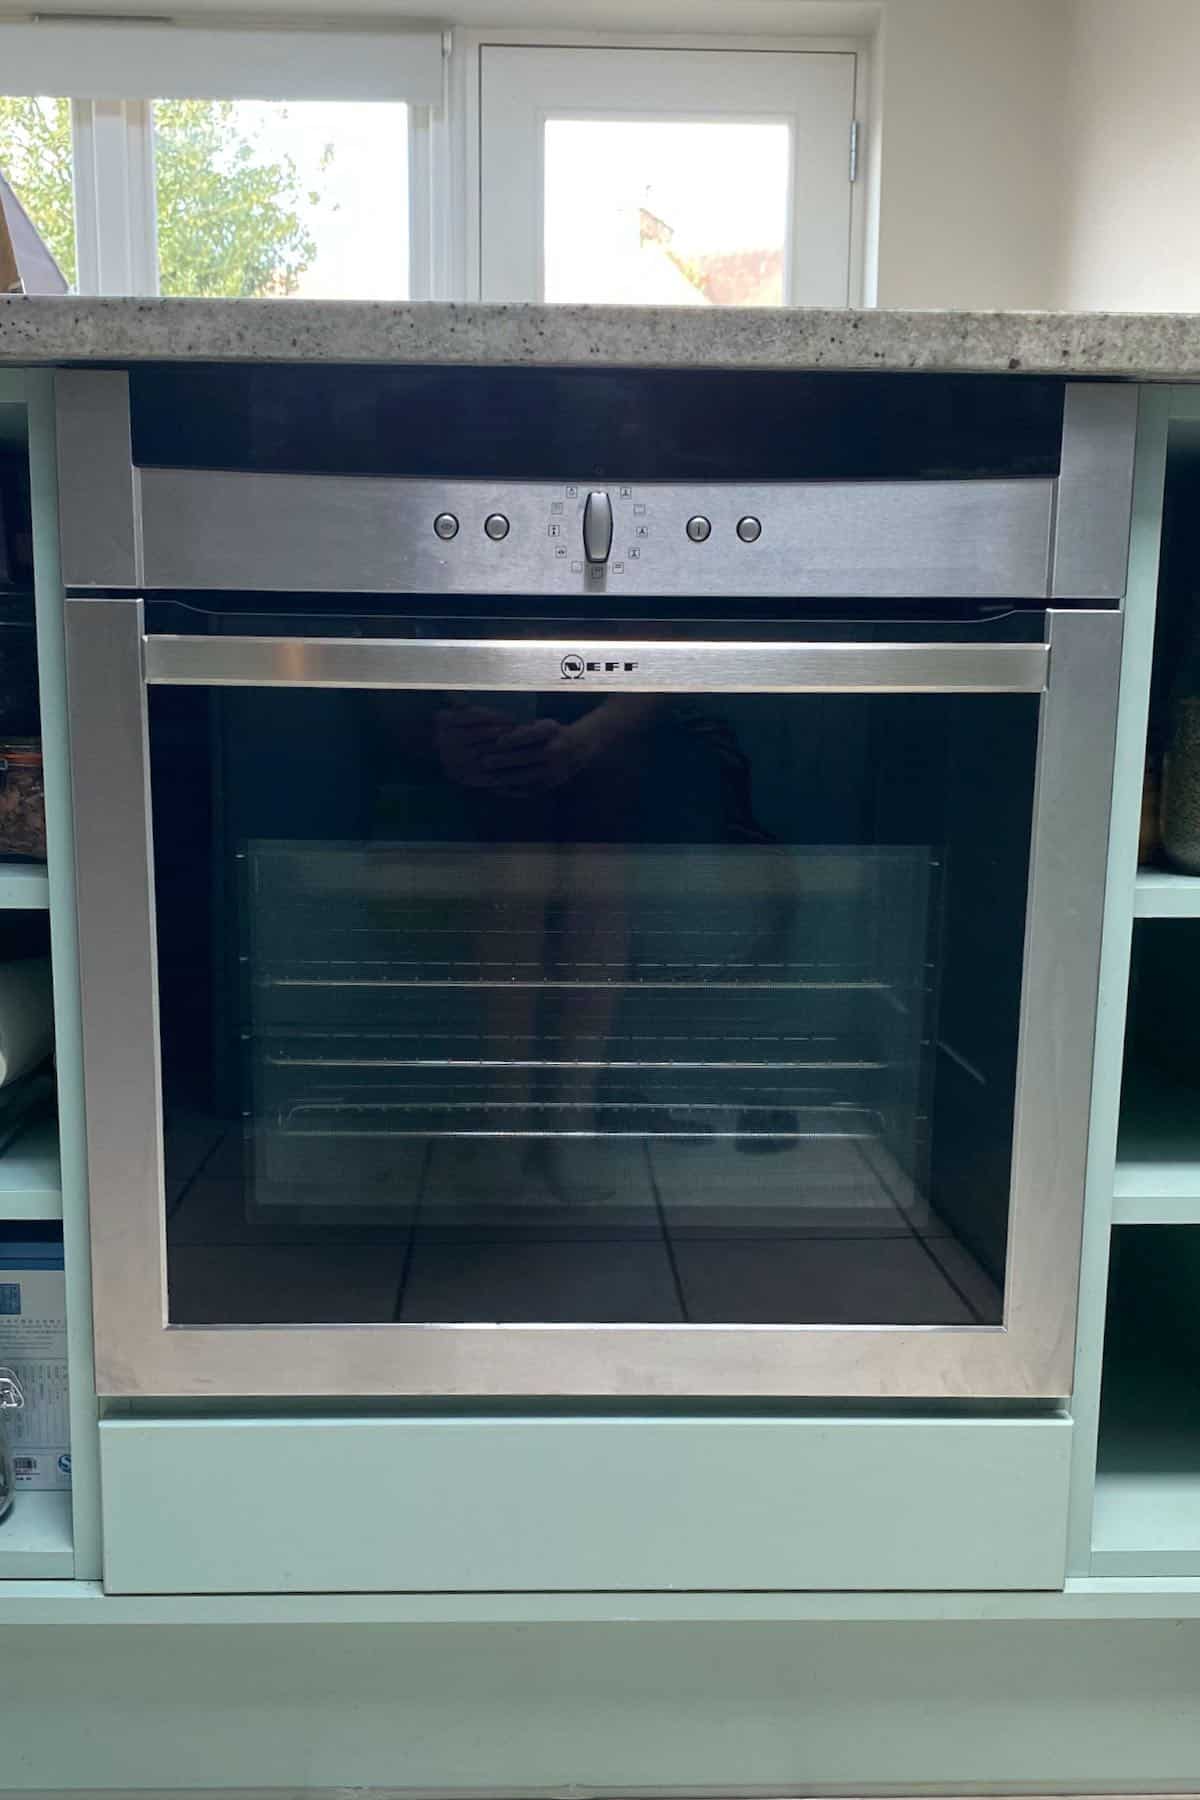
You can then, optionally, dry out the oven completely by turning it on for 10-15 minutes. This would also get rid of the ‘cleaning’ smells. This is great for avoiding those smells the next time you’re actually using the oven for food.
FAQs
I’d say giving it a quick/’light’ wipe-down once every month or so should help to stop grime from building up too much.
However, I’d do this type of deeper clean every 3-6 months (as needed, really).
Baking soda and vinegar are used a lot for natural cleaning methods. However, when the baking soda bubble up and fizzles, this is actually the two ingredients canceling each other out.
Thus this method actually cleans using the baking soda then finishes up with the vinegar. For this method, it’s best to use vinegar after wiping away the baking soda paste. That way, it causes a reaction with any leftover sediment to help you get rid of it entirely.
There is a way to “steam clean” the oven, similar to how I clean a microwave. However, this takes much longer due to the much larger space (like an hour at 250ºF/120ºC). This will steam the inside of the oven and loosen any built-up grime.
I find this method still needs a lot of scrubbing if the oven is even fairly grimy.
Besides using a natural lemon oil with the baking soda paste, you could also use a little vanilla extract when wiping down the oven with the damp cloth; this will help to naturally deodorize the oven too.
Top Tips & Method Notes
- One of the best tips for cleaning an oven is actually all about prevention: To prevent a build-up of grime at the bottom of your oven, you can purchase flexible oven liners. They can be removed, wiped off, and placed back in the oven.
- This method works best with fairly clean to relatively grimy ovens. However, if you’re looking at an oven with years of built-up grime and burnt-on food, then I’m afraid you might need to resort to tougher measures for the best results.
- For really baked-on grime, you may need to do the baking soda paste method twice but won’t need to wait overnight for the second round – just an hour or two.
Related DIYs
If you use this ‘how to clean an oven with baking soda’ method, then let me know your thoughts and questions in the comments. I’d also love to see how well it works for you in your own ovens – just tag @AlphaFoodie.
How To Clean Oven With Baking Soda (With and Without Chemicals)
Instructions
Step 1: How to remove the oven door
- Note: I'm not sure if this works the same for most ovens. However, this is the method that works for my own – and many others' ovens. It's not necessary but definitely makes cleaning the oven easier – without it being in the way.To remove the oven door, first, open the oven door fully, and you'll notice the two metal hinges connecting the door to the oven. On these hinges, there will be latches, locking the hinges in place.Whichever way the latches currently lay on the hinge, you'll need to flip it up and over completely to unlock the hinges. If the latches are stuck at all, you can usually use a tool (like a screwdriver) to help you push it open.
- Once the latches are released, then partially close the door again until it's about 1/3 of the way open. Hold the door firmly on both sides, then lift the door upwards and pull it towards you. You'll likely need to wiggle it slightly to release it from the hinges.
- Place it down safely on a flat surface while you clean the inside of the oven. It may be best to lay a blanket or something underneath to avoid scratching your floor/surface and the oven door.
Step 2: Clean the inside of the oven
- Put on protective gloves – even if you're using the vinegar and baking soda mixture (not the hydrogen peroxide).Empty the oven. Remove the baking trays and wire racks. You can also detach the oven rails (on which you slide the tray/racks) by lightly lifting up and pulling them out.
- Remove any loose food and debris from the bottom of the oven. You can wipe this away and/or use a vacuum to do this.
- Prepare the oven cleaner. Do this by combining water with baking soda – enough to make a thick, pasty consistency. I usually use around 2:1 – 3:1 baking soda to water, but usually, I eyeball the amount.Alternatively, use hydrogen peroxide instead of water. This method cleans quicker/better and requires less scrubbing, I've found.
- Spread the paste around the inside of your oven. You can do this by hand. If there are any particularly grimy or burnt-on areas, add a little extra paste to those areas.Avoid putting the paste on any of the heating elements inside the oven, though.
- Allow the mixture to sit for at least 1 hour (if there’s no much mess), or overnight if the oven requires a deeper clean and you want to avoid scrubbing too much.
- After that, dampen your sponge/cloth with a little warm water and wipe away the baking soda paste. If you have any stubborn areas, you can scrub them lightly in a circular motion or use a spatula to scrape them away.
- After removing as much of the residue as possible, you can use a little vinegar-water mixture (1:1) and spray the oven. This will cause the remaining baking soda to bubble up and foam – making it easy to wipe away the remaining baking soda mixture.Tip: Ensure that all the residue is 100% removed and nothing is in contact with the heating elements. Otherwise, you'll end up smoking out the oven.
Step 3: Clean The Oven Door
- To clean the glass oven door, you can use the same method as above, with a baking soda paste left to work for a while, then wiped away with a damp cloth followed by a dry cloth.Top Tip: Don't use any harsh brush/scourer on the glass as it can scratch the glass.
- Many ovens have two layers of glass, too – with the bit between that often gets grimy and seems impossible to clean. While you can remove the glass with screws – who wants to do that?!Instead, you can usually wrap a cloth/kitchen towel around a long kitchen brush or ruler to push down into this space and wipe it.
Step 4: Clean The Oven Rails, Wire Racks, and Baking Trays
- Soak all of the oven racks and trays together in either a spare plastic storage box, your sink (if it's large enough), or the bathtub.To do this, lay the racks and trays down, sprinkle them with baking soda and a bit of hydrogen peroxide or vinegar, and then completely cover them with hot water to task for at least two hours or overnight. Note: Some oven racks may be dishwasher safe- check your oven manual to find out.
- After soaking, give the racks a little scrub for any built-up dirt using a small brush (or even an old toothbrush). The key is to allow them to soak long enough that scrubbing is minimized.After scrubbing, you can rinse and wipe down with the dry cloth and place the oven rails, wire racks, and baking tray back in the oven. Make sure to place each rail on the correct side – usually, each has its designated side, either left or right. If they have curved rods, these should be at the front.
- The oven trays can be easily cleaned on a more regular basis. Just place them on a flat surface, sprinkle them with baking soda and a bit of hydrogen peroxide or vinegar, and fill them up with hot water. Let them sit like this for 30 minutes (or longer, depending on their condition), then rinse them with soapy water and wipe them down with a dry cloth.
Step 5: Put the Oven Door Back Again
- This process is basically the reverse of removing it. Align the door with the hinge slots at a slight angle and push the hinges into the slots – all the way.To test if you've done it correctly, try to open the door the entire way- you shouldn't have any issues doing this. If you do, then remove the door and try again.Once the door is successfully in position, then re-lock the latches.
- You can then, optionally, dry out the oven by turning it on for 10-15 minutes to dry the oven completely and get rid of the 'cleaning' smells. This is great for avoiding those smells the next time you're actually using the oven for food.
Notes
- One of the best tips for cleaning an oven is actually all about prevention: To prevent a build-up of grime at the bottom of your oven, you can purchase flexible oven liners. They can be removed, wiped off, and placed back in the oven.
- This method works best with fairly clean to relatively grimy ovens. However, if you’re looking at an oven with years of built-up grime and burnt-on food, then I’m afraid you might need to resort to tougher measures for the best results.
- For really baked-on grime, you may need to do the baking soda paste method twice but won’t need to wait overnight for the second round – just an hour or two.


Amazing!! Thank you so much
Thank you so much for your comment, Andrea!
Love this! So useful.
Thank you so much, Lily!
Great tip ! 🙂
Super useful! Thank you 🙂
Thank you so much, Albane.