
This post may contain affiliate links. Please read our disclosure policy.
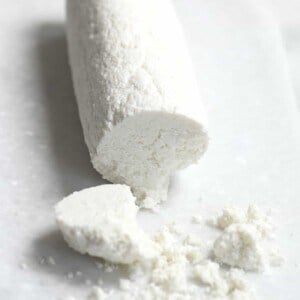
Making your own cheese at home sounds like a huge project, but learning how to make cottage cheese is actually one of the simplest kitchen wins you can have. Once you taste a fresh batch without the thickeners and gums found in the plastic tubs, you will never want to go back to the store-bought version. This cheese is soft, pillowy, and has a clean, milky flavor that works for both sweet and savory snacks.
I spent several rounds in the kitchen testing temperatures and acids to get the perfect curd. I found that avoiding ultra-pasteurized milk is the real secret to getting those soft, pillowy curds every single time. If you follow the temperature cues closely (aiming for that 180°F to 190°F range), you will get a much better yield and a texture that actually melts in your mouth.
If you enjoy making your own kitchen staples, you might also like my homemade yogurt or fresh ricotta.
Cottage cheese ingredients
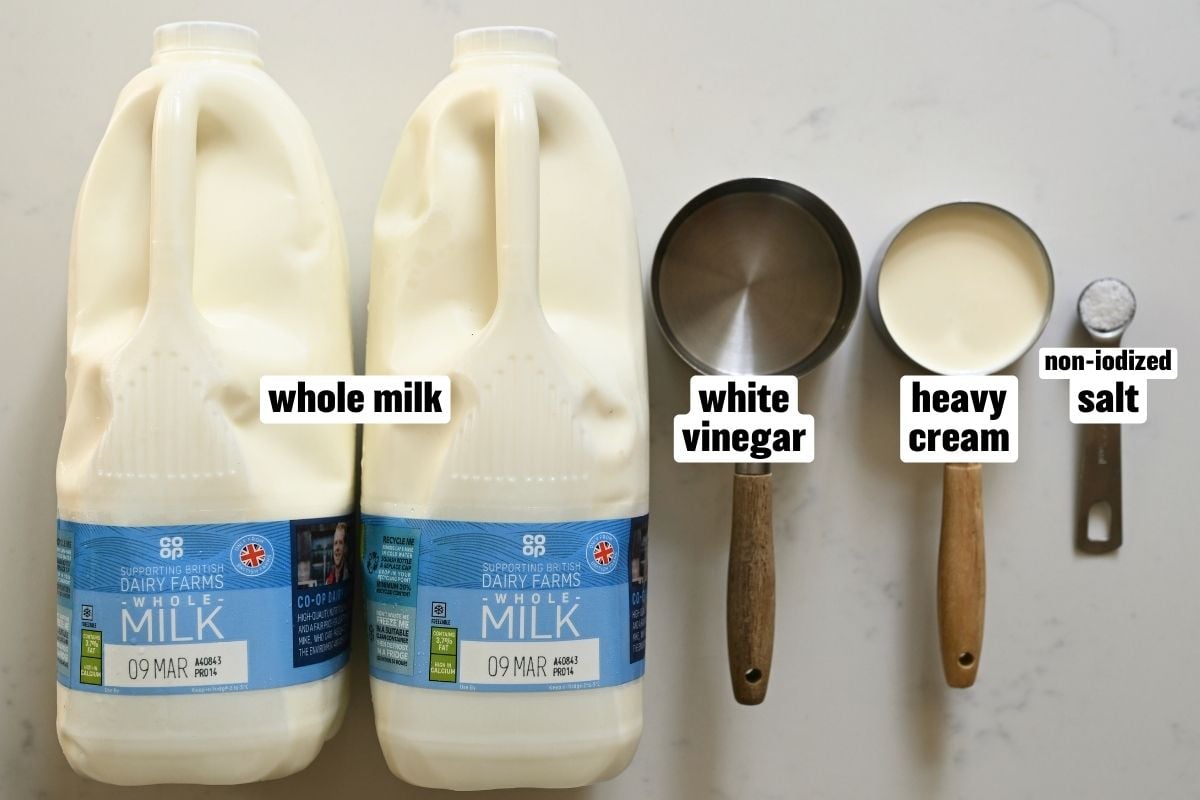
- Whole Milk: This is the base of your cheese, so use a high-quality whole milk; just make sure it is not labeled “ultra-pasteurized” or it will not curdle properly.
- White Vinegar: This is the acid that separates the solids from the liquid (the whey). You can also use lemon juice if you prefer a slightly different tang.
- Non-iodized Salt: Essential for bringing out the flavor of the fresh dairy and controlling your own sodium levels. Sea salt or cheese salt works perfectly here.
- Heavy Cream: An optional addition at the end if you prefer a “wet” and creamy style cottage cheese.
- Plain Yogurt: Another optional add-in; adding a spoonful of yogurt with live cultures gives the cheese a nice tang and a probiotic boost.
See printable recipe card below for the full ingredients list and quantities.
How to make cottage cheese
Start by warming your milk in a heavy-bottomed pot over medium heat. You want to stir it occasionally so the milk does not scorch on the bottom of the pot.
Keep a close eye on the liquid until it reaches between 180°F and 190°F. It should look very steamy with tiny bubbles just starting to form around the edges.
 1. Heat milk
 2. Reach 180F
Remove the pot from the heat and slowly stir in your vinegar or lemon juice. Stir gently for about 30 seconds; you will see the white curds immediately start to pull away from the liquid.
Cover the pot and let it sit undisturbed for at least 30 minutes. You will know it is ready when the liquid, also known as the whey, looks like a clear, pale yellow-green.
 3. Add vinegar
 5. Cover and rest
 4. Gently stir
 6.
6.Carefully pour the mixture into your lined colander. Let it drain for at least 10 minutes, or up to 30 minutes if you like a firmer, drier curd.
If you want a milder flavor, give the curds a quick rinse under cold water while they are still in the cloth.
If you like it tangier and softer, skip the rinse and just give the cheesecloth a very gentle squeeze to remove excess liquid.
 7. Drain
 9. Squeeze – optional
 8.
8. 10.
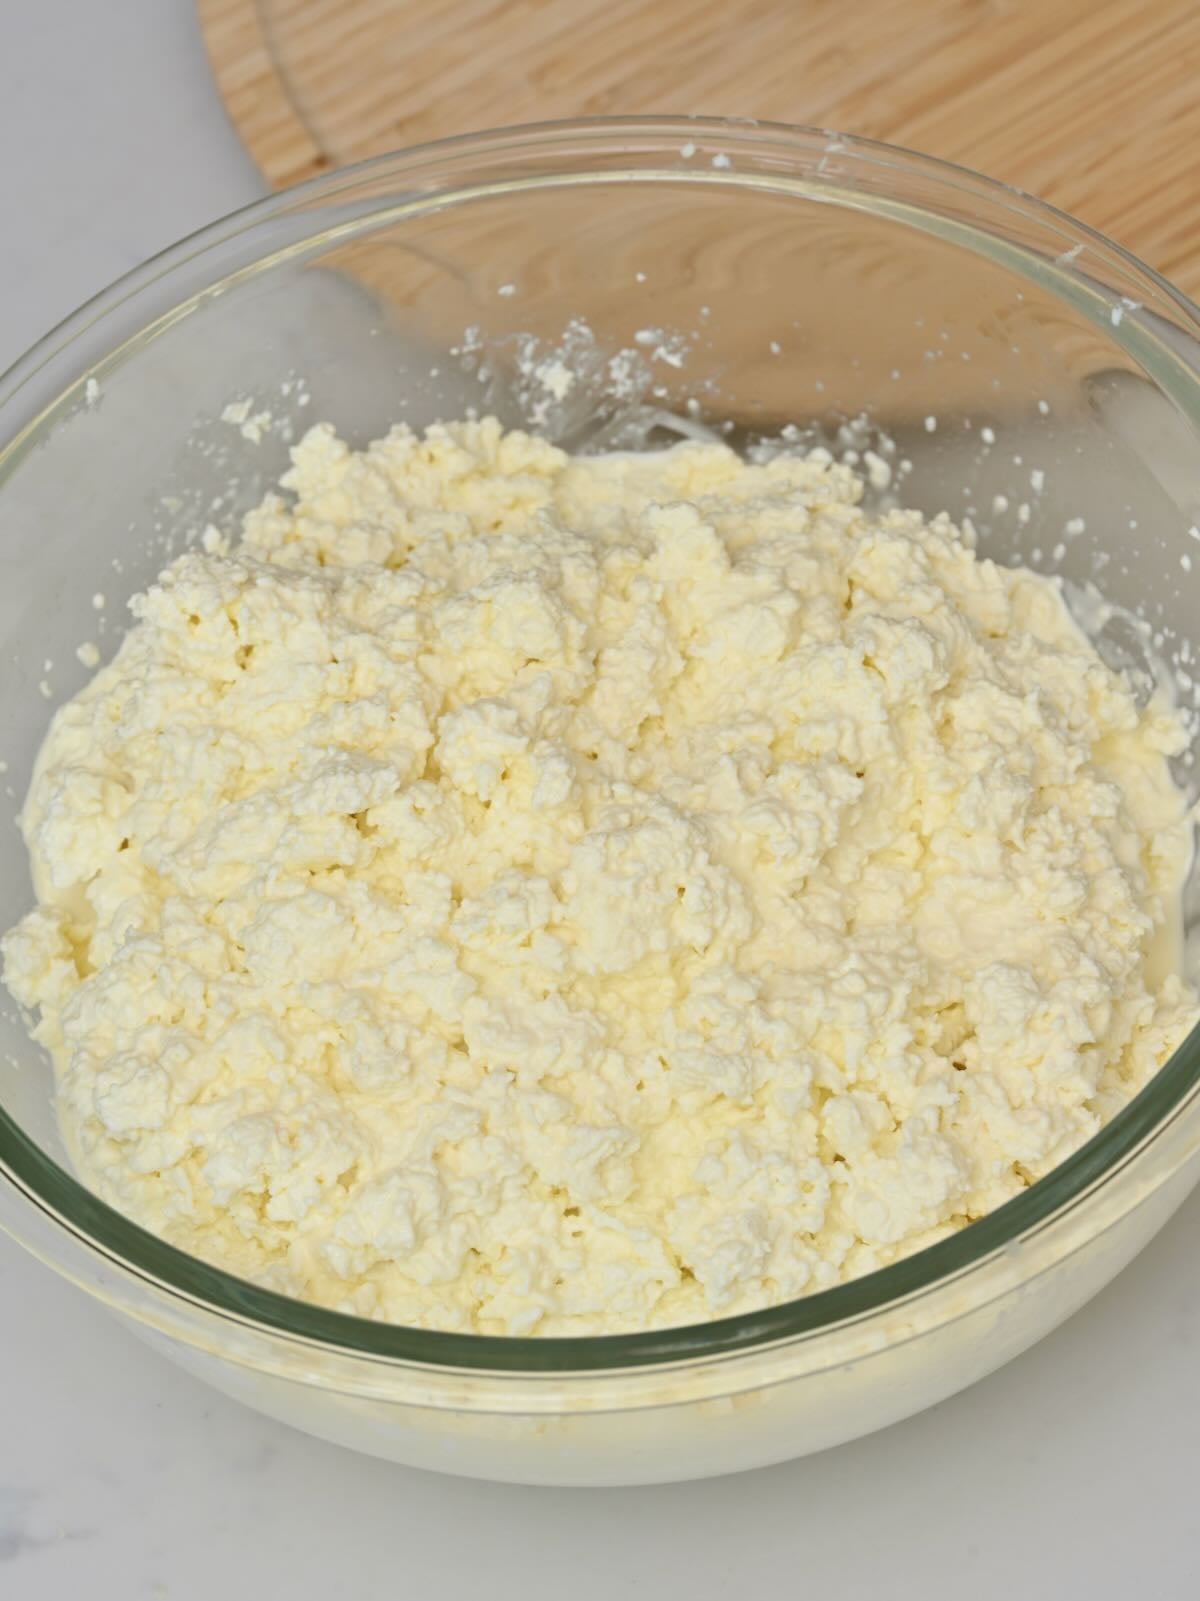
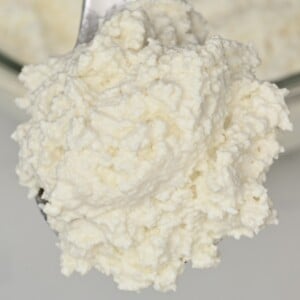
10.Transfer the curds to a bowl and break them up with a spoon. This is where you can customize the texture: stir in your salt and fold in the heavy cream, yogurt, or both until it is exactly as creamy as you like it.
Serve it immediately while fresh or chill it for an hour to let the texture set. Store any leftovers in an airtight container in the fridge for up to 5 days.
 11.
11. 13. Mix
 12. Add salt and heavy cream
 14.
14.My tips

Check the Label: Avoid milk labeled “UHT” or “Ultra-Pasteurized”. The high-heat treatment changes the proteins and prevents them from forming solid curds.
Use a Thermometer: Temperature is key. If the milk is not hot enough, it will not curdle; if it is too hot, the curds can become tough and rubbery.
Do Not Over-Stir: When you add the acid, stir very gently. Aggressive stirring can break the curds into tiny grains that are hard to drain.
Save the Whey: Do not toss the leftover liquid. It is full of protein and works beautifully in smoothies, in stews, soups or as a replacement for water in bread recipes.
How to serve cottage cheese
I love it spooned onto savory breakfasts or used as a quick protein boost in snacks. Try it alongside a cozy dinner like chicken casserole, blended into a creamy breakfast like this strawberry rose oats breakfast smoothie, or served with eggs like my veggie omelette.
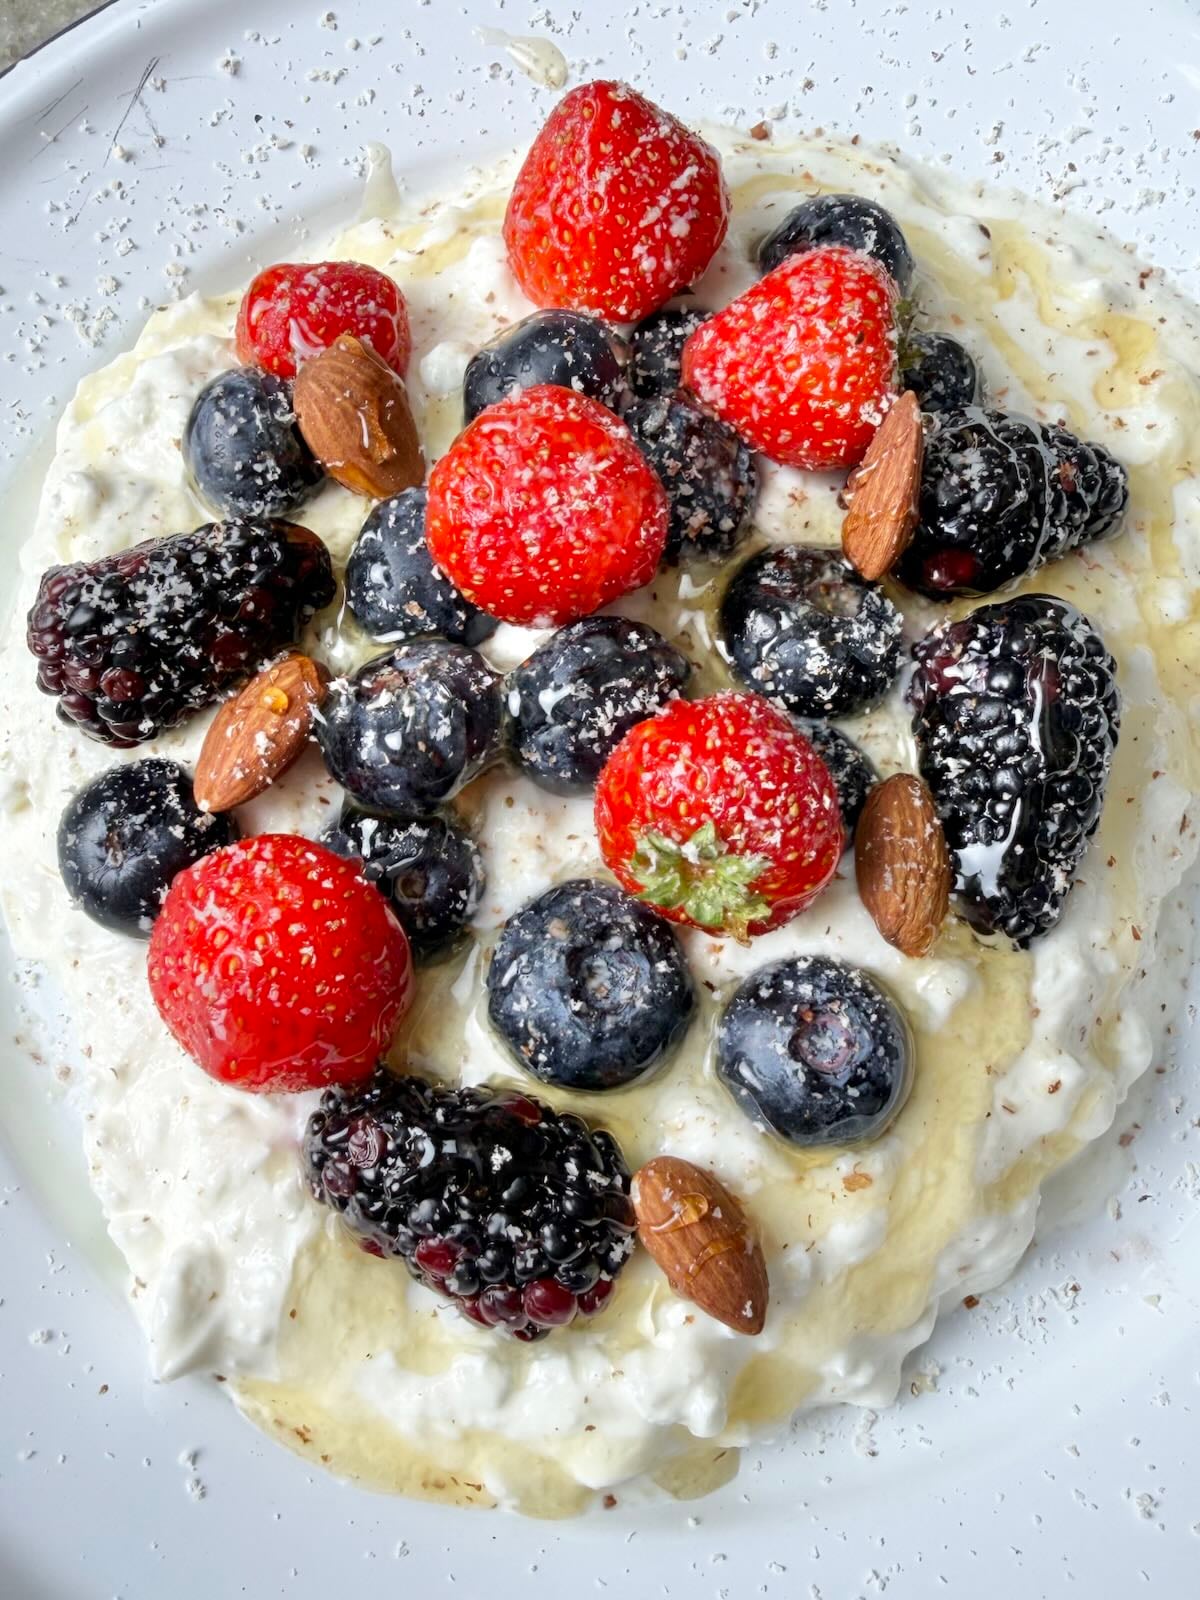
And if you’re in a sweet mood, it’s also great as the base for simple cottage cheese dessert recipes (think fruit, a drizzle of honey, and a pinch of cinnamon).
FAQs
Yes. This quick method uses vinegar or lemon juice to separate curds and whey, so rennet is not needed.
You can expect to get about 3 cups of fresh cottage cheese from a single gallon of milk.
Yes, you can use 2% milk, though the results will be slightly less creamy than when using whole milk. Avoid non-dairy milks for this method as they will not curdle properly.
Cottage cheese is made by acidifying milk to create larger curds, while ricotta is traditionally made from the leftover whey and results in a much finer, spreadable texture.
More cheese recipes
If you want to keep going with homemade cheese, here are three favorites to try next:

If you try this recipe, I would really appreciate a star rating and short review below. It truly supports my work and helps others find the recipe.
How to Make Cottage Cheese
Equipment
- Fine mesh strainer or colander
- Cheesecloth (Muslin cloth) or clean thin kitchen towel
- Airtight container
Ingredients
- 1 gallon whole milk
- ¾ cup white vinegar or lemon juice (for more tang)
- 1 teaspoon kosher salt (non-iodized) plus more to taste
- ¼ cup heavy cream optional
- 3 tablespoons plain yogurt optional, with live cultures
Instructions
- Line a colander with cheesecloth or set a fine-mesh sieve over a large bowl and set it aside.
- Pour the milk into a heavy-bottomed pot and warm it over medium heat. Stir occasionally to prevent scorching until the milk reaches 180°F to 190°F and looks steamy with small bubbles around the edge.
- Remove the pot from the heat and slowly stir in the vinegar or lemon juice for about 20 to 30 seconds. Cover the pot and let it sit until the curds set and the whey looks pale yellow-green, about 20 to 30 minutes.
- Carefully pour the mixture into the lined colander. Let it drain until the curds reach your preferred texture, which usually takes 10 to 30 minutes.
- For a milder flavor and firmer curds, rinse them under cold water while gently squeezing the cloth. For a tangier and softer cottage cheese, skip the rinsing step and just squeeze the cloth lightly to remove excess liquid.
- Transfer the curds to a bowl and break them up with a spoon. Stir in the salt, then add the heavy cream and/or yogurt if you want a creamier, tangier finish. Serve immediately or chill in the refrigerator.
Video
Notes
Nutrition
Nutrition information is automatically calculated, so should only be used as an approximation.


This looks so delicious! I want to give it a try!
I hope you give it a try. Let me know how it goes!