
This post may contain affiliate links. Please read our disclosure policy.

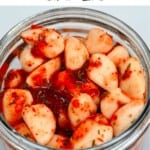

How to make pickled garlic at home; either plain or spicy pickled garlic – with a quick and simple process! Prepare the plain pickled garlic first and transform it into TikTok trending spicy pickled garlic!
Pickling has become one of my favorite things to do this past year or so. Along with this pickled garlic recipe, I’ve already posted pickled red onion, pickled jalapeños, easy pickled cucumber, and pink pickled turnips!
Within this post, I’ll take you through how to make plain pickled garlic and a delicious spicy pickled garlic recipe, using just 5 base ingredients and, if wanted, an extra 4 ingredients to make delicious chili/spicy garlic pickle!
Spicy pickled garlic is one of the newest ‘trends’ on TikTok, which means, obviously, I’m diving in headfirst. I’ve already shared my versions of baked oatmeal (like this strawberry cheesecake and peanut butter chocolate version), corn riblets, baked feta pasta, and the viral tortilla hack (all in 2021!) – the time for garlic is here!
While the version shared on TikTok uses pre-made pickled garlic in a jar, I thought – why not make it entirely from scratch?! That way, you can be 100% in control of every ingredient added to the dish!
Best of all, this process takes no time at all to prep, and the resulting pickled garlic can be stored in the refrigerator for several months (without canning). Garlic in vinegar has never tasted so good!
Want to save this recipe?
The pickled garlic ingredients
For plain garlic pickles
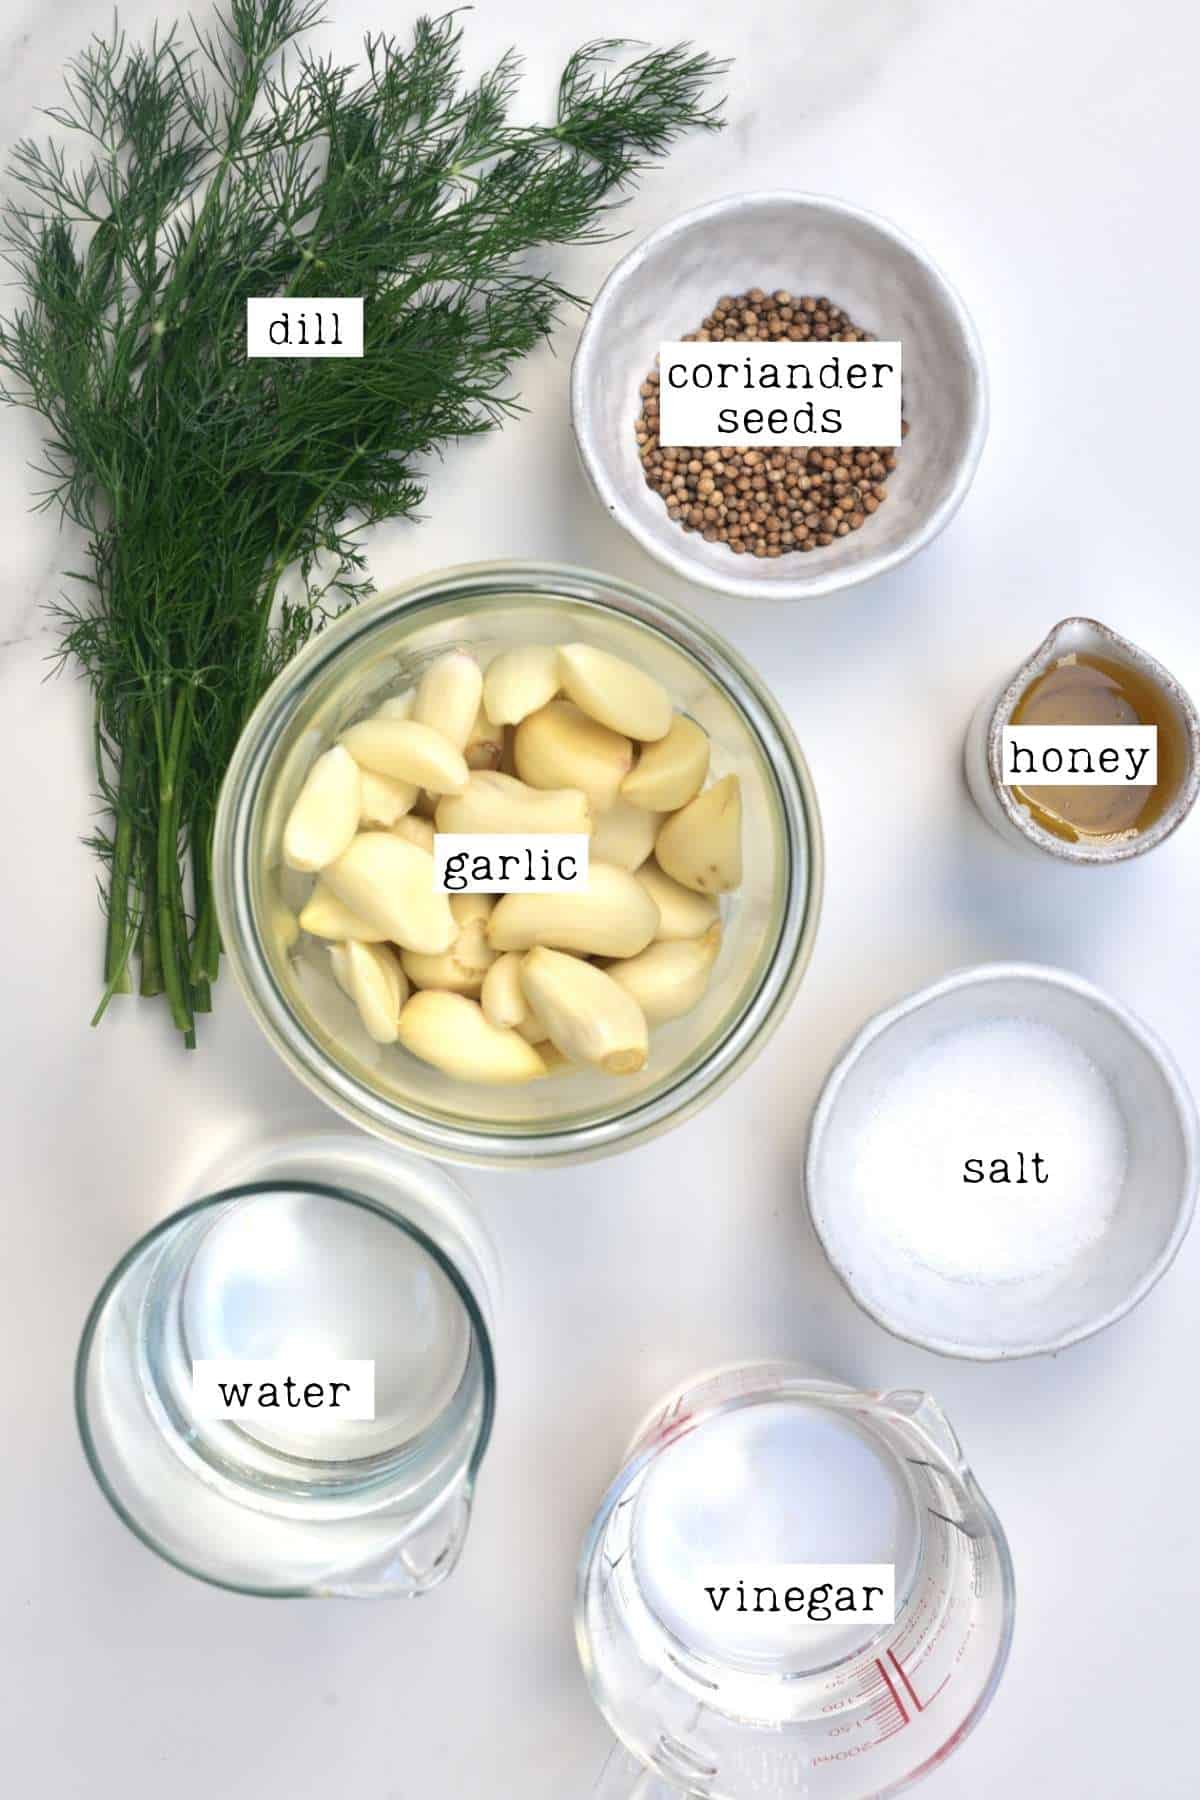
- Garlic: and lots of it! Use fresh garlic (younger garlic will be less pungent), and feel free to use one of these methods to peel them quickly and easily! There are several varieties of garlic available – I recommend using a ‘hardneck’ or ‘softneck’ variety.
- Vinegar: I used white distilled vinegar. However, feel free to experiment with vinegar varieties for different results. I often use apple cider vinegar for pickling.
- Herbs: dill and coriander seeds – these are two of my favorite add-ins when pickling anything.
- Honey (optional): alternatively, you could use maple syrup or granulated sugar. I prefer honey as I find it adds more flavor and is slightly sweeter than sugar.
- Salt: I recommend using pickling salt or a salt with no additives, even though you can use regular salt. Just keep in mind that the brine may become cloudy from the salt, which can look a little like ‘spoil.’
- Water: I use filtered water for the best results though it’s not necessary.
For spicy pickled garlic

- Pickled garlic: using the below method to pickle the garlic or store-bought pickled garlic if you want it ready ‘immediately’.
- Hot sauce: use your hot sauce of choice, like sriracha.
- Chili powder: or red chili flakes – feel free to adjust the amount based on your preferred spice levels.
- Dried thyme: this is technically optional but tastes really nice with the spicy ingredients.
- Honey: a little sweetener works well to balance the spicy flavor. Feel free to use maple instead for a vegan option.
How to make pickled garlic
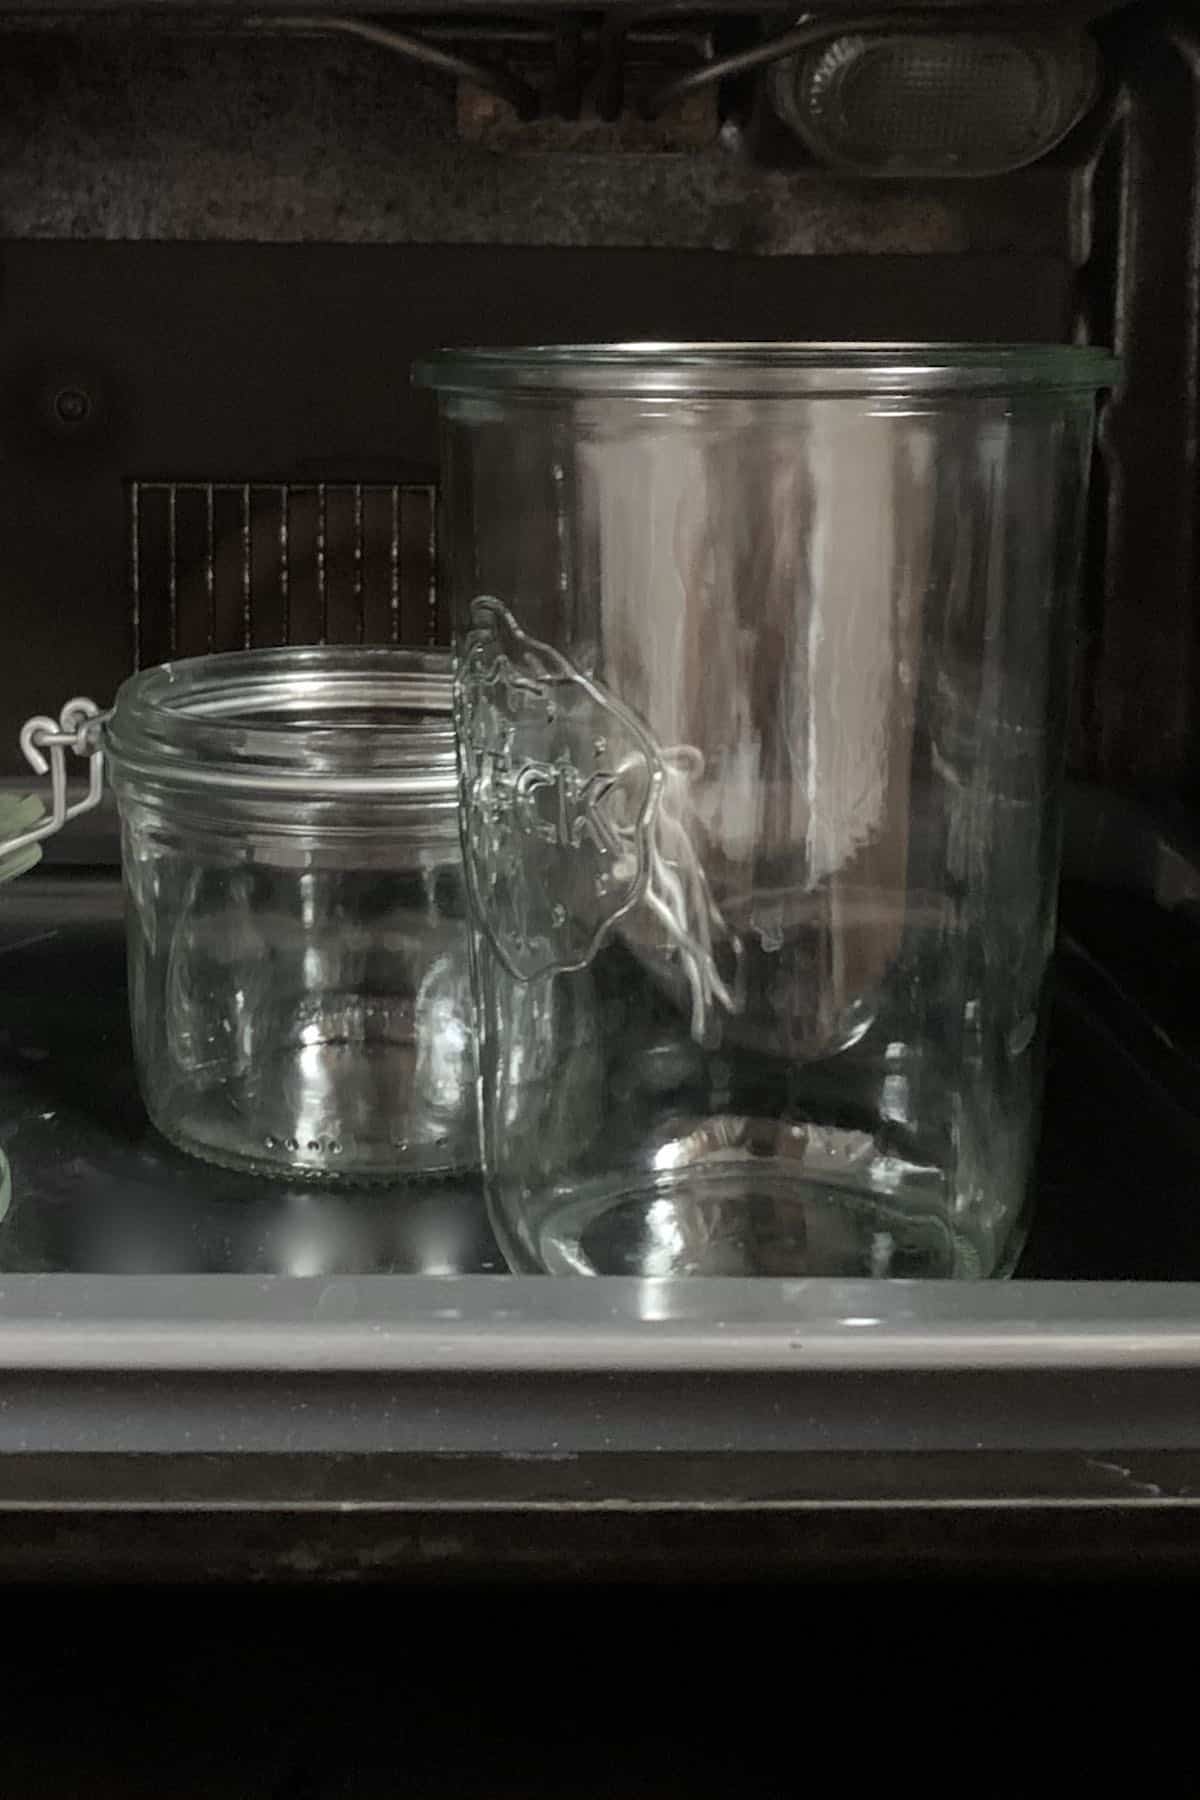
Step 1: Sterilize the jars
Wash the jars and lids in hot soapy water, rinsing well. Then place the jars (no rubber or plastic parts) in a pre-heated oven for ten minutes at 160ºC/325ºF to completely dry them.
Step 2: Prepare the pickling brine
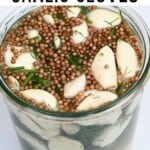
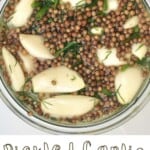
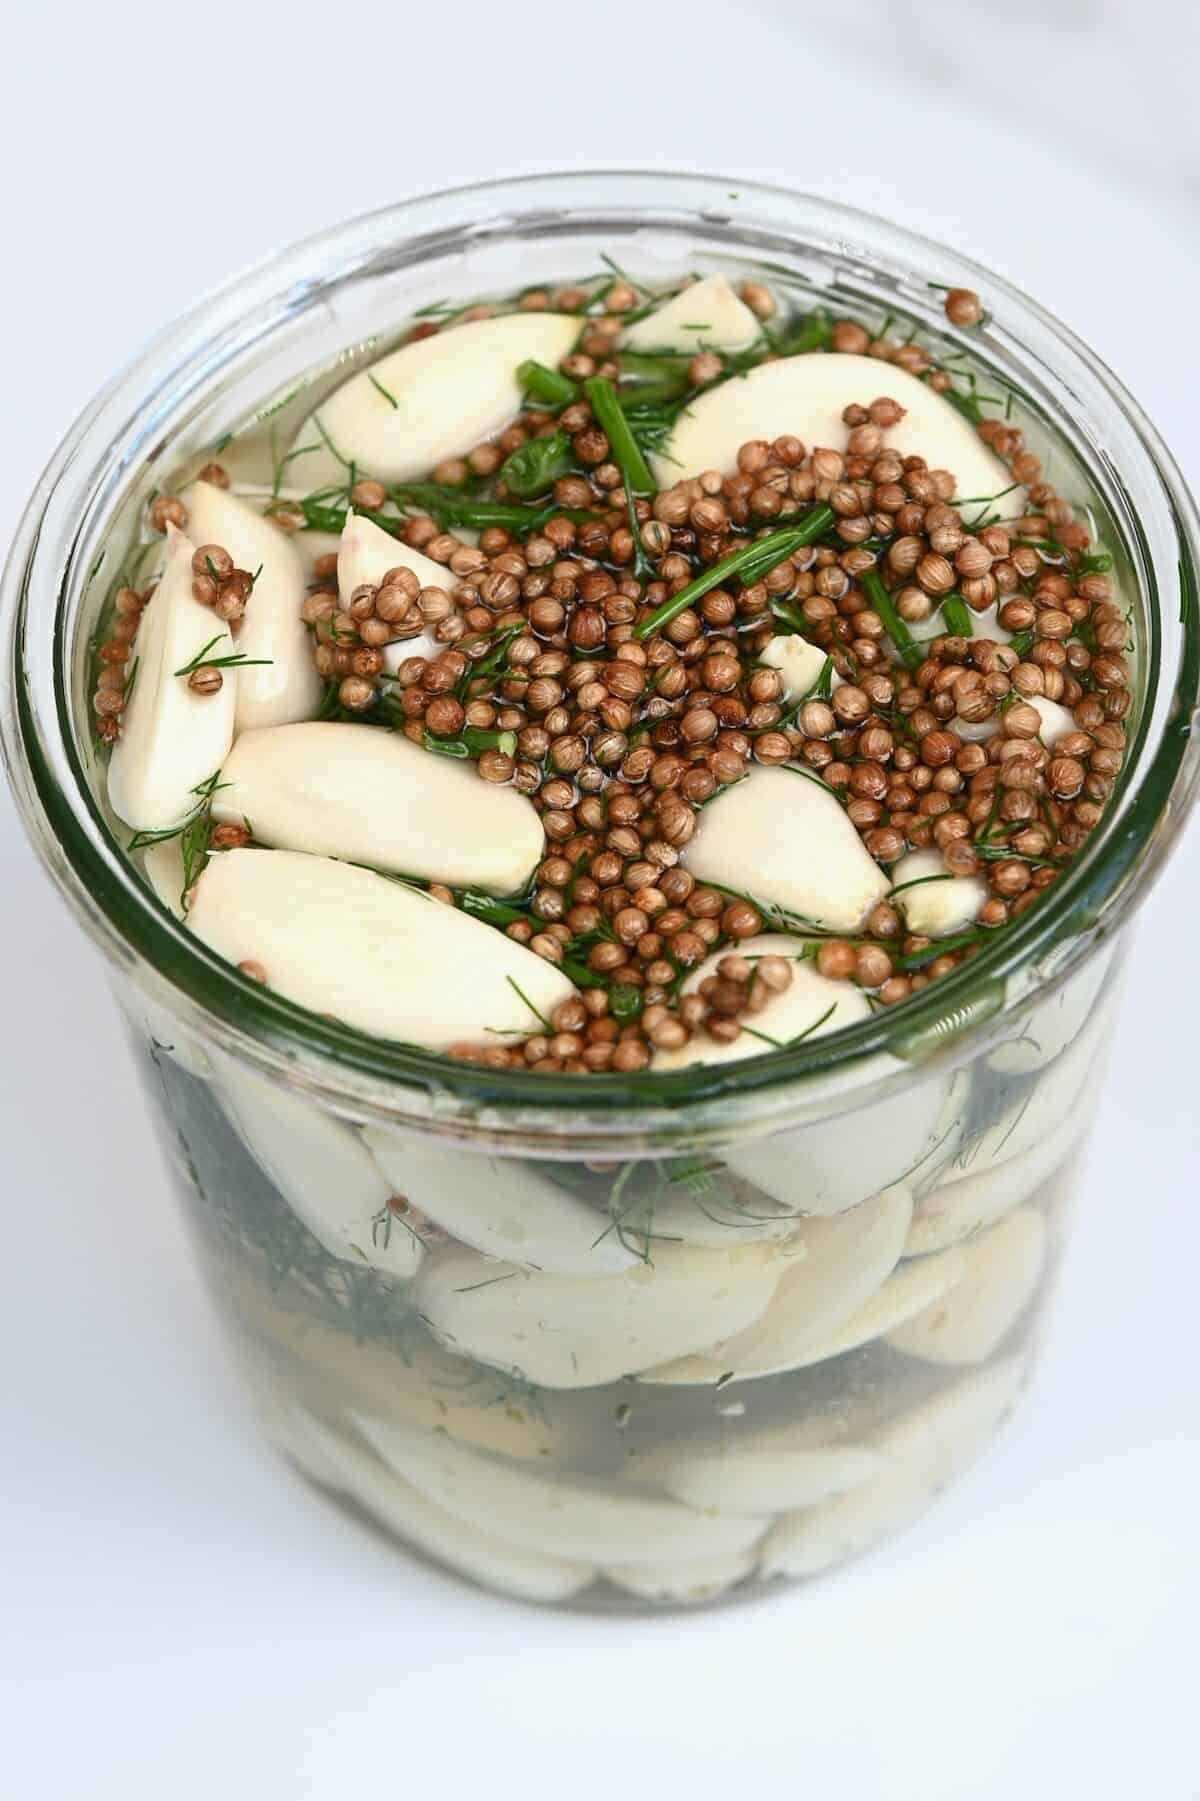
Combine the water, vinegar, and salt in a small pot and heat over medium, stirring, until the salt is completely dissolved. Then remove from the fire and add the chopped dill and coriander seeds and mix.

I usually use some scissors to chop the dill directly into the pot.
If you want to add honey, you can add it right at the end of this step before moving the brine to the jar.
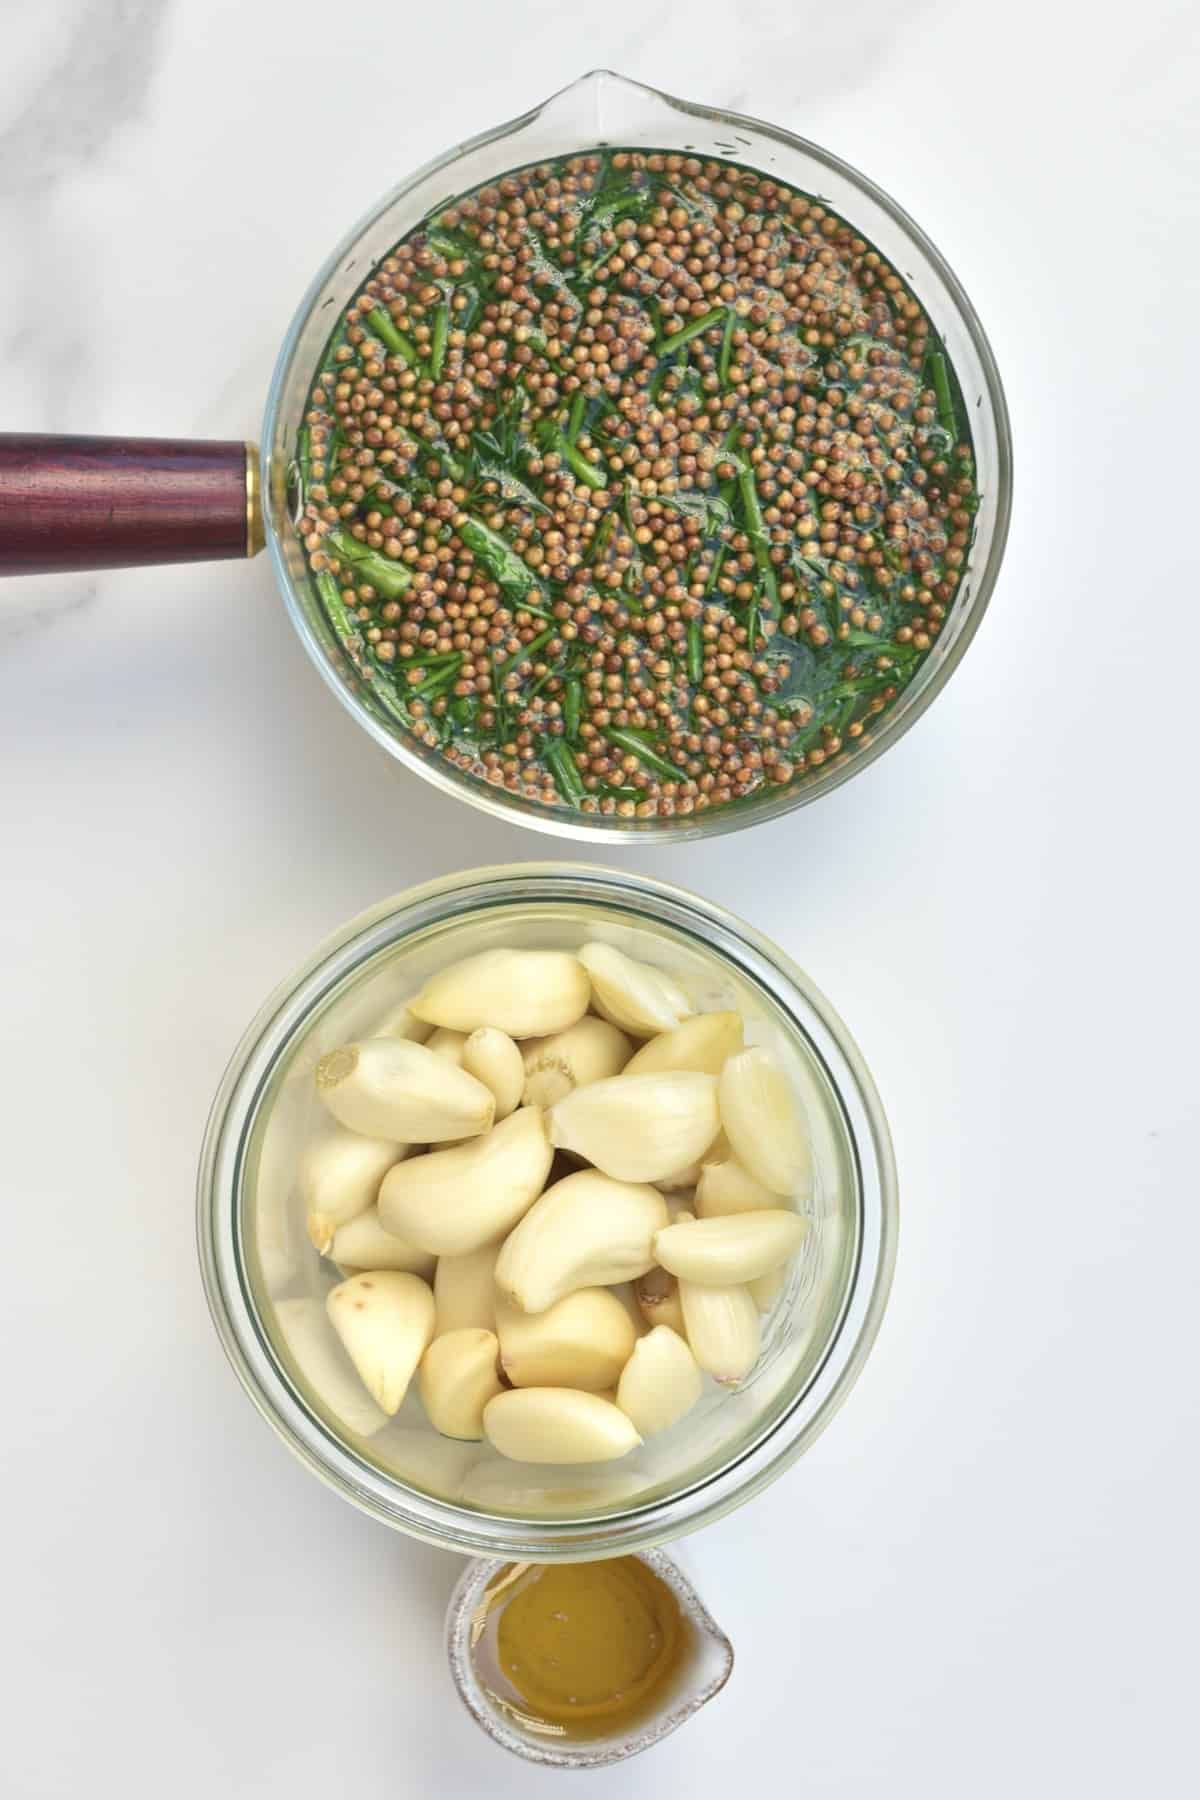
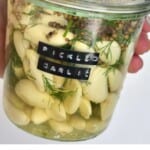
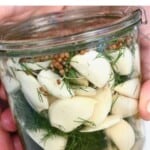
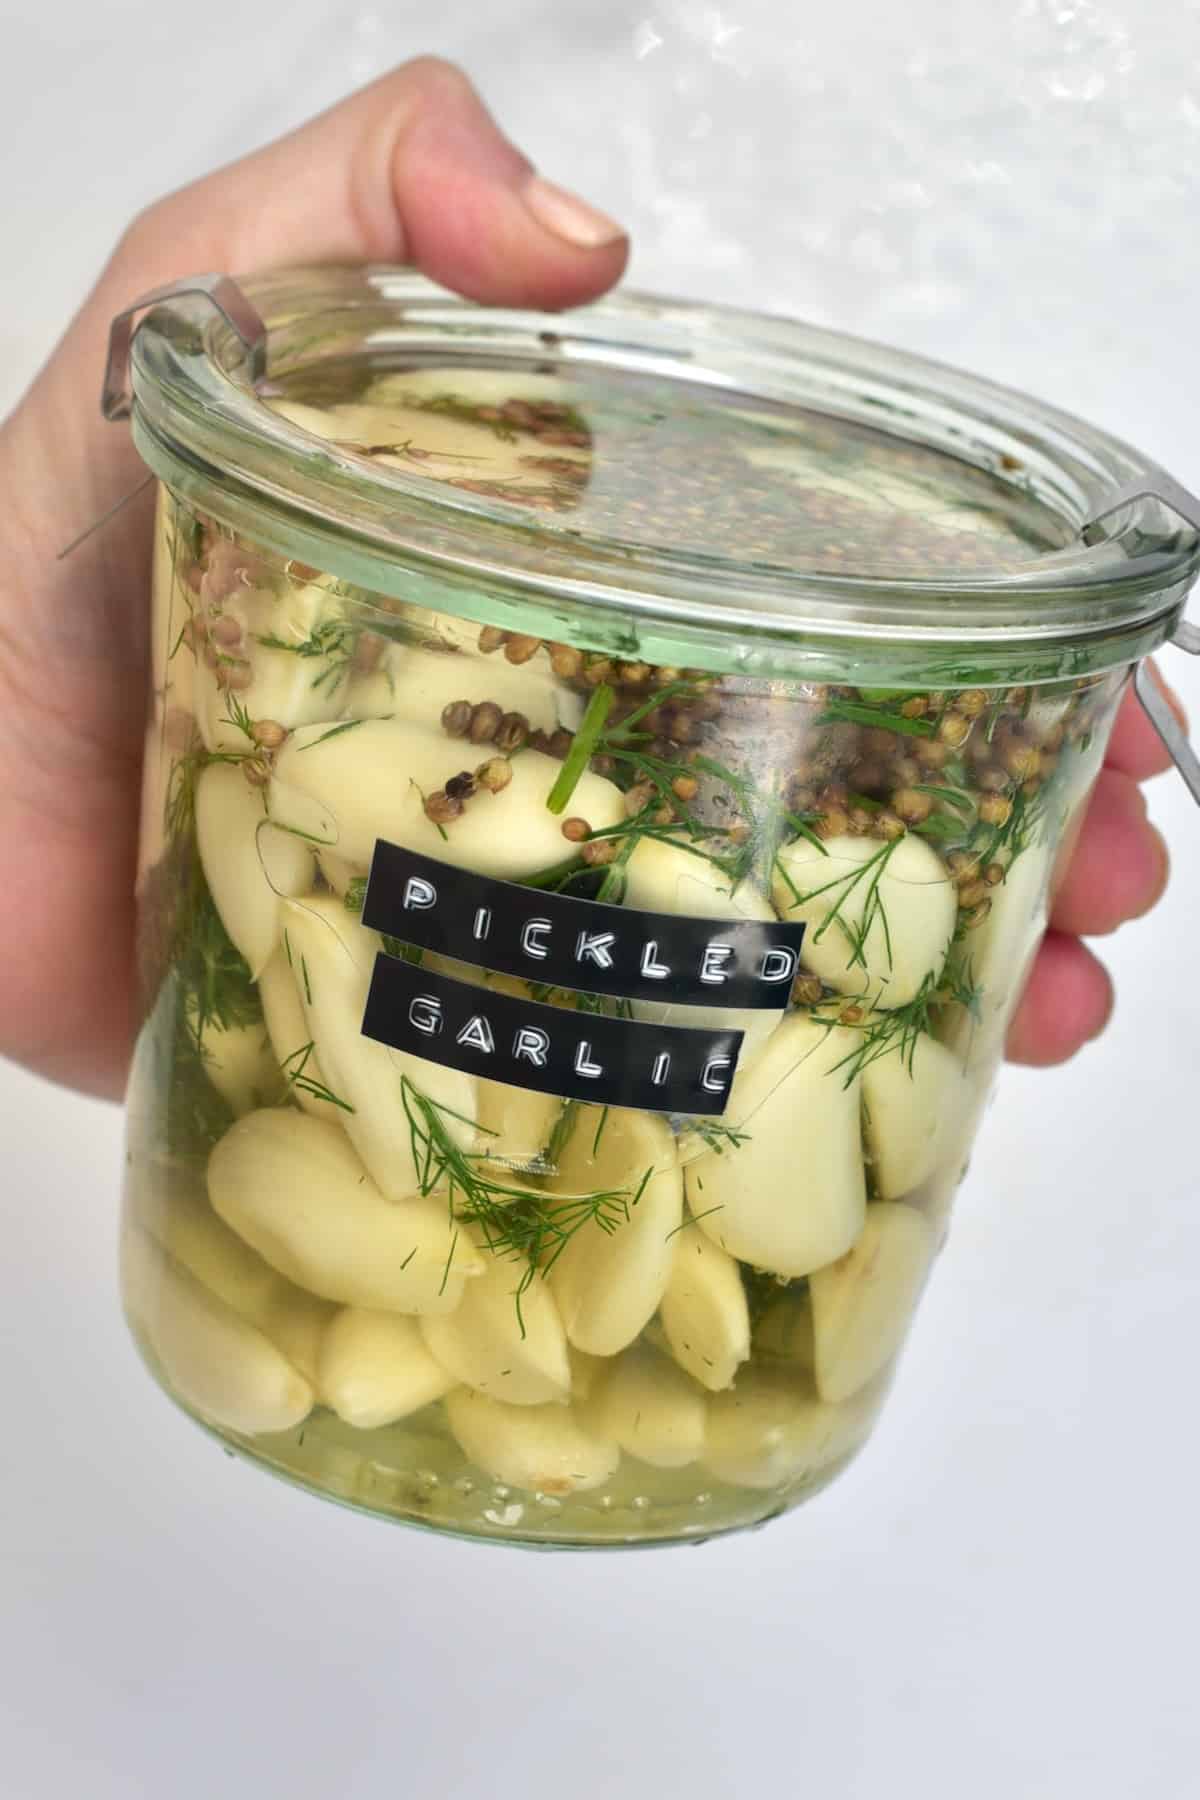
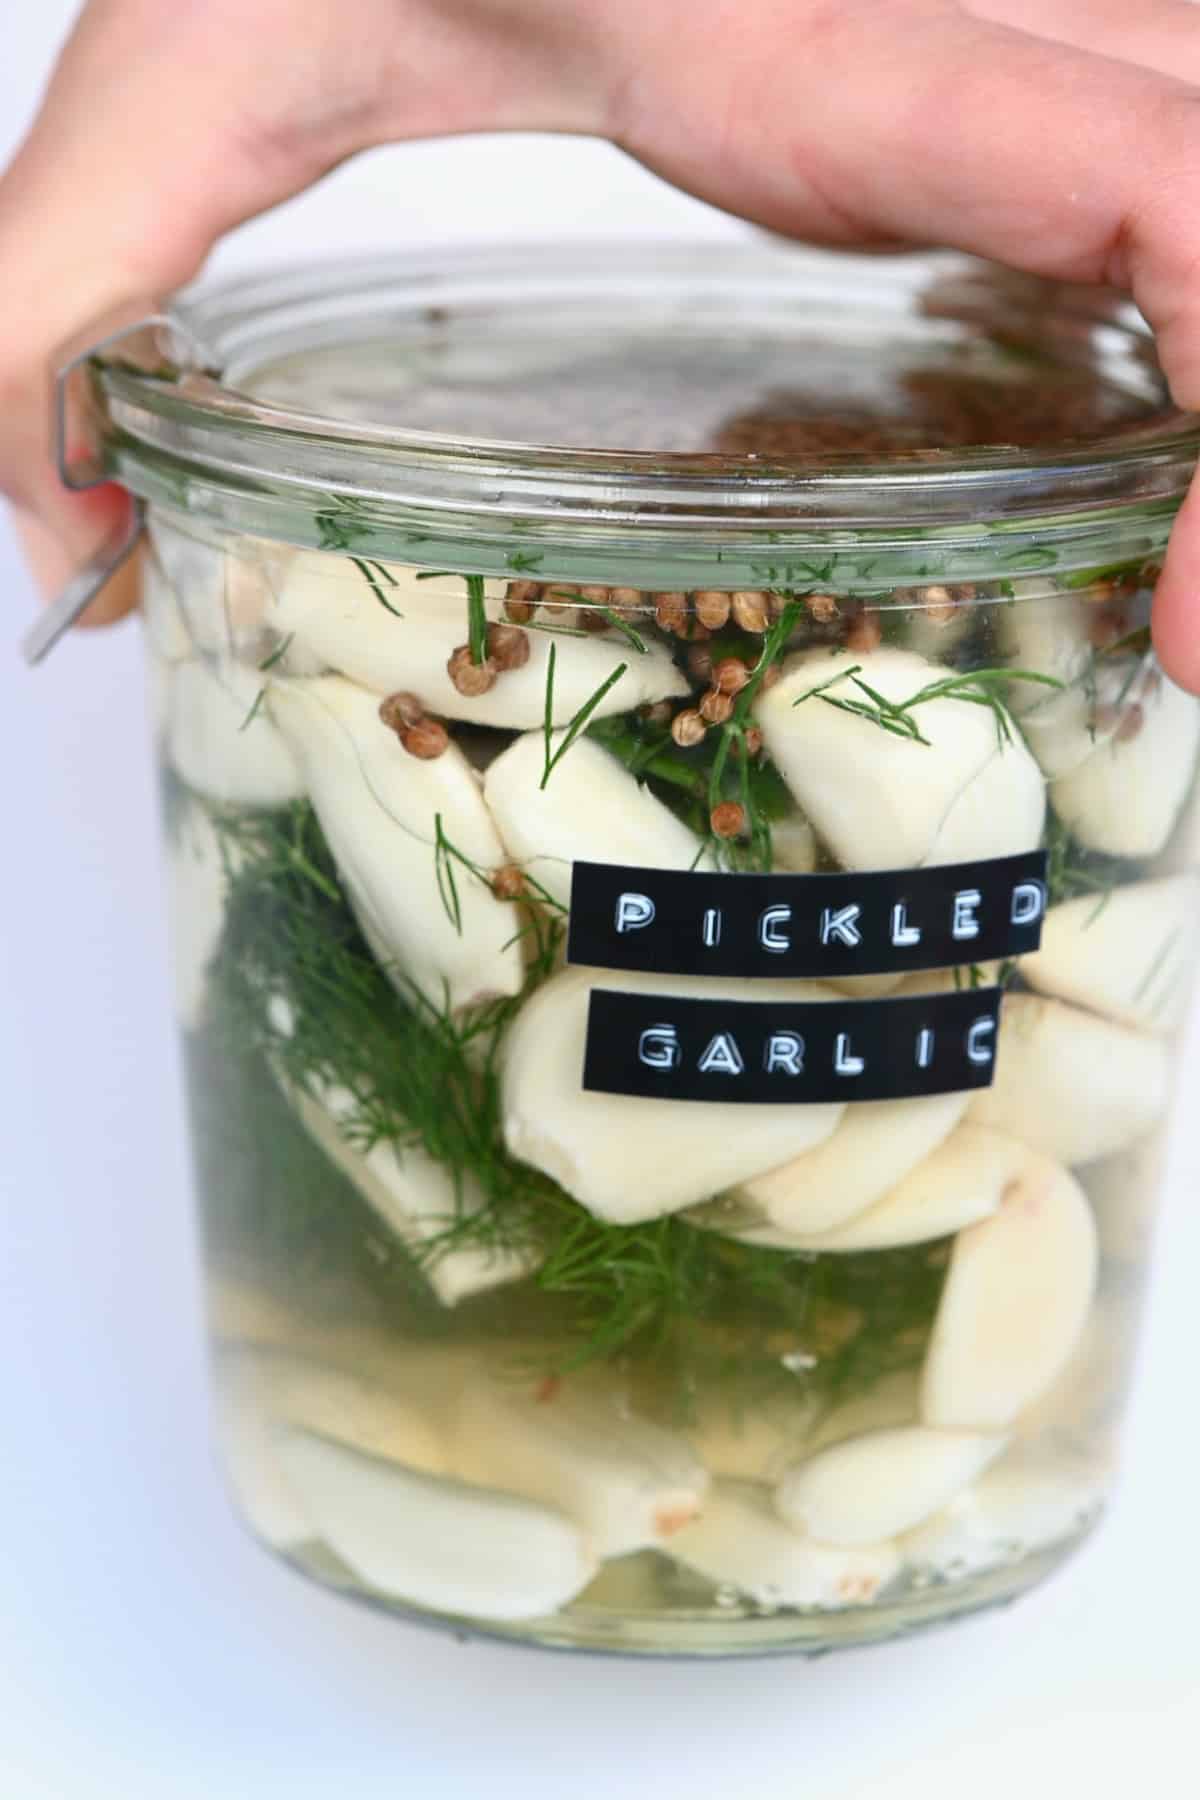
Step 3: Assemble the pickled garlic jar
Peel the garlic and then place the cloves directly into your sterilized jar/s. If you want, check my top methods for how to peel garlic.
Then pour in the brine until it completely covers the cloves, leaving around ½ inch (1.2 cm) headspace at the top of the jar, and stir a couple of times to mix everything well.
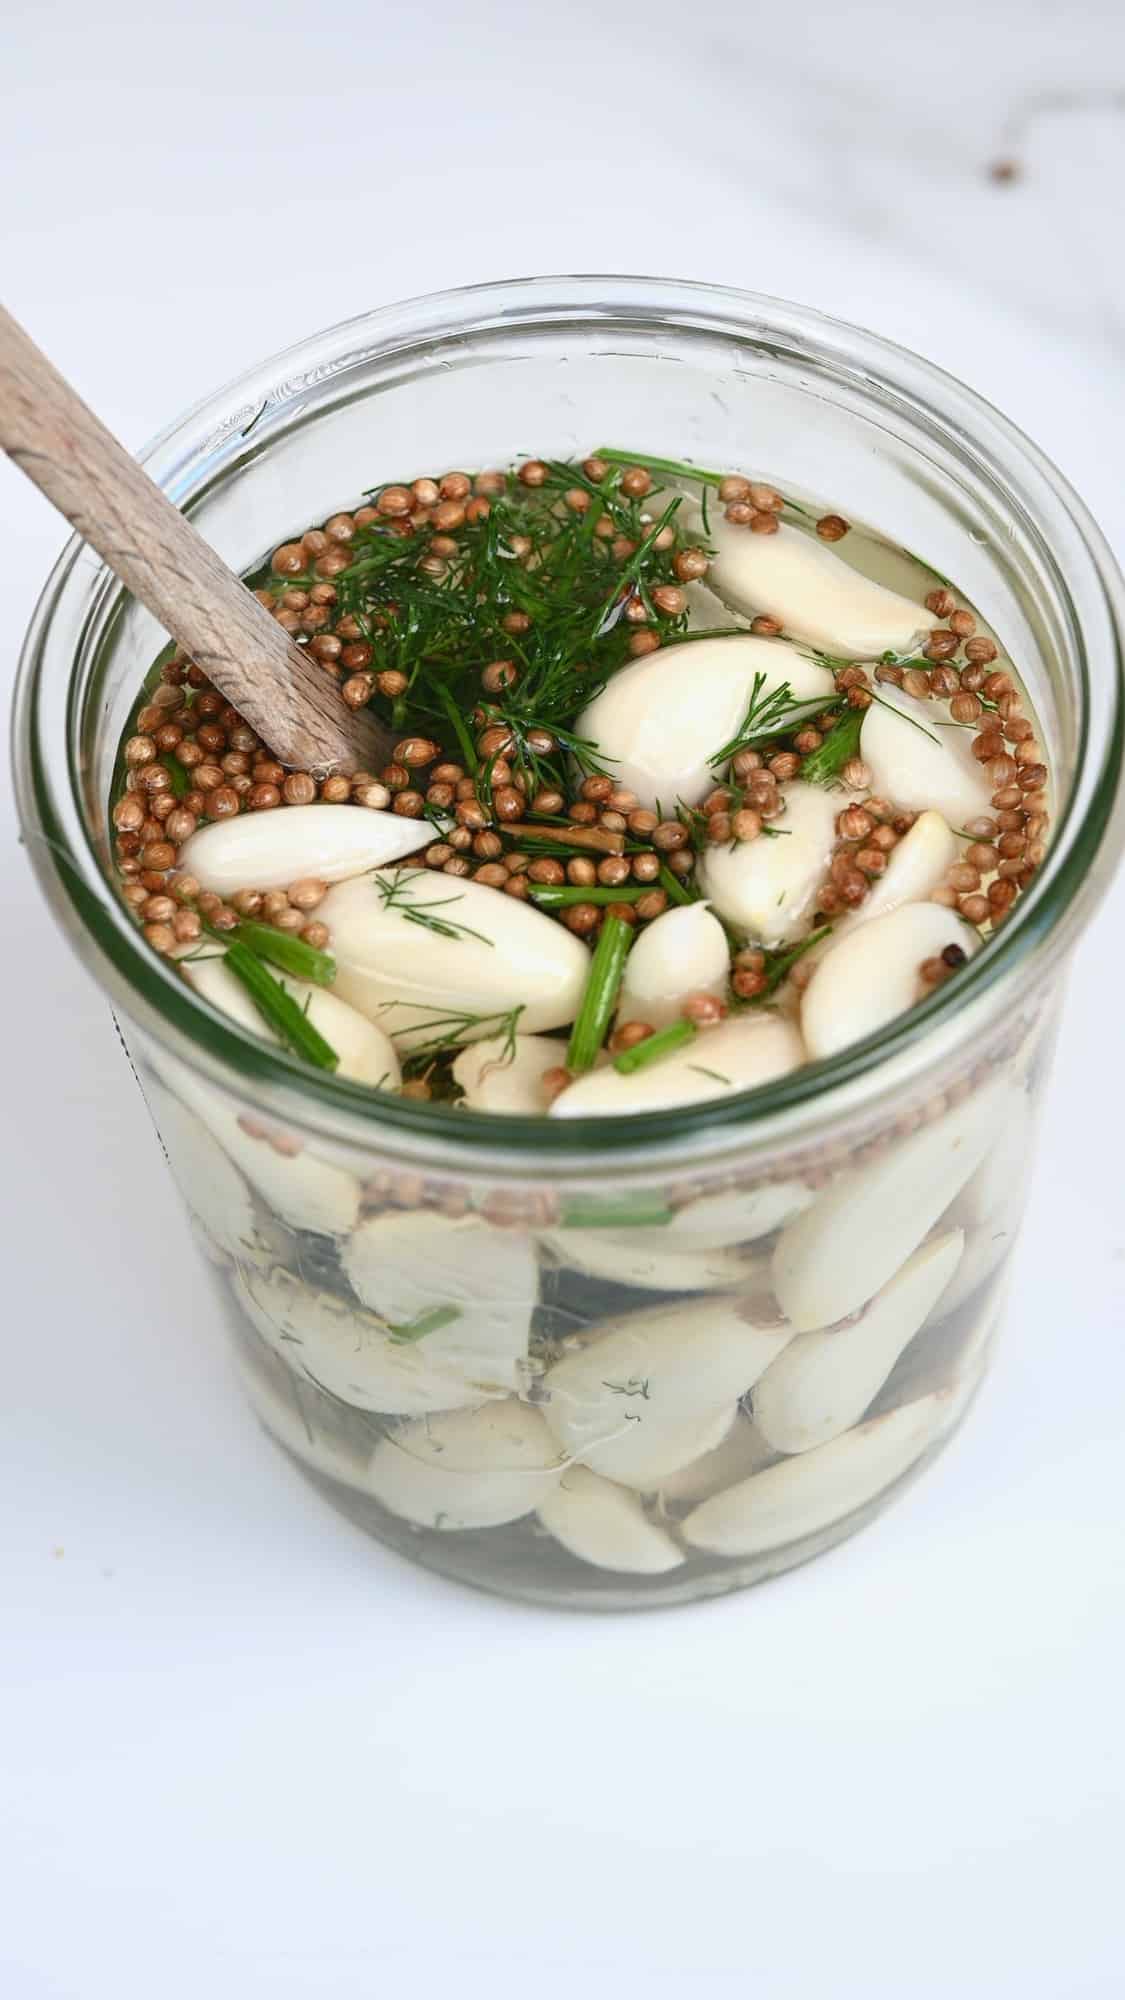
Allow the jar contents to pickle for about a week in the refrigerator. The longer you can hold out, the better the flavor will be, so I recommend waiting at least one week, but around 3 weeks is the sweet spot!
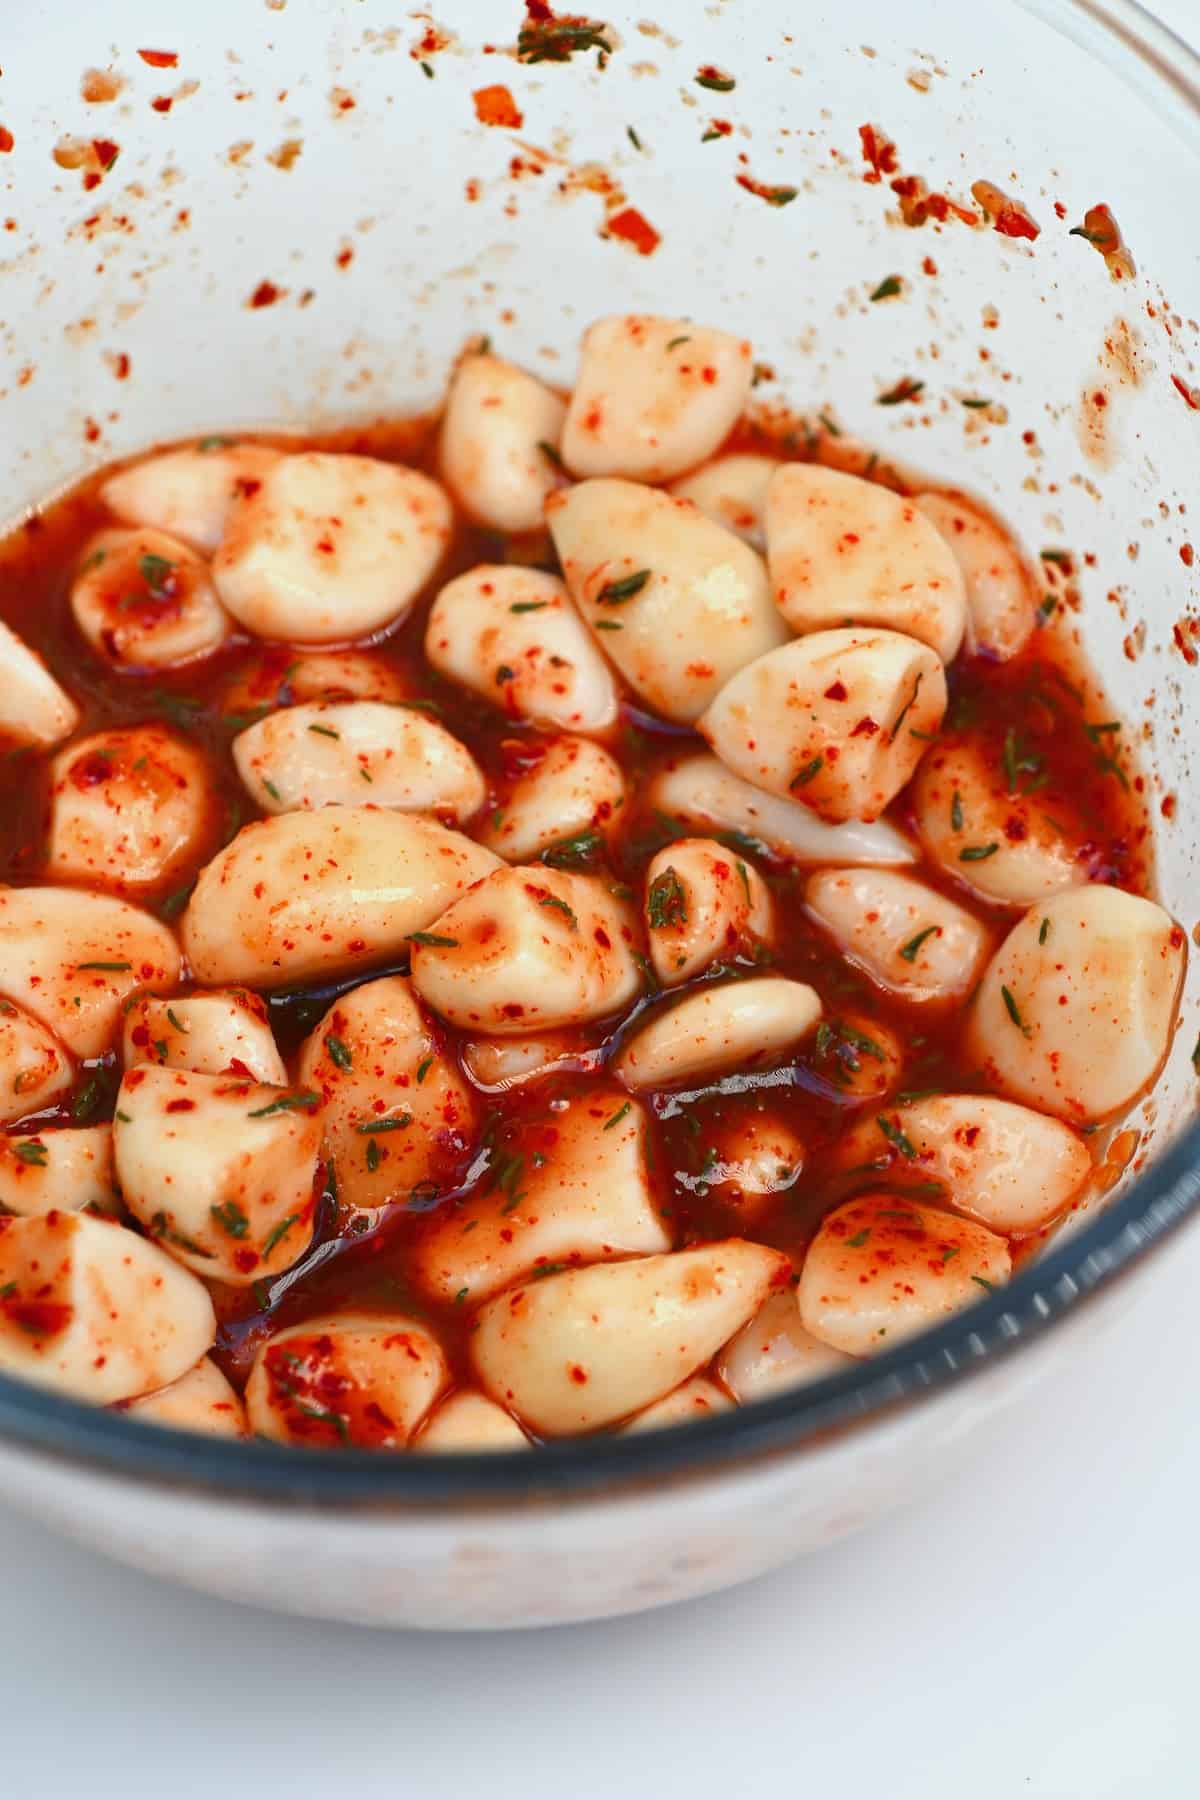
To make spicy pickled garlic
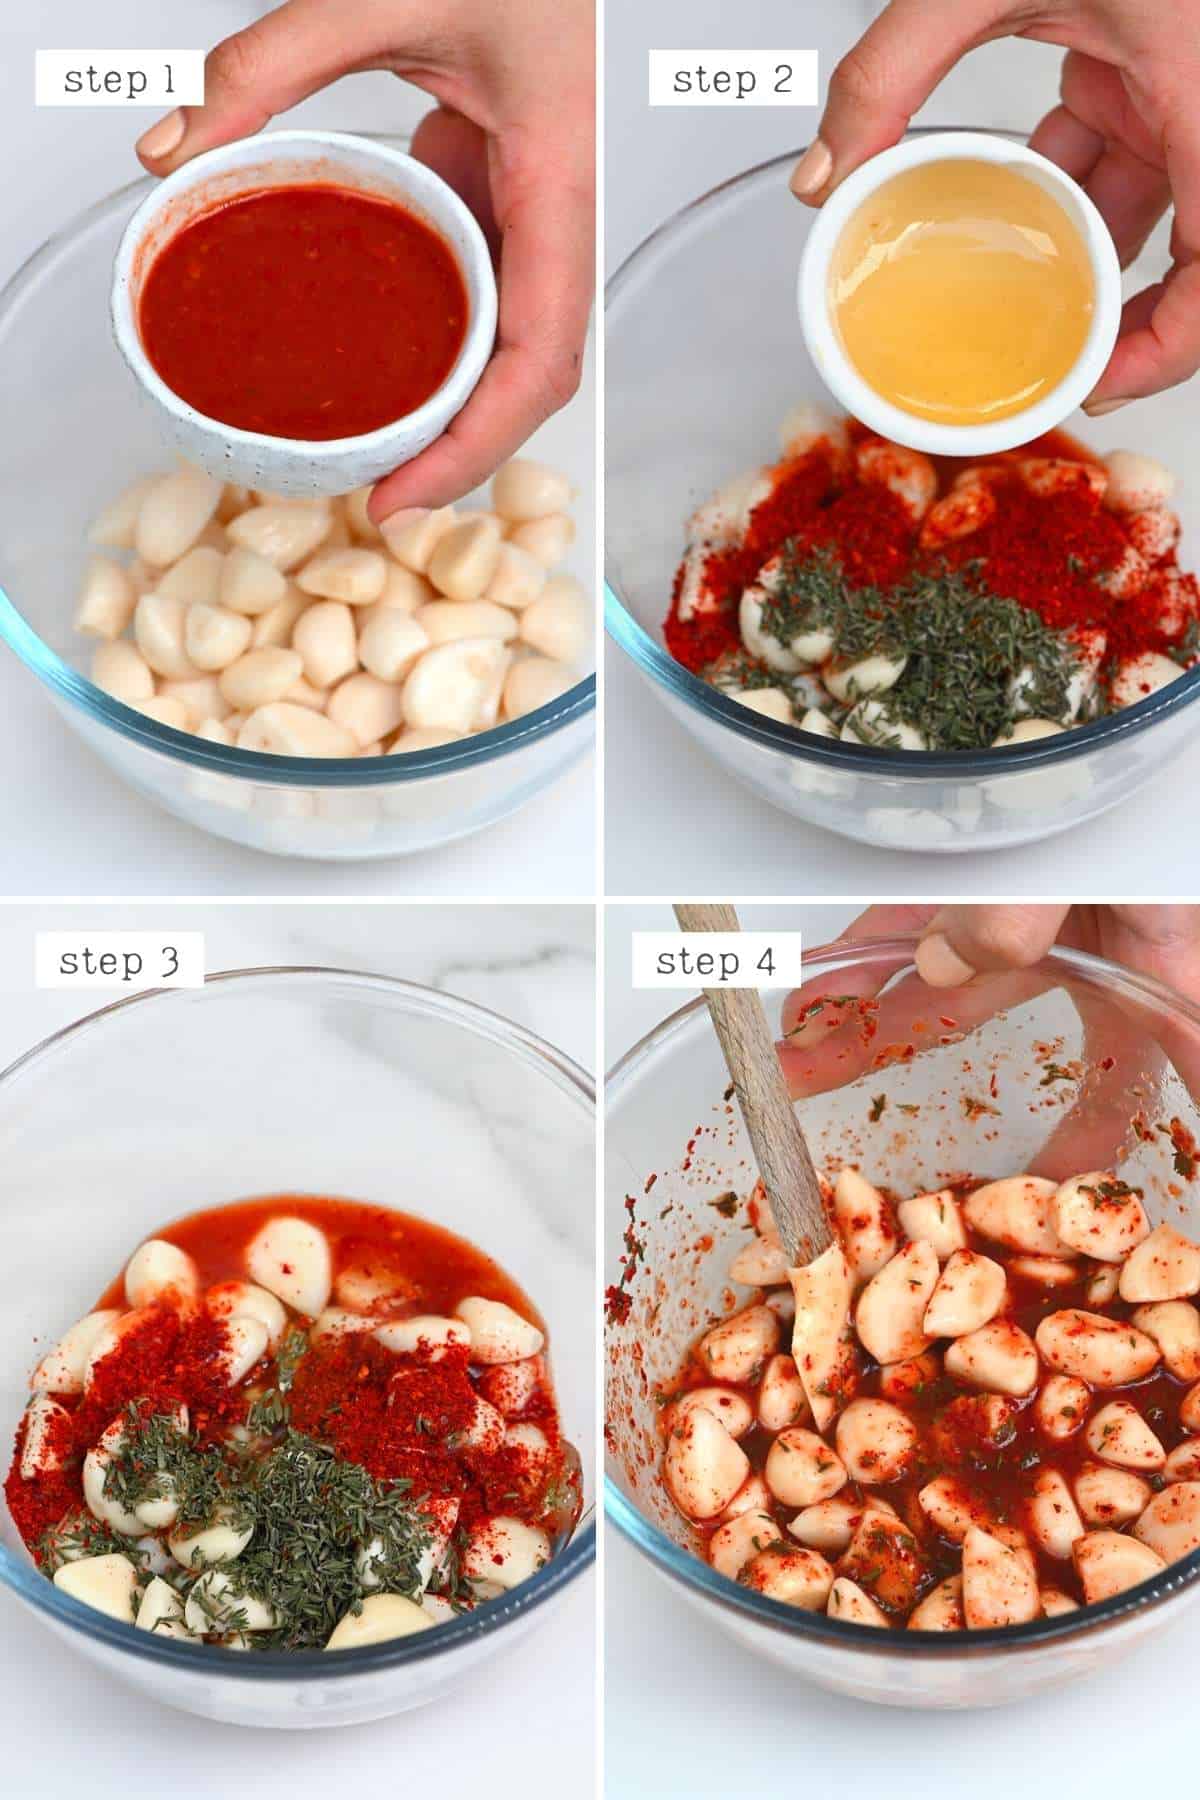
Once your garlic is ready, and at your desired flavor level, it’s time to make this spicy pickled garlic recipe (more of a marinated garlic).
Drain the pickling brine from the jar – this can be used for a second batch of pickled garlic.
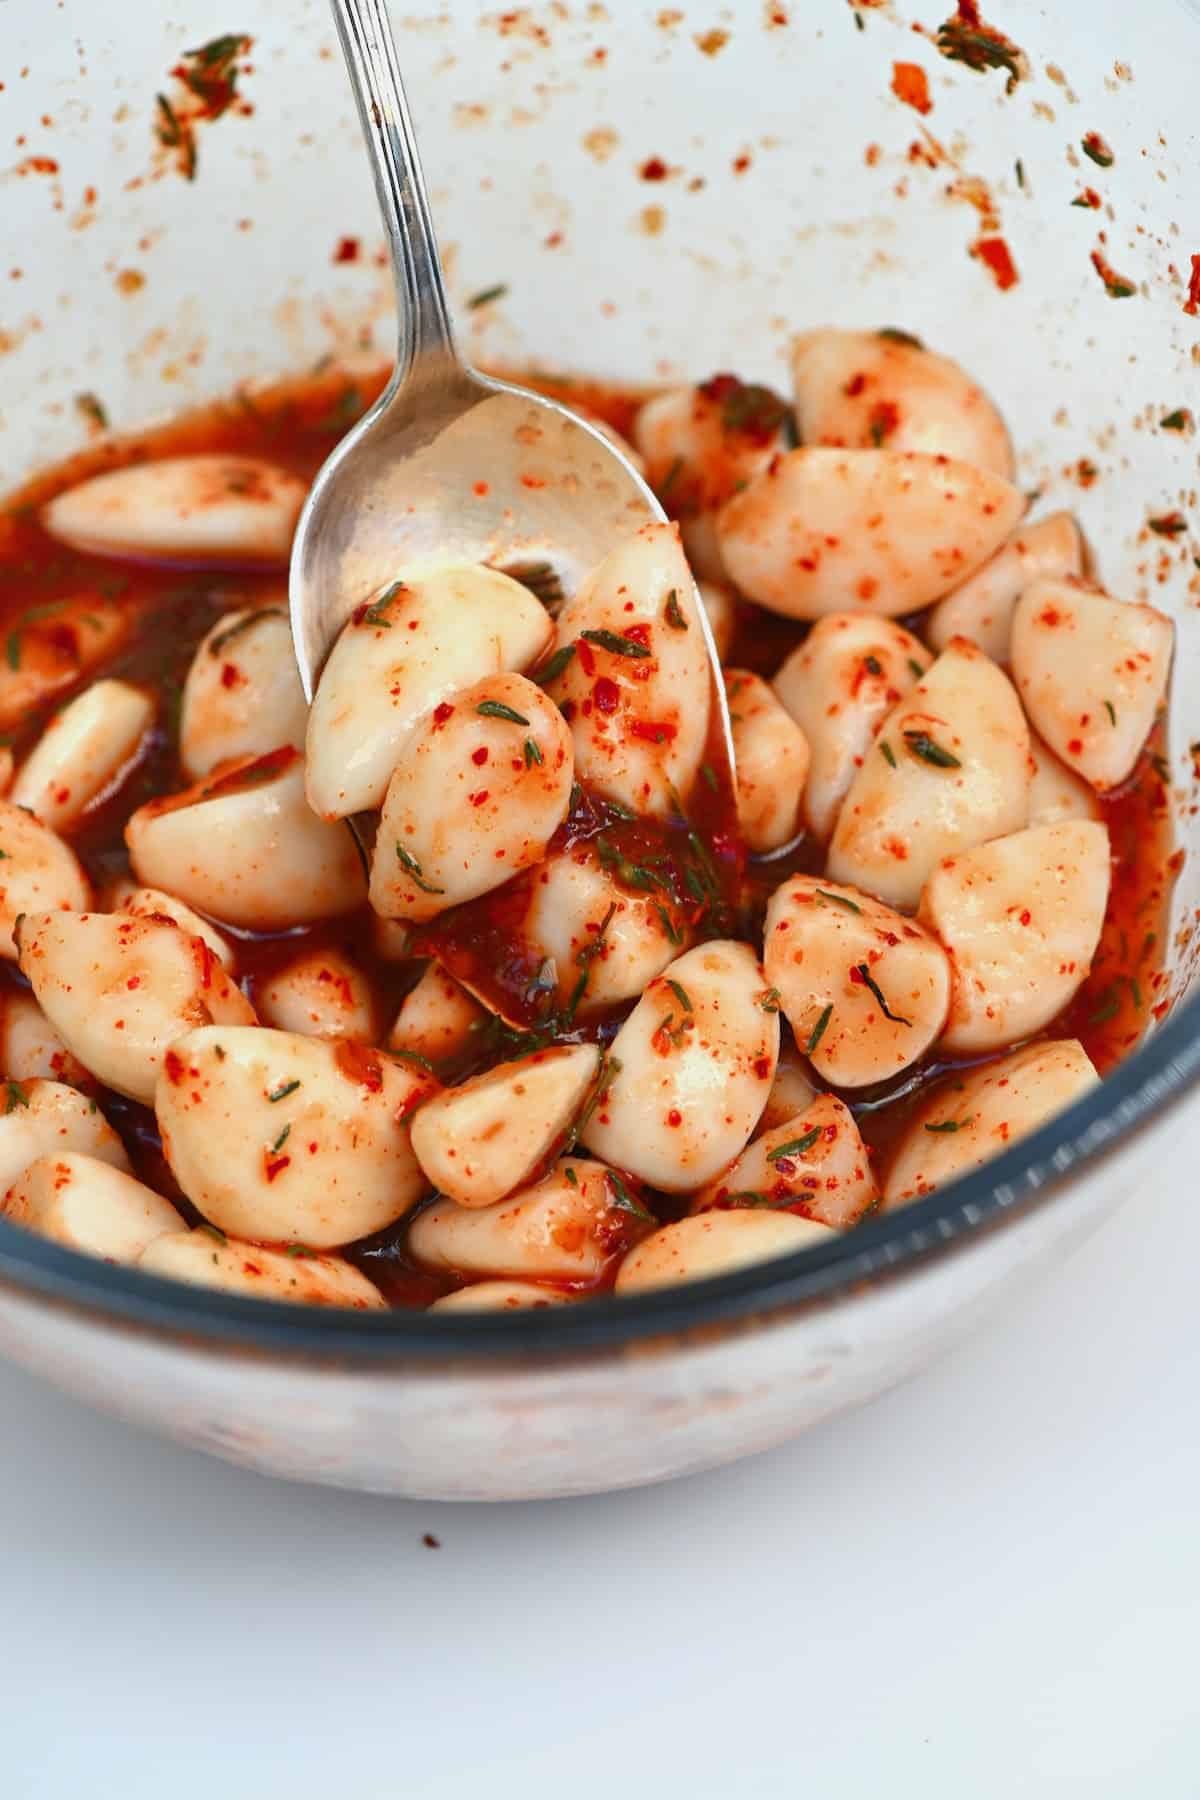
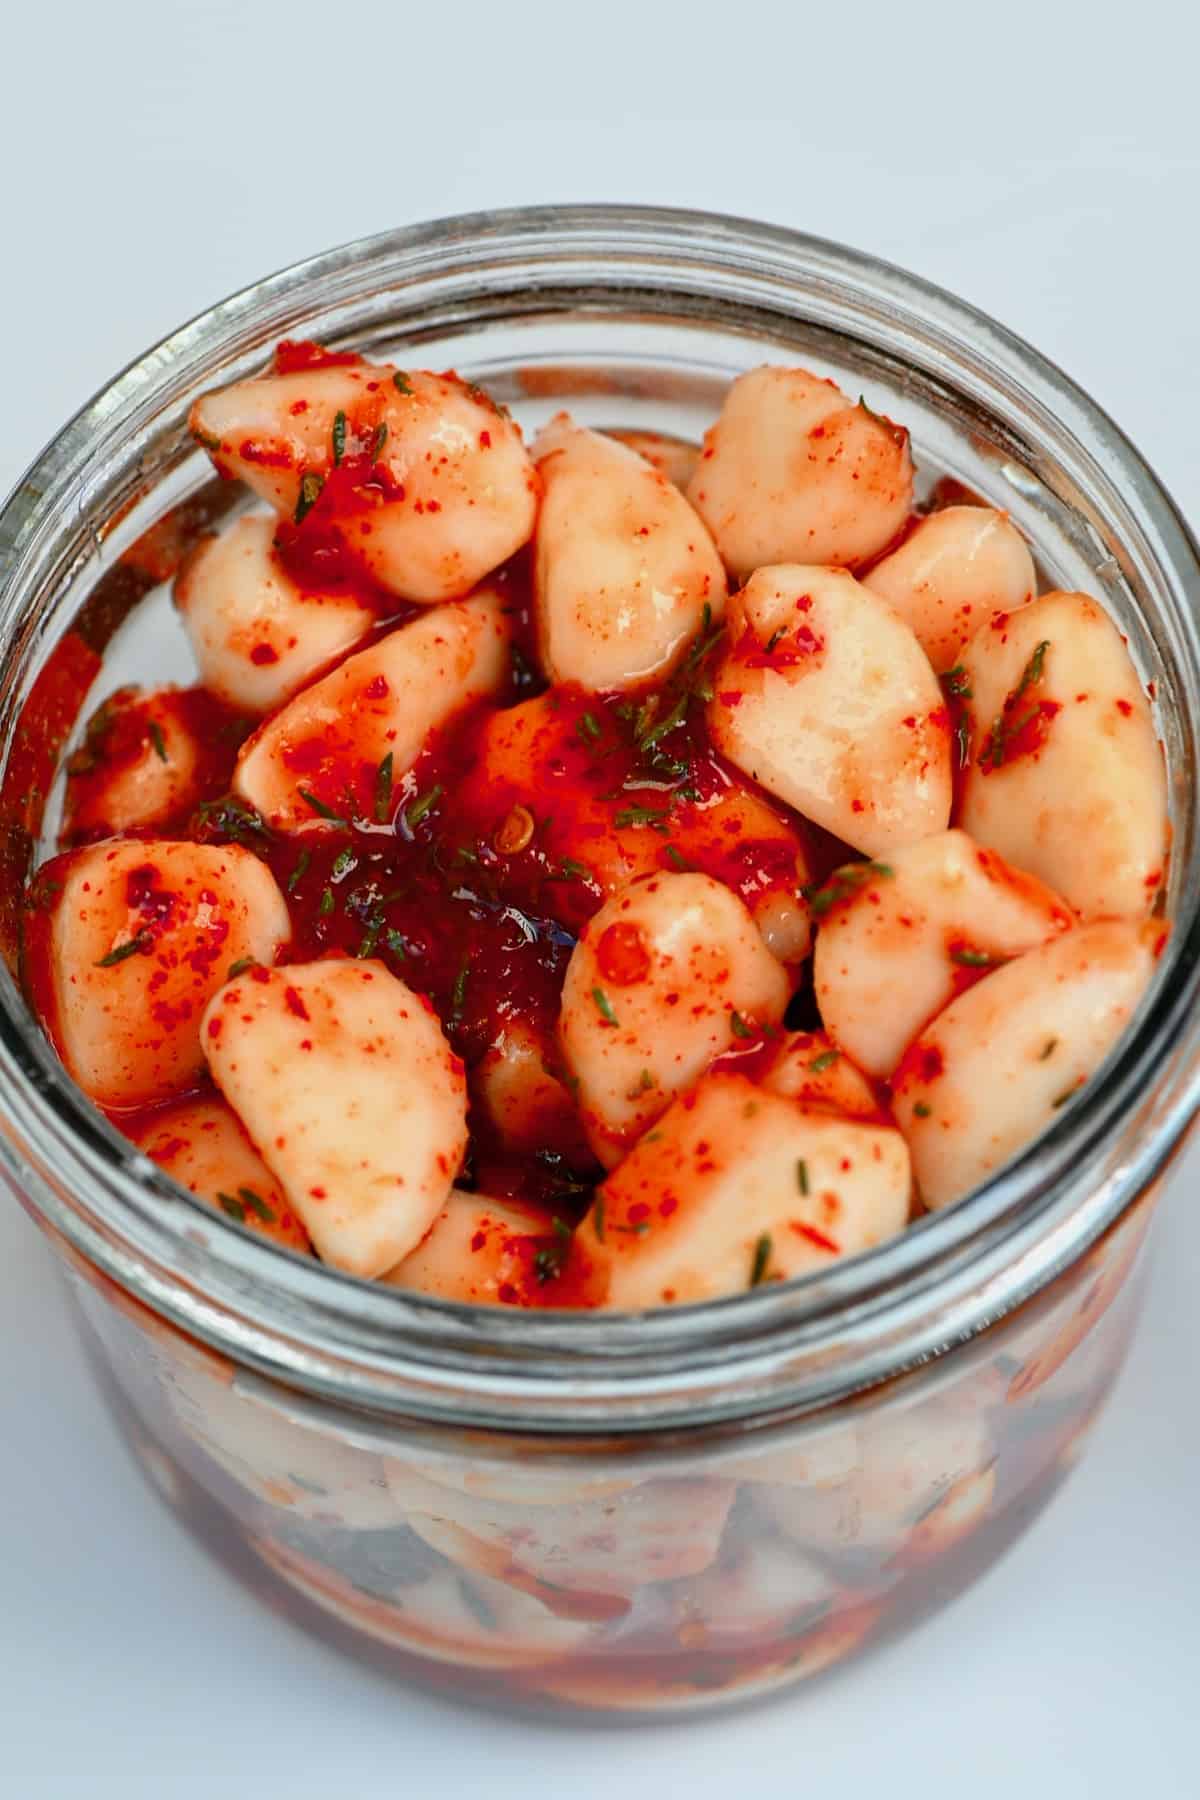
Then add the hot sauce (or sriracha), chili powder, dried thyme, and honey to the garlic and mix well. You can do this in a bowl or directly in the jar (place the lid on and shake!)
You can then enjoy the spicy garlic pickle immediately or allow it to marinate for a few hours to help the flavor meld with the garlic. Enjoy!
How to Store
Plain pickled garlic: Store the garlic pickle jar in the fridge and aim to use it within three months. If you notice any signs of mold or yeast growth, then it’s time to start again!
Spicy pickled garlic: Once this is prepared, I aim to eat these within a few days since the garlic is no longer stored within the brine.
How to Use pickled garlic
This really depends on you and your personal taste. I love to add pickled garlic to sandwiches, falafel wraps, and salads (when I’m not eating them straight from the jar with a spoon!). They also make for a great addition to an appetizer platter with canapés.
I also like to eat mine with vegan tacos, over homemade pizza, and with grilled burgers!
FAQs
For all garlic lovers out there, you’ll be happy to know that NO, pickled garlic doesn’t give you garlic breath like fresh garlic does.
This can happen naturally with pickled garlic – in fact, the garlic can turn a green or blue tinge. This is due to a chemical reaction between the acid in vinegar and amino acids in garlic. The same can happen when using reactive materials (certain metals) with the garlic and if your water has trace minerals in it. For this reason, I recommend using distilled vinegar and water and iodine-free salt (kosher). Make sure to also store the garlic away from sunlight.
However, it’s perfectly safe to eat the blue/green garlic!
There are a couple of ways that you can do this. If you reduce or eliminate the water from the brine, then pickling will happen a lot faster. However, the flavor will vary.
You can also add the garlic to the hot brine in the pan and allow it to cook for between 1-2 minutes (2 mins max!) before removing it from the heat.
I’ve also heard that blanching the garlic in boiling water for 3-4 minutes can help it to pickle faster – though this isn’t a method I’ve tried.
Recipe notes
- Increase the spice: if you want to up the spice in even the plain variety, then you could add some chopped chilies to the jar when pickling.
- Experiment with other herbs: I stuck to a simple mix here. However, there are several other herbs you could use—for example, a crushed bay leaf, peppercorns, allspice, etc.
- Shelf-stable canning: I didn’t design this recipe with canning in mind. Though it may be possible, it’s not something I’ve extensively tested, so I don’t feel comfortable sharing a canning process- especially as storing garlic has different rules than other veg.
Related DIYs
- How to Make Chili Flakes (Oven + Dehydrator)
- How to Make Chili Oil
- Homemade Easy Pickled Cucumbers Recipe
- How to Make Pickled Red Onions (Pink Onions)
- Easy Refrigerator Pickled Green Tomatoes
- Quick Pickled Asparagus
- 3 Easy Ways to Make Pickled Eggs
If you try this recipe for plain pickled garlic or spicy pickled garlic, I’d love to hear your thoughts/questions below. Also, I’d really appreciate a recipe card rating below, and feel free to tag me in your recipe recreations on Instagram @Alphafoodie!

Pickled Garlic (Plain & Spicy Version)
Ingredients
- 1 cup garlic cloves 3-5 garlic bulbs
- 2 ounces dill fresh; or 1 tbsp dried
- 1/2 cup white vinegar or another vinegar: apple cider vinegar, etc.
- 1/2 cup filtered water
- 1 Tbsp kosher salt or pickling salt
- 1 Tbsp coriander seeds
- 1 Tbsp honey optional – or maple syrup for vegan
For the spicy pickled garlic
- 1 cup pickled garlic
- 2 Tbsp sriracha hot chili sauce or other hot sauce
- 1/2 Tbsp chili powder
- 1/2 Tbsp dried thyme
- 1 Tbps honey optional – or maple/sugar
Instructions
- Sterilize jars: Wash with hot, soapy water, rinse, and dry jars in a 325ºF oven for 10 minutes.
- Peel garlic: Use fresh cloves. See my garlic peeling guide for tips.
- Make brine: Combine vinegar, water, and salt in a saucepan. Heat until salt dissolves. Remove from heat and stir in dill, coriander, and optional honey.
- Pack jars: Fill jars with garlic, pour hot brine on top, and leave ½ inch headspace.
- Seal and cool: Close jars, cool to room temp, then refrigerate for at least 1 week (2–3 weeks is best).n
- For spicy remix: In a clean jar or bowl, mix pickled garlic with hot sauce, chili, thyme, and honey. Stir and refrigerate. Eat within 5–7 days.
Video
Notes
- Use distilled vinegar and filtered water to help prevent garlic from turning blue.
- Always refrigerate — this is not a canning recipe.
- Let sit for 2–3 weeks for the best mellow flavor.
storage:
- Plain pickled garlic: Up to 3 months in the fridge
- Spicy remix: Eat within 5–7 days
- Not shelf-stable — always refrigerate
See full post for more helpful tips.
Nutrition
Nutrition information is automatically calculated, so should only be used as an approximation.


Can I use coriander powder instead of seeds? If so what would be the ratio
Hey Tracy! Yes, you can use coriander powder instead of seeds, but since the powder is more concentrated, you’ll need less to avoid overpowering the flavor. A good starting point is ¼ teaspoon of coriander powder per 1 teaspoon of coriander seeds.
Since ground spices infuse differently than whole seeds, you might notice a slightly stronger or more dispersed flavor in the brine. If you try it, let me know how it turns out!
when storing the garlic, do you store in the brine? can you make a batch, pour out the brine, store the garlic and start over with another batch?
Hi Kim! The garlic should be stored in the brine. This keeps the garlic properly preserved and flavorful. If you remove it from the brine, it can spoil quickly and won’t continue pickling. You can certainly make a second batch, but it’s best to start fresh with a new brine for food safety. Hope that helps!
Okay, but where did you get those jars??
Hi, Kourt. The jars are linked on the shop page. They are glass jars with clamp seals but you can use any jar with a tight-fitting cap. I hope this helps.
You better stick to your TikTok.
Thanks for your comment, Harry 🙂