
This post may contain affiliate links. Please read our disclosure policy.
This post shows you how to make chili oil at home with just two base ingredients, using a super quick and easy method. This gluten-free, vegan condiment is the perfect addition to elevate tons of meals, with a smoky, spicy aroma that is sure to delight!
I admit it – I’m a bit of a ‘condiment’ lover. Anything that you can add to a dish that instantly elevates it is a win-win. Personally, chili oil is one of the best condiments to have on-hand for any spice-lovers out there. This hot pepper oil can be drizzled over noodles and rice, dumplings, pasta, and pizza or even used to cook with – the options are endless!
Plus, as usual, making a homemade version is fifty times better than any store-bought option. You don’t have to worry about unnecessary additives or MSG. Plus, the shelf life goes on and on (especially if stored in the fridge), so it’s there whenever you need it.

On top of that, little bottles of chili oil (or “chili oil”) make for an excellent gift for family and friends. You know I’m all about gifting, with bottles of Hot Honey, Vanilla Extract, and Rose Water, now this is one for all the spice lovers out there. Plus, with tons of optional add-ins and recipe tweaks, this chili oil recipe can be batched and customized easily.
Want to save this recipe?
The chili oil ingredients
It probably won’t surprise you to read that the ingredients found in this chili oil consist of, you guessed it, chili and oil. However, with that being said, there are still tons of different variations that you can create with these two simple ingredients!
The oil
When it comes to choosing an oil for any ‘infused oil’ recipe, you want something light and neutral. Vegetable oils, canola oil, soybean oil, peanut oil, and grapeseed oil are all great options.

Avoid using any oils that have a low smoke point, or have very distinct, robust flavors. While you could technically make this chili oil with olive oil, you’d need to choose a light one, be extremely careful when heating, and it will likely ‘set’ in the fridge.
Meanwhile, avocado oil has a high smoke point AND neutral flavor, yet it is also an intense green color. This may make your chili oil turn a very odd shade.
Lastly, you can also make an oil blend. For example, add just a couple of spoonfuls of a more flavorful oil to your neutral base, like sesame oil. That way, it doesn’t overpower the dish but creates a lovely aroma and additional flavor.
Top Note: Depending on what oil you choose, along with what chilies will also affect the color of your infused chili oil. Some may remain ‘oil’-like in color, while others will turn a deep red chili shade.
The chili peppers
Depending on what chili you use will massively affect the outcome of your chili oil. There are hundreds and hundreds of different chili pepper varieties – and I’m not an expert. However, there are a few that I do know of that can work excellently for this infused oil.
I think it’s essential to begin by stating that the best chili for you depends on the type of heat that you want from the oil. For example, I recently heard about the Chinese málà (麻辣) flavor. This refers to a numbing, spicy oil that combined Sichuan peppercorns with pepper flakes. While some may love that tongue-numbing effect, I know many others won’t – so variety is the spice of life.
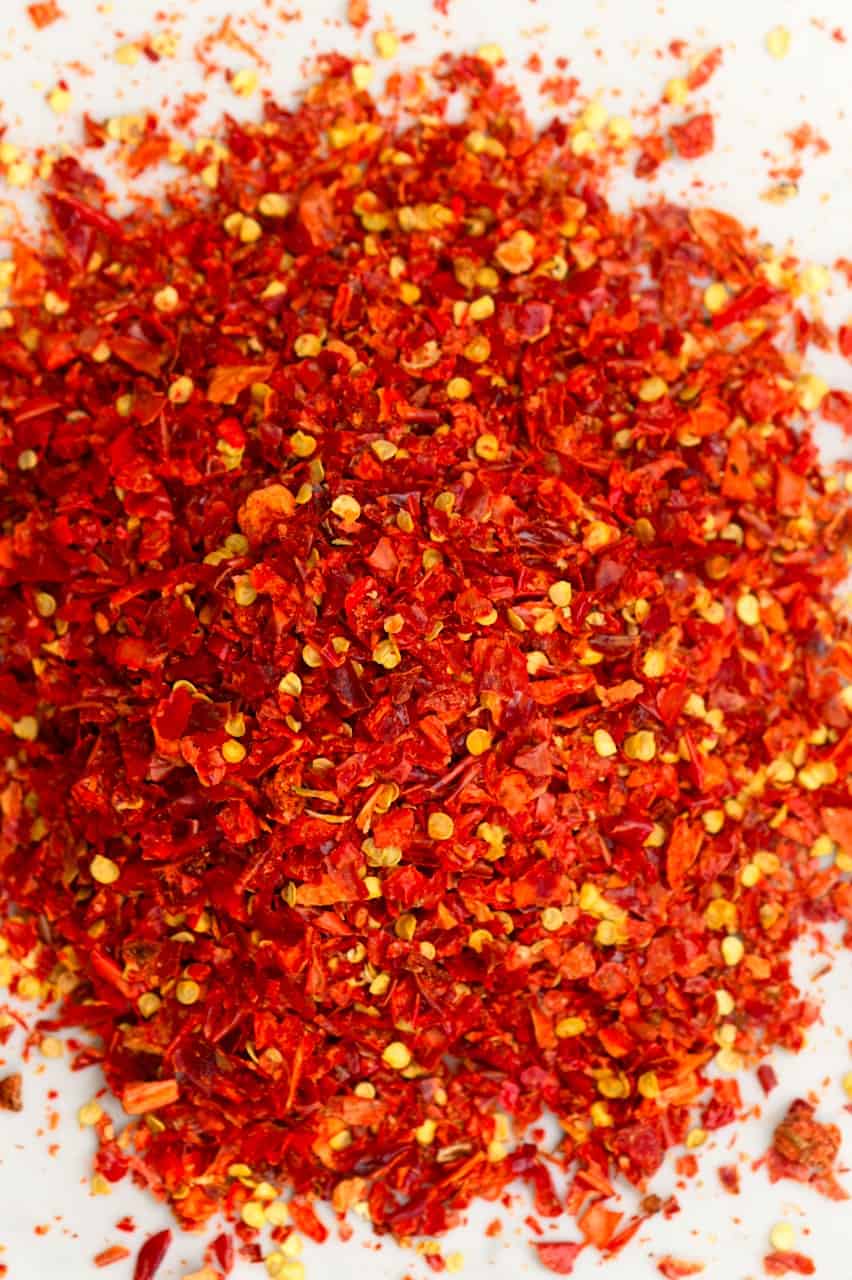
Hot red pepper flakes can be found in most stores and are an excellent option for those that want moderate heat levels. Meanwhile, Sichuan pepper chili flakes are also modest in heat (it’s the peppercorns that bring out the heat) and can provide a lovely red oil color.
Korean pepper flakes (gochugaru) provide a subtle smokiness to the oil with a fairly hot and slightly sweet flavor and can be found in many Asian supermarkets.
I’ve used Italian-style red pepper flakes with some success. Since they are usually already roasted for longer than their Asian counterparts, you may run the risk of them burning when you pour over the hot oil. This depends on the brands used, though. However, read below for a ‘cold-oil’ method that may work well for these.
Cayenne pepper will bring the heat and is best used as a combination with other milder pepper flakes, too. You can also add chili powders (such as cayenne). These will likely boost the spice in the oil and will also affect the color.
Optional add-ins
This basic two-ingredients recipe is for a simple, delicious chili oil base. If you start adding too many additional ingredients, then next thing you know, you have a chili sauce, rather than infused oil. However, this base can undoubtedly handle some add-ins to boost flavor and texture in various ways.
Some of the popular add-in options include:
- Garlic
- Ginger
- Onions
- Scallions
- Shallots
- Crushed black pepper
- Sesame seeds (packs a lot of flavor, plus texture)
- Paprika
- Dried Mushrooms
- Sichuan peppercorns (for numbing heat)
- Five Spice
- Star anise
- Cloves
- Sesame seeds
- Liquid smoke
- Cinnamon stick
- Bay leaves
For example, you may want to combine the pepper flakes with five-spice, star anise, bay leaves, sesame seeds, and Sichuan peppercorns. A simpler version could contain pepper flakes with ginger, garlic, and a dash of salt.
Top Note: If you want to use garlic, ginger, or onions, then mince them. That way, you don’t need to cook them with oil. Just pour the oil over all the ingredients and mix well.
Also make sure to use up oils with any ingredients that add moisture (like garlic, onion, ginger, etc) quickly, to avoid spoilage.
How to make chili oil
For such a simple dish, there are certainly lots of ways to prepare it too – mainly depending on if you want a Westernized version or Chinese style hot pepper oil. Some like to infuse the oil with various ‘aromatics’ before straining and pouring over chili flakes; others heat the flakes and oil together with ginger and garlic, etc. Meanwhile, this simple two-ingredient chili oil base just requires quick heating of oil that is then poured over the chili flakes for the ultimate ‘ASMR’ sizzle experience.
By pouring the hot oil over the ingredient, instead of heating them together, you eliminate the risk of burning the flakes (which can happen easily!). Burn chili not only looks bad but will make the entire oil taste bitter too. Meanwhile, the heated oil still helps to pull out the flavors from the chili.
What’s Needed
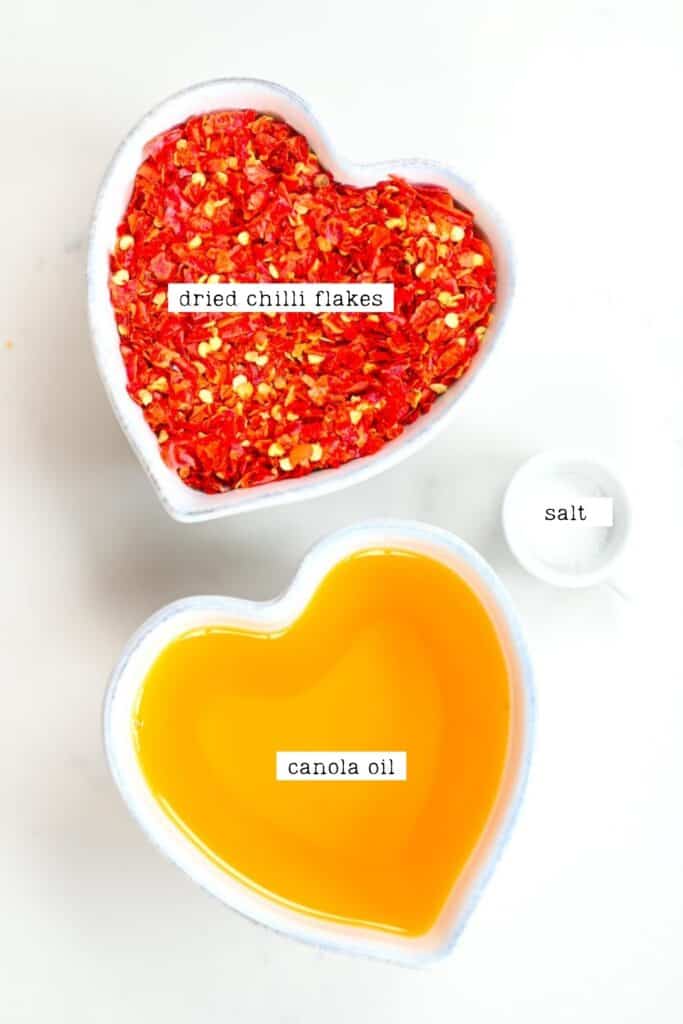
- Dried chili flakes (varieties listed above)
- Canola oil or other neutral oil (as listed above)
- Salt
The Steps
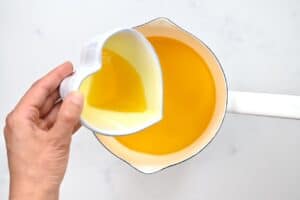
Pour the oil in a small saucepan and heat over medium heat.
Heat the oil for about 2-3 minutes until hot. It’s very important not to overheat the oil, you can use a thermometer if preferred (keep it below 380ºF/193ºC), but heating it on medium-low should suffice.
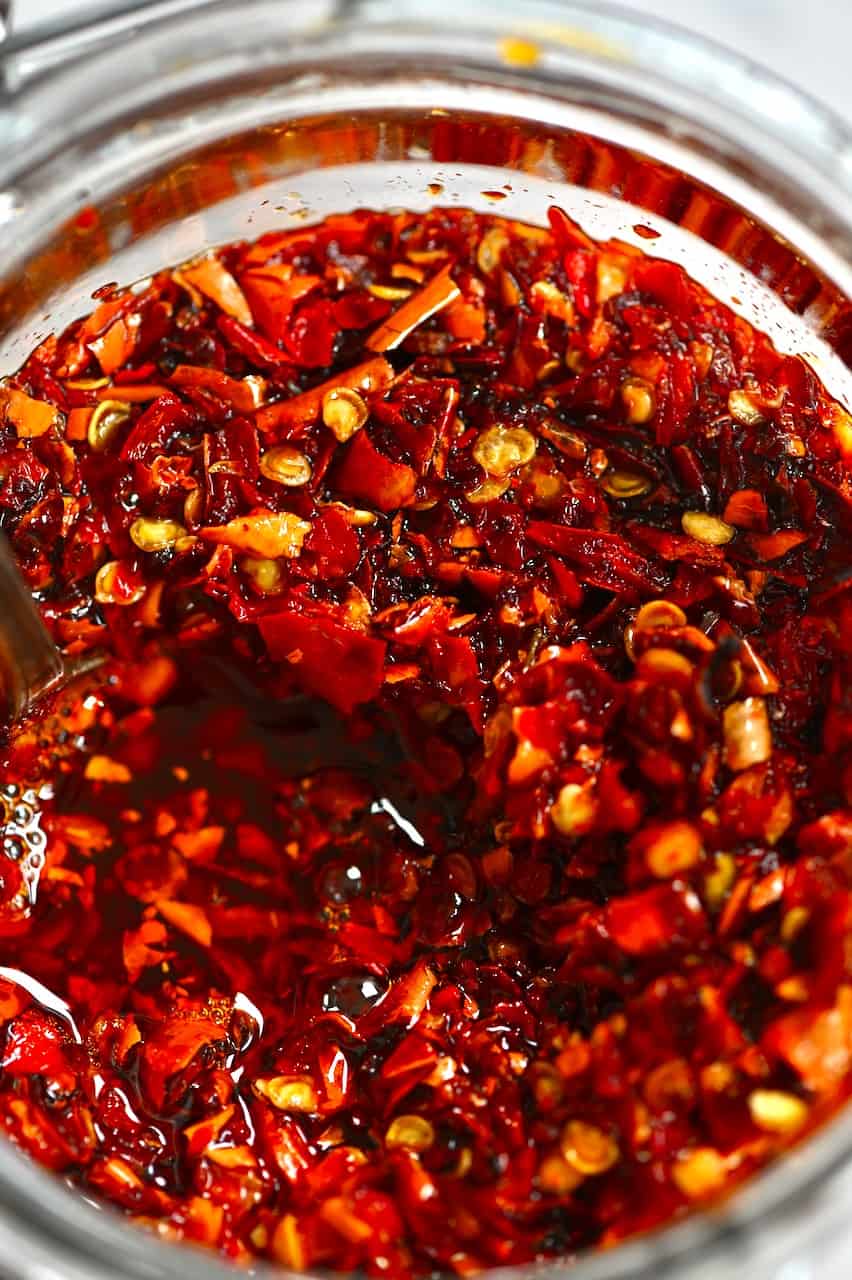
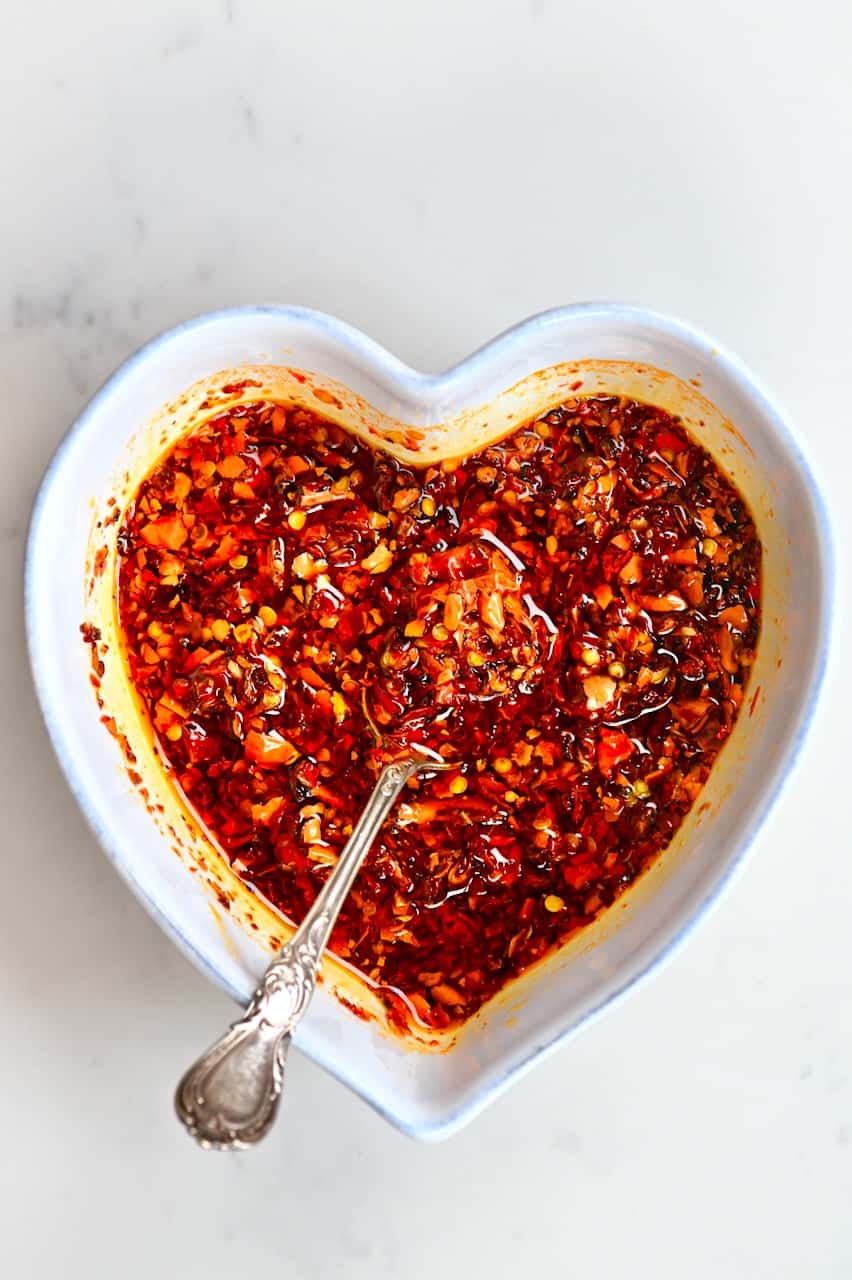
Next, carefully pour the oil over the dried chili flakes. They will sizzle wonderfully from the heat and let off an amazing aroma – see the video.
Add the salt to the mixture and stir well to incorporate fully.
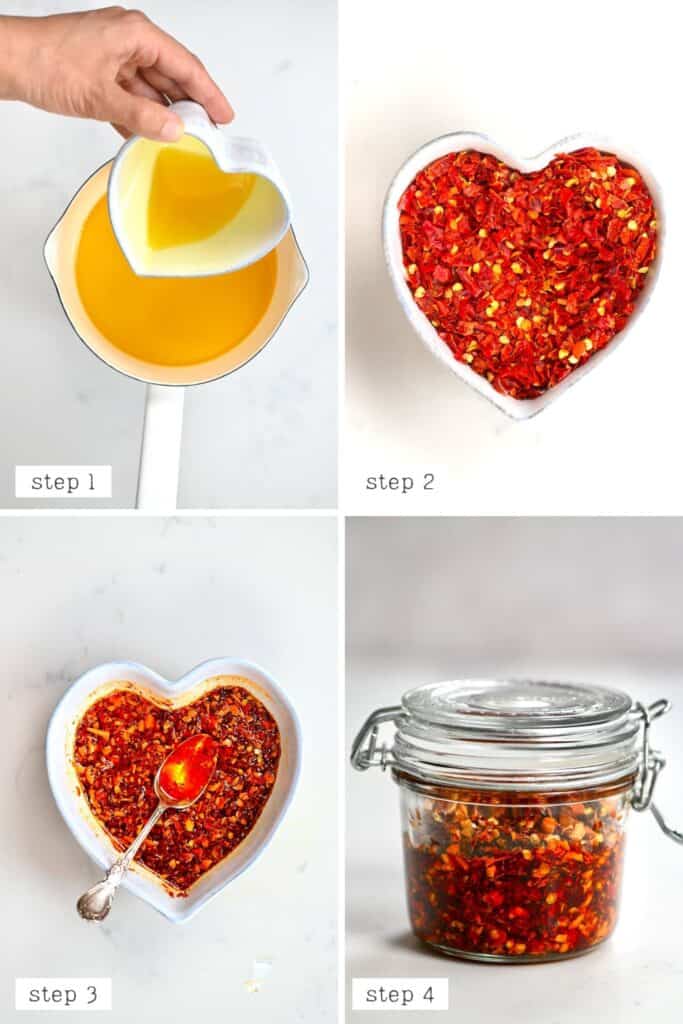
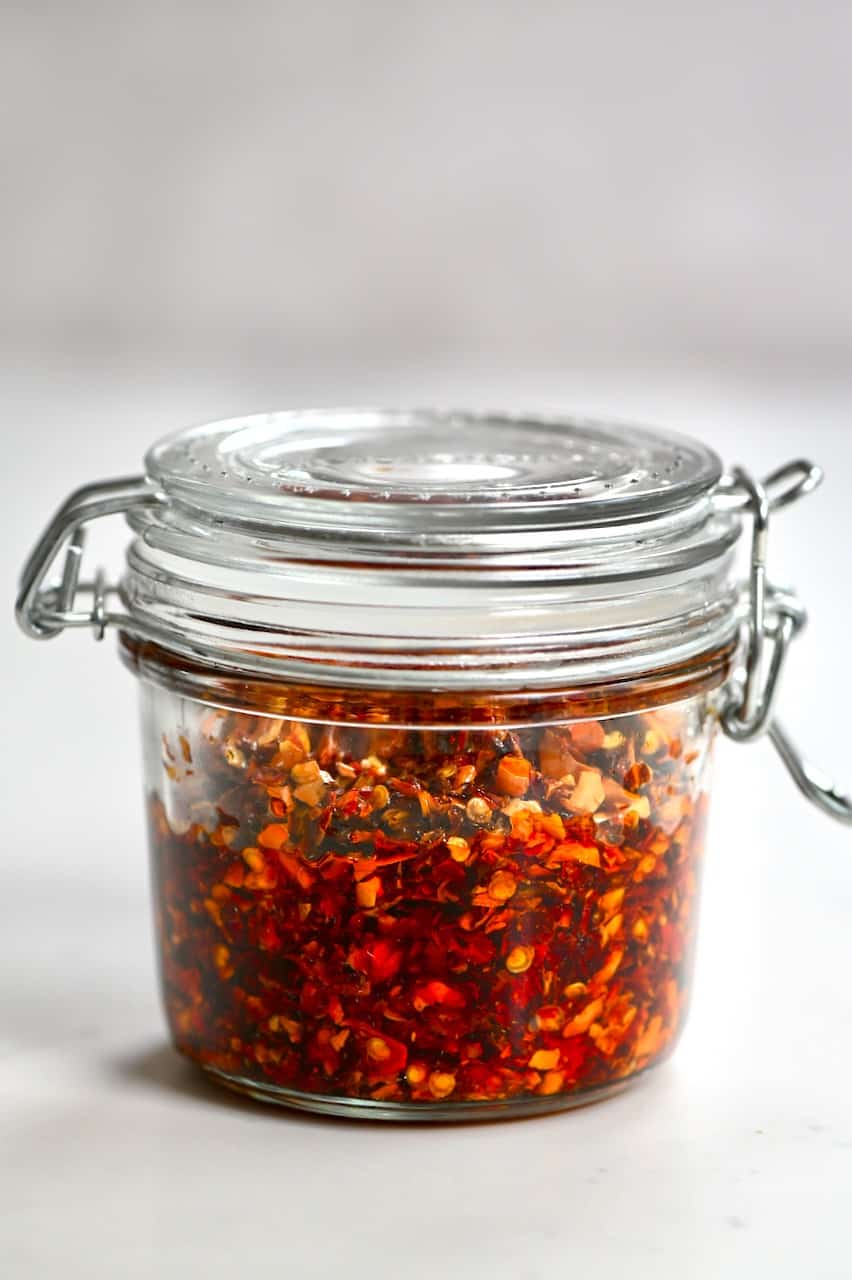
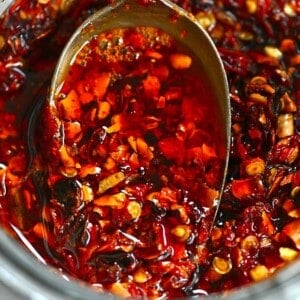
Finally, leave the oil to cool down completely then transfer to a sterilized glass jar.
How to store
As long as the oil is stored in a sterilized, airtight container, then this oil will last six months, if not longer, in the fridge or 2-3 months at room temperature. As we haven’t added any other ‘aromatics,’ it is likely to last far longer (over a year). Just make sure always to use clean utensils when spooning any oil from the jar.
You’ll know when the oil has ‘gone bad’ as the oil will become rancid and will smell and taste bad.
How to serve
Just like with any condiment, this chili oil is perfect for boosting tons and tons of meals. Drizzle over pizza and pasta, garlic chili oil noodles, crispy rice paper dumplings, homemade dumpling soup, rice, dips, sauces, etc. Stir it into dressing and sauces or swirl into soups and stews. I love to use it as a cooking oil too – for stir-fried grains, veggie omelets, veggie stir-fry, and more.
Here are a few dishes that you may like to use the chili oil for:
- Japanese-inspired Ramen Noodle Soup
- Simple Asian Cucumber Salad (Sunomono)
- Lebanese Green Beans (Loubieh Bi Zeit)
- Delicious Homemade Neapolitan pizza (Marinara style)
- Butternut squash pizza
- Vegetarian One-Pot Pasta bake
- Muhammara (Roasted Red Pepper and Walnut Dip)
- Easy Garlic Chili Oil Noodles (10 Minute Meal!)
and many more options.
If you give this recipe a go, then let me know your thoughts in the comments. Also, feel free to tag me in your recreations @AlphaFoodie.
How to Make Chili Oil
Equipment
Ingredients
- 1 cup Dried chili flakes varieties listed in blog post
- 1½ cup Canola oil or other neutral oil as listed in the blog post
- ½ tsp salt
Instructions
- Pour the oil in a small saucepan and heat over medium heat.Heat the oil for about 2-3 minutes until hot. It's very important not to overheat the oil, you can use a thermometer if preferred (keep it below 380ºF/193ºC), but heating it on medium-low should suffice.

- Next, carefully pour the oil over the dried chili flakes. They will sizzle wonderfully from the heat and let off an amazing aroma – see the video.
- Add the salt to the mixture and stir well to fully incorporate.
- Finally, leave the oil to cool down completely then transfer to a sterilized glass jar.


How To Store:
- As long as the oil is stored in a sterilized, airtight container then this oil will last six months, if not longer, in the fridge or around 2-3 months at room temperature. As we haven't added any other 'aromatics', it is likely to last far longer (over a year). Just make sure to always use clean utensils when spooning any oil from the jar.You'll know when the oil has 'gone bad' as the oil will become rancid and will smell and taste bad.
Video
Notes
- You can leave the chili oil with the flakes inside or strain it for a clear oil.
- Make sure that the jar/container you use has been sterilized in boiling water and left to dry completely.
- Experiment with the types of chili flakes you use and the amounts of each. start of subtle if you know you prefer a subtle-spice. It may take some time and experimentation to find your perfect combination!
- When adding any extra aromatics, this will affect the shelf life of the oil, so be aware.
Nutrition
Nutrition information is automatically calculated, so should only be used as an approximation.


Made this tonight and it turned out amazing! Thank you for sharing this easy and fast recipe!
You’re welcome, Asya. Glad you like it! 🙂