This post may contain affiliate links. Please read our disclosure policy.
Make the BEST homemade peanut butter with just two ingredients. It’s simple to make, creamy, delicious, and cheaper than store-bought.
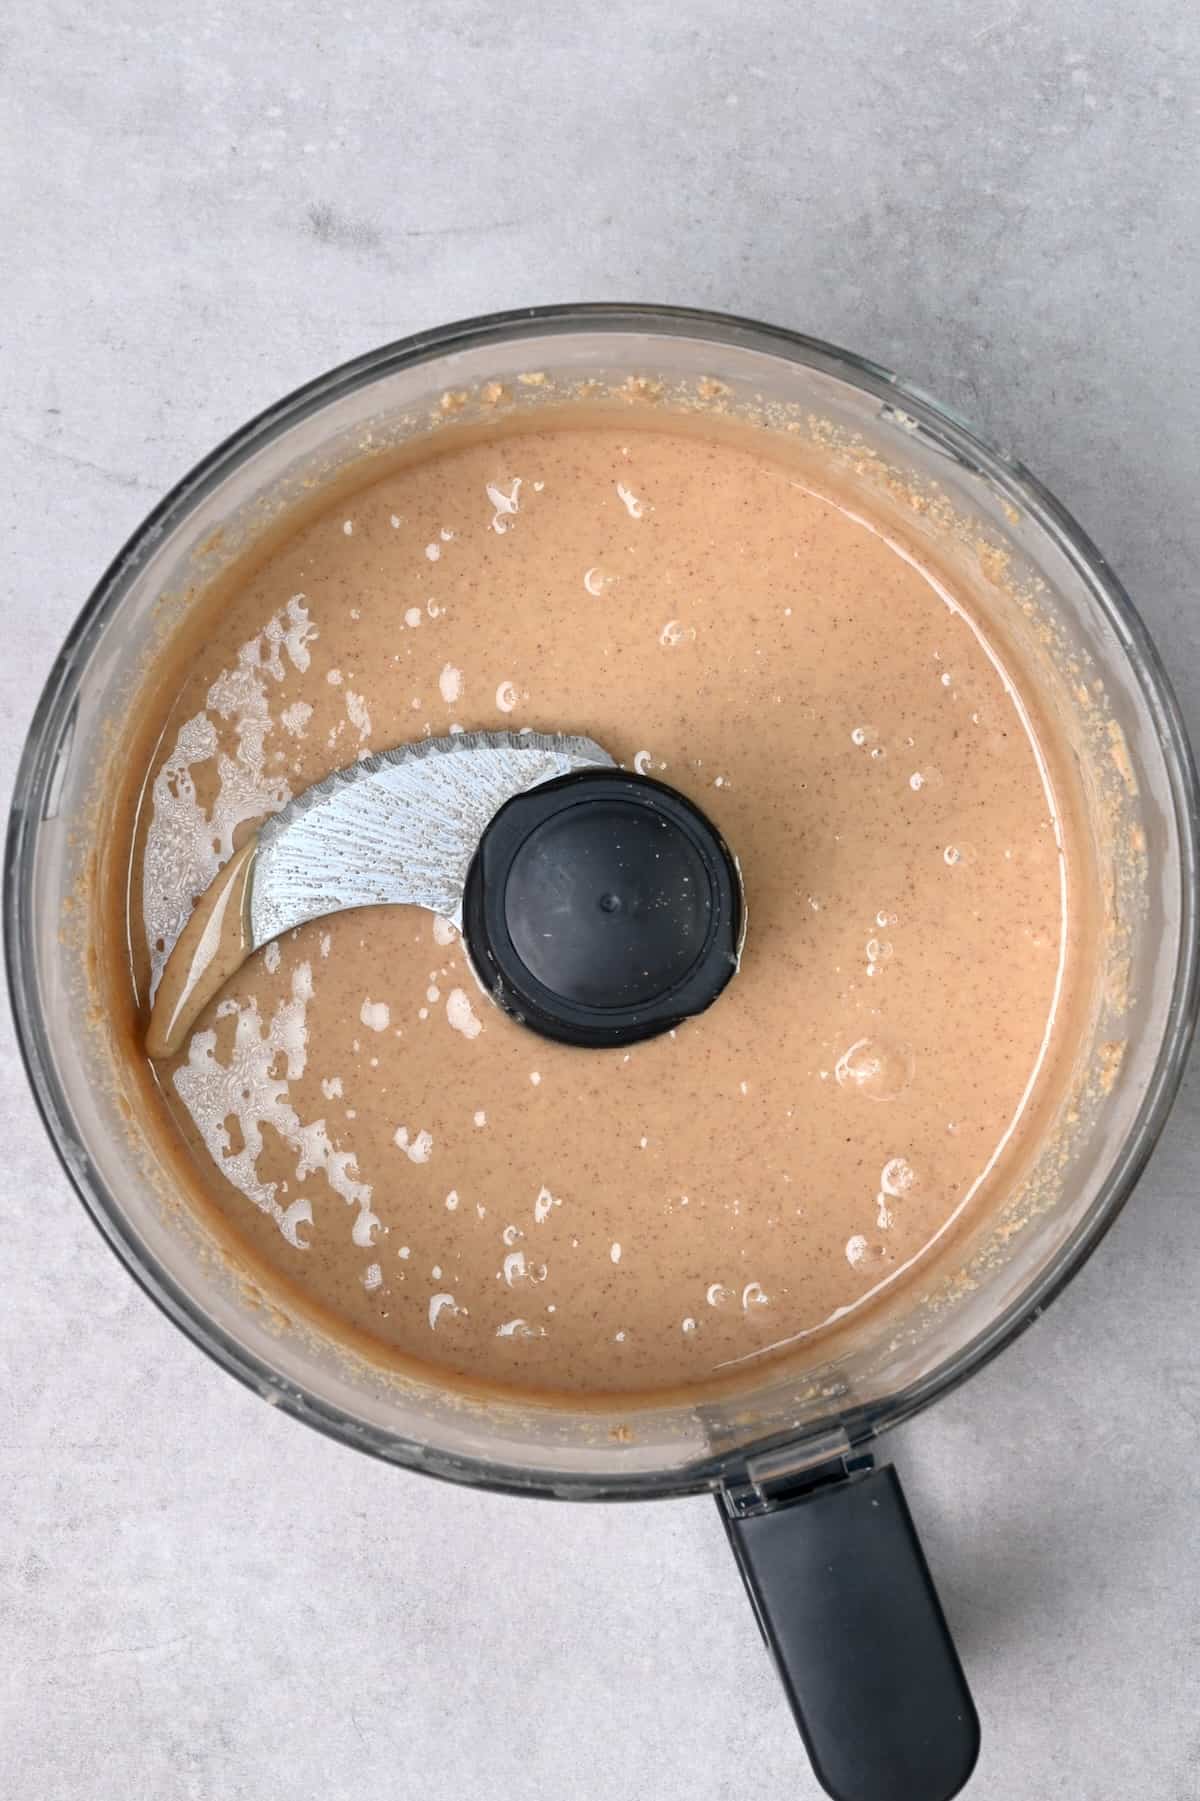
Peanut butter is a tasty high-protein spread that everyone loves. But why pay for a jar when you can make it with a simple process? Also, grocery store versions tend to have too many ingredients. To this, I say: for a fraction of the price and with just 2 ingredients – roasted peanuts and salt, you can easily make your own peanut butter at home.
So here is my simple homemade peanut butter recipe for the best, super smooth, and creamy spread.
Want to save this recipe?
What to Look for When Buying Peanuts
For homemade peanut butter, it’s best to use raw, unroasted peanuts. Store-bought roasted nuts often include additives such as oils, salt, flour/starch, as well as spices and herbs. You need unroasted, unsalted peanuts. Plus, you will have to roast the nuts before blending them so they release their natural oils – this is an important part that shouldn’t be skipped by buying already roasted peanuts.
For those looking to simplify the process and save time, you can always purchase already blanched peanuts. This eliminates a lot of mess and significantly speeds up the preparation.
I usually peel them myself after roasting which means sometimes a bit of the skin is left on nuts. And it does take some extra time.
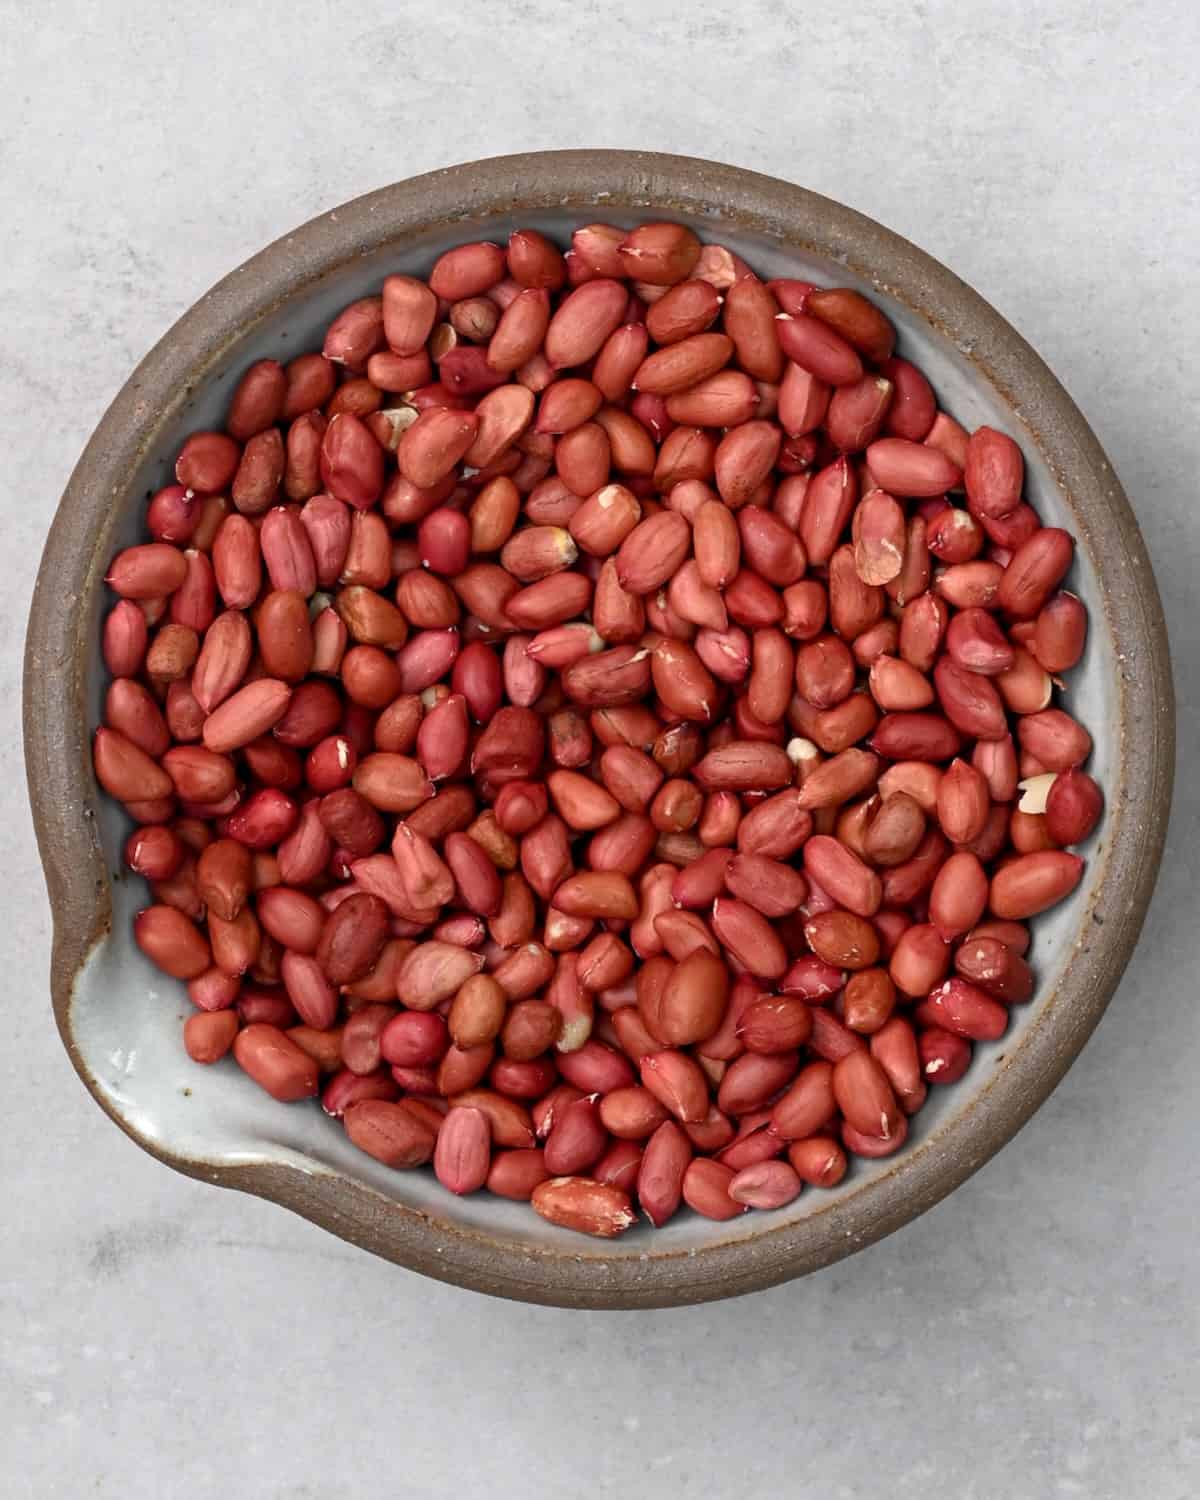
Lastly, when choosing the best peanuts for peanut butter, keep in mind that there are four main peanut varieties, Valencia, Runner, Virginia, and Spanish. Runner is the traditional choice when making homemade peanut butter but you can use whichever you prefer or have at hand.
How to Make Homemade Peanut Butter
To begin with, the only homemade peanut butter ingredients you need are raw peanuts and salt.
Step 1: Prepared and Roast the Peanuts
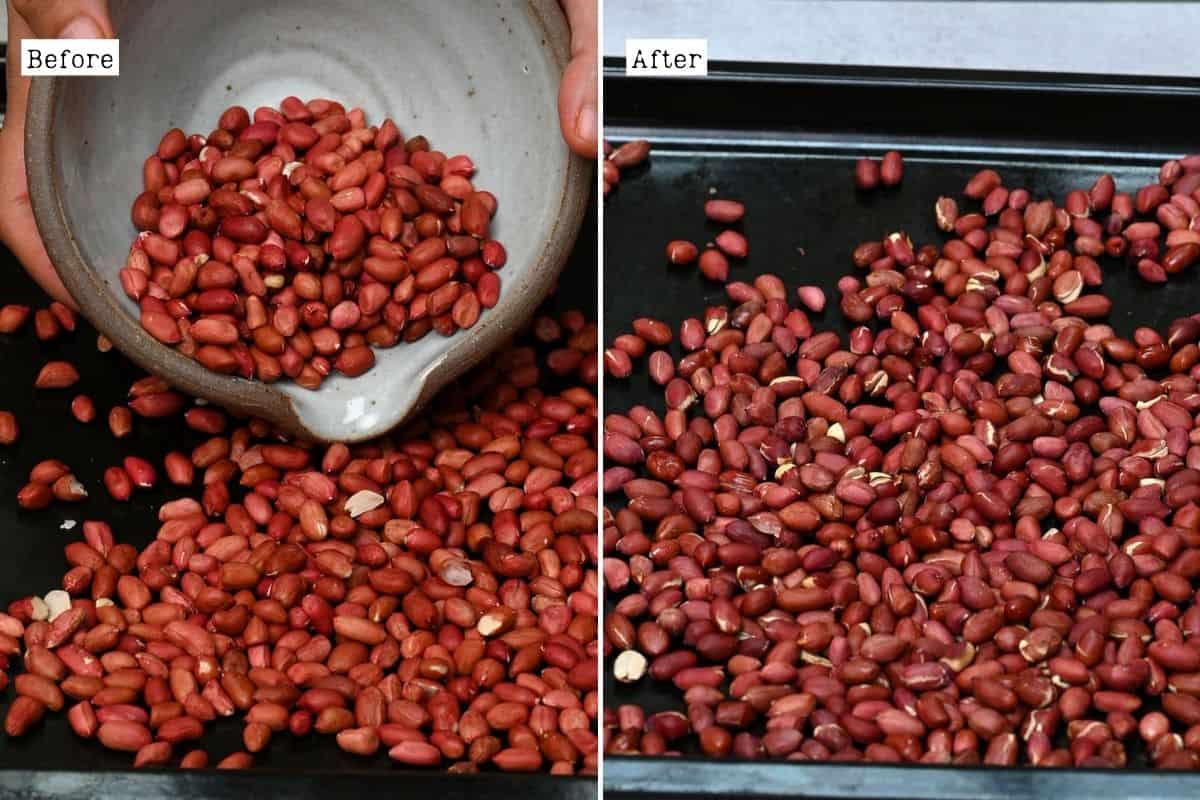
While you can consume them raw, I like roasting peanuts for peanut butter as this releases their natural oils which helps when blending.
Place the peanuts on a baking tray. Roast in the oven at 325ºF/165ºC for 7-10 minutes. Let them cool down before peeling and blending.
Note: if you use peeled raw peanuts, you still need to roast them.
Step 2: Remove the Skin
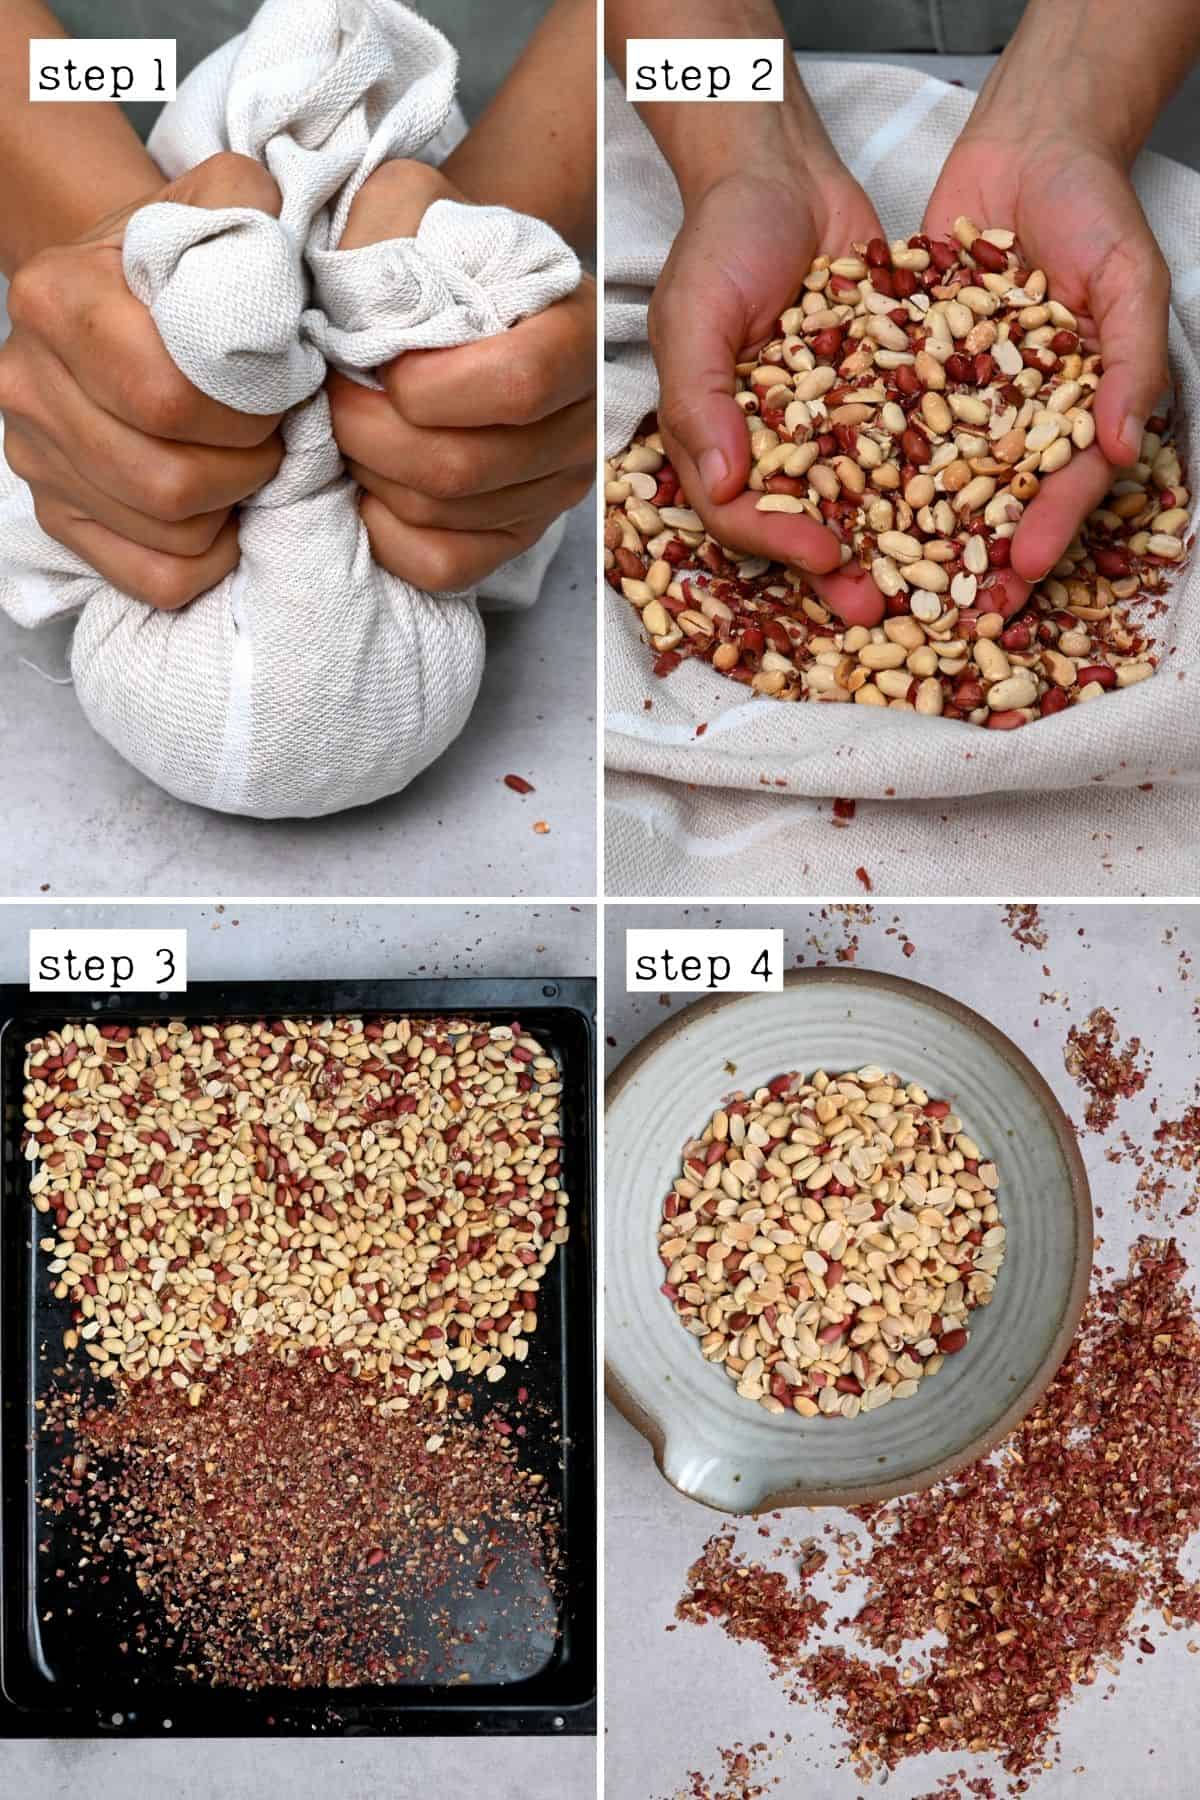
Skip this step if you bought already peeled peanuts. Also, this step is optional as you can keep the skin on if preferred.
As soon as you can handle the peanuts, carefully peel them. An effortless way to remove the skin is to scrunch the peanuts with your hands or in a kitchen towel. The skin will come off easily. Then collect the peeled nuts.
Step 3: Blend
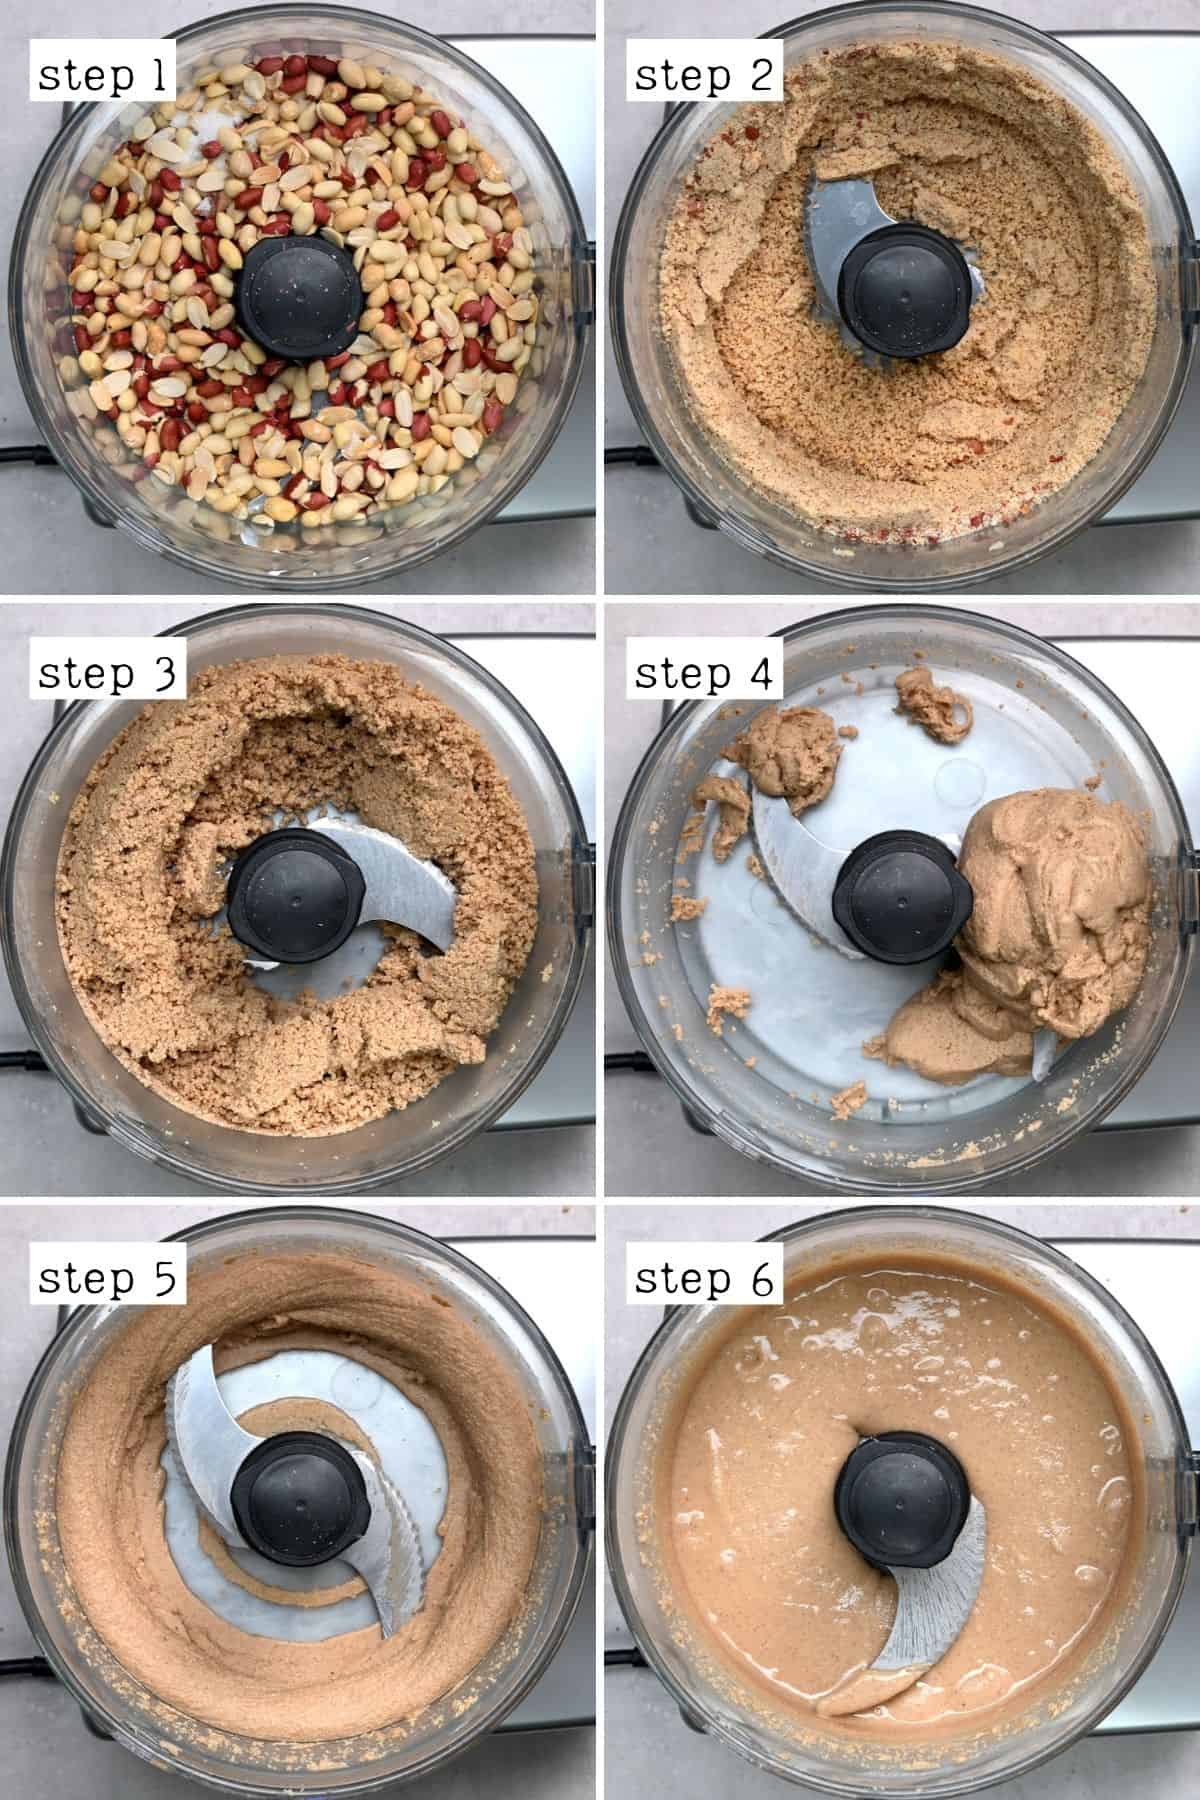
Once cooled, place the peanuts and a pinch of salt in a food processor or a high-speed blender and blitz them until you achieve your desired consistency. The longer you blend, the runnier the peanut butter becomes.
Also, make sure to give the machine a break so it doesn’t overheat! Use this time to scrape down the sides of the processor bowl.
Depending on your machine, how much homemade peanut butter you are making, and the texture you like, this process can take between 5 and 15-20 minutes.
For Chunky Peanut Butter
If you want to make chunky peanut butter, first pulse the roasted peanuts until they are chopped into small pieces. Then place some of them to the side.
Continue blending the rest until you obtain a smooth butter. Then finally, stir in the reserved chopped peanuts, and voila, you get chunky peanut butter.
Step 4: Store
Once you’ve blended the homemade peanut butter to your desired consistency, pour it into a clean mason jar or glass container. When kept in a pantry or cupboard, it can last for at least 3-4 weeks. However, I recommend keeping it in the fridge for 2-3 months.
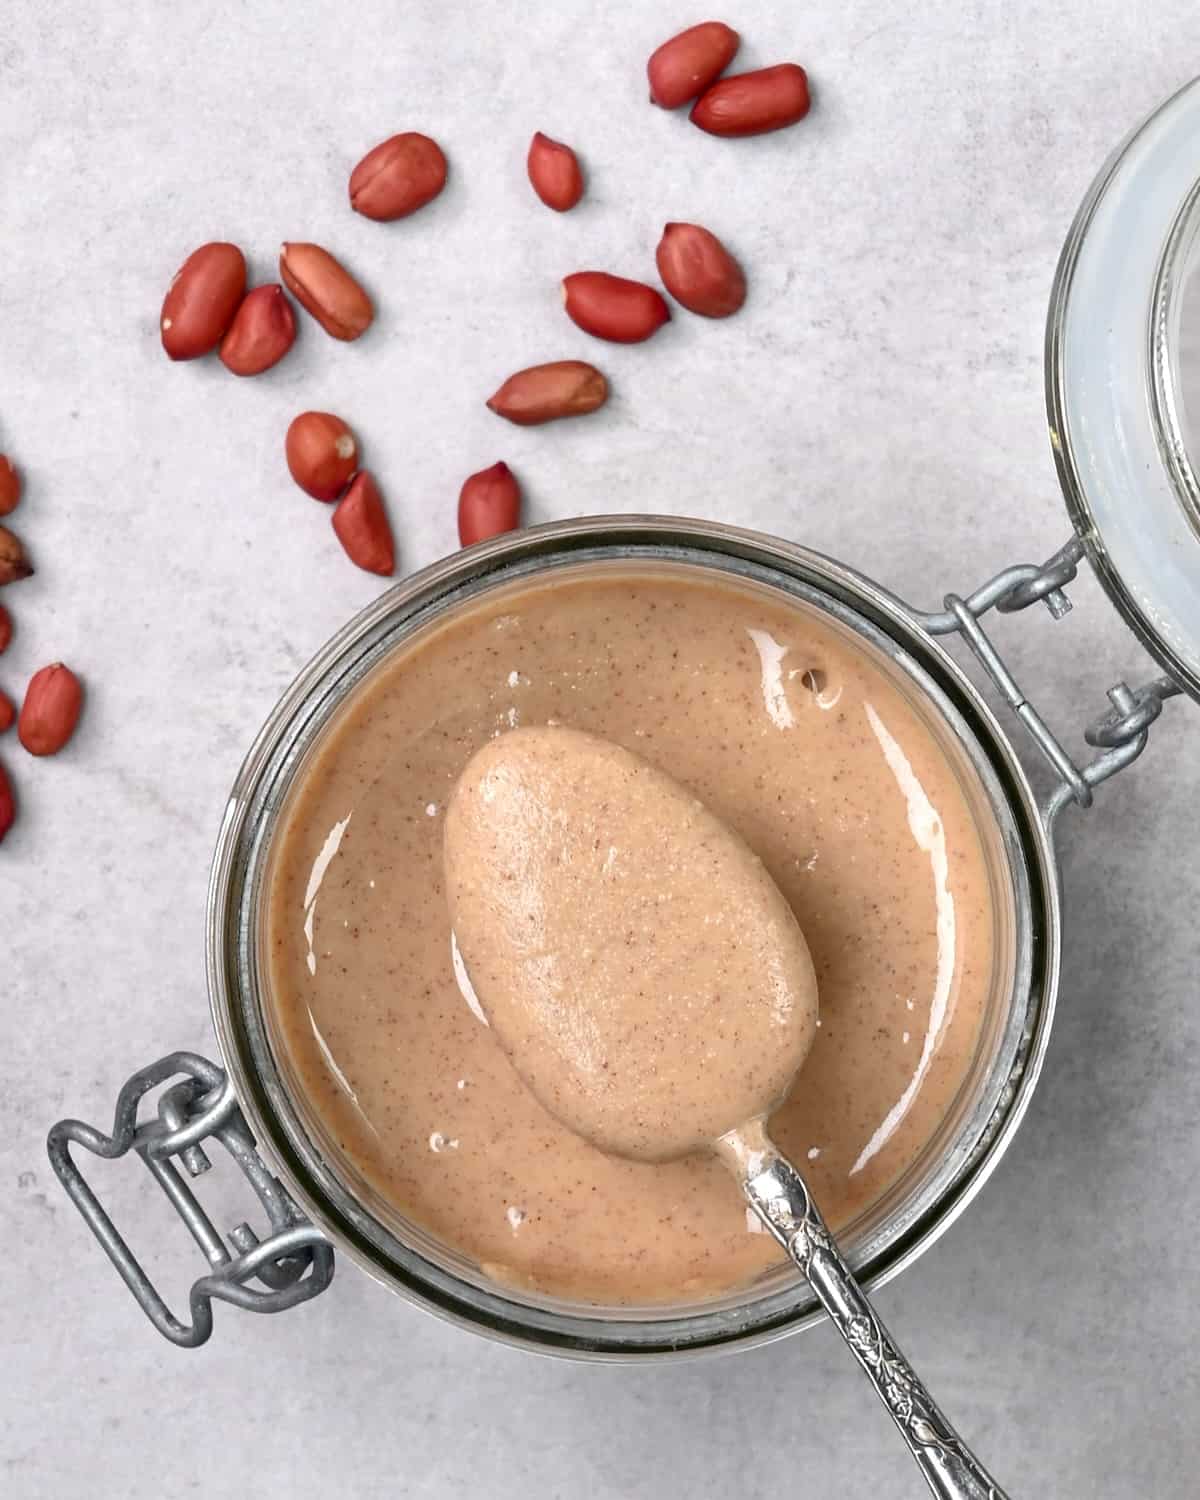
Peanut butter tends to separate over time, with the natural oils rising to the top – this is completely natural. Make sure to stir it before use to redistribute the peanut oils.
If you notice any signs of spoilage (such as a change in smell, color, or texture), it’s best to discard it. When spoiled, it is darker in color and has a sour/bitter taste.
Can You Freeze Peanut Butter
Natural peanut butter – anything with more than 90% peanuts – freezes well. It will keep for about 6 months when stored in a freezer-safe container
What to Eat with Peanut Butter
There are a few classic ways to enjoy creamy peanut butter:
- PB&J: Spread a generous amount of the butter and raspberry jam (or your favorite jam) over a slice of toasted bread.
- With fruit & veggies: Dip or spoon peanut butter over slices of banana, apple, celery, or carrots. These are tasty combinations that make a protein-rich snack.
- Pancakes/waffles: Drizzle some of the peanut sauce over freshly made pancakes and waffles.
- Breakfast: Stir some into your morning oatmeal, overnight oats, or yogurt bowl for added creaminess and flavor. You can also blend it into your favorite smoothie for an extra boost of protein and nutty flavor.
And here are some of my other favorite uses for peanut butter:
- Use it to make peanut dressing or sauce for all your favorite Asian-inspired dishes.
- Make vegan caramel sauce.
- Add it to desserts like chocolate peanut butter baked oatmeal, brownies, Mars cake, peanut butter cookies, and more.
More Easy Nut Butter DIYs
If you try this DIY peanut butter recipe, let me know how it goes in the comments below. I’d appreciate a recipe card rating and would love to see your recipe recreations – tag me on Instagram @Alphafoodie!
The Best Homemade Peanut Butter
Equipment
- Food Processor or blender
Ingredients
- 14 oz peanuts raw, peeled or with skin,3 cups
- 1/2 tsp sea salt
This will yield 1.5 cups of peanut butter
Instructions
- Place the peanuts on a baking tray. Roast in the oven at 325ºF/165ºC for 7-10 minutes. The longer you roast them, the deeper the color of the peanut butter. Let them cool down before peeling and blending.
- Skip this step if you have already peeled peanuts. Also, this step is optional as you can keep the skin on if preferred. As soon as you can handle the peanuts, carefully peel them. The skin should just come off easily when you scrunch them in your hands or with a towel.
- Once cooled, place the peanuts and a pinch of salt in a food processor or a high-speed blender and blitz them until you achieve your desired consistency – this process can take between 5 and 15-20 minutes. The longer you blend, the runnier the peanut butter becomes.Make sure to give the machine a break so it doesn't overheat! Use this time to scrape down the sides of the processor bowl.
- Once you've blended the homemade peanut butter to your desired consistency, pour it into a clean mason jar or glass container. When kept in a pantry or cupboard, it can last for at least 3-4 weeks. However, I recommend keeping it in the fridge for 2-3 months. Make sure to stir it before use to redistribute the peanut oils.
Video
Notes
Nutrition
Nutrition information is automatically calculated, so should only be used as an approximation.


Instead of salt or honey can I use chocolate chips to make creamy peanut butter and chocolate
Hi Randy,
You can still add the salt – it will enhance the chocolate flovor. Ad for the chocolate chips – are you planning on melting them? Or do you want to have some crunchy bits in the peanut butter? If you want to blend into the peanut butter, you can at least soften them a bit for a few seconds in the microwave. Let me know how it goes!
I want to try making my own homemade peanut butter. Can you suggest a vendor from which to purchase the peanuts online? I would appreciate any suggestions that you can give.
Hi Mina,
It’s best to check out the reviews for a vendor that can deliver to your area. I hope you give this recipe a try 🙂
Hi Samira!
This is so amazing, I never knew it was that easy to make home made peanut butter! I will definitely try to make this! Thank you so much for the explanation!
Greetings form the Netherlands 🙂
Thanks for your comment, Michaël.
I hope you give it a try – I also have other nut and seed butters on the blog if you want to check them out – they all use the same method. 🙂
Do all the nut butters need to be put in the fridge?
Trying out peanut, cashew and almond today
Hi Wendy,
That sounds amazing! It is recommended that you store any homemade nut butters in the fridge if your room temperature is above 21º Celsius. I hope this answers your question. 🙂
I don’t have an oven. Is it okay to pan roast them? If so how long should I do that?
I’ve never tried, but I imagine that it would work. Just dry-fry them until they begin to brown and smell toasty. Probably between 5-10 minutes 🙂
mine is not* powerful enough
Hello! I love your recipes! Always looks so good and fun to do!! I’m looking for a good blender because mine is now powerful enough. Which one are you using? Do you have any recommandation? Thank you very much!
Thank you 🙂 I’m glad you enjoy them! I’ve used lots of different blenders and food processors before and they’ve all worked( vitamix, blendtec and a few food processors) If your blender isn’t very powerful you will just need to blend the butter for longer, giving it lots of breaks in between – so that it doesn’t overheat 🙂
Hey, out of all the blenders/food processors you’ve tried, which one would you recommend for nut butter?
Hi Neha,
Any food processor should work. Just make sure to give your machine a rest from time to time so it doesn’t overheat. You might have to run it for 10-15 minutes to get to the nut butter consistency you like. High-speed blenders usually are faster in getting to that consistency, but you can make peanut butter with any blender.