
This post may contain affiliate links. Please read our disclosure policy.


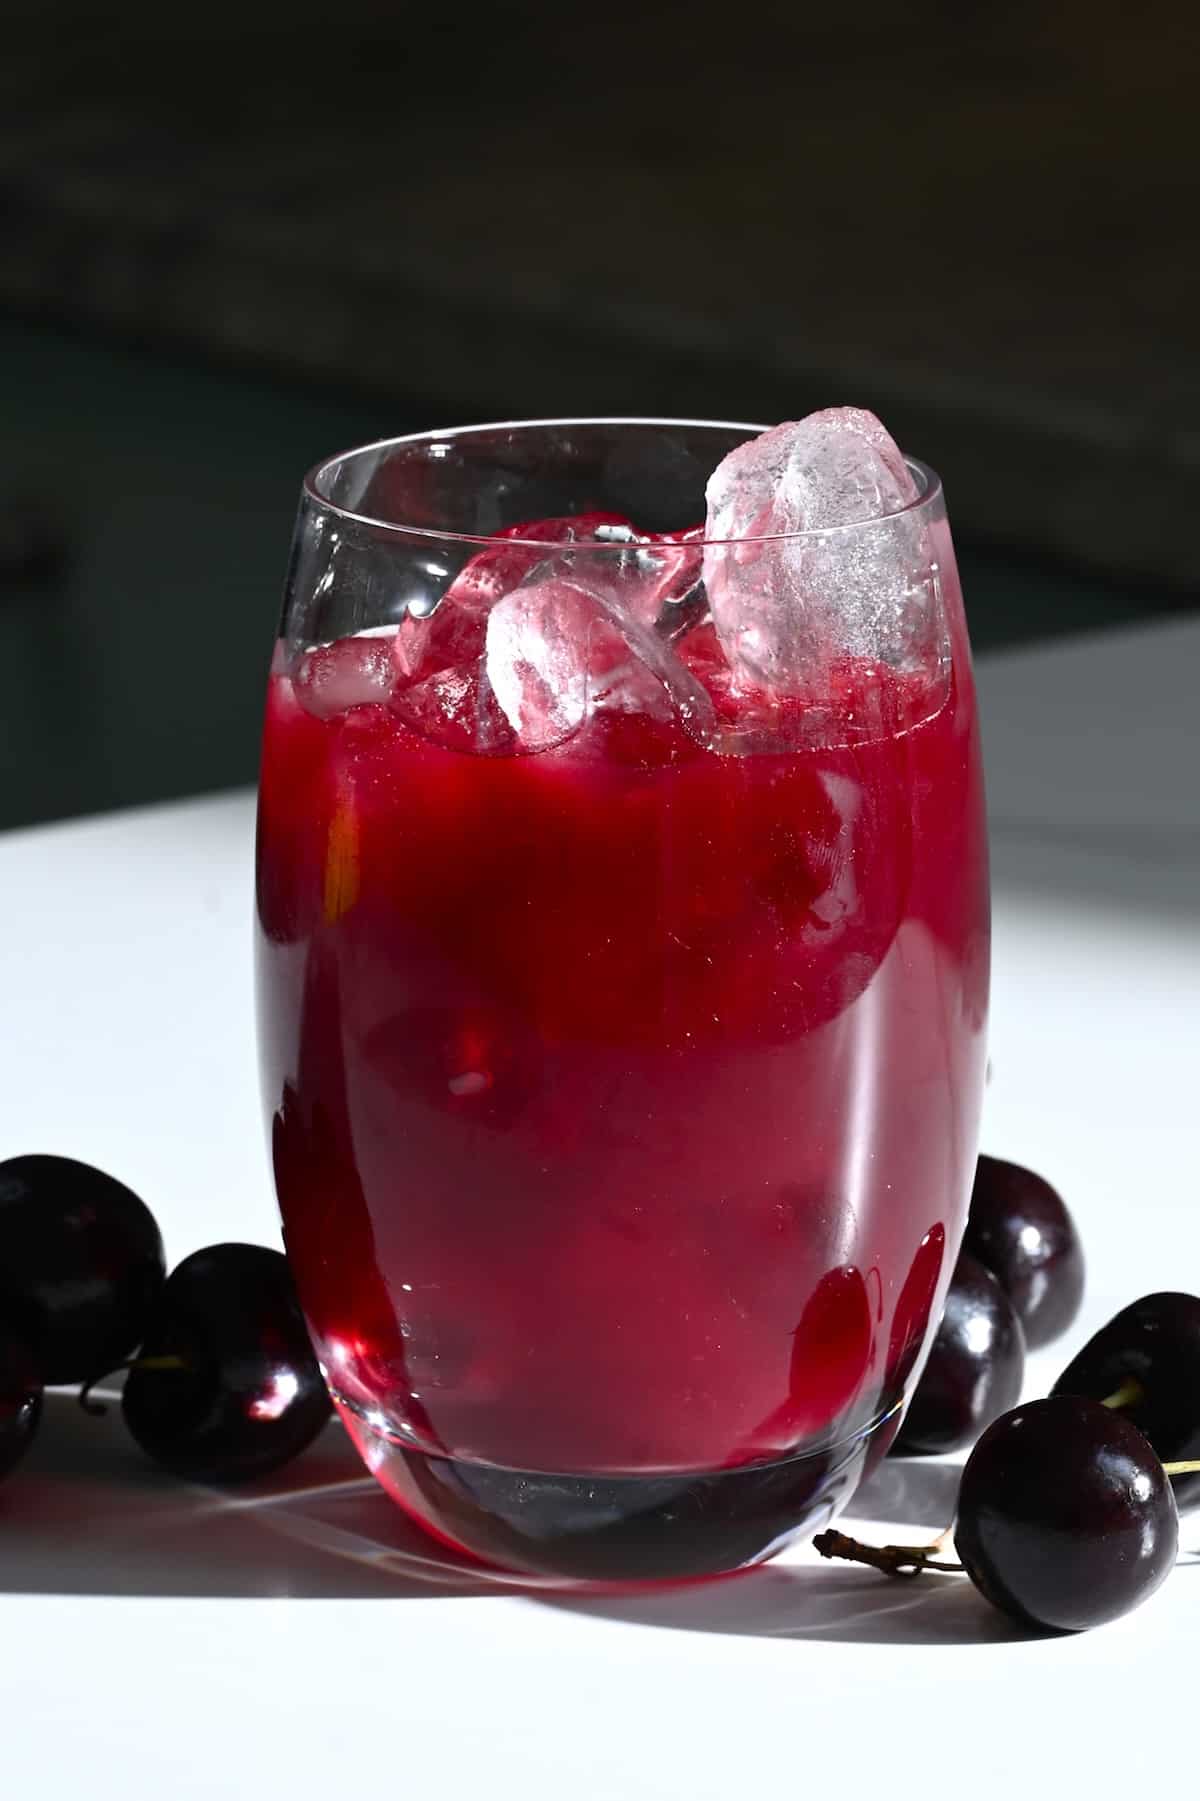
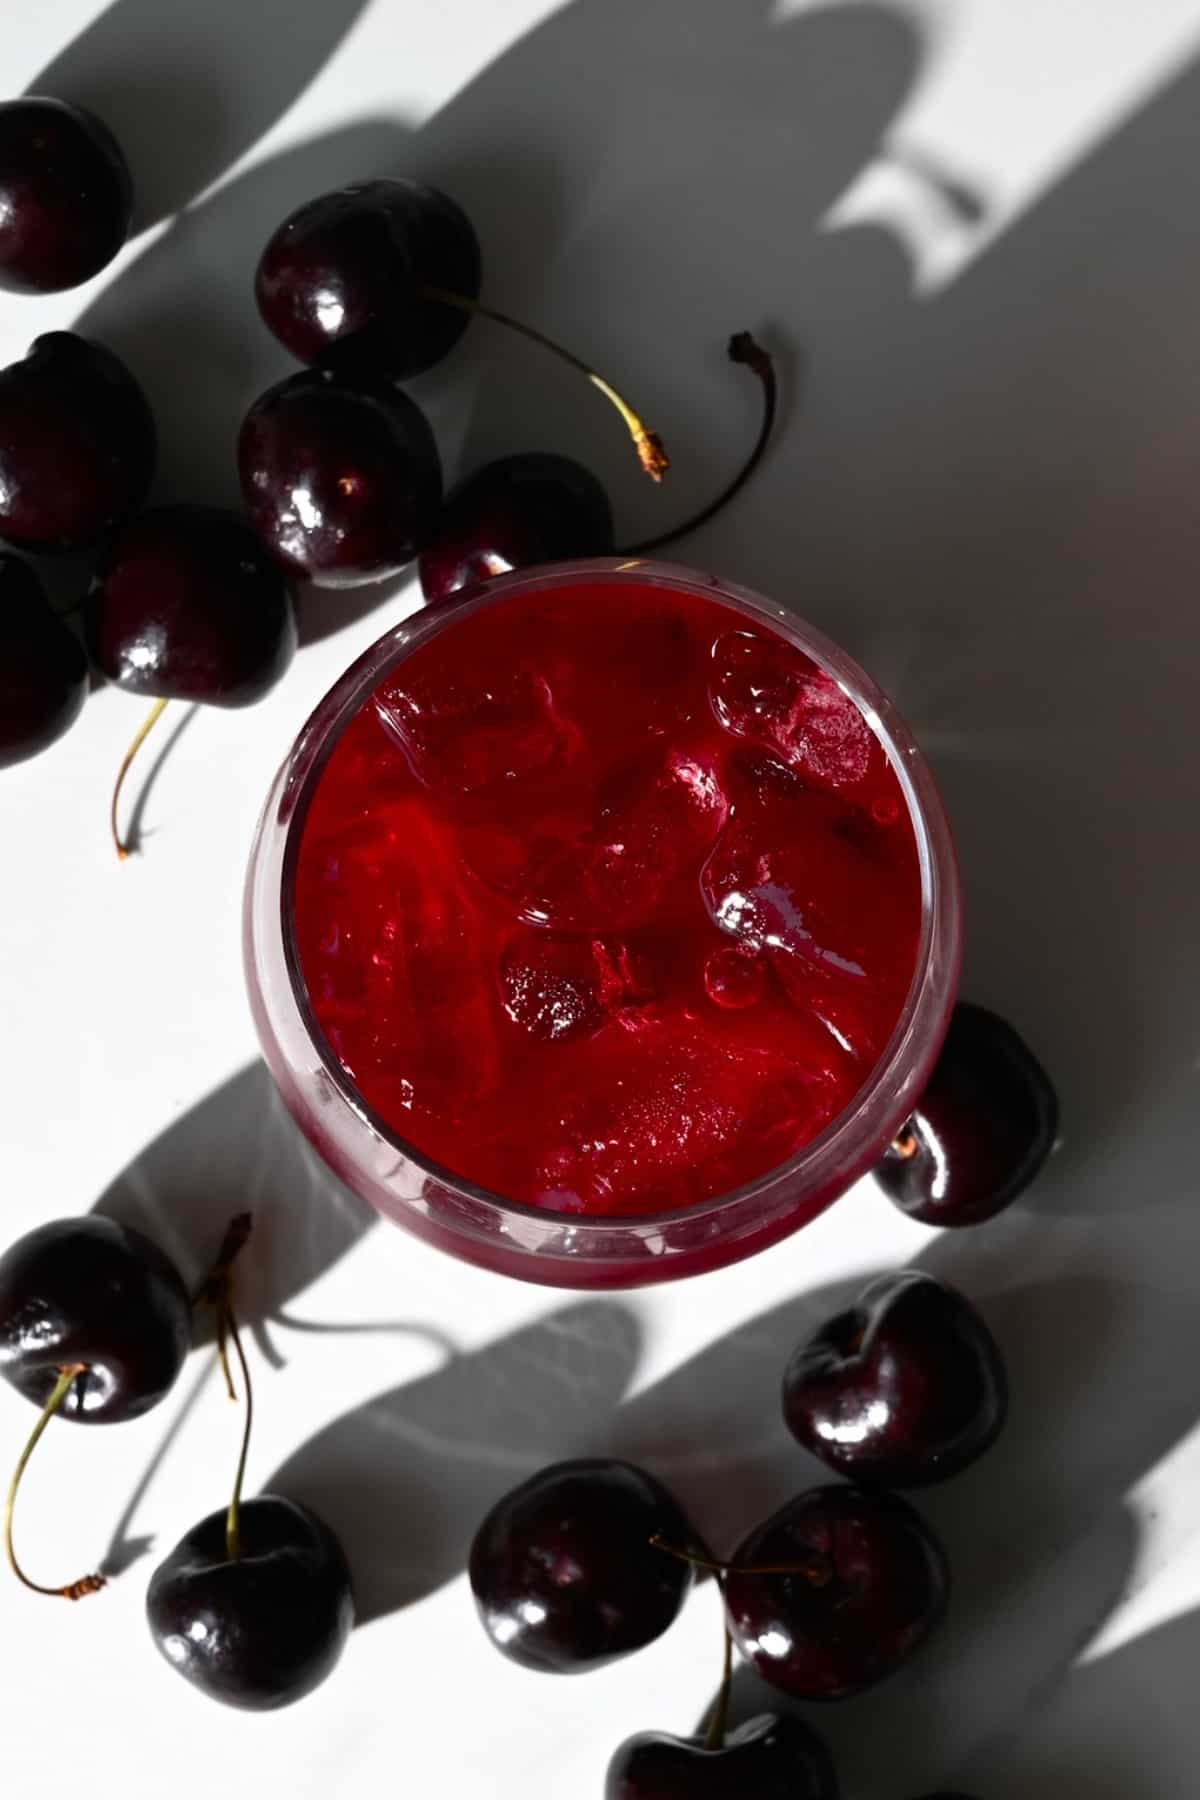
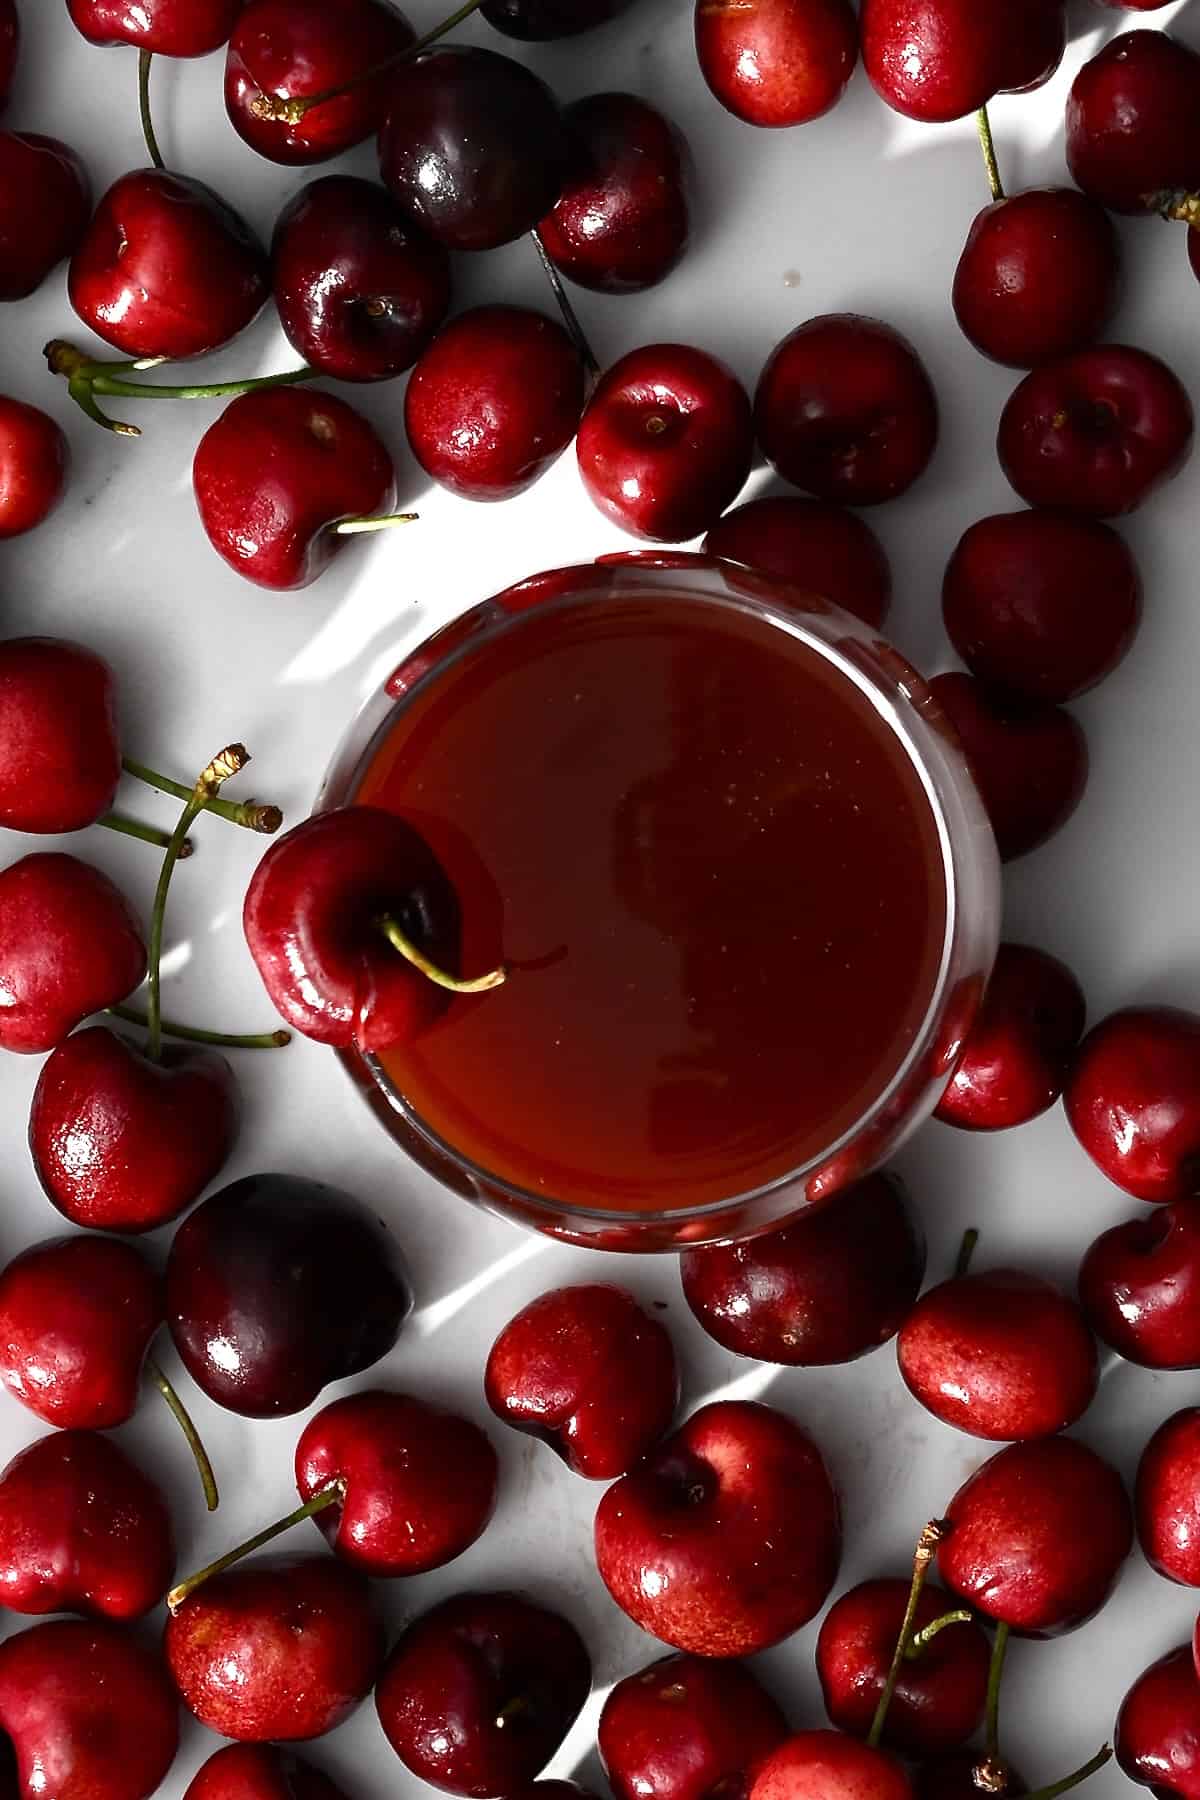
How to pit cherries and make homemade cherry juice using either sweet or tart cherries and one of five methods—with or without a juicer. This sweet/tart cherry juice is super refreshing, and flavorful.
I currently have leftover mango juice, peach juice, and pineapple juice in my freezer. But I can’t seem to stop this homemade fruit juice kick that I’m on. Next up, how to make cherry juice!
Cherry juice comes in sweet and tart versions. Though drinking tart cherry juice is what I am used to from my upbringing. It is a super cooling, refreshing drink for the warmer summer months (with no added sugars).
If you haven’t tried it, you’re missing out! And, while these days I usually eat my cherries in the form of cheesecakes and tarts (yummy), it’s time to get back to the basics.
Luckily, there are several ways to juice cherries at home (sweet cherries or sour Montmorency cherries) with or without a juicer or blender. The resulting juice is super fresh and 100% additive and preservative free – yay! Plus, since you need to pit cherries before juicing them, I’ve also included several methods on how to pit cherries without a cherry pitter!
Want to save this recipe?
What you’ll need
This cherry juice recipe requires just one ingredient with optional water and sweetener (depending on the juicing method you use).
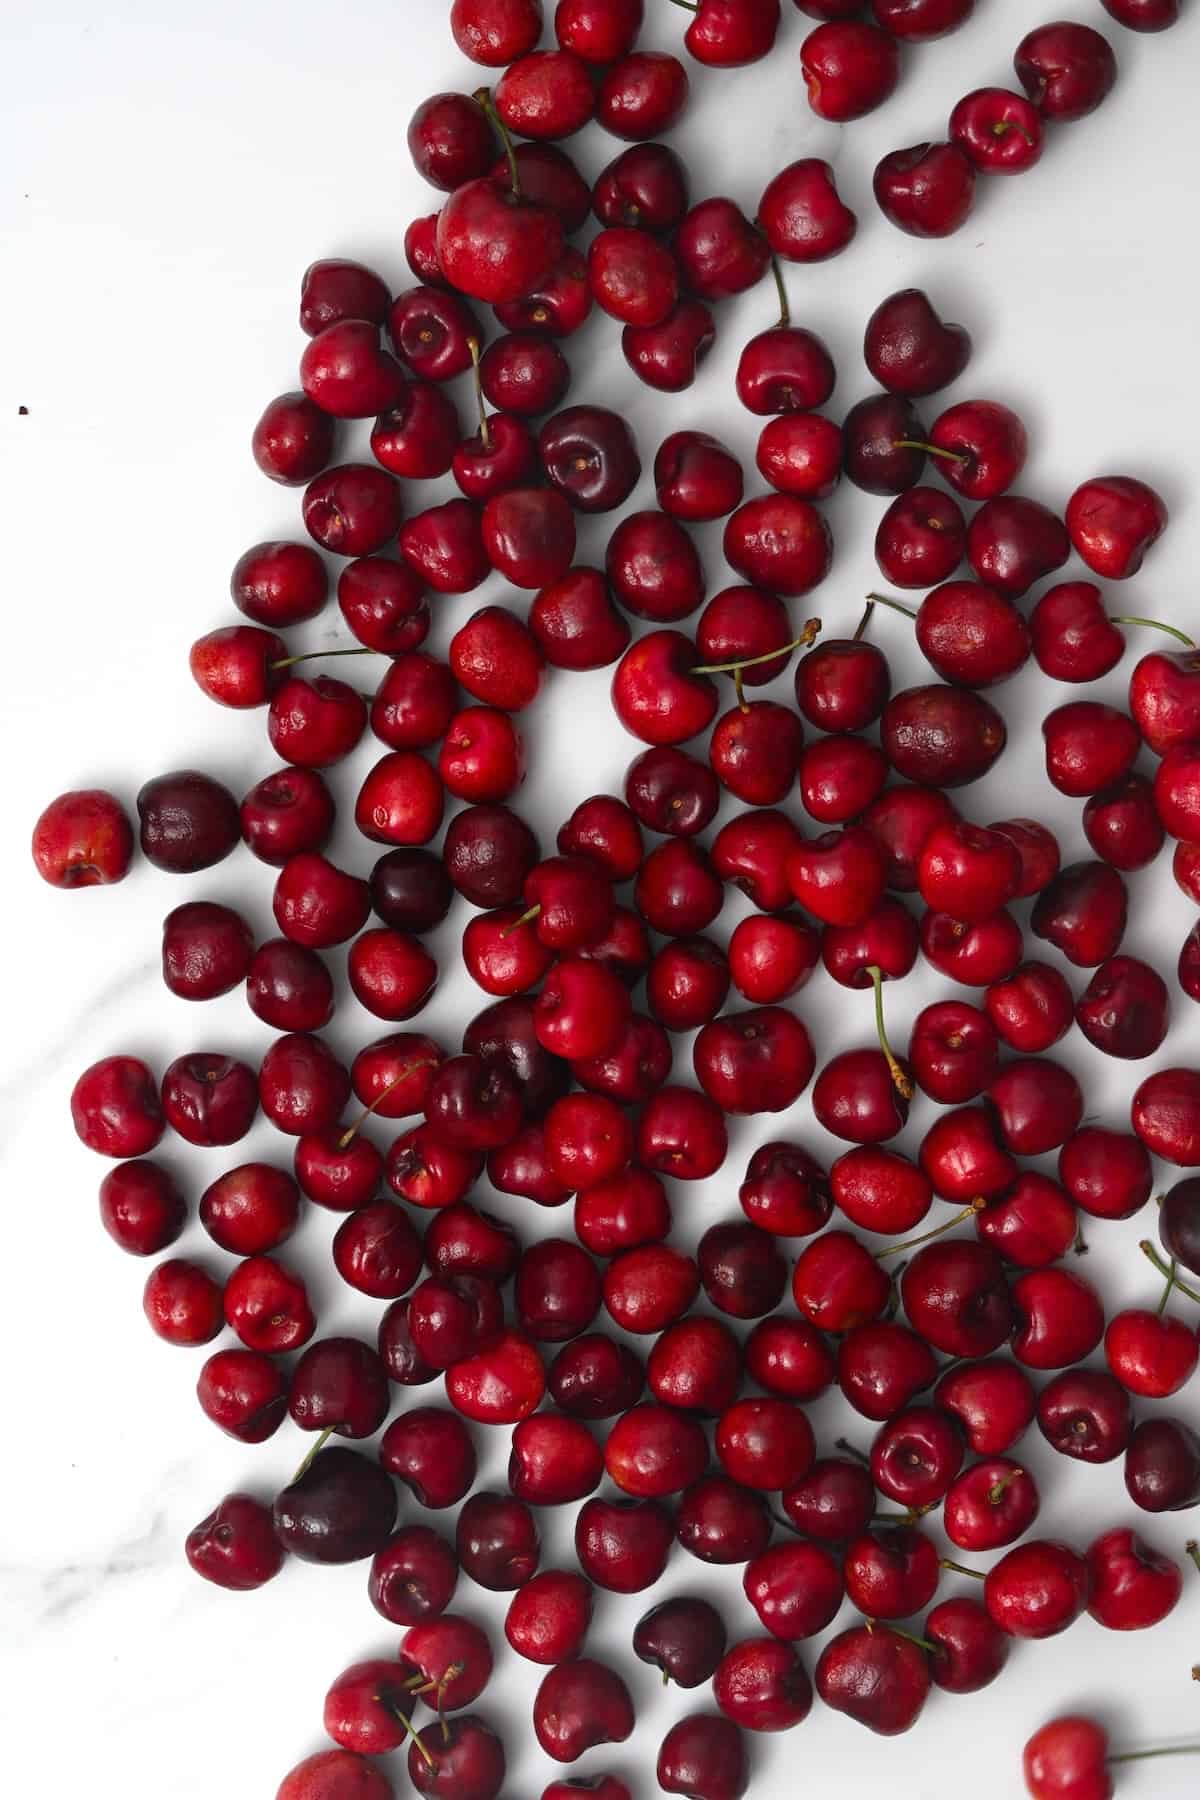
- Cherries: You can use fresh (ripe and in season for the best flavor) or frozen (and thawed) cherries to make cherry juice. You can also make tart cherry juice using Montmorency cherries or other tart, sour cherry varieties (like black cherries).
I highly recommend using organic cherries when making juice, as you’ll be consuming a large amount of cherries in one go, and standard supermarket cherries are often loaded with pesticides.
You’ll also need
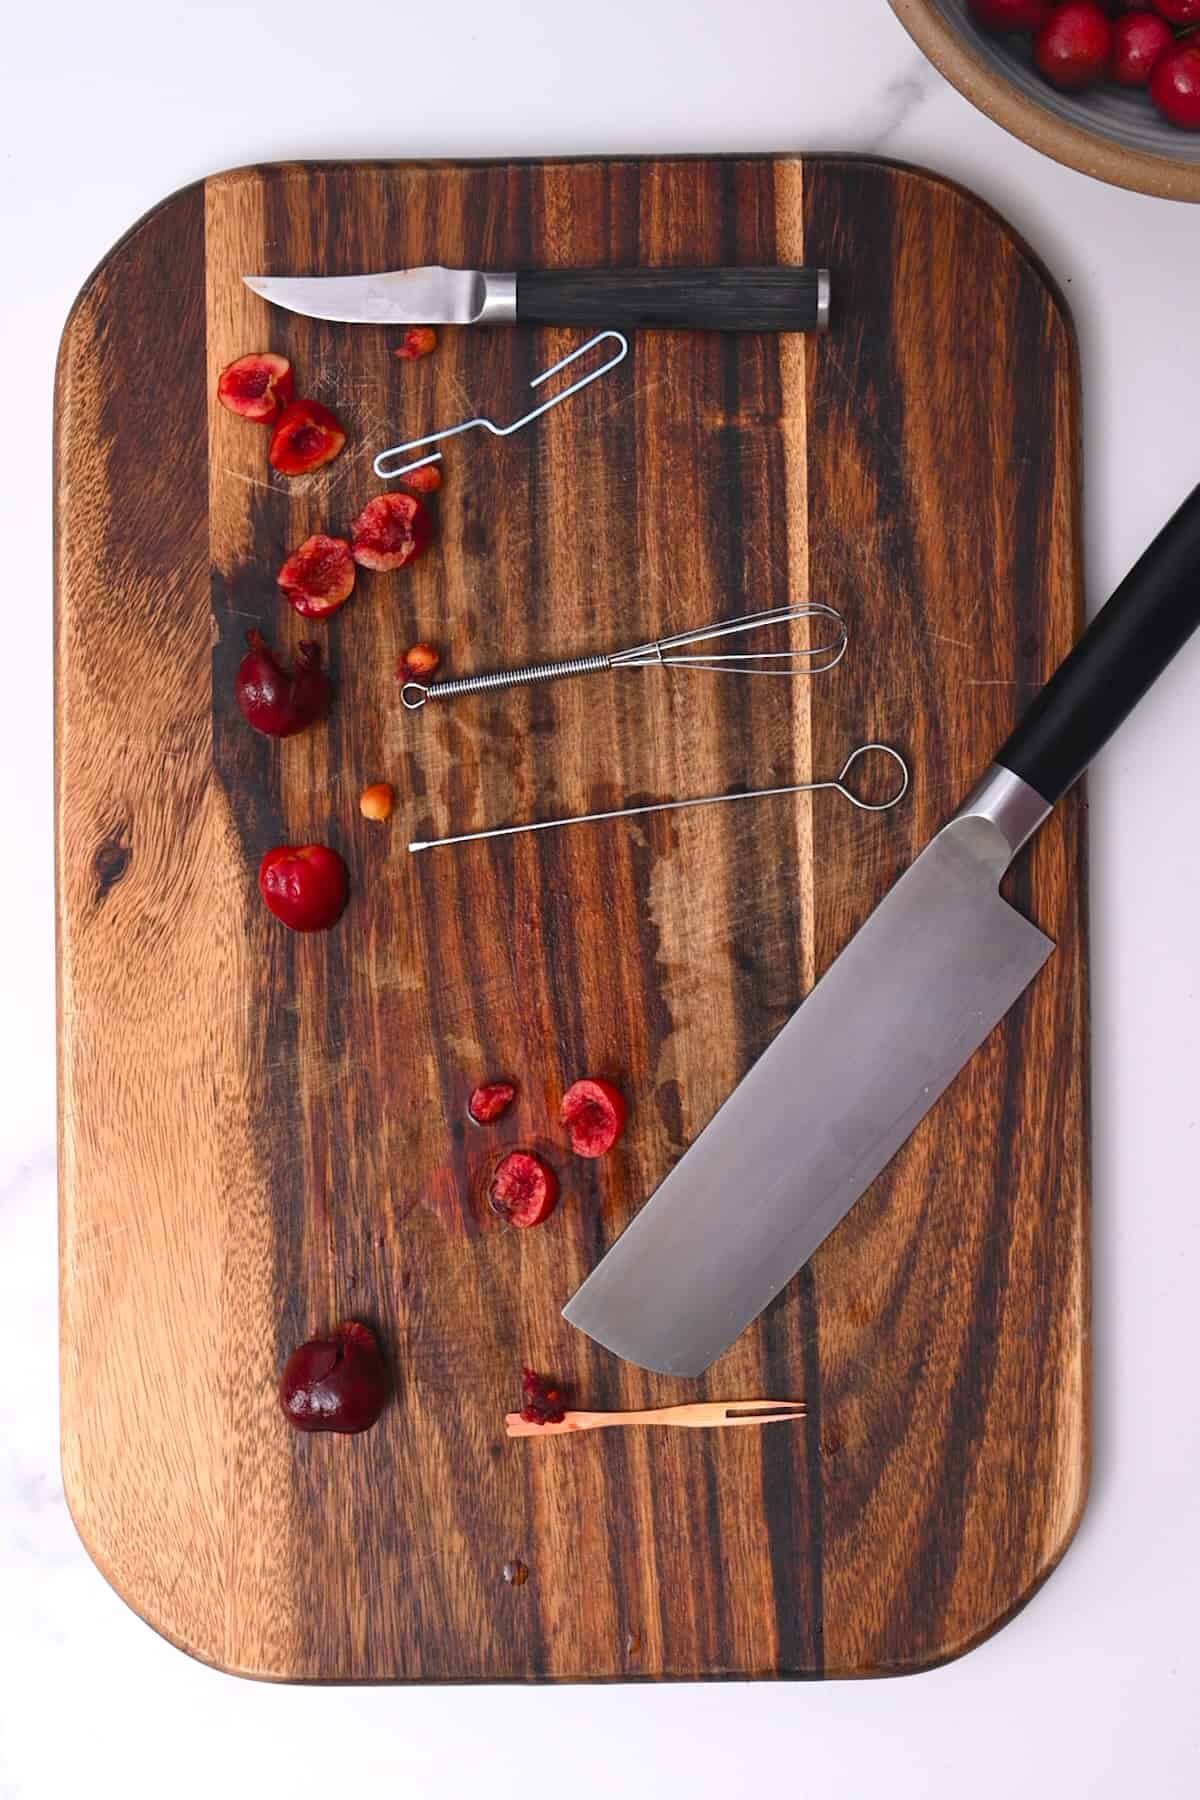
- To pit the cherries: There are several kitchen gadgets you can choose from:
- Paring knife
- Large knife
- Skewer (or a metal straw, piping tip, or chopstick) + empty bottle
- Fruit fork/two-pronged fork
- Sturdy paperclip
- A utensil with a small hoop (like the handle of something).
- To Juice the cherries: A blender OR food processor OR potato masher and sieve/ nut milk bag.
How to pit cherries?
Having turned to my Instagram followers for tips, I was sent a long list of household tools to try out to pit cherries without a cherry pitter. Below are the methods and results.
Wash and remove the cherry stems before any of the below methods.
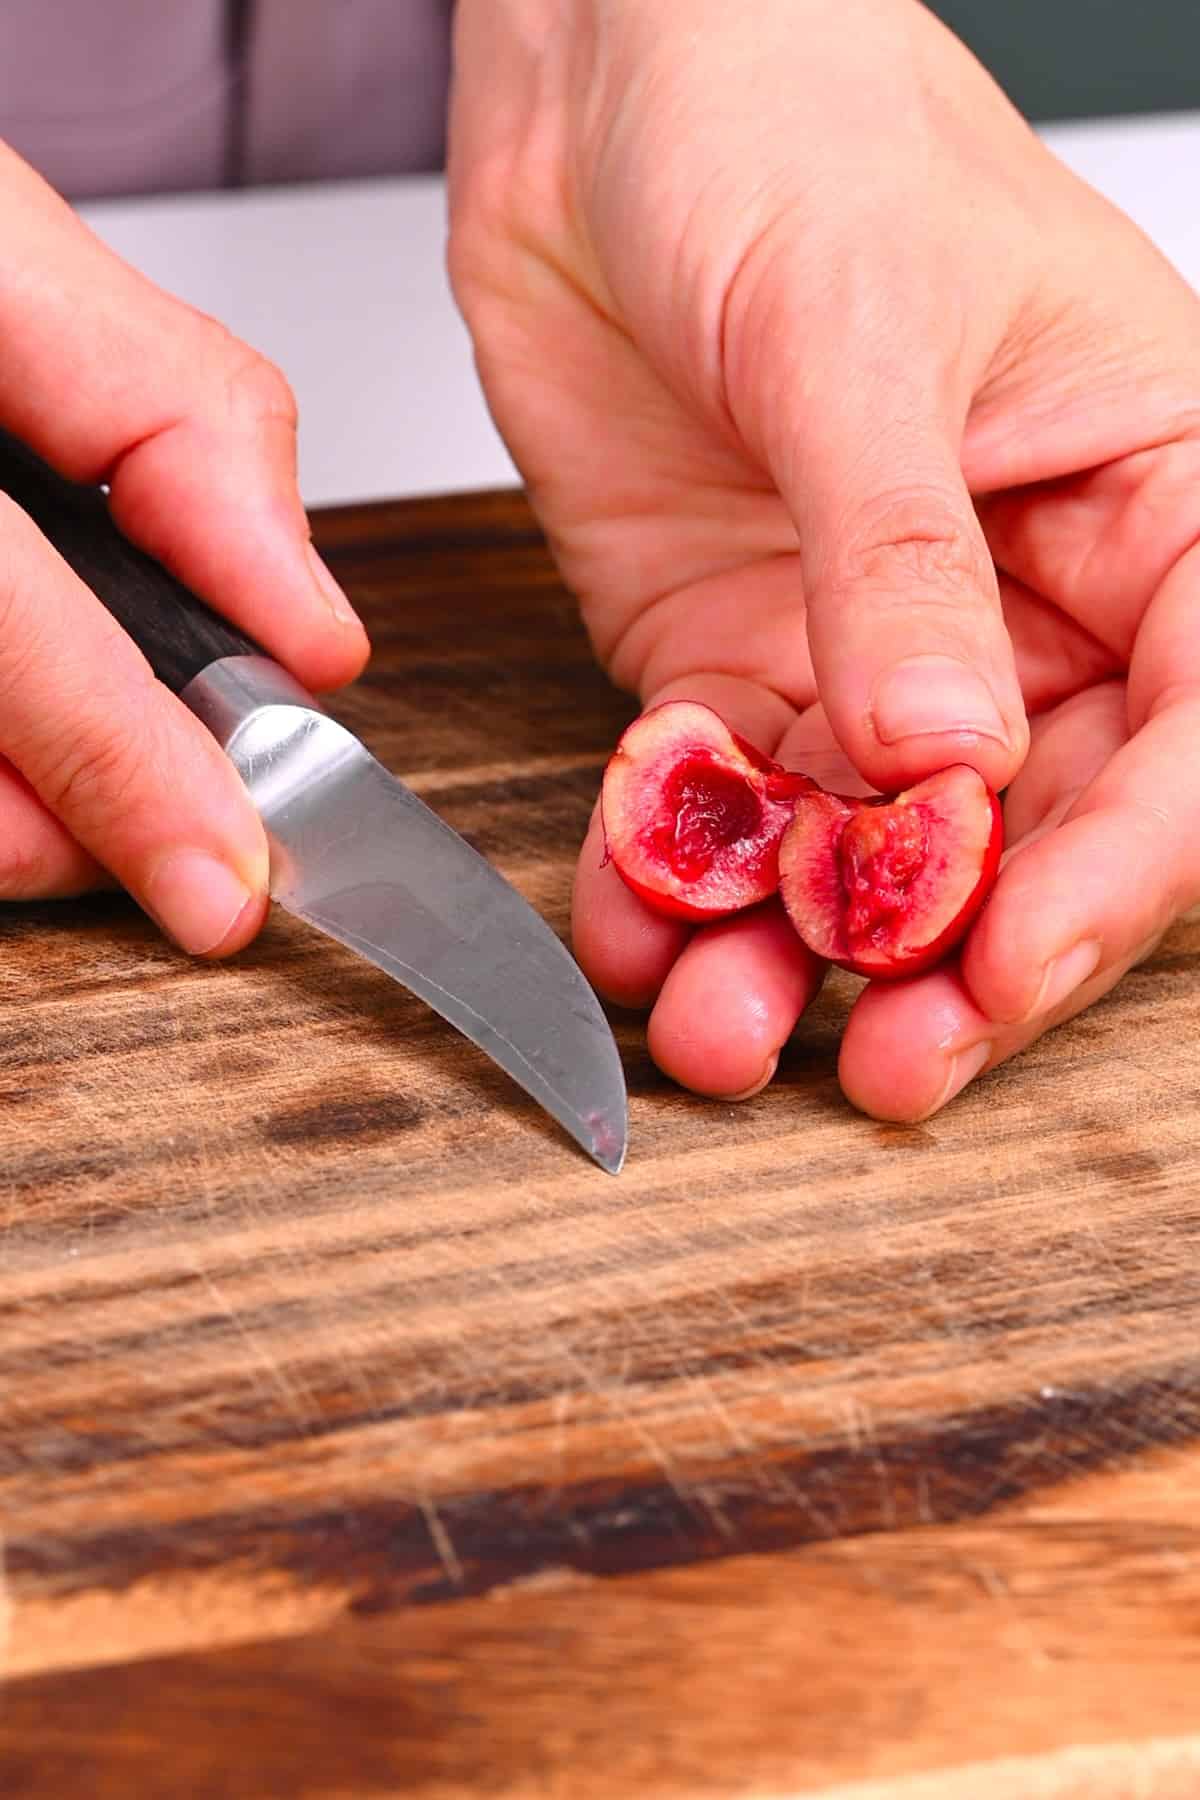
A paring knife: Slice the cherries in half and remove the pits with the knife or by hand.
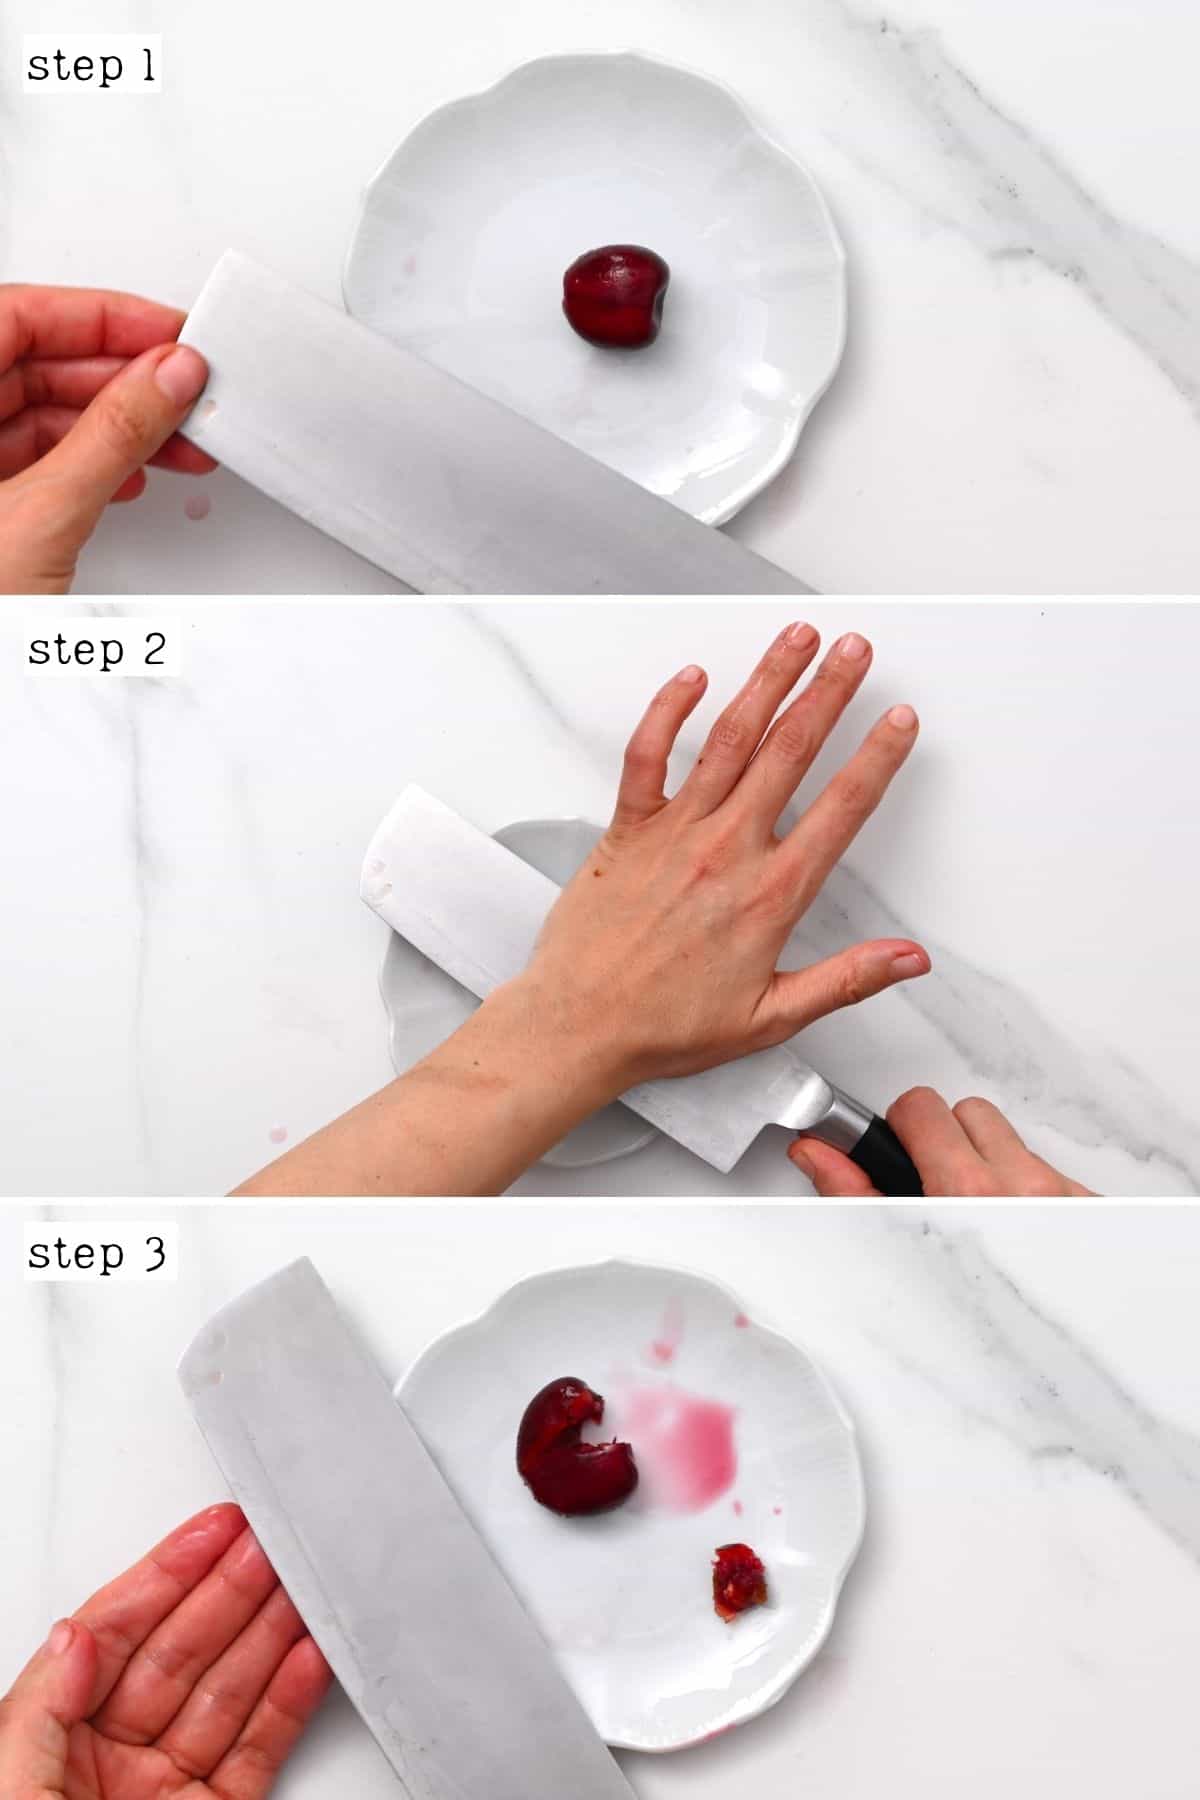
A large knife: Using the flat edge of the knife, press down on the cherries against a flat surface like a cutting board. This will cause the cherries to open and release their pits.
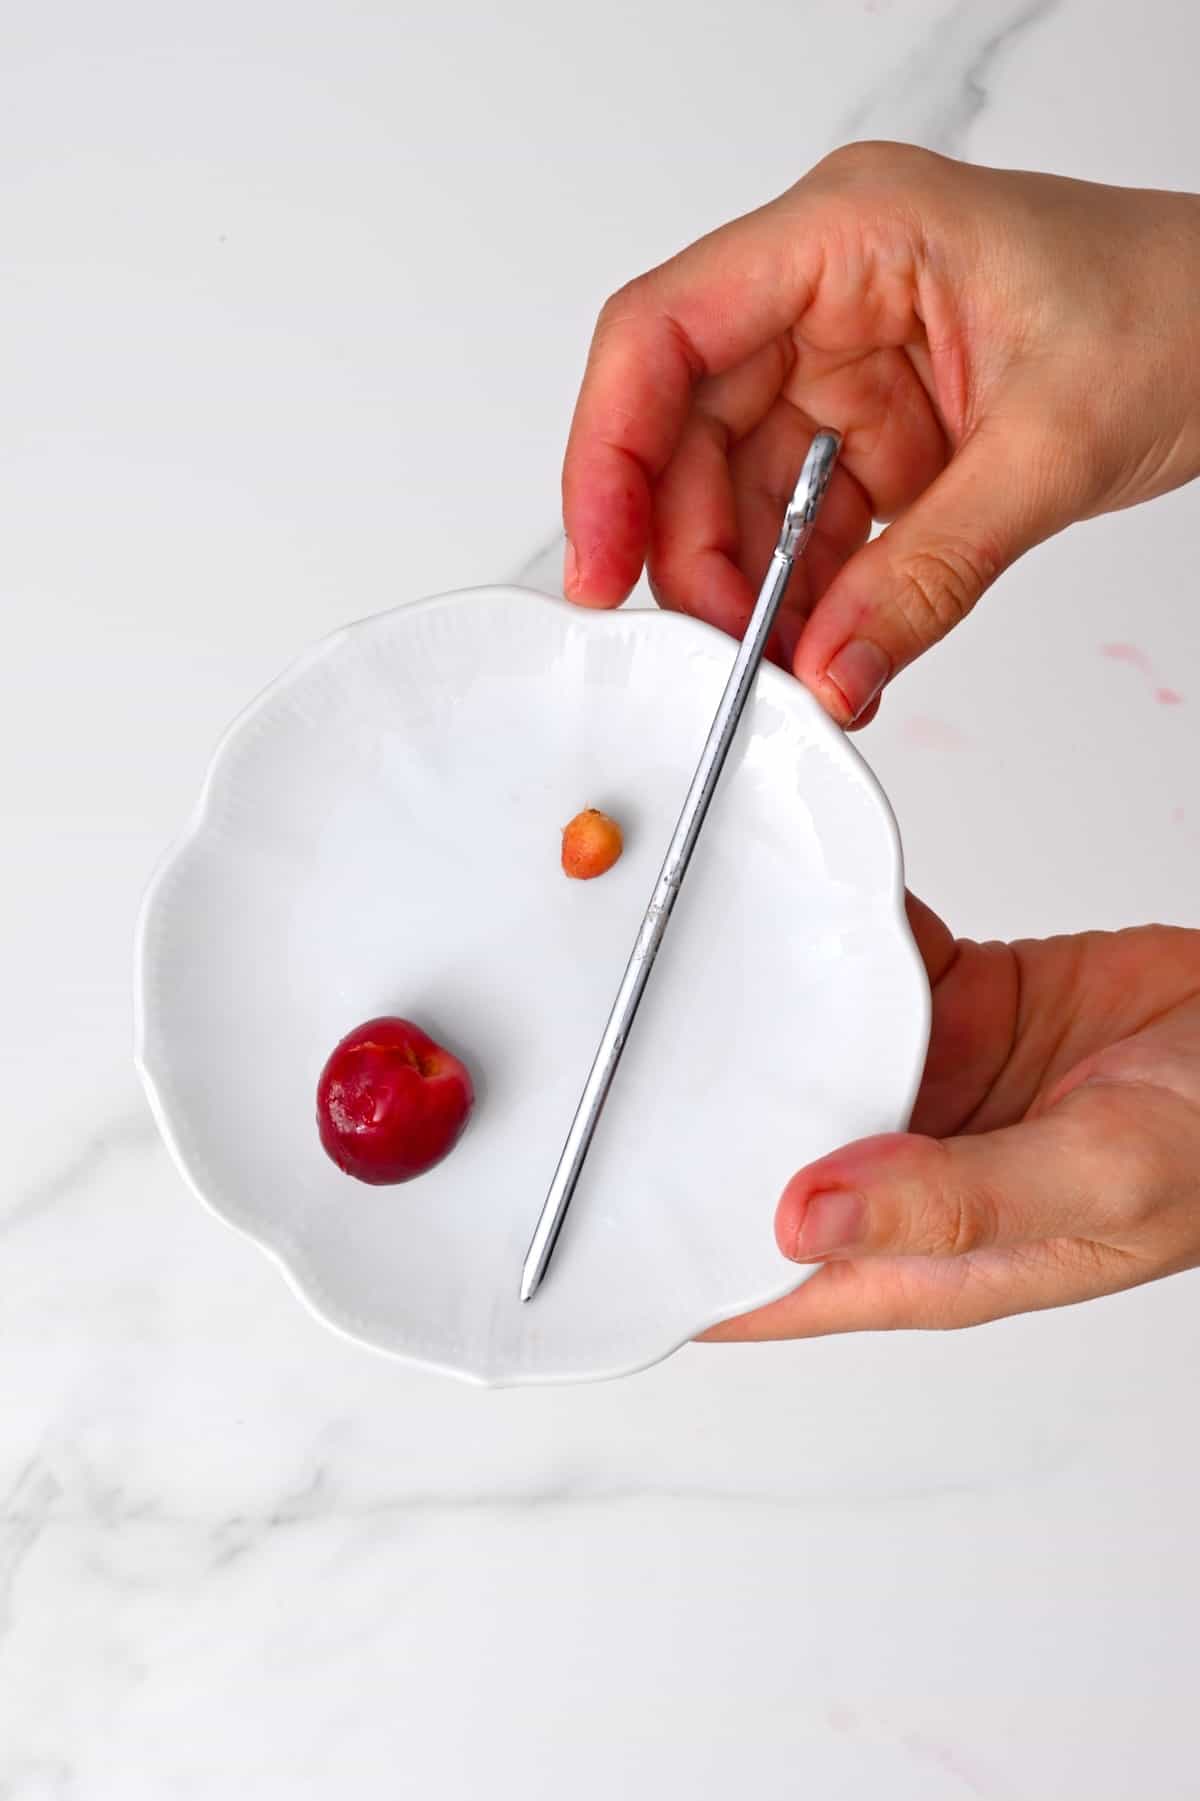
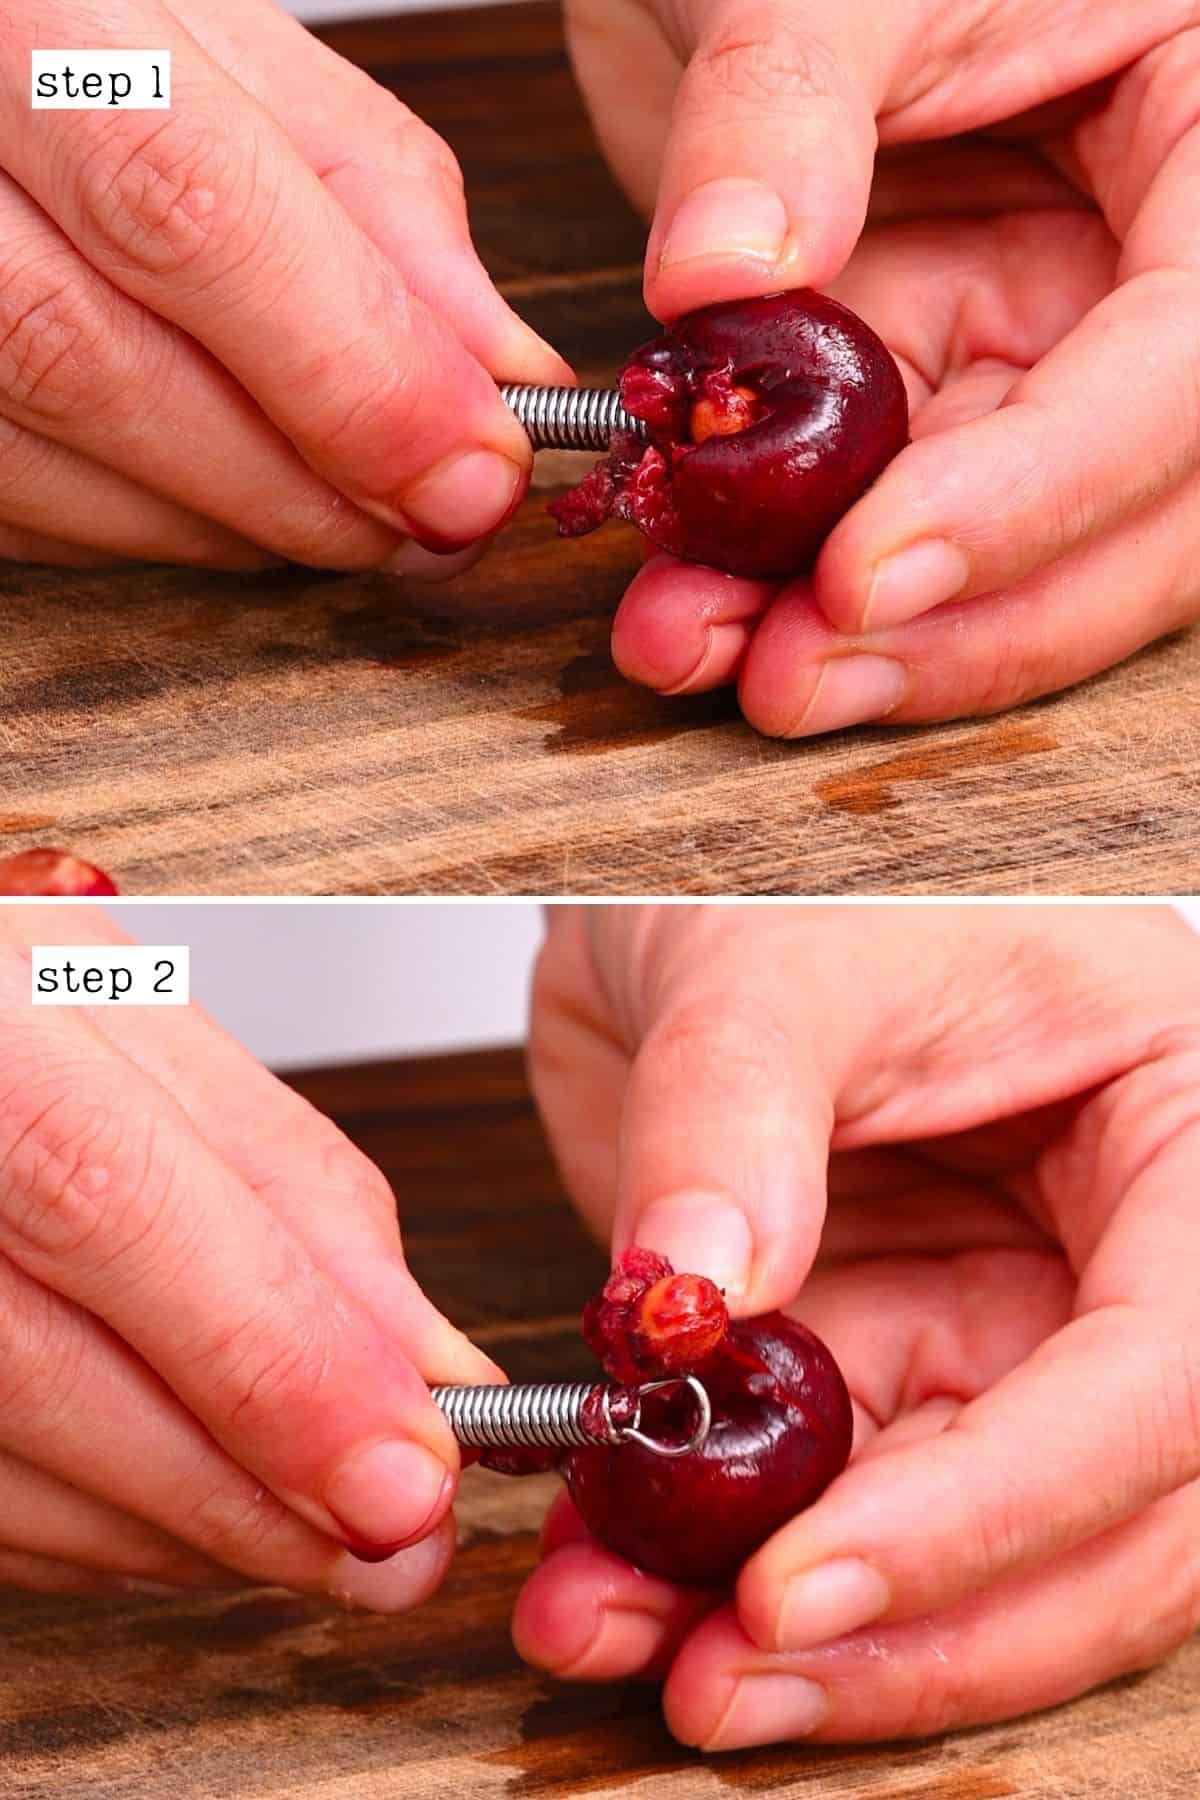
Skewer method: Use a metal skewer (wood may break) and press it through the center of each cherry at the point where the stem is attached to the cherry. This will help push the pit out the other end, similar to a cherry pitter.
For a practically mess-free option, place the cherry in the stem of an empty bottle (like a wine bottle). That way, the cherries are held still, and the messy pits will fall right down into the bottle.
This method will also work with a chopstick (with a flat, not pointy bottom) or reusable (sturdy) straw. Thin piping tips (pastry tips) also work very well as you can place a finger or thumb in the wide end and use that to push the pit through the cherry OR place it tip-side upwards on your chopping board and push the cherries down onto it.
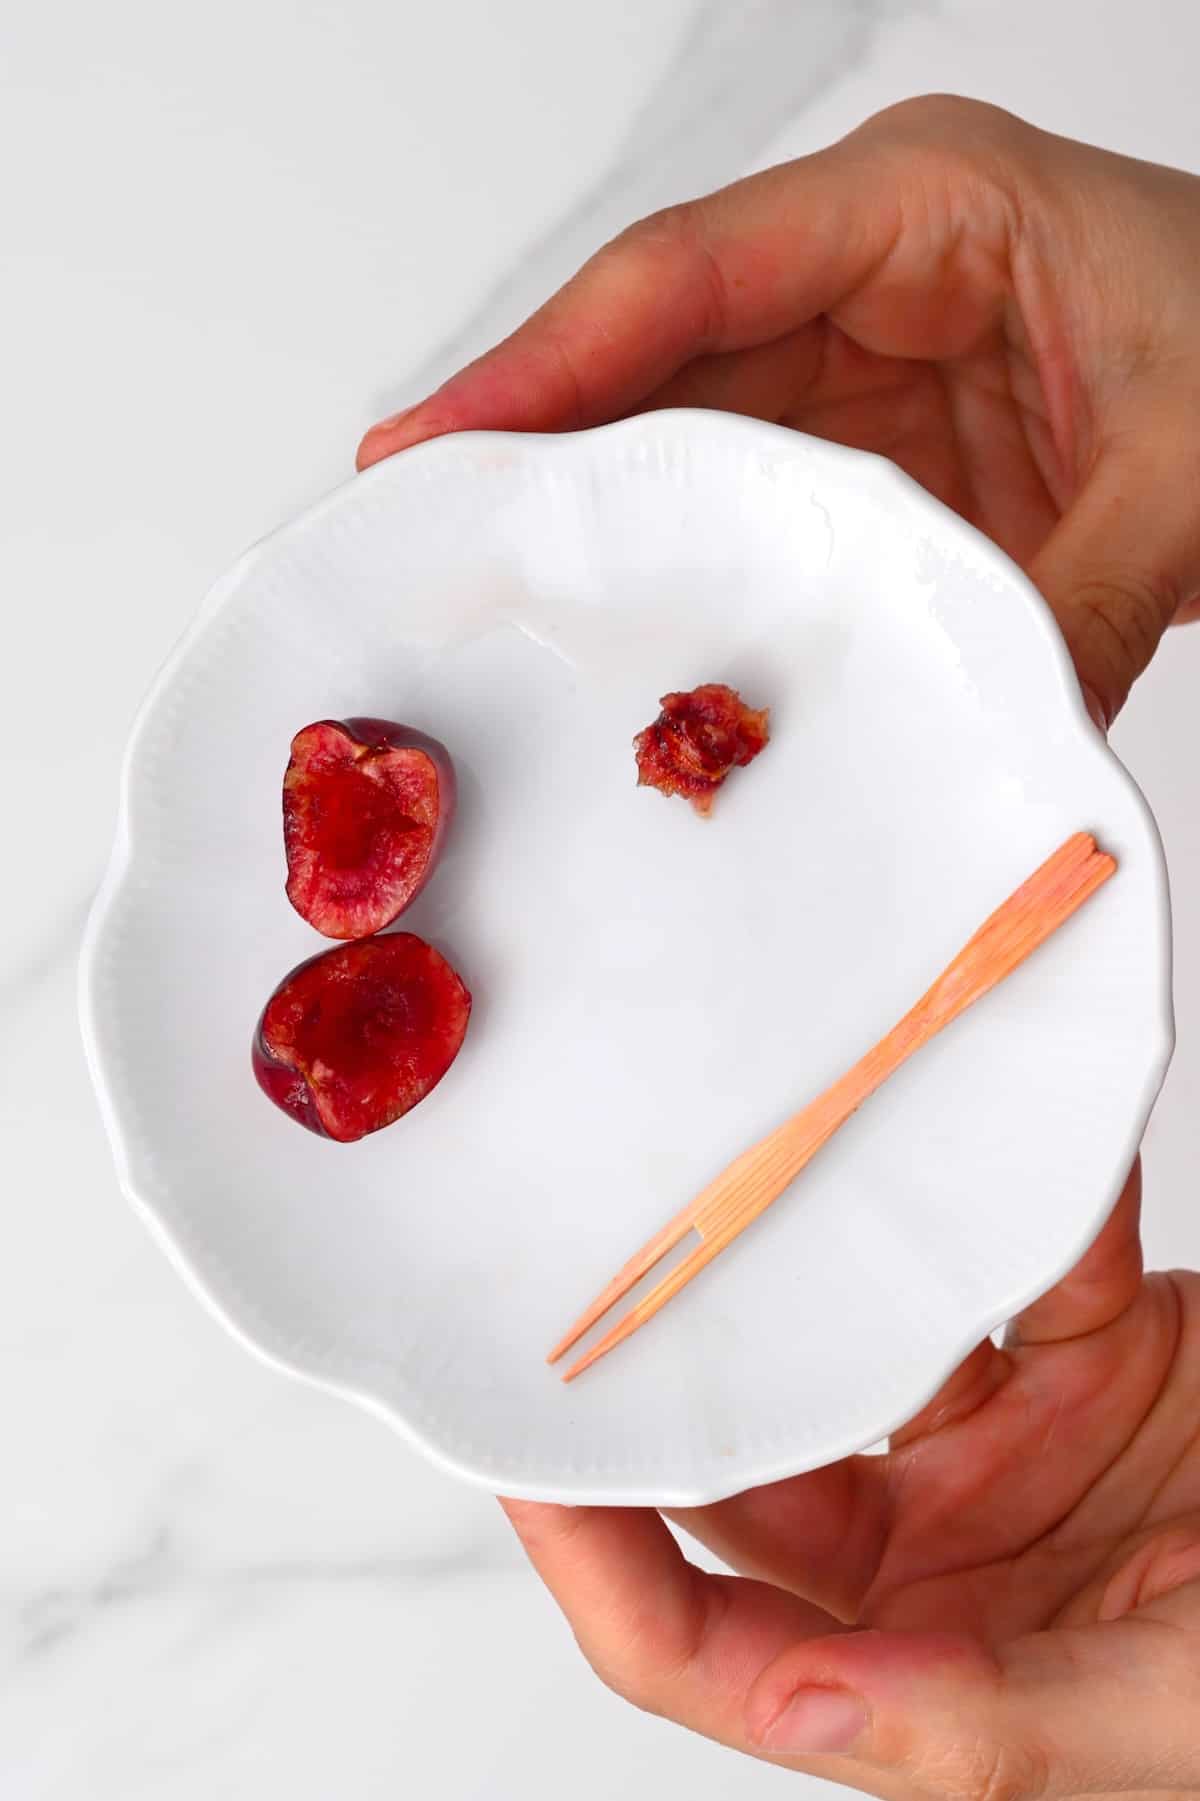
Fruit fork/two-pronged fork method: Press one of the prongs into the stem end of the cherry and use it to cut through the cherry and remove the pit (this method is messy).
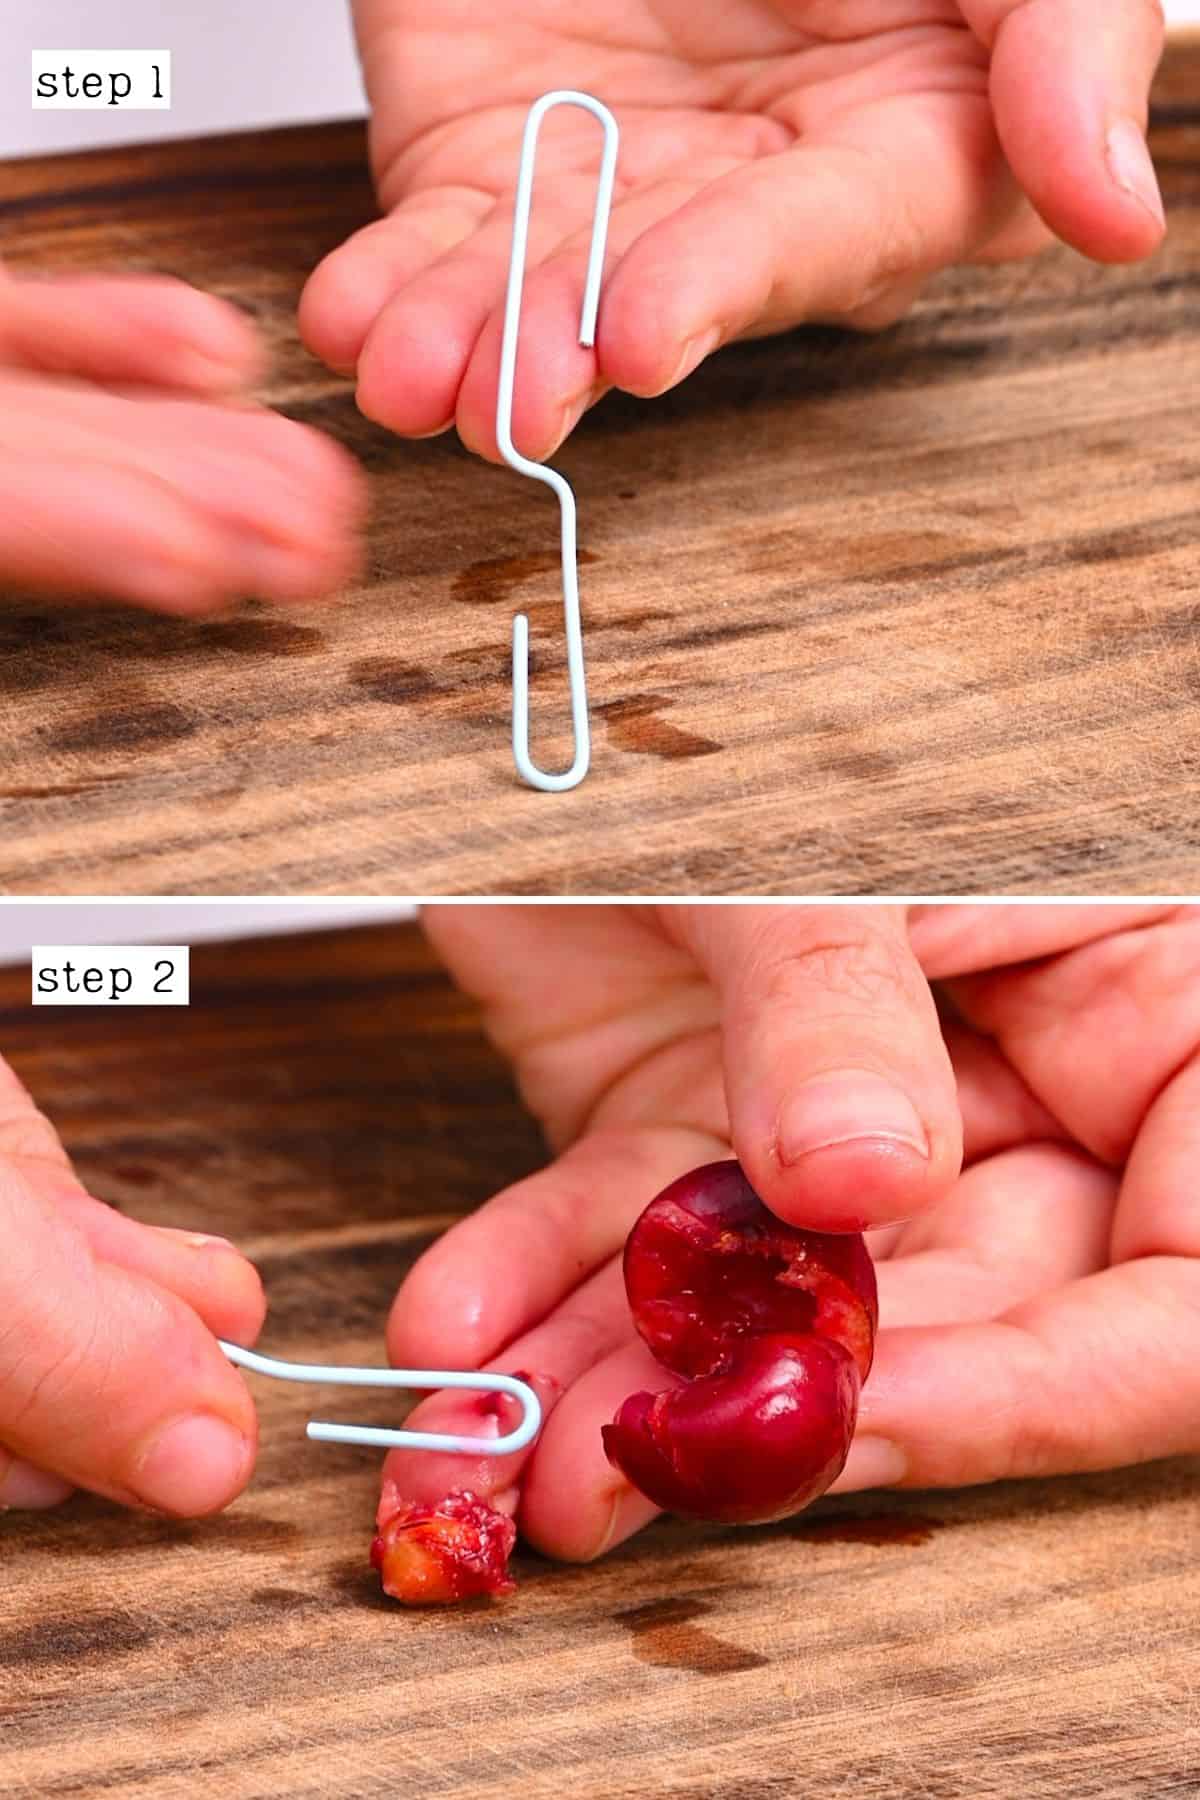
Paper clip method: You’ll need a sturdy paper clip for this. Unfold the middle, so there is a loop at the top and bottom (refer to the image below). Then use the loop to dig into the cherries, twist, and remove the pits.
Loop method: Use a tool with a hoop/loop (I used the back of my mini whisk handle) and dip the hoop into the cherries to pull out the pits.
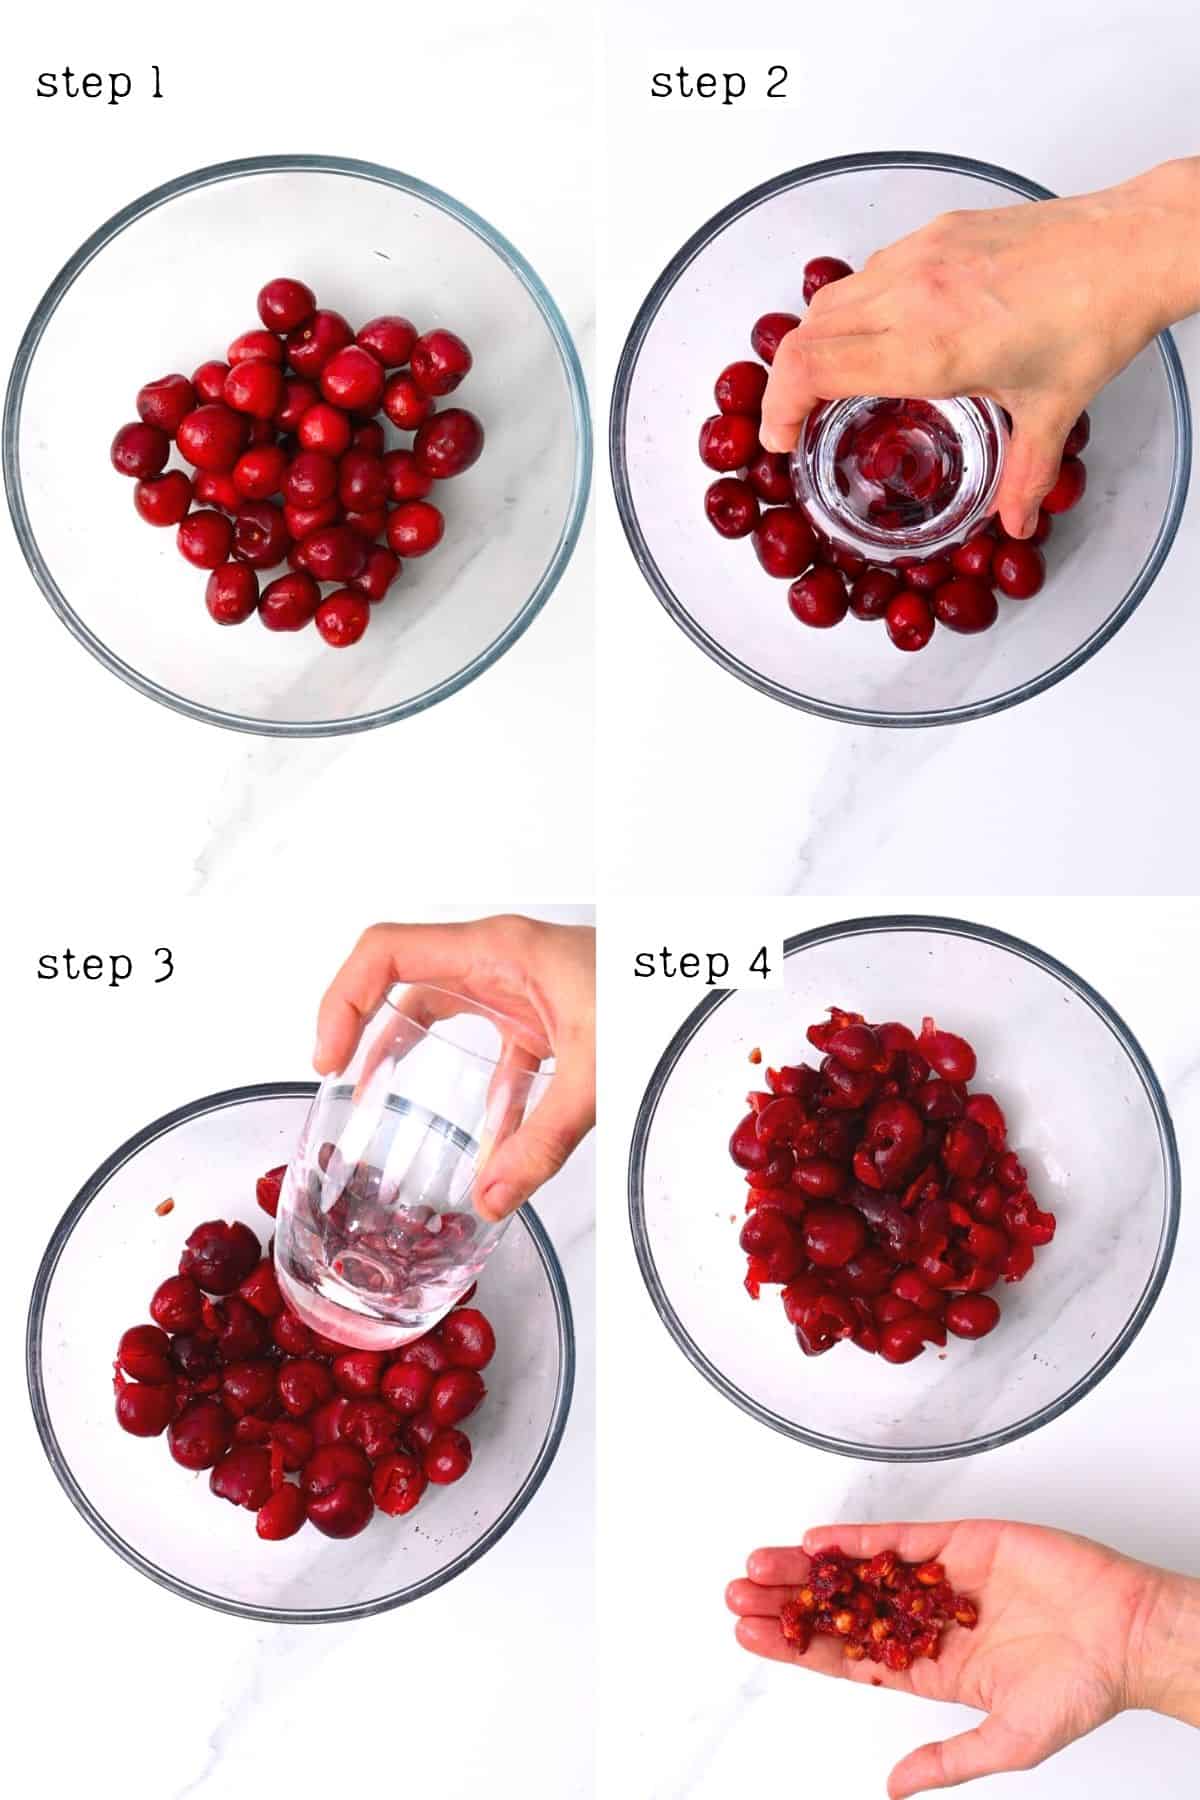
Mashing method: Press or mash the cherries in a bowl/container then manually remove the pits.
Which method works best?
This really comes down to your aim (least mess, keeping the cherries whole, etc.). For recipes with only a few to pit, I’ll usually just use a small knife to slice them open and pop out the pit. This method is also great for firmer cherries.
For recipes where I want the cherries whole/minimal mess, the skewer method (which mimics a cherry pitter) is my preferred one. I use whichever of the suggested tools I have to hand, using the addition of a bottle to keep the mess to an absolute minimum.
While the paperclip, loop, large knife, and mashing methods do work, they also create more mess and/or may be slightly more fiddly (for example, the paperclip method can take a few tries to get the hang of), so would be my “plan B” options.
How to make cherry juice?
Juicer method
- First, wash the cherries and remove the pits (which can be hard on juicers and may even break them).
- Then, simply feed the cherries through the juicer chute and let the machine do all the work.
I recommend reprocessing the pulp a further 1-2 times to extract as much of the juice as possible from the fruit.
Blender method
As this method relies on water to help with the blending process, this juice is naturally diluted and won’t be as sweet or flavorful as the juicer version.
- First, wash and remove the cherry pits.
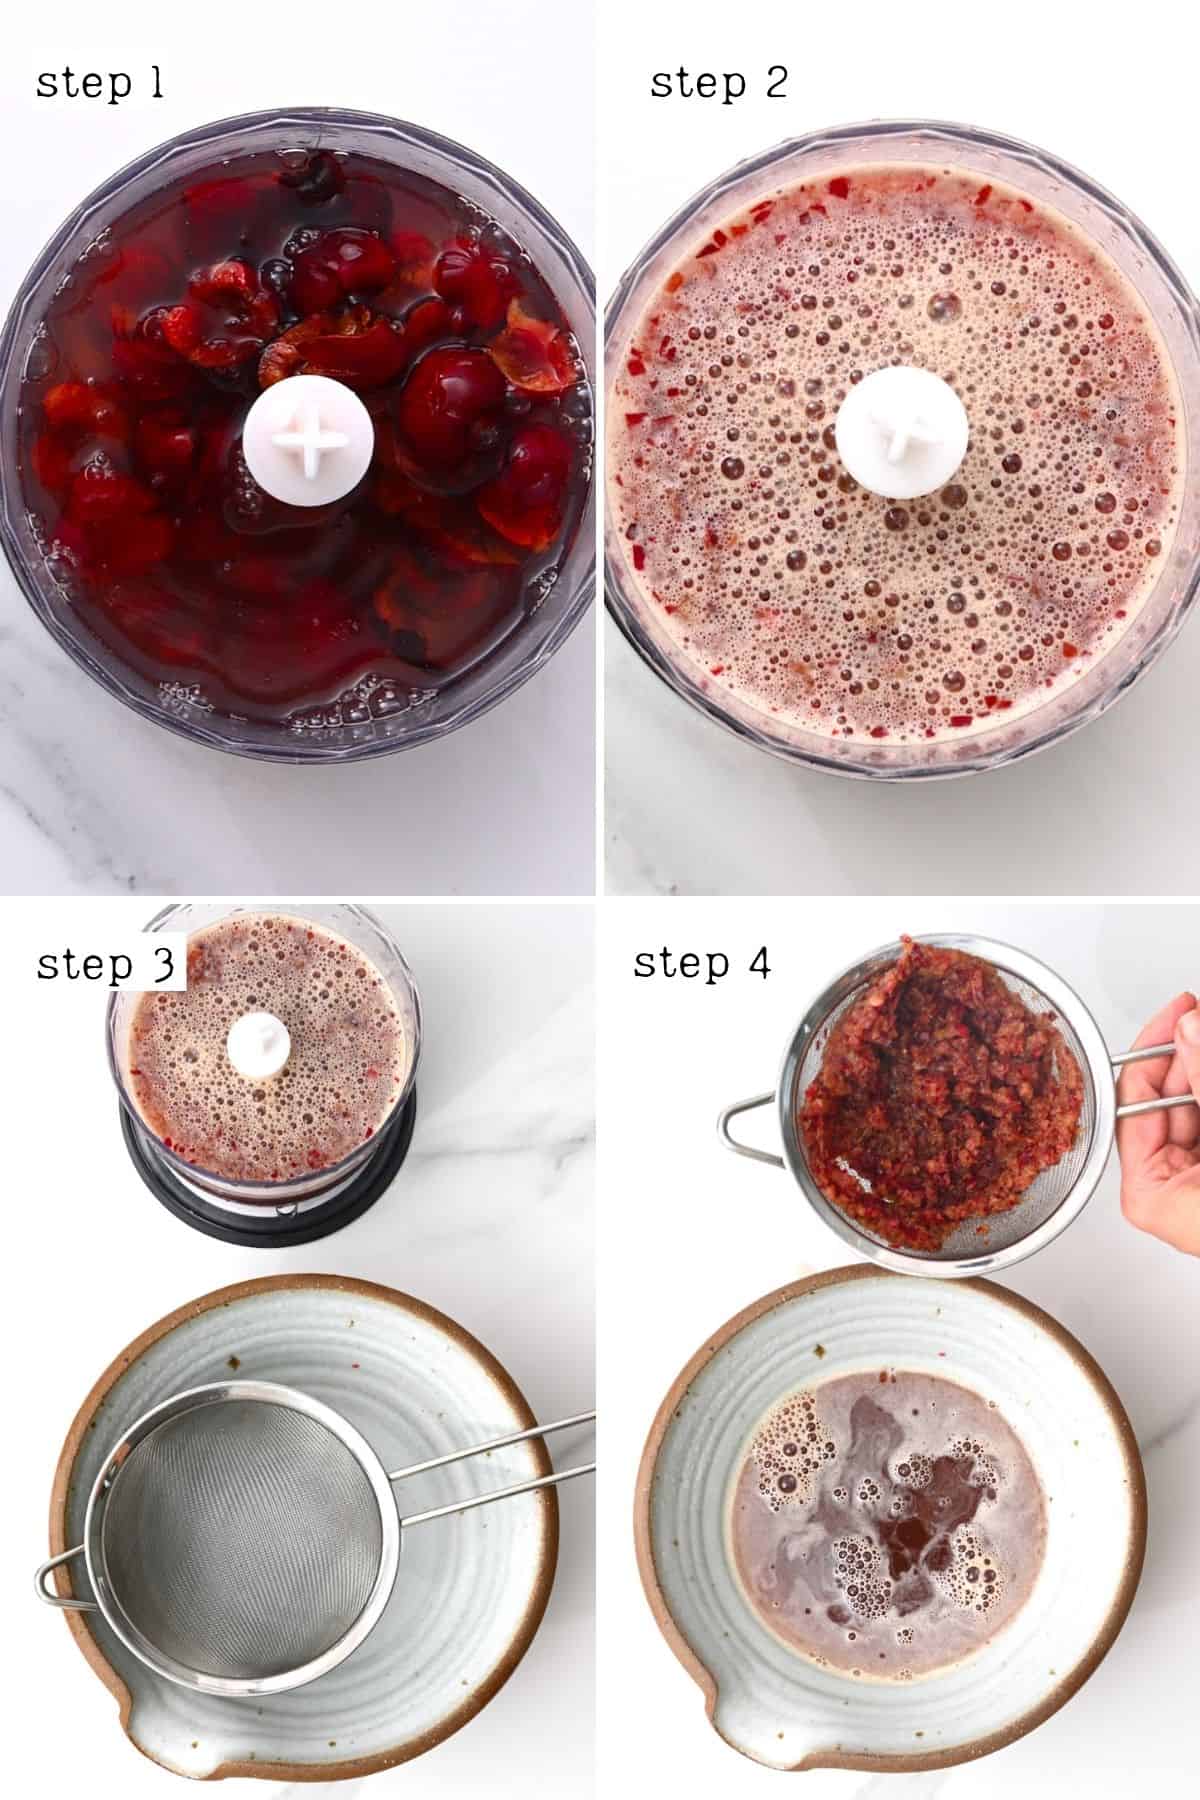
- Then, transfer the fruit to the blender with a bit of cold water (around ¼ cup per 1 cup of cherries) and blend until smooth and juicy.
- Enjoy pulpy if preferred. Otherwise, pass the cherry juice through a fine mesh sieve or nut milk bag to remove the pulp.
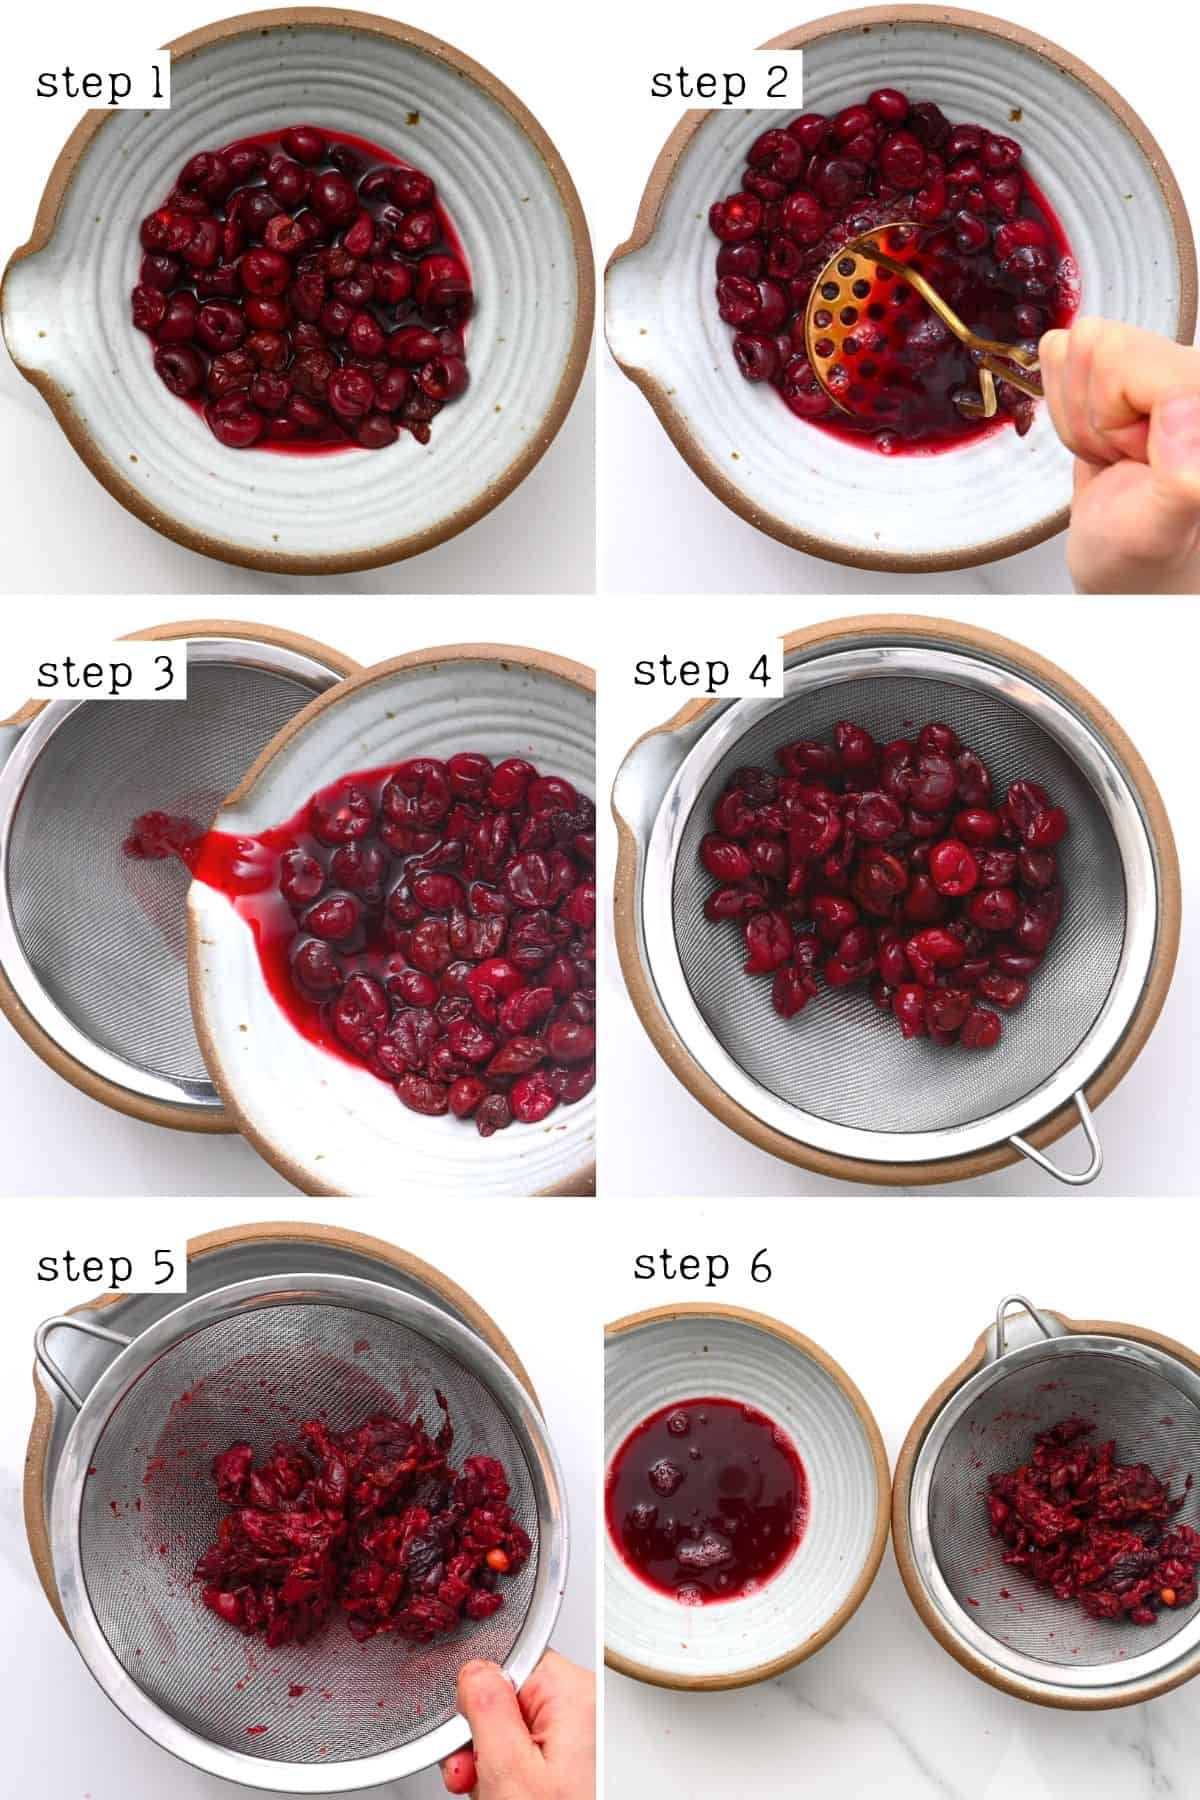
Mashing method
- Rinse and pit the cherries.
- Then, transfer them to a large bowl or flat dish (I find the latter easier) and use a potato masher or similar tool to mash the cherries to release their juice.
If you have one, a potato ricer works wonderfully with frozen and thawed cherries. However, it needs to be done in small batches of one layer at a time.
- Then, transfer the cherry mush to a fine mesh strainer or nut milk bag over a large bowl and squeeze/press the flesh to collect as much juice as possible.
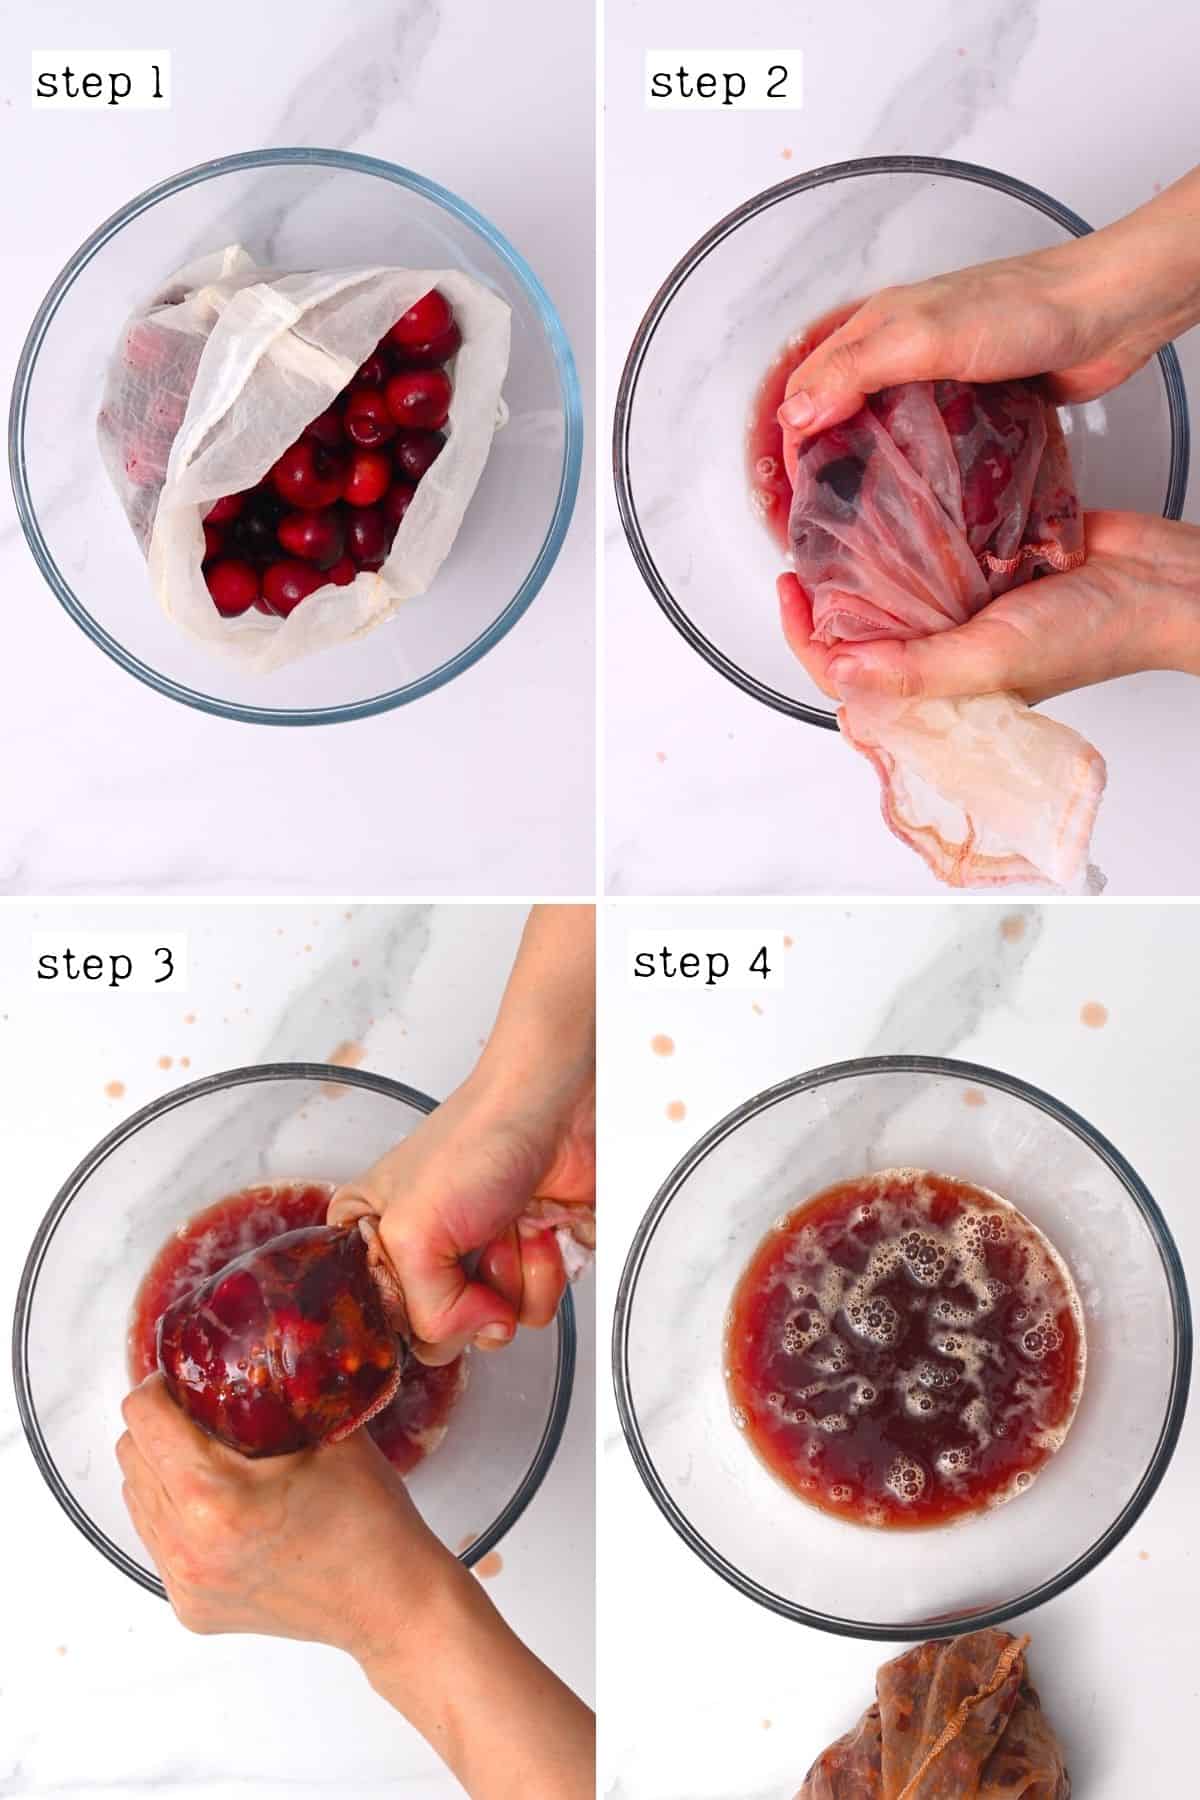
Hand squeezed method
I don’t recommend attempting this method unless your cherries are relatively soft or they were previously frozen and thawed, which naturally softens them.
- Rinse the cherries, then transfer them to a nut milk bag (with or without the pits removed).
- Then, simply use your hand to squeeze and mash the cherries over a glass bowl to extract as much juice as possible.
If you squeeze the cherries without causing too much damage to the fruit itself (i.e., they’re still in one piece), it’s easy to dehydrate the leftover fruit for baking, granola, etc.
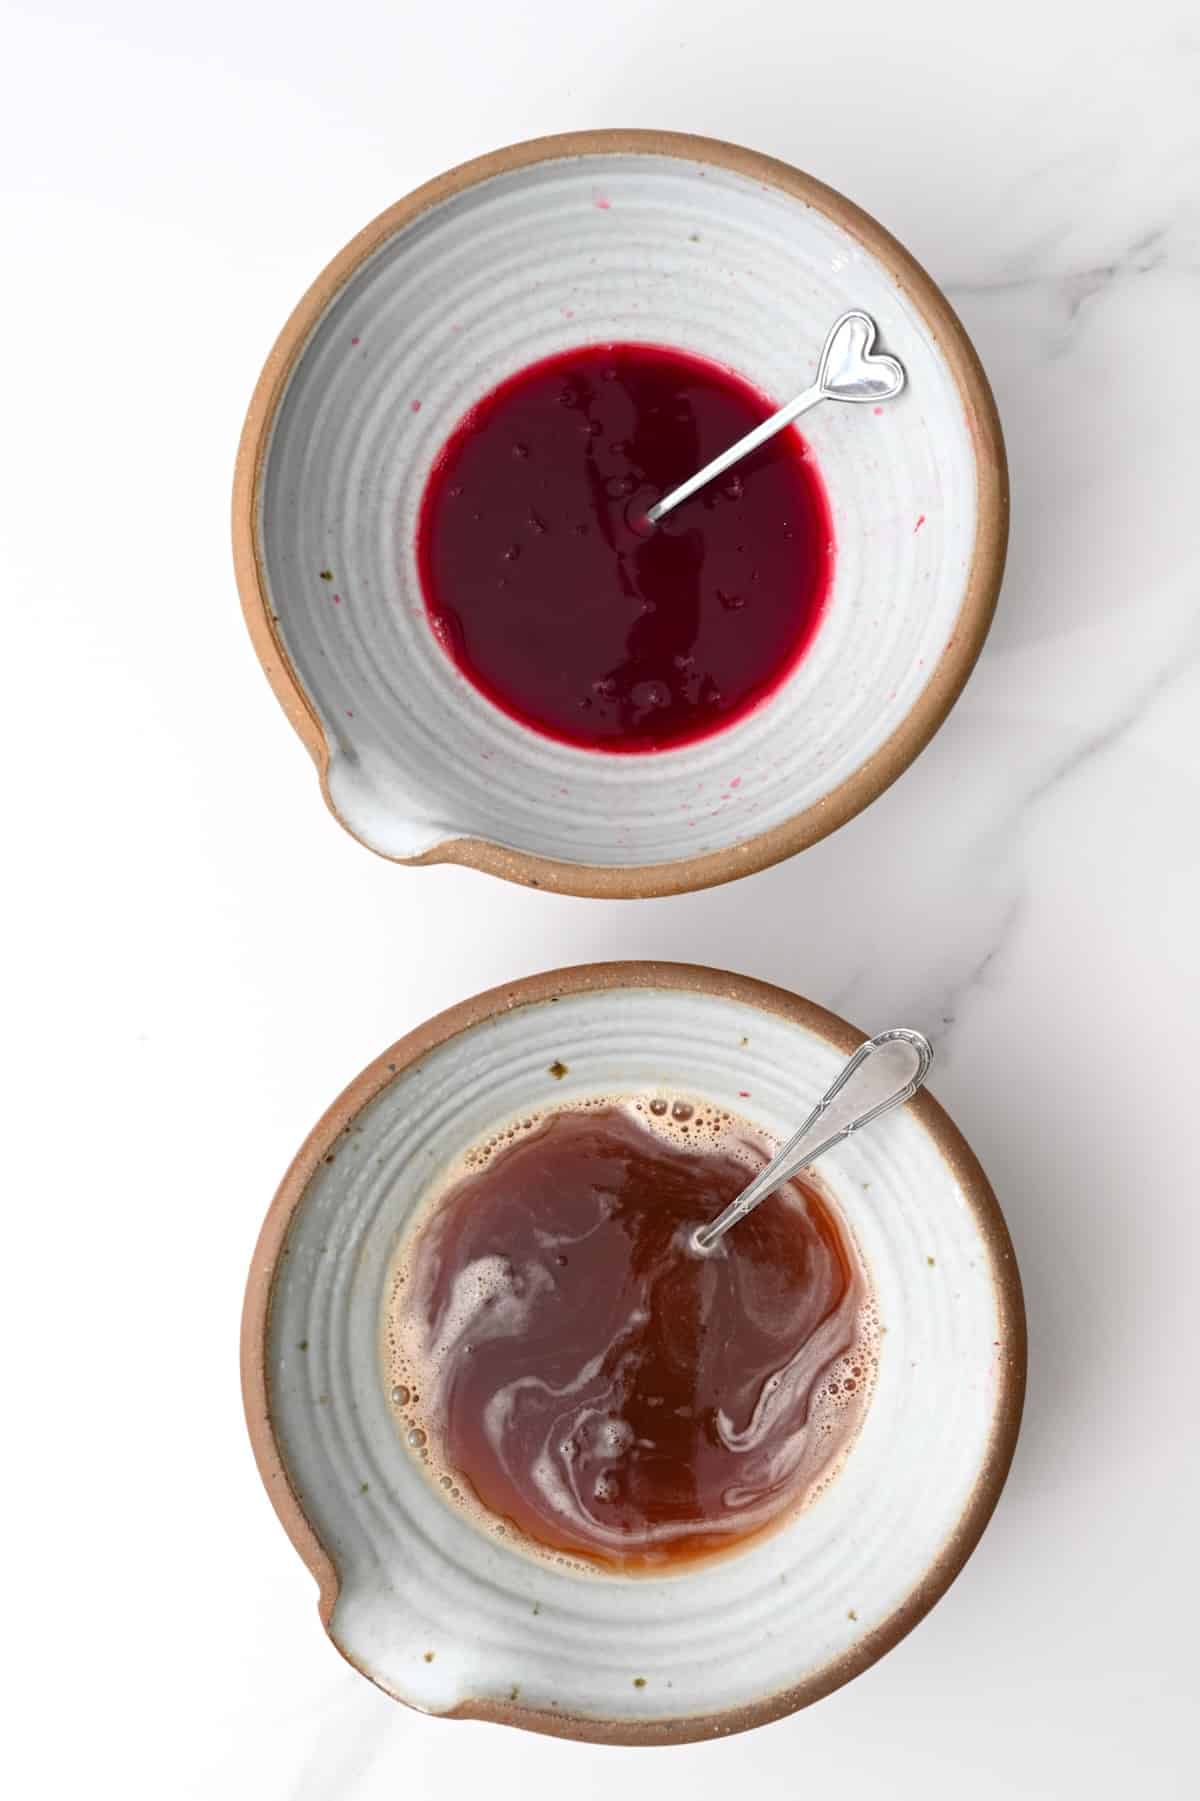
Bonus: Cherry juice concentrate
This is the only method for how to make cherry juice that uses heat and creates more of a tart cherry juice concentrate.
- Wash the cherries first and remove the stems, but there’s no need to remove the pits.
- Then, transfer the fruit and water (add 2 cups of water per 1 lb of cherries) to a saucepan, bring to a boil, and then simmer for 20 minutes.
- Drain through a fine-mesh sieve, pressing on the fruit with a spoon to release as much juice as possible.
- Next, transfer the liquid back to the saucepan and add sugar to taste. Simmer until the sugar has dissolved, then remove from the heat.
To make cherry syrup, continue to simmer the juice-sugar mixture until it reduces and thickens into a light syrupy consistency (it will thicken as it cools).
If you want to water bath can this juice, then transfer it to the cans while hot. Otherwise, allow it to cool to room temperature before transferring it to containers.
Storage instructions
Store: For maximum nutrients and freshness, I recommend consuming homemade cherry juice immediately. However, any leftovers can be stored in a covered bottle/jar in the fridge for a further 1-2 days.
The cherry juice concentrate will last closer to 10-14 days as the heat and sugar act as preservatives.
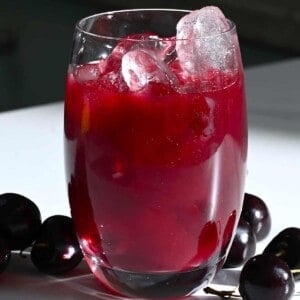
Freeze: You can freeze the cherry juice for 3 months in Ziplock bags, freezer-safe jars, or ice cube trays, depending on the portion sizes. Allow it to thaw in the fridge overnight before enjoying OR blend from frozen with a bit of liquid for a cherry slushy.
Serving recommendations
Once you’ve made the homemade cherry juice, you can enjoy it in several ways:
- As a refreshing beverage,
- Create a juice blend (e.g. with peach juice),
- Make a cherry cinnamon tea,
- Dilute it with coconut water or soda,
- Use it in cocktails,
- Use it to make cherry syrup,
- Make a delicious cherry jelly or jelly layers in desserts such as a tart,
- Use it to make homemade fruit popsicles,
- Add to dressings, vinaigrettes, and marinades.
FAQs
Frozen and thawed cherries are great for making cherry juice, as the freezing and thawing process helps break down the fruit somewhat and make them softer and easier to “juice.”
Due to cherry pits containing a cyanide-like toxin, I was worried that someone may destine them to be discarded. However, there are several ways to use leftover cherry pits. Luckily, the heat seems to deactivate the toxin in the pit, leaving you to enjoy them in:
– Cherry pit vinegar, cherry pit syrup, cherry pit liqueur, and even ice cream.
You can also burn them as fuel or even re-plant the pits to grow cherry trees.
As long as the pits are whole, they shouldn’t pose any danger. However, if you accidentally smash/grind a pit into the juice, then don’t consume the juice.
I tend to use leftover fruit pulps to add to smoothies. However, you can often also mix them into baked goods like muffins and quick bread recipes for extra nutrients.
You can store them for 5-7 days in an airtight container in the refrigerator OR in a Ziplock bag or container in the freezer for up to 6 months.
You could use a crushed vitamin C pill in the juice to work as a natural preservative that helps to keep the color fresh.
Yes, you can follow my method for water bath canning and the USDA guidelines for fruit products.
Recipe notes and tips
- Frozen cherries juice easier: During the freezing/thawing process, the cherries soften and become far easier to juice, making them great for any non-machine-based juicing method. For the best flavor, you can freeze ripe cherries yourself rather than rely on pre-frozen fruit bags.
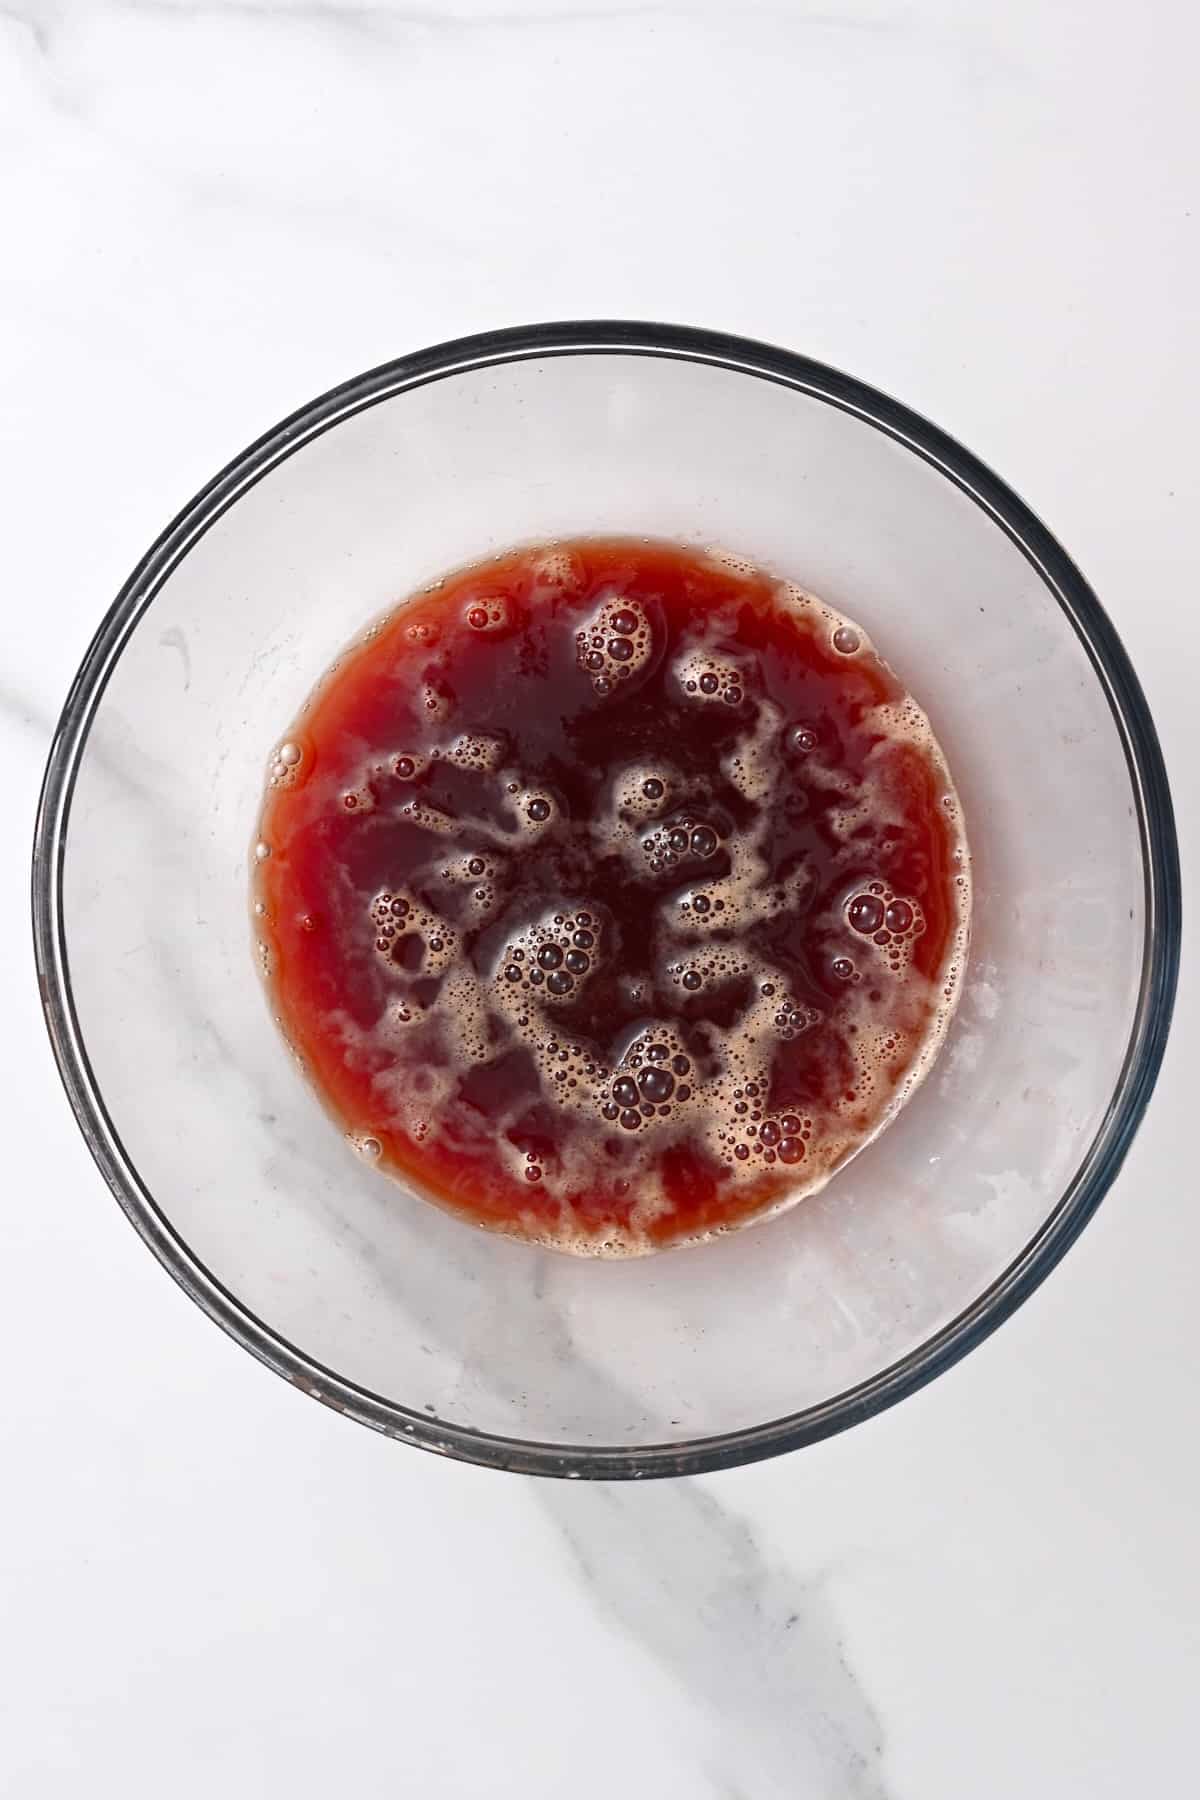
- Color will vary: Any method of juicing cherries that creates a foam tends to lead to discoloration of the juice (leaning towards brown). It’s perfectly safe to drink but just doesn’t look as nice.
- Adjust the sweetness to taste: Depending on the type of cherries you use, you may need to add some sugar. You can use regular sugar, maple syrup or honey, or even a sugar-free sweetener like erythritol, to taste.
- Choose soft cherries: If they’re too firm, they’ll be very hard to juice unless you use a blender or juicer method.
Other juice recipes
- Apple Juice
- Orange Juice
- Watermelon Juice (4 methods)
- Peach Juice (Peach Nectar | 2 Methods)
- How to Make Lemon Water
If you try one of these methods for how to juice cherries, I’d love to hear your thoughts/questions below. Also, I’d appreciate a recipe card rating below, and feel free to tag me in your recipe recreations on Instagram @Alphafoodie!
How To Make Cherry Juice (5 Methods)
Equipment
- Pitting tool Or a paring knife, large knife, skewer (or metal straw, piping tip, or chopstick) + empty bottle, fruit fork/ two-pronged fork, sturdy paperclip, or a utensil with a small hoop (like the handle of something).
- Juicer (use code ALPHAFOODIE) or blender or potato masher and a sieve or nut milk bag
Ingredients
- 1.1 lb cherries 3 cups; ripe and fresh or frozen; use sweet or sour cherries (like Montmorency)
- 1/2 cup water or more to your liking; needed to help with blending, if using a blender
This will yield about 2 cups, though it depends on the juicing method.
Instructions
Juicer Method
- Wash the cherries and remove the pits (which can be hard on juicers and may even break them – check the post for several methods on how to remove the pits).
- Simply feed the cherries through the juicer chute and let the machine do all the work.I recommend reprocessing the pulp a further 1-2 times to extract as much of the juice as possible from the fruit.
Blender Method
- As this method relies on water to help with the blending process, this juice is naturally diluted and won’t be as sweet or flavorful as the juicer version.Wash and remove the cherry pits.
- Transfer the fruit to the blender with a bit of cold water (around ¼ cup per 1 cup of cherries) and blend until smooth and juicy.
- Enjoy pulpy if preferred. Otherwise, pass the cherry juice through a sieve or nut milk bag to remove the pulp.
Mashing Method
- Rinse and pit the cherries.
- Transfer them to a large bowl or flat dish (I find the latter easier) and use a potato masher or similar tool to mash the cherries to release their juice.If you have one, a potato ricer works wonderfully with frozen and thawed cherries. However, it needs to be done in small batches of one layer at a time.
- Transfer the cherry mush to a sieve or nut milk bag over a large bowl and squeeze/press the flesh to collect as much juice as possible.
Hand Squeezed Method
- I don’t recommend attempting this method unless your cherries are relatively soft or they were previously frozen and thawed, which naturally softens them.Rinse the cherries, then transfer them to a nut milk bag (with or without the pits removed).
- Simply use your hand to squeeze and mash the cherries over a glass bowl to extract as much juice as possible.Note: this method yields the least amount of juice (3 cups of cherries produced 1 cup of juice).
Cherry Juice Concentrate
- This is the only method for how to make cherry juice that uses heat and creates more of a tart cherry juice concentrate.Wash the cherries first and remove the stems, but there's no need to remove the pits.
- Transfer the fruit and water (add 2 cups of water per 1 lb of cherries) to a saucepan, bring to a boil, and then simmer for 20 minutes.
- Drain through a fine-mesh sieve, pressing on the fruit with a spoon to release as much juice as possible.
- Transfer the liquid back to the saucepan and add sugar to taste. Simmer until the sugar has dissolved, then remove from the heat.To make cherry syrup, continue to simmer the juice-sugar mixture until it reduces and thickens into a light syrupy consistency (it will thicken as it cools).If you want to water bath can this juice, then transfer it to the cans while hot. Otherwise, allow it to cool to room temperature before transferring it to containers.
Storage Instructions
- Store: For maximum nutrients and freshness, I recommend consuming homemade cherry juice immediately. However, any leftovers can be stored in a covered bottle/jar in the fridge for a further 1-2 days.The cherry juice concentrate will last closer to 10-14 days as the heat and sugar act as preservatives.Freeze: You can freeze the cherry juice for 3 months in Ziplock bags, freezer-safe jars, or ice cube trays, depending on the portion sizes. Allow it to thaw in the fridge overnight before enjoying OR blend from frozen with a bit of liquid for a cherry slushy.
Video
Notes
- Frozen cherries juice easier: During the freezing/thawing process, the cherries soften and become far easier to juice, making them great for any non-machine-based juicing method. For the best flavor, you can freeze ripe cherries yourself rather than rely on pre-frozen fruit bags.
- Color will vary: Any method of juicing cherries that creates a foam tends to lead to discoloration of the juice (leaning towards brown). It’s perfectly safe to drink but just doesn’t look as nice.
- Adjust the sweetness to taste: Depending on the type of cherries you use, you may need to add some sugar. You can use regular sugar, maple syrup or honey, or even a sugar-free sweetener like erythritol, to taste.
- Choose soft cherries: If they’re too firm, they’ll be very hard to juice unless you use a blender or juicer method.
Nutrition
Nutrition information is automatically calculated, so should only be used as an approximation.


Do you use the water you boiled the cherries in as well for the juice??
Hey Holly! Yes, you do use the water the cherries were boiled in for the juice, as it absorbs a lot of the flavor and nutrients. The recipe uses 2 cups of water per 1 lb of cherries, simmered for about 20 minutes. You can find the full details in the recipe card if you’d like a step-by-step breakdown. Hope that helps!
So if you make the concentrate and then you want to drink it how much water do you add?
Hi Pauline! You can mix about 1 part concentrate with 2 parts water, but feel free to adjust it to your taste. Enjoy your cherry juice!