
This post may contain affiliate links. Please read our disclosure policy.
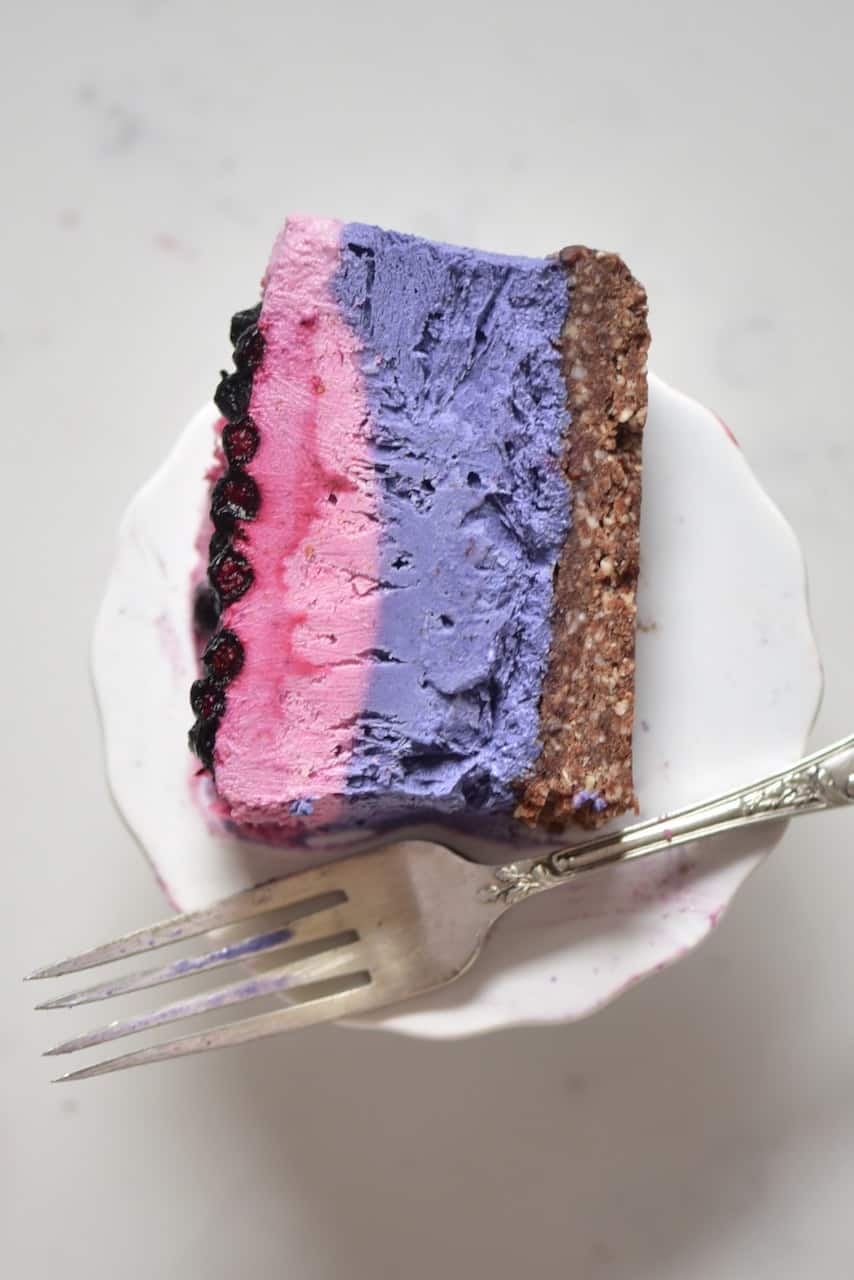
These berrylicious raw vegan cheesecake slices are a cashew-based raw vegan snack/dessert. Dairy-free, gluten-free, refined sugar-free, and taste as good as they look!
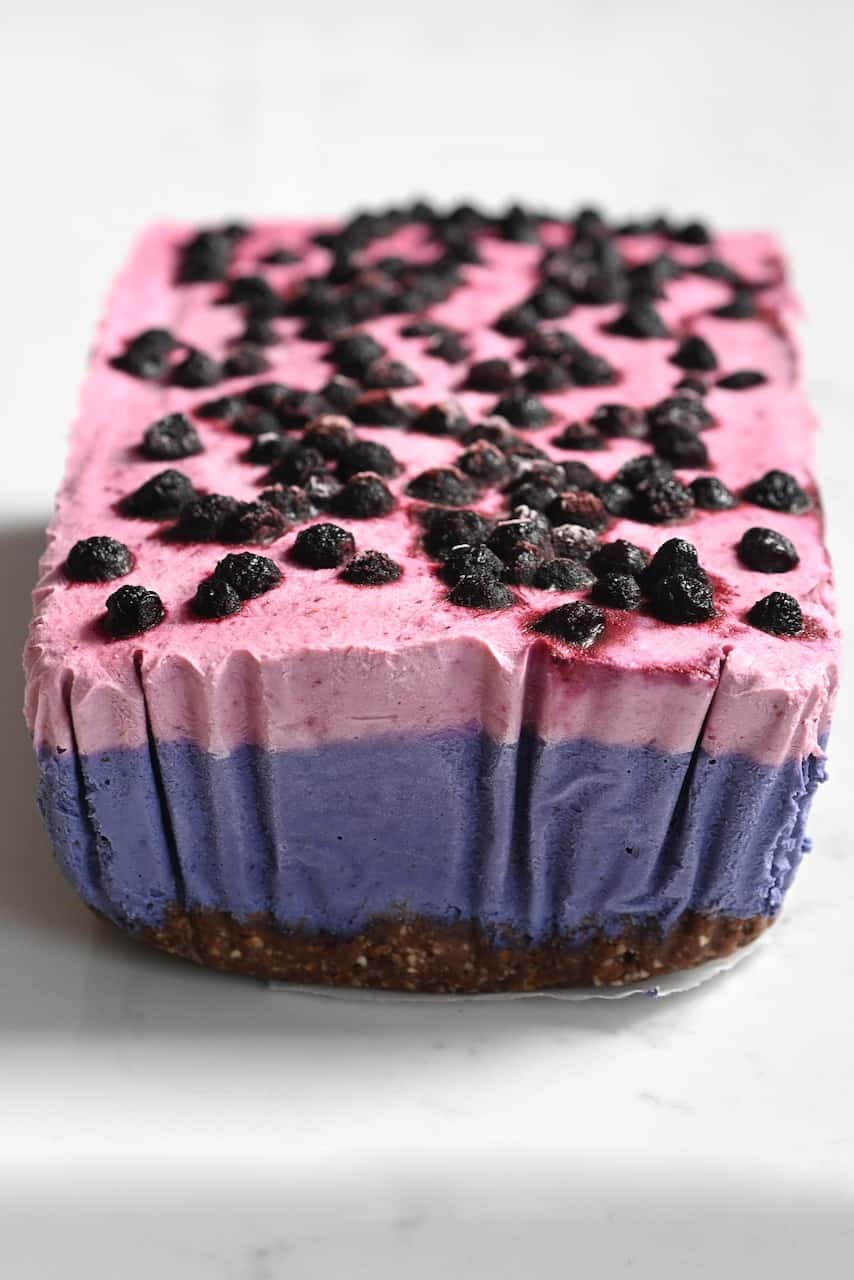
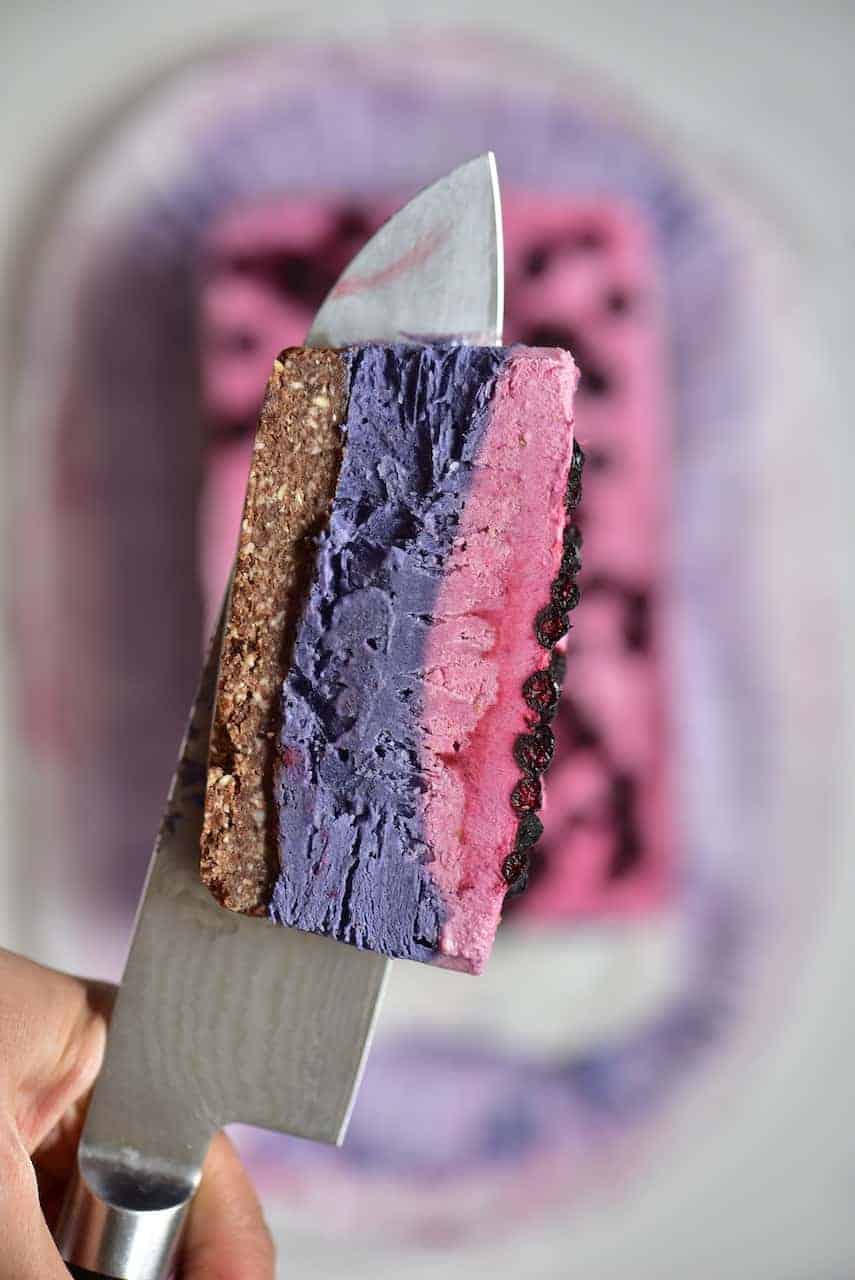
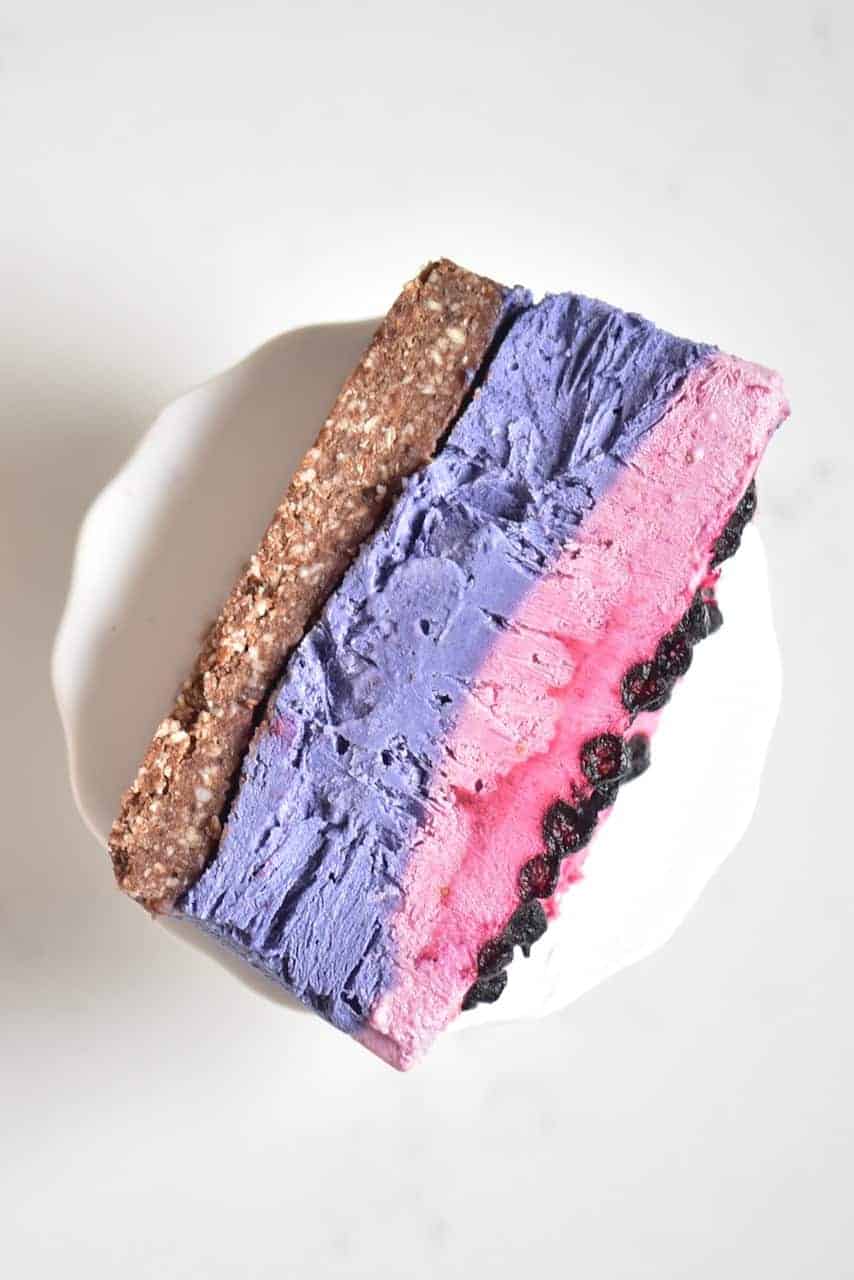
Raw cashews are to vegan desserts what chocolate is to… life – everything! These berry raw vegan cheesecake slices and creamy and rich with the berry and cashew filling, topping an almond cacao raw vegan crust. The vegan berry cheesecake is a delicious combination of blueberry and raspberry layers and topped with additional fruit that is served in a semi-Fredo (semi-frozen) state.
I can’t remember the first time I tried cashew-based raw vegan desserts. Whenever and whatever it was that I first tried must have left an impression on my taste buds though as there is rarely a time when I don’t have a variety of raw vegan snacks in my fridge/freezer. Cashew cheesecake is probably one of my absolute favorite options though, and it’s been a while since I last shared a vegan cheesecake recipe.
Plus, even with three separate layers, this dessert only contains 10 ingredients (as a few are optional). The berries could also be experimented with too – try swapping the raspberries for blackberries etc. to try different flavor (and color) combinations.
All you need to make this vegan berry cheesecake is a high-powered blender. If it’s not so great, then it might take a bit longer to get your creamy fillings ready – but not impossible, either. In terms of ingredients, the main one that is likely to be lacking from your kitchen currently is butterfly pea flowers. These are optional though anyway, more for natural color than taste.
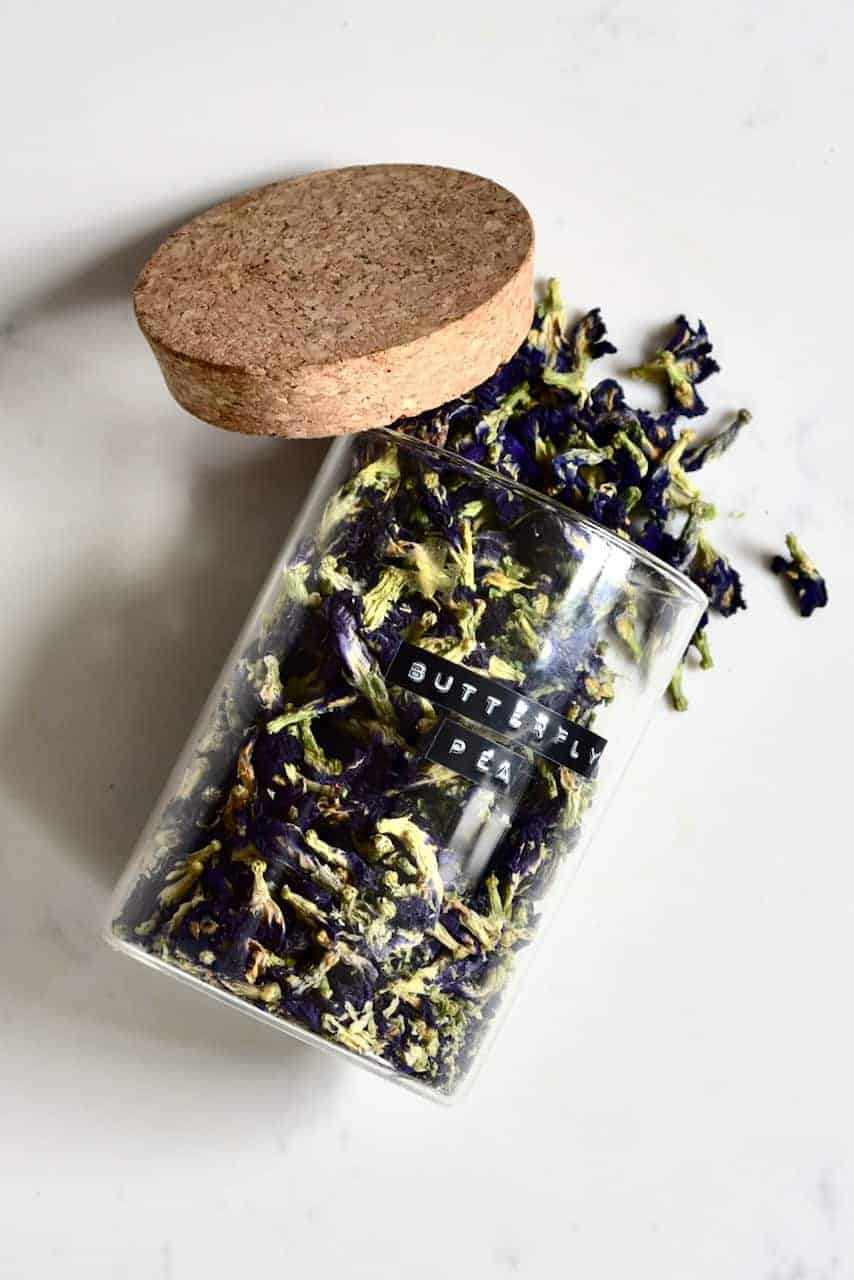
Butterfly pea flowers are an excellent natural coloring ingredient, as well as “magic” – often used for recipes like this Simple Colour-changing Magic Lemonade. This is due to how the flower’s color changes when mixed with something acidic that changes the PH balance of the mixture. While we’re not using that magic here – it can intensify the blue/purple color of the blueberry cheesecake layer.
Want to save this recipe?
The Raw Vegan Cheesecake How-To
For the base:
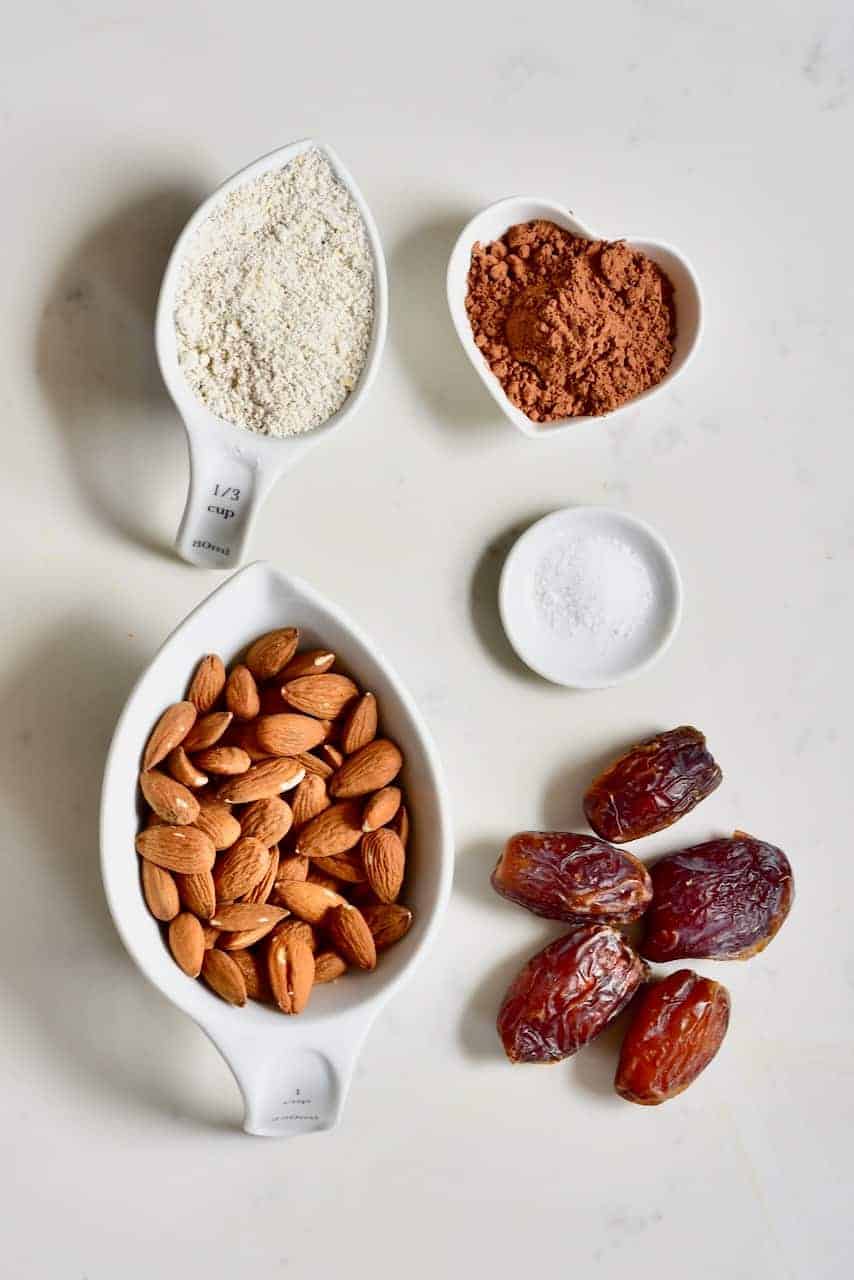
- Raw almonds, Medjool dates, oat flour
- Cacao powder, salt
For the blueberry layer:
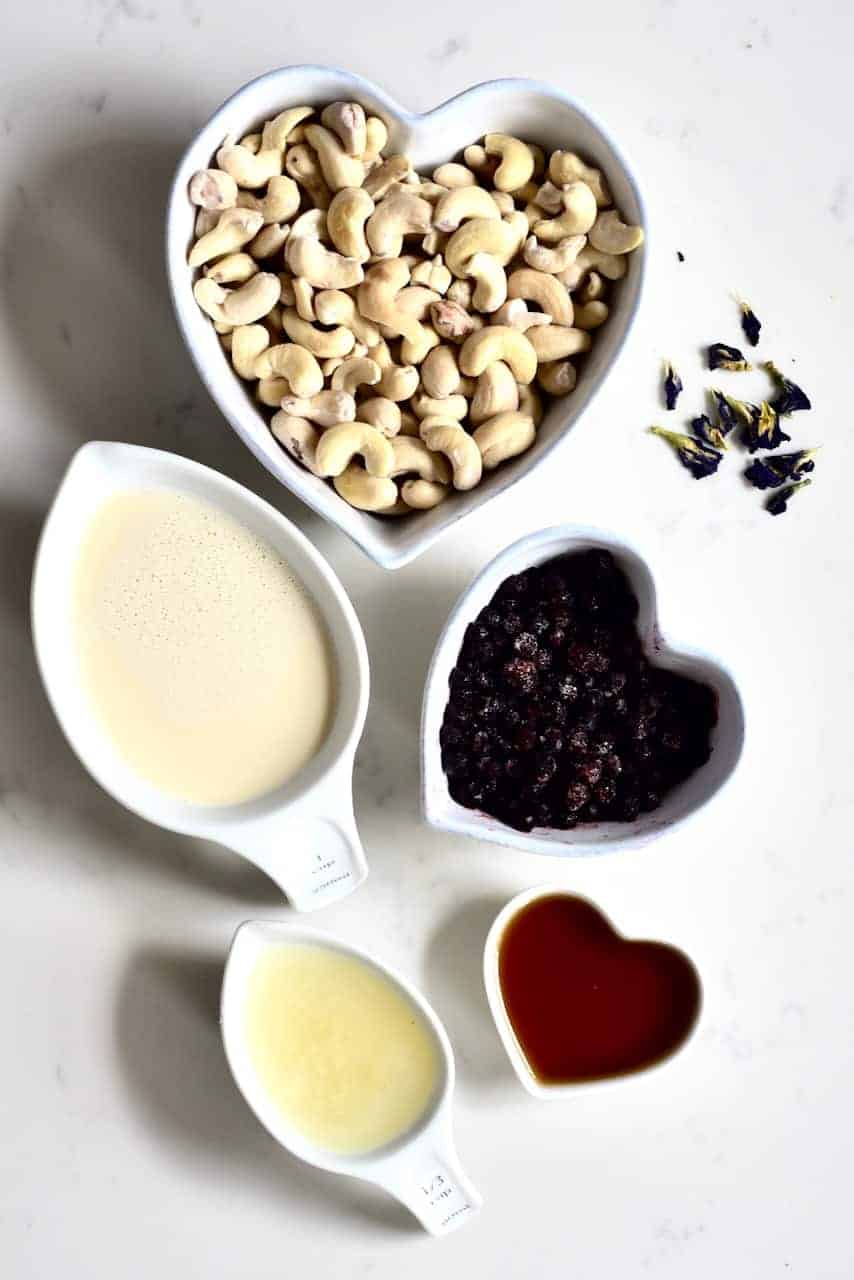
- Cashews, plant-based milk (I used homemade oat milk), frozen blueberries (or fresh – however, this will change the texture of the raw vegan bar from more ice-cream like to a softer filling)
- Coconut oil, maple syrup
- butterfly pea flower (totally optional, just to intensify the colour)
For the raspberry layer:
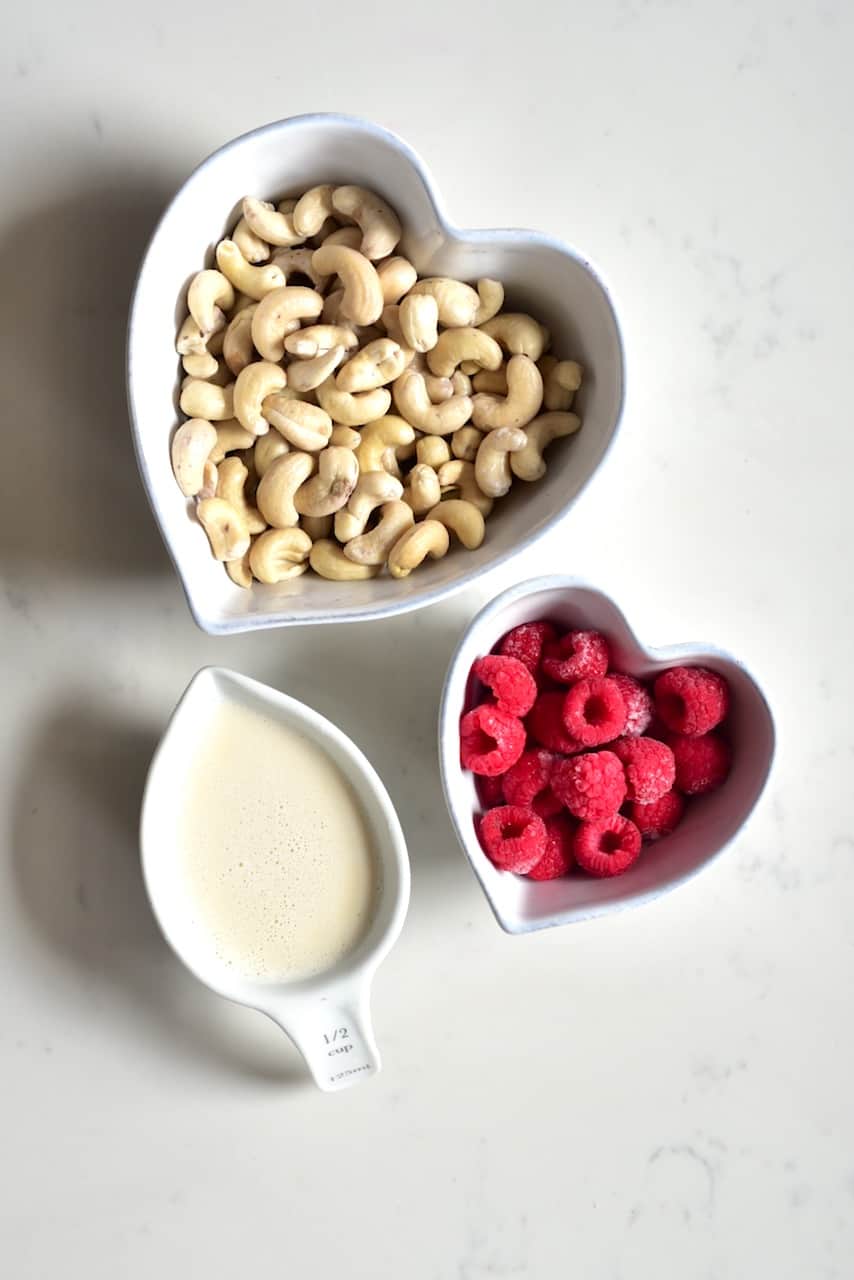
- Cashews, plant-based milk, frozen raspberries (or fresh)
- optional additives: vanilla or sweetener
Note* Whether or not you use frozen berries for this dessert will affect the texture of the dessert. If using frozen berries, you will end up with more of a berry ‘ice-cream’ slice. Whereas, if using fresh berries, you’ll achieve the normal cashew cheesecake consistency that, while frozen, isn’t ‘icy’.
Steps:
First, make sure to soak the cashews for about 6 hours or even overnight. Then, rinse them thoroughly after soaking them.
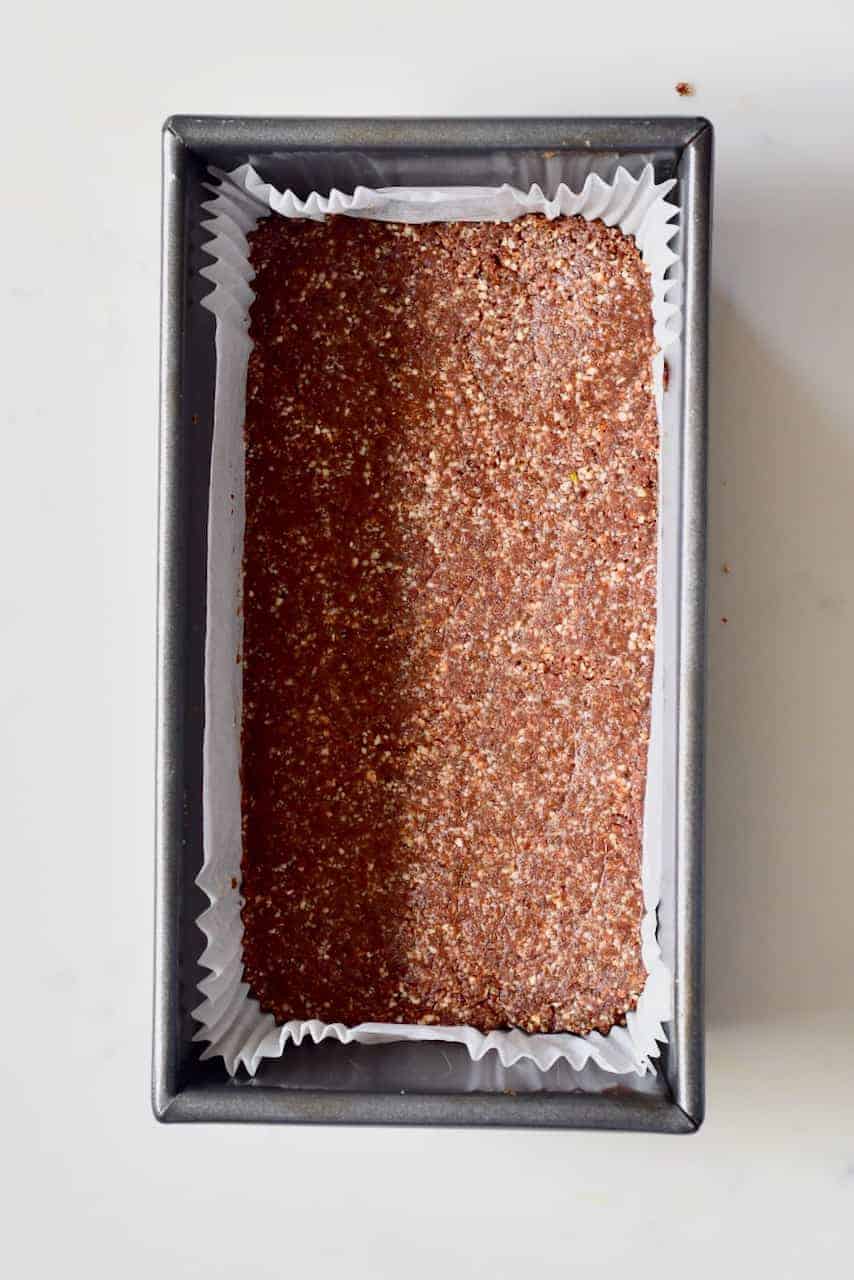
Start by making the base. To do this, blitz the almonds in a food processor/blender until you achieve a fine crumb.
Add the rest of the ingredients to the blender with the almonds and blend until you obtain a uniform sticky mixture.
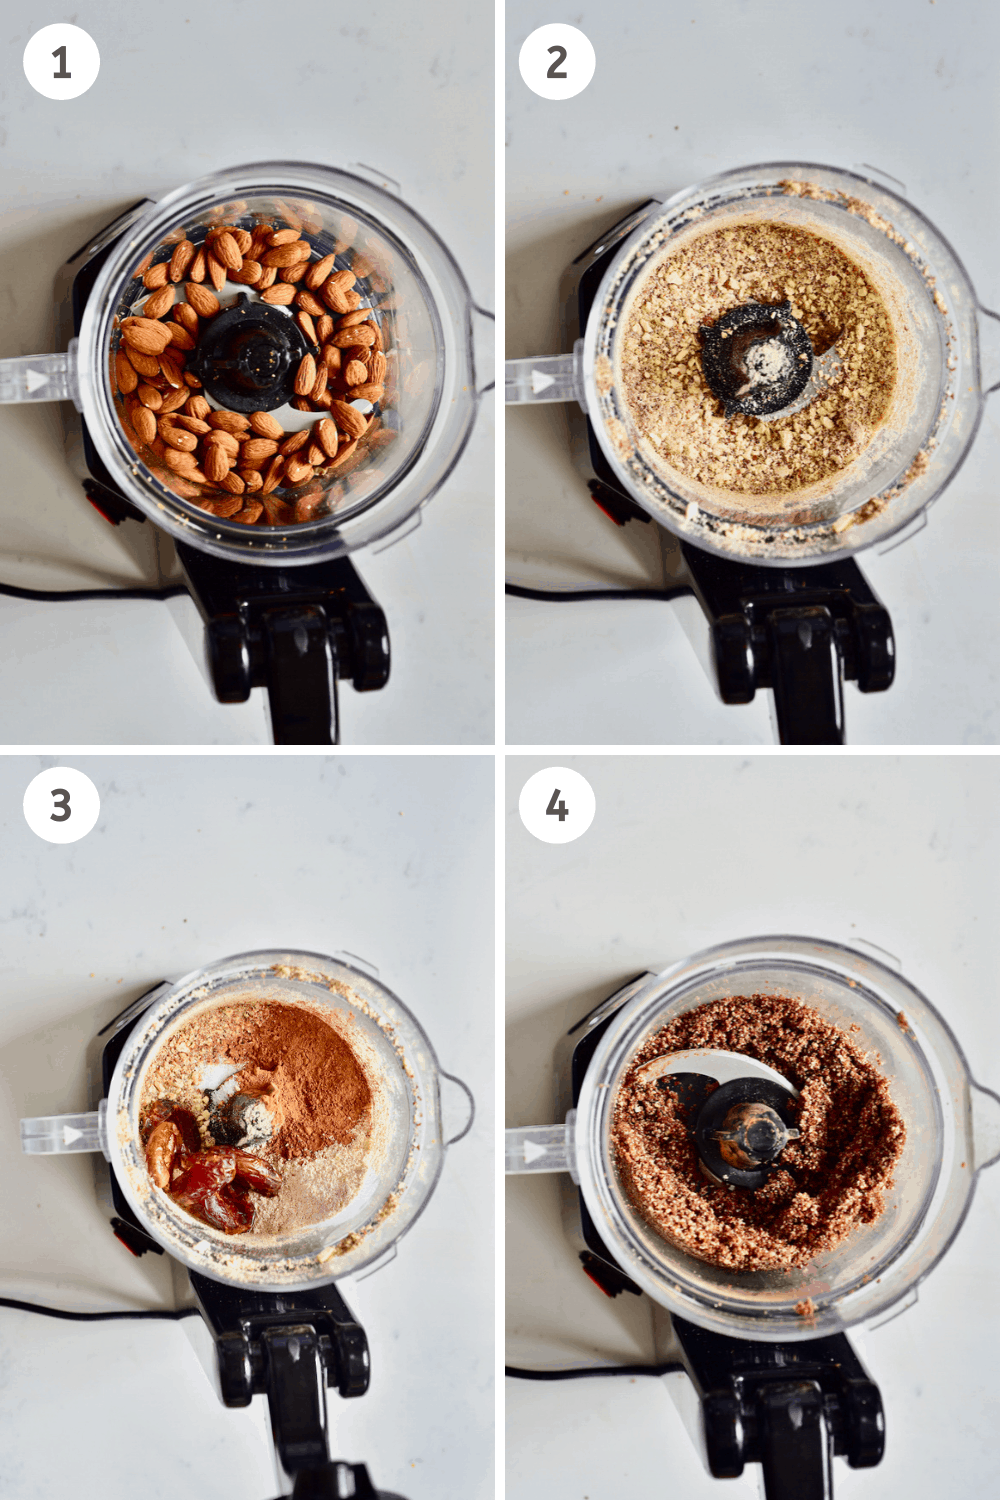
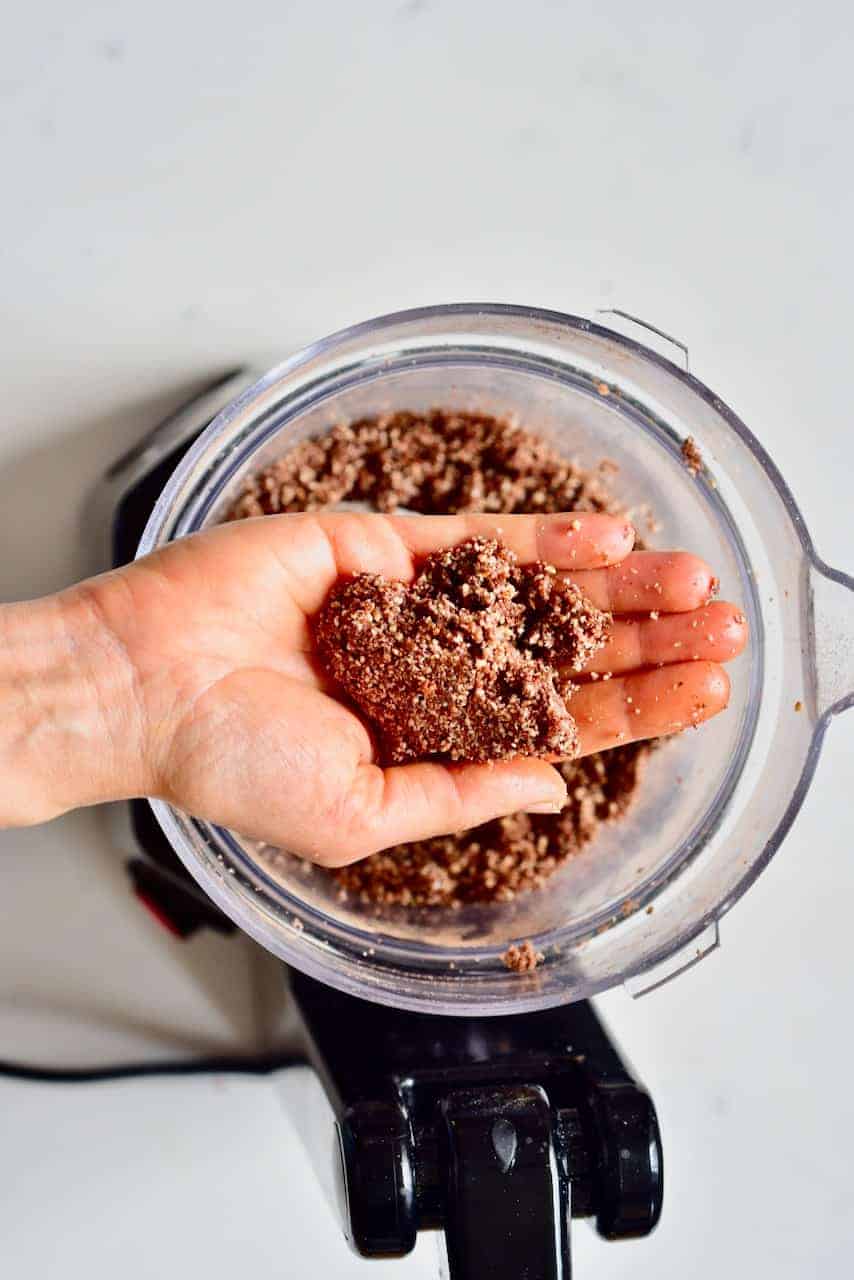
You can test the stickiness of the crust by pinching some in your hands. If it holds its shape, then it’s ready, if not, then add an extra date or 1 tBsp of coconut oil.
Note* You can also pre-soak the dates in hot water for 10-15 minutes pre-blending and that will help increase their stickiness.
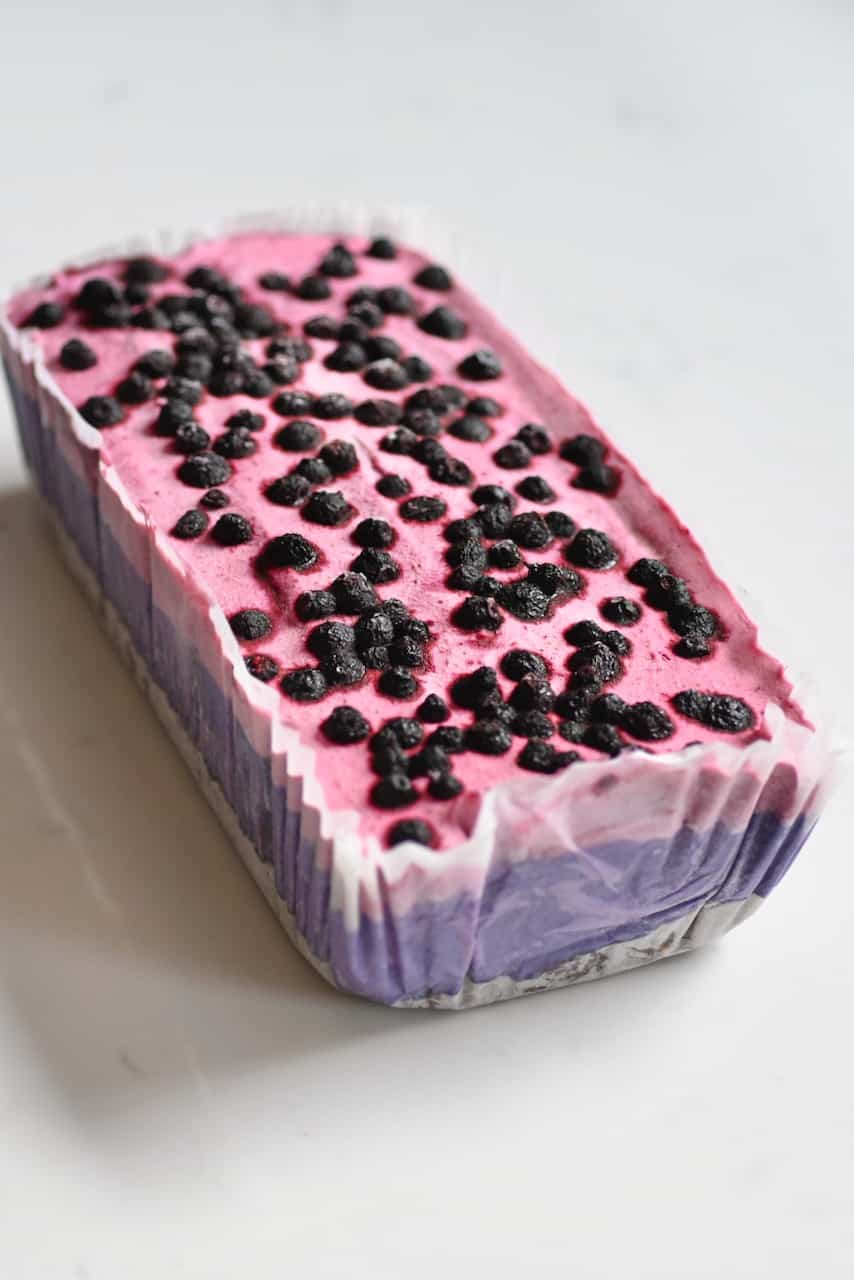
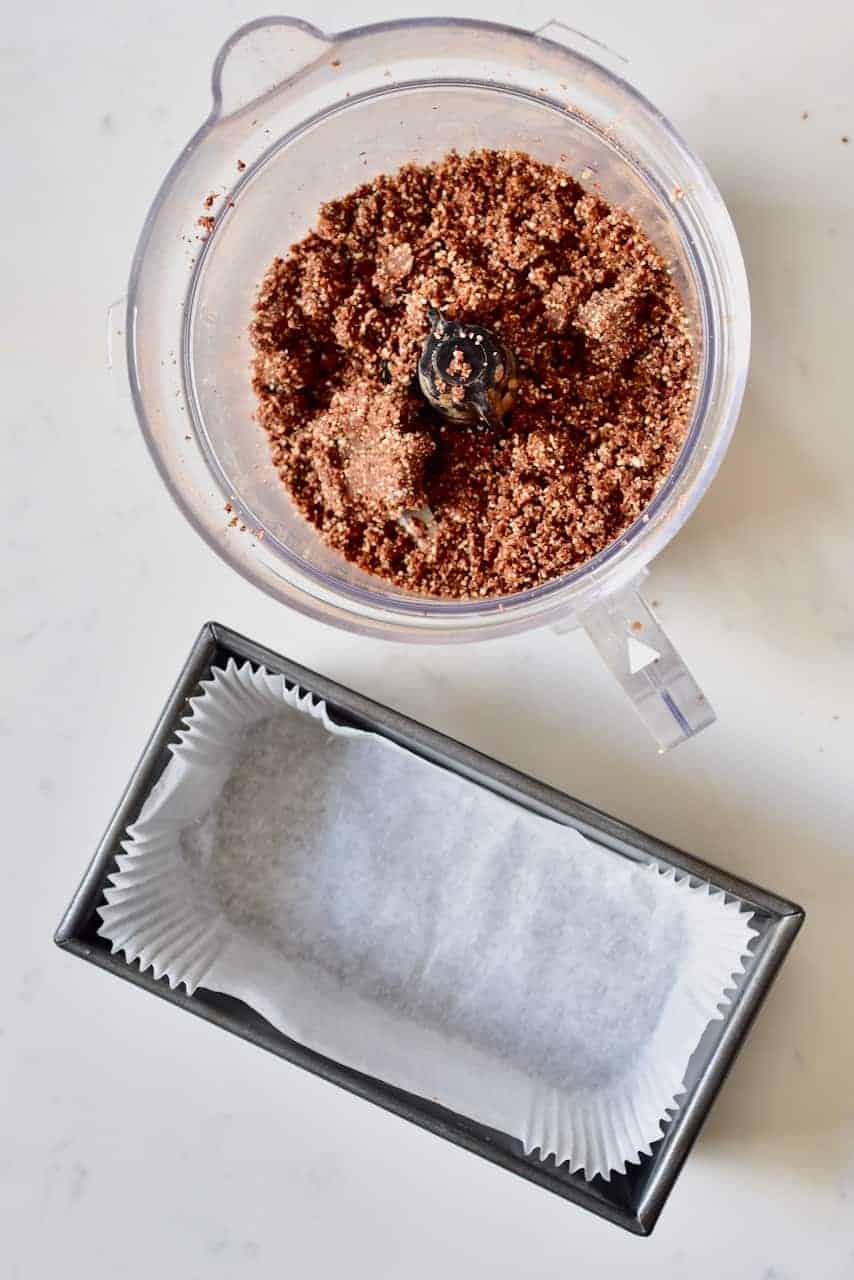
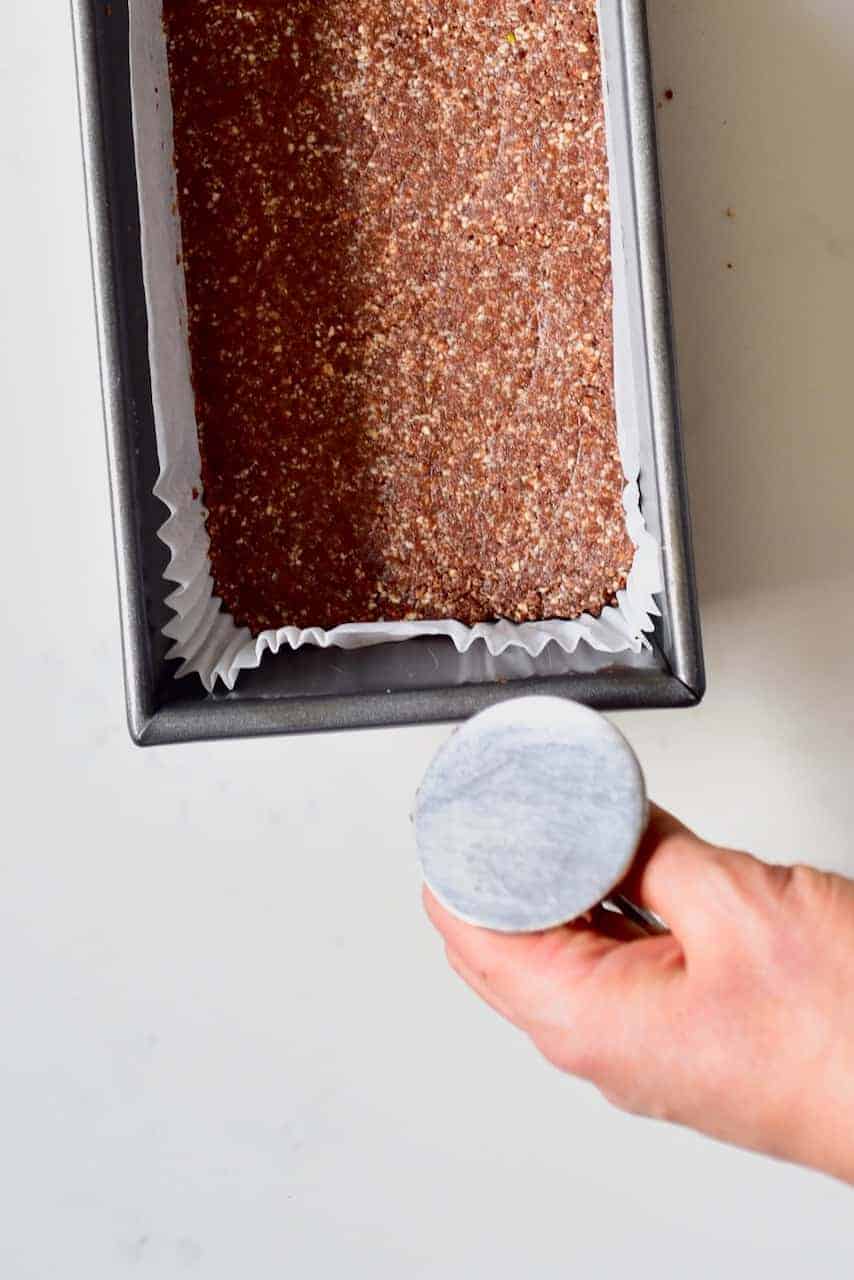
Add the crust dough to a bread loaf tin (about 9″ x 5″/22 cm x 12 cm). Spread it evenly on the whole surface and press it down to level it. I used a baking paper lining for my tin, for easy removal. You could also use a springform pan or mini tart pans/molds to make mini berry cheesecakes.
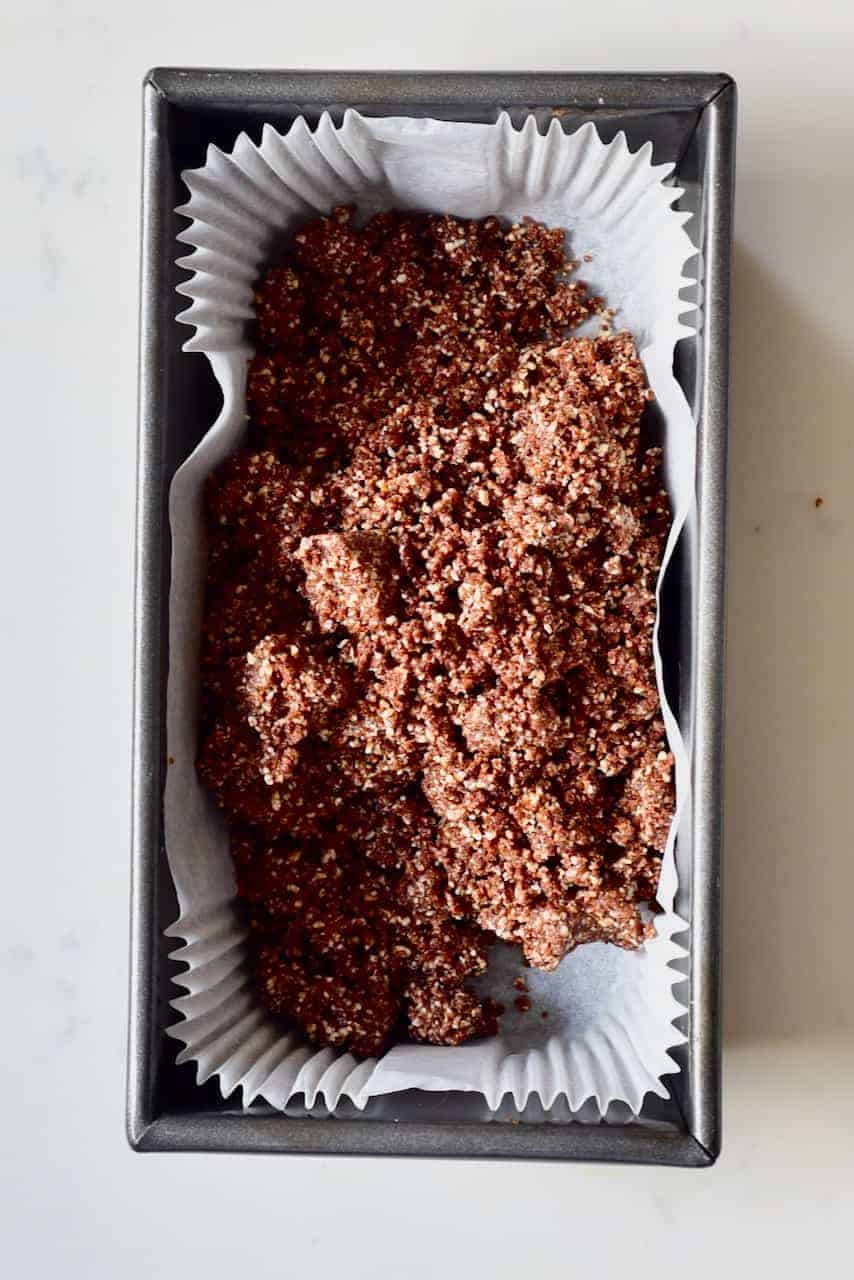
Freeze the base while you prepare the next layer.
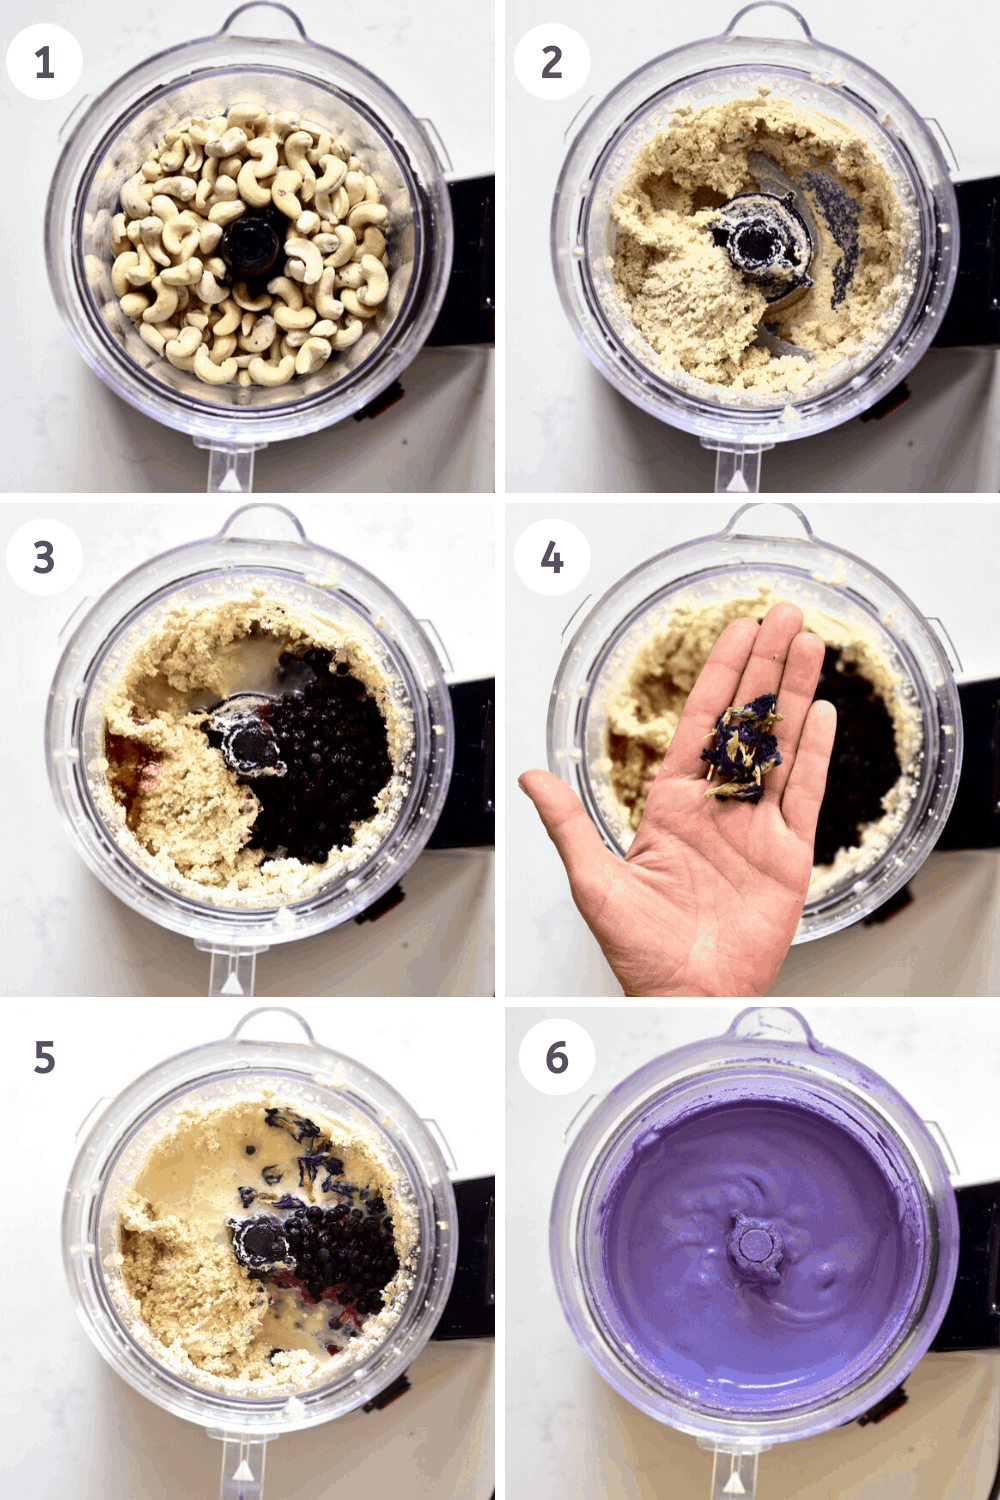
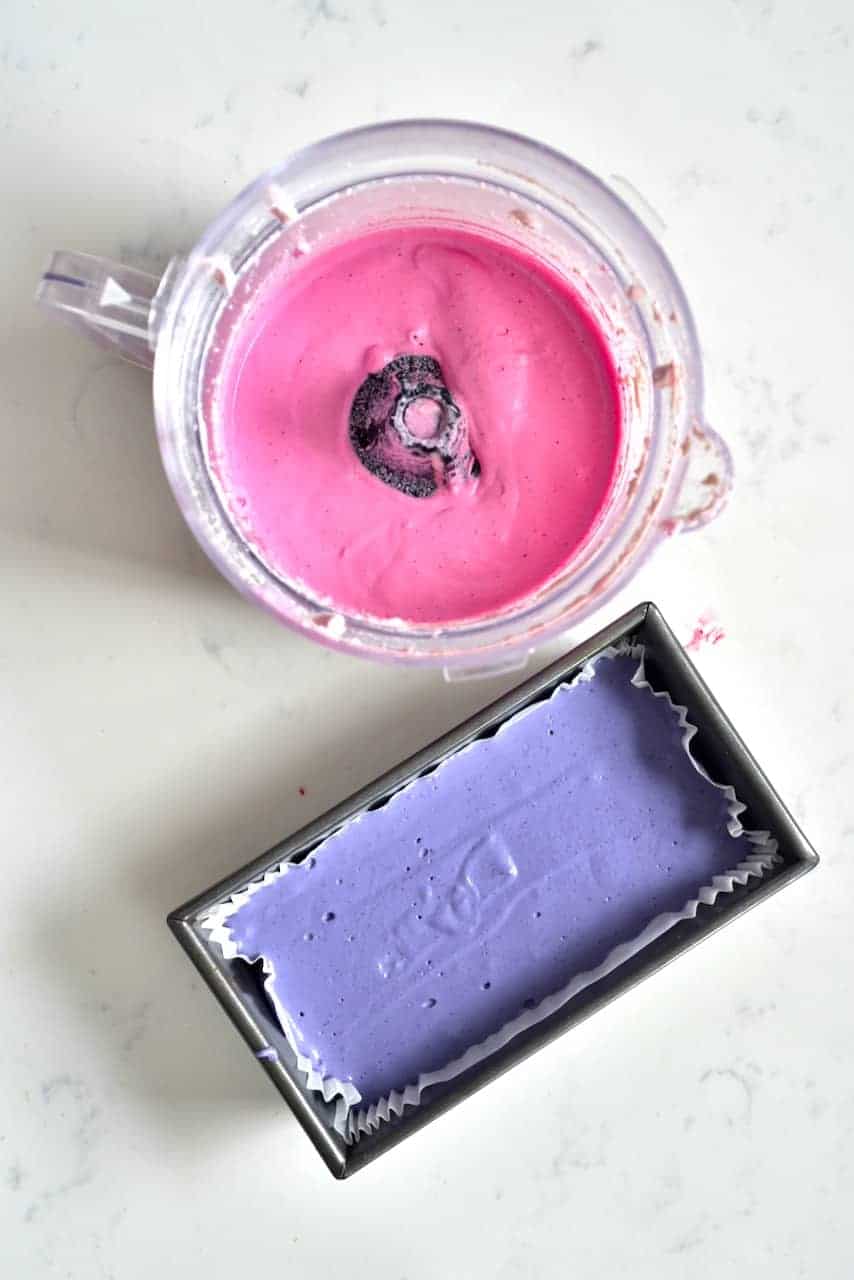
To prepare the blueberry layer, first, blend the cashews in the food processor/blender to make sure they are fully processed/pulverized. When ready, it’ll look like a thick paste.
Add in the rest of the ingredients for the blueberry layer and blitz again until they are well incorporated, and you have a uniform, creamy mixture. I always run a spoon through it to check as sometimes it can look super creamy but still have larger chunks of cashew inside.
Note: I recommend tasting the mixture and adjusting the sweetness to your liking. I have previously made this recipe using coconut cream instead of my homemade oat milk. However, as the cashews already make the recipe very rich, I found it to be a bit too decadent (coconut milk could work though).
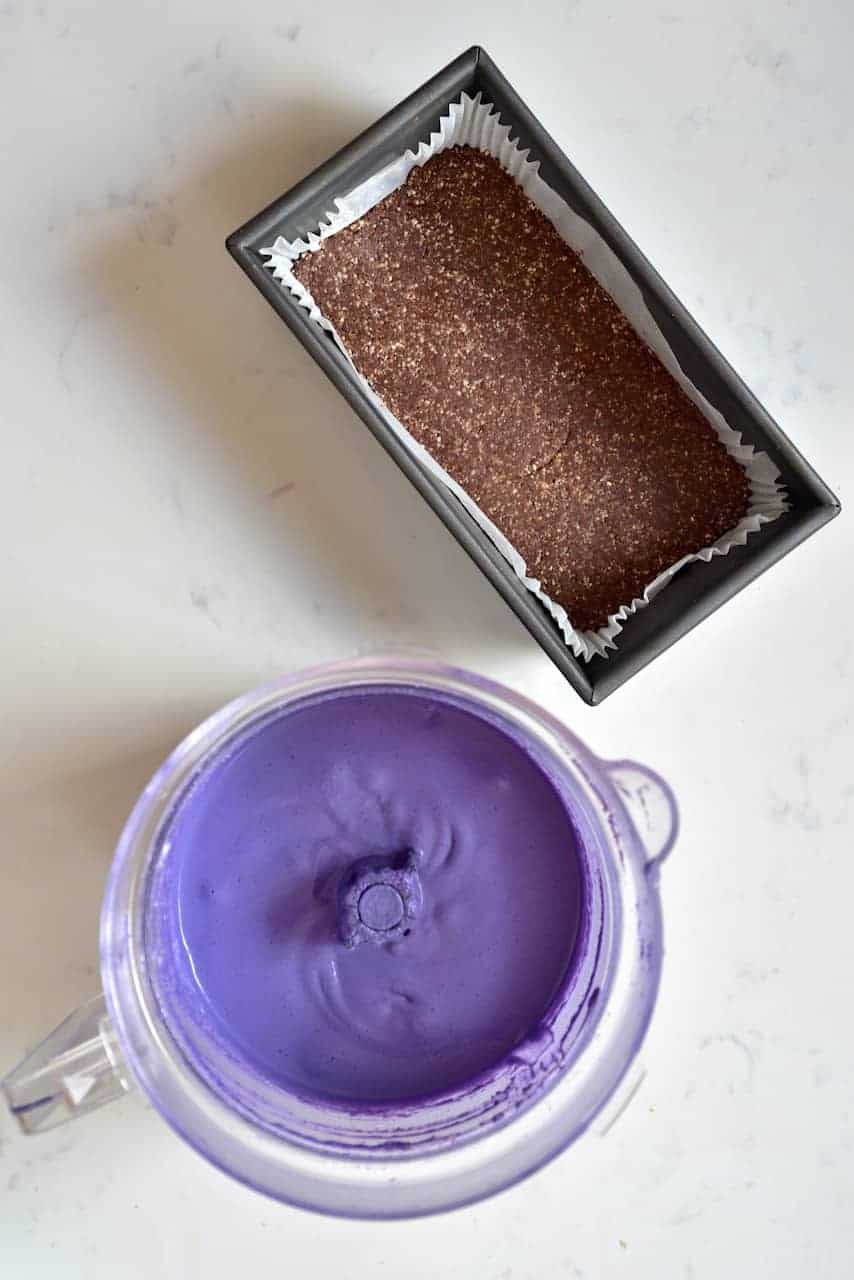
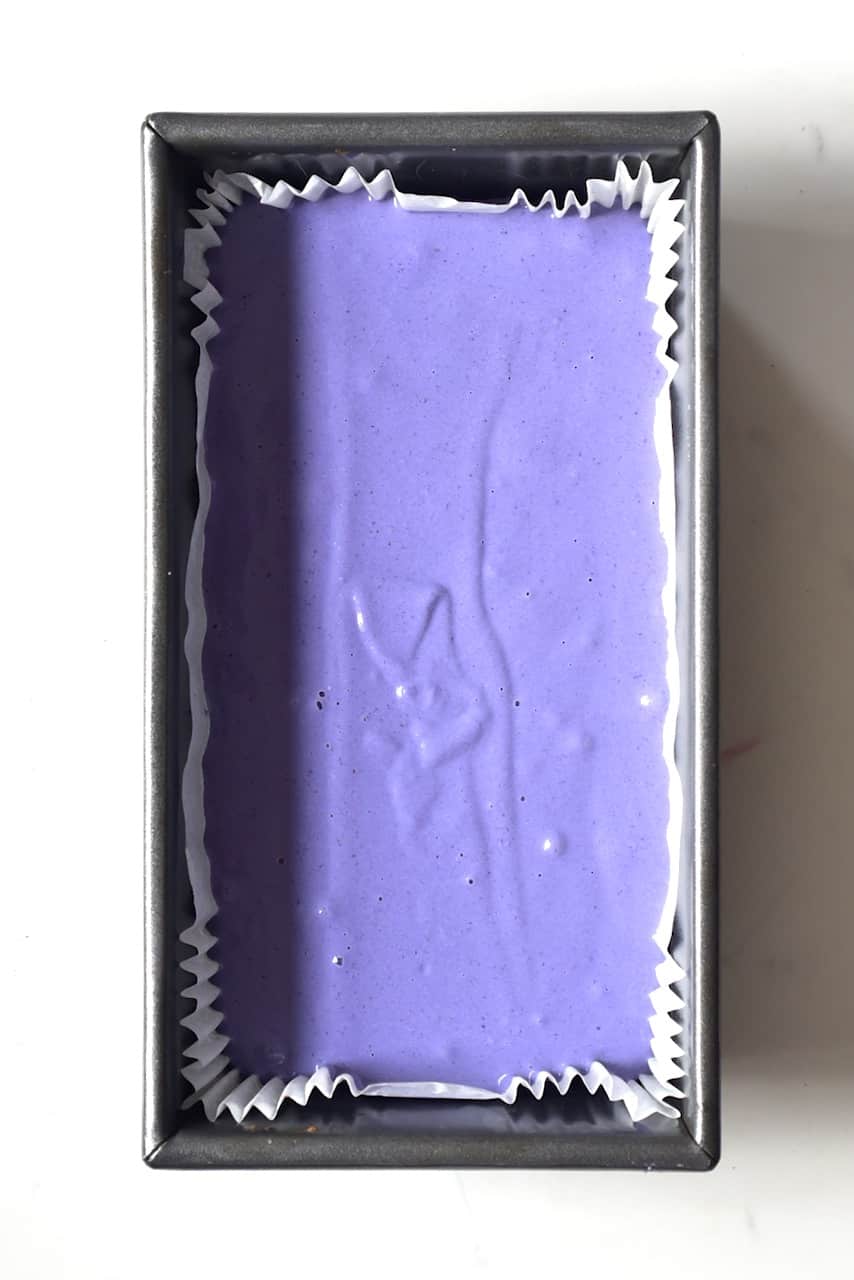
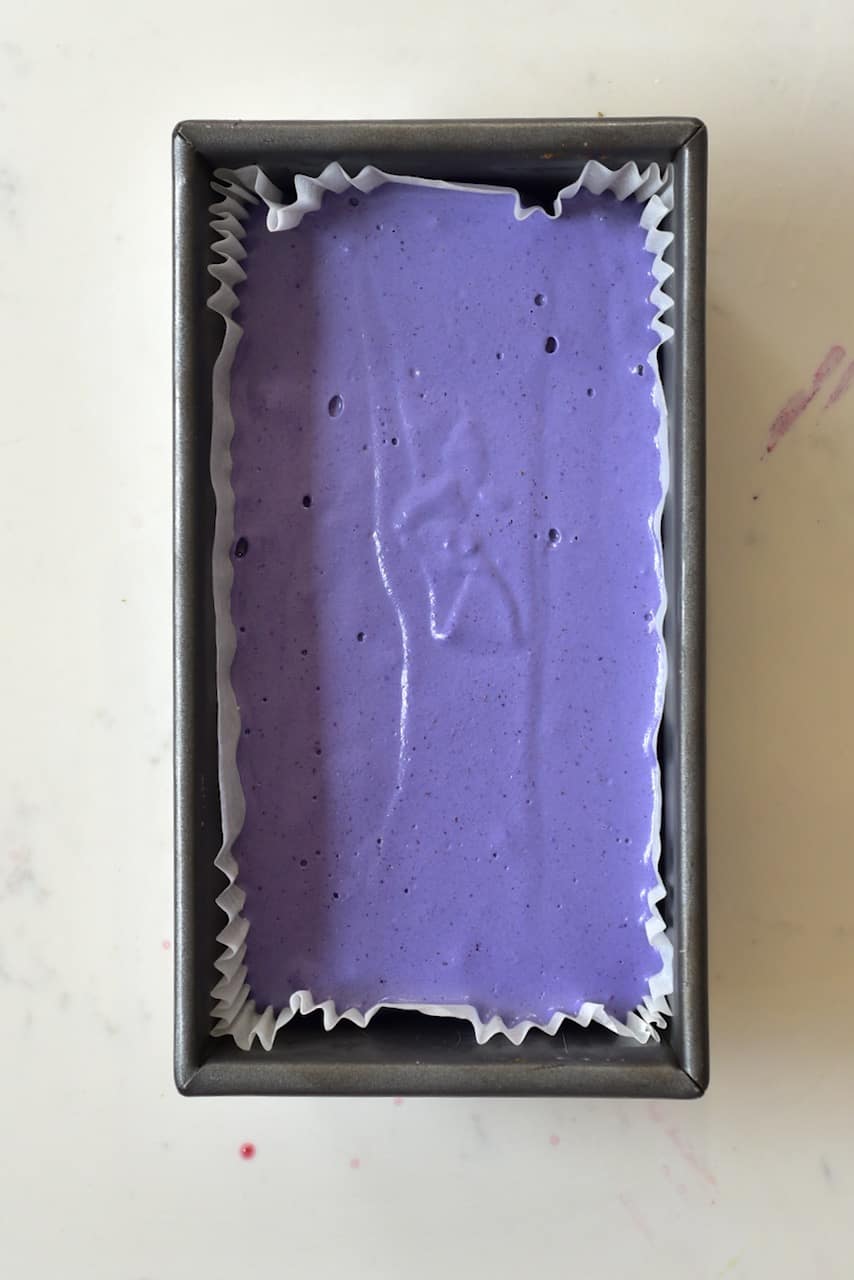
Pour the blueberry mixture over the chilled crust and place back in the freezer. It will need around two hours to fully set – However, you just need it to be stable enough so the final layer can be poured on top without them mixing.
It’s also a good idea to tap the tin lightly against the tables’ surface to release any bubbles inside. I didn’t do this, and it’s not a massive deal – perhaps just for perfectionists.
Note* You can either prepare the raspberry layer straight away and keep it chilled till the blueberry layer has adequately frozen OR wait until it’s ready and then make the raspberry layer.
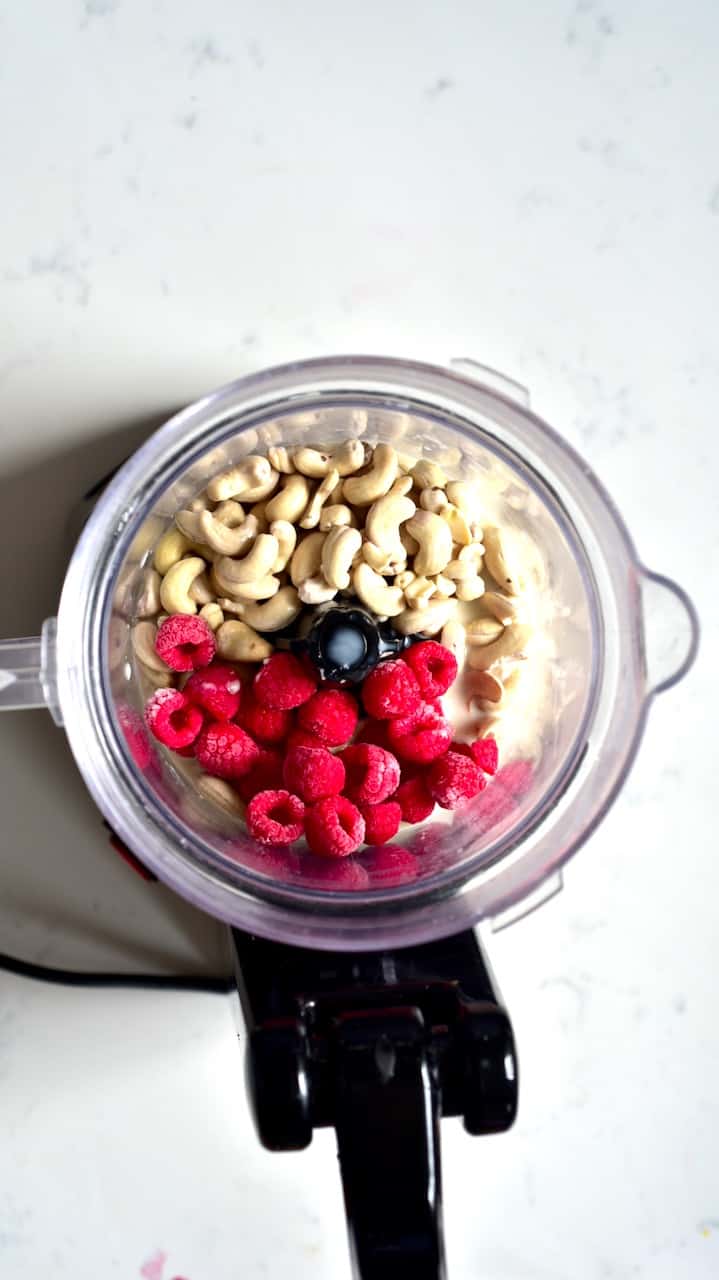
To prepare the raspberry layer, again start by blending the cashews in the food processor/blender.
Then add the rest of the ingredients and blend again until you get a uniform mixture.
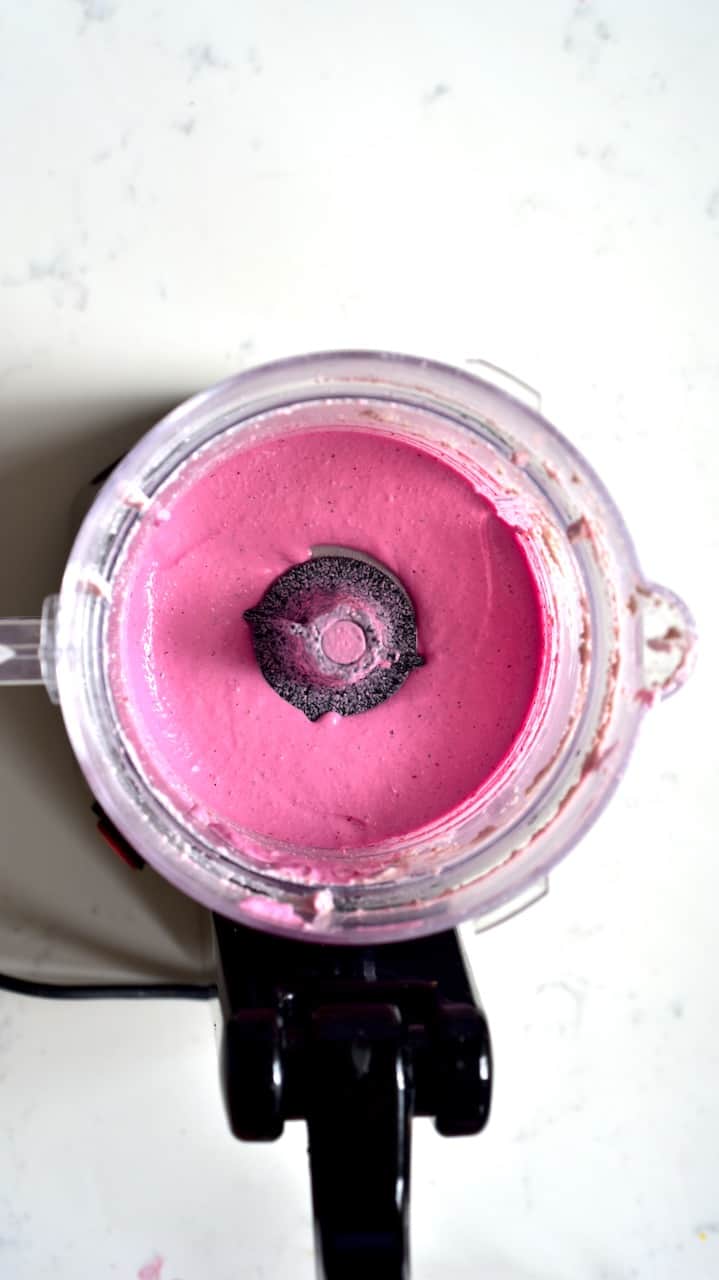
Note: I prefer keeping the raspberry mixture more on the sour side. If you prefer it sweeter, then add some maple syrup or your favorite natural sweetener.
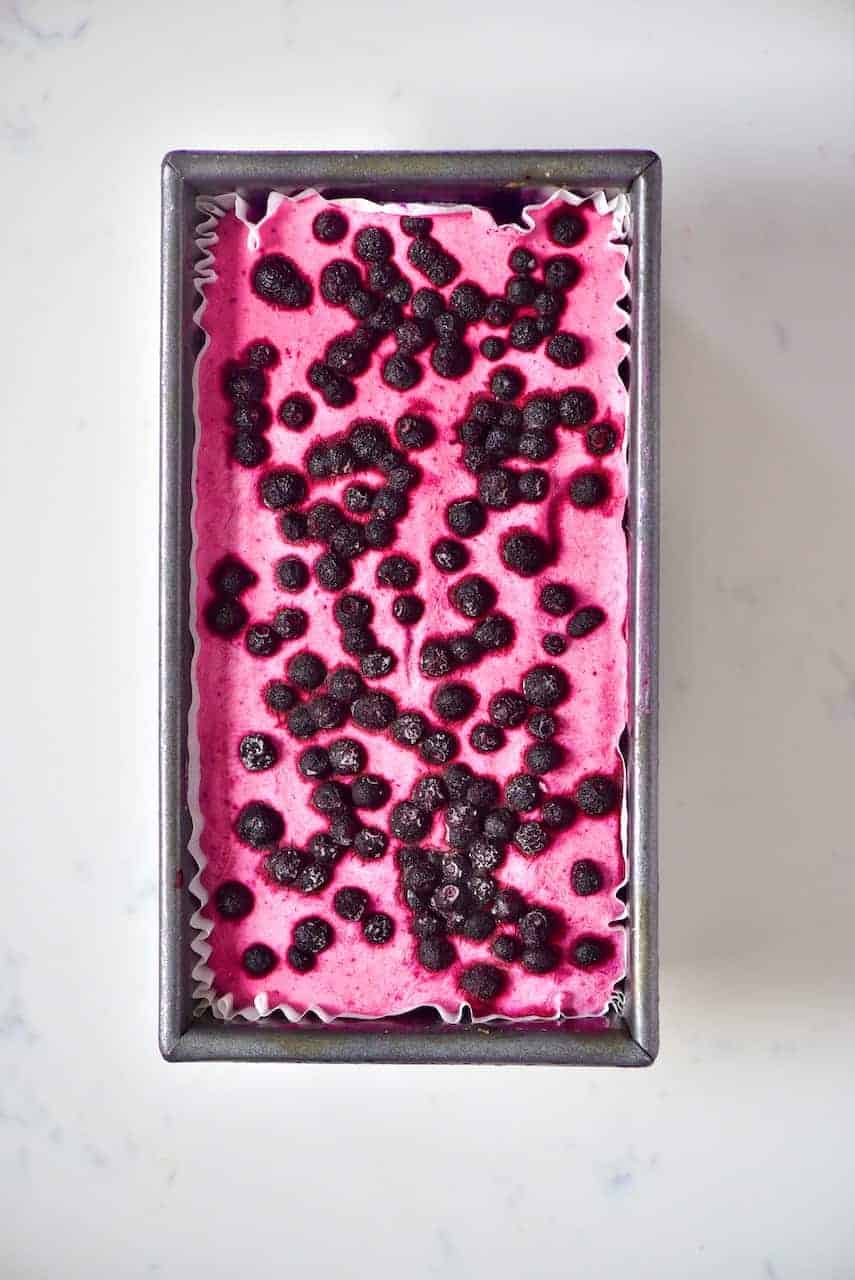
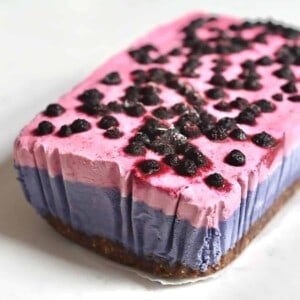
Pour the raspberry mixture over the hardened blueberry layer.
You can also add some wild blueberries or your favorite fruit/sprinkles as toppings.
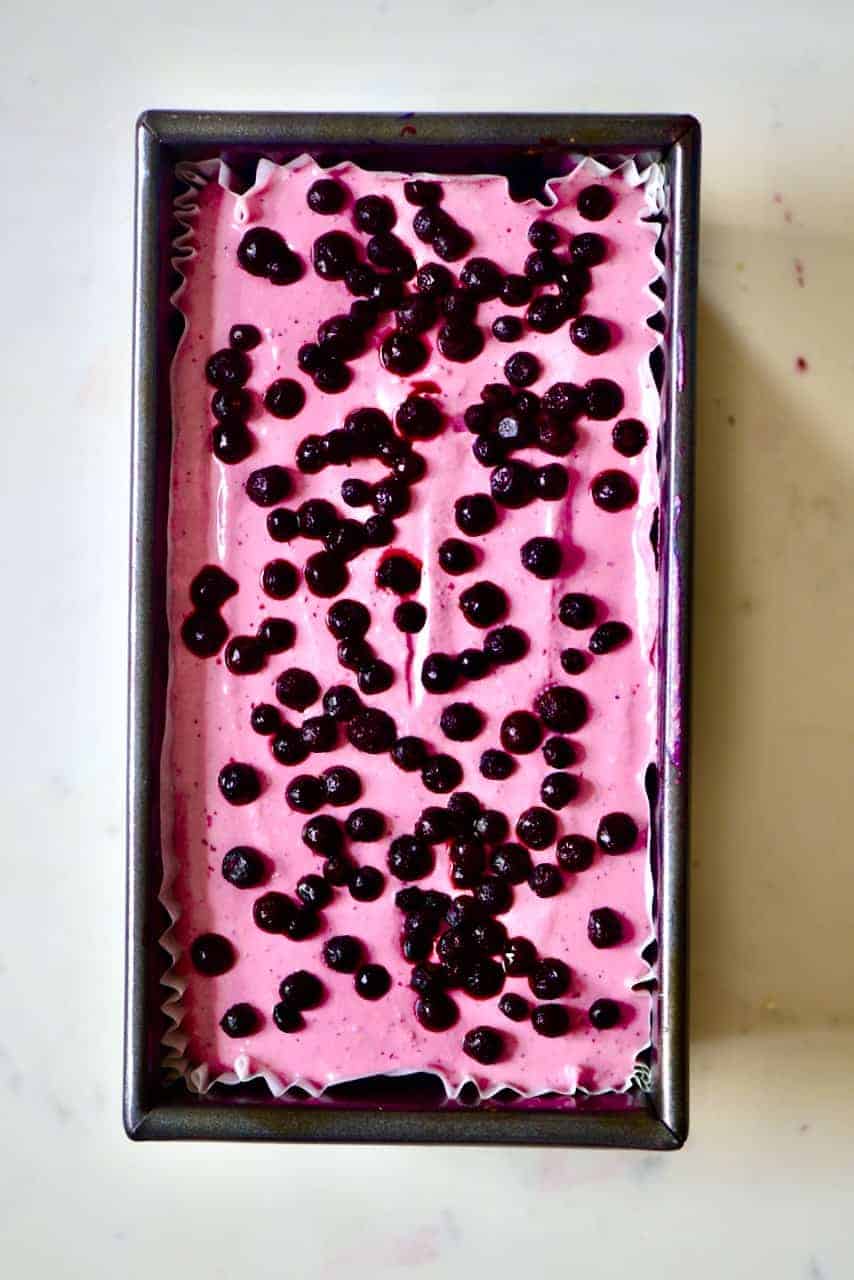
Freeze for at least 3-4 hours. For best results, keep in the freezer overnight.
Serve cold and enjoy!
Serving tips:
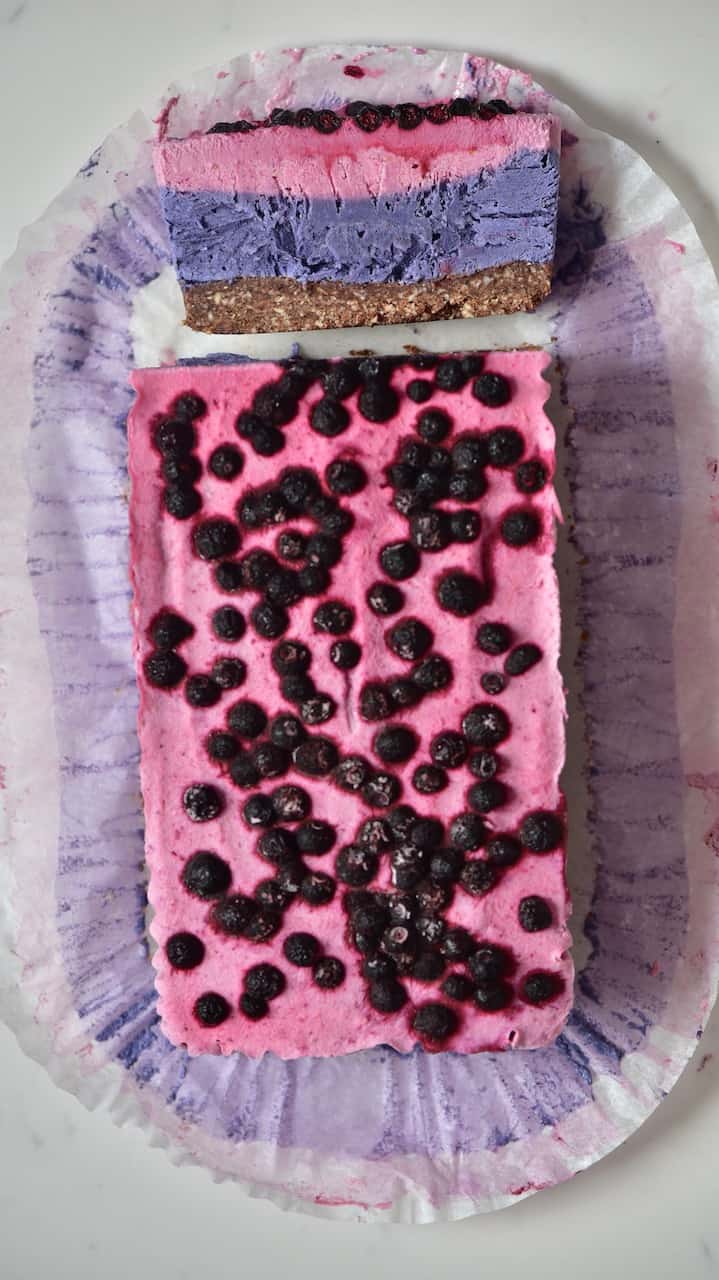
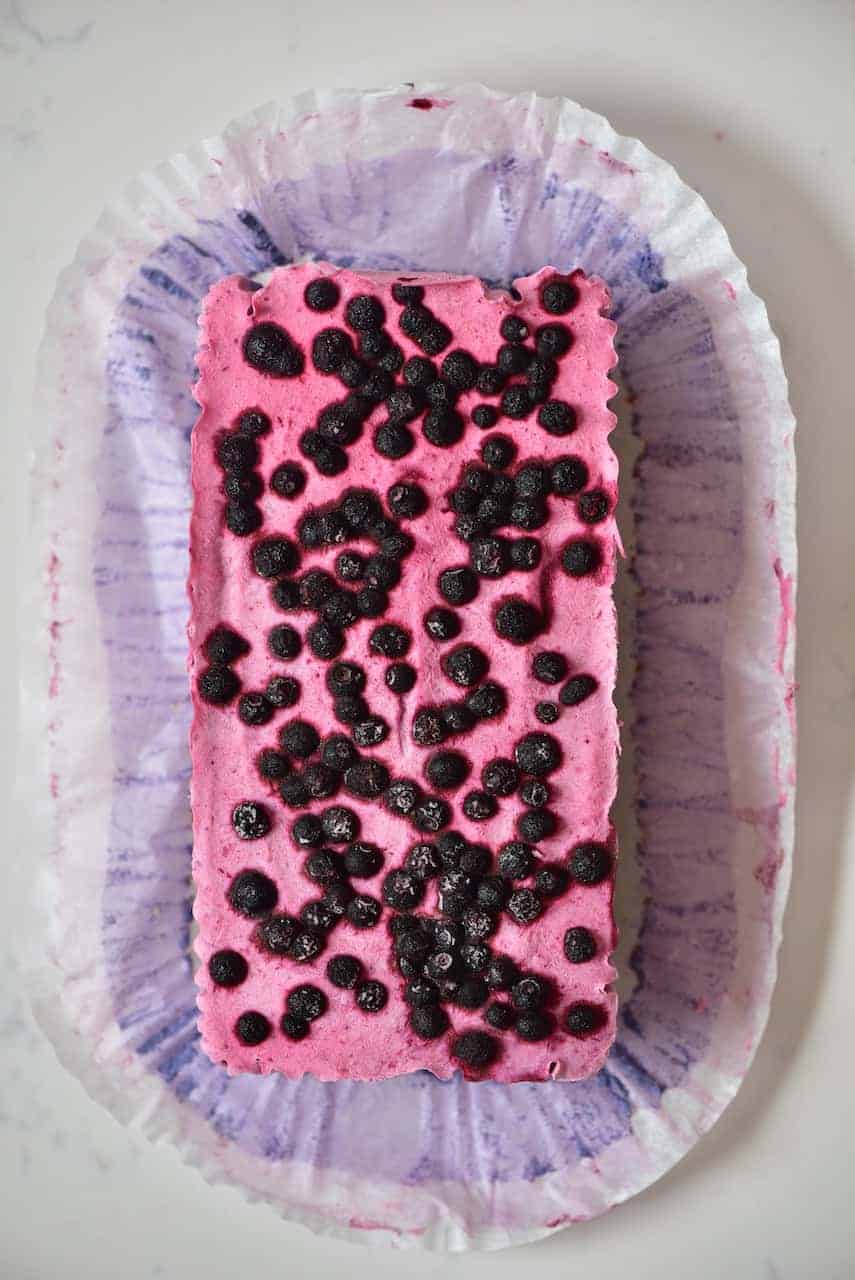
When you are ready to serve this dessert, dip a sharp knife in hot water before each raw vegan slice, you cut. This will allow you to cut effortlessly through the frozen layers.
You can also cut the dessert in advance and keep the individual slices in the freezer. Then, the next time you want something sweet, you can just take a berry slice out.
Other Dessert Recipes You May Like
If raw vegan dessert recipes are your thing then I have just the thing for you. From cheesecake recipes to raw desserts, there’s something for everyone.
For other raw vegan dessert recipes, you may like these Healthier Homemade snickers Bars (Vegan), Almond Pistachio Thumbprint Cookies or even Salted Caramel & Raspberry Vegan Magnum Ice Creams. I also have a large selection of no-bake vegan tarts and more. Head over to the desserts section of this blog for the full list.
If you give this recipe a go, then please let me know in the comments below. Feel free to ask me any questions you have and I’d super appreciate a recipe rating. Also, feel free to tag me in your re-creations @AlphaFoodie.
Raw Vegan Berry Cheesecake Slices
Equipment
Ingredients
For the base:
- 1 cup almonds raw
- 5 dates medjool
- 1/3 cup oat flour
- 2 tBsp cacao powder
- 1/4 tsp salt
For the blueberry layer:
- 1.5 cups cashews presoaked for about 6 hours or overnight then rinsed
- 1 cup oat milk or any other milk
- 1 cup blueberries frozen
- 1/3 cup coconut oil
- 2 tBsp maple syrup
- butterfly pea flower totally optional, just to intensify the colour
For the raspberry layer:
- 1 cup cashews
- 1 cup raspberries frozen
- 1/2 cup oat milk or any other milk
- optional additives: vanilla or sweetener
Instructions
- First, make sure to soak the cashews for about 6 hours or even overnight. Rinse them well after soaking them.
To make the base:
- Blitz the almonds to in a food processor/blender until you achieve a fine crumb.
- Add the rest of the ingredients and blend until you obtain a uniform sticky mixture. You can test the stickiness of the crust by pinching some in your hands. If it holds its’ shape then it’s ready, if not then add an extra date or 1 tBsp of coconut oil.*
- Add the crust dough to a bread loaf tin (about 9" x 5"/22 cm x 12 cm). Spread it evenly on the whole surface and press it down to level it.**
- Freeze the base while you prepare the next layer.
To make the blueberry layer:
- Blend the cashews in the food processor/blender to make sure they are fully processed/pulverized. When ready, it’ll look like a thick paste.
- Add in the rest of the ingredients for the blueberry layer and blitz again until they are well incorporated and you have a uniform, creamy mixture. I always run a spoon through it to check as sometimes it can look super creamy but still have larger chunks of cashew inside. ***
- Pour the blueberry mixture over the chilled crust and place back in the freezer. It will need around two hours to fully set – However, you just need it to be solid enough so the final layer can be poured on top without them mixing.
- It’s also a good idea to tap the tin lightly against the tables’ surface to release any bubbles inside. I didn’t do this and it’s not a massive deal – perhaps just for perfectionists.
To make the raspberry layer:
- Blend the cashews in the food processor/blender.
- Add the rest of the ingredients and blend again until you get a uniform mixture. Note: I prefer keeping the raspberry mixture more on the sour side. If you prefer it sweeter, then add some maple syrup or your favourite natural sweetener.
- Pour the raspberry mixture over the hardened blueberry layer. You can also add some wild blueberries or your favourite fruit/sprinkles as toppings.
- Freeze for at least 3-4 hours. For best results, keep in the freezer overnight.
Decoration/Serving tips:
- When you are ready to serve this dessert, remove from the freezer and dip a sharp knife in hot water before each slice you cut. This will allow you to cut easily through the frozen layers.
- You can also cut the dessert in advance and keep the individual slices in the freezer. Then next time you want something sweet, you can just take one out.
Video
Notes
- Note- Whether or not you use frozen berries for this dessert will affect the texture of the dessert. If using frozen berries you will end up with more of a berry ‘ice-cream’ slice. Whereas, if using fresh berries, you’ll achieve the normal cashew cheesecake consistency that, while frozen, isn’t ‘icy’.
- * You can also pre-soak the dates in hot water for 10-15 minutes pre-blending and that will help increase their stickiness.
- ** I used a baking paper lining for my tin, for easy removal. You could also use a springform pan or mini tart pans/moulds to make mini berry cheesecakes.
- *** I recommend tasting the mixture and adjusting the sweetness to your liking. I have previously made this recipe using coconut cream instead of my homemade oat milk. However, as the cashews already make the recipe very rich, I found it to be a bit too decadent ( coconut milk could work though).
Nutrition
Nutrition information is automatically calculated, so should only be used as an approximation.


The crust didnt work our for me – needed to double the date amount, as it was too dry it didnt clump together.
My food processor/blender probably wasnt strong enough, no fault of the recipe, but its a definite must have if you want that smooth, homogenous consistency.
So sorry to hear Jay, I hope you give it another try one day!