
This post may contain affiliate links. Please read our disclosure policy.
How to make vanilla butter from scratch with just 2 ingredients and a simple process; a delicious sweet butter for slathering other toast, muffins, baked squash, and using within sweet baking recipes and buttercream frosting.
When you think of compound butter (flavored butter), flavor combinations that often come to mind include herbs and chilies – but did you know you can make a sweet compound butter with vanilla? Learning how to make vanilla butter is simple and can be done in under 10 minutes.
And, okay, I know that technically you can make this homemade vanilla butter in just a couple of minutes if you’re using store-bought butter, but it takes under 10 minutes to make this vanilla butter from scratch with delicious homemade butter.

Plus, there are several ways to adapt the recipe too with additional ingredients and flavor combinations. Once prepared, the vanilla butter can be slathered over all sorts of baked treats and even roasted vegetables and proteins.
Want to save this recipe?
The Ingredients
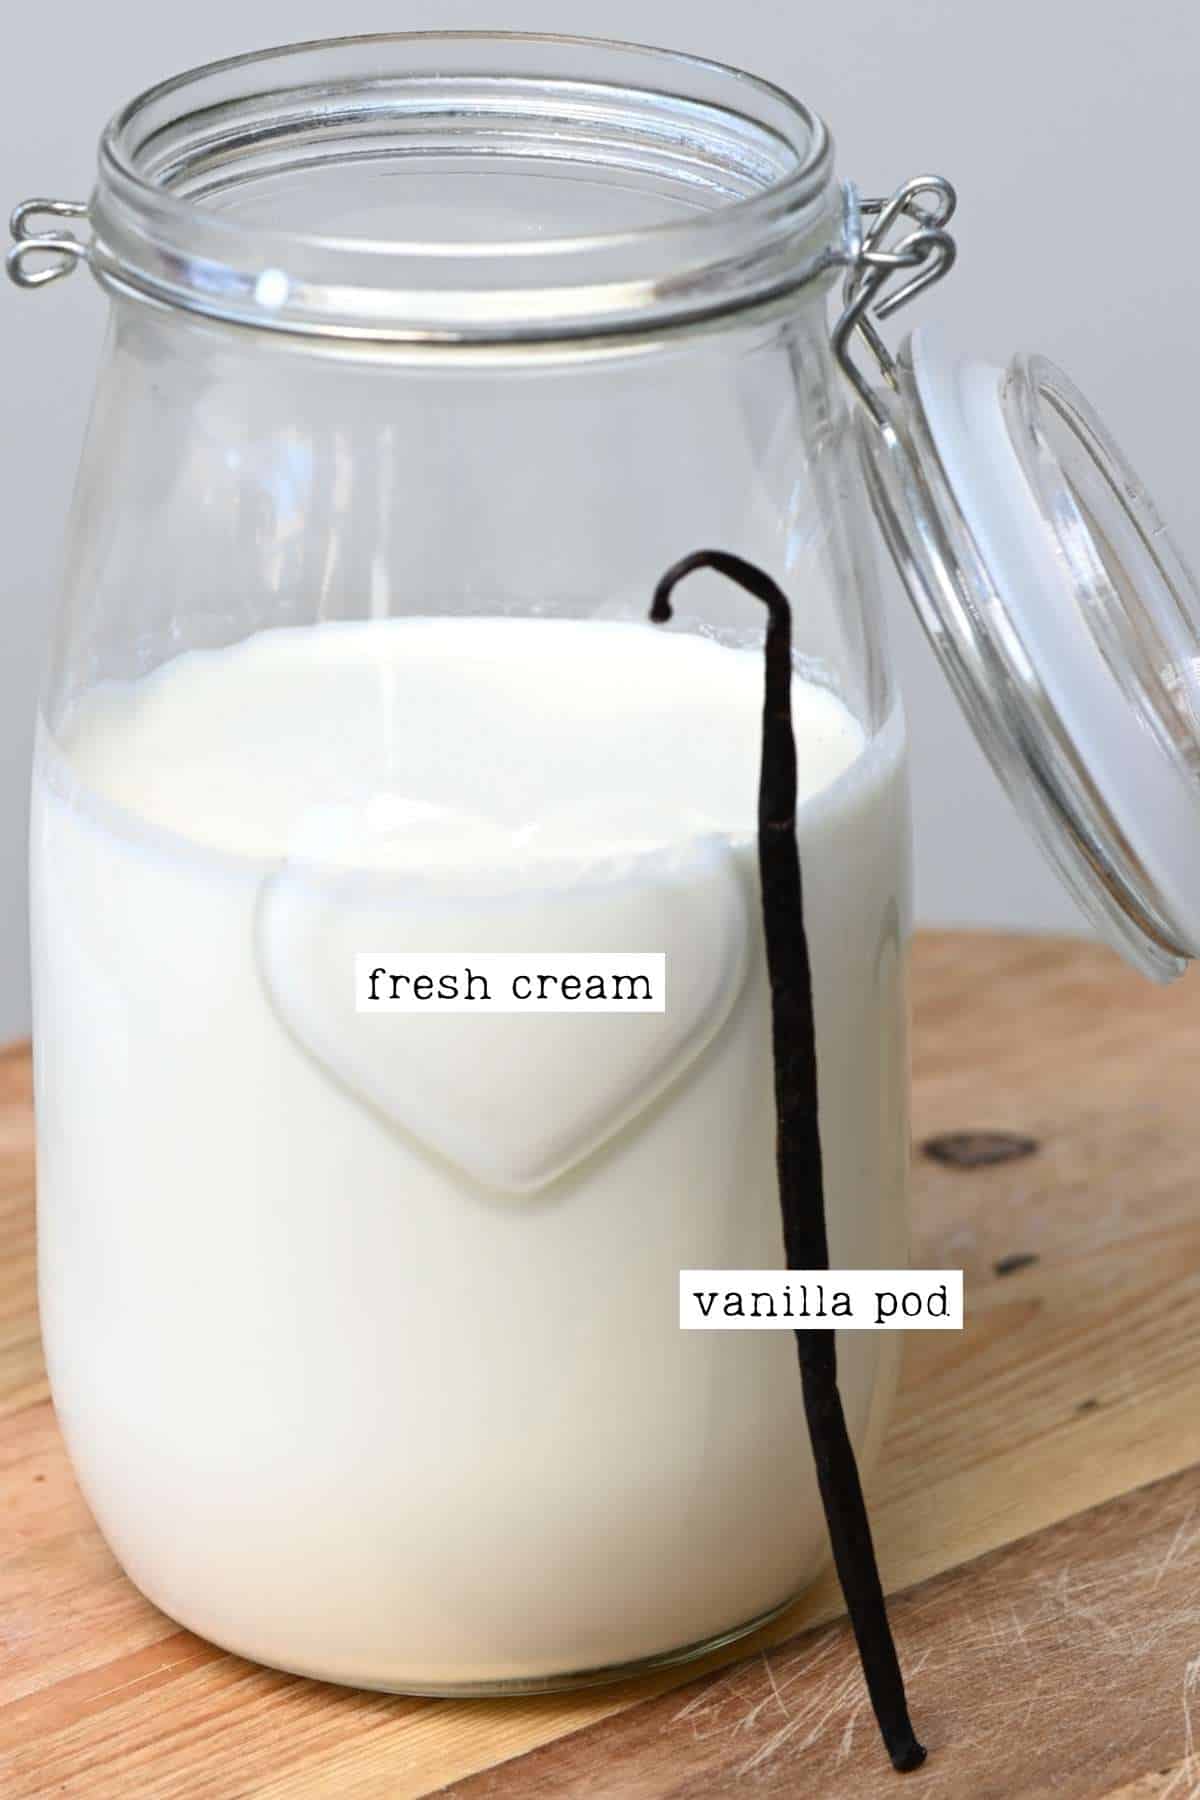
- Cream: it’s best to use fresh cream, heavy cream, or double cream.
- Vanilla pod: I like to use a fresh vanilla pod for this to see all the specks of vanilla within the butter. If you want additional vanilla flavor, you could bump up the flavor with natural vanilla extract.
- (Optional) A pinch of salt: can be added to add depth to the vanilla butter flavor.
- (Optional) Powdered sugar: If you want to create sweet butter, you can add a little powdered sugar. You can easily adapt this to the sugar or sugar alternative of your choice: coconut sugar, cane sugar, granulated erythritol, etc., and grinding it into a fine powder. I suggest adding around 1 tbsp sugar- but feel free to adapt this amount.
Flavor Variations
- Vanilla Honey Butter: whipped honey butter is a classic made even better with the addition of vanilla. Add honey 1tbsp at a time until you reach your desired sweetness.
- Citrus vanilla butter: You can experiment with different zest; orange, lemon, lime, etc. I suggest adding between 1-2tsp zest in total.
- Adding cinnamon: Adding cinnamon to the plain vanilla butter or alongside honey too will taste delicious.
- Vanilla chai butter: This is best when combined with powdered sugar or honey. I suggest adding around 1/2-3/4tsp ground chai spice blend.
How To Make Vanilla Butter
Step 1: Whip the cream into butter
You can do this method using a stand mixer, a hand-held mixer, or even with a whisk (if you have a lot of muscle and patience).
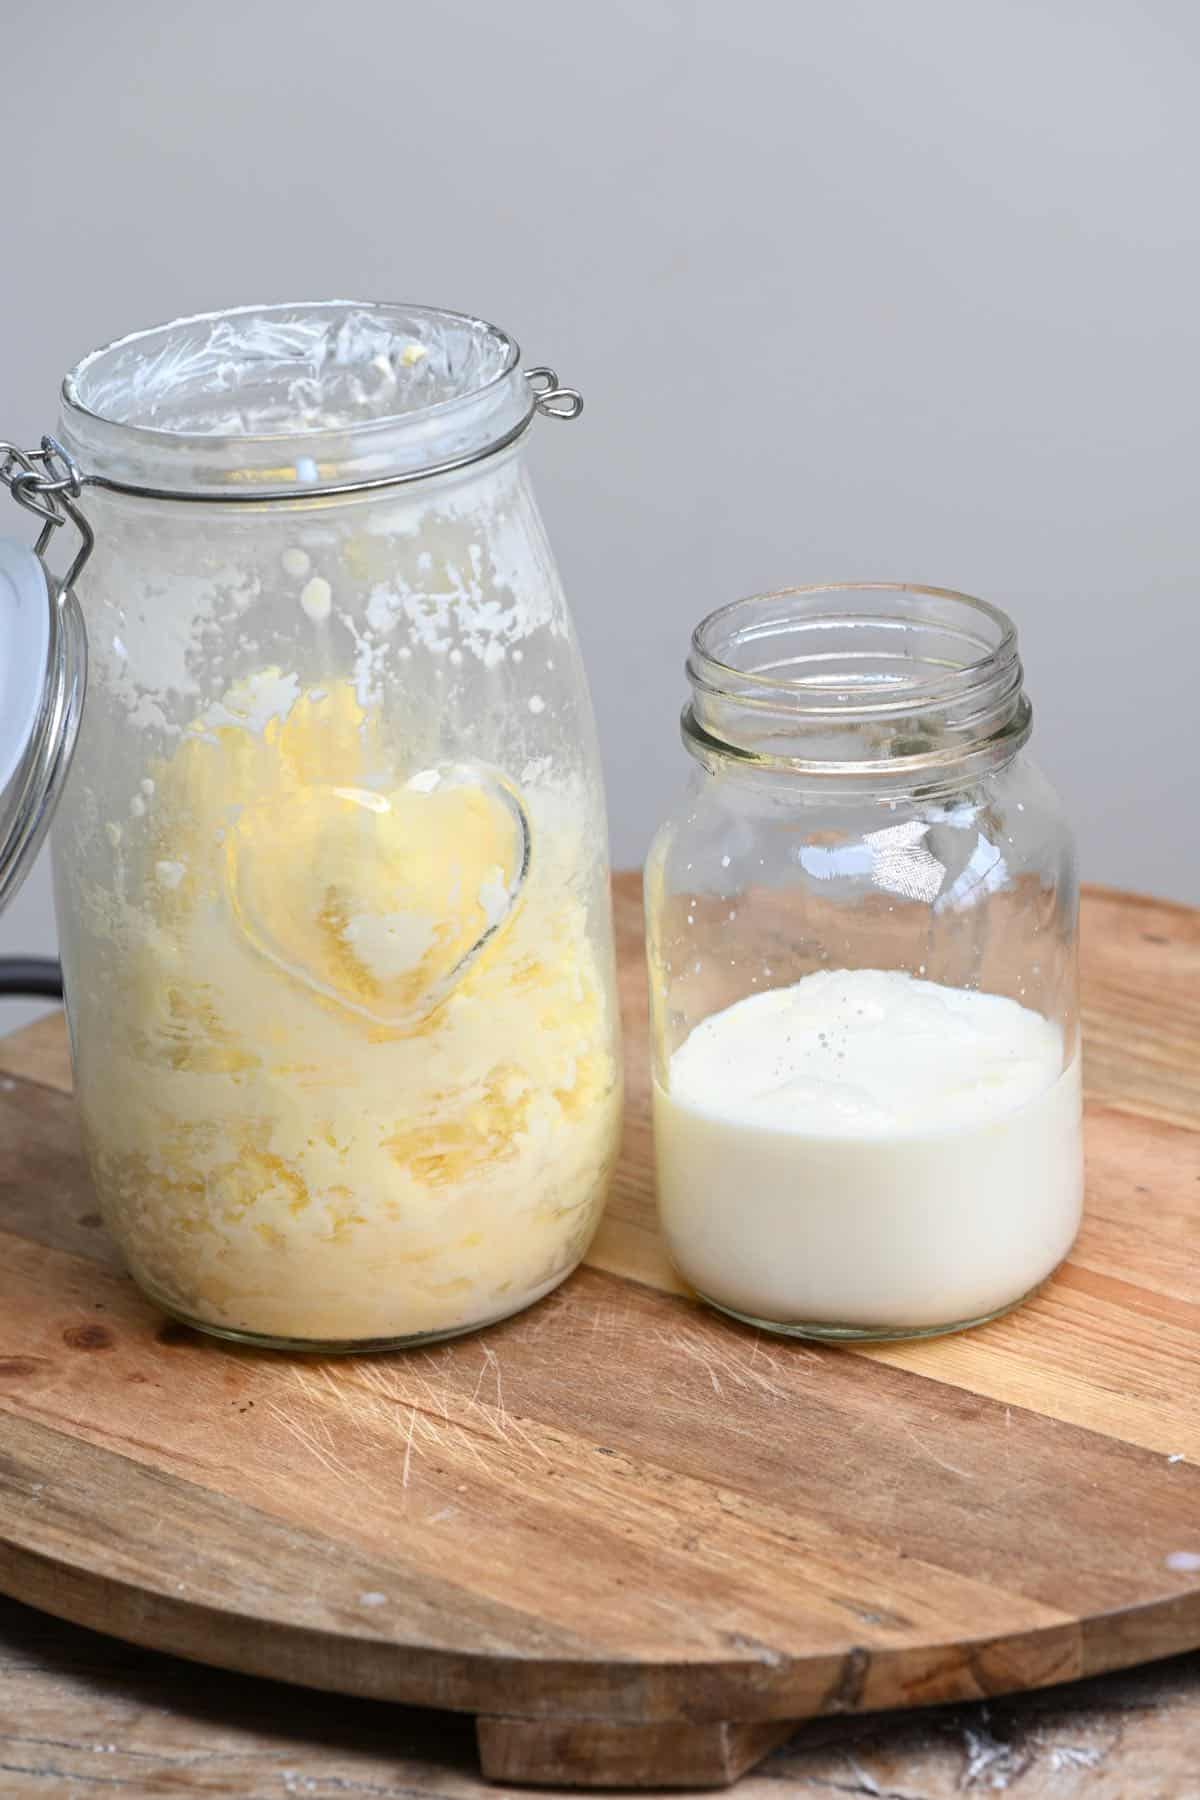
Place the cream either in a stand mixer or in a large glass jar (using a hand-held mixer) and start mixing. It will become whipped cream before becoming stiffer, and finally, it will become butter – where the fat solids will separate from the buttermilk liquids.
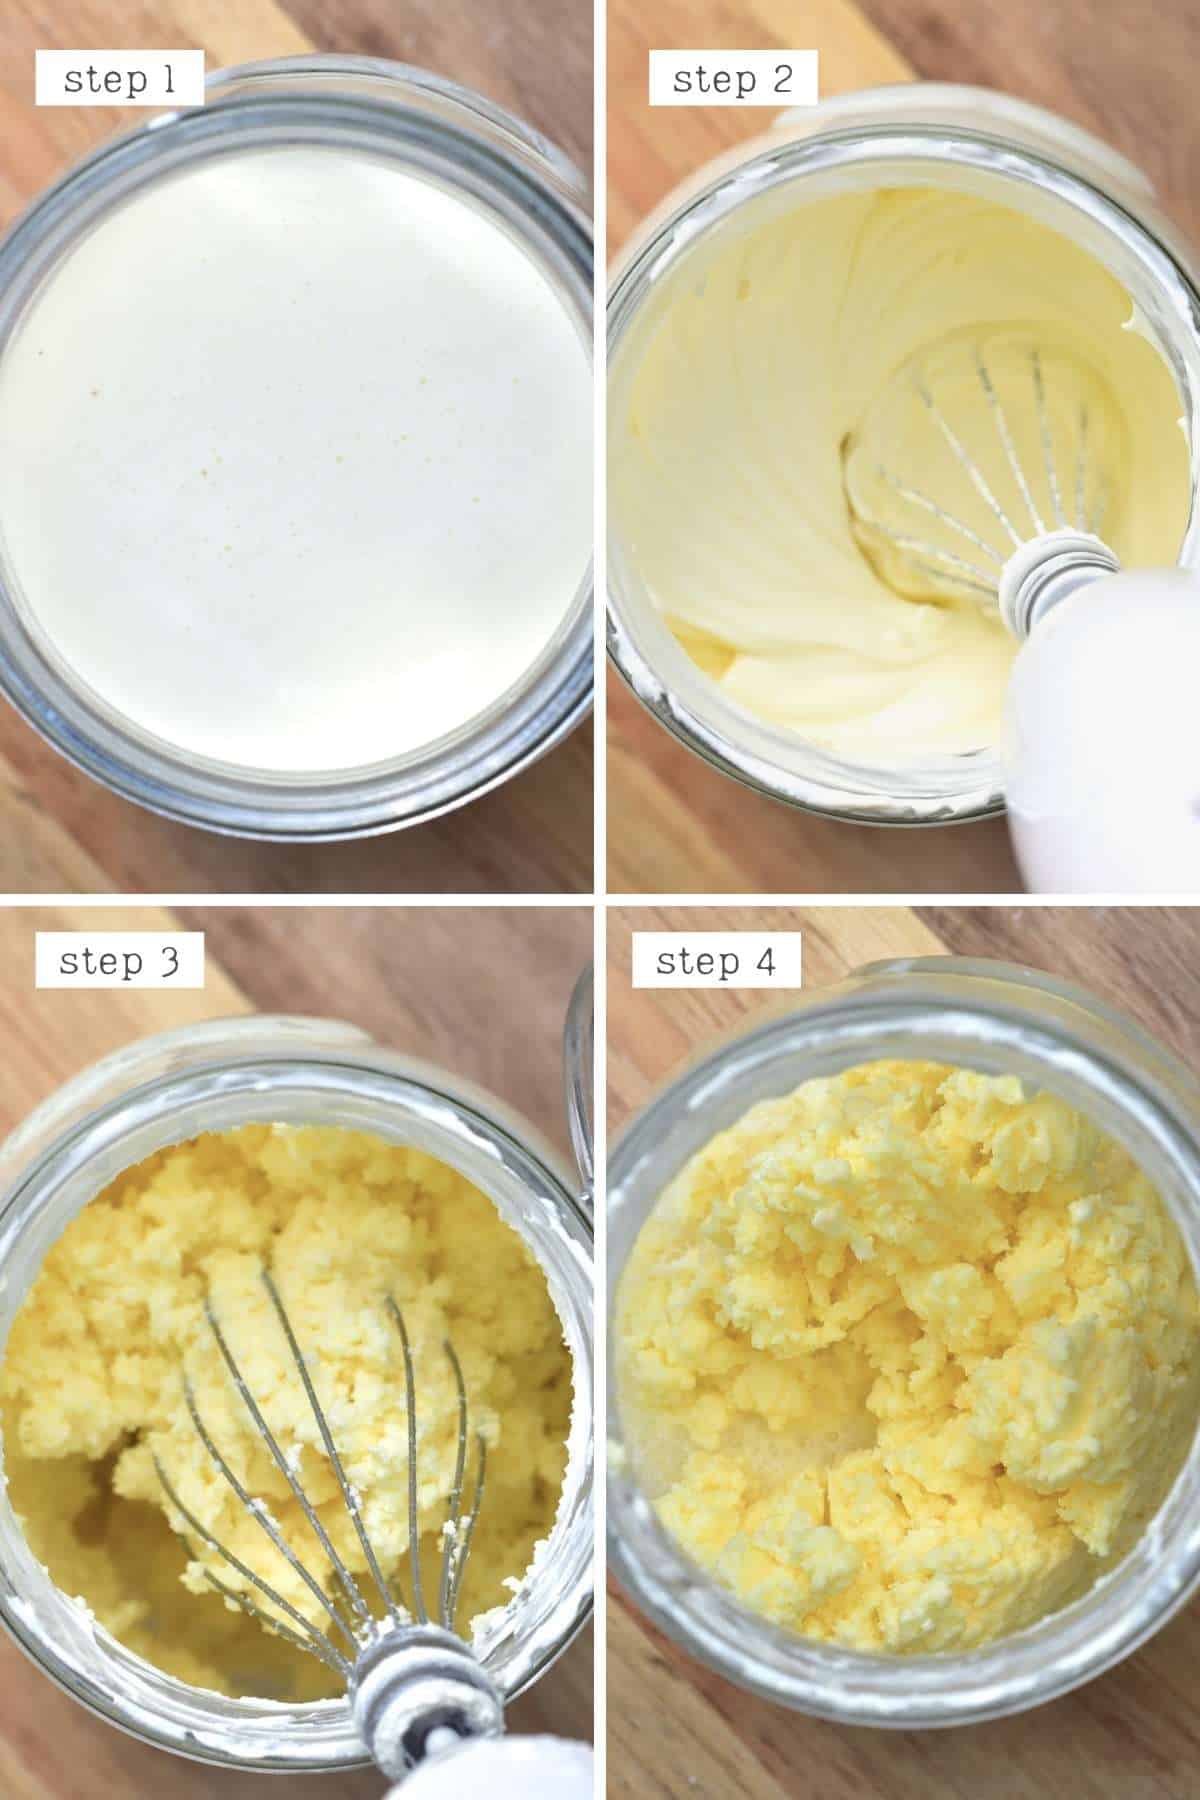
Drain the buttermilk from the butter, squeezing the butter well to get out as much of the buttermilk as possible. You can keep the buttermilk in the fridge and add it to recipes that require it – both sweet and savory.
Step 2: Drain and ‘wash’ the butter
Then it’s time to wash the butter to remove all the remaining buttermilk – this is important as it will impact the shelf life and flavor of the butter. To do this, fill a bowl with ice-water, add the butter to the water and squeeze it well in between your hands to squeeze out as much of the buttermilk as possible.
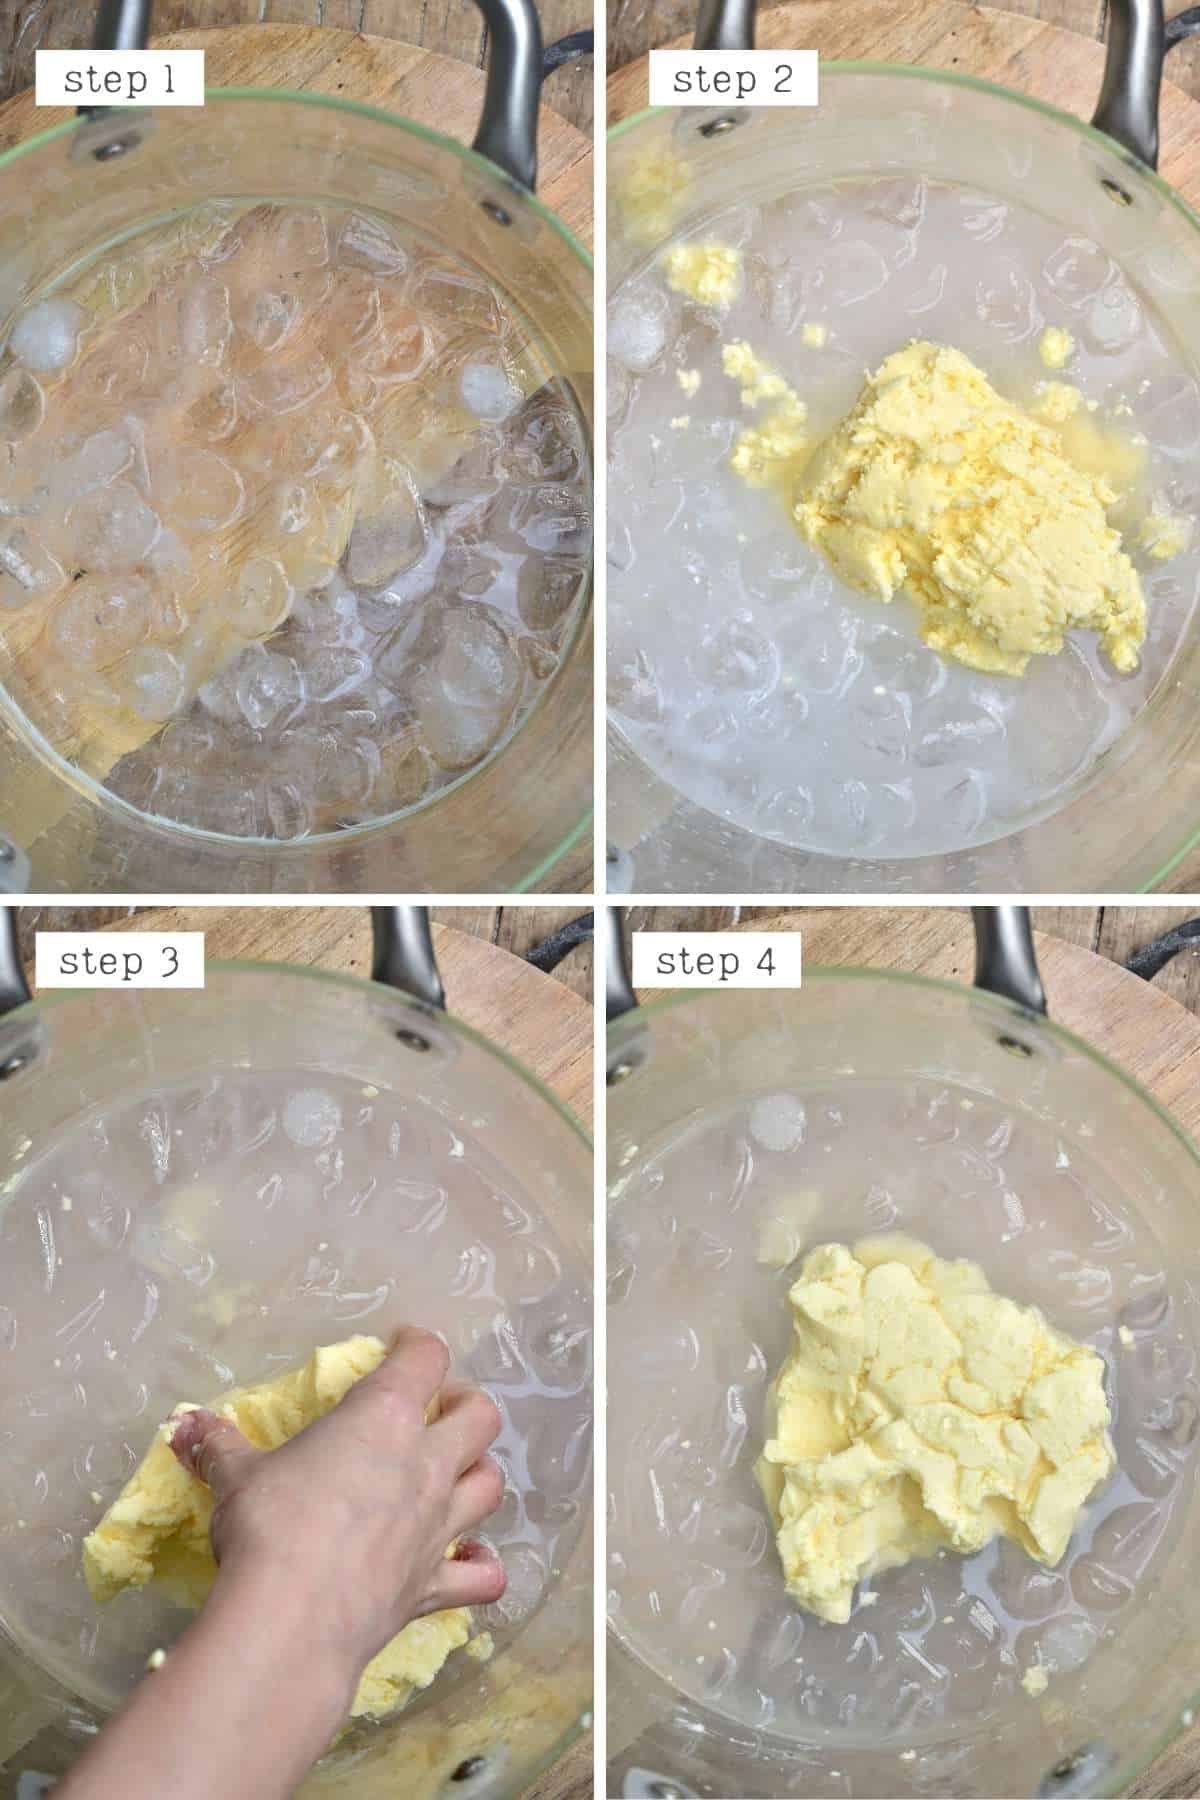
Then rinse the butter to get off any remaining buttermilk residue.
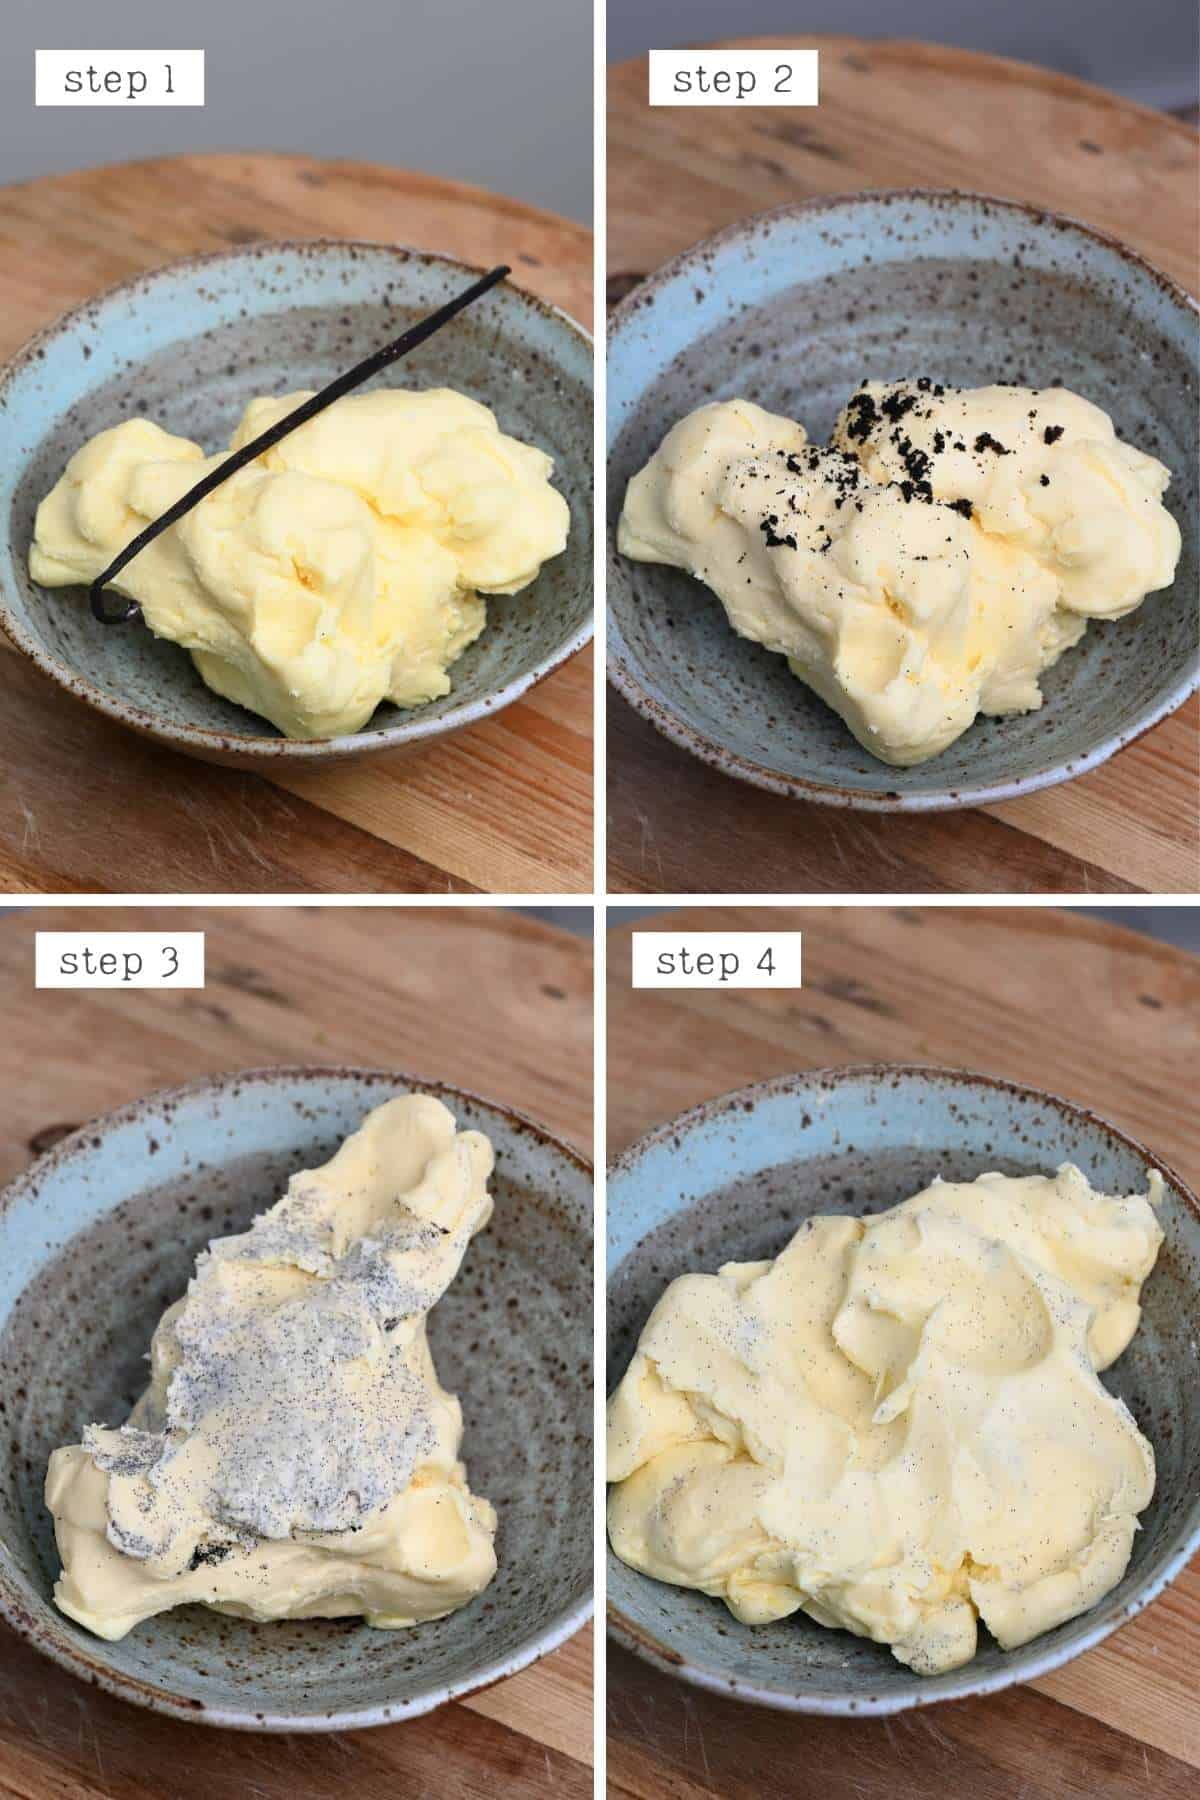
Step 3: Add the vanilla
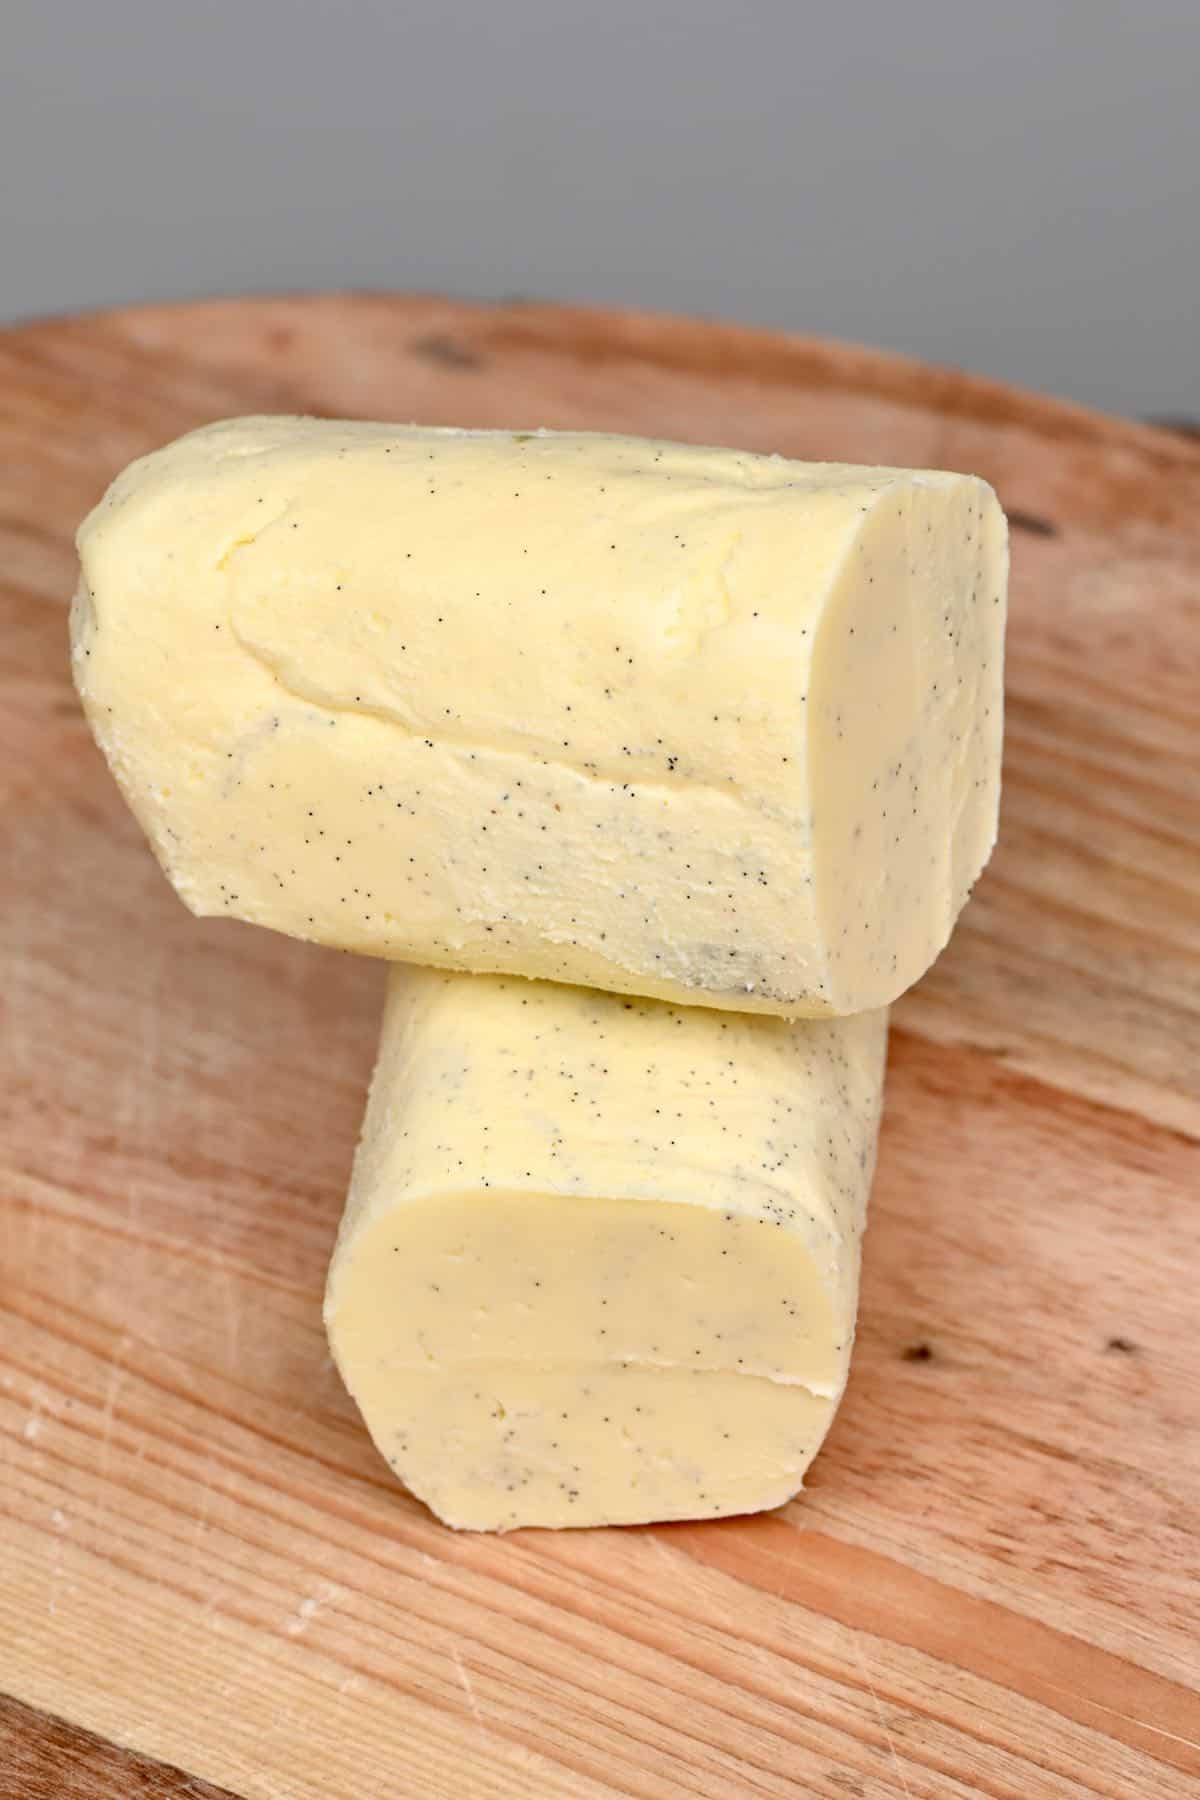
With a small paring knife, cut the vanilla bean in half lengthwise and use the back of the knife to scrape out all of the seeds and add it to a bowl with the butter and mix well to combine thoroughly.
You could also do this in your stand mixer or with a blender to quickly mix the vanilla butter.
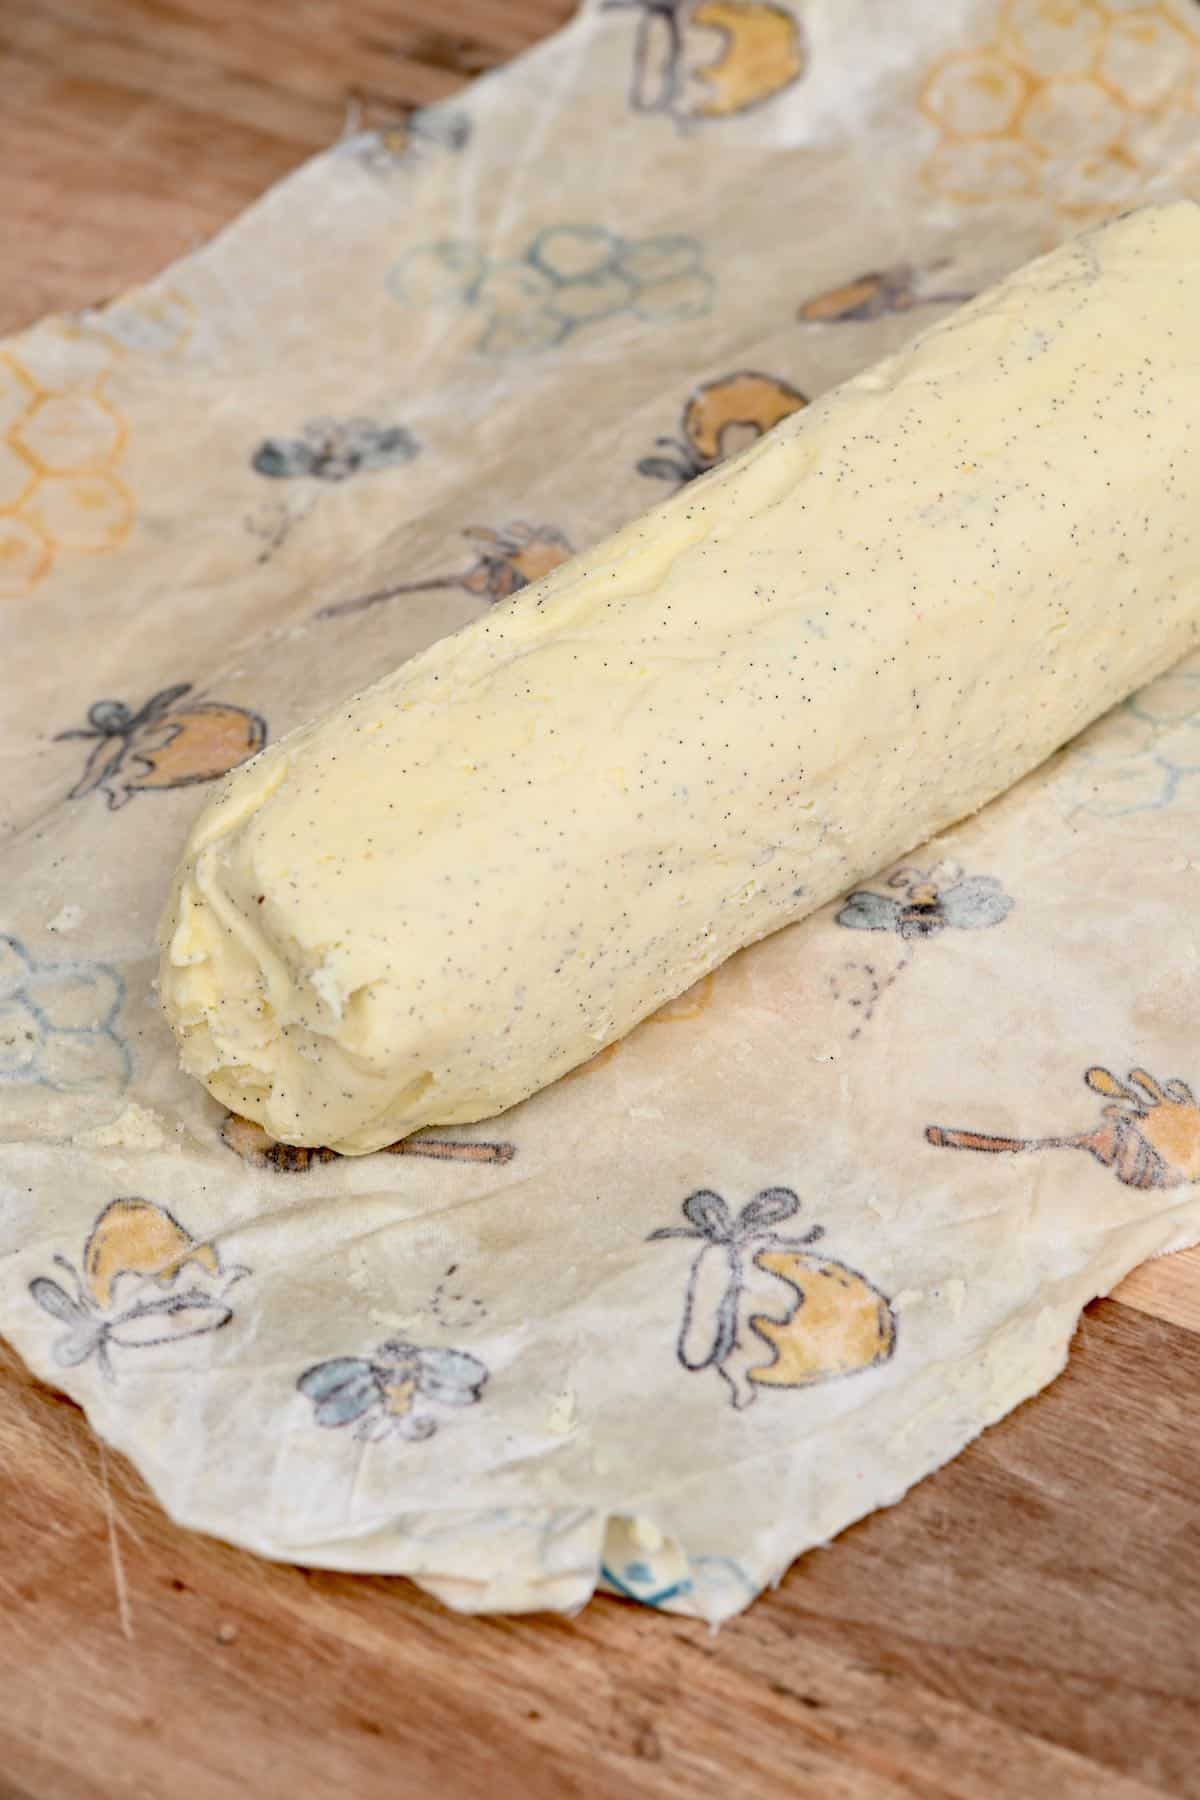
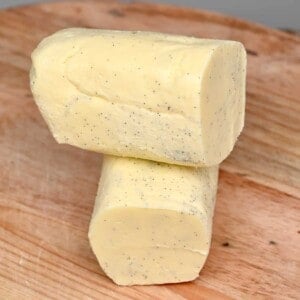
Once prepared, either transfer the vanilla butter to an airtight container or scoop it onto a piece of parchment paper/wrap, shape it into a 1-inch log, and wrap it like a Christmas cracker, twisting the ends.
Finally, refrigerate the butter until you’re ready to use it.
How To Store
Store the vanilla butter in the fridge for between 1-2 weeks. Alternatively, you can also freeze the butter for up to 6 months.
How To Use
There are several ways you can enjoy this homemade vanilla butter. Here are just a few suggestions.
- Slathered over toast/bagels
- Over warm muffins
- Use to make vanilla buttercream
- With pancakes – like these fluffy Japanese pancakes, or Aebleskiver Danish Pancakes.
- A pat over oatmeal bowls or baked oatmeal
- Spread over freshly baked banana bread – or this GF banana bread, or even healthy banana bread.
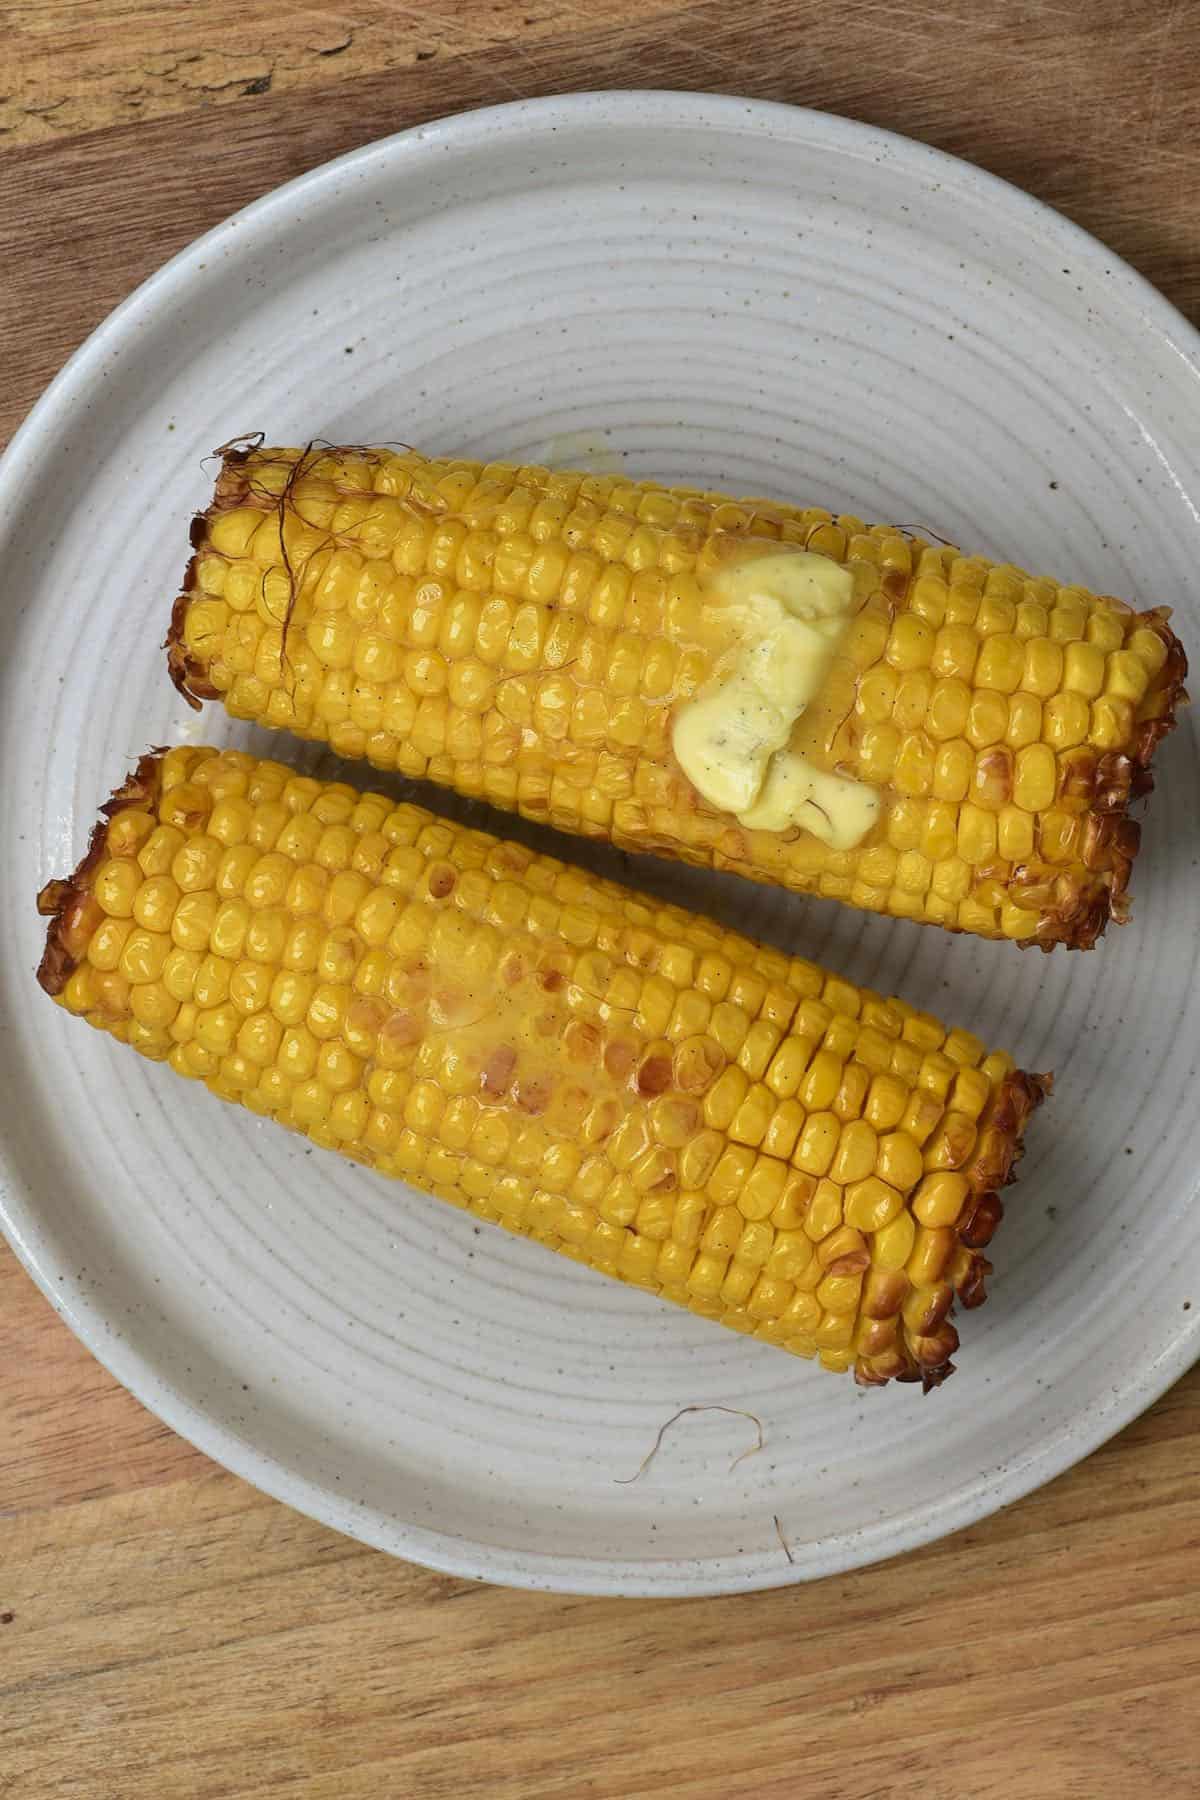
- Over a baked sweet potato, squash, pumpkin, or even sweet corn on the cob.
- Within any sweet baking recipe where butter is required – like these lemon cupcakes
- Over cornbread, with a drizzle of honey.
Recipe Notes
- The buttermilk drained from this homemade butter can be used in any recipe calling for buttermilk. However, it doesn’t tend to be as acidic as commercial buttermilk. You can mimic this by adding an extra 1 Tbsp acid (vinegar or lemon juice) before using it.
- You can read more about flavored butter on my compound butter post.
- Be careful when removing the buttermilk from the butter – if you don’t do this well, then the casein within the buttermilk can putrify and affect the butter’s shelf life.
Other Easy Compound Butter Recipes
- Easy Lemon Butter (+ Flavor Variations)
- Avocado Butter (Avocado Compound Butter)
- Roasted Garlic Butter (+ Flavor Variations)
- Herb Butter (Compound butter)
- Cinnamon Butter
- How To Make Butter (ONE ingredient)
If you try this vanilla butter recipe, then let me know your thoughts and questions in the comments. I’d also really appreciate a recipe rating and would love to see your recreations – just tag @AlphaFoodie.
How To Make Vanilla Butter
Equipment
- Stand mixer -OR-
Ingredients
- 2 cups fresh cream or heavy cream or double cream for creamier results
- 1 vanilla pod
- 1 Tbsp powdered sugar optional, use powdered sugar or sugar-alternative of your choice
Instructions
Step 1: Whip the cream into butter
- You can do this method using a stand mixer, a hand-held mixer, or even with a whisk (if you have a lot of muscle and patience).
- Place the cream either in a stand mixer or in a large glass jar (using a hand-held mixer) and mix the cream. It will become whipped cream before becoming stiffer and finally, it will become butter – where the fat solids will separate from the buttermilk liquids.
- Drain the buttermilk from the butter, squeezing the butter well to get out as much of the buttermilk as possible.
Step 2: Drain and ‘wash’ the butter
- Wash the butter to remove all the remaining buttermilk – this is important as it will have an impact on the shelf life and flavor of the butter. To do this I fill a bowl with ice-water, add the butter to the water and squeeze it well in between your hands to squeeze out as much of the buttermilk as possible.
- Rinse the butter, to get off any remaining buttermilk residue.
Step 3: Add the vanilla
- With a small paring knife, cut the vanilla bean in half lengthwise and use the back of the knife to scrape out all of the seeds and add it to a bowl with the butter and mix well to thoroughly combine.
- You could also do this in your stand mixer or with a blender to quickly mix the vanilla butter.
- Once prepared, either transfer the vanilla butter to an airtight container or scoop it onto a piece of parchment paper/plastic wrap, shape it into a 1-inch log, and wrap it like a Christmas cracker, twisting the ends.
- Refrigerate the butter until you're ready to use it.
How To Store
- Store the vanilla butter in the fridge for between 1-2 weeks. Alternatively, you can also freeze the butter for up to 6 months.
Notes
- The buttermilk drained from this homemade butter can be used in any recipe calling for buttermilk. However, it doesn’t tend to be as acidic as commercial buttermilk. You can mimic this by adding an extra 1tbsp acid (vinegar or lemon juice) before using it.
- You can read more about flavored butter on my compound butter post.
- Be careful when removing the buttermilk from the butter- if you don’t do this well, then the casein within the buttermilk can putrify and will affect the shelf life of the butter.1
Nutrition
Nutrition information is automatically calculated, so should only be used as an approximation.


