
This post may contain affiliate links. Please read our disclosure policy.
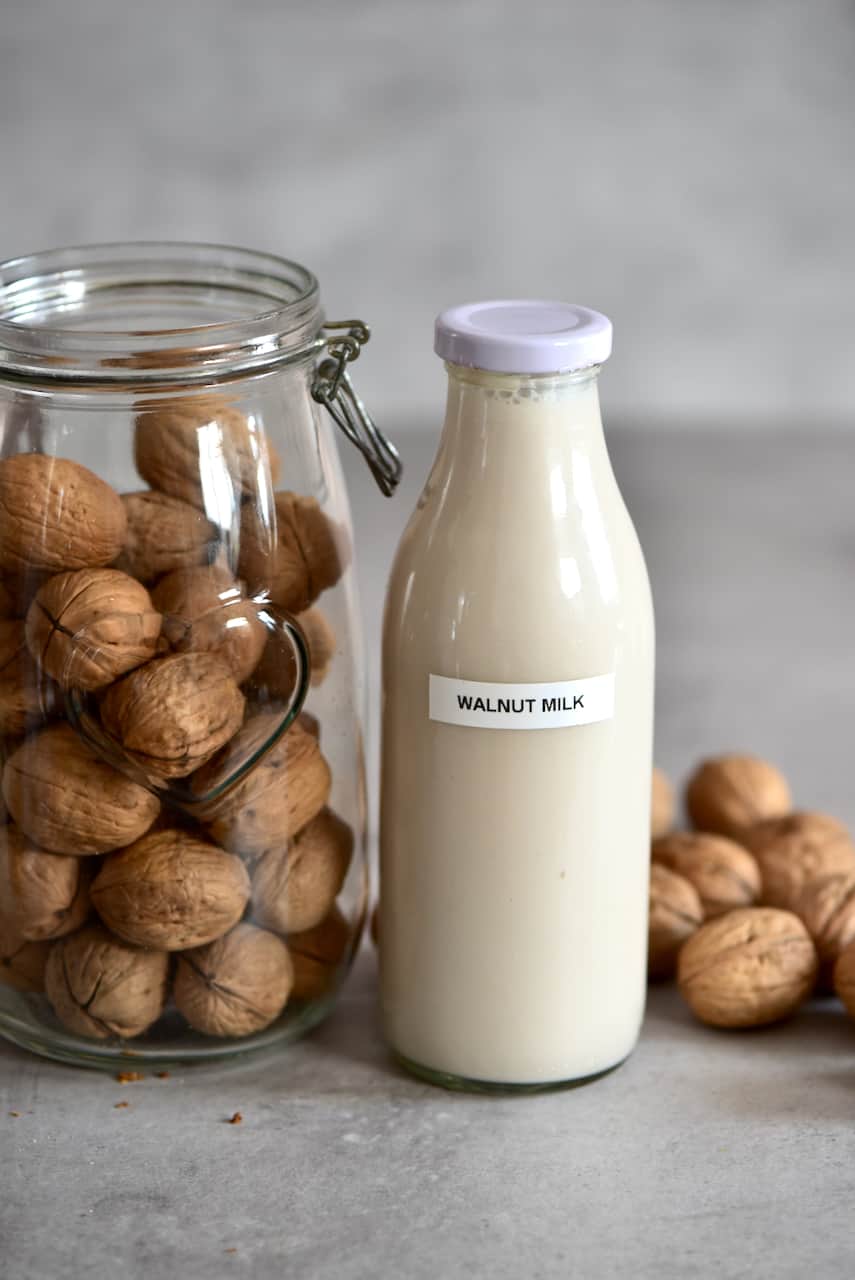
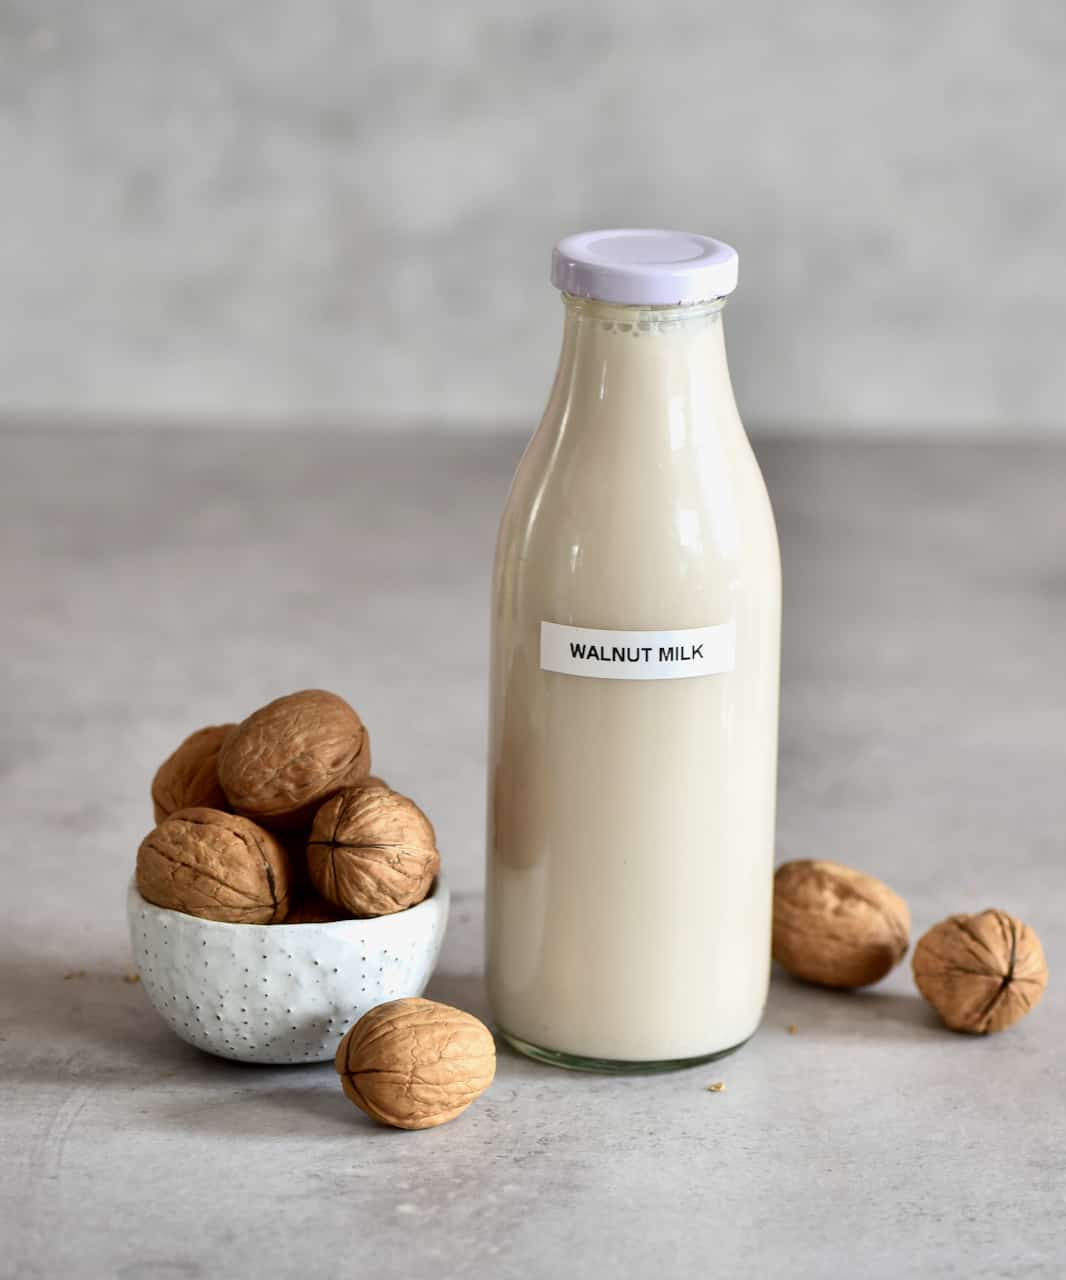
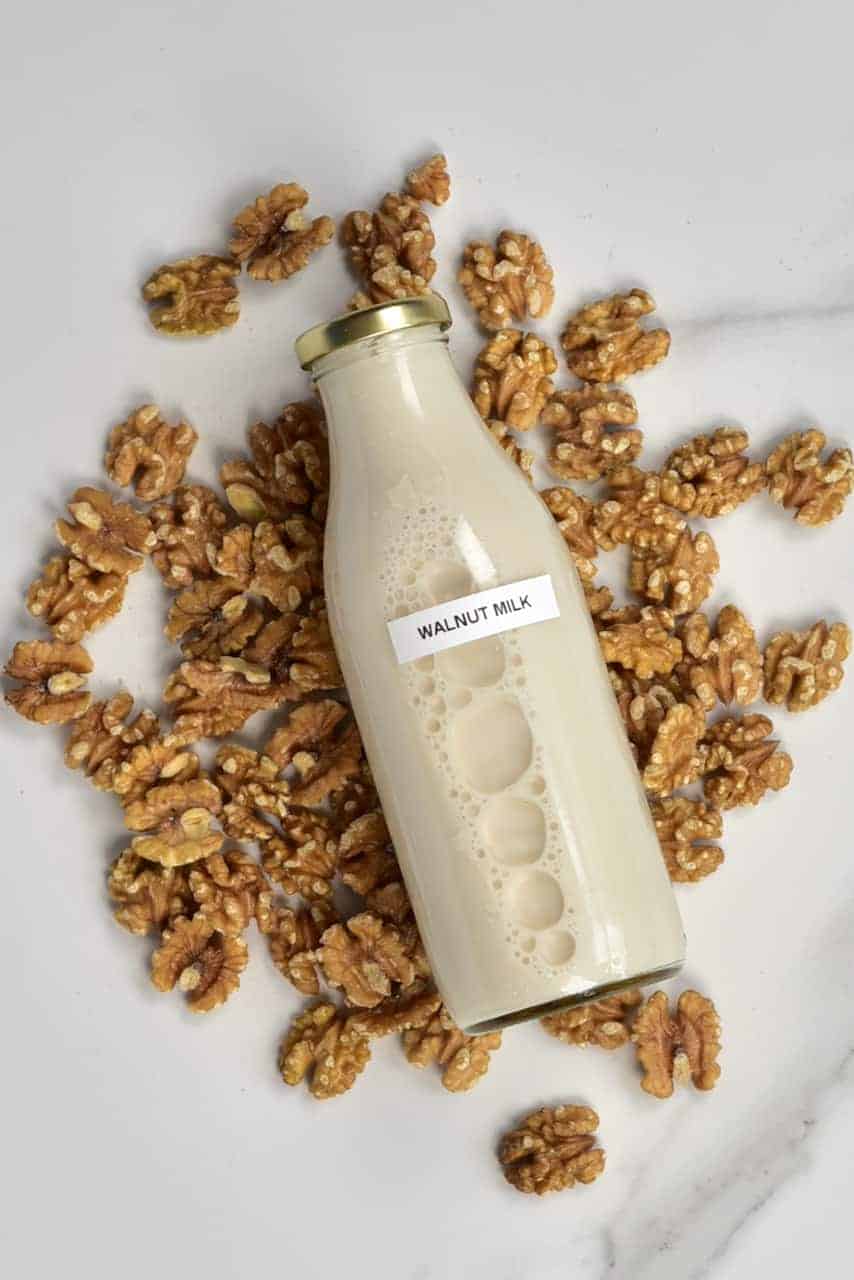
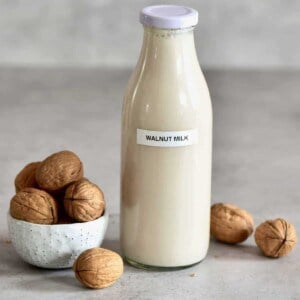
How to make homemade walnut milk with just TWO ingredients and a blender! This homemade walnut milk blends soaked walnuts (activated walnuts) and water to make a buttery, creamy, silky walnut milk packed with flavor and nutrition! This simple nut milk is the perfect new addition to your dairy-free milk collection!
This homemade walnut milk recipe was originally posted in March 2020, but has been updated as of October 2021 with some extra notes, tips, uses, and flavor varieties!
Since the early 2010s, dairy alternatives have exploded onto the market. However, although shelves are filled with instant almond milk, coconut milk, and oat milk, there is still a distinct lack of walnut milk available commercially. Luckily, learning how to make walnut milk at home is quick and simple and will save you some on packaging and money, too!
If you’ve never tried walnut milk before, then prepare to be amazed at this creamy, buttery, and frankly delicious nut milk. Not only does it taste great, but it’s nutritionally impressive too. When compared to popular almond milk, this homemade walnut milk definitely holds its own, too. Whereas almonds contain more fiber (with almost twice the amount), more protein (6g vs. 4g per serving), and are more abundant in certain minerals while remaining slightly lower in calories. Walnuts provide a higher source of a variety of vitamins, omega-3 fatty acids, and antioxidants.
You might also enjoy adding walnuts to your diet more, as I’ve done with this fig jam, quinoa salad, and muhammara dip!
Want to save this recipe?
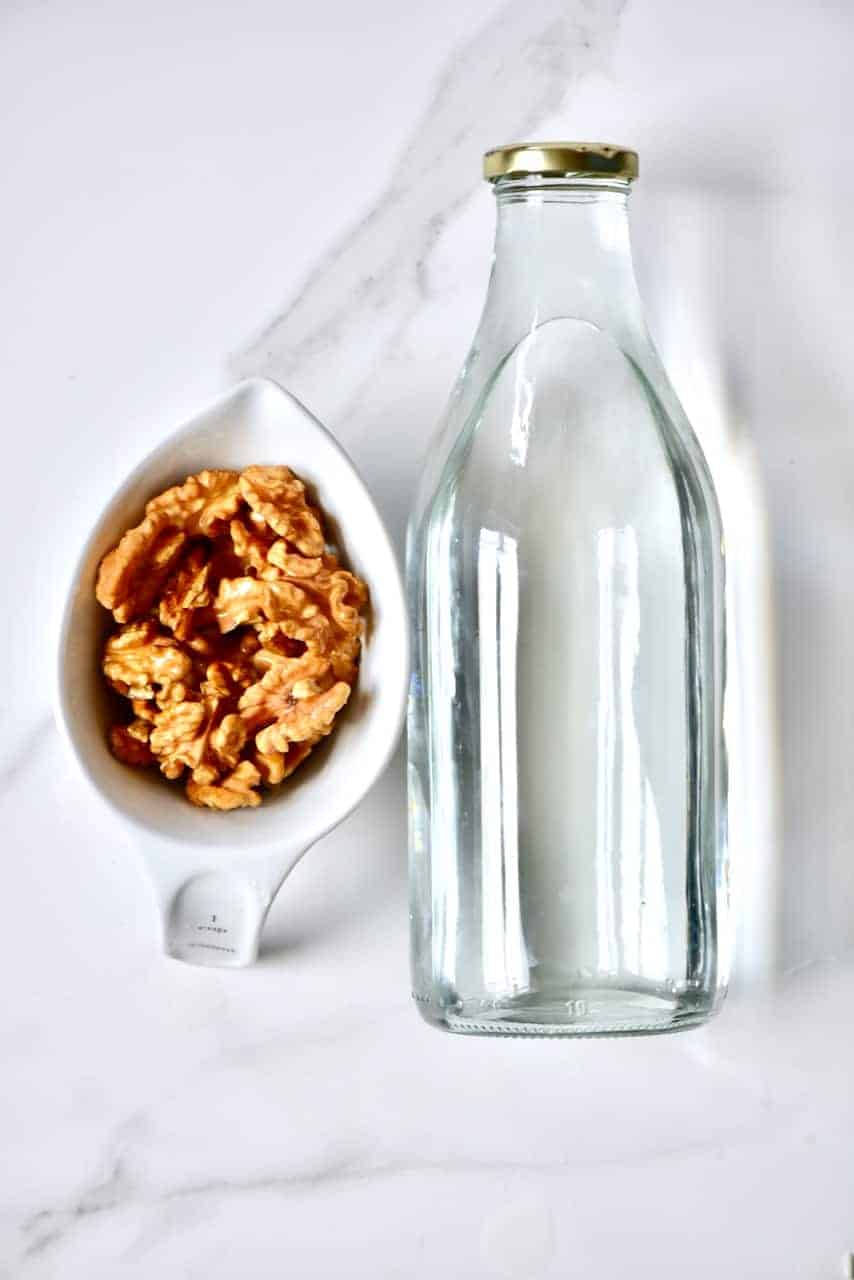
What you’ll need
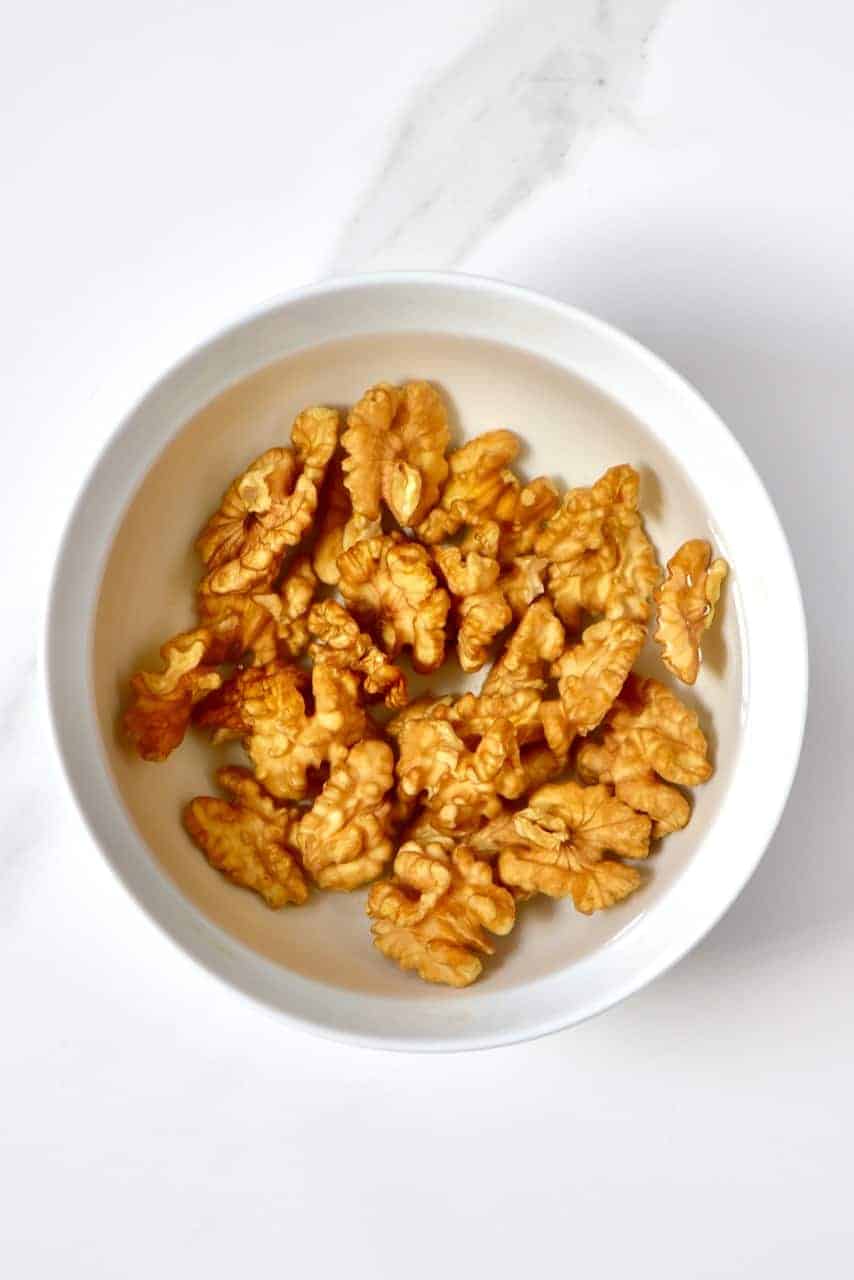
- Walnuts: you’ll need raw, unsalted walnuts. You can use English, Persian, or Black walnuts.
- Water: I like to use filtered water, but it isn’t necessary (tap water will be fine).
You also need:
- Blender: luckily, you don’t necessarily need a high-speed blender for this soft nut milk. However, if you are using a mid-level machine, it will likely take slightly longer to blend.
- A nut milk bag, a coffe filter, or cheese cloth – if you use a regular blender, you’d need to filter the milk through one of these.
And that’s it! (For the base recipe anyway). However, if you want to make flavored walnut milk, keep reading for my favorite add-ins!
How to flavor walnut milk
There are several ways to sweeten and flavor homemade walnut milk easily and naturally. Here are just a few of my top recommendations.
Basic optional add-ins
- Salt: a pinch of salt helps enhance the nuts’ flavor in a wonderful way and will act as a natural preservative.
- Sweetener: there are several ways to sweeten your homemade walnut milk. You can use dates (or date paste to avoid any bits in your nut milk), sweeteners (like monk fruit or erythritol), or even liquid sweeteners (like honey or maple syrup.)
Flavored walnut milk
- Vanilla: add 1 teaspoon of homemade Vanilla extract or Vanilla Powder, increase to personal taste.
- Chocolate walnut milk: I recommend adding 2 Tbsp of cocoa powder with the sweetener of your choice (adjusted to taste) and a pinch of salt.
- Maple walnut milk: this flavor combination is perfect for the Fall/Winter months. Simply add 2-3 tablespoons maple syrup and a pinch of salt (add more for a salted maple nut milk). Optionally add some vanilla too.
- Golden milk: Add some turmeric paste or golden milk powder.
- Cinnamon date: cinnamon and walnuts pair SO well. For this cinnamon walnut milk, add 1/4-1/2 teaspoon ground cinnamon and 2-4 Medjool dates (based on how sweet you want the milk to be) or the sweetener of your choice.
- Vanilla spice nut milk: there are several spice blends that you can combine with vanilla and the sweetener of your choice. Pumpkin pie spice, apple pie spice, gingerbread, chai spice, etc.
Walnut milk also makes for the perfect base for an apple cinnamon smoothie (aka apple pie smoothie).
How to make walnut milk
The process for making homemade walnut milk is incredibly simple, but you need to plan for enough time to soak the walnuts (aka activate them). This process is very hands-off and can be done overnight.
Step 1: Soak the walnuts
Add the walnuts to a large bowl, cover with cold/room temperature water, and add ½ tsp salt. Leave to soak for at least 6 hours, up to 12 hours. I like to do this overnight (8-9hrs).
When simply soaking nuts, I usually don’t use any salt. However, salt is used when activating nuts to help to neutralize the enzyme inhibitors.
Then, drain the nuts and rinse them once more. Activated nuts then generally go through a dehydrating process. However, we want the nuts soaked when making walnut milk so you can skip that step entirely.
If you didn’t add any salt to the soaking water, it could be saved to use to water plants (your plants will love it, as it will contain higher levels of carbon dioxide). However, if salted, discard the water. Do not drink either version, as it will contain all the phytic acid and other nasties that we’ve specifically tried to remove.
Step 2: Blend the walnut milk
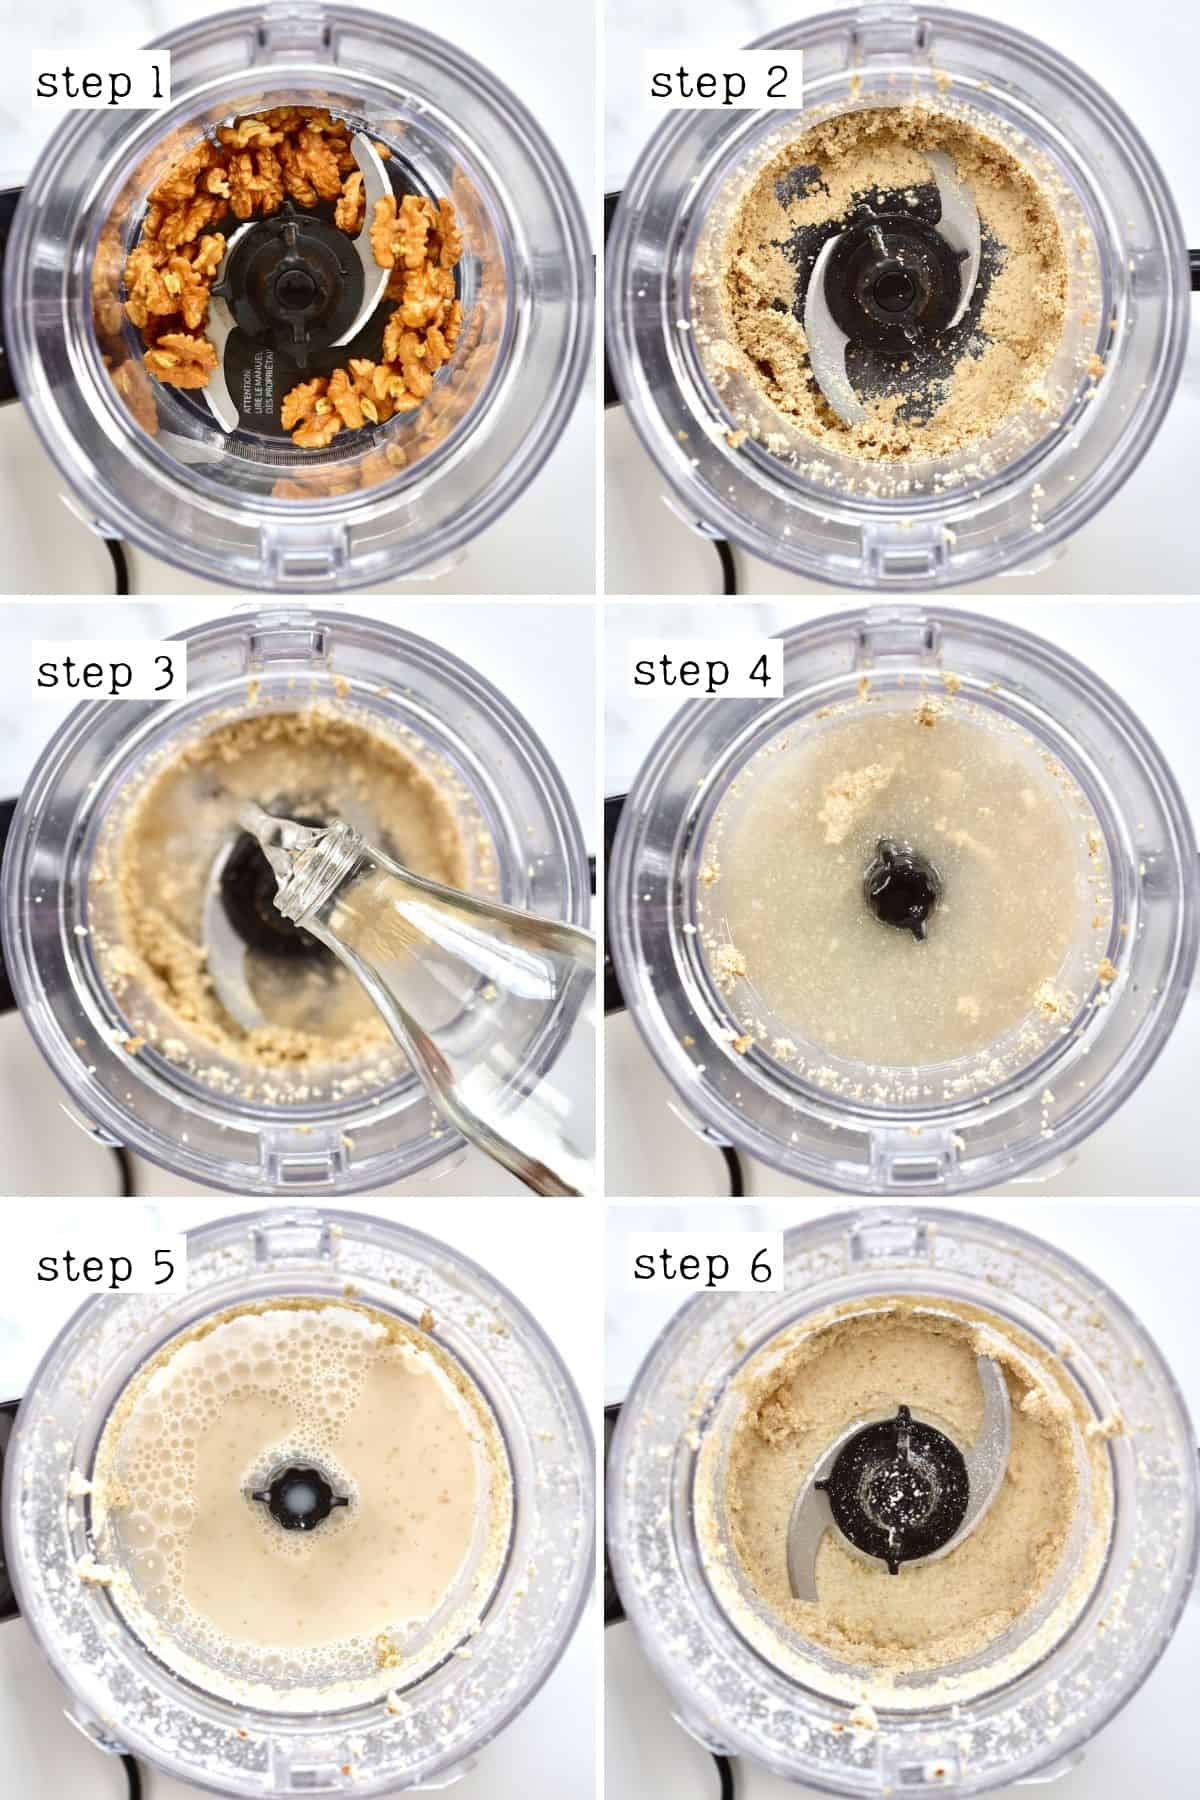
Transfer the soaked walnuts to your high-speed blender and blend into a rough crumb consistency. Be careful not to over-blend, or you’ll start to make walnut butter,
Then, add the filtered water and allow the machine to blend for around two minutes until the liquid is creamy and milky-looking.
Step 3: Strain the walnut milk
When using a regular blender/food processor, you’ll need to strain the milk manually. To do so:
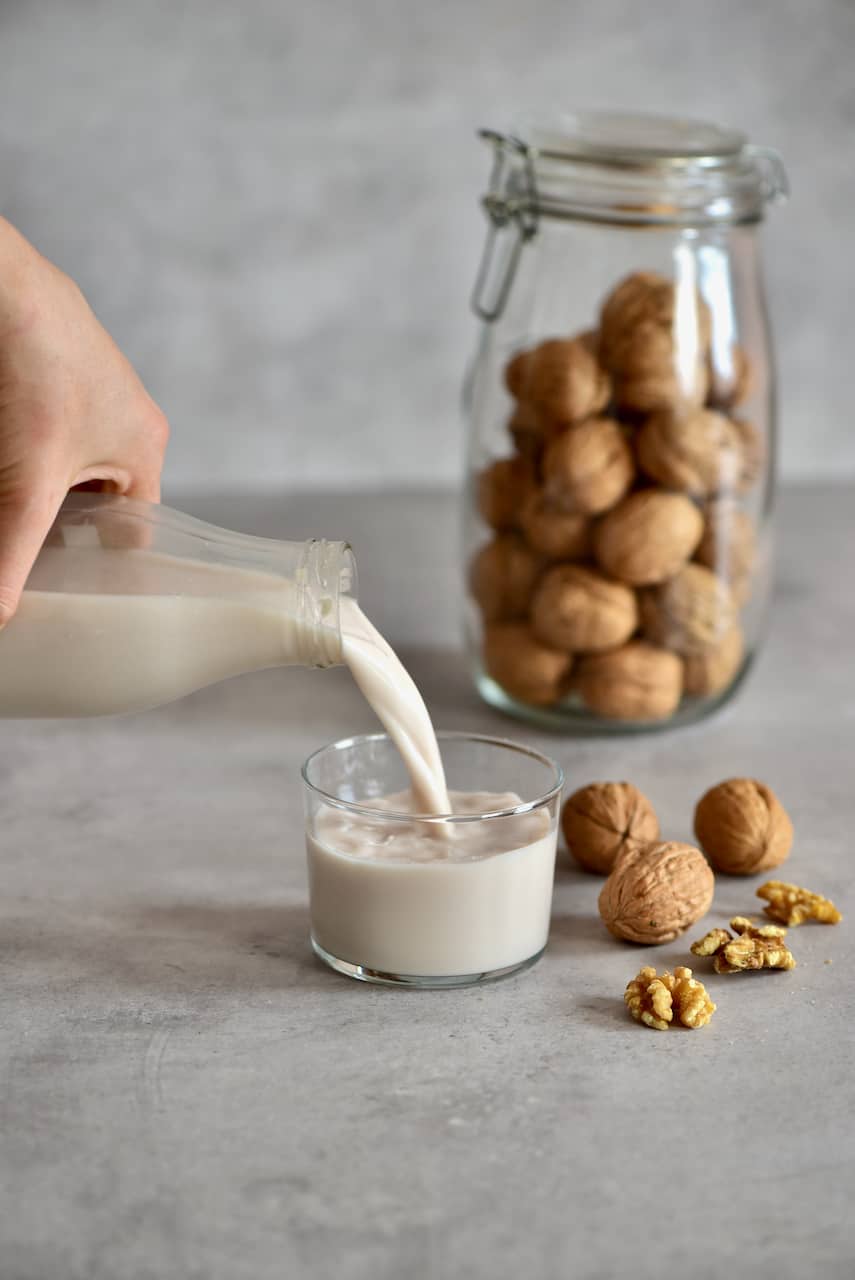
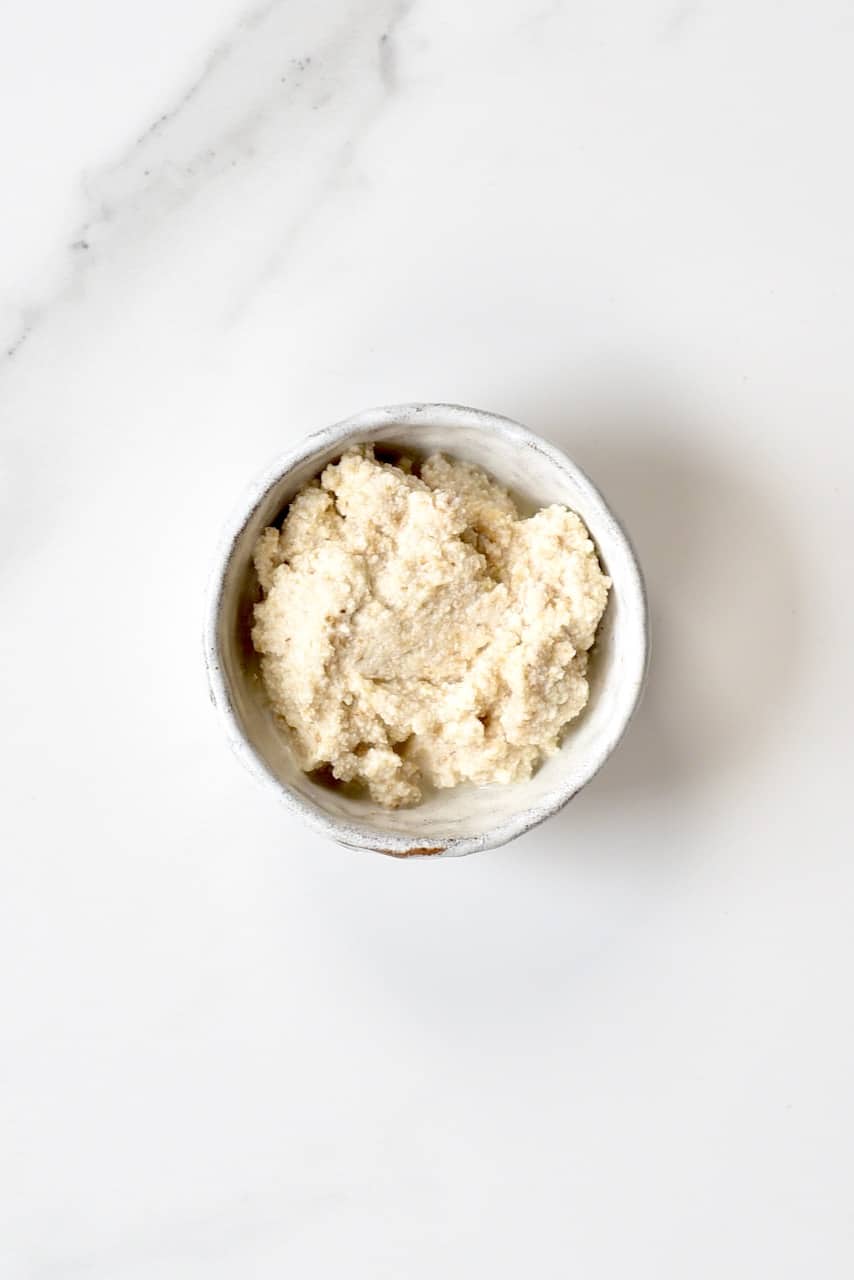
Use either a nut milk bag, coffee filter, or several layers of cheesecloth over a bowl (if using cheesecloth, it’s easiest to lay it in a sieve – otherwise, you’ll need a second person to hold the cloth while you pour). Then, pour the walnut milk through the nut milk bag. Then squeeze the bag to strain as much liquid as possible from the leftover pulp. You may also use a fine-mesh sieve and press the walnut pulp to drain the liquid.
Due to walnuts being such a soft, buttery nut, you may find that you don’t get much pulp at all. You could even decide not to strain the milk – it’s up to you. Don’t discard any leftover walnut pulp, though! Read the FAQs for how to use this and avoid waste!
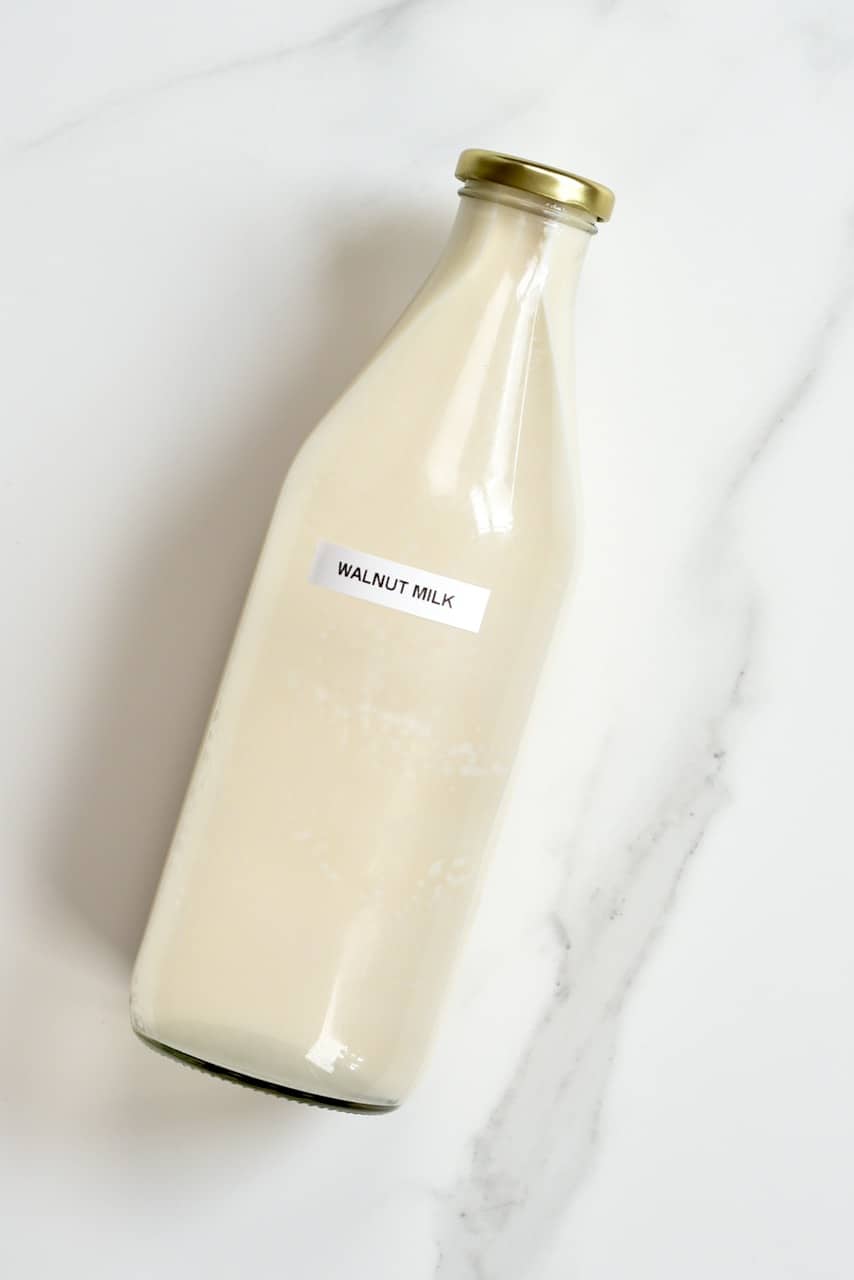
You can then enjoy the walnut milk immediately or transfer it to a bottle (easiest using a funnel) and store it in the fridge.
How to store
Store: You can store the walnut milk in an airtight bottle in the fridge for between 3-5 days.
It’s natural for the walnut milk to separate as it sits in the fridge, as it contains no stabilizers. Just give it a good shake before using it each time. When it’s past its best, the walnut milk will begin to smell bitter or off.
Freeze: I don’t often freeze this homemade walnut milk. However, if you want to try, you could freeze it either in a freezer-safe container or an ice-cube tray, ready to pop out as needed.
How to use walnut milk
Just like any dairy-free milk, there are several ways to use this nutritious nut milk, including:
- Use for cereal and homemade granola.
- Use for oatmeal porridge or overnight oats.
- Mix into easy smoothy recipes.
- Use to make coffee ice cream.
- Use for banana milkshakes and other drinks.
- Flavor and drink as-is!
FAQs
Leftover nut pulp is still packed with fiber and various nutrients, so definitely worth holding onto. You can add the wet pulp into smoothies, salads, and oatmeal/overnight oats or freeze it in ice-cube trays for later. Alternatively, dehydrate the pulp (in a dehydrator or low temp in the oven – around 200ºF/90ºC for between 1 -1 ½ hours) and then store for up to a month, adding it to cookies, cakes, cupcakes, breads, etc. You can also use it to make crackers and no-bake treats like these easy brownies.
In terms of walnut pulp, I love to mix it into dishes that already use crushed walnuts – like this baklava recipe, muhammara dip, and some Persian salads. Just don’t substitute all the crushed nuts with nut pulp, as the fat content/taste will differ.
I like to use one cup of walnuts to four cups of filtered water and find this makes wonderfully creamy results. However, if you prefer even creamier nut milk, I recommend experimenting with using a 1:3 or even 1:2 ratio of walnuts to water. Just note that the calorie/fat amounts per serving will differ based on the amount of water used.
Nut milk bags are a simple and inexpensive reusable kitchen tool that makes straining nut milk a breeze. They’re simply a material bag that you can pour the milk into and squeeze. They’re easier to work with than cheesecloth (and easier to clean). I often use nut milk bags in my cheese-making now too! Note that cloth/hemp versions are slightly harder to clean. I recommend using nylon versions.
Sure – heat it gently in a saucepan or microwave, then use as intended.
In terms of flavor, it actually works well – adding just a subtle “walnut” flavor to your cuppa. However, like most “fresh nut milk,” if you drink very strong coffee, the milk may split/separate (due to the high acidity).
To try to avoid separation, you can pour the milk into your mug first and slowly top it up with the coffee. That way, it will help to temper the milk and (hopefully) prevent separation. However, in general, store-bought options are usually best for coffee, thanks to the addition of stabilizers.
Technically, walnuts are soft enough that you can use raw walnuts for walnut milk, and it will work. However, it likely won’t blend quite as well, and you’ll end up with more pulp. More so, unsoaked nuts contain phytates, tannins, and other anti-nutrients that will impact the milk’s nutritional value, make them less easy to digest, and yield more bitter walnut milk.
Top tips and recipe notes
- One-minute “cheat” walnut milk: if you’ve run out of walnut milk, you can actually make “instant” nut milk by combining ONE tablespoon of raw, unsalted walnut butter (or nut butter of your choice) per ONE cup of water.
- Use a combination of nuts: yup, you read that right. If you want to mix and match nuts, feel free to do so. Just make sure to soak them all so they blend easily.
- To strain or not strain: walnut milk (and cashew milk) are particularly great for making nut milk that doesn’t leave behind a ton of pulp since they’re so soft. This means you can get away with not straining the milk at all in some cases (especially if using a high-speed blender). Though there will be sediment in the milk, so it won’t be completely smooth unless strained.
- To quick-soak nuts: if you want to quickly soften the nuts but aren’t too fussed with “activating” the walnuts, you can soak the walnuts in boiling water for 15 minutes before blending.
- Be careful not to under-blend: I blend for a full two minutes in my high-speed machine until the liquid is super milky and opaque – to try to extract as much from the soaked walnuts as possible. For less powerful machines, you will likely need more time.
- To avoid the milk separating: you can add around one teaspoon of sunflower lecithin – a natural emulsifier. However, note that some people may experience stomach issues with this, so I don’t include it in the main recipe.
Other nut and seed milk recipes
- Hazelnut milk
- Pistachio milk
- Instant almond milk
- Tiger nut milk (horchata de chufa)
- Hemp seed milk
- Cashew milk
- Mexican Horchata (Agua de Horchata)
As always, if you give this homemade walnut milk recipe a try, let me know your thoughts and questions in the comments below. Also, feel free to tag me in your recreations @AlphaFoodie.
How to Make Walnut Milk
Ingredients
- 1 cup walnuts
- 4 cups filtered water
Instructions
Step 1: Soak the Walnuts
- Add the walnuts to a large bowl, cover with cold/room temperature water, and add ½ tsp salt. Leave to soak for at least 6 hours, up to 12 hours. I like to do this overnight (8-9 hrs).When simply soaking nuts, I usually don't use any salt. However, salt is used when activating nuts to help to neutralize the enzyme inhibitors.
- Drain the nuts and rinse them once more. Activated nuts then generally go through a dehydrating process. However, we want the nuts soaked when making walnut milk so you can skip that step entirely.If you didn't add any salt to the soaking water, it could be saved to use to water plants (your plants will love it, as it will contain higher levels of carbon dioxide). However, if salted, discard the water. Do not drink either version, as it will contain all the phytic acid and other nasties that we've specifically tried to remove.
Step 2: Blend the Walnut Milk
- Transfer the soaked walnuts to your high-speed blender and blend into a rough crumb consistency. Be careful not to over blend, or you'll start to make walnut butter,
- Add the filtered water and allow the machine to blend for around two minutes until the liquid is creamy and milky-looking.
Step 3: Strain the Walnut Milk
- You need to strain the milk manually. Use either a nut milk bag, coffee filter, or several layers of cheesecloth over a bowl (if using cheesecloth, it's easiest to lay it in a sieve – otherwise, you’ll need a second person to hold the cloth while you pour).Pour the walnut milk through the nut milk bag. Then squeeze the bag to strain as much liquid as possible from the leftover pulp. You may also use a fine-mesh sieve and press the walnut pulp to drain the liquid.Due to walnuts being such a soft, buttery nut, you may find that you don't get much pulp at all. You could even decide not to strain the milk – it's up to you. Don’t discard any leftover walnut pulp, though! Check the FAQs for how to use this and avoid waste!
- Enjoy the walnut milk immediately or transfer it to a bottle (easiest using a funnel) and store it in the fridge.
How to Store
- Store: store the walnut milk in an airtight bottle in the fridge for between 3-5 days.It's natural for the walnut milk to separate as it sits in the fridge, as it contains no stabilizers. Just give it a good shake before using it each time. The walnut milk will begin to smell bitter/off when it's past its best.Freeze: I don't often freeze this homemade walnut milk. However, if you want to try, you could freeze the walnut milk either in a freezer-safe container or an ice-cube tray, ready to pop out as needed.
Video
Notes
Nutrition
Nutrition information is automatically calculated, so should only be used as an approximation.


I too had lots of walnuts from the food bank. I have tried many walnut recipes and this is one of my favorites. I have a feeling I will be making this on the regular.
Hi Darlene,
Glad you liked this walnut milk recipe! I hope you make it again and again! Happy cooking!
Soak to remove phytates? The anti-cancer, anti-heart disease, anti-diabetic, anti-kidney stone, anti-osteoporosis nutrient phytate? The nutrient that some scientists say should be classified as an essential nutrient, if not a vitamin?
Studies show that phytates only work as “anti nutrients” when eating a very nutrient poor diet that is abnormally high in phytates. If you aren’t, then they are very healthy.
Thanks for the recipe! Not trying to bash or anything, just wanted to let you know not to be afraid of this nutrient! See Dr. Greger’s website NutritionFacts for the science behind the above.
Hi! Thanks so much for taking the time to share this – it’s a really thoughtful point 😊 You’re absolutely right that phytates have plenty of researched health benefits and aren’t something to fear in a balanced, nutrient-rich diet. I mainly mention soaking for flavor, digestibility, and texture rather than out of concern about phytates. I appreciate you adding the nuance for other readers, and I’ll keep it in mind when revisiting the post.
Thank you so much for the wonderful recipe and for taking the time to share. I was being over-run with bags of walnuts from our food pantry and didn’t want to waste them. I’m enjoying a walnut milk smoothie with fresh plums, peaches, and some really ripe bananas I had frozen. It’s so delicious!
Thank you so much for your comment, Oveta. Glad you liked the recipe. If still have lots of walnuts, you can also make candied walnuts. 🙂
I use 6 dates to two cups walnuts to 6 cups water. My grand kids have no clue they are not drinking cow’s milk. You cannot tell the difference except for the color.
That sounds like a delicious combo, Anne! Thanks for sharing!
I love Walnut milk!! So pleased to see a recipe online. It’s my go to in my Chai. Best nut milk ever. I never strain it. So much easier than Almonds. Thanks for sharing the love!!
Glad you like it, Deanna!
After blending the nuts in a blender you add more water bag in, how much water do you add back in? Is it the 4cups?
Hi Elena,
Yes, to make the walnut milk, you need to add 4 cups of filtered/drinking water to the blended walnuts.
Hello,
Thanks for these recipes. Since the milk may separate, can the nutmilk be used for homemade yogurt? I recently made yogurt using a probiotic and soy milk in my instant pot and it worked it beautifully. And I am working towards limiting soy for a while so looking for an alternative. I LOVE your DIY protein powder by the way!
Thanks in advance!
Hi Gerry,
I haven’t tried making yogurt with walnut milk yet, however I have multiple dairy-free yogurt recipes on my blog (using soy, coconut and almonds) let me know if you tried it with walnuts.