
This post may contain affiliate links. Please read our disclosure policy.
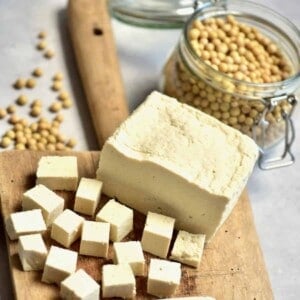
Two super simple methods for how to make tofu at home – this tofu DIY shows you the two different methods, using just a few ingredients for each method, is low-budget, and follows a simple process from soft to firm homemade tofu
When I realized that making homemade tofu is pretty much like cheese making (which I’ve done a lot of recently), I was thrilled. Not only is the process simple, but it is super affordable (often a lot cheaper than store-bought varieties) and a great household staple.
Not only is tofu extremely prevalent in Asian cuisine, but for Vegetarians and Vegans, tofu provides a wonderful source of protein to meals and soaks up the flavor of the items it’s cooked with. Plus, it can be baked, fried, deep-fried, boiled (such as in soups), and more.
With stores offering tofu in what feels like dozens of varieties, it can be a little bit confusing. Luckily, when making it at home, you can be in charge of how firm yours is – so it’s the perfect consistency for whatever use you need it for. And don’t worry if you’re reading this and wondering what the heck I’m talking about – I go through the different varieties below.
In this post, I’m including two methods of making tofu, one using lemon juice rather than a coagulant that may be harder to get a hold of.
Want to save this recipe?
What is Tofu and What is Tofu Made of?
Tofu (otherwise called “bean curd”) has become a staple in kitchens all over the world. Originating in China, tofu is meant to have been discovered over 2000 years ago – when someone accidentally mixed soy milk with a coagulant.
The result was curdling milk, where the solids are able to be pressed into shape. Tofu is actually made using a similar process to cheese-making. In fact, it reminded me A LOT of my recipe for homemade paneer – the difference being that rather than coming from dairy, tofu begins with soybeans.
I know that soy products can be a bit controversial, due to the fact that the majority of beans grown in the US are genetically modified (GMO) and this is a divisive topic.
Luckily, there is the option to pick up organic, non-GMO soybeans – if that is something you’d prefer when making any soy foods. However, these will be more expensive than their non-organic, GMO counterparts.
In my post for Simple Homemade Soy Milk, I link to a couple of articles that debate whether or not soy is good or bad for you. So if that is something you’re interested in reading more about, then you can check that out.
The Different Types Of Tofu
When buying tofu in stores there is a variety of texture choices you can choose from. These include silken, soft, firm, and extra firm- sometimes even with a few in between. You can also buy flavored and smoked versions, depending on your tastes.
If you’re not sure what the difference is between these, then – have no fear.
Silken Tofu
Silken tofu is the main “different” one in terms of look. It is custardy in texture, hasn’t been pressed, and is used as a dairy alternative in puddings, pies, sauces, salad dressings, smoothies, and ice cream, and can even be used as an egg, butter, and cream replacement. The coagulant is added to it, to help it “set” – yet depending on how firm it is, it often won’t hold its shape when pressed.
Note: You can get soft-firm silken tofu too. However, even firm silken is the texture of jelly at most and not ‘solid’.
Pressed Tofu
The next three varieties are all a form of pressed tofu. The difference between them is how much they have been pressed and the amount of water that has been pressed out of them. Once again, just like with my homemade paneer recipe, the way you press your curds will massively impact the final texture of the product.
It’s also worth noting that the nutrition levels vary depending on which variety you’re using too. The softer varieties carry the least protein and most water content, and the firmest variety has the most protein. The firmer the tofu, the harder it is for flavors to permeate, too – just to keep in mind.
Soft Tofu is fairly similar to silken but has been pressed lightly as a block. This is my favorite texture for soups like miso and other ramen dishes – for example, this Japanese-inspired Ramen Noodle Soup.
Regular/Firm tofu has been pressed for longer and holds its shape better but is still soft enough to be used for dishes such as Tofu Scramble. I lump the two types together because I find that, especially when buying store-bought, the texture can vary a lot from brand to brand as to how well it holds its shape.
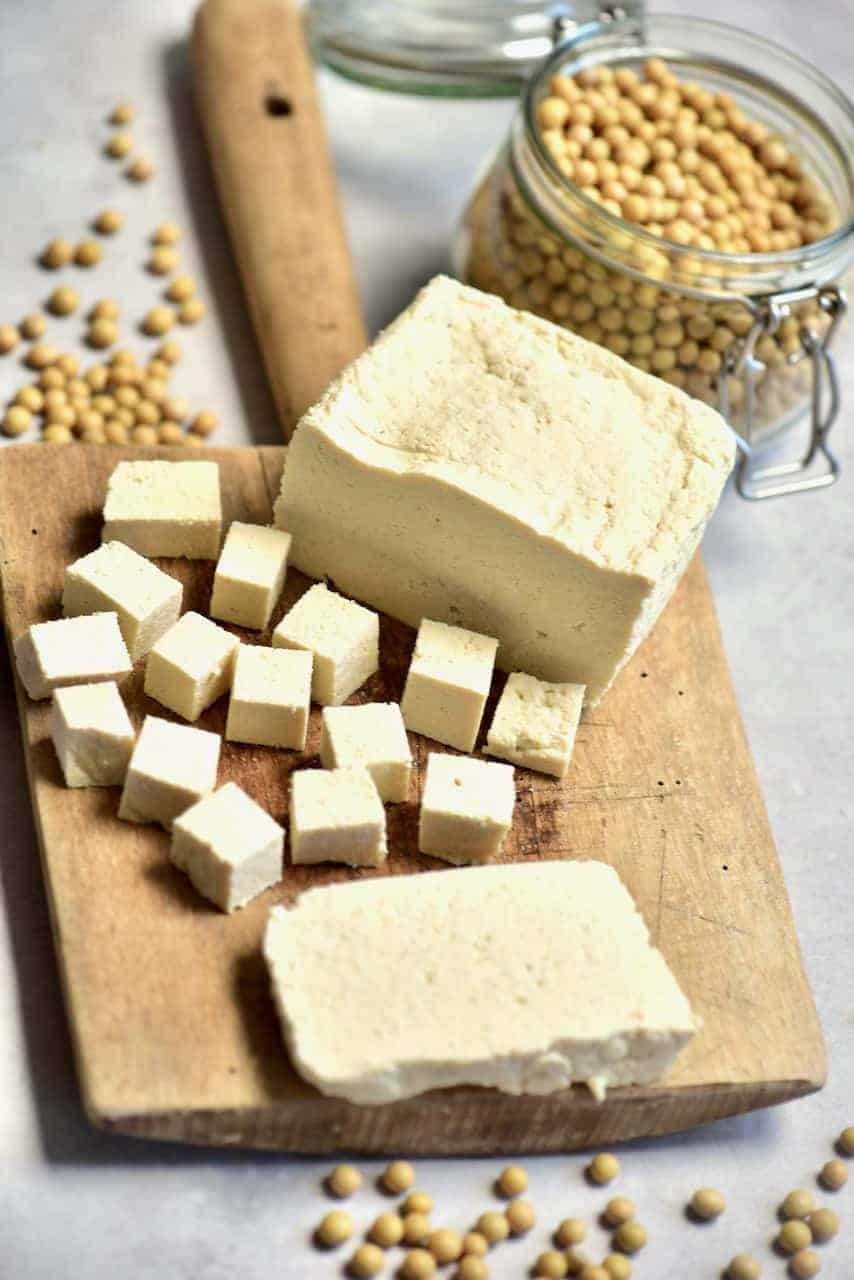
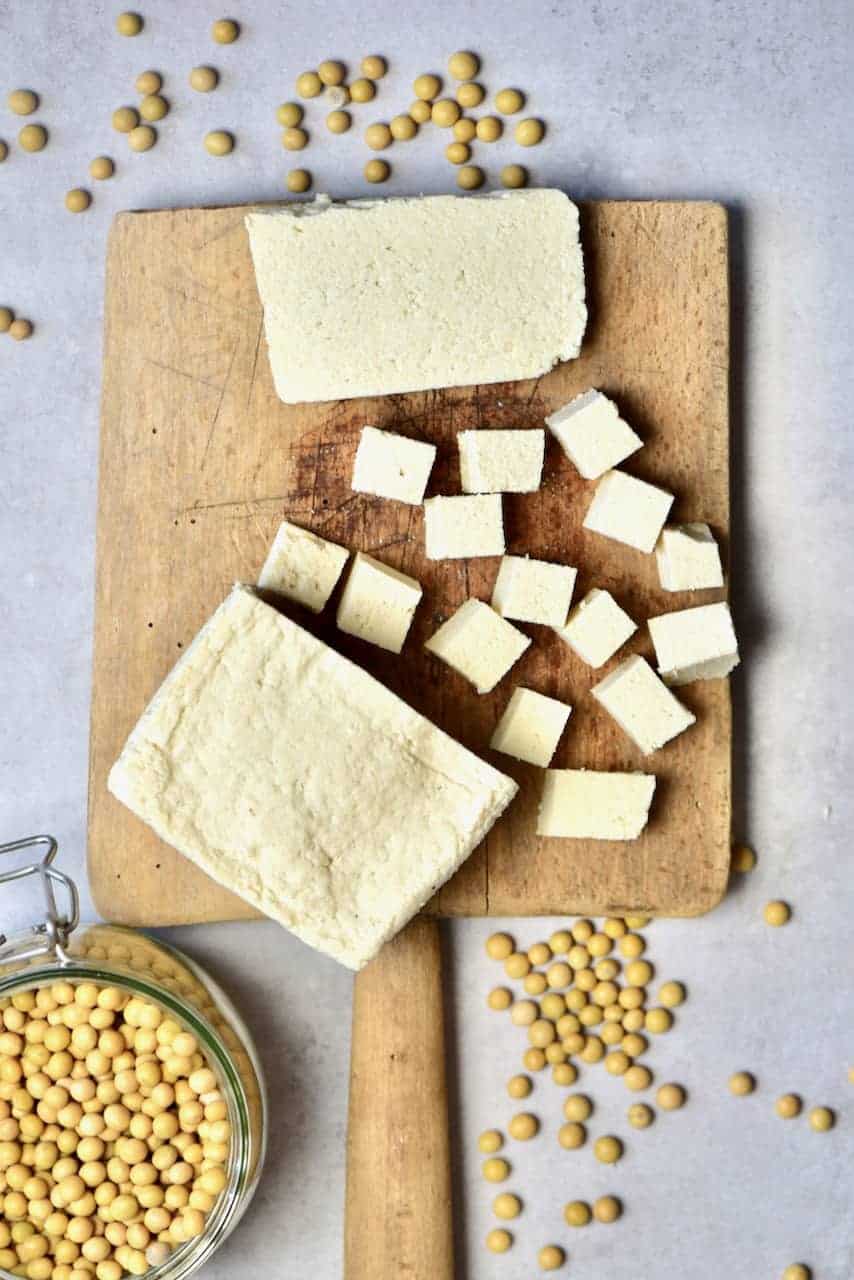
Extra Firm tofu is great for any dish where it requires dicing/ slicing the tofu. It’s great for frying, baking, and grilling. This tofu is my favorite to use when wanting a meat-free protein alternative and I’ll use this as my main protein source in a variety of dishes.
When making homemade tofu you can be in control of how firm you want your tofu with home much coagulant you use and how much you press your tofu.
A Few Notes About Tofu
I thought I’d answer a few of what I think are the top FAQs for tofu here.
- Firstly, yes it can be eaten raw. There isn’t much flavor to it at this point but it’s perfectly edible
- Yes, tofu can also be frozen – for 4-5 months. Freezing does change the texture of tofu – however, it’s often seen as a good thing. If you freeze and thaw your tofu before cooking it, it will make it more ‘pocket-y’ and retain more flavor, becoming crispier crispy tofu when fried, but also has a chewier – more ‘meaty’ texture than if not frozen.
- It is possible to flavor your tofu at home but I haven’t tried this yet, as I usually add mine to sauces and high-flavor dishes anyway. However, it’s possible to flavor in a way similar to cheese – with herbs spices, and “sundries” like olives and sundried tomatoes. Just be careful not to add too much so the curds don’t solidify together.
- What does tofu taste like is a question I feel like all newbies struggle to find an answer to because the answer is – not much! I love this though, as it allows you to mold it to your dish and pick up the flavors of the spices/sauce it’s cooked with.
Ask me any more questions that you have in the comments and I’ll try to answer as best I can.
What You’ll Need
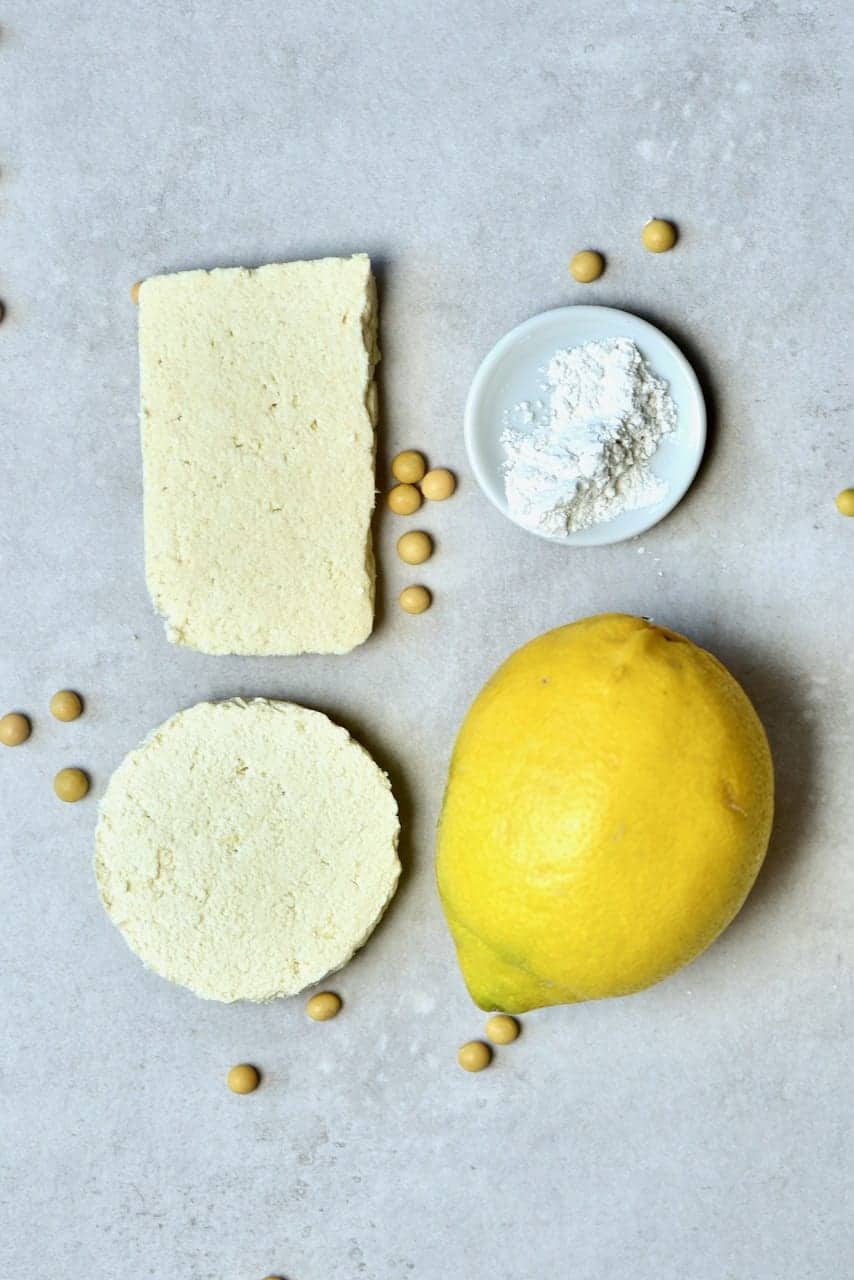
Homemade tofu is easy to make and a good source of plant-based protein. It needs just three ingredients, with a choice of coagulant (thickener- turning the liquid to solid).
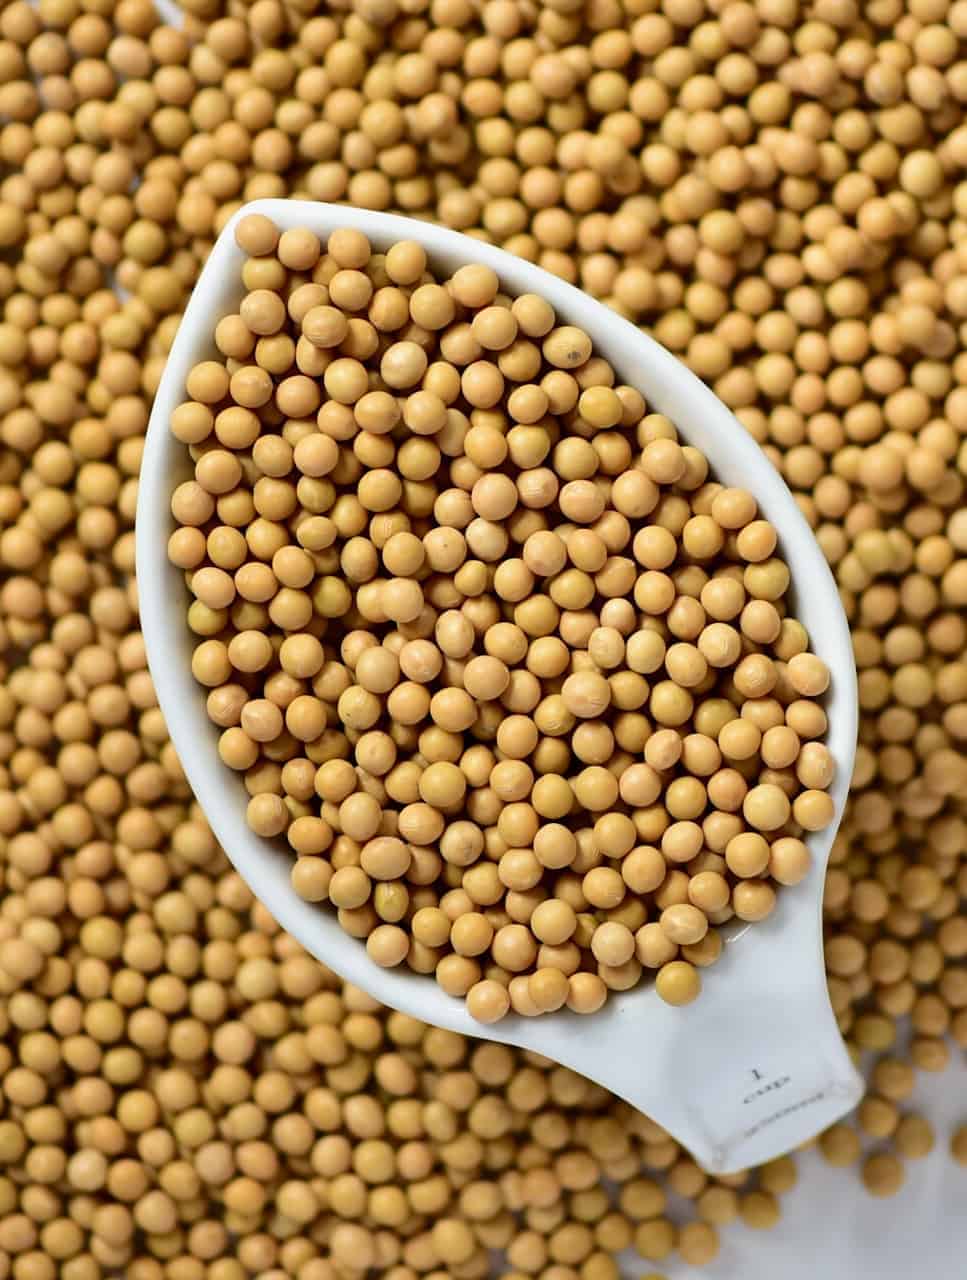
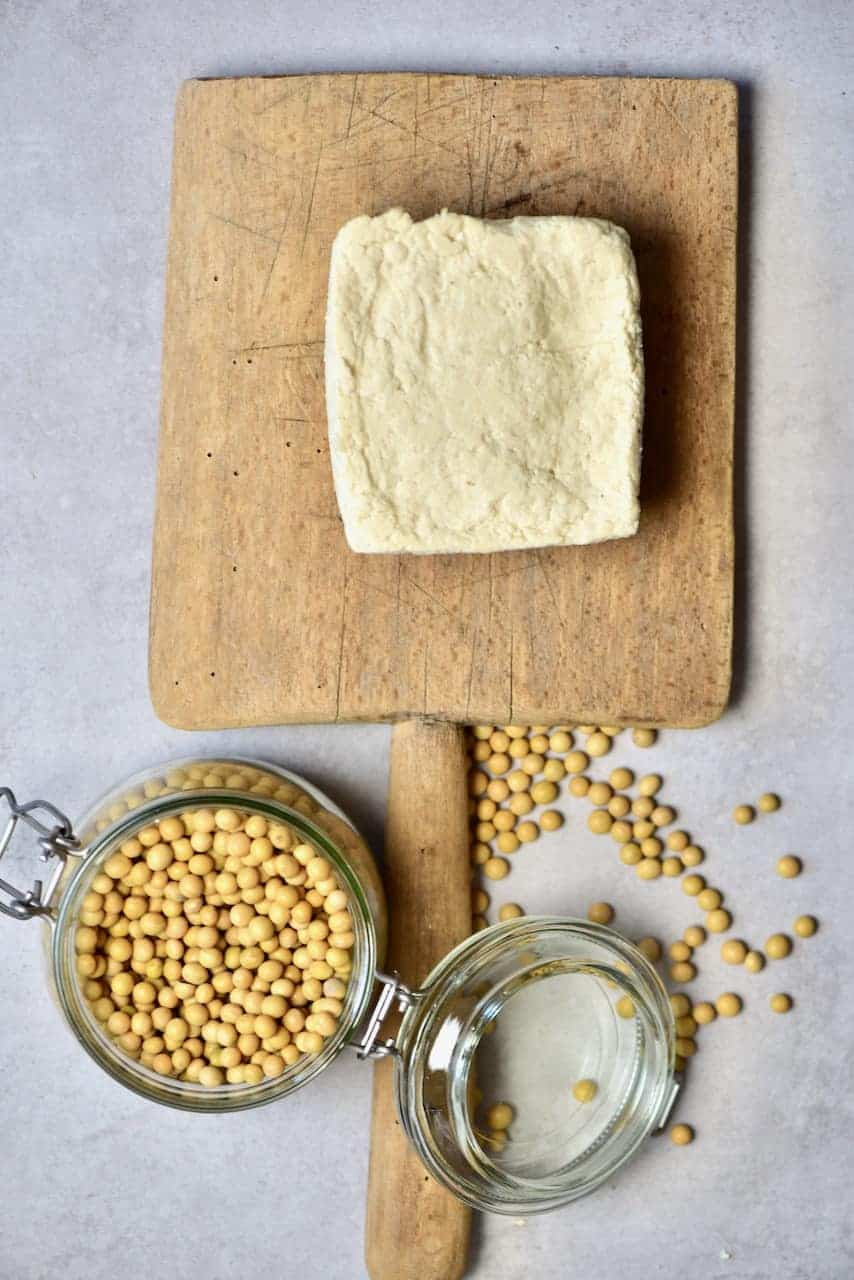
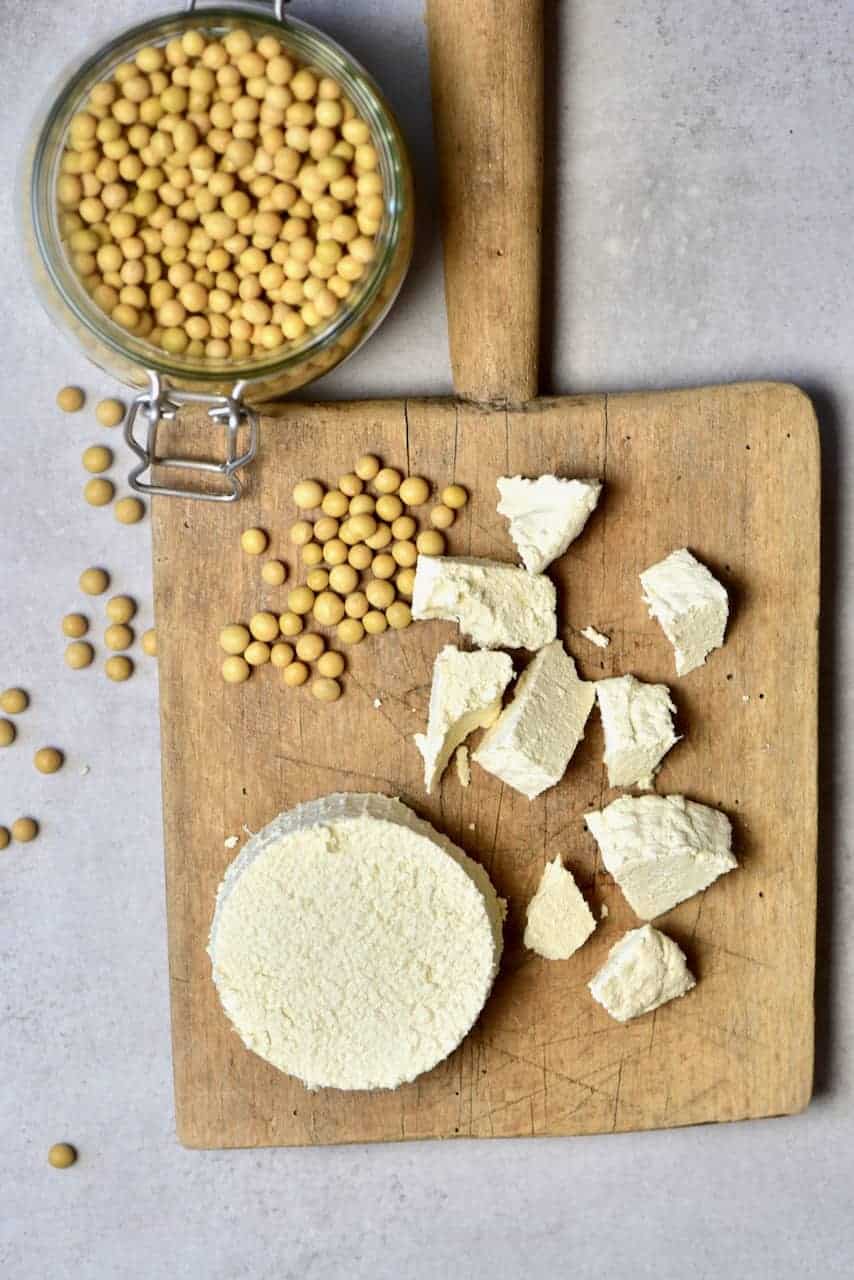
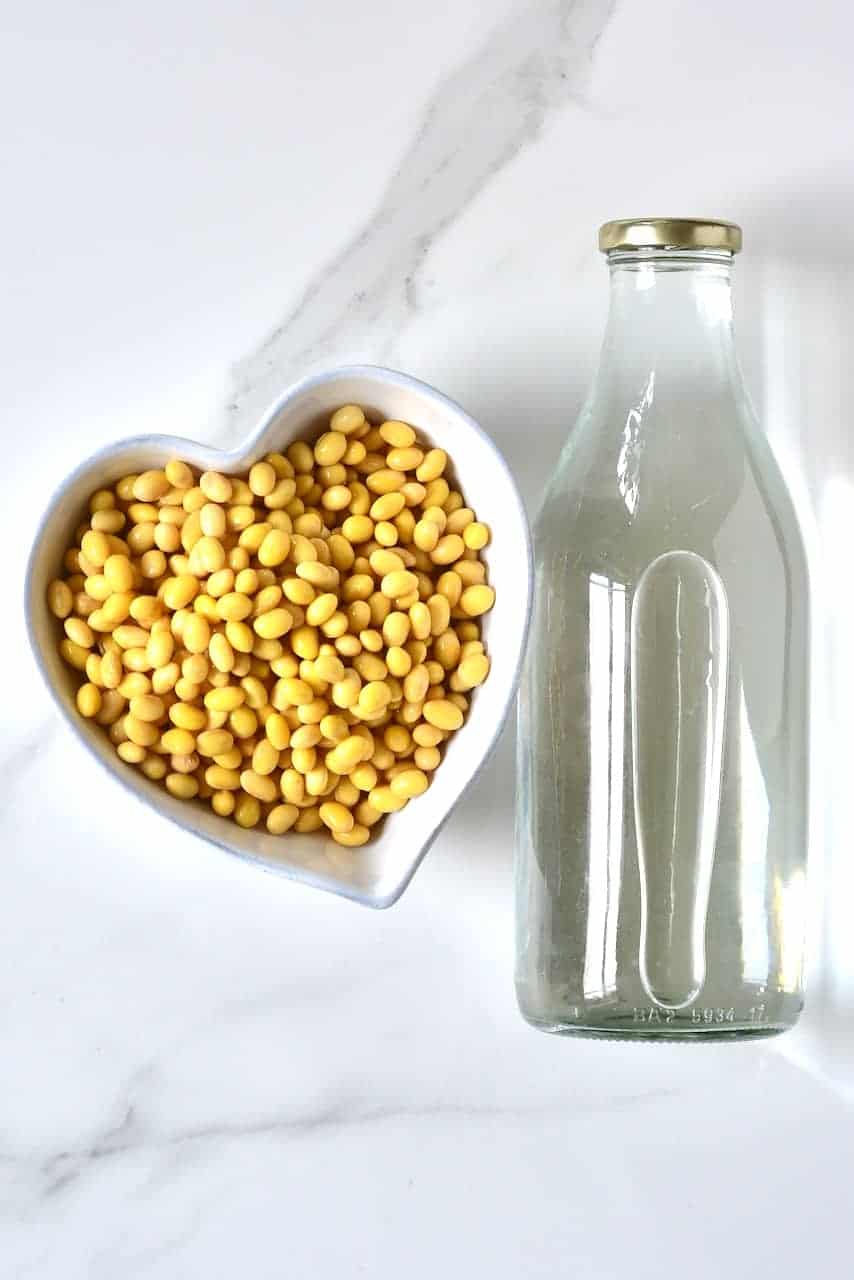
- dry soybeans, ideally organic GMO-free ones
- filtered water
- tofu coagulant
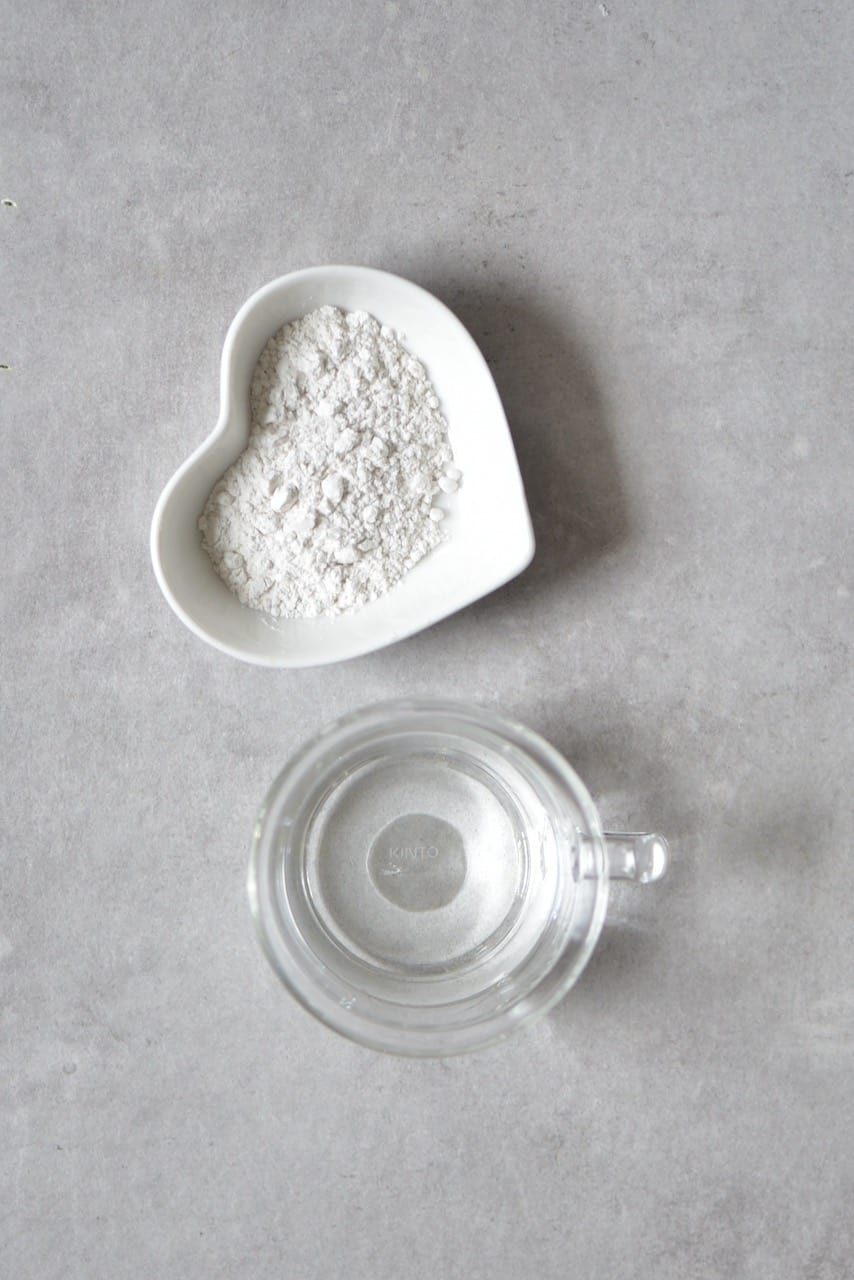
Types of Tofu Coagulant
- Gypsum – natural calcium sulfate. Traditionally used. Has a sweeter taste.
- Nigari – extracted from seawater. magnesium chloride. Used more as an alternative.
- Lemons – specifically, lemon juice. It makes the milk curdle just as well – bringing a hint of lemon to the tofu taste.
Below I’ll be describing how to make tofu using two methods: gypsum and lemon juice. They both work perfectly fine, the only difference being that you’ll have a slight citrus flavor in the lemon version. To be honest, though, I actually prefer the lemon version as I enjoy the additional flavor.
For the traditional method:
- gypsum powder (calcium sulfate) with a bit of water to dilute it
OR – Method 2 with lemon juice:
- freshly squeezed juice from sour lemons
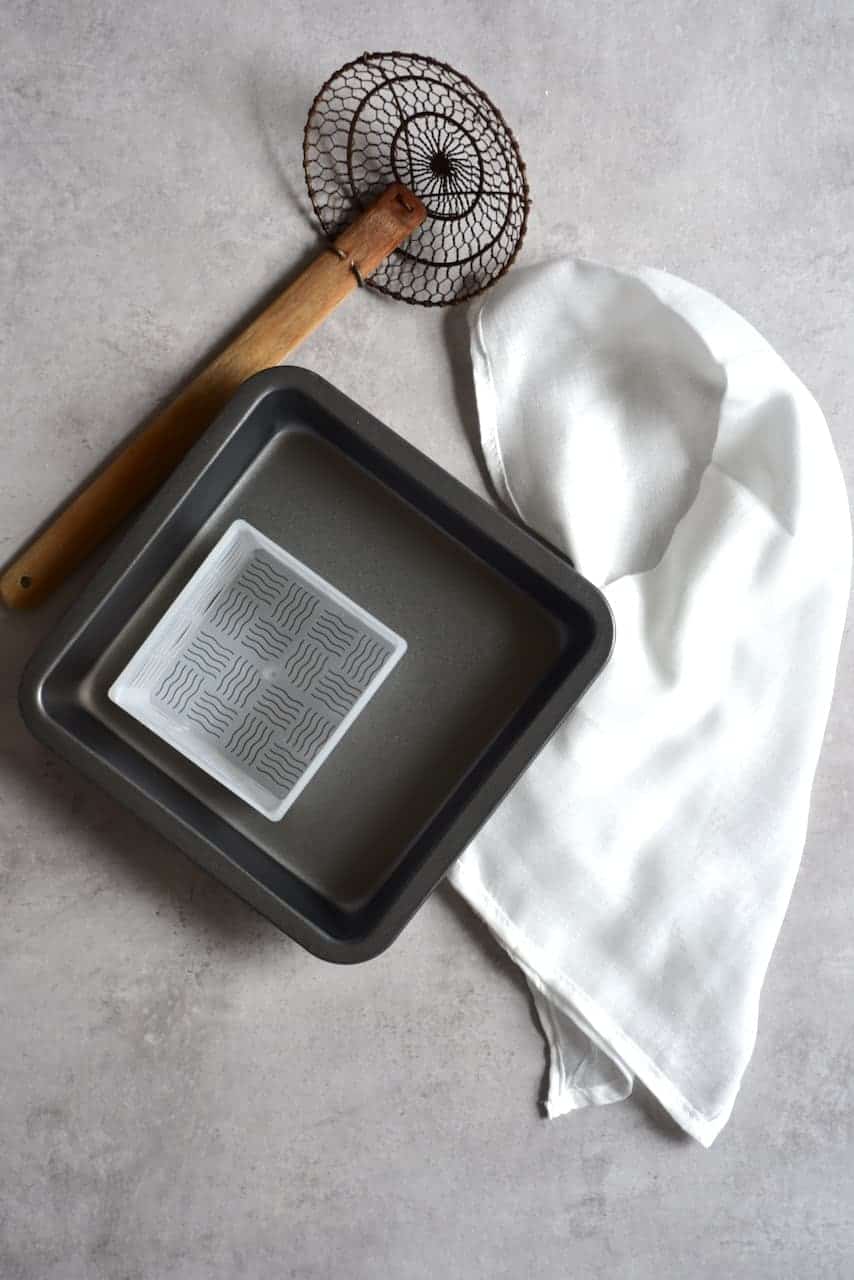
Tools:
- Cheesecloth or muslin cloth, or alternatively nut milk bag
- A tofu mold or a square bowl/tray to shape the block
- A tray to collect the liquid
- A skimmer spoon
How To Make Tofu
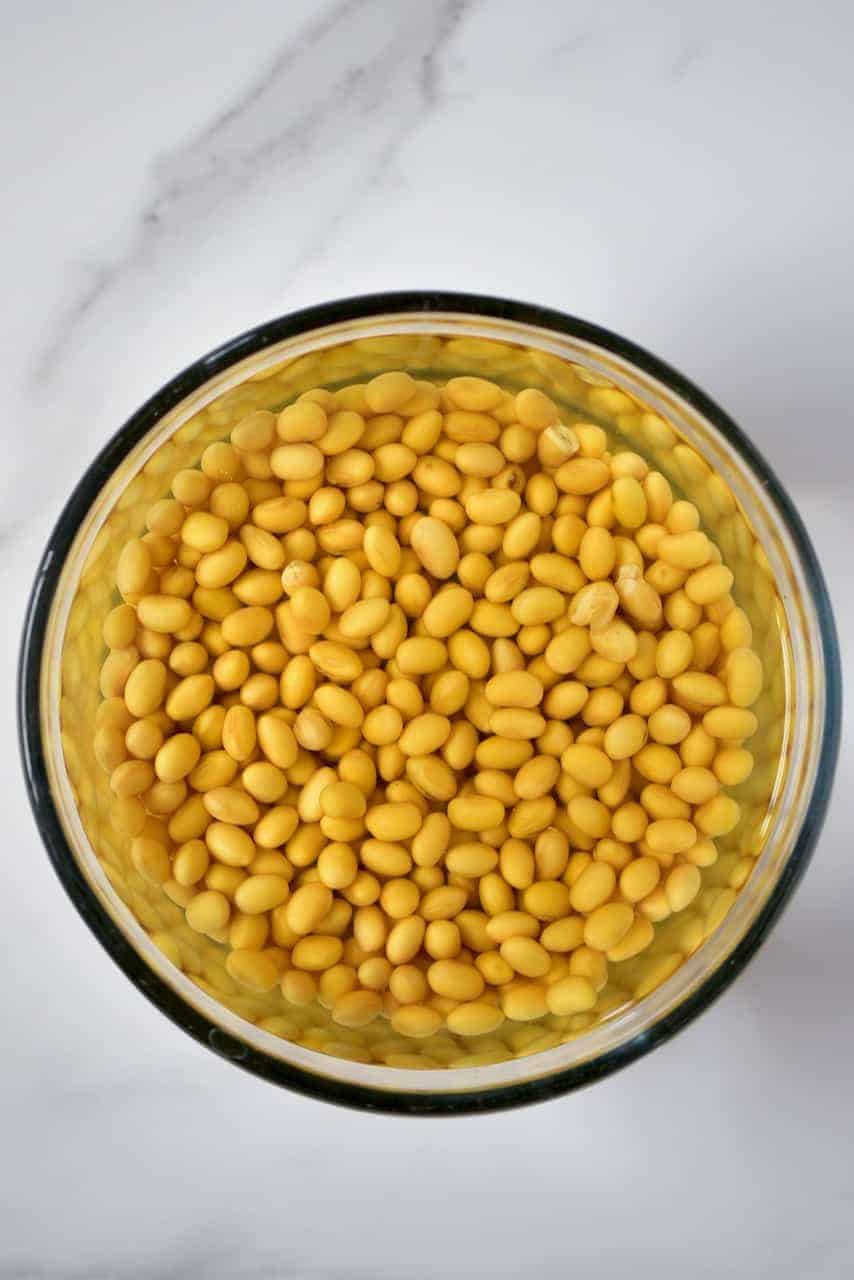
Begin by soaking the soybeans for at least 6 hours, or even overnight. They will expand 2-3 times their size, in this time.
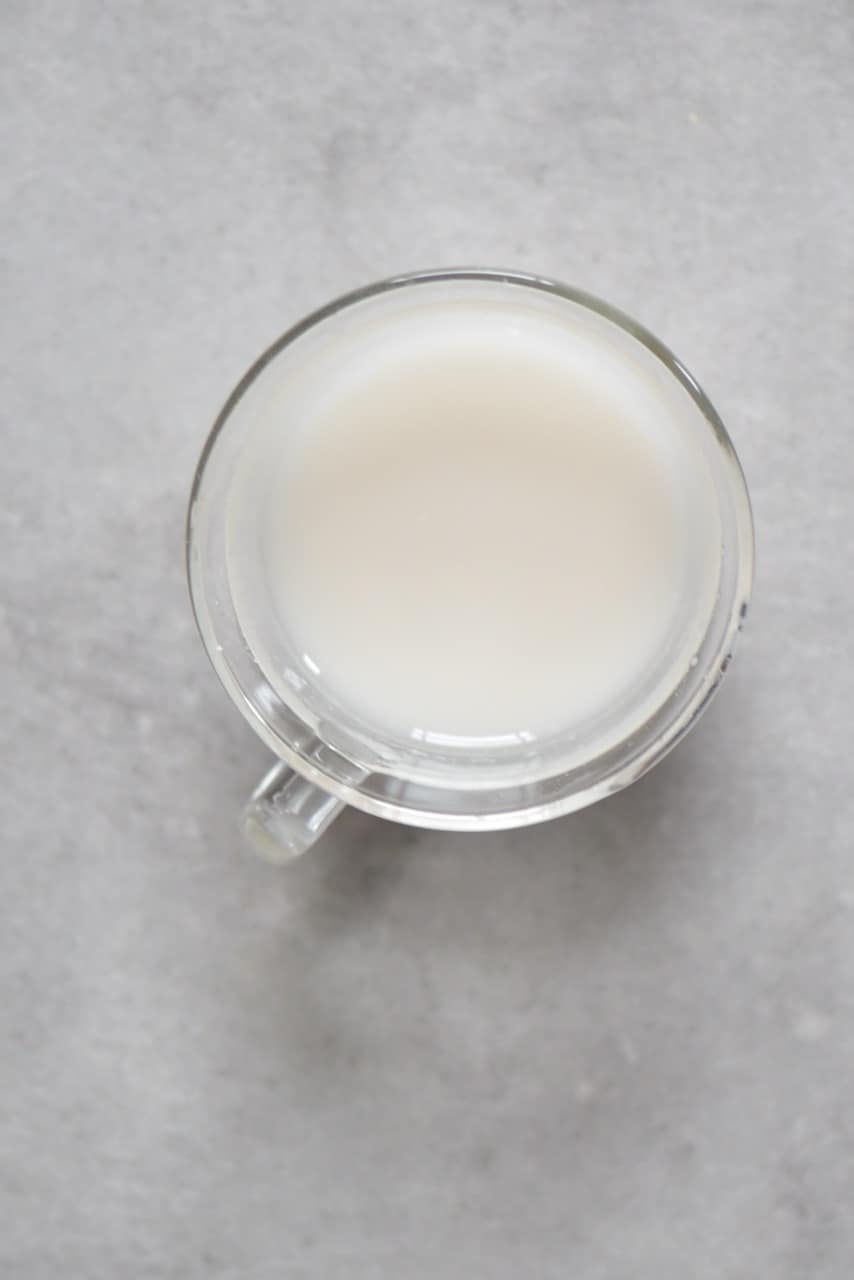
Now it’s time to make soy milk. Add the soaked beans into a high-speed processor/blender for just 10-15 seconds to break down the beans slightly.
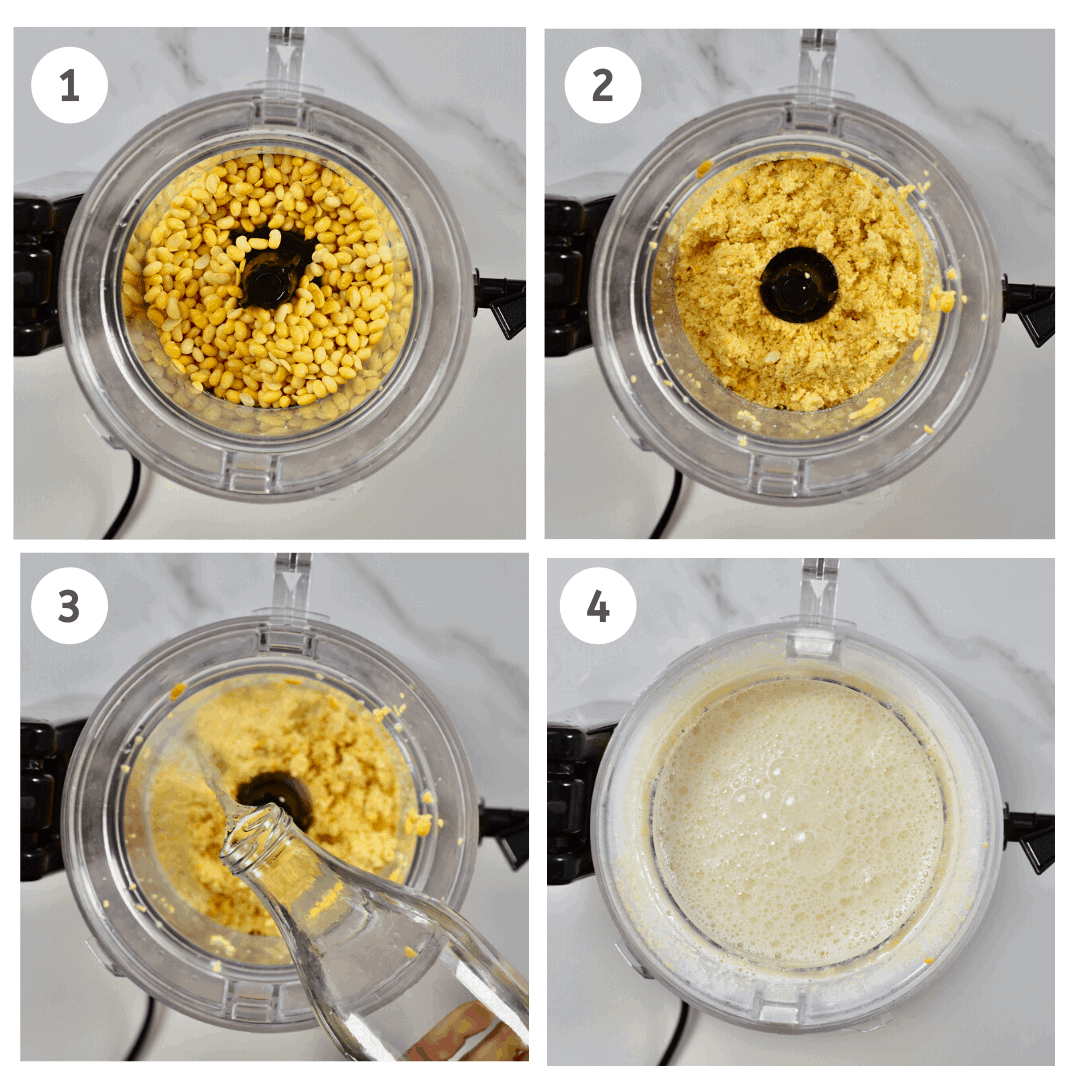
Add the water and blend again until smooth and creamy.
Next, transfer the mixture into a large pot, using a sieve to collect the soy pulp.
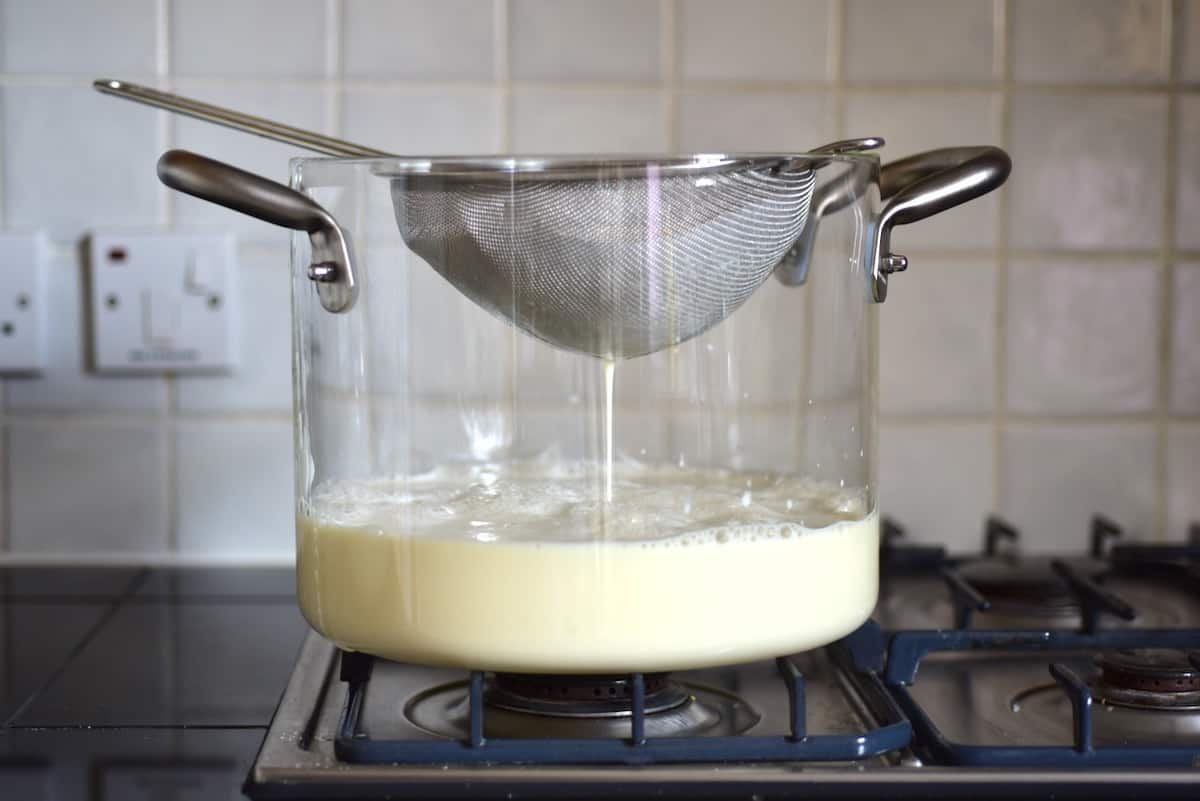
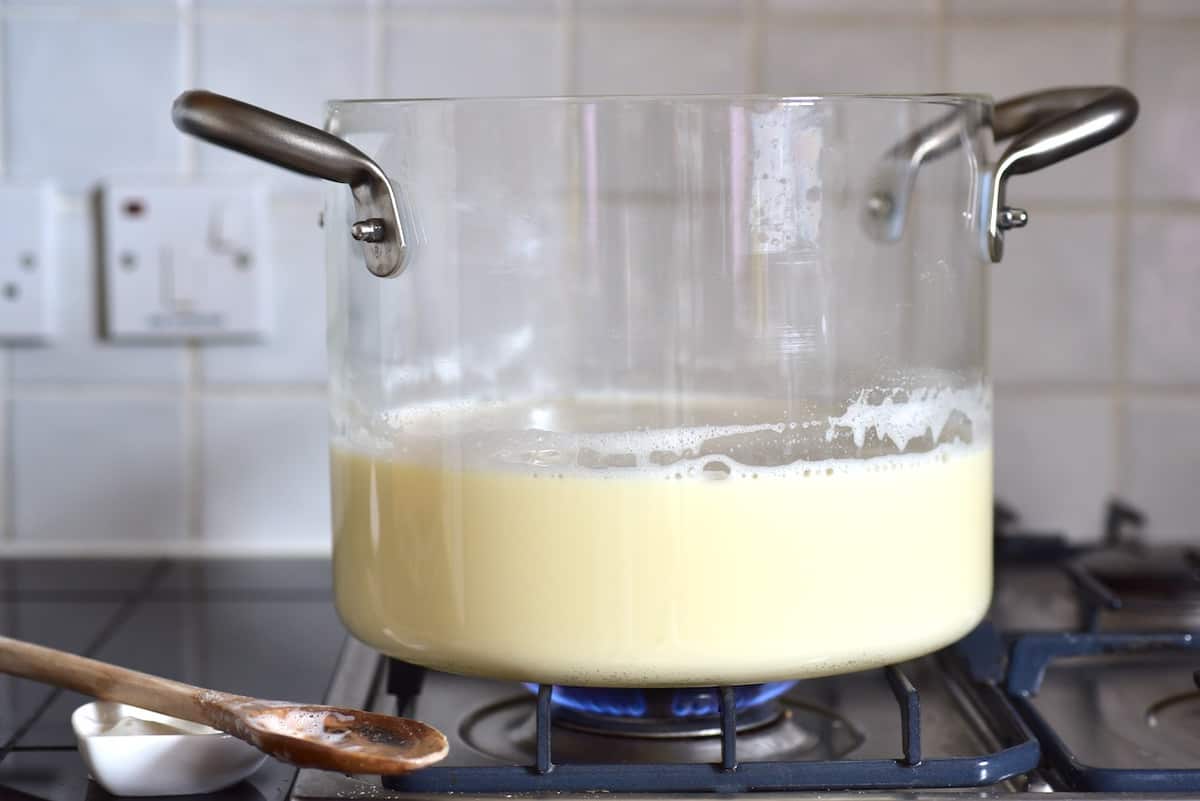
Bring to boil over medium heat. Stir occasionally and remove the foam that forms on the top with a wooden spoon.
Note* I’ve heard that this ‘skin’ is something people actually use for dishes too, but I’ve never tried this.
METHOD 1 – with Gypsum
In the meantime, mix the gypsum powder with water and stir well.
As soon as the soy milk begins to boil, switch off the heat and add the diluted gypsum!
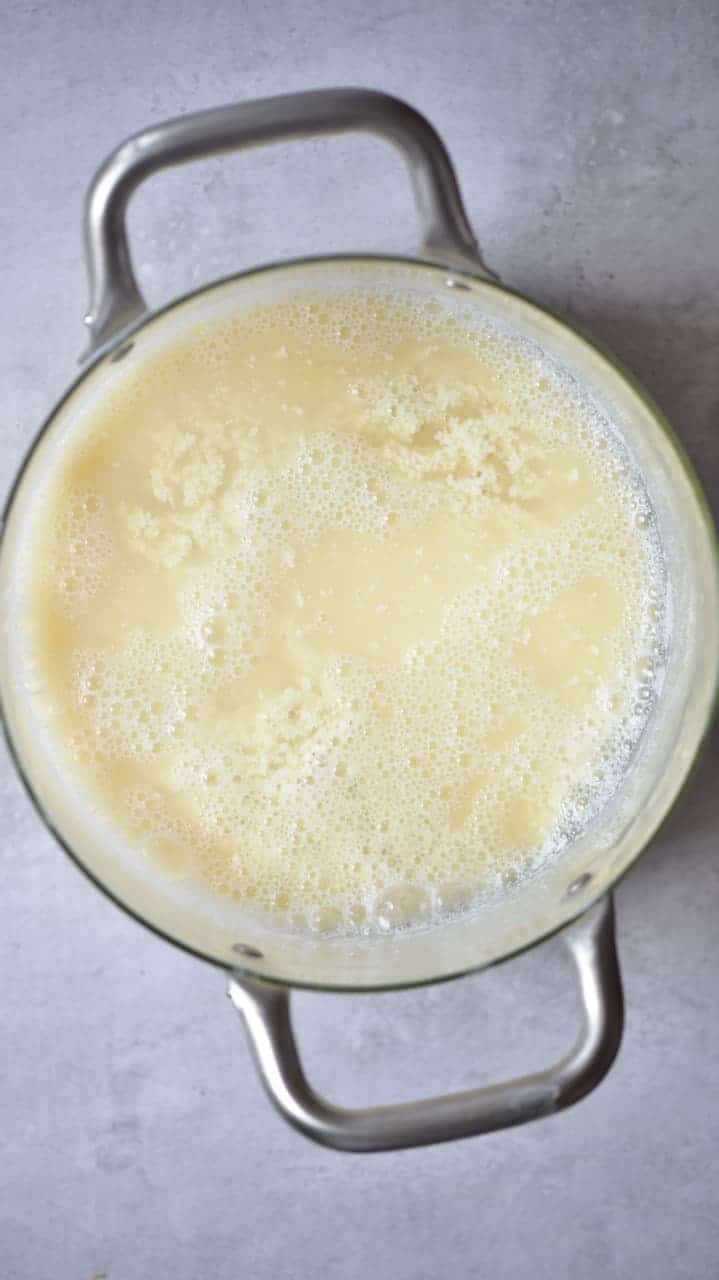
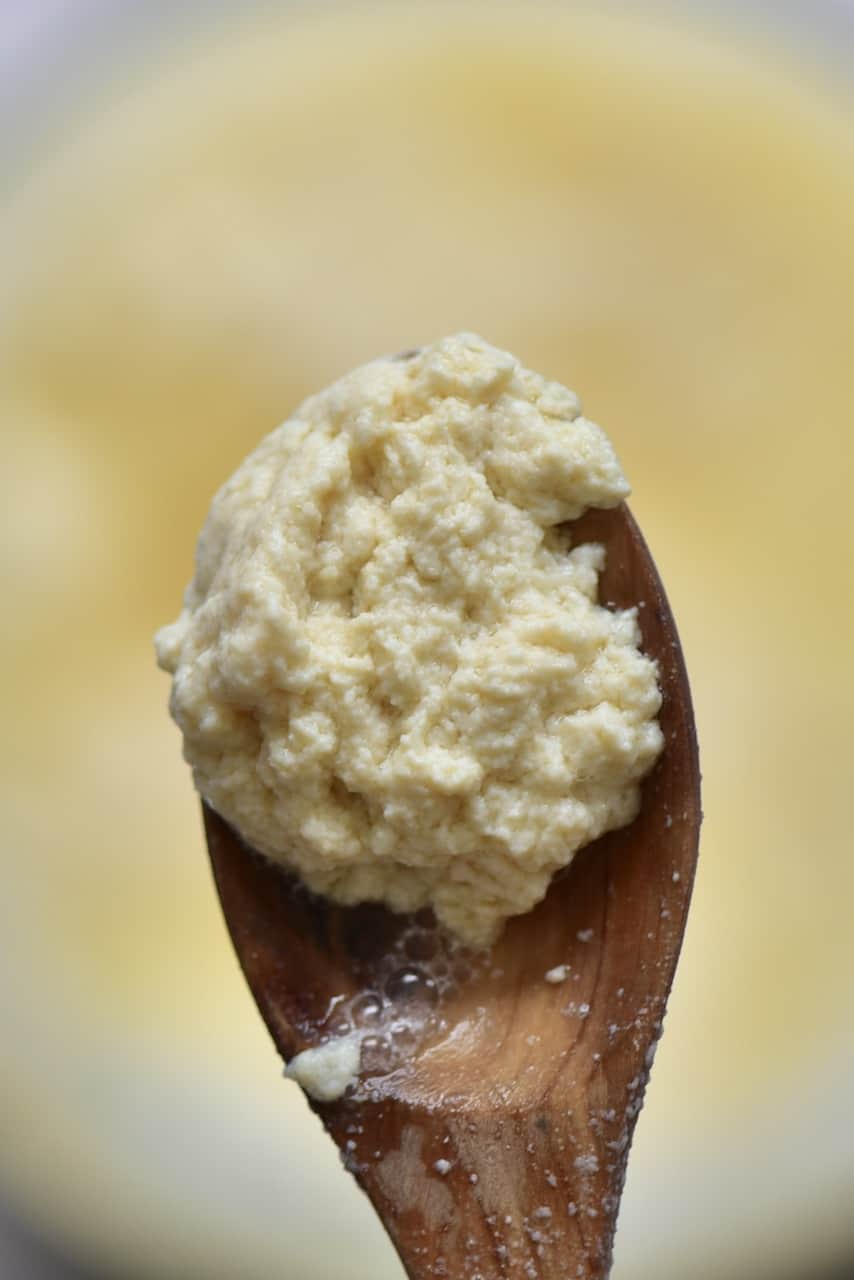
Gently stir a few times, then set aside and it will begin to curdle.
Note: If no curdles are forming, turn the heat on for a couple of minutes and add a bit more of the gypsum.
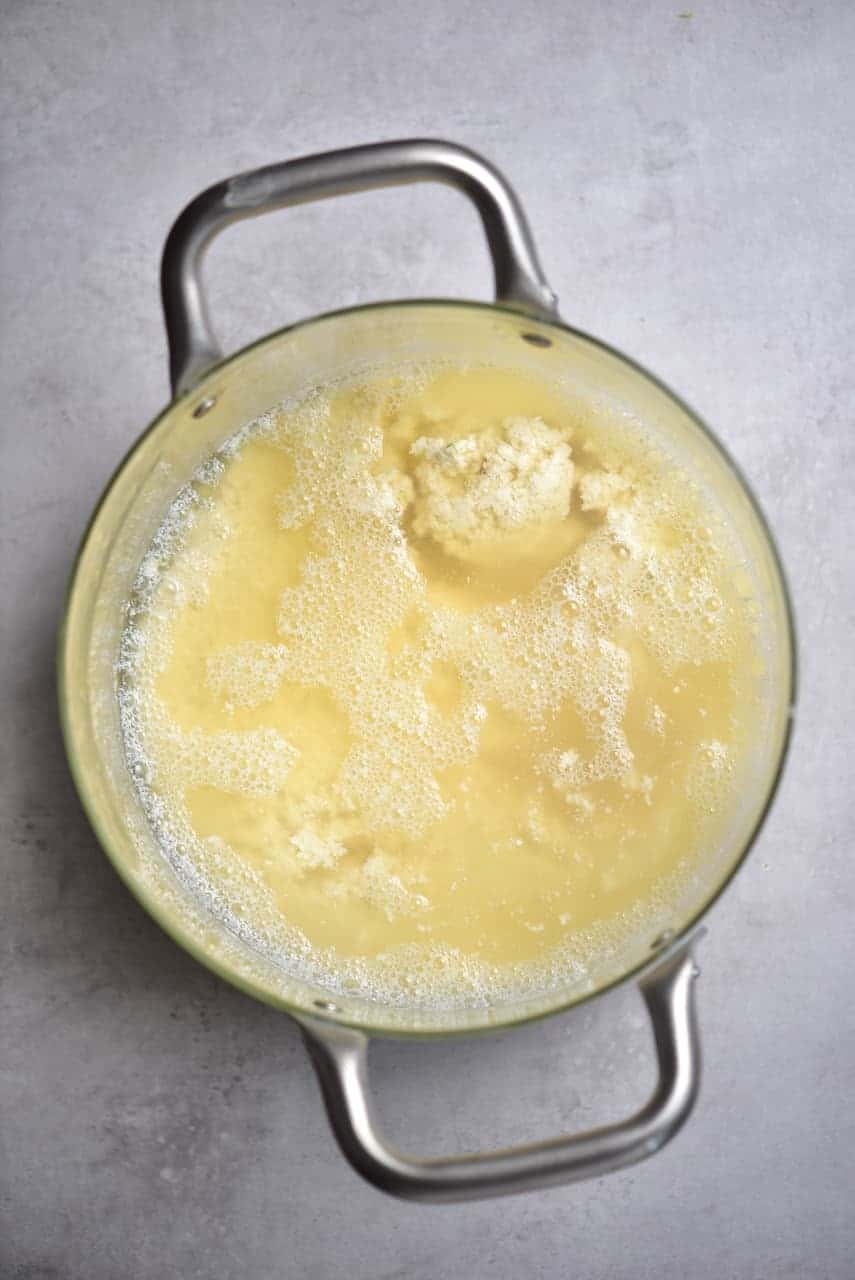
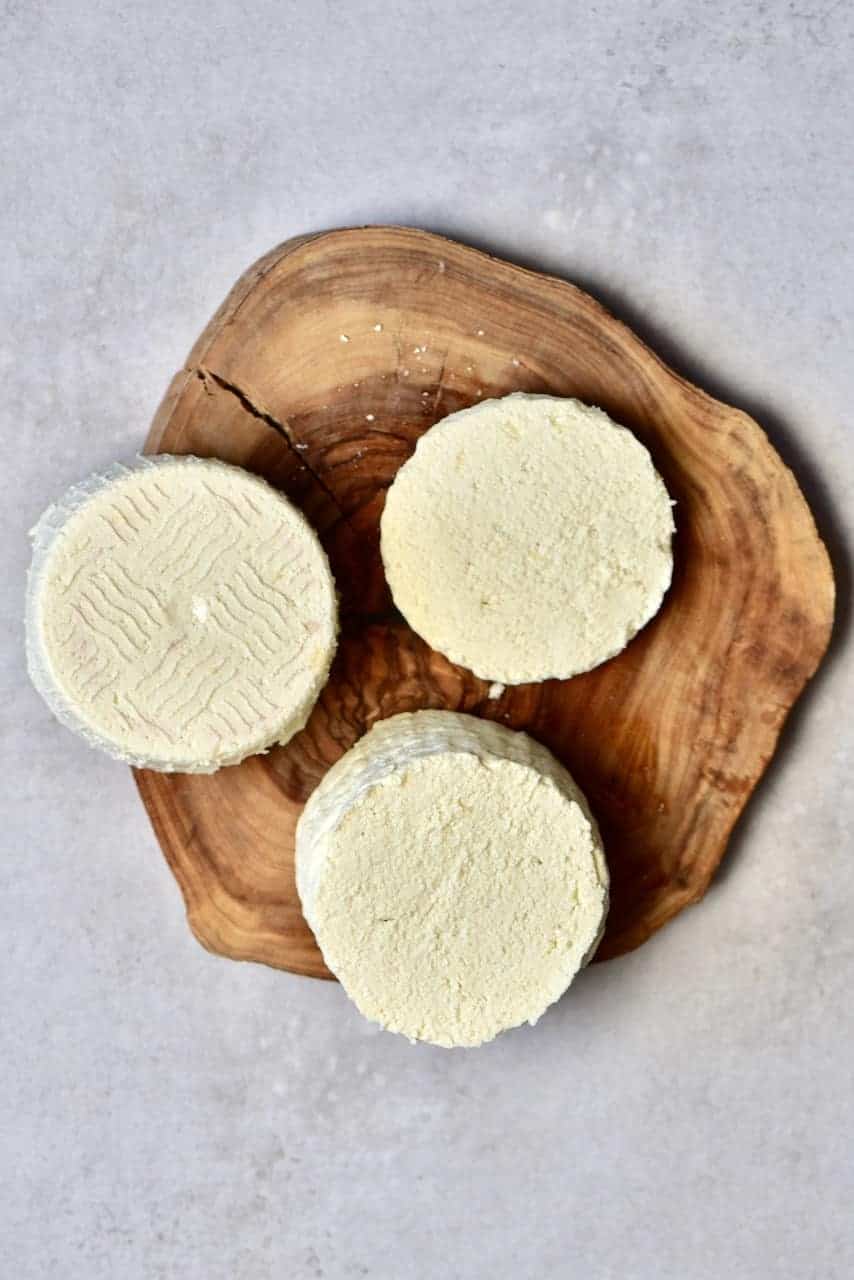
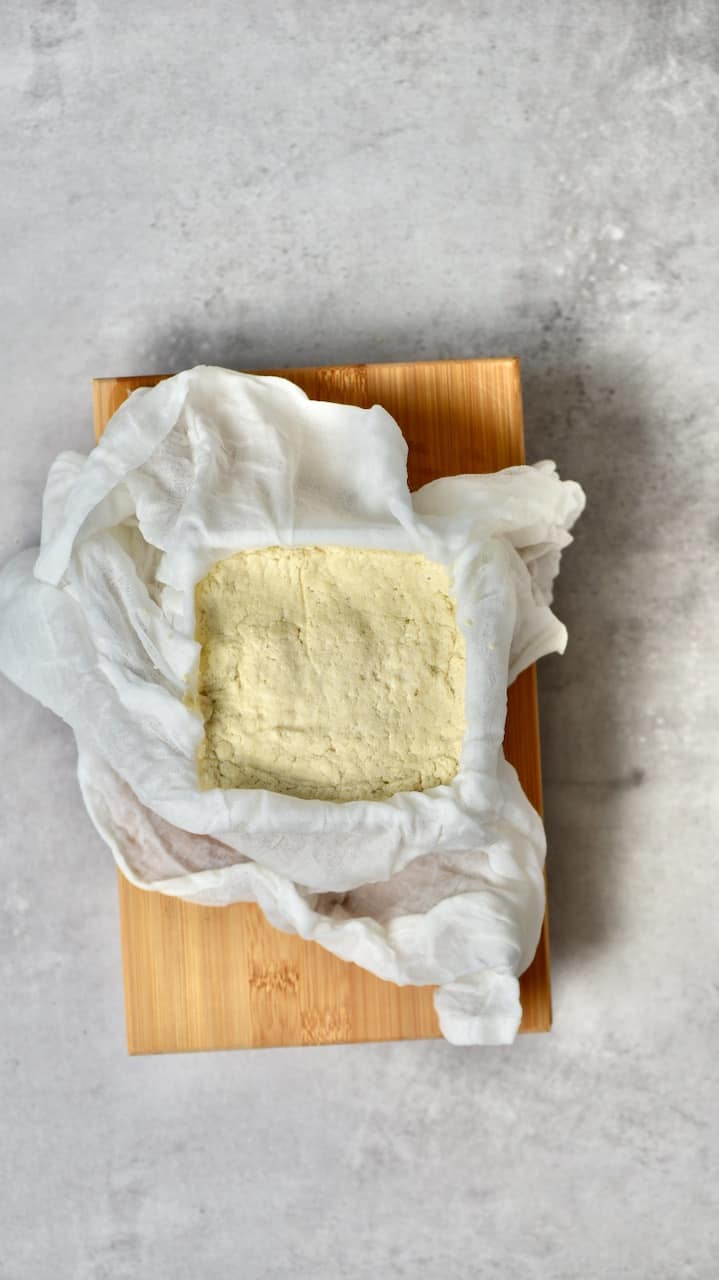
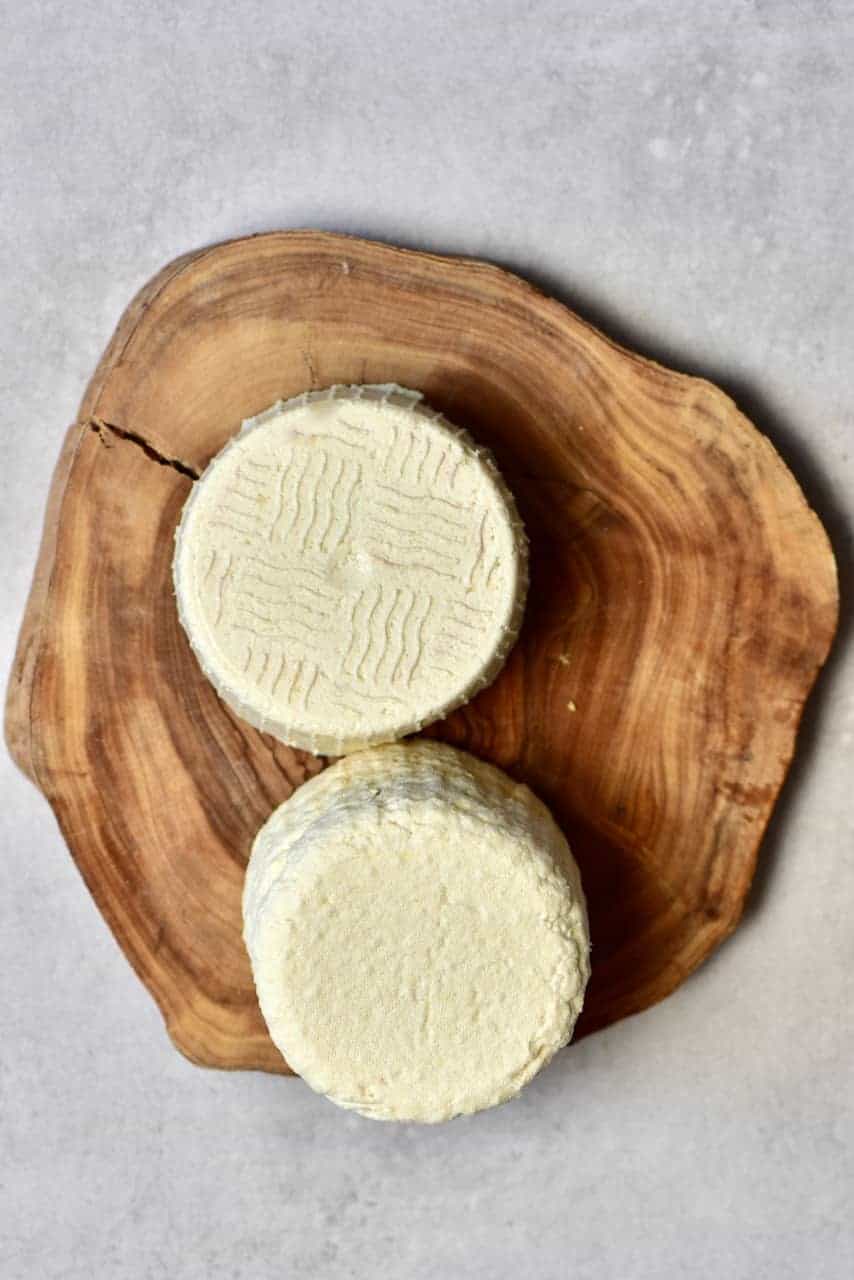
Put a muslin cloth over your mold then use a skimmer spoon to transfer just the soybean curd into the mold. Make sure the mold is placed on top of something that can ‘catch’ the excess water from the curds while pressing.
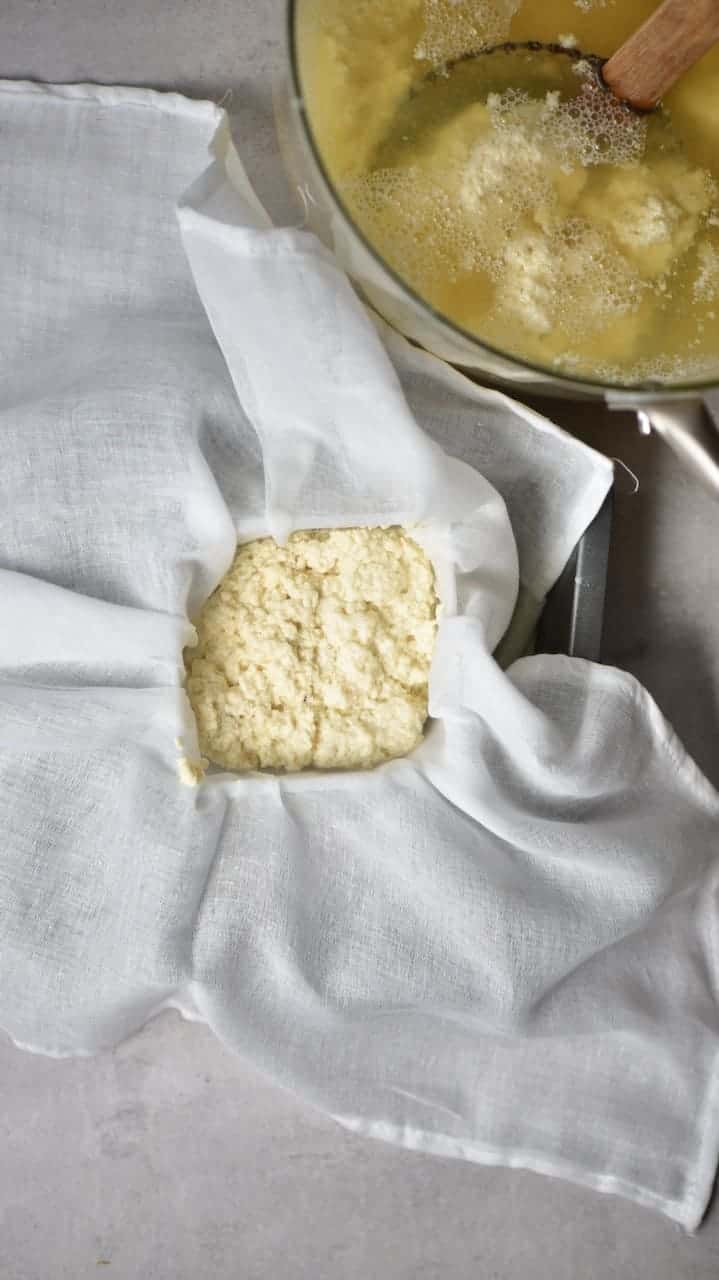
Wrap the cloth tightly around the milk curdles.
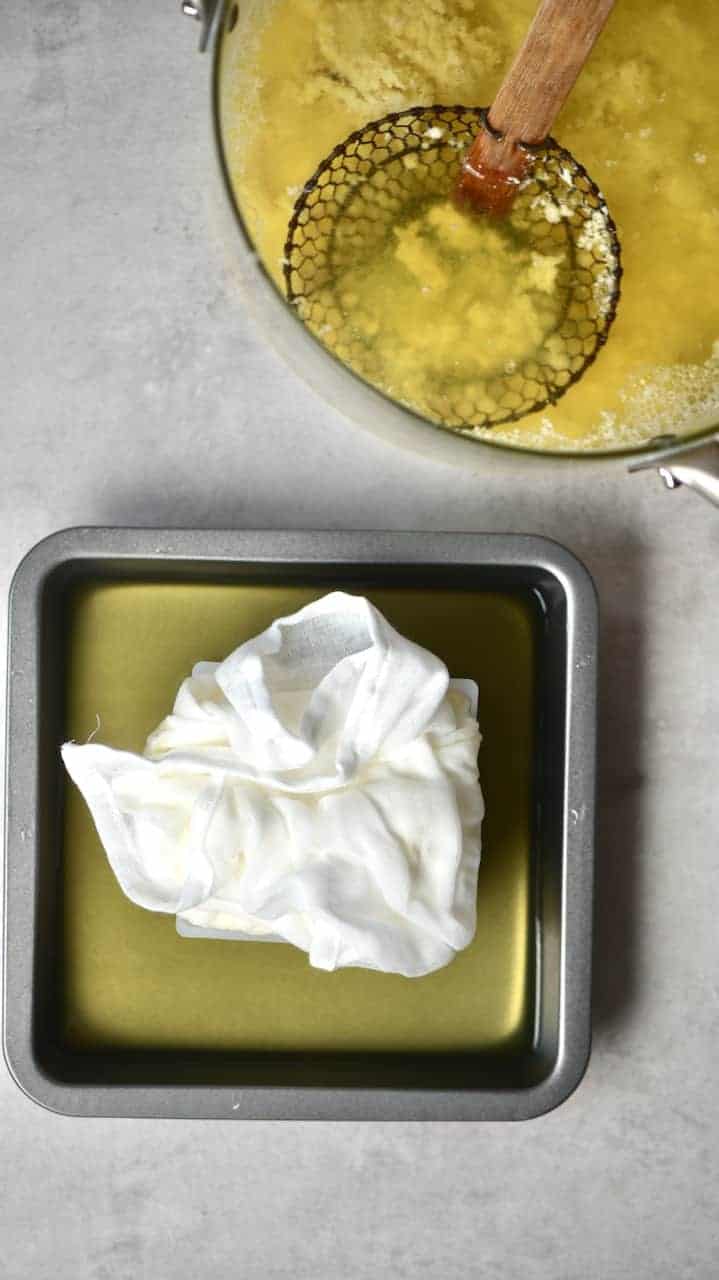
Put a heavy object to press down the muslin cloth. This will allow the tofu to form and harden.
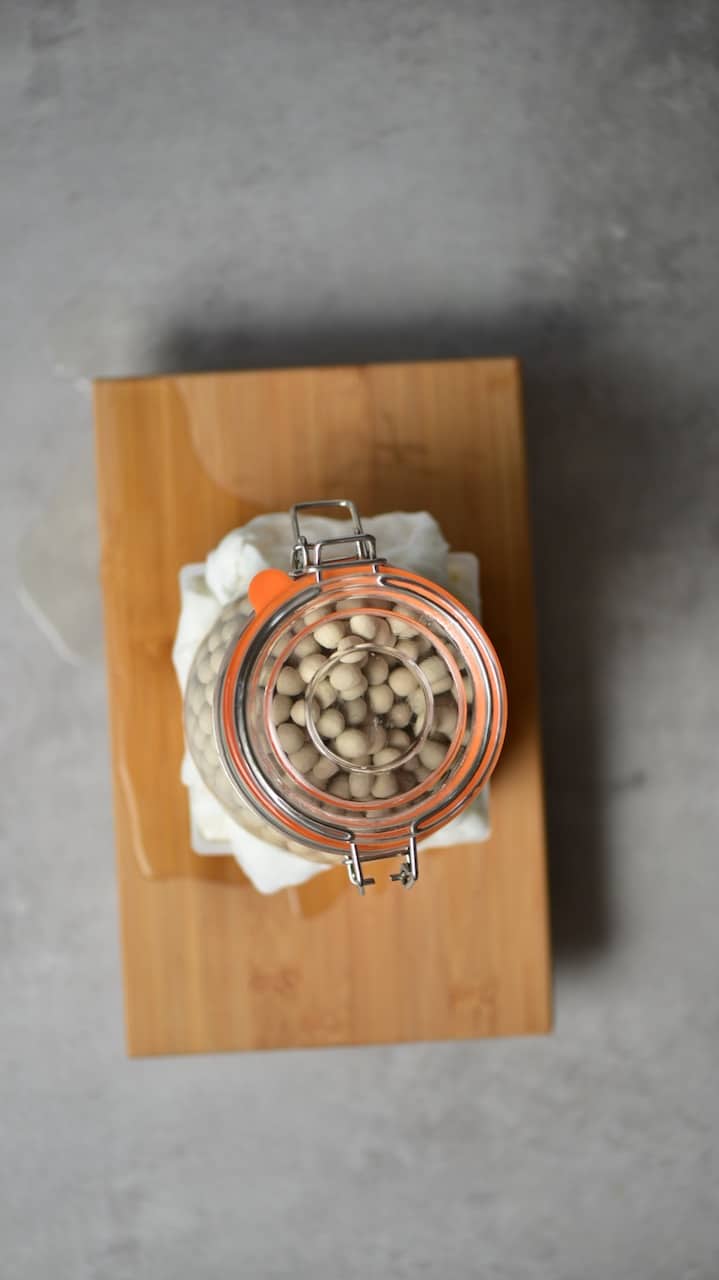
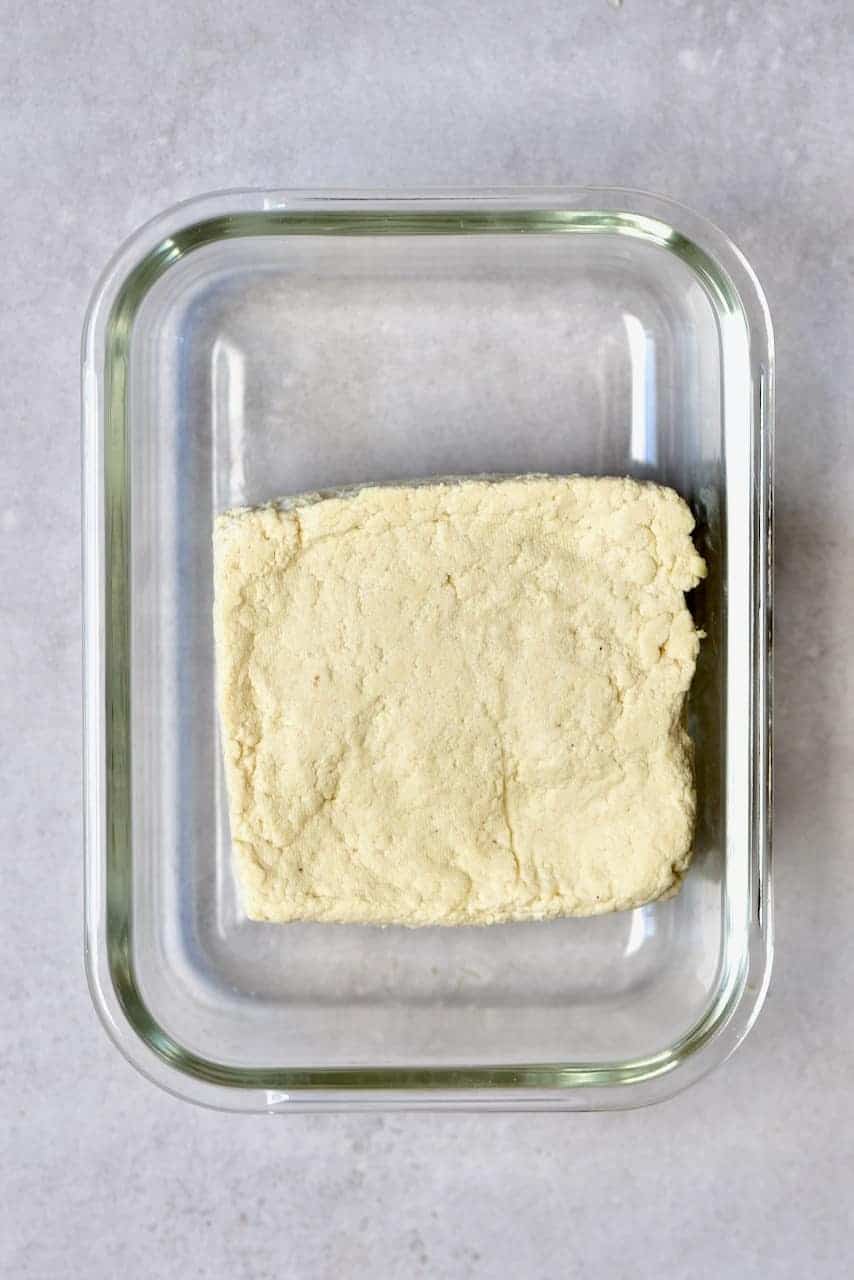
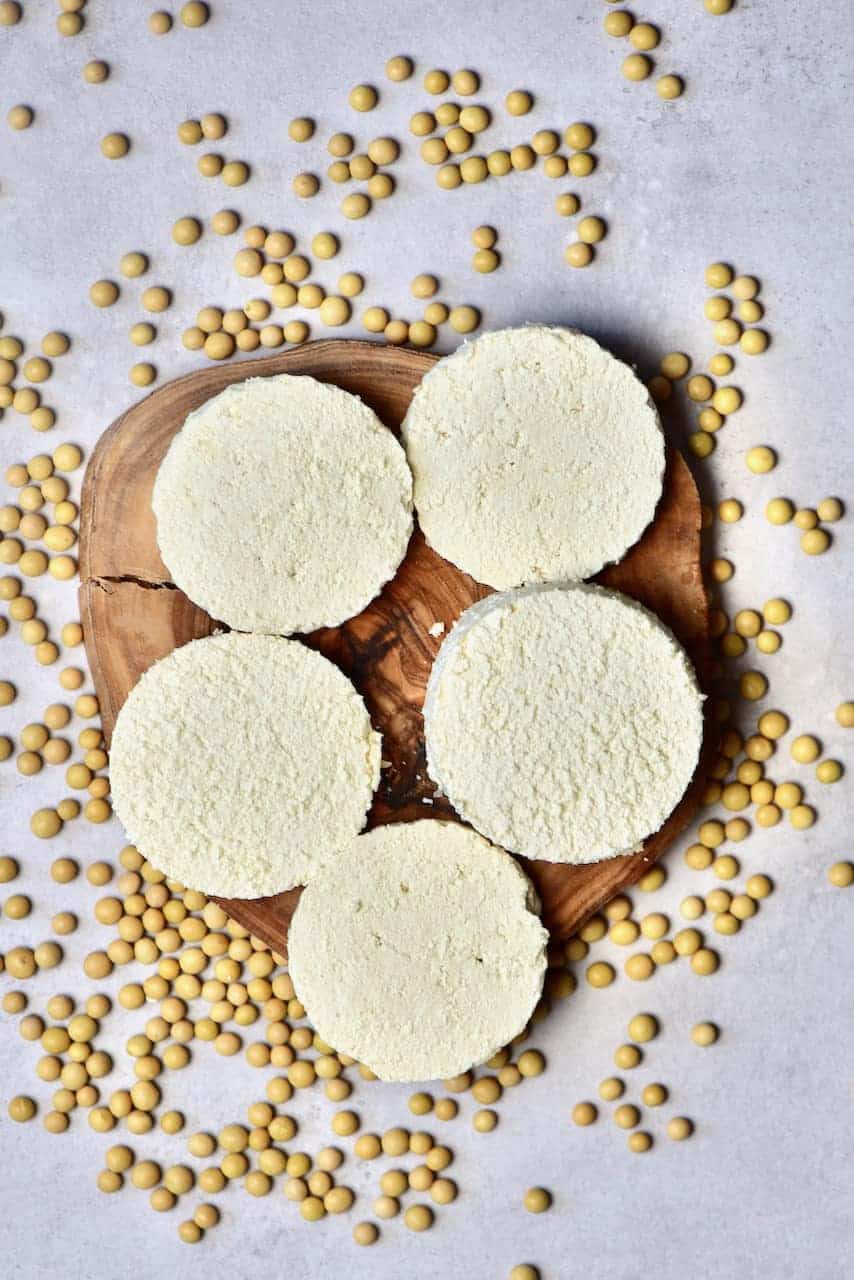
Within 20 minutes, your firm tofu is ready.
Note: You can choose between soft and extra firm by deciding how long to press it. Check after 5-10 minutes and continue as needed.
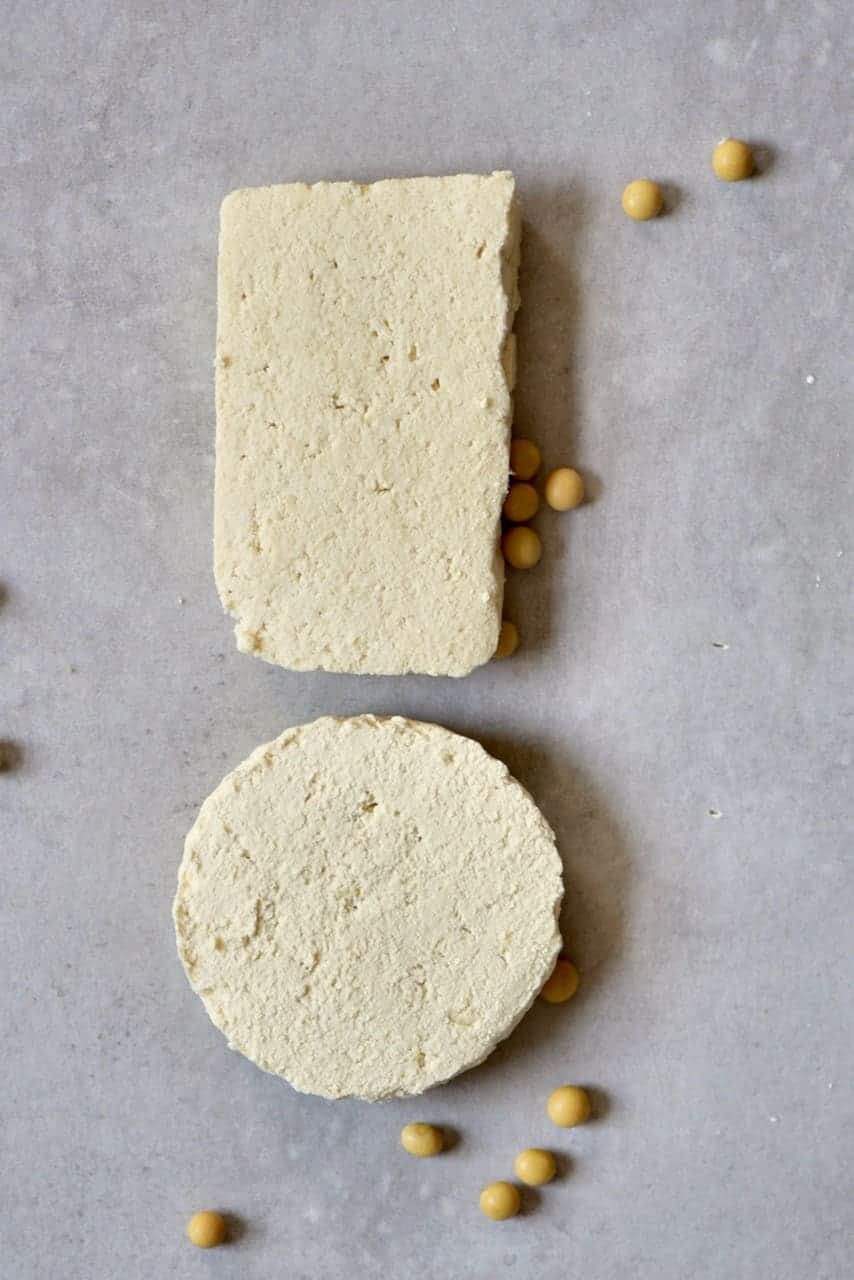
Keep in an airtight container in the fridge for 3-4 days. Remember, if you’re not planning on eating it the same day that you make it then it’s best to store it in a container filled with filtered cold water and change this daily, as tofu dries out quickly.
When you want to cook it – Once you’ve drained the tofu then you can blot it with paper towels, press it to get out any excess water before cooking as you please.
METHOD 2 – with Lemon Juice
Having soaked your beans and made the milk, as mentioned above, it’s time to continue with the lemon juice tofu method:
Transfer the mixture to a large pot and bring to a soft boil over low-medium heat. Stir occasionally and remove the foam ‘skin’ that forms on the top with a wooden spoon.
In the meantime, juice the lemons. As soon as the milk starts boiling, add the lemon juice and remove it from the heat.
Stir carefully a few times, then set aside. Curdles will start forming.
Note: If no curdles are forming, turn the heat on for a couple of minutes and add a few more drops of lemon juice.
Once the bowl is filled with curdles ( this can take different times each time- so it’s hard to pinpoint) then put a muslin cloth over a mould and transfer the milk curdles with a skimmer spoon. Wrap the cloth tightly around the milk curdles.
Put a heavy object over the cloth, to press it. This will allow the tofu to form and harden and get rid of excess liquid.
Within 20 minutes, your firm tofu is ready. If you’d like it to be softer then check after 5-10 minutes and continue to press, as needed.
Store this lemon tofu the same way as the above method – kept in an airtight container in the fridge for 3-4 days.
And remember, tofu dries out quickly so it’s best to keep it stored in filtered water. You can then press the tofu, as needed, before cooking.
How To Cook Tofu
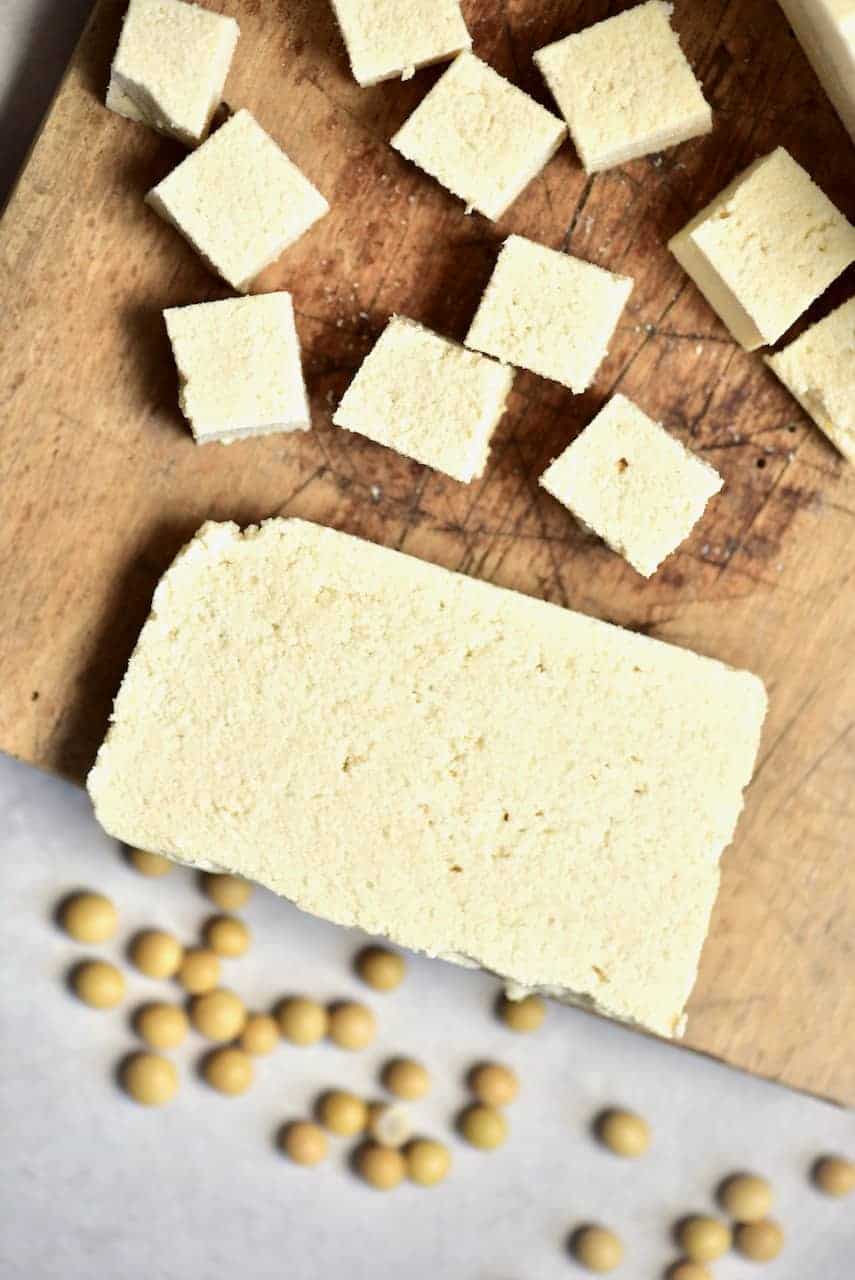
There are a variety of ways to use your homemade tofu – you can fry it, grill it, make tofu scramble, or crispy baked tofu, and more. The method of cooking your tofu will affect the texture and obviously, flavor.
My personal favorite method is to chop the tofu into cubes, marinate it in my sauce of choice and then lightly fry till crispy. I usually then add these to pasta dishes, stir-fries, fried rice, and more.
If you have any questions about this tofu recipe, then feel free to leave them in the comments below. Also, I love to see any recreations to you can tag me on Instagram @AlphaFoodie.
How to Make Tofu At Home
Equipment
- Tofu mould or a square bowl/tray to shape the tofu
Ingredients
- 1.1 lb dry organic GMO-free soybeans
- 14.5 cups filtered water for making the milk and additional water for soaking the beans
Coagulant for curdling:
- 1.5 tsp gypsum powder calcium sulfate
-OR-
- 1.5 medium-sized lemons juiced
Instructions
- I have tried both methods and they both work.
- Begin by soaking the soybeans for at least 6 hours, or even overnight. They will expand 2-3 times their size so make sure to use a large enough bowl and plenty of water. Discard the water once done.
- Add the soaked beans into a high-speed processor/blender for just 10-15 seconds to break down the beans slightly.
Add the water and blend again until smooth and creamy. - Transfer the mixture into a large pot, though a sieve to collect the pulp. Bring to a boil over medium heat. Stir occasionally and remove the foam ‘skin’ that forms on the top with a wooden spoon. *
Method 1- The Gypsum Method:
- In the meantime, mix the gypsum powder with a little water and stir well.
- As soon as the soy milk is boiling, switch off the heat and add the diluted gypsum. Stir carefully a few times then set aside. Curdles will start forming.**
- Once the bowl is filled with curdles then put a muslin cloth over a mould and transfer the milk curdles with a slotted spoon. Wrap the cloth tightly around the milk curdles (see video).Put a heavy object to press down the muslin cloth. This will allow the tofu to form and harden.
- Within 20 minutes, your firm tofu is ready. Less firm (softer) tofu would be ready faster, so check after 5-10 minutes and continue to press, as needed.
Method 2 – with Lemon juice:Having soaked your beans and made the milk, as mentioned above, it's time to continue with the lemon juice tofu method:
- Transfer the mixture into a large pot and bring to a soft boil over low-medium heat. Stir occasionally and remove the foam ‘skin’ that forms on the top with a wooden spoon.
- In the meantime, juice the lemons. As soon as the milk starts boiling, add the lemon juice and remove from the heat.
- Stir carefully a few times then set aside. Curdles will start forming.**
- Once the bowl is filled with curdles ( this can take different times each time- so it’s hard to pinpoint) then put a muslin cloth over a mould and transfer the milk curdles with a skimmer spoon. Wrap the cloth tightly around the milk curdles.
- Put a heavy object oven the cloth, to press it. This will allow the tofu to form and harden and get rid of excess liquid.
- Within 20 minutes, your firm tofu is ready. If you’d like it to be softer then check after 5-10 minutes and continue to press, as needed.
- Keep your tofu in an airtight container in the fridge for 3-4 days. Tofu dries out quickly so it’s best to keep is stored in filtered water. You can then press it again before using.
Video
Notes
A Few Notes About Tofu:
I thought I’d answer a few of what I think are the top FAQ’s for tofu here.- Firstly, yes it can be eaten raw. There isn’t much flavour to it at this point but it’s perfectly edible
- Yes, tofu can also be frozen – for 4-5 months. Freezing does change the texture of tofu – however, it’s often seen as a good thing. If you freeze and thaw your tofu before cooking it, it will make it more ‘pocket-y’ and retain more flavour, becoming crispier crispy tofu when fried, but also has a chewier – more ‘meaty’ texture than if not frozen.
- It is possible to flavour your tofu at home but I haven’t tried this yet, as I usually add mine to sauces and high-flavour dishes anyway. However, it’s possible to flavour in a way similar to cheese – with herbs spices and ‘sundries’ like olives and sundried tomatoes. Just be careful not to add too much so they curds don’t solidify together.
- what does tofu taste like is a question I feel like all newbies struggle to find an answer to because the answer is – not much! I love this though, as it allows you to mould it to your dish and pick up the flavours of the spices/ sauce it’s cooked with.


How much lemon juice and how much water for making the milk? I didn’t see any amounts listed for anything actually.
Hi Adri,
I am really sorry, I just saw your question. I am glad you found the answer 🙂
I always include the required amounts in the recipe card for each post, along with detailed steps and tips.
Hi! How long does the homemade tofu last in fridge?
Hi Evelin,
Keep your tofu in an airtight container in the fridge for 3-4 days. You can also freeze it for 4-5 months. I hope this helps.
Do you have any tricks for cleaning the pot after making the tofu? The thick milk on the bottom of the pot is very difficult to clean.
Hi Lori,
I would suggest first bringing the milk to a soft boil over medium heat. Then, when you also stir occasionally, the milk wouldn’t burn/stick to the bottom of the pot and it should be easy to clean it. Otherwise, just boil water and baking soda (you can leave it to soak for a bit) and scrape carefully with a wooden spoon. I hope this helps 🙂
Thank you for this recipe. I used the lemon method and it was a success!
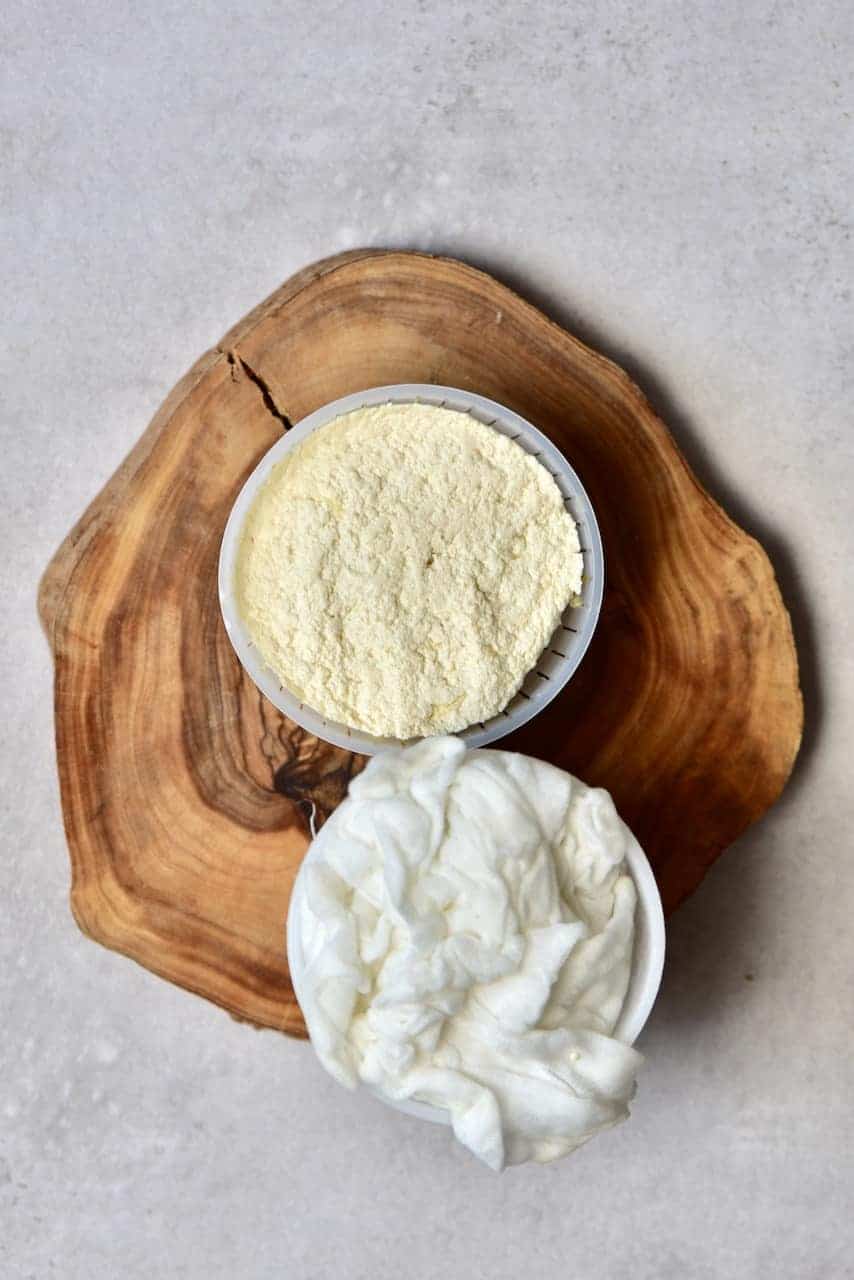
What do you do with the processed beans? Can they be used for anything? Or do they go to the compost/bin?
Thanks, Lauren. I am glad you tried the tofu and liked it.
Keep in mind that soybeans need to be cooked before ingesting (just like we boil the soy milk). You could add them into soups and stews while cooking the other ingredients. I have a recipe coming soon on how to use these leftovers to create a high protein soy flour. I hope this helps. 🙂
Hello,
Can i use vinegar instead of lemon?
you can indeed 🙂
Hey, I was wondering if I could use just soy milk for this recipe. Is better to make the soymilk from scratch?
Hi, You can use ready-made soy milk to make tofu however it isn’t something I’ve tried. So I’m not sure exactly how the results would work out. Let me know if you try it 🙂
i unfortunately don’t have access to soybeans. if i were to make this with other types of beans, would the milk curdle as well w/ lemon? dying to make my own tofu! thank you!
Hi Taylor,
Other types of beans require different methods of preparing the tofu. I am experimenting with some other recipes and will hopefully post my recipe and tips soon.
Hi Samira,
If I’m making homemade soya milk, Would it be okay to use the pulp to make tofu?
I’ve made two batches of soymilk but each time I just threw the pulp filtered out.
Thanks!
Hi Crystal,
You could add the pulp into soups and stews while cooking the other ingredients. Keep in mind that soybean pulp needs to be cooked before ingesting (just like we boil the soy milk). I have a recipe coming soon on how to use these leftovers to create a high protein soy flour.
To make tofu, you actually use the soy milk, not the leftover pulp.
I hope this helps.
What do you do with the mashed soybeans? Any ideas, I hate throwing food away.
Thank you for this guide. I love the tip about freezing it. I will try it!
Hi Roma,
You could add the mashed soybeans into soups and stews while cooking the other ingredients. Keep in mind that soybean pulp needs to be cooked before ingesting that’s why you need to add it while cooking. I have a recipe coming soon on how to use these leftovers to create a high protein soy flour. I hope this helps.
Hi, how do you remove the faint odour/ taste that soy gives you whilst making tofu
Hi Swati,
As long as the soybeans are soaked before making the tofu, there shouldn’t be any disagreeable soy-odors.
I hope this helps.
Hello! Where do you get your tofu molds? I can’t seem to find any…
Thanks!
Hi, I ordered mine online- they are just simple tofu basket ‘press molds’ 🙂
So you don’t cook the soybeans first? You just soak them?
Hi Rae,
There’s no need to cook the beans in advance. You just need to soak the soybeans and blend them with water. Then, finally, you boil the mixture over medium heat. I hope this helps.
Hi,
It’s well explained recipe, but if I want to make a half porcion of tofu, just I need to divide all ingredient in a half?
Thank you Carolina, yes that’s what I would do too to make half the amount!